

Page 1

User manual
Benutzerinformation
Notice d'utilisation
Gebruiksaanwijzning
ERC38810
Page 2

We were thinking of you
when we made this product
Page 3

Welcome to the world of Electrolux
Thank you for choosing a first class product from Electrolux, which hopefully will
provide you with lots of pleasure in the future. The Electrolux ambition is to offer
a wide variety of quality products that make your life more comfortable. You find
some examples on the cover in this manual. Please take a few minutes to study
this manual so that you can take advantage of the benefits of your new machine.
We promise that it will provide a superior User Experience delivering
Ease-of-Mind. Good luck!
3
Page 4
Safety instructions
Your new Wine cooler may have other functions compared to your previous one.
This appliance is not intended for use by persons (including children) with
reduced physical, sensory or mental capabilities, or lack of experience and
knowledge, unless they have been given supervision or instruction concerning
use of the appliance by a person responsible for their safety.
Carefully read these instructions to learn how the appliance works and how
care for it. Keep the instruction booklet. It will come in handy if you later sell
cabinet or give it to somebody else.
These warnings are provided in the interests of your safety. Ensure that you
understand them all before installing or using the appliance. Your safety is of
paramount importance. If you are unsure about any of the meanings or warnings
contact the Customer Care Department.
For the User
· The cabinet is intended for keeping beverages in a normal household as
explained in this instruction booklet.
· Do not keep explosive gases or liquids in the refrigerator. They may explode
and cause injury an d material damage.
· Do not let sharp objects come into contact with the refrigerating system on
the back of and inside the cabinet. If the refrigerating system is punctured, the
cabinet will be damaged and foodstuff inside may spoil.
· The cabinet is heavy. The edges and projecting parts of the cabinet may be
sharp. Be careful when moving the cabinet and always use gloves.
Child Safety
· Pay attention so that small ch ildren do not gain access to the operating
controls or the inside of the cabinet.
to
the
WARNING
Keep ventilation openings, in the appliance enclosure or in the built-in structure,
clear of obstruction.
WARNING
Do not use mechanical devices or other means to accelerate the defrosting
process, other than those recommended by the manufacturer.
WARNING
Do not damage the refrigerant circuit.
WARNING
Do not use electrical appliance inside the food storage compartments of the
appliance, un less they are of the type recommended by the manufacturer.
4
Page 5
Scrapping old appliances
T
he symbol on the product or on its packaging indicates that this product
may not be treated as household waste. Instead it should be taken to the
appropriate collection point for the recycling of electrical and electronic
equipment. By ensuring this product is disposed of correctly, you will help
prevent potential negative consequences for the en vironment and human
health, which could otherwise be caused by inappropriate waste h an dling of
this product. For more detailed information about recycling of this product,
please contact your local council, your household waste disposal service or the
shop where you purchased the product.
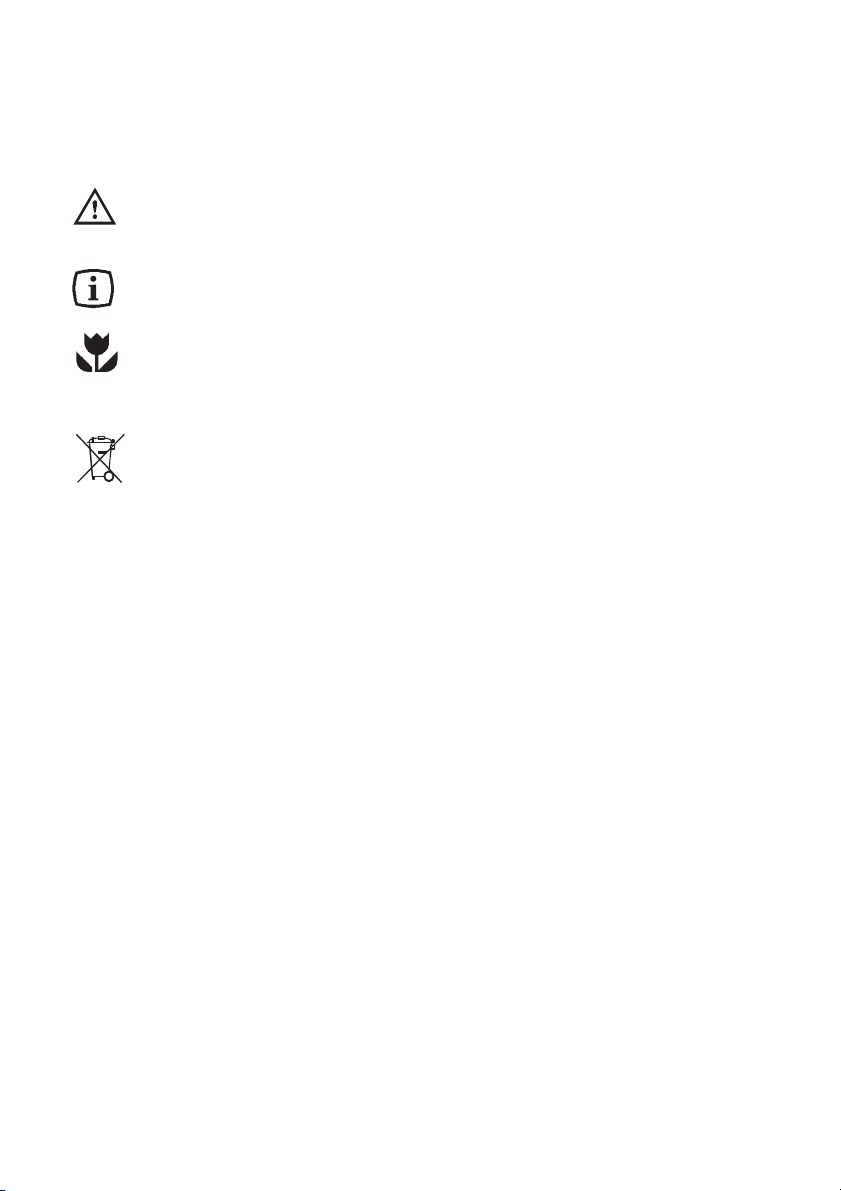
The following symbols are used in this manual:
Important information concerning your personal safety and
information on how to avoid damaging the appliance
General information and tips
Environmental information
5
Page 6

Contents
Safety instructions 4...............
Scrapping old cabinets 5...........
Contents 6.......................
USE 7...........................
Control Panel 7...................
To start the wine cooler and set
the correct temperature 7.......
Temperature inside the wine cooler 8.
Wine Placement
Storage tips 8.................
Measuring the temperature 9........
Switching off 9....................
Alarms and other features 9.........
Lighting 9........................
Cabinet interior 9..................
HINT and TIPS 9..................
Saving energy 9...................
Food Storage 10..................
Protect the environment 10.........
MAINTENANCE and CLEANING 10..
Removing the ventilation grille 10....
Cleaning 10......................
To chan ge the lamp 11.............
Defrosting the wine cooler 11........
When the appliance is not in use 11..
SOMETHING NOT WORKING 12....
TECHNICAL SPECIFICATION 13....
INSTALLATION 14.................
Electrical cord 14..................
Unpacking 14.....................
Remove the transport supports 14...
Cleaning 14......................
Electrical connection 14............
Installing the cabinet 15............
Door Reversal 16..................
6
Page 7
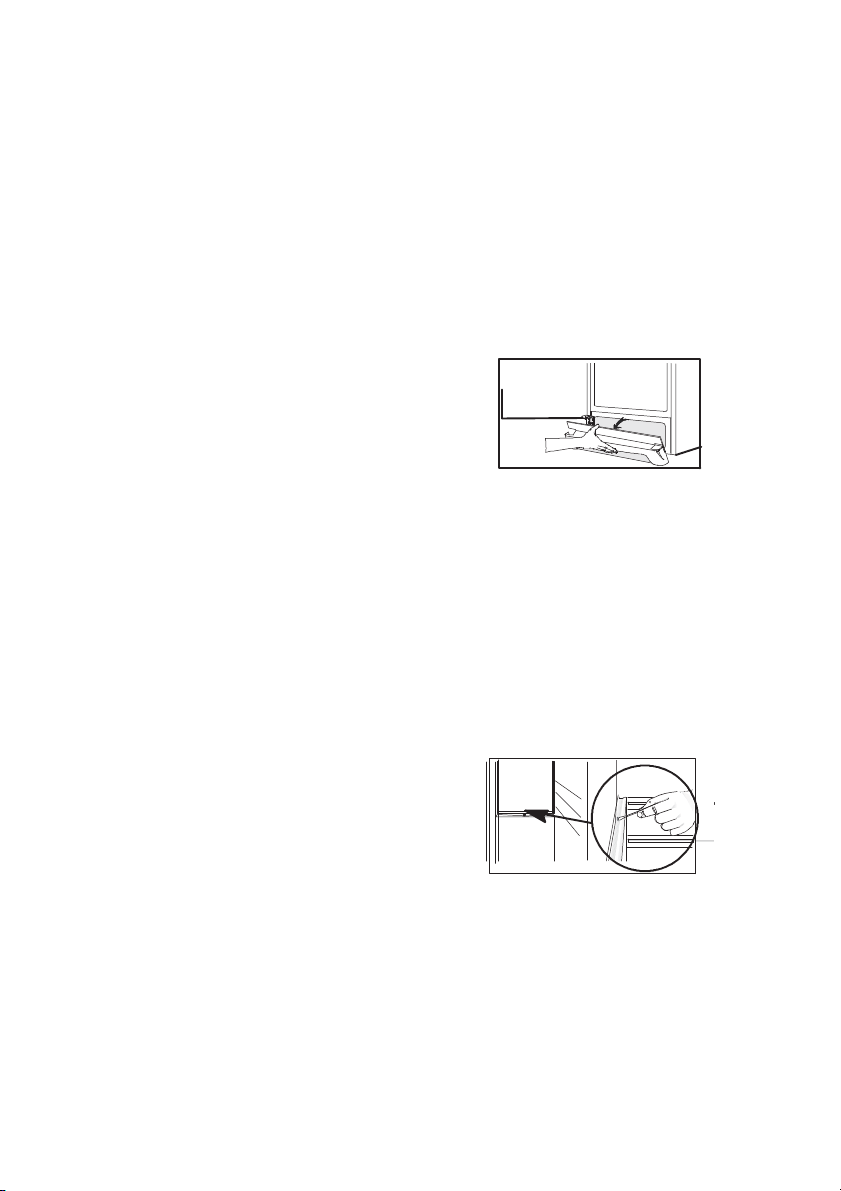
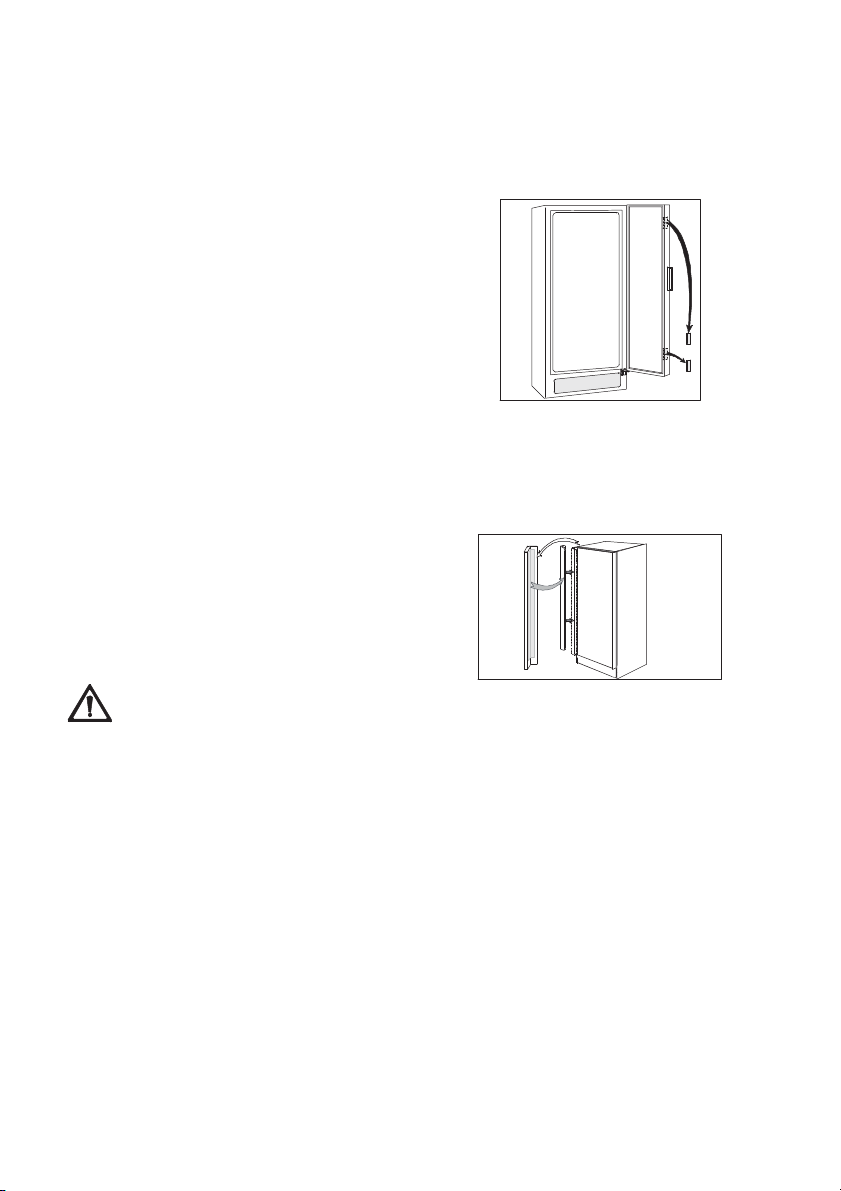
USE
Position and clean the cabinet as
explained in the section "Installation".
Check that the drain hose at the rear
of the cabinet discharges into the drip
tray.
Before inserting the power plug into the outlet and switching on the cabinet for
the first time, leave it standing upright for about 2 hours. Otherwise the
compressor may sustain damage. This time will allow the oil sufficient time to
return to the compressor .
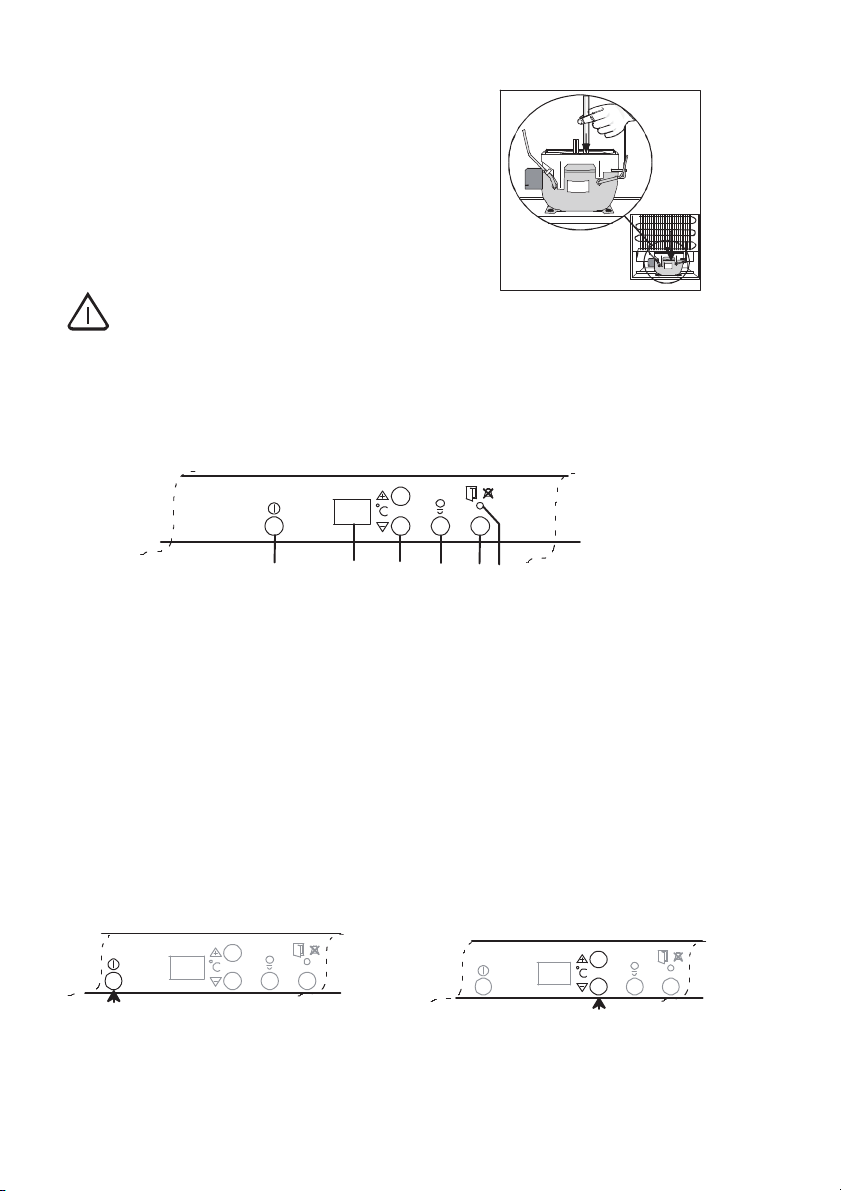
Control Panel
12
A
A. Wine cooler power switch
Switches the wine cooler on and off.
B. Temperature display
Shows the average temperature in the
middle of the wine cooler.
C. Temperature adjustment
buttons/thermostat
Used to set the temperature.
B
C
D
EF
D. Lighting
E. Alarm shut-off button
Used to turn the audible alarm off.
F. Red warning lamp
Flashes when the alarm in the cabinet
has been triggered.
To start the wine cooler and set the correct temperature
Switching on:
Switch on the wine cooler by pressing
the power switch.
12
Setting the temperature
Press the buttons until the desired
temperature flashes in the temperature
display (The temperature can be set
7
between +6°C and +15°C.)
"+" raises the temperature.
"-" lowers the temperature.
12
Once set, the temperature display
shows the current temperature inside
the cabinet.
Page 8

NOTE: The controllable area is limited
by a room temperature of 17°C or
below.
Allow the cabinet to run for a period of
24 hours whenever the temperature
setting is chan ged. This will allow the
temperature to stabilise in side the
cabinet.
It is not necessary to reset the
temperature when the cabinet is
switched on after it has been out of
use. The thermostat recalls the
previously set temperature.
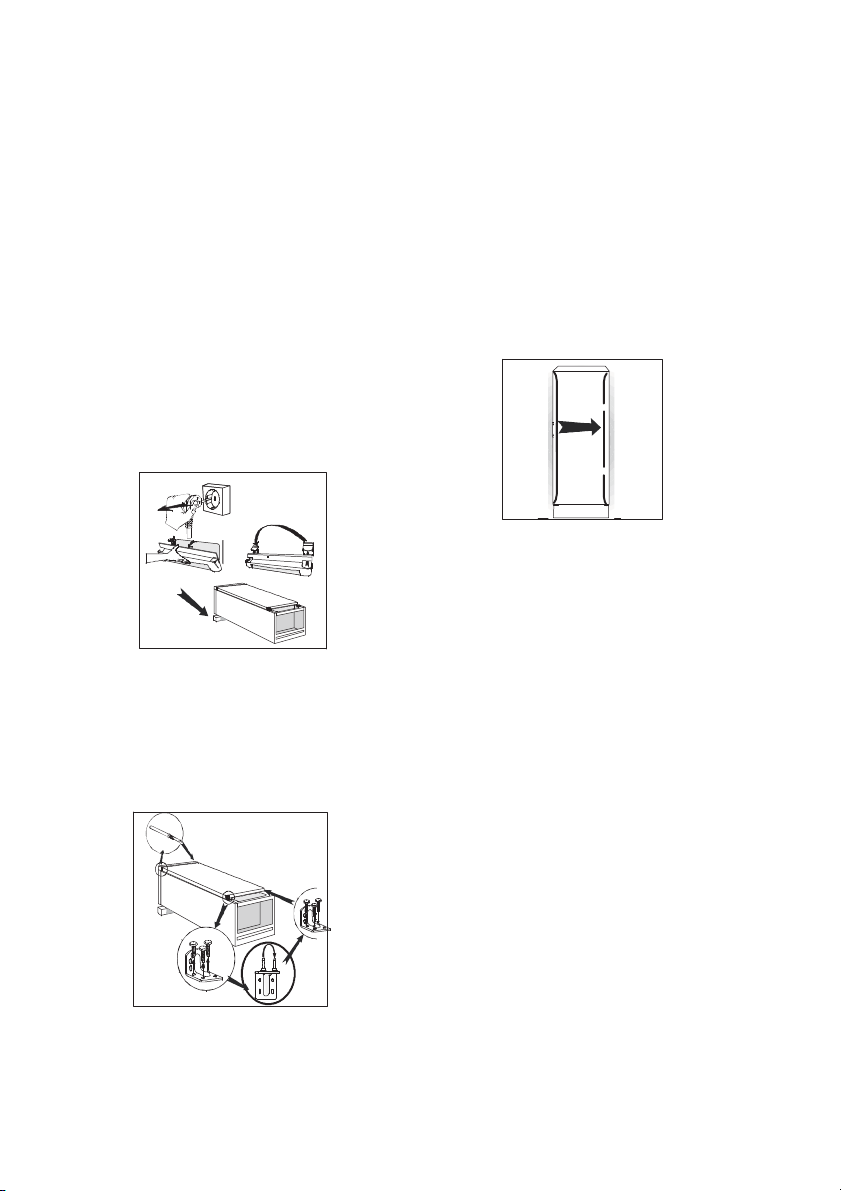
Temperature inside the wine
cooler
NOTE: The picture shows the coldest
and warmest places inside the fridge.
(+ warm, - cold)
+
+
+
-
-
+
Wine Placement
Storage tips
The amount of time to store wine
depends on its maturity, type of grape,
alcohol content, and dissolved fructose and tannins. When purchasing
your wine, find out whether it is mature
or if it will improve over time.
In the lower part of the cooler. Cold air
prolongs the time to maturity. Accordingly, store old and mature wine as well
as wine you would like to store for a
long time in the lower portion of the
cooler. The lower part should also be
usedtostorewinethatistobeserved
cold.
In the upper part of the cooler. In the
upperpart,storewinethatyouwishto
let further mature, wines that are
served at a warmer temperature, and
those wines you intend to consume
relatively soon.
Store the bottles lying down so that
the corks do not dry out.
Store the wine in the dark. The cooler
doors are made with double-paned
glass with a dark coating. This will
protect the wine against light damage
if the cooler is placed in a well-lit area.
Avoid turning on the light in the cooler
too often or for too long. The wine
should be stored in the dark.
Handle the bottles with care, so that
the wine is not agitated.
Heed any advice and recommendations given at the time of purchase or
in the professional literature concern ing the wine's quality, durability and
optimal storage temperature.
Recommended storage temperatures:
- for white wines +10 to +12°C
- for rosé wines and light red wines
+12to+16°C
- for champagne and sparkling wines
+6 to +8°C
If you stack several bottles on top of
one another, make sure they do not
touch the cabinet's cooling plate.
8
Page 9
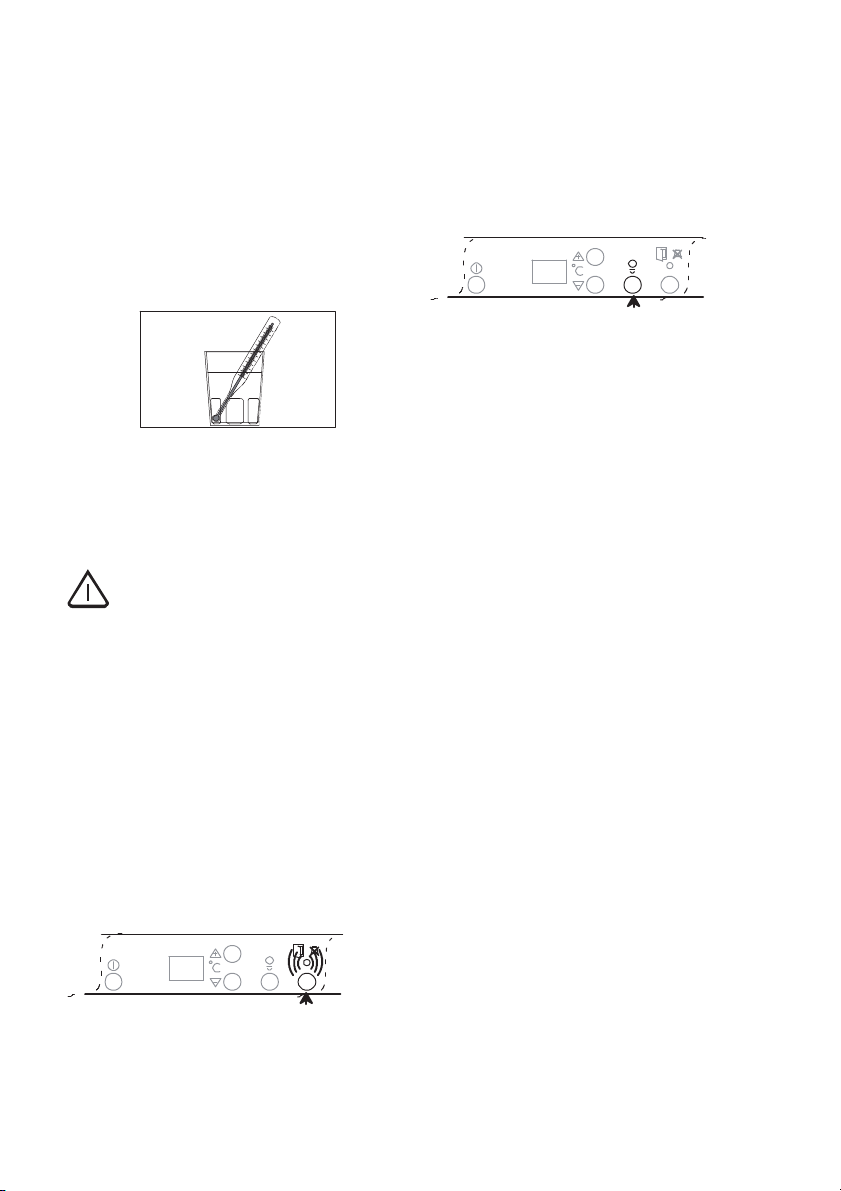
Measuring the temperature
If the temperature is measured using a
standard, single thermometer, this
should be put in a glass of water
centrally placed inside the cabinet.
This will reflect the temperature inside
the food products. Do not place the
thermometer hanging or lying directly
on the shelf.
Switching off
Switch off the cabinet by pressing the
power switch.
Keep the button pressed for approx. 1
second.
easy to survey the contents of the
cooler without opening the door . The
cooler lighting should normally be off,
so that the wine is not unduly exposed
to light. The lighting turns off
automatically after about 5 minutes.
12
Cabinet interior
The shelves may be placed flat or at
an an gle.
Angle the shelf by placing the front
pegs in a lower set of tracks. You can
store already opened bottles on the
shelf in this position.
HINT and TIPS
Power to the cabinet is completely
interrupted only when the power plug
is disconnected.
Alarms and other features
Door open alarm
If the fridge door remains open for
more than 5 minutes, the red warning
lamp starts flashing and an audible
alarm sounds.
To switch off the alarm:
Press the "alarm shut-off button". The
red warning lamp goes out when the
door is closed.
12
Lighting
The cooler lighting may be turned on
with the door closed. This makes it
9
Saving energy
· Pay careful attention to where the
cabinet is placed. See the section
"Installation". When installed correctly,
the cabinet will consume less energy.
· Try to avoid keeping the door open
for long periods, or opening the door
too frequently as warm air will enter the
cabinet, and cause the compressor to
switch on unnecessarily often.
· Ensure there are no obstructions
preventing the door from closing
properly.
· It is advisable to periodically clean
the refrigeration system at the back of
the appliance with a duster or vacuum
cleaner.
· Make sure the door gasket is
complete and always clean.
Page 10
Food Storage
· To obtain the best results from your
appliance, neither hot foods nor liquids
which may evaporate, should be
placed in the l arder compartment.
· Avoid buying frozen food if you can
not store it straight away. The use of
an in sulated container is advisable.
When you arrive home place the
frozen food in the freezer immediately.
· Ensure that food placed in the
freezer is dated and labelled and used
in date order to ensure that food is
consumed at its best. Remove suspect
food from you refrigerator and clean,
refer to cleaning and main tenance.
Protect the environment
· H an d over the cabinet packaging
and discarded fridges an d freezers to a
recycling station. Contact your local
city office or your closest dealer for
more information.
· When cleaning the cabinet, use a
mild washing-up detergent.
· F ollow the advice in the section
"Saving energy"
· The door gasket and coolant used in
this cabinet will not harm the ozone
layer.
· All parts in the packaging can be
recycled.
· The cabinet h as been designed for
easy dismantling and subsequent
recycling.
MAINTENANCE and
CLEANING
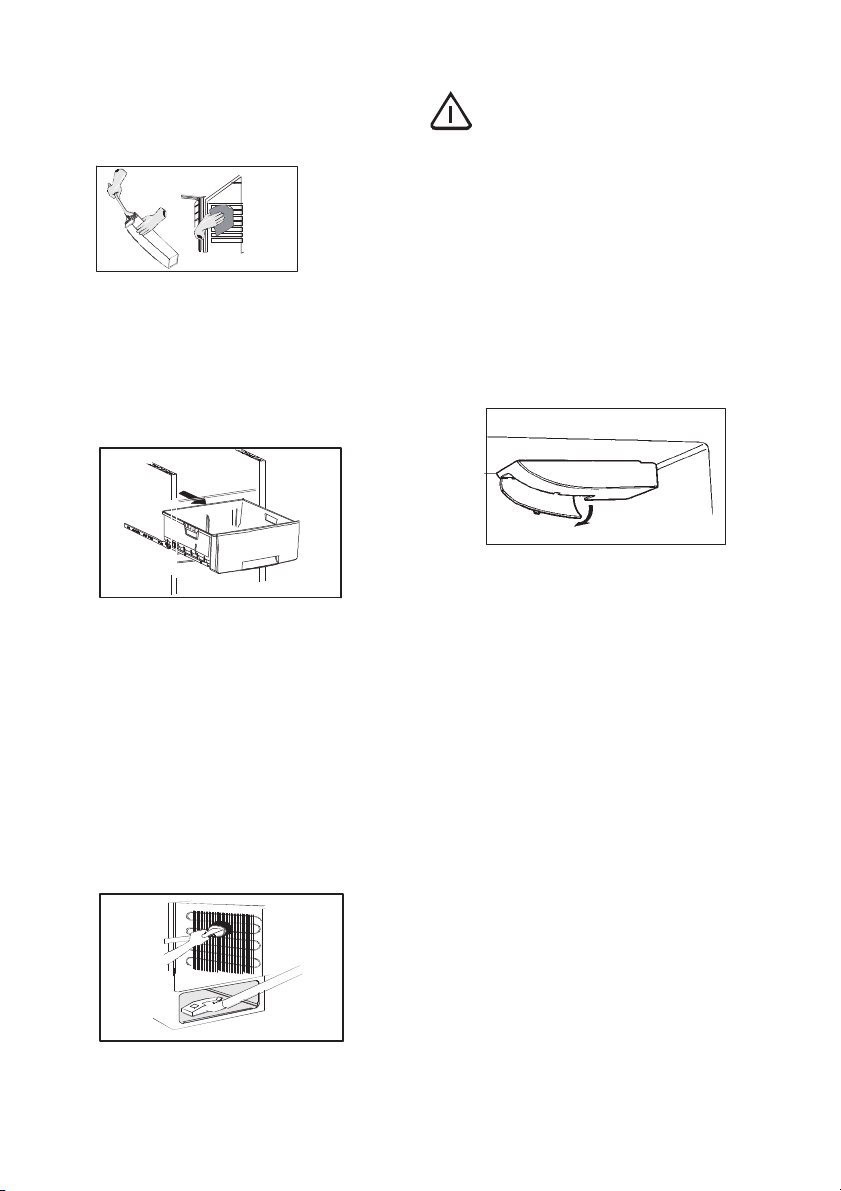
Removing the ventilation grille
The ventilation grille can be removed,
e.g. to wash the grille.
Make sure the door is open when
removing the ventilation grille. Unsnap
the upper edge of the grille by pulling
outward/downward. Then pull the grille
straight out to completely remove it.
Cleaning
Clean the cabinet at regular intervals.
Disconnect the appliance from
electricity supply.
Clean out the drip channel inside the
wine cooler at regular intervals and
ensure that the drip chann el is clear at
all times. If blocked carefully clear
using a piece of flexible curtain wire
inserted into the drain outlet to remove
the blockage.
Clean the inside and accessories with
warm water and bicarbonate of soda
(5ml to 0,5 litre water) Rinse and dry
thoroughly.
Regularly check the door seals and
wipe clean to ensure they are clean
and free from debris.
10
Page 11
Clean off the interior wooden details
with a moist rag and mild kitchen
soap. Do not soak the wood.
Drawer.
Pull out drawer.
Lift it over the locks in back on the
sliding guides. Tip drawer downwards
and pull it out.
Clean.
Assemble in reverse order.
Wash the outer cabinet with warm
soapy water. Remove the ventilation
grille (see the section "Removing the
ventilation grille") and vacuum-clean
under the cabinet. Once or twice a
year dust the condenser (black grille)
and the compressor at the back of the
appliance, with a brush or vacuum
cleaner, as an accumulation of dust
will affect the performance of the
appliance and cause excessive
electricity consumption.
When moving the cabinet, lift it by the
front edge to avoid scratching the floor.
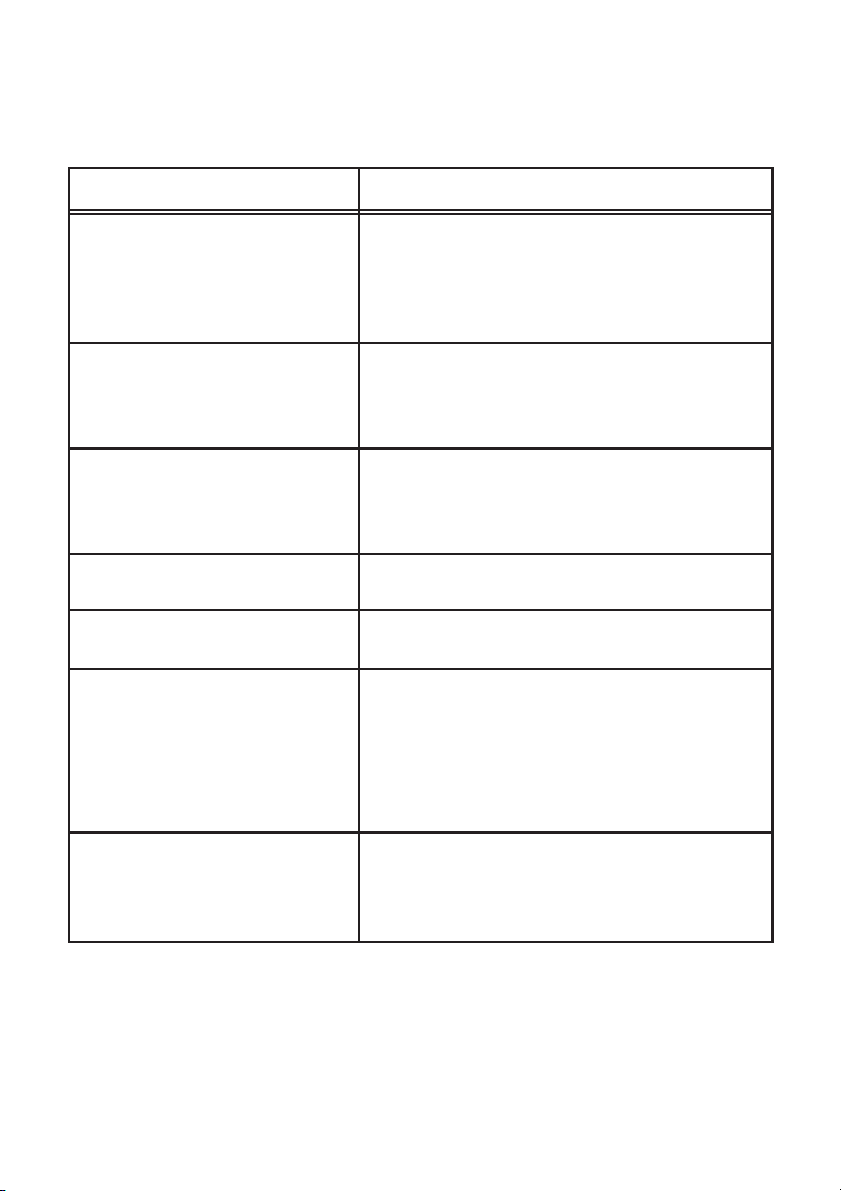
To change the lamp
Before replacing the light bulb,
disconnect the power plug from the
outlet.
Fold the grille backward by
unsnapping the front edge.
Use a bulb of the same type, E14
socket, maximum rating of 25 W.
Defrosting the wine cooler
The wine cooler is defrosted
automatically every time the
compressor stops. Frost formation can
be prevented by:
· not putting warm foodstuff inside
the cabinet.
· avoiding frequently opening the
door or keeping it open too long.
When the appliance is not in use
Disconnect the appliance from
electricity supply.
If the cabinet is to be kept on, ask
somebody to check it once in a while
to prevent the food inside from spoiling
in case of a power failure.
Empty all foods and clean the
appliance, leaving the doors ajar to
prevent unpleasant smells.
11
Page 12
SOMETHING NOT WORKING
Before contacting your local Service Force Centre check the following point:
Problem Possible cause / Remedy
”” is displayed in the
temperature display.
It is too warm inside the wine
cooler.
It is too warm inside the wine
cooler.
It is too cold inside the wine
cooler.
There is water on the cooling
plate inside the wine cooler.
Water is running inside the
wine cooler.
Water comes out on the floor. Place the drain hose at the back of the
An error has occurred in measuring the
temperature. Call your service representative.
(The cooling system will continue to keep
food products cold, but temperature
adjustment will n ot be possible.)
Set a lower temperature.
Make sure that the door is completely closed
and that the insulating strip is complete and
clean.
Set a lower temperature.
Make sure that the door is completely closed
and that the insulating strip is complete and
clean.
Set a warmer temperature.
This is normal. During automatic defrostin g,
frost thaws on the cooling plate.
Clean the water drain and drain hole inside
the wine cooler using e.g. cotton swabs or a
bottle cleaner brush.
Some food products could have been placed
near the rear of the appliance prevetung the
water from running into the drain.
cabinet above the drain bowl. See the
chapter "Before using the cabinet the first
time".
12
Page 13
The cabinet does not operate
at all. Cooling or in terior light
does not operate. No indicator
lamps light.
The compressor operates
continuously.
Sound level in cabinet is too
high.
The cabinet is not switched on.
Power does not reach the cabinet. (Try
connecting another electrical device to the
power outlet.)
Thefusehasblown.
The power plug is not properly connected.
Set a warmer temperature.
Make sure that the door is completely closed
and that the insulating strip is complete and
clean.
The refrigerating system will always produce
some sounds. A pulsing sound is heard when
coolant is pumped inside the cooling pipes.
A ticking sound from the thermostat can be
heard when the compressor switches on and
off. The sound level varies depending on the
operation of the cabinet.
If you feel the sound level is incorrect:
Make sure the pipes at the back of the
cabinet do not touch each other. Carefully
bend them if they do.
If the cushion spacers (between the cabinet
wall and pipes) come loose, put them back in
place again.
Carefully follow the instructions in the chapter
"Installing the cabinet".
TECHNICAL SPECIFICATION
Model ERC38810WS
Net capacity Refrigerator l 361
Dimension mm
Height 1800
Width 595
Depth 623
13
Page 14
INSTALLATION
Electrical cord
Do not remove the power cord by
pulling on its lead, particulary when the
product is being pulled out of its niche.
· Damage to the cord may cause a
short-circuit, fire and/or electric shock.
· In the event of damage to the
appliance's main cable, only an
authorised service company
recommended by the manufacturer or
a similarly qualified person may adjust
it in order to avoid shock hazard for the
user.
Unpacking
Unpack the cabinet and check that it
is in good condition and free of any
transport damage. Notify the dealer
immediately of any damage. Hand the
packaging over for recycling. F or more
information, contact your local council
or the dealer.
until the shelf tilts and the transport
support can be removed.
Mounting the handle
Thehandleisincludedinthe
packaging material of the cabinet.
Secure the h an dle.
Do not allow children to play with the
packaging. The plastic film can cause
suffocation.
Remove the transport supports
Removethetapeandthetransport
supports from
· the door sides
·theshelves
Remove the transport support on the
glass shelf by pushing the support
forwardalongtheedgeoftheshelf
until it stops. Take h old of the rear
edge of the glass shelf and pull the
shelf and transport support forward
Cleaning
Wash the inside of the cabinet using
lukewarm water, a mild washing-up
detergent and a soft cloth. Clean off
the interior wooden details with a moist
rag and mild kitchen soap. Do not
soak the wood.
Electrical connection
Connect the cabinet to a grounded
electrical outlet.
Voltage: 230 V.
Fuse: 10 A.
Refer to the rating plate on the left
inside the cabinet.
14
Page 15
Installing the cabinet
Make sure that the power plug is not
squashed or damaged by the back of
the product.
· A damaged power plug may
overheat and cause a fire.
Do not place heavy articles or the
product itself on the power cord.
· there is a risk of a short circuit and
fire.
If the power plug socket is loose, do not
insert the power plug.
· there is a risk of electric shock or fire.
To obtain the best performance from the
cabinet, ensure:
· the cabinet is placed in a dry, cool
place and is not exposed to direct
sunlight.
· the cabinet is not placed close to a
source of heat, e.g. a cooker or
dishwasher.
· the cabinet is level. The cabinet
should not lean against any wall. If
necessary adjust the feet using the
adjustment spanner supplied.
b) behind and above the top cupboard.
In this case, the space behind the
cupboard must be at least 50 mm deep.
a)
b)
50mm
Cabinet is placed at a location where
the ambient temperature corresponds
to the climate classification*, for which
the appliance is designed.
* See on the rating plate on the inside
of the appliance.
The following table shows which
ambient temperature is correct for
each climate classification.
Climate
classifi-
for an ambient
temperature of
cation
SN
+10°C to +32°C
· there is good air circulation around
the cabinet and that the air channels
below and behind the cabinet are not
blocked. The ventilation space above
the cabinet must be at least 4 cm.
The ventilation space can either be
a) directly above the cabinet, or
15
N
ST
T
+16°C to +32°C
+18°C to +38°C
+18°C to +43°C
Check that the drain hose at the rear
of the cabinet discharges into the drip
tray.
If the cabinet is placed in a corner and
the side with the hinges facing the
wall, the distance between the wall
and the cabinet must be at least 230
mm to allow the door to open enough
so that the shelves can be removed.
Page 16
The power plug must be accessible
after installation of the cabinet.
Door Reversal
1. Close the cabinet and remove the
plug from the electrical socket.
2. Remove the ventilation grille. There
is a part on the grille that can be
removed. Remove and reposition it on
the other side.
with the supplied spanner. Secure with
the lock-nut.
Raise the cabinet and replace the
ventilation grille.
5. Move the handle.
Unscrew the handle and secure it to
the other side. Press the supplied
plastic plugs into the holes to which
the handle was previously fitted.
3. Put the cabinet on a wooden board
when it is laid down. Later, when
raising the cabinet, it will be easier to
grip under the cabinet thanks to the
board.
1
2
3
4. On the upper part of the cabinet.
Put the hinge pin on the other side.
On the lower part of the cabinet.
Unscrew the hinge. Move the hinge
pin and plastic cover. Secure the hinge
on the other side.
4
5
Put the cabinet in position. Check that
the appliance is level. See the section
"Positioning the cabinet".
Removeanyplayinthedoorby
adjusting the height of the lower hinge
16
Page 17

Willkommen bei Electrolux!
Wir möchten uns bedanken, dass Sie sich für ein erstklassiges Produkt von
Electrolux entschieden haben, welches Ihnen sicherlich viel Freude bereiten wird.
Es ist unser Bestreben, eine breite Vielfalt von Qualitätsprodukten anzubieten,
die helfen, Ihr Leben etwas komfortabler zu machen. Sie finden einige Beispiele
auf der vorletzten Seite in diesem H eft. Bitte nehmen Sie sich einige Minu ten,
diese Benutzerinformation zu lesen, um voll von den Vorteilen Ihres neuen
Gerätes profitieren zu können. Wir sind sicher, dass wird Ihr Leben zukünftig
etwas leichter machen.
Wir wün schen eine gute Zeit.
17
Page 18
Wichtige Hinweise zur Sicherheit
Die Funktionen Ihres neuen Weinkühler
unterscheiden sich möglicherweise
von denen Ihres bisherigen Gerätes.
Das Gerät darf von Personen
(einschließlich Kindern), deren
physische, sensorische Fähigkeiten
und deren Mangel an Erfahrung und
Kenntnissen einen sicheren Gebrauch
des Gerätes ausschließen nur unter
Aufsicht oder nach ausreichender
Einweisung durch eine
verantwortungsbewußte Person
benutzt werden, die sicherstellt, dass
sie sich der Gefahren des Gebrauchs
bewusst sind.
Bitte lesen Sie diese
Gebrauchsanleitung vor der
Inbetriebnahme des Gerätes sorgfältig
durch, um eine sachgerechte
Bedienung und Pflege sicherzustellen.
Verwahren Sie die Gebrauchsanleitung
anschließend an einem sicheren Ort.
Sie können dann später im Bedarfsfall
jederzeit darauf zurückgreifen oder die
Gebrauchsanleitung im Falle eines
Besitzerwechsels weitergeben.
Anwendungsbereich
· Das Gerät ist für die Aufbewahrung
von Getränke im Haushaltsbereich
entsprechend dieser
Gebrauchsanleitung bestimmt.
· Bewahren Sie niemals explosive
Gase oder Flüssigkeiten im Kühl- oder
Gefrierraum auf. Sie könnten
explodieren und sowohl Personen- als
auch Sachschäden verursachen.
· Lassen Sie keine scharfen
Gegenstände mit dem Kühlsystem auf
der Rückseite und im inneren des
Gerätes in Berührung kommen.
Löcher im Kühlsystem führen sowohl
zu einer Beschädigung des Gerätes
als auch zu einem Verderben der im
Gerät gelagerten Lebensmittel.
· Das Gerät ist schwer. Die Kanten
sowie hervorstehende Teile könnten
scharf sein. Transportieren Sie das
Gerät mit äußerster Vorsicht und
tragen Sie beim Transport
Handschuhe.
Kinder
· Achten Sie unbedingt darauf, daß
Kleinkinder weder an den
Bedienelementen spielen noch in das
Gerät hineinklettern.
Achten Sie darauf, dass die
Belüftungsöffnungen im Gehäuse um
das Gerät oder im Einbauschrank nicht
blockiert sind.
Versuchen Sie nicht, den
Abtauprozess durch andere als vom
Hersteller empfohlene mechanische
oder sonstige Hilfsmittel zu
beschleunigen.
Achten Sie darauf, den Kühlkreislauf
nicht zu beschädigen.
Betreiben Sie in den
Lebensmittelfächern des Geräts keine
anderen als die vom Hersteller
empfohlenen Elektrogeräte.
WARNUNG!
WARNUNG!
WARNUNG!
WARNUNG!
18
Page 19
g
Einige Passagen in der Gebrauschsanweisung sind besonders gekennzeichnet.
Diese Kennzeichnungen haben folgende Bedeutung.
Mit dem Warndreieck und/oder durch Signalwörter (Warnung!, Vorsicht!,
Achtung!) sind Hinweise hervorgehoben, die für Ihre Sicherheit oder für
die Funktionsfähigkeit des Gerätes wichtig sind. Bitte unbedingt
beachten.
Nach diesem Zeichen erhalten Sie ergänzende Informationen zur
Bedienung und praktischen Anwendung des Gerätes
Mit der Blume sind Tips und Hinweise zum wirtschaftlichen und
umweltschonenden Einsatz des Gerätes
ekennzeichnet
Entsorgen alter Geräte
Das Symbol auf dem Produkt oder seiner Verpackung weist darauf
hin, dass dieses Produkt nicht als normaler Haushaltsabfall zu
behandeln ist, sondern an einem Sammelpunkt für das Recycling von
elektrischen und elektronischen Geräten abgegeben werden muss. Durch
Ihren Beitrag zum korrekten Entsorgen dieses Produkts schützen Sie die
Umwelt und die Gesundheit Ihrer Mitmenschen. Umwelt und Gesundheit
werden durch falsches Entsorgen gefährdet. Weitere Informationen über
das Recycling dieses Produkts erhalten Sie von Ihrem Rathaus, Ihrer
Müllabfuhr oder dem Geschäft, in dem Sie das Produkt gekauft haben.
19
Page 20

Inhaltsverzeichnis
WICHTIGE HINWEISE ZUR
SICHERHEIT 18...............
Entsorgen alter Geräte 19...........
Inhaltsverzeichnis 20...............
Beschreibung 21..................
Vor der ersten Inbetriebnahme des
Gerätes 21....................
Bedienelemente 21................
Schalten Sie den Weinkühler ein und
wählen Sie die richtige
Temperatur 22.................
Innentemperatur des Weinkühler 22..
Messen der Temperatur 23..........
Abschalten 23....................
Alarme und andere Funktionen 23...
Innenraum 24.....................
PRAKTISCHE TIPS 24.............
Energiespartips 24.................
Das Gerät und die Umwelt 24.......
Umweltschutz 24..................
PFLEGE UND WARTUNG 25........
Entfernen des Lüftungsgitters 25.....
Reinigung 25.....................
Glühlampenwechsel 26.............
Abtauen - Weinkühler 26...........
Wenn Sie das Gerät nicht benutzen 26
WENN DAS GERÄT NICHT
FUNKTIONIERT 26.............
TECHNISCHE ANGABEN 28........
INSTALLATION 28.................
Geräteanschlußkabel 28............
Auspacken 29....................
Entfernen Sie die
Transportsicherungen 29........
Reinigung 29.....................
Aufstellen des Gerätes 29...........
Ändern des Türanschlages 31.......
Elektrischer Anschluß 31...........
20
Page 21

Beschreibung
Vor der ersten Inbetriebnahme des
Gerätes
Beziehen Sie sich bezüglich der
Aufstellung und Reinigung des Gerätes
auf das Kapitel "Aufstellen".
Kontrollieren Sie vor dem Aufstellen
des Gerätes, ob der Ablaufschlauch
auf der Rückseite in die Auffangschale
mündet.
Lassen Sie das Gerät vor Anschluß an das Netz und vor der ersten
Inbetriebnahme ca. 4 Stunden lang stehen, bevor es in Betrieb genommen
werden darf. Andernfalls könnte der Kompressor beschädigt werden. Währ end
der Ruhephase kann das Öl zum Kompressor zurüc k f lie ßen.
Bedienelemente
12
A
A. Weinkühler -Netzschalter
Zum Ein- und Ausschalten des
Weinkühler .
B. Temperaturanzeige
Zeigt die im Weinkühler herrschende in
der Mitte des temperatur an.
C. Temperatureinstelltasten/
Thermostat
Zum Einstellen der Temperatur.
D. Beleuchtung
E. Alarm-Ausschalttaste
Zum Ausschalten des akustischen
Alarmsignals.
F. Rote Warnleuchte
Blinkt, wenn im Gerät ein Alarm
ausgelöst worden ist.
21
B
C
D
EF
Page 22

Schalten Sie den Weinkühler ein
und wählen Sie die richtige
Temperatur
Einschalten:
Schalten Sie den Weinkühler durch
Betätigung des Netzschalters ein.
Innentemperatur des Weinkühler
+
+
12
Einstellen der Temperatur
Drücken Sie die Tasten so lange, bis
die gewünschte Temperatur auf der
Temperaturanzeige blinkt. (Die
Temperatur ist zwischen +6°C und
+17°C einstellbar.)
"+" erhöht die Temperatur.
"-" senkt die Temperatur.
12
Nach der Einstellung wird die im
Kühlgeräte gemessene Temperatur auf
der Temperaturanzeige angezeigt.
ANMERKUNG: Die Leistungskapazität
des Kühlers wird bei einer Temperatur
von 17ºC oder wärmer negativ
beeinflußt.
Lassen Sie das Gerät n ach jeder
Temperaturänderung 24 Stunden lang
laufen, damit sich die Temperatur im
Gerät stabilisieren kann.
Eine Neueinstellung der Temperatur ist
nicht erforderlich, wenn Sie das Gerät
nach einer Betriebsunterbrechung
erneut einschalten. Das Thermostat
hat die zuletzt eingestellte Temperatur
gespeichert.
+
-
-
+
Die Abbildung zeigt die kältesten und
wärmsten Stellen im Weinkühler.
Weinregal
Lagertipps
Wie lange ein Wein gelagert werden
kann hängt von seinem Reifegrad, der
Traubensorte, dem Alkoholgehalt
sowie dem aufgelösten Fruchtzucker
und Tannin ab. Achten Sie beim
Weinkauf darauf, ob es sich um einen
reifen Wein h an delt oder ob er mit der
Zeit noch besser wird.
Im unteren Teil des Kühlers. Kalte Luft
verlangsamt den Reifeprozess. Lagern
Sie demgemäß ältere und reife Weine
sowie solche, die Sie über einen
längeren Zeitraum lagern möchten, im
unteren Teil des Kühlers. Außerdem
sollten im unteren Teil Weine gelagert
werden, die kalt serviert werden.
22
Page 23

Im oberen Teil des Küh lers. Lagern Sie
im oberen Teil Weine, die weiter
heranreifen sollen, Weine, die wärmer
serviert werden und solche, die Sie
recht bald konsumieren möchten.
Legen Sie die Flachen hin, damit der
Korken nicht austrocknet.
Lagern Sie den Wein an einem
dunklen Ort. Die Türen des Kühlers
sind doppelt verglast und mit einer
dunklen Schicht überzogen. Dadurch
wird der Wein gegen schädliche
Lichteinflüsse geschützt, sofern der
Kühler an einem gut beleuchteten Ort
aufgestellt wird.
Schalten S i e das L ich t im Kühler nicht
zu oft und zu lange an. Wein sollte in
Dunkelheit gelagert werden.
Gehen S ie vorsichtig mit den Flaschen
um, damit der Wein n ich t geschüttelt
wird.
Beachten Sie die Ratschäge und
Empfehlungen in Bezug auf Qualität,
Haltbarkeit und optimale
Lagertemperatur des Weines, die man
Ihnen beim Kauf des Wein gibt oder
die Sie in der einschlägigen Literatur
finden können.
Empfohlene Lagertemperaturen:
- Weißwein +10 bis +12°C
- Roséwein und leich ter Rotwein +12
bis +16°C
- Champagner und Sekt +6 bis +8°C
Wenn S i e verschiedene Flaschen
übereinander legen, ach ten Sie darauf,
dass keine mit den Kühlplatten in
Berührung kommt.
Messen der Temperatur
Wenn Sie die Temperatur mit einem
herkömmlichen, einfachen
Thermometer messen, sollten Sie das
Thermometer in ein Glas Wasser
stellen und es in der Mitte des Gerätes
placieren. Dieses Verfahren gibt
Aufschluß über die Temperatur in den
Lebensmitteln. D as Thermometer darf
weder am Regal hängen noch direkt
darauf liegen.
Abschalten
Schalten Sie das Gerät durch
Betätigung des Netzschalters aus.
Halten Sie die Taste ca. 1 Sekunde
gedrückt, um einen Fehlbetrieb zu
vermeiden.
Die Stromzufuhr ist nur dann
vollständig unterbrochen, wenn der
Netzstecker von der Netzsteckdose
abgetrennt ist.
Alarme und andere Funktionen
Warnung "Tür geöffnet"
Wenn die Tür für länger als 5 Minuten
geöffnet ist, beginnt die rote
Warnleuchte zu blinken. Darüber
hinaus ertönt ein Alarmsignal.
Ausschalten des Alarmsignals:
Drücken Sie die
"Alarm-Ausschalttaste". Die rote
Warnleuchte erlischt, sobald die Tür
geschlossen ist.
12
23
Page 24

Beleuchtung
Die Beleuchtung des Kühlers sollte bei
geschlossener Tür angeschaltet
werden. So kann der Inhalt des
Kühlers bequem durchgesehen
werden, ohne dass die Tür geöffnet
werden muss. Das Licht des Kühlers
sollte normalerweise ausgeschaltet
sein, damit der Wein keiner ständigen
Beleuchtung ausgesetzt ist. Es
schaltet sich nach etwa 5 Minuten
automatisch ab.
12
Innenraum
Die Regalbretter sollten flach oder
schräg eingelegt werden.
Sie erzielen die Schräglage, indem Sie
die vorderen Haken in eine niedrigere
Schiene einlegen. In dieser Position
können auch bereits geöffnete
Flaschen auf den Regalbrettern
gelagert werden.
PRAKTISCHE TIPS
Energiespartips
· Wählen Sie den Aufstellungsort
sorgfältig au s. Beziehen Sie sich auf
das Kapitel "Aufstellung". Bei richtiger
Installation hat das Gerät eine
geringere Stromaufnahme.
· Machen Sie das Gerät nicht ständig
auf und zu und lassen Sie es nicht
unnötig lange offen stehen.
· Überzeugen Sie sich hin u n d wieder
davon, daß das Gerät richtig
geschlossen ist.
· Staubsaugen Sie den Kompressor
und das Kühlsystem auf der Rückseite
des Gerätes einmal jährlich.
· L assen Sie warme Speisen vor der
Aufbewahrung im Kühlschrank
abkühlen.
· Stellen Sie sicher, daß die
Türidichtung vollständig vorhanden
und stets sauber ist.
Das Gerät und die Umwelt
· Die in diesem Gerät verwendeten
Türisolierungen und Kältemittel
enhalten kein e Stoffe, die einen Abbau
der Ozonschicht verursachen.
· Das gesamte Verpackungsmaterial ist
recyclings bar.
· Die Konstruktion des Gerätes
ermöglicht eine einfache Demontage
und problemloses Recycling.
Umweltschutz
· Übergeben Sie das Verpackungsmaterial sowie ausrangierte Kühlgeräte
einer Recyclingstelle. Näh ere
Informationen erhalten Sie bei Ihrer
Stadtverwaltung oder Ihrem H än dler.
· Reinigen Sie das Gehäuse mit einem
milden Reinigungsmittel.
· Befolgen Sie die Empfehlungen im
Kapitel "Energiespartips".
24
Page 25

PFLEGE UND WARTUNG
Entfernen des Lüftungsgitters
Das Lüftungsgitter kann z.B. für
Reinigungszwecke abgenommen
werden.
Beim Herausnehmen des
Lüftungsgitters muß die Tür geöfnet
sein. Lösen Sie die Oberkante des
Lüftungsgitters durch Ziehen nach
außen/unten. Ziehen Sie das
Lüftungsgitter dann gerade heraus.
Reinigung
Reinigen Sie das Gerät regelmäßig.
Schalten Sie das Gerät aus und ziehen
Sie den Netzstecker aus der
Wandsteckdose.
Reinigen Sie die sich im Weinkühler
befindliche Auffangschale mit Hilfe von
Wattestäbchen oder einem
Pfeifenreiniger. Wenn der Ablauf
verstopft ist, können Sie die
Verstopfung mit Hilfe eines
Kunststoff-Gardinenhakens beseitigen.
Entfernen Sie alle herausnehmbaren
Teile und waschen Sie sie per Hand
ab. Säubern Sie das Gerät, den
Innenraum und die Türisolierung mit
einem weichen Tuch . Verwenden Sie
für die Reinigung einen mit lau warmem
Wasser verdünnten milden Reiniger.
Die Tür darf erst geschlossen werden,
wenn der Innenraum vollständig
getrocknet ist.
Fach.
Ziehen Sie das Fach heraus.
Heben Sie es über den h interen
Verschluss auf die Schiebevorrichtung.
Kippen Sie das Fach nach unten und
ziehen Sie es heraus.
Reinigung.
Setzen Sie es in umgekehrter
Reihenfolge wieder zusammen.
Die Holzeinrichtungs Details können
mit einen feuchten Reinigungstuch
und lauwarmen Wasser unter Zugabe
von einem mildem Handspülmittel
gereinigt.
Die Holzteile nicht ins Wasser legen.
Entfernen Sie das Lüftungsgitter
(beziehen Sie sich auf das Kapitel
"Entfernen des Lüftungsgitters") und
saugen Sie unter dem Gerät den
Staub. Ziehen Sie das Gerät von der
Wand ab und reinigen Sie die
Geräterückseite, das Kühlsystem und
den Kompressor mit einem
Staubsauger.
25
Page 26

Heben Sie bei einem Umsetzen des
Gerätes die Vorderkante an, um ein
Zerkratzen des Fußbodens zu
vermeiden.
Glühlampenwechsel
Vor dem Auswechseln der Glühlampe
muß der Netzstecker von der
Netzsteckdose abgetrennt werden.
Klappen Sie das Gitter zurück, indem
SiedieVorderkantelösen.
Ersetzen Sie die alte Glühlampe mit
einer vom gleichen Typ. E14-Fassung,
max. 25 W.
Abtauen - Weinkühler
Der Weinkühler wird bei jedem
Stoppen des Kompressors
automatisch abgetaut. Reifbildung läß t
sich wie folgt vermeiden:
· Stellen Sie keine warmen Speisen
in das Gerät.
· Machen Sie die Tür nicht ständig
auf und zu und lassen Sie sie nicht
unnötig lange offen stehen.
Wenn Sie das Gerät nicht benutzen
Schalten Sie das Gerät aus und ziehen
Sie den Netzstecker aus der
Wandsteckdose.
Reinigen Sie das Gerät wie im Kapitel
"Reinigung" beschrieben. Lassen Sie
die Gerätetür offen. Andernfalls
könnten im Gerät unangenehme
Gerüche entstehen.
Wenn Sie das Gerät eingeschaltet
lassen, sollten Sie jemanden bitten, hin
und wieder nach dem Gerät zu sehen,
damit die eingefrorenen Lebensmittel
bei einem eventuellen Stromausfall
nicht verderben.
WENN DAS GERÄT NICHT FUNKTIONIERT
Sollten Ihnen beim Betrieb des Gerätes einmal Unregelmäßigkeiten auffallen, so
lesen Sie sich bitte zunächst die nachfolgenden Anweisungen sorgfältig durch,
bevor Sie möglicherweise unnötig einen Kundendienst beauftragen. Viele
Symptome lassen sich selbst beheben.
Modellbezeichnung
In der Temperaturanzeige
erscheint ““.
Mögliche Ursache /Abhilfemaßnahme
Es ist ein Te mperatur-Meßfehler aufgetreten.
Beauftragen Sie Ihren Kundendienst. (Die
Lebensmittel werden weiterhin gekühlt; eine
Temperatureinstellung ist nicht möglich.)
26
Page 27

Die Temperatur im Weinkühler
ist zu hoch.
Die Temperatur im Weinkühler
ist zu niedrig.
Auf der Kühlplatte im
Weinkühler befindet sich
Wasser.
In den Weinkühler läuft
Wasser.
Auf den Fußboden läuft
Wasser.
Das gesamte Gerät ist außer
Funktion. Die Kühlung oder die
Innenbeleuchtung
funktionieren nicht. Es leuchten
keine Anzeigelämpchen.
Der Kompressor ist ständig in
Betrieb.
Stellen Sie eine niedrigere Temperatur ein.
Stellen Sie sicher, daß die Tür ganz
geschlossen und der Dichtung sowohl
vollständig vorhanden als auch sauber ist.
Stellen Sie eine höhere Temperatur ein.
Das ist normal. Während des automatischen
Abtauens taut der Reif auf die Kühlplatte.
Reinigen Sie den Wasserablaß und die
Ablaßöffnung z.B. mit Wattestäbchen oder
einer Flaschenbürste.
Wenn die Temperatur auch im Tiefkühlteil
niedriger ist als gewünscht, können Sie die
Temperatur mit der Temperatureinstelltaste
erhöhen.
LegenSiedensichaufderRückseitedes
Gerätes befindlichen Ablaufschlauch über
den Ablaufbehälter. Lesen Sie im Kapitel "Vor
Inbetriebnahme des Gerätes" nach.
Das Gerät ist nicht ein geschaltet.
Das Gerät wird n ich t mit Strom versorgt.
(Versuchen Sie ein anderes elektrisches Gerät
an die Steckdose anzuschließen.)
Die Sicherung ist herausgesprungen.
Der Netzstecker ist nicht richtig
angeschlossen.
Stellen Sie eine höhere Temperatur ein.
Stellen Sie sicher, daß die Tür ganz
geschlossen und der Dichtung sowohl
vollständig vorhanden als auch sauber ist.
27
Page 28

Der Geräuschpegel im Gerät
ist zu hoch.
Das Kühlsystem erzeugt ständig gewisse
Geräusche. Ein Impulsgeräusch ist
wahrnehmbar, wenn Kühlflüssigkeit in die
Kühlkanäle gepumpt wird. Beim Ein- und
Ausschalten des Kompressors ist ein Ticken
zu hören. Der Geräuschpegel hängt vom
jeweiligen Gerätebetrieb ab.
Wenn Ihnen der Geräuschpegel abnorm
erscheint:
Biegen Sie die Kanäle auf der
Geräterückseite auseinander und stellen Sie
sicher, daß sich die Kanäle nicht gegenseitig
berühren.
Sollten sich die Puffer (zwischen der
Gerätewand und den Kanälen) lösen,
müssen diese erneut befestigt werden.
Folgen Sie genau den Anweisungen im
Kapitel "Installation, Aufstellen des Gerätes".
TECHNISCHE ANGABEN
Modell ERC38810WS
Netto Inhalt Kühlraum l 361
Dimension mm
Höhe 1800
Breite 595
Tiefe 623
INSTALLATION
Geräteanschlußkabel
Den N etzstecker n ie am Kabel aus der
Steckdose ziehen, besonders wenn
das Gerät aus der Niche gezogen
wird.
· Eine Beschädigung des Netzkabels
kan Kurzchluss, Stromschlag- und
Brandgefahr verursachen.
· Beschädigte Geräteanschlußkabel
nur dürfen durch einen vom Händler
empfohlenen Kundendienst bzw.
qualifiziertes Personal ausgetauscht
werden um Gefahr für den Benutzer zu
verhindern.
28
Page 29

Auspacken
Packen Sie das Gerät aus und
überprüfen Sie es auf
Transportschäden. Sollten
Beschädigungen festgestellt werden,
so benachrichtigen Sie bitte
unverzüglich Ihren Händler. Geben Sie
das Verpackungsmaterial zum
Recycling. Nähere Informationen
erhalten Sie bei Ihrer Stadtverwaltung
oder Ihrem Händler.
Lassen Sie Kinder nicht mit der
Verpackung spielen. Die Plastikfolie
kann Erstickungen verursachen.
Entfernen S ie die
Transportsicherungen
Entfernen Sie das Klebeband und die
Transportsicherungen
· seitlich der Türen
· in den Tü rscharni eren
· auf den Ablagerosten
Entfernen Sie die Transportscharnier
ab.
Befestigung der Griffe
Die Griffe sind im Lieferumfang des
Gerätes enthalten.
Befestigen Sie den Griff.
Reinigung
Reinigen Sie den Innenraum des
Gerätes mit lauwarmem Wasser, einem
milden Reiniger und einem weichen
Tuch. Die Holzeinrichtungs Details
können mit einen feuchten
Reinigungstuch und lauwarmen
Wasser unter Zugabe von einem
mildem Handspülmittel gereinigt.
Die Holzteile nicht ins Wasser legen.
Aufstellen des Gerätes
Bitte prüfen, dass das N etzkabel
und/oder Netzstecker nicht von der
Geräterückseite eingeklemmt und
beschädigt wird.
· Ein beschädigtes Netzkabel
und/oder Netzstecker kan überhitzen
und einen Brand verursachen.
Keine schweren Gegenstände bzw.
das Gerät selbst auf das Netzkabel
stellen.
· Kurzschluss- und Brandgefahr!
Den N etzstecker n iemals in eine
lockere oder beschädigte Steckdose
stecken.
· Stromschlag- und Brandgefahr!
29
Page 30

Um die Leistungsfähigkeit des Gerätes
optimal nutzen zu können, sollten die
nachfolgend aufgeführten Hinweise
unbedingt beachtet werden:
· Stellen Sie das Gerät an einem
trockenen, kühlen Ort auf, an dem es
keiner direkten Sonneneinstrahlung
ausgesetzt ist.
· Vermeiden Sie die Aufstellung des
Gerätes in der Nähe von
Wärmequellen wie z.B. einem Herd
oder Geschirrspüler.
· Das Gerät muß gerade stehen und
auf allen vier Ecken ruhen und sollte
darüber hinaus nicht gegen eine Wand
gelehnt werden. Justieren Sie die Füße
im Bedarfsfall mit dem mitgelieferten
Schraubenschlüssel.
a)
b)
50mm
· Stellen Sie das Gerät an einem
trockenen, dessen Umgebungstemperatur der Klimaklasse* entpricht,
für die das Gerät ausgelegt ist.
*Sie auf dem Typchild links im innern
es Geräts.
Nachtehende Tabelle zeigt, welce
Umgebungs- temperatur welcher
Klimaklasse zugeordnet ist.
· Rund um das Gerät muß eine gute
Luftzirkulation gewährleistet sein. Die
Lüftungsschlitze unter und hinter dem
Gerät dürfen auf keinen Fall blockiert
werden. Der Lüftungsraum über dem
Gerät und sämtlichen Lebensmitteln/
Hängeschränken muß mindestens 4
cm betragen. Der Lüftungsraum kann
entweder
a) direkt über dem Gerät oder
b) hinter und über dem Gerät sein. In
diesem Fall muß hinter dem Gerät ein
Mindestabstand von 50 mm
verbleiben.
Klimat-
klasse
SN
N
ST
T
für Umgebungs-
temperatur von
+10°C bis +32°C
+16°C bis +32°C
+18°C bis +38°C
+18°C bis +43°C
Kontrollieren Sie vor dem Aufstellen
des Gerätes, ob der Ablaufschlauch
auf der Rückseite in die Auffangschale
mündet.
Wenn Sie das Gerät in einer Ecke mit
den Scharni eren zur Wand hin
aufstellen, muß der Abstand zwischen
Wand und Gerät mindestens 230 mm
betragen, damit die Tür so weit
geöffnet werden kann, daß ein
Herausnehmen der Ablageroste
problemlos möglich ist.
30
Page 31

Der Netzstecker muß nach dem
Aufstellen des Gerätes erreichbar sein.
Ändern des Türanschlages
1. Schließen Sie das Gerät und ziehen
Sie den Netzstecker aus der
Netzsteckdose.
2. Entfernen Sie das Lüftungsgitter. Ein
Teil des Lüftungsgitters ist abnehmbar.
Entfernen Sie diesen Teil und legen Sie
ihn auf die andere Seite.
3. Vor dem Hinlegen des Gerätes
sollten Sie ein Holzbrett u nterlegen,
damit Sie beim späteren Aufrichten
leichter unter das Gerät fassen
können.
1
2
Justieren Sie die Höhe des unteren
Scharniers mit dem mitgelieferten
Schraubenschlüssel so, daß die Tür
kein Spiel mehr hat und ziehen Sie die
Gegenmutter an.
Heben Sie das Gerät an und setzen
Sie das Lüftungsgitter wieder ein.
5. Schrauben Sie den Griff ab.
Den Griff abschrauben und ihn auf der
anderen Seite anschrauben. Die
mitgelieferten Kunststoffdübel in die
Löcher drücken, in denen die Griffe
befestigt waren.
5
3
4. Auf dem oberen Teil des Gerätes.
Setzen Sie den Lagerzapfen auf die
andere Seite.
Auf dem unteren Teile des Gerätes.
Schrauben Sie das Scharnier ab.
Setzen Sie den Lagerzapfen und die
Kunststoffabdeckung um. Befestigen
Sie das Scharnier auf der anderen
Seite.
4
31
Stellen Sie das Gerät an dem dafür
vorgesehenen Platz auf und achten Sie
darauf, daß es gerade steht. Beziehen
Sie sich auf das Kapitel "Aufstellen des
Gerätes".
Elektrischer Anschluß
Schließen Sie das Gerät an eine
Schukosteckdose an.
Spannung: 230 V.
Sicherung: 10 A.
Beziehen Sie sich auf das links im
Gerät angebrachte Leistungsschild.
Page 32

Bienvenue dans le monde d'Electrolux
Nous vous remercions de la confiance que vous nous témoignez en choisissant
un appareil Electrolux qui, nous espérons vous accompagnera agréablement au
fil du temps.
Au travers d'une large gamme de produits de qualité, la volonté d'Electrolux est
de vous rendre la vie plus agréable.
Vous pouvez en voir quelques exemples sur la couverture de cette notice.
Nous vous invitons à prendre quelques minutes pour découvrir ce guide qui
vous permettra de profiter au mieux de tous les avantages de votre nouvel
appareil.
Nous vous assurons que son utilisation vous offrira jour après jour satisfaction et
sérénité.
Abientôt.
32
Page 33

AVERTISSEMENTS IMPORTTANS
Il se peut que votre nouveau Armoire à
vins possède d'autres fonctions que
votre précédent.
Cet appareil n' est pas conçu pour être
utilisé par des personnes (y compris
des enfants) dont les facu ltés
physiques, sensorielles sont réduites,
ou qui manquent d'expérience et de
connaissances, à moins qu'une
personne responsable de leur sécurité
ne les supervise ou leur donne des
instructions sur la manière de l'utiliser.
Lisez attentivement cette notice
d'utilisation afin de vous familiariser
avec le fonctionnement de l'appareil et
d'en prendre soin. Conservez cette
notice. Elle doit suivre l'appareil si vous
décidez par la suite, de le vendre ou
de le donner à quelqu'un d'autre.
Utilisation
· L'appareil est destiné à la
conservation boissons pour la
consommation normale d'une famille
et selon les instructions de la présente
notice.
· Ne conservez pas de récipients
contenant des gaz ou des liquides
explosifs dans l es compartiments
réfrigérateur et congélateur. Ils risquent
d'exploser de provoquer des
dommages corporels ou matériels.
· Evitez que des objets pointus
entrent en contact avec le circuit
frigorifique au dos et à l'intérieur de
l'appareil. Si le circuit frigorifique est
percé, l'appareil sera endommagé et
des aliments à l'intérieur peuvent
s'abîmer.
· L'appareil est lourd. Les bords et
certaines pièces en saillie peuvent être
coupantes. Faîtes attention en
déplaçant l'appareil et utilisez toujours
des gants.
Enfants
· Veillez à ce que les en fan ts en bas
âge n'aient pas accès aux
commandes de fonctionnement ou à
l'intérieur de l'appareil.
Protection de l'environnement
· Tous les matériaux marqués par le
symbole
Déposez-les dans un e déchetterie
prévue à cet effet (renseignez-vous
auprès de votre commune) pour qu'ils
puissent être récupérés et recyclés.
· Le système frigorifique et l'isolation
de votre appareil ne contiennent pas
de C.F.C., contribuant ainsi à préserver
l'environnement.
· Si vous vous débarrassez de votre
appareil, veillez à ne pas détériorer les
circuits frigorifiques.
· Cet appareil est muni de fermetures
magnétiques. S'il remplace un appareil
équipé d'une fermeture à ressort, nous
vous conseillons de rendre celle-ci
inutilisable avant de vous en
débarrasser, ceci afin d'éviter au x
enfants de s'enfermer dans l'appareil
et de mettre ainsi leur vie en danger.
Veillez également à couper le câble
sont recyclables.
33
Page 34

Le symbole sur le produit ou son emballage indique que ce produit ne
peut être traité comme déchet ménager. Il doit être remis au point de
collecte dédié à cet effet (collecte et recyclage du matériel électrique
et électronique). En procédant à la mise à la casse réglementaire de l'appareil,
nous préservons l'environnement et notre sécurité, s'assurant ainsi que le
déchets seront traités dans des conditions appropriées. Pour obtenir plus de
détails sur le recyclage de ce produit, veuillez prendre contact avec les services
de votre commune ou le magasin où vous avez effectué l'achat.
ATTENTION! Veillez à ce que les orifices de ventilation, situés dans
l'enceinte de l'appareil ou la structure intégrée, ne soient pas obstrués.
ATTENTION! N'utilisez aucu n autre dispositif mécanique ou autre pour
accélérer le processus de dégivrage que ceux recommandés par le fabricant.
ATTENTION! N'endommagez pas le circuit de refroidissement.
ATTENTION! N'utilisez pas d'appareil électrique à l'intérieur des
compartiments de conservation des aliments de l'appareil, sauf s'ils sont du type
recommandé par le fabricant.
Les symboles duivants vous guideront tout au long de la lecture de
vorte notice d'utilisation.
Instructions de sécurité
Conseils et recommandations
Informatons liées à la protection de l'en vironnement
34
Page 35

Sommaire
Avertissements importants 33.......
Protection de l'environnement 33....
Votre réfrigérateur et l'environnemen 39
Préservation de l'environ n ement 39..
Sommaire 35.....................
UTILISATION 42...................
Avant d'utiliser l'appareil pour
la première fois 36.............
Le bandeau de commande 36.......
Mettez en marche le armoire à vins et
réglez la température
appropriée 36.................
Température à l'intérieur du armoire à
vins 37.......................
Rangement du vin
Conseils d'entreposage 37......
Mesure de la température 38........
Arrêt 38..........................
Alarme et autres fonctions 38........
Éclairage 38......................
Compartiment intérieur 38..........
CONSEILS UTILES 39.............
Economie d'énergie 39.............
ENTRETIEN ET NETTOYAGE 39.....
Retrait de la grille de ventilation 39...
Nettoyage 39.....................
Remplacement de l'ampoule 40.....
Dégivragearmoireàvins 40.........
Arrêt prolongé 41..................
EN CAS D'ANOMALIE DE
FONCTIONNEMENT 41.........
CARACTÉRISTIQUES
TECHNIQUES 43..............
INSTALLATION 43.................
Câble 43.........................
Déballage 43.....................
Nettoyage 43.....................
Retrait des cales de transport 43.....
Mise en place de l'appareil 44.......
Remontagedelaporte 45..........
Branchement électrique 46.........
35
Page 36

UTILISATION
Avant d'utiliser l'appareil pour la
première fois
Placez et nettoyez le compartiment en
suivant les explications données dans
la section "Installation".
Contrôlez que le flexible d'évacuation à
l'arrière du compartiment débouche
bien dans le bac collecteur.
! Avant d'insérer la fiche dans la prise secteur et de mettre en marche l'appareil
pour la première fois, laissez-le environ 4 heu res. Dans le cas contraire, le
compresseur risquerait d'être endommagé. Ce délai permet, en effet, qu'une
quantité suffisante d'huile retourne dans le compresseur.
Le bandeau de commande
12
A
A. Interrupteur d’alimentation du
armoire à vins
Allume et éteint le armoire à vins.
B. Affichage de température
Affiche la température à au milieu du
armoire à vins.
C. Touches de réglage de
température/ thermostat
B
C
D
EF
Utilisé pour régler la température.
D. Éclairage
E. Touche arrêt alarme sonore
Utilisée pour arrêter l’alarme sonore.
F. Voyant rouge alarme
Clignote lorsqu’une des alarmes dans
le compartiment a été déclenchée.
Mettezenmarchelearmoireàvinsetréglezlatempérature
appropriée
Mise en marche:
Mettez le l'armoire en marche en
appuyant sur la touche d'alimentation.
12
Réglagedelatempérature
Appuyez sur les touches jusqu'à ce
que la température désirée clignote sur
l'indicateur de température (La
température peut être réglée entre
+6°C et +17°C.)
"+" augmente la température.
"-" diminue la température.
36
Page 37

12
Une fois réglé, l'indicateur de températureindiquelatempératureàl'intérieure du réfrigérateur.
REMARQUE : pour que l'armoire
fonctionne correctement, la température ambiante ne doit pas dépasser les
17ºC.
Laissez l'appareil fonctionner pendant
24 heures après chaque modification
deréglagepourpermettreàla
température de se stabiliser à
l'intérieur de l'appareil.
Il n'est pas nécessaire de régler à
nouveau la température lorsque le
compartiment est mis sous tension
après avoir été hors service. Le
thermostat se rappelle de la
température définie précédemment.
Température à l'intérieur du
armoire à vins
REMARQUE: La figure indique les
emplacements le plus froid et le plus
chaud à l'intérieur du réfrigérateur.
+
+
+
-
-
+
Rangement du vin
Conseils d'entreposage
Laduréedeconservationd'unvin
dépend de sa maturité, du type de
raisin, de la teneur en alcool, de la
quantité de fructose diluée et des
tanins. Lorsque vous achetez un vin,
vérifiez s'il s'agit d'un vin mûr ou d'un
vin qui a besoin de vieillir pour se
bonifier.
Partie inférieure de l'armoire. Ici, l'air
froid prolonge la durée de vieillissement. Par conséquent, conservez les
vins vieux et mûrs ainsi que les vins
que vous souhaitez garder longtemps
dans la partie inférieure de l'armoire.
Celle-ci accueillera également les vins
qui devront être servis frais.
Partie supérieure de l'armoire. Ici,
conservez les vins que vous souhaitez
laisser se bonifier plus longtemps, les
vins servis à température plus élevée
et ceux que vous comptez consommer
dans un délai relativement bref.
Rangez les bouteilles en position horizontale afin d'éviter le dessèchement
des bouchons de liège.
Conservez le vin dans un endroit
obscur. Lesportesdel'armoiresont
en double vitrage et recouvertes d'un
revêtement sombre afin de protéger le
vin de la lumière au cas où le meuble
serait placé dans un endroit lu mineu x.
Evitez d'allumer la lumière de l'armoire
trop souvent ou trop longtemps. Le vin
devraêtreconservédansunmaximum
d'obscurité.
Manipulez le vin avec soin en veillant à
ne pas l'agiter.
37
Page 38

Tenez compte des conseils donnés
lors de l'achat du vin ou des recommandations issues des brochures
spécialisées relatives à la qualité du
vin, sa longévité et sa température de
conservation optimale.
Températures de conservation recommandées:
- de +10 à +12ºC pour les vins blancs
- de +12 à +16ºC pour les vins rosés
et les rouges légers
- de +6 à +8ºC pour les champagnes
et les vins mousseux.
Laduréedeconservationd'unvin
dépend de sa maturité, du type de
raisin, de la teneur en alcool, de la
quantité de fructose diluée et des
tanins. Lorsque vous achetez un vin,
vérifiez s'il s'agit d'un vin mûr ou d'un
vin qui a besoin de vieillir pour se
bonifier.
Mesure de la température
Silatempératureestmesuréeavecun
thermomètre standard, il doit être
placé dans un verre d'eau au milieu à
l'intérieur du compartiment. Cela
donne la température à l'intérieur des
denrées alimentaires. Ne pas placer le
thermomètre suspendu ou posé
directement sur la grille.
touche appuyée pendant environ 1
seconde.
L'alimentation de l'appareil est
totalement interrompue uniquement
lorsque la fiche d'alimentation est
Alarme et autres fonctions
Alarme de porte ouverte
Si la porte reste ouverte pendant plus
de 5 minutes, le voyant rouge
commence à clignoter et une alarme
sonore retentit.
Pour arrêter l'alarme:
Appuyer sur la touche "d'arrêt
d'alarme". Le voyant rouge s'éteint
lorsque la porte est fermée.
12
Éclairage
L'éclairage de l'armoire peut être
activéaveclaportefermée.Cette
fonction permet d'examiner le contenu
de l'armoire sans devoir ouvrir la porte.
L'éclairage devra généralement être
éteint afin que le vin ne soit pas inutilementexposéàlalumière.Lalampe
s'éteint automatiquement au bout
d'environ 5 minutes.
Arrêt
Arrêtez l'appareil en appuyant sur la
touche d'alimentation.
Pour plus de sûreté, maintenez la
12
Compartiment intérieur
Les étagères peuvent être placées à
plat ou en oblique.
Pour pencher l'étagère, placez les
pitons de devant sur un rail inférieur.
Dans cette position, vous pourrez
conserver des bouteilles en tamées.
38
Page 39

CONSEILS UTILES
Economie d'énergie
· Soyez attentif à l'emplacement
choisi pour l'appareil. Référez-vous à
la section "Installation". Si l'appareil est
installé correctement, il consommera
moins d'énergie.
· Evitez d'ouvrir la porte
fréquemment et trop longtemps.
· Vérifiez de temps à autre si la porte
est bien fermée.
· Dépoussiérez à l'aide d'un
aspirateur le compresseur et le circuit
frigorifique au dos de l'appareil une
fois par an environ.
· Laissez les aliments chauds refroidir
avant de le mettre au réfrigérateur.
· Vérifiez si l'isolant est complet et
toujours propre.
Votre réfrigérateur et
l'environnement
· L'isolant et le réfrigérant utilisés
dans cet appareil sont inoffensifs pour
la couche d'ozone.
· Tous les matériaux d'emballage
sont recyclables.
· L'appareil est conçu pour être
facilement démonté puis recyclé.
Préservation de
l'environnement
· Déposez l'emballage et les
réfrigérateurs et congélateurs à mettre
au rebus dans une déchetterie. Pour
de plus amples informations,
renseignez-vous auprès des services
municipaux ou auprès de votre
revendeur le plus proche.
· Lorsque vous nettoyez votre
appareil, utilisez des produits de
nettoyagepréservant l'environnement.
· Suivez les conseils de la section
"Economie d'énergie".
ENTRETIEN ET
NETTOYAGE
Retrait de la grille de ventilation
La grille de ventilation peut être retirée,
par exemple pour la nettoyer.
Vérifiez si la porte est ouverte lorsque
vous enlevez la grille de ventilation.
Enlevez le bord supérieur de la grille en
tirant vers le haut/vers le bas. Puis,
tirez la grille en avant pour la retirer
complètement.
Nettoyage
Nettoyez régulièrement votre appareil.
Mettez l'appareil hors tension et retirez
la fiche de la prise secteur ou bien
retirez le fusible.
Nettoyez le conduit d'écoulement à
l'intérieur du armoire à vins avec un
cotontigeouuncure-pipe.Sile
flexible d'évacuation est bouché, vous
pouvez utiliser une spirale plastifiée
pour rideaux.
39
Page 40

Retirez tous les éléments amovibles et
t
lavez-les à la main. Essuyez l'extérieur
et l'intérieur de l'appareil ainsi que les
joints d'échantéité de porte. Utilisez un
chiffon doux et un produit vaisselle
dilué dans l'eau tiède. Ne fermez la
porte que lorsque l'intérieur de
l'appareil est parfaitement sec.
Lors du déplacement du compartimen
soulever par le bord avant afin d'éviter
de rayer le sol.
Tiroir
Retirez le tiroir.
Soulevez-le et faites-le glisser sur les
guides. Appuyez sur le tiroir vers le
bas, puis retirez-le.
Nettoyage.
Remontez dans l'ordre inverse.
Nettoyer les éléments en bois avec un
torchon humide et un peu de produit
de vaisselle. Ne jamais mouiller les
arrangements en bois.
Retirez la grille de ventilation (voir la
section "Retrait de la grille de
ventilation" et passez l'aspirateur sous
l'appareil. Tirez l'appareil pour
l'éloigner du mur et passez l'aspirateur
sur l'arrière du réfrigérateur, sur le
circuit frigorifique et sur le
compresseur.
Remplacement de l'ampoule
Replacez la grille en tirant sur le bord
avant.
Remplacez l'ampoule par une
ampoule de même type, à douille E14,
de puissance max 25 W.
Avant de remplacer l'ampoule, mettez
l'appareil hors tension en retirant la
fiche de la prise secteur.
Dégivragearmoireàvins
Le dégivrage est automatique à
chaque arrêt. La formation de givre
peut être réduite en:
· ne mettant pas d'aliments chau ds
dans le réfrigérateur.
· évitant d'ouvrir trop fréquemment la
porteoudelalaisserouvertetrop
longtemps.
40
Page 41

renfermé risque de s'installer à
Arrêt prolongé
Mettez l'appareil hors tension et retirez
la fiche de la prise secteur ou bien
retirez le fusible.
Nettoyez l'appareil suivant les
explications de la section "Nettoyage".
Ne fermez pas la porte : une odeur de
l'intérieur de l'appareil.
Si l'appareil reste en marche,
demandez à quelqu'un de contrôler
régulièrement son bon
fonctionnement, pour éviter de perdre
son contenu en cas de panne de
secteur.
EN CAS D'ANOMALIE DE FONCTIONNEMENT
Si le compartiment ne fonctionne pas correctement, il est souvent possible
d'effectuer la réparation soi-même. Afin d'éviter des appels de dépannage
inutiles, lire attentivement les instructions ci-dessous et les suivre.
Problème Causepossible/Remède
““ est affiché sur l'affichage
de température.
La température à l'intérieur du
armoire à vins est trop chaude.
La température à l'intérieur du
armoire à vins est trop froide.
Il y a de l'eau sur la plaque de
réfrigération à l'intérieur du
armoire à vins.
L'eau coule à l'intérieur du
armoire à vins.
Une erreur s'est produite au cours de la
mesure de la température. Prendre contact
avec votre service après-vente. (Le système
de réfrigération continue à maintenir les
denrées alimentaires froid, mais le réglage de
température n'est pas possible.)
Diminuer la température.
S'assurer si la porte est complètement
fermée et si la bande isolante est entière et
propre.
Augmenter la température.
C'est normal. Pendant le dégivrage
automatique, la glace est dégivrée sur la
plaque de réfrigération.
Nettoyer l'embout de vidange d'eau et le trou
de vidange à l'intérieur du armoire à vins
avec, par exemple, des coton-tiges ou une
brosse pour nettoyer des bouteilles.
Certaines denrées alimentaires ont été
placées de façon que l'eau coule dans le trou
de vidange.
41
Page 42

De l'eau coule au sol.
Le compresseur fonctionne en
continu.
Le compartiment ne fonctionne
pas du tout. Le voyant de
réfrigération ou le voyant
intérieur ne fonctionne pas.
Aucun voyant n'est allumé.
Le niveau sonore dans le
compartiment est trop élevé.
Placer le flexible de vidange à l'arrière du
compartiment au-dessus du bac de vidange.
Voir le chapitre "Avant de mettre le
compartiment sous tension pour la première
fois ".
Augmenter la température.
S'assurer si la porte est complètement
fermée et si la bande isolante est entière et
propre.
Le compartiment n'est pas mis sous tension.
Le compartiment n'a pas été mis sous
tension. (Essayer de brancher un autre
appareil électrique à la prise d'alimentation.)
Lefusibleasauté.
La fich e d'alimentation n'est pas branchée
correctement.
Le système de réfrigération émet toujours des
sons. Un son impulsionnel est entendu
lorsque l'eau de réfrigération est pompée à
l'intérieur des tuyaux de réfrigération. Un son
tic-tac venant du thermostat peut être
entendu lorsque le compresseur se met en
route et s'arrête. Le niveau du son varie selon
le fonctionnement du compartiment.
Si le niveau sonore paraît incorrect:
Plier doucement les tuyaux à l'arrière du
compartiment et s'assurer qu'ils ne se
touchent pas.
Si les cales d'amortissement (entre la paroi
du compartiment et les tuyaux) sont
desserrées, les remettre en place.
Suivre attentivement les instructions décrites
au ch apitre " Mise en place de l'appareil".
42
Page 43

CARACTÉRISTIQUES TECHNIQUES
Modèle
Volume total de réfrigérateur (l)
Dimension mm
Hauteur
Largeur
Profondeur
ERC38810WS
361
1800
595
623
INSTALLATION
Câble
Ne débranchez pas l'appareil en tirant
sur le câble, particulièrement lorsque
l'appareil est tiré de son emplacement.
· Si le câble d'alimentation est
endommagé ou écrasé peut causer un
court circuit, un incendie et/ou une
électrocution.
· En cas d'endommagement du
câble de connexion de l'appareil, seul
du personnel qualifié ou agréé par le
fournisseur officiel pourra procéder au
changement, en vue de garantir un
maximum de sécurité.
Déballage
Déballez l'appareil et contrôlez s'il est
enbonétatets'iln'apassubide
dégât en cours de transport. Les
dégâts éventuellement constatés
doivent être immédiatement signalés
au four nisseur. Déposez l'emballage
dans une déchetterie pour
récupération. Pour de plus amples
informations, renseignez-vous auprès
des services mu n icipaux ou de votre
revendeur.
! Ne laissez pas les enfants jouer avec
l'emballage. Le film en plastique peut
provoquer un étouffement.
Nettoyage
Laver l'intérieur de l'appareil à l'eau
tiède avec un produit vaisselle et un
chiffon doux. Nettoyer les éléments en
bois avec un torchon humide et un
peu de produit de vaisselle. Ne jamais
mouiller les arrangements en bois.
Retrait des cales de transport
Enlevez les bandes et les cales de
transport
· sur les côtés de portes
· à l'intérieur des charnières de porte
·surlesétagères
Retirez la cale de transport charn ière.
43
Page 44

Montagelapoignée
La poignée sont incluses dans le
contenu de l'amballage de l'appareil.
Fixez la poignée.
Mise en place de l'appareil
Assurez-vous que la câble et/ou la
prise n'est pas écrasée ou
endommagée par l'arrière de
l'appareil.
· risque d'incendie.
Ne placez pas d'objets lourds ou
l'appareil sur le câble d'alimentation.
· risque de court circuit et incendie.
Si la prise murale est mal fixée, ne
branchez pas l'appareil.
· risque d'electrocution ou incendie.
Pour que votre appareil puisse
fonctionner dans les meilleures
conditions, vérifiez si:
· l'appareil est placé dans un local
frais et sec, à l'abri des rayons directs
du soleil.
· l'appareil n'est pas placé à
proximité de sources de chaleur telles
qu'une cu isinière ou un lave-vaisselle.
· l'appareil est droit et repose sur les
quatre angles. L'appareil ne doit pas
s'appuyer contre un mur. Ajustez la
hauteur des pieds si nécessaire au
moyendelacléfournieàceteffet.
· l'air circule bien autour de l'appareil
et si les conduits de ventilation derrière
et sous l'appareil ne sont pas
obstrués. L'espace de ventilation
nécessaire au-dessus de l'appareil ou
de tout autre élément supérieur est
d'au moins 4 cm. L'espace de
ventilation peut être ménagé soit
a) directement au-dessus de
l'appareil, soit
b) derrière et au-dessus de l'appareil.
Dans ce cas, l'espace prévu pour la
ventilationàl'arrièredoitêtreprofond
d'au moins 50 mm.
a)
b)
50mm
44
Page 45

· l'appareil est placé dans un local à
la température ambiente corrospond à
la classe climatique* pour lequel il est
prévu.
* La classe climatique est indiquée sur
la plaque signalétique qui se truve à
l'intérieur de l'appareil.
Le tableau ci-après indique quelle
température ambiante correspond à
quelle classe climatique.
3. Couchez l'appareil sur une planche
de bois. Pour relever l'appareil par la
suite, il sera ainsi plus facile de le saisir
par en-dessous grâce à la planche.
1
2
3
Classe
climatique
SN
N
ST
T
Laprisedecourantdoitrestée
accessible après l'installation de
l'appareil.
Si l'appareil est placé dans un coin,
avec le côté des charnières contre le
mur , laissez au moins 230 mm entre le
mur et l'appareil pour permettre une
ouverturesuffisantedelaporte,afinde
pouvoir retirer les étagères.
Contrôlez que le flexible d'évacuation à
l'arrière du compartiment débouche
bien dans le bac collecteur.
pour une
température
ambiente de
+10°C à +32°C
+16°C à +32°C
+18°C à +38°C
+18°C à +43°C
Remontagedelaporte
1. Fermez l'appareil et débranchez la
fiche de la prise secteur.
4.Surlapartiesupérieurede
l'appareil. Mettez l'axe de charnière
surlecôtéopposé.
Surlapartieinférieuredel'appareil.
Dévissez la ch arnière. Déplacez l'axe
de char n i ère et le bouchon en
plastique. Fixez la charnière de l'autre
côté.
4
Corrigez tout jeu de la porte en
ajustant la hauteur de la charnière
inférieure au moyen de la clé.
Vérouillez avec l'écrou de blocage.
Relevez l'appareil et remettez en place
la grille de ventilation.
2. Déposez la grille de ventilation. Un
élément de la grille peut être enlevé.
Retirez-le et placez-le de l'autre côté.
45
Page 46

5. Déplacez la poignée.
Dévissez la poignée et fixez-la de
l'autrecôtédelaporte.Rebouchezles
trousdefixationdelapoignéede
l'ancien emplacement avec les
bouchons de plastique fournis à cet
effet.
5
Remettre l'appareil en place et
contrôlez s'il est à niveau. Voir la
section "Installation".
Branchement électrique
Branchez l'appareil sur une prise reliée
àlaterre.
Tension: 230 V.
Fusible: 10 A.
Voir la plaque signalétique sur la
gauche, à l'intérieur de l'appareil.
46
Page 47

Welkom in de wereld van Electrolux!
Gefeliciteerd, u h ebt gekozen voor een eersteklas product van Electrolux. U zult
hier jarenlang plezier aan beleven. Het is de ambitie van Electrolux om het
huishouden voor u gemakkelijker te maken door middel van een breed
assortiment kwaliteitsapparatuur. U vindt en kele voorbeelden hiervan op de
voorzijde van deze gebruiksaanwijzing. Neem de tijd om deze gebruiksaanwijzing
te bestuderen zodat u kunt profiteren van de voordelen van uw nieuwe apparaat.
Wij beloven u een superieure gebruikerservaring en dus meer gemoedsrust.
Veel succes!
47
Page 48

Veiligheidsinformatie
Uw nieuwe wijnkoeler kan andere
functies hebben dan uw oude.
Dit apparaat is niet bedoeld voor
gebruik door personen (waaronder
begrepen kinderen) met verminderde
fysieke, zintuiglijke gesteldheid of een
gebrek aan ervaring en kennis, tenzij
dit onder toezicht gebeurt van een
voor hun veiligheid verantwoordelijke
persoon of tenzij zij van een dergelijke
persoon instructie hebben ontvangen
over het gebruik van het apparaat.
Lees deze gebruiksaanwijzing met
informatie over het gebruik en het
onderhoud van de kast in zijn geheel
aandachtig door. Zorg ervoor, dat de
gebruiksaanwijzing bewaard blijft. Dit
kan nu ttig zijn als u de kast later aan
iemand an ders geeft of verkoopt.
Gebruik
· Zoals in deze gebruiksaanwijzing
wordt uitgelegd is dit apparaat
uitsluitend bedoeld om in een normaal
huishouden dranken te bewaren.
· Bewaar geen explosieve stoffen in
het koelsvak. Dergelijke stoffen kunnen
exploderen en lichamelijk letsel of
materiële schade veroorzaken
· Voorkom dat h et koelsysteem aan
de achterkant en aan de binnenkant
van de kast met scherpe voorwerpen
in aan raking komt. Als er lekkage in
het koelsysteem optreedt, kan het
apparaat onherstelbaar worden
beschadigd en kunnen de levensmiddelen bederven.
· Het apparaat is zwaar. De onderkant van de kast heeft scherpe
randen. Wees voorzichtig bij het tillen
van de kast en draag hierbij altijd
handschoenen.
Kinderen
· Laat kinderen niet aan het apparaat
en de bedieningsorganen komen.
WAARSCHUWING!
Houd de ventilatie-openingen van de
apparaten en de behuizing waarin ze
zijn ingebouwd vrij.
WAARSCHUWING!
Gebruik geen mechanische apparaten
of andere hulpmiddelen om het
ontdooiproces te versnellen dan
degene die door de fabrikant zijn
aanbevolen.
WAARSCHUWING!
Beschadig niet het koelmiddelcircuit.
WAARSCHUWING!
Gebruik geen elektrisch apparaat in de
voedselopslagcompartimenten van h et
apparaat , tenzij een type dat door de
fabrikant is aanbevolen
48
Page 49

Enkele paragrafen in deze handleidungen zi
j
d
beeknis hebben:
Dit symbool vindt u bij belangrijke voor de gebruiksveiligheid van uw
machine. Het niet in acht nemen van deze in formatie kan schade
veroorzaken.
Dit symbool geeft in formatie over een juist gebruik van de
machine en vertelt u hoe u de beste prestaties van de machine
kunt verkrijgen.
Dit symbool geeft belangrijke information over milieubescherming
n voorzien van symbolen die volgen
Als u uw oude toestel afdankt
Het symbool op het product of op de verpakking wijst erop dat dit
product niet als huishoudafval mag worden behan deld, maar moet worden
afgegeven bij een verzamelpunt waar elektrische en elektronische apparatuur
wordt gerecycled. Als u ervoor zorgt dat dit product op de juiste manier
wordt verwijderd, voorkomt u mogelijke negatieve gevolgen voor mens en
milieu die zich zouden kunnen voordoen in geval van verkeerde afvalverwerking. Voor gedetailleerdere informatie over het recyclen van dit product,
kunt u contact opnemen met de gemeente, de gemeentereiniging of de
winkel waar u het product hebt gekocht.
49
Page 50

Inhoud
Veiligheidsinformatie 48............
Als u uw oude toestel afdankt 49....
Inhoud 50........................
HET GEBRUIK 51.................
Alvorens de kast in gebruik
te nemen 51..................
Bedieningsorganen 51.............
Schakel de wijnkoeler in en stel de juiste
temperatuur in 51..............
De temperatuur in de wijnkoeler 52...
Plaatsing van de wijn
Tips voor opslag 52............
De temperatuur meten 53..........
Uitschakelen 53...................
Alarmeringen en andere kenmerken 53
De verlichting 53..................
Het interieur van de kast 53.........
HANDIGE TIPS 54.................
Energiespaaradviezen 54...........
De kast en het milieu 54............
Denk aan het milieu 54.............
ONDERHOUD 54..................
Het ventilatierooster verwijderen 54...
Reinigen 54.......................
De lamp vervangen 55.............
De wijnkoeler ontdooien 55.........
Alsdekastnietgebruiktwordt 56....
ALS DE KAST NIET NAAR BEHOREN
FUNCTIONEERT 56............
TECHNISCHE GEGEVENS 57.......
INSTALLEREN 58.................
Aansluitsnoer 58..................
Uitpakken 58.....................
Reinigen 58.......................
De transportsteunen verwijderen 58..
Elektrische aansluiting 58...........
De kast installeren 59..............
De deur opnieuw afhangen 60.......
50
Page 51

HET GEBRUIK
Alvorens de kast in gebruik te
nemen
Plaats en reinig de kast volgens de
aanwijzingen van "Installeren".
Controleer of de afvoerslang aan de
achterkant van de kast in de
opvangbak uitmondt.
Voo rdat u de stekker voor het eerst in het stopco ntact steekt, dient u de
kast ongeveer 4 uur te laten staan. De compressor kan beschadigd wor den als
deze wachttijd niet in acht wordt genomen. De olie heeft hiermee voldoende tijd
om naar de comp ressor te kunnen terug stromen.
Bedieningsorganen
12
A
A. Koelkastschakelaar
Met deze schakelaar wordt de koelkast
in- en uitgeschakeld.
B. Temperatuurdisplay
Deze display toont de temperatuur in
midden van de wijnkoeler.
C. Temperatuur-insteltoetsen/
thermostaat
Voor het instellen van de temperatuur.
B
C
D
EF
D. Verlichting
E. Alarmtoets
Met deze toets wordt het alarmsignaal
uitgeschakeld.
F. Rode waarschuwingslamp
De lamp begint te knipperen wann eer
een alarm is afgegaan.
Schakel de wijnkoeler in en stel de juiste temperatuur in
Inschakelen:
Schakel de wijnkoeler in door de
netschakelaar in te drukken.
12
Instellen van de temperatuur
Houd de toetsen ingedrukt totdat de
51
gewenste temperatuur op de
temperatuurdisplay wordt
weergegeven. (De temperatuur kan
tussen +6°C en +17°C worden
ingesteld.)
"+" verhoogt de temperatuur.
"-" verlaagt de temperatuur.
Page 52

12
Als de temperatuur eenmaal is
ingesteld, toont de temperatuurdisplay
de huidige temperatuur in de koelkast.
OPMERKING: Het optimale
temperatuurbereik kan worden
gehaald bij een omgevingstemperatuur
van 17°C of lager.
Laat de kast gedurende een periode
van 24 uur aanstaan als de
temperatuurinstelling veranderd wordt.
Hierdoor kan de temperatuur in de
kast stabiliseren.
De temperatuur hoeft niet opnieuw te
worden ingesteld als de koelkast enige
tijd niet is gebruikt. De thermostaat
onthoudt de eerder ingestelde
temperatuur.
De temperatuur in de wijnkoeler
OPMERKING: De afbeelding toont de
koudste en de warmste gedeelten van
de wijnkoeler.
+
+
+
-
-
+
Plaatsing van de wijn
Tips voor opslag
De tijd dat u een fles wijn moet
bewaren is afh an kelijk van zijn rijping,
het type druif, het alcoholgehalte en de
opgeloste fructose en tannine. Vraag
wanneer u de wijn koopt of deze
volledig gerijpt is of nog beter kan
worden door hem enige tijd te
bewaren.
In het onderste gedeelte van de koeler.
Koude lucht zorgt voor een tragere
rijping. Daarom kunt u oude, gerijpte
wijn en wijn die u langer wilt bewaren
het beste onderin de koeler plaatsen.
Gebruik het onderste gedeelte
bovendien voor wijn die koud moet
worden geserveerd.
In het bovenste gedeelte van de
koeler. In het bovenste gedeelte
bewaart u de wijn die u verder wilt
laten rijpen, wijn die op een hogere
temperatuur wordt geserveerd, en wijn
die u binnenkort gaat opdrinken.
Bewaar de flessen liggend om te
voorkomen dat de kurken uitdrogen.
Bewaar de wijn in het donker. De
deuren van de koeler zijn gemaakt van
dubbel glas met een donkere coating.
Dit beschermt de wijn tegen de
schadelijk invloed van het lich t
wanneer de koeler op een goed
verlichte plaats staat.
Vermijd vaak en langdurig gebruik van
de verlichting in de koeler. De wijn
moet in het donker worden bewaard.
Ga voorzichtig om met flessen.
Voorkom dat de wijn wordt geagiteerd.
Houd u altijd aan eventuele adviezen
en aan bevelingen met betrekking tot
de kwaliteit van de wijn, de
houdbaarheid en de optimale
bewaartemperatuur die u krijgt bij de
aankoop of uit de vakliteratuur.
52
Page 53

Wanneer u meerdere flessen op elkaar
bewaart, moet u controleren of geen
vandeflessendekoelplaatvande
kast raakt.
De temperatuur meten
Als de temperatuur gemeten wordt
met een standaard thermometer, moet
de thermometer in een glas water in
het midden van de koelkast worden
gezet. Dit zorgt voor een goede
weergave van de temperatuur in de
levensmiddelen. Leg of hang de
thermometer niet op of aan een plank.
waarschuwingslamp gaat uit als de
deur gesloten wordt.
12
De verlichting
De verlichting van de koeler kan ook
met gesloten deur worden
ingeschakeld. Hierdoor kunt u de
inhoud makkelijk zien zonder daarvoor
de deur van de koeler hoeven openen.
Laat de verlichting van de koeler
normaal uit, zodat uw wijn niet
onnodig wordt blootgesteld aan licht.
De verlichting gaat automatisch uit na
ongeveer 5 minuten.
12
Uitschakelen
Schakel de kast uit door op de
netschakelaar te drukken.
Houd de toets ongeveer 1 seconde
ingedrukt om storingen te voorkomen.
De voeding van de kast wordt slechts
volledig onderbroken wanneer de
stekker uit het stopcontact.
Alarmeringen en andere
kenmerken
Deuralarm
Als de deur langer dan 5 minuten open
blijft staan, begint de rode
waarschuwingslamp te knipperen en
klinkt het alarmsignaal.
Om het alarm uit te schakelen:
Druk de "alarmtoets" in. De rode
53
Het interieur van de kast
De planken kunnen vlak of onder een
hoek worden geplaatst.
Plaats de plank onder een hoek door
de voorste pinnen in lagere gaatjes te
steken. Op deze manier kunt u ook
reeds geopende flessen op de plank
bewaren.
Page 54

HANDIGE TIPS
Energiespaaradviezen
· Kies de plaats van de kast met
zorg. Zie "Installatie". Het stroomverbruik van de kast kan aanzienlijk
afnemen als een goede plaats is
gekozen.
· Voorkom dat de kast te vaak wordt
geopend en de deur te lang open blijft
staan.
· Controleer regelmatig of de kast
goed sluit.
· Reinig de compressor en het
koelsysteem aan de achterkant van de
koelkast ongeveer eenmaal per jaar
met een stofzuiger.
· Controleer en reinig de afdichtring
regelmatig.
De kast en het milieu
· De in deze kast gebruikte afdichting
en h et koelmiddel tasten de ozonlaag
niet aan.
· De verpakking kan volledig
hergebruikt worden.
· De kast is speciaal ontworpen om
gemakkelijk gedemonteerd en
hergebruikt te kunnen worden.
Denk aan het milieu
· Uit het oogpunt van milieubescherming moeten afgedankte
koel- en vriestoestellen volgens de
plaatselijke regelingen op deskundige
wijze verwerkt worden. Informeer bij de
gemeente naar de mogeliijkheden in
uw woonplaats.
· Bewaar levensmiddelen bij
voorkeur in verpakkingsmateriaal dat
opnieuw gebruikt kan worden. Vermijd
het gebruik van wegwerpverpakking zo
veel mogelijk.
· Gebruik een neutraal reinigingsmiddelomdekasttereinigen.
· Volg de adviezen van
"Energiespaaradviezen " nauwgezet.
ONDERHOUD
Het ventilatierooster verwijderen
Het ventilatierooster kan voor h et
reinigen worden verwijderd.
Zet de deur open voordat u het
ventilatierooster verwijdert. Open het
rooster door de bovenste rand naar
benedenennaarvorentetrekken.
Trek het rooster daarna recht naar
voren.
Reinigen
Reinig de kast regelmatig.
Schakel de kast uit en trek de stekker
uit het stopcontact. U kunt eventueel
ook de zekering verwijderen.
Maak de druppelgoot schoon met
behulp van een wattenstaafje of een
pijpreiniger. Gebruik een met plastic
omgeven gordijnspiraal om eventuele
verstoppingen in de afvoerslang te
verhelpen.
54
Page 55

Verwijder alle loszittende onderdelen
en was ze met de hand af. Reinig de
kast, het interieur en de afdichting.
Gebruik een zachte doek, bevochtigd
in een sopje van handwarm water en
een mild afwasmiddel. Sluit de deur
niet voordat de kast van binnen
helemaal droog is.
Til bij het verplaatsen van de kast de
kast aan de voorkant op om te
voorkomen dat de vloer beschadigd
wordt.
Bak
Trek de bak naar buiten.
Hefzeoverderemmendiezich
achteraan op de rails bevinden. Kantel
de bak neerwaarts en trek haar naar
buiten.
Reinig.
Monteer in omgekeerde volgorde.
Reinig de houten binnendelen met een
vochtige doek en een sopje van zachte
zeep. Maak het hout niet overdreven
nat.
Verwijder het ventilatierooster (zie "Het
ventilatierooster verwijderen" ) en
stofzuig onder de kast. Trek de kast
vandewandafenstofzuigde
achterkant van de kast, het
koelsysteem en de compressor.
De lamp vervangen
Trek de stekker uit het stopcontact
voordat u de lamp verwisselt.
Klik de voorste rand los en vouw het
rooster naar achteren.
Gebruik een lamp van hetzelfde type,
E14fitting,max.vermogen25W.
De wijnkoeler ontdooien
De wijnkoeler wordt elke keer dat de
compressor afslaat automatisch
ontdooid. IJsvorming kan worden
voorkomen door:
· geen warme levensmiddelen in de
kast te zetten.
· te voorkomen dat de deur te vaak
wordt geopend of te lang open blijft
staan.
55
Page 56

niet: hierdoor zou er een muffe geur in
Alsdekastnietgebruiktwordt
Schakel de kast uit en trek de stekker
uit het stopcontact. U kunt eventueel
ook de zekering verwijderen.
Reinig de kast zoals wordt uitgelegd in
"Reiniging". Sluit de deur van de kast
de kast kunnen ontstaan.
Als de kast aan moet blijven staan,
verdient het aanbeveling om iemand
de kast regelmatig te laten controleren
om te voorkomen dat levensmiddelen
door een stroomstoring bederven.
ALS DE KAST NIET NAAR BEHOREN
FUNCTIONEERT
Als de kast niet n aar behoren functioneert, is het vaak mogelijk om dit zelf te
verhelpen. Lees onderstaande aanwijzingen aandachtig door om onnodige
onderhoudsbeurten te voorkomen.
Probleem Mogelijke oorzaak / Oplossing
De temperatuurdisplay geeft
““ aan.
Het is te warm in de wijnkoeler. Stel een lagere temperatuur in.
Hetistekoudindewijnkoeler. Stel een hogere temperatuur in.
Er ligt water op de koelplaat in
de wijnkoeler.
Er loopt water in de wijnkoeler. Reinig de waterafvoer en het afvoergat in de
Er ligt water op de vloer. Hang de afvoerslang aan de achterkant van
De compressor is continu in
bedrijf.
Er is een fout opgetreden bij de meting van
de temperatuur. Neem contact op met uw
leverancier. (Het koelsysteem werkt
voldoende om uw levensmiddelen gekoeld te
houden, maar de temperatuurinstelling kan
niet worden veranderd.)
Controleer of de deur goed gesloten is en of
de isolatiestrip schoon en heel is.
Dit is normaal. Het ijs ontdooit tijdens het
automatisch ontdooien op de koelplaat.
wijnkoeler met behulp van wattenstaafjes of
een flessenborstel.
Er kunnen levensmiddelen zodanig zijn
neergelegd, dat er water in de afvoer loopt.
de koelkast boven de opvangbak. Zie het
hoofdstuk "Alvorens de koelkast in gebruik te
nemen".
Stel een hogere temperatuur in.
Controleer of de deur goed gesloten is en of
de isolatiestrip schoon en heel is.
56
Page 57

De kast werkt niet. Er wordt
niet gekoeld of de kastlamp
brandt niet. Ook de indicators
branden niet.
De kast produceert te veel
geluid.
De kast is niet ingeschakeld.
Er is geen stroomtoevoer naar de kast. (Sluit
als test een ander elektrisch apparaat op het
stopcontact aan.)
De zekering is doorgebrand.
De stekker zit niet goed in h et stopcontact.
Het koelsysteem produceert altijd wat
bijgeluiden. Er is een stromend geluid
hoorbaar wanneer de koelvloeistof door het
koelsysteem wordt gepompt. Er is een
klikgeluid van de thermostaat hoorbaar
wanneer de compressor wordt in- of
uitgeschakeld. De geluidssterkte hangt af van
de bedrijfsstatus van de kast.
Als u denkt dat de geluidssterkte niet goed is:
Verbuig de leidingen aan de achterzijde van
de kast voorzichtig, zodat ze niet met elkaar
in aanraking komen.
Als de afstandskussens (tussen de kastwand
en de leidingen) losraken, zet u ze weer vast.
Voer de aanwijzingen van hoofdstuk "De
kast Installeren" zorgvuldig uit.
TECHNISCHE GEGEVENS
Model ERC38810WS
Netto inhoud koel l 361
Dimension
Hoogte 1800
Breedte 595
Diepte 623
57
Page 58

INSTALLEREN
Aansluitsnoer
Trek de stekker niet u it het stopcontact
door aan het snoer te trekken, vooral
niet als het apparaat uit de nis wordt
getrokken.
· Schala aan het snoer kan
kortsluiting, brand en/of een
elektrische schok veroorzaken.
· Als het aansluitsnoer van het
product beschadigd is, mag het alleen
vervangen worden door een door de
leverancier geautoriseerd servicebedrijf
of een deskundig persoon om gevaar
te voorkomen.
Uitpakken
Pak de kast uit en controleer of de
kast in goede staat is en tijdens het
transport niet beschadigd is. Licht
onmiddellijk uw leverancier in als de
kast tijdens transport beschadigd is.
Lever de verpakking in voor recycling.
Voor vragen hierover kunt u terecht bij
het gemeentehuis van uw gemeente of
bij uw leverancier.
De transportsteunen verwijderen
Verwijder het plakband en de
transportsteunen van
· de deurscharnieren
· de binnenkant van de
deurscharnieren
· de rekken
Verwijder de transportsteun van de
transportsdeurscharnieren.
Het monteren van de handgrepen
De han dgrepen zijn bijgesloten in de
verpakking van de kast.
Monteer de handgreep.
Laat kinderen niet met de verpakking
spelen. Het plastic kan gevaar voor
verstikking opleveren.
Reinigen
Reinig de binnenkant van de kast met
behulp van een zachte doek,
bevochtigd in een sopje van
handwarm water en een mild
afwasmiddel. Reinig de houten
binnendelen met een vochtige doek en
een sopje van zachte zeep. Maak het
hout niet overdreven nat.
Elektrische aansluiting
Sluit de kast aan op een geaard
stopcontact.
Voltage: 230 V.
Zekering: 10 A.
Zie de kenplaat aan de linkerzijde in de
kast.
58
Page 59

De kast installeren
Zorg ervoor dat de aansluitsnoer en/of
stekker niet wordt platgedrukt of
beschadigd door de achterkant van
het apparaat.
· een beschadigde aansluitsnoer
en/of stekker kan oververhit raken en
brand veroorzaken.
Plaats geen zware voorwerpen of het
apparaat zelf op het aansluitsnoer.
· daardoor bestaat kans op
kortsluiting en brand.
Als het stopcontact los zit, steek de
stekker er dan niet in.
· daardoor bestaat kans op een
elektrische schok of brand.
Voor een goede werking van de kast is
het van belang, dat:
· de kast op een droge, koele plaats
wordt neergezet en niet aan direct
zonlicht wordt blootgesteld.
· dekastnietindebuurtwordt
geplaatst van een warmtebron, zoals
een for n u is of een vaatwasmachine.
· de kast waterpas staat en op alle
vier de hoeken rust. De kast mag niet
tegen een muur leunen. Stel zonodig
de voetjes af m.b.v. de bijgeleverde
stelsleutel.
niet geblokkeerd worden. De
ventilatieruimte boven de koelkast en
de eventueel erboven geplaatste
bovenkast /keukenkast dient
tenminste 4 cm te zijn. De
ventilatieruimte kan zijn aangebracht
a) direct boven de kast, of
b) achter en boven de bovenkast die
boven de kast is geplaatst. In dit geval
dient de open ruimte tenminste 50 mm
diep te zijn.
a)
b)
50mm
· de kast alleen op een plaats
neerzetten waarvan de
omgevingstemperatuur overrnkomt
met de klimaatcategorie* waarvoor het
apparaat is ontworpen.
* Zie typeplaatje het apparaat bevindt.
De volgende tabel geeft aan welke
omgevingstemperatuur bij welke
klimaatcatergorie behoort.
· er een goede luchtcirculatie
rondom de kast mogelijk is en de
luchtkanalen onder en ach ter de kast
59
Klimaat-
categorie
SN
N
ST
T
voor een omgevings-
temperatuure van
+10°C tot +32°C
+16°C tot +32°C
+18°C tot +38°C
+18°C tot +43°C
Page 60

Als de kast in een hoek wordt
geplaatst en de scharnieren zich aan
de muurzijde bevinden, dient er tussen
de kast en de muur een afstand van
tenminste 230 mm bewaard te
worden, zodat de deur ver genoeg
geopend kan worden om de rekken uit
de kast te kunnen nemen.
Controleer of de afvoerslang aan de
achterkant van de kast in de
opvangbak uitmondt.
De stekker moet ook na de installatie
van de kast bereikbaar zijn.
De deur opnieuw afhangen
1.Sluitdekastentrekdestekkeruit
het stopcontact.
2. Verwijder het ventilatierooster. Op
het rooster zit een afneembaar
onderdeel. Plaats dit aan de andere
kant van het rooster.
3. Leg een plank onder de kast
wanneer u de kast plat neer moet
leggen. Als de kast later weer rechtop
moet worden gezet, dan is het
gemakkelijker om de kast vast te
pakken als er een plank onder ligt.
Zet het scharnier aan de andere kant
vast.
4
Stel m.b.v. de bijgeleverde sleutel de
hoogte van het onderste scharnier in
om eventuele speling weg te nemen.
Zet het scharnier met de borgmoer
vast.
Zet de kast rechtop en plaats het
ventilatierooster terug.
5. Het monteren van de handgrepen.
Schroef de handgreep los en maak
hem op de andere kant vast. Druk de
bijgeleverde plastic pluggen in de
openingen waarin de handgreep
voordien vastzat.
5
1
2
3
4. Op het bovenste deel van de kast.
Plaats de scharnierpen aan de andere
kant.
Op het onderste deel van de kast
schroef het scharn ier los. Verplaats de
scharnierpen en de plastic afdekplaat.
Zet de kast op zijn plaats. Controleer
of de kast waterpas staat. Zie
"Installeren".
60
Page 61

616263
Page 62

Page 63

Page 64

www.electrolux.com
www.electrolux.gb
www.electrolux.de
www.electrolux.fr
www.electrolux.nl
8184205-00/6 012008
 Loading...