

Page 1

ENN2853AOW
................................................ .............................................
NL KOEL-VRIESCOMBINATIE GEBRUIKSAANWIJZING 2
EN FRIDGE FREEZER USER MANUAL 23
DE KÜHL - GEFRIERSCHRANK BENUTZERINFORMATION 43
ES FRIGORÍFICO-
CONGELADOR
MANUAL DE
INSTRUCCIONES
65
Page 2

www.electrolux.com
2
INHOUD
1. VEILIGHEIDSVOORSCHRIFTEN . . . . . . . . . . . . . . . . . . . . . . . . . . . . . . . . . . . . . . . . . . . . . 3
2. BEDIENINGSPANEEL . . . . . . . . . . . . . . . . . . . . . . . . . . . . . . . . . . . . . . . . . . . . . . . . . . . . . 5
3. DAGELIJKS GEBRUIK . . . . . . . . . . . . . . . . . . . . . . . . . . . . . . . . . . . . . . . . . . . . . . . . . . . . 6
4. NUTTIGE AANWIJZINGEN EN TIPS . . . . . . . . . . . . . . . . . . . . . . . . . . . . . . . . . . . . . . . . . . 9
5. ONDERHOUD EN REINIGING . . . . . . . . . . . . . . . . . . . . . . . . . . . . . . . . . . . . . . . . . . . . . . 10
6. PROBLEMEN OPLOSSEN . . . . . . . . . . . . . . . . . . . . . . . . . . . . . . . . . . . . . . . . . . . . . . . . 11
7. MONTAGE . . . . . . . . . . . . . . . . . . . . . . . . . . . . . . . . . . . . . . . . . . . . . . . . . . . . . . . . . . . . 13
8.
GELUIDEN . . . . . . . . . . . . . . . . . . . . . . . . . . . . . . . . . . . . . . . . . . . . . . . . . . . . . . . . . . . . 19
9. TECHNISCHE GEGEVENS . . . . . . . . . . . . . . . . . . . . . . . . . . . . . . . . . . . . . . . . . . . . . . . . 22
WE DENKEN AAN U
Bedankt om een Electrolux-apparaat te kopen. U koos voor een product dat jaren professionele
ervaring en innovatie bevat. Ingenieus en stijlvol, het werd ontworpen met u in het achterhoofd.
Wanneer u het gebruikt, kunt u er op vertrouwen dat u keer op keer fantastische resultaten zult
krijgen.
Welkom bij Electrolux.
Ga naar onze website voor:
Advies over gebruik, brochures, het oplossen van problemen en onderhoudsinformatie:
www.electrolux.com
Registreer uw product voor een betere service:
www.electrolux.com/productregistration
Koop accessoires, verbruiksartikelen en originele reserveonderdelen voor uw apparaat:
www.electrolux.com/shop
KLANTENSERVICE
Wij raden altijd het gebruik van originele onderdelen aan.
Zorg er als u contact opneemt met de klantenservice voor dat u de volgende gegevens bij de
hand hebt.
De informatie staat op het typeplaatje. model, productnummer, serienummer.
Waarschuwing - Belangrijke veiligheidsinformatie.
Algemene informatie en tips
Milieu-informatie
Wijzigingen voorbehouden.
Page 3

NEDERLANDS 3
1.
VEILIGHEIDSVOORSCHRIFTEN
In het belang van uw veiligheid en om een
correct gebruik te kunnen waarborgen is
het van belang dat u, alvorens het apparaat te installeren en in gebruik te nemen,
deze gebruiksaanwijzing, inclusief de tips
en waarschuwingen, grondig doorleest.
Om onnodige vergissingen en ongevallen
te voorkomen is het belangrijk ervoor te
zorgen dat alle mensen die het apparaat
gebruiken, volledig bekend zijn met de
werking ervan en de veiligheidsvoorzieningen. Bewaar deze instructies en zorg ervoor dat zij bij het apparaat blijven als het
wordt verplaatst of verkocht, zodat iedereen die het apparaat gedurende zijn hele
levensduur gebruikt, naar behoren is geïnformeerd over het gebruik en de veiligheid
van het apparaat.
Voor de veiligheid van mensen en eigendommen dient u zich aan de voorzorgsmaatregelen uit dit instructieboekje te
houden, de fabrikant is niet verantwoordelijk voor schade die door het niet opvolgen van de aanwijzingen veroorzaakt is.
1.1 Veiligheid van kinderen en
kwetsbare mensen
• Dit apparaat is niet bedoeld voor gebruik door personen (waaronder begrepen kinderen) met verminderde fysieke,
zintuiglijke vermogens of een gebrek
aan ervaring en kennis, tenzij dit onder
toezicht gebeurt van een voor hun veiligheid verantwoordelijke persoon of
tenzij zij van een dergelijke persoon instructie hebben ontvangen over het gebruik van het apparaat.
Houd kinderen uit de buurt om te voorkomen dat ze met het apparaat gaan
spelen.
• Houd alle verpakkingsmateriaal buiten
het bereik van kinderen. Gevaar voor
verstikking.
• Als u het apparaat afdankt trek dan de
stekker uit het stopcontact, snij de voedingskabel door (zo dicht mogelijk bij
het apparaat) en verwijder de deur om
te voorkomen dat kinderen een elektrische schok krijgen of zichzelf in het apparaat opsluiten.
• Als dit apparaat, dat voorzien is van een
magnetische deursluiting, een ouder
apparaat vervangt, dat voorzien is van
een veerslot (slot) op de deur of het
deksel, zorg er dan voor dat u het slot
onbruikbaar maakt voordat u het oude
apparaat weggooit. Dit voorkomt dat
kinderen er in opgesloten kunnen raken.
1.2 Algemene veiligheid
WAARSCHUWING!
Houd de ventilatieopeningen altijd vrij van
obstructies; dit geldt zowel voor losstaande als ingebouwde modellen.
• Dit apparaat is bedoeld voor het bewaren van levensmiddelen en/of dranken
in een gewoon huishouden en gelijkaardig gebruik zoals:
– personeelskeukens in winkels, kanto-
ren of andere werkomgevingen;
– door gasten in hotels, motels en an-
dere residentiële omgevingen;
– bed-and-breakfast-accommodatie;
– catering en gelijkaardige niet-com-
mercieel gebruik.
• Gebruik geen mechanische hulpmiddelen of kunstgrepen om het ontdooiproces te versnellen.
• Gebruik geen andere elektrische apparaten (bijvoorbeeld ijsmachines) in koelkasten, tenzij ze voor dit doel goedgekeurd zijn door de fabrikant.
• Let op dat u het koelcircuit niet beschadigt.
• Het koelmiddel isobutaan (R600a) bevindt zich in het koelcircuit van het apparaat, dit is een natuurlijk gas dat weliswaar milieuvriendelijk is, maar ook uiterst ontvlambaar.
Controleer of de onderdelen van het
koelcircuit tijdens transport en installatie
van het apparaat niet beschadigd zijn
geraakt.
Indien het koelcircuit beschadigd is:
– open vuur en ontstekingsbronnen
vermijden
– de ruimte waar het apparaat zich be-
vindt grondig ventileren
Page 4
www.electrolux.com
4
• Het is gevaarlijk om wijzigingen aan te
• Dit apparaat is zwaar. Wees voorzichtig
• Haal geen artikelen uit het vriesvak en
• Stel het apparaat niet langdurig bloot
• De eventuele gloeilampen in dit appa-
1.3 Dagelijks gebruik
• Zet geen hete potten op de kunststof
• Bewaar geen brandbare gassen of
brengen in de specificaties of dit product op enigerlei wijze te modificeren.
Een beschadigd netsnoer kan kortsluiting, brand en/of een elektrische schok
veroorzaken.
WAARSCHUWING!
Alle elektrische onderdelen (netsnoer, stekker, compressor) mogen om gevaar te voorkomen uitsluitend worden vervangen door
een erkende onderhoudsdienst of
gekwalificeerd onderhoudspersoneel.
1.
Het netsnoer mag niet verlengd
worden.
2.
Verzeker u ervan dat de stekker
niet platgedrukt of beschadigd
wordt door de achterkant van het
apparaat. Een platgedrukte of beschadigde stekker kan oververhit
raken en brand veroorzaken.
3.
Verzeker u ervan dat u de stekker
van het apparaat kunt bereiken.
4.
Trek niet aan het snoer.
5.
Als de stekker los zit, steek hem
dan niet in het stopcontact. Dan
bestaat er een risico op een elektrische schok of brand.
6.
U mag het apparaat niet gebruiken
zonder het afdekkapje (indien van
toepassing) van het lampje.
als u het apparaat verplaatst.
raak ze niet aan als uw handen vochtig/
nat zijn, dit kan uw huid beschadigen of
vrieswonden veroorzaken.
aan direct zonlicht.
raat zijn speciaal geselecteerd en uitsluitend bedoeld voor gebruik in huishoudelijke apparaten. De lampjes zijn
niet geschikt voor de verlichting van
ruimtes.
onderdelen in het apparaat.
vloeistoffen in het apparaat, deze kunnen ontploffen.
• Zet geen levensmiddelen direct tegen
de luchtopening in de achterwand. (Als
het apparaat rijpvrij is)
• Diepgevroren voedsel mag niet opnieuw worden ingevroren als het eenmaal ontdooid is.
• Bewaar voorverpakte diepvriesproducten volgens de aanwijzingen van de fabrikant.
• U dient zich strikt te houden aan de
aanbevelingen van de fabrikant van het
apparaat met betrekking tot het bewaren van voedsel. Raadpleeg de betreffende aanwijzingen.
• Leg geen koolzuurhoudende of mousserende dranken in de vriezer, deze
veroorzaken druk op de fles die daardoor kan ontploffen, dit kan schade
toebrengen aan het apparaat.
• IJslollies kunnen vrieswonden veroorzaken als ze rechtstreeks vanuit het apparaat geconsumeerd worden.
1.4 Onderhoud en reiniging
• Schakel het apparaat uit en trek de
stekker uit het stopcontact voordat u
onderhoudshandelingen verricht.
• Maak het apparaat niet schoon met
metalen voorwerpen.
• Gebruik geen scherpe voorwerpen om
ijs van het apparaat te krabben. Gebruik een kunststof schraper.
• Controleer de afvoer in de koelkast regelmatig op dooiwater. Maak de afvoer,
indien nodig, schoon. Als de afvoer verstopt is, zal er water op de bodem van
het apparaat liggen.
1.5 Installatie
Voor de aansluiting van elektriciteit
dienen de instructies in de desbetreffende paragrafen nauwgezet te
worden opgevolgd.
• Pak het apparaat uit en controleer of er
beschadigingen zijn. Sluit het apparaat
niet aan als het beschadigd is. Meld
mogelijke beschadigingen onmiddellijk
bij de winkel waar u het apparaat gekocht heeft. Gooi in dat geval de verpakking niet weg.
• Wij adviseren u om 4 uur te wachten
voordat u het apparaat aansluit, dan
Page 5

kan de olie terugvloeien in de compressor.
• Rond het apparaat dient adequate
luchtcirculatie te zijn, anders kan dit tot
oververhitting leiden. Om voldoende
ventilatie te verkrijgen de instructies met
betrekking tot de installatie opvolgen.
• De achterkant dient zo mogelijk tegen
een muur geplaatst te worden, teneinde
te voorkomen dat hete onderdelen
(compressor, condensator) aangeraakt
kunnen worden en brandwonden veroorzaken.
• Het apparaat mag niet vlakbij radiatoren
of kooktoestellen geplaatst worden.
• Verzeker u ervan dat de stekker bereikbaar is nadat het apparaat geïnstalleerd
is.
• Aansluiten op de drinkwatervoorziening
(indien voorzien van een wateraansluiting).
1.6 Onderhoud
• Alle elektrotechnische werkzaamheden
die noodzakelijk zijn voor het uitvoeren
van onderhoud aan het apparaat, dienen uitgevoerd te worden door een ge-
NEDERLANDS 5
kwalificeerd elektricien of competent
persoon.
• Dit product mag alleen worden onderhouden door een erkend onderhoudscentrum en er dient alleen gebruik te
worden gemaakt van originele reserveonderdelen.
1.7 Bescherming van het milieu
Dit apparaat bevat geen gassen
die de ozonlaag kunnen beschadigen, niet in het koelcircuit en
evenmin in de isolatiematerialen.
Het apparaat mag niet worden
weggegooid bij het normale huishoudelijke afval. Het isolatieschuim bevat ontvlambare gassen: het apparaat moet weggegooid worden conform de van
toepassing zijnde regels die u bij
de lokale overheidsinstanties kunt
verkrijgen. Voorkom beschadiging
aan de koeleenheid, vooral aan de
achterkant bij de warmtewisselaar. De materialen die gebruikt
zijn voor dit apparaat en die voor-
zien zijn van het symbool
recyclebaar.
zijn
2. BEDIENINGSPANEEL
Signaallampje
1
Temperatuur-regelaar
2
Fast Freeze -lampje
3
Fast Freeze -schakelaar
4
FreeStore-lampje
5
FreeStore-schakelaar
6
2.1 Inschakelen
Steek de stekker in het stopcontact.
Draai de thermostaatknop op een gemiddelde stand.
1 2 3 4 5 6
Het controlelampje gaat branden.
2.2 Uitschakelen
Draai, om het apparaat uit te zetten, de
thermostaatknop naar de "O" stand.
Het controlelampje gaat uit.
2.3 Temperatuurregeling
De temperatuur wordt automatisch geregeld.
Ga als volgt te werk om het apparaat in
werking te stellen:
Page 6

www.electrolux.com
6
• draai de thermostaatknop op een lage-
• draai de thermostaatknop op een hoge-
De exacte instelling moet echter gekozen
worden rekening houdend met het feit dat
de temperatuur in het apparaat afhankelijk
is van:
• de omgevingstemperatuur
• hoe vaak de deur geopend wordt
• de hoeveelheid voedsel die bewaard
• de plaats van het apparaat.
2.4 Fast Freeze-functie in en uit
Druk op de Fast Freeze-knop om de functie Fast Freeze te activeren.
Het Fast Freeze lampje gaat branden.
re stand om de minimale koude te verkrijgen.
re stand om de maximale koude te verkrijgen.
Een gemiddelde instelling is over
het algemeen het meest geschikt.
wordt
Deze functie stopt automatisch na
52 uur.
Druk op de Fast Freeze-knop om de functie om op elk moment te uit te schakelen.
Het Fast Freeze-lampje gaat uit.
2.5 FreeStore-functie in en uit
U kunt de FreeStore functie activeren
door op de FreeStore schakelaar te drukken.
Het FreeStore lampje gaat branden.
Het is mogelijk de functie te allen tijde te
deactiveren door te drukken op de FreeStore-schakelaar.
Het FreeStore-lampje gaat uit.
Als de functie automatisch wordt
geactiveerd, wordt het indicatielampje FreeStore niet weergegeven (zie "Dagelijks gebruik").
Het activeren van de functie
FreeStore verhoogt het energieverbruik.
3. DAGELIJKS GEBRUIK
3.1 Voordat u het apparaat voor
de eerste keer gebruikt
Voordat u het apparaat voor de eerste
keer gebruikt, wast u de binnenkant en de
interne accessoires met lauwwarm water
en een beetje neutrale zeep om de typische geur van een nieuw product weg te
nemen. Droog daarna grondig af.
Gebruik geen oplosmiddelen of
schuurmiddelen. Deze beschadigen de lak.
3.2 Vers voedsel invriezen
Het vriesvak is geschikt voor het invriezen
van vers voedsel en voor het voor een
lange periode bewaren van ingevroren en
diepgevroren voedsel.
Activeer om vers voedsel in te vriezen de
Action Freeze functie ten minste 24 uur
voordat u het in te vriezen voedsel in het
vriesvak legt.
Leg het in te vriezen verse voedsel in het
bovenste deel van de vriezer, dat is namelijk het koudste punt.
De maximale hoeveelheid voedsel die in
24 uur ingevroren kan worden is vermeld
op het typeplaatje, een etiket dat aan de
binnenkant van het apparaat zit.
Het invriesproces duurt 24 uur: voeg gedurende deze periode niet meer in te vriezen voedsel toe.
3.3 Het bewaren van ingevroren
voedsel
Als u het apparaat voor het eerst of na
een periode dat het niet gebruikt is inschakelt, dient u het apparaat minstens 2
uur op een hoge instelling te laten werken
voordat u er producten in plaatst.
Page 7

In het geval van onbedoelde ontdooiing, bijvoorbeeld als de
stroom langer is uitgevallen dan
de duur die op de kaart met technische kenmerken onder "tijdsduur" is vermeld, moet het ontdooide voedsel snel geconsumeerd worden of onmiddellijk bereid worden en dan weer worden
ingevroren (nadat het afgekoeld
is).
3.4 Ontdooien
Diepgevroren of ingevroren voedsel kunt,
voordat het gebruikt wordt, in het koelvak
of op kamertemperatuur laten ontdooien,
afhankelijk van de hoeveelheid tijd die
hiervoor nodig is.
Kleine stukken kunnen zelfs rechtstreeks
vanuit de vriezer gekookt worden als ze
3.7 Temperatuurweergave
NEDERLANDS 7
nog bevroren zijn: in dat geval zal de bereiding iets langer duren.
3.5 Het maken van ijsblokjes
Dit apparaat is uitgerust met een of meer
bladen voor het maken van ijsblokjes. Vul
deze bladen met water en zet ze dan in
het vriesvak.
Gebruik geen metalen instrumenten om de laden uit de vriezer te
halen.
3.6 Koude accumulators
De vriezer is voorzien van een of meer
koudeaccumulators; hierdoor blijft het
voedsel langer koud als de stroom uitvalt
of als er een storing is.
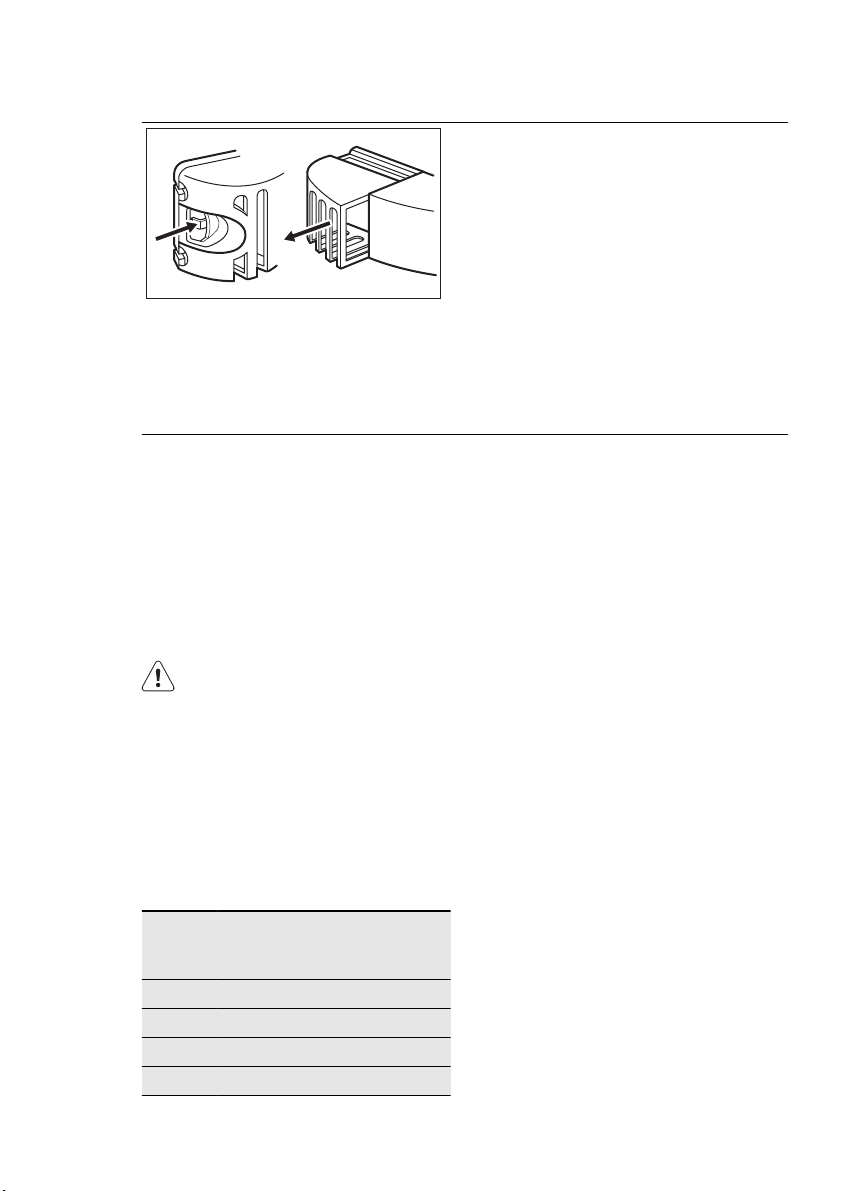
Dit apparaat wordt verkocht in
Frankrijk.
In overeenstemming met de richtlijnen die gelden in dit land, moet
dit apparaat worden geleverd met
een speciaal onderdeel (zie afbeelding). Dit onderdeel is geplaatst in
de onderste lade van de koelkast
om de koudste zone aan te geven.
3.8 Verplaatsbare schappen
De wanden van de koelkast zijn voorzien
van een aantal glijschoenen zodat de legrekken op de gewenste plaats gezet
kunnen worden.
Voor een beter gebruik van de ruimte
kunnen de voorste halve plateaus over de
achterste worden geplaatst.
Page 8

www.electrolux.com
8
3.9 Het plaatsen van de deurplateaus
3.10 Vochtigheidsregeling
Om het bewaren van voedselpakketten
van verschillende afmetingen mogelijk te
maken, kunnen de schappen op verschillende hoogtes worden geplaatst.
Om deze aanpassingen uit te voeren,
gaat u als volgt te werk: trek het schap
geleidelijk in de richting van de pijlen totdat het los komt en plaats het schap op
een andere gewenste hoogte terug.
De glasplaat omvat een constructie met
inkepingen (afstelbaar door middel van
een schuifhendel), waarmee u de temperatuur in de groentelade(s) kunt regelen.
Wanneer de ventilatieopeningen gesloten
zijn:
wordt het natuurlijke vochtgehalte van het
voedsel in de fruit- en groentelades langer
behouden.
Als de ventilatieopeningen geopend zijn:
heeft meer luchtcirculatie een lagere
luchtvochtigheidsgehalte tot gevolg in de
fruit- en groentelades.
3.11 FreeStore
Het koelvak is voorzien van een apparaat
dat snelle koeling van voedsel mogelijk
maakt en een gelijkmatigere temperatuur
in het vak.
Het apparaat activeert zichzelf indien nodig, bijvoorbeeld voor een snel temperatuurherstel nadat de deur is geopend of
als de omgevingstemperatuur hoog is.
Stelt u in staat om het apparaat handmatig in te schakelen indien nodig (zie
'FreeStore-functie').
Het FreeStore-apparaat stopt als de deur
open is en start onmiddellijk opnieuw nadat de deur is gesloten.
Page 9

4. NUTTIGE AANWIJZINGEN EN TIPS
NEDERLANDS 9
4.1 Tips voor energiebesparing
• De deur niet vaker openen of open laten staan dan strikt noodzakelijk.
• Als de omgevingstemperatuur hoog is,
de thermostaatknop op een lage temperatuur staat en het apparaat volledig
gevuld is, kan de compressor continu
aan staan waardoor er ijs op de verdamper ontstaat. Als dit gebeurt, zet u
de thermostaatknop naar een warmere
instelling om de koelkast automatisch
te laten ontdooien en zo elektriciteitsverbruik te besparen.
4.2 Tips voor het koelen van
vers voedsel
Om de beste prestatie te verkrijgen:
• Zet geen warm voedsel of verdampende vloeistoffen in de koelkast
• dek het voedsel af of verpak het, in het
bijzonder als het een sterke geur heeft
• plaats het voedsel zodanig dat de lucht
er vrijelijk omheen kan circuleren
4.3 Nuttige tips voor het koelen
Nuttige tips:
Vlees (alle soorten) in plastic zakken verpakken en op het glazen schap leggen,
boven de groentelade.
Bewaar het, voor de veiligheid, slechts
een of maximaal twee dagen op deze manier.
Gekookt voedsel, koude schotels, enz.:
deze moeten afgedekt worden en mogen
op willekeurig welk schap gezet worden.
Fruit en groente: deze moeten zorgvuldig
schoongemaakt worden en in de speciaal
daarvoor bedoelde lade(n) geplaatst worden.
Boter en kaas: dit moet in speciale luchtdichte bakjes gelegd of in aluminiumfolie
of plastic zakjes gewikkeld worden om
zoveel mogelijk lucht buiten te sluiten.
Melkflessen: deze moeten een afdekdop
hebben en opgeslagen worden in het flessenrek in de deur.
Bananen, aardappelen, uien en knoflook,
indien niet verpakt, mogen niet in de koelkast bewaard worden.
4.4 Tips voor het invriezen
Om u te helpen om het beste van het invriesproces te maken, volgen hier een
paar belangrijke tips:
• de maximale hoeveelheid voedsel die in
24 uur ingevroren kan worden. is vermeld op het typeplaatje;
• het invriesproces duurt 24 uur. Voeg
gedurende deze periode niet meer in te
vriezen voedsel toe;
• vries alleen vers en grondig schoongemaakte levensmiddelen van uitstekende
kwaliteit in;
• bereid het voedsel in kleine porties
voor, zo kan het snel en volledig worden ingevroren en zo kunt u later alleen
die hoeveelheid laten ontdooien die u
nodig heeft;
• wikkel het voedsel in aluminiumfolie of
plastic en zorg ervoor dat de pakjes
luchtdicht zijn;
• leg vers, nog niet ingevroren voedsel
niet tegen het al ingevroren voedsel, om
te voorkomen dat dit laatste warm
wordt;
• smalle pakjes zijn makkelijker op te bergen dan dikke; zout maakt voedsel
minder lang houdbaar;
• water bevriest, als dit rechtstreeks uit
het vriesvak geconsumeerd wordt, kan
het aan de huid vastvriezen;
• het is aan te bevelen de invriesdatum
op elk pakje te vermelden, dan kunt u
zien hoe lang het al bewaard is;
4.5 Tips voor het bewaren van
ingevroren voedsel
Om de beste resultaten van dit apparaat
te verkrijgen, dient u:
• verzeker u ervan dat de commercieel
ingevroren levensmiddelen op geschikte wijze door de detailhandelaar werden
opgeslagen;
• zorg ervoor dat de ingevroren levensmiddelen zo snel mogelijk van de winkel
naar uw vriezer gebracht worden;
• de deur niet vaker te openen of open te
laten staan dan strikt noodzakelijk
Page 10

www.electrolux.com
10
• als voedsel eenmaal ontdooid is, bederft het snel en kan het niet opnieuw
worden ingevroren;
5. ONDERHOUD EN REINIGING
• bewaar het voedsel niet langer dan de
door de fabrikant aangegeven bewaarperiode.
LET OP!
Voordat u welke onderhoudshandeling dan ook verricht, de stekker
uit het stopcontact trekken.
Het koelcircuit van dit apparaat
bevat koolwaterstoffen; onderhoud en herladen mag alleen uitgevoerd worden door bevoegde
technici.
5.1 Periodieke reiniging
Het apparaat moet regelmatig worden
schoongemaakt:
• Veel normaal verkrijgbare keukenreinigers bevatten chemicaliën die de kunststoffen die in dit apparaat gebruikt zijn
kunnen aantasten/beschadigen. Gebruik daarom een zachte doek met
warm water met neutrale zeep om de
binnen- en buitenkant van de kast
schoon te maken.
Gebruik geen reinigings- of
schuurmiddelen voor de buitenkant, deze kunnen de lak, het
roestvrij staal en de beschermlaag
tegen vingerafdrukken beschadigen.
• controleer de deurrubbers regelmatig
en wrijf ze schoon om u ervan te verzekeren dat ze schoon en vrij van restjes
zijn.
• Spoel ze af en maak ze grondig droog.
• Maak de condensor (zwart rooster) en
de compressor aan de achterkant van
het apparaat schoon met een borstel.
Deze handeling zal de prestatie van het
apparaat verbeteren en het elektriciteitsverbruik verminderen.
Trek niet aan leidingen en/of kabels aan de binnenkant van de
kast en verplaats of beschadig ze
niet.
Zorg ervoor dat u het koelsysteem
niet beschadigt.
Steek, na het schoonmaken van het apparaat, de stekker weer in het stopcontact.
5.2 Periodes dat het apparaat
niet gebruikt wordt
Als het apparaat gedurende lange tijd niet
gebruikt wordt, neem dan de volgende
voorzorgsmaatregelen:
trek de stekker uit het stopcontact
•
• verwijder al het voedsel,
• Ontdooi het apparaat (indien nodig) en
toebehoren en maak alles schoon
• laat de deur/deuren op een kier staan
om de vorming van onaangename
luchtjes te voorkomen.
Als uw apparaat aan blijft staan, vraag
dan iemand om het zo nu en dan te controleren, om te voorkomen dat het bewaarde voedsel bederft, als de stroom
uitvalt.
Page 11

5.3 Het ontdooien van de koelkast
5.4 Het ontdooien van de vriezer
Het vriesvak van dit model is een "nofrost"-type. Dit betekent dat zich in het
vriesvak geen ijs vormt als deze in bedrijf
is, noch tegen de wanden noch op de levensmiddelen.
6. PROBLEMEN OPLOSSEN
NEDERLANDS 11
Rijp wordt elke keer als de compressormotor tijdens normale werking stopt, automatisch van de verdamper van het koelvak verwijderd. Het dooiwater loopt via
een afvoergaatje in een speciale opvangbak aan de achterkant van het apparaat,
boven de compressormotor, waar het
verdampt.
Het is belangrijk om het afvoergaatje van
het dooiwater in het midden van het koelvak regelmatig schoon te maken om te
voorkomen dat het water overloopt en op
het voedsel in de koelkast gaat druppelen.
Het voorkomen van ijsvorming wordt gerealiseerd door een continue circulatie van
koude lucht in het vak, die aangedreven
wordt door een automatisch geregelde
ventilator.
WAARSCHUWING!
Voordat u storingen opspoort, de
stekker uit het stopcontact trekken.
Het opsporen van storingen die
niet in deze handleiding vermeld
zijn, dient te worden verricht door
een gekwalificeerd technicus of
deskundig persoon.
Er zijn tijdens de normale werking
geluiden te horen (compressor,
koelcircuit).
Probleem Mogelijke oorzaak Oplossing
Het apparaat werkt
niet. Het lampje
Het apparaat is uitgeschakeld.
Mettez l'appareil en fonctionnement.
brandt niet.
De stekker zit niet goed in
het stopcontact.
Het apparaat krijgt geen
stroom. Er staat geen
spanning op het stopcontact.
Steek de stekker goed in
het stopcontact.
Sluit een ander elektrisch
apparaat op het stopcontact aan.
Neem contact op met een
gekwalificeerd elektricien.
Het lampje werkt
niet.
Het lampje staat in de
stand-by stand.
Sluit en open de deur.
Het lampje is stuk. Zie 'Het lampje vervangen'.
Page 12
www.electrolux.com
12
Probleem Mogelijke oorzaak Oplossing
De compressor
werkt continu.
De deur is niet goed ge-
De deur is te vaak geo-
De temperatuur van het
La temperatura ambiente
Er loopt water over
de achterkant van
de koelkast.
Er loopt water in de
koelkast.
Producten verhinderen dat
Er loopt water over
de vloer.
De temperatuur in
het apparaat is te
laag.
De temperatuur in
het apparaat is te
hoog.
Er worden veel producten
De temperatuur in
de koelkast is te
hoog.
De temperatuur in
de vriezer is te
hoog.
De temperatuur is niet
goed ingesteld.
Stel een hogere temperatuur in.
Zie 'De deur sluiten'.
sloten.
Laat de deur niet langer
pend.
dan nodig openstaan.
Laat het product afkoelen
product is te hoog.
tot kamertemperatuur voordat u het opbergt.
Verlaag de temperatuur in
è troppo alta.
Tijdens het automatische
de kamer.
Dit is normaal.
ontdooiproces ontdooit de
rijp tegen de achterwand.
De waterafvoer is verstopt. Reinig de waterafvoer.
Zorg ervoor dat de producwater in de wateropvangbak kan stromen.
De dooiwaterafvoer loopt
niet in de verdamperbak
ten de achterwand niet ra-
ken.
Maak de dooiwaterafvoer
vast op de verdamperbak.
boven de compressor.
De temperatuurknop is
niet goed ingesteld.
De temperatuurknop is
niet goed ingesteld.
Stel een hogere tempera-
tuur in.
Impostare una temperatura
inferiore.
Bewaar minder producten
tegelijk bewaard.
Er is geen koude luchtcirculatie in het apparaat
aanwezig.
Producten zijn te dicht op
elkaar geplaatst.
tegelijk.
Zorg ervoor dat er koude
luchtcirculatie in het appa-
raat aanwezig is.
Bewaar de producten op
een manier die een koude
luchtcirculatie mogelijk
maakt.
Page 13
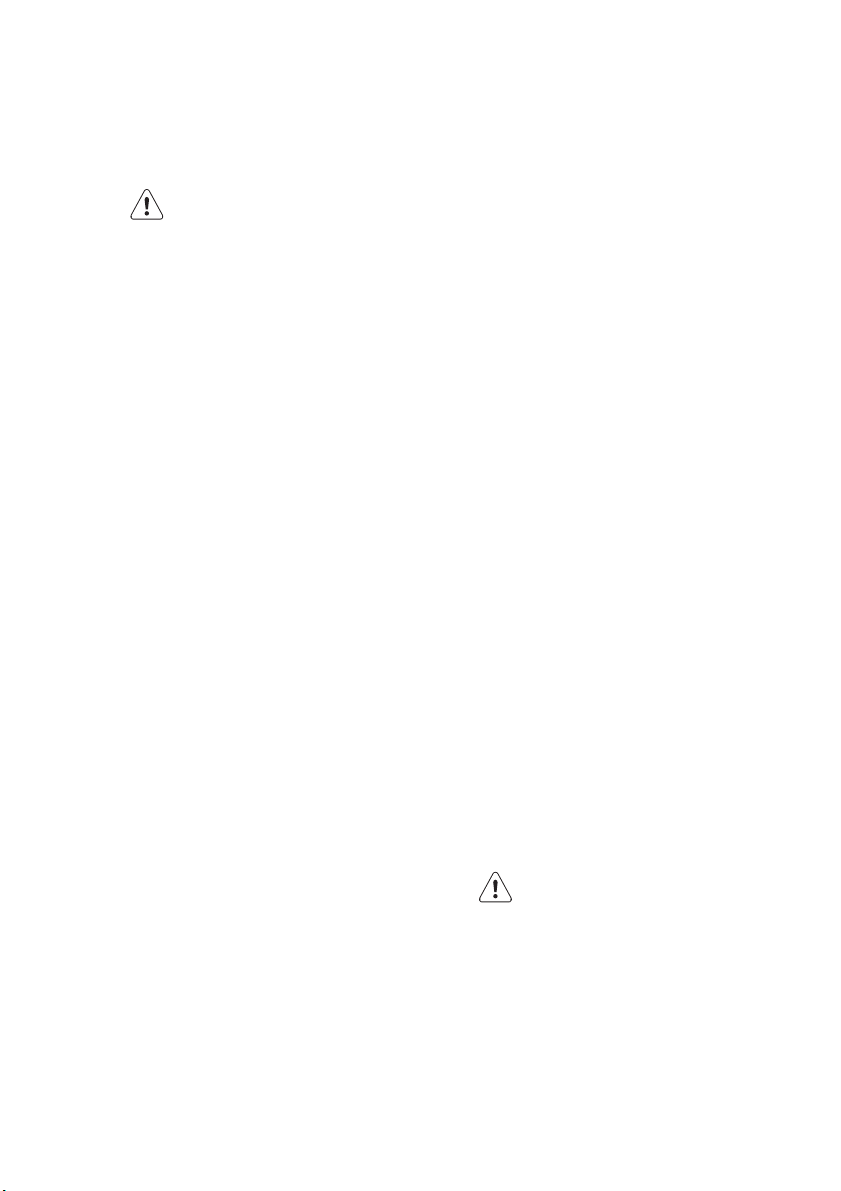
6.1 Het lampje vervangen
1
2
6.2 De deur sluiten
1.
Maak de afdichtingen van de deur
schoon.
2.
Stel de deur, indien nodig, af. Raadpleeg "Montage".
NEDERLANDS 13
1.
Het apparaat uitschakelen
2.
Druk op de achterste haak en schuif
het kapje tegelijkertijd in de richting
van de pijl
3.
Vervang het kapotte lampje door een
nieuw lampje met hetzelfde vermogen
dat specifiek bedoeld is voor huishoudelijke apparaten. (het maximale vermogen wordt getoond op de afdekking van het lampje).
4.
Schuif de afdekking van de lamp terug op z'n oorspronkelijke plek.
5.
Schakel het apparaat in.
6.
Open de deur. Controleer of het
lampje gaat branden.
3.
Vervang, indien nodig, de defecte
deurafdichtingen. Neem contact op
met de klantenservice.
7. MONTAGE
WAARSCHUWING!
Lees voor uw eigen veiligheid en
correcte werking van het apparaat
eerst de "veiligheidsinformatie"
aandachtig door, alvorens het apparaat te installeren.
7.1 Opstelling
Installeer dit apparaat op een plaats waar
de omgevingstemperatuur overeenkomt
met de klimaatklasse die vermeld is op
het typeplaatje van het apparaat:
Klimaatklasse
SN +10°C tot + 32°C
N +16°C tot + 32°C
ST +16°C tot + 38°C
T +16°C tot + 43°C
Omgevingstemperatuur
7.2 Aansluiting aan het
elektriciteitsnet
Zorg er vóór het aansluiten voor dat het
voltage en de frequentie op het typeplatje overeenkomen met de stroomtoevoer
in uw huis.
Dit apparaat moet worden aangesloten
op een geaard stopcontact. De netsnoerstekker is voorzien van een contact voor
dit doel. Als het stopcontact niet geaard
is, sluit het apparaat dan aan op een afzonderlijk aardepunt, in overeenstemming
met de geldende regels. Raadpleeg hiervoor een gekwalificeerd electrotechnicus.
De fabrikant kan niet aansprakelijk gesteld
worden als bovenstaande veiligheidsvoorschriften niet opgevolgd worden.
Dit apparaat voldoet aan de EU-richtlijnen.
Page 14

www.electrolux.com
14
7.3 Omkeerbaarheid van de deur
De deur van het apparaat gaat naar
rechts open. Als u wilt dat de deur naar
links open gaat, ga dan, voordat u het apparaat installeert, als volgt te werk:
• Maak de bovenste pen los en verwijder
de afstandhouder.
• Verwijder de bovenste pen en de bovenste deur.
• Schroef de pennen (B) en de afstandhouders (C) los.
C
B
C
• Verwijder de onderste deur
• Maak de onderste pen los.
Op de tegenoverliggende zijde:
• Monteer de onderste pen.
• Monteer de onderste deur.
• Bevestig de pennen (B) en de afstandhouders (C) weer op het middelste
scharnier aan de tegenoverliggende
kant.
• Monteer de bovenste deur.
• Zet de afstandhouder en de bovenste
pen vast.
Page 15

7.4 Ventilatievereisten
NEDERLANDS 15
5 cm
min.
200 cm
2
min.
200 cm
7.5 Het apparaat installeren
LET OP!
Zorg ervoor dat het aansluitsnoer
niet klem zit.
x
De luchtcirculatie achter het apparaat
moet voldoende zijn.
2
Ga als volgt te werk.
Knip indien nodig de zelfklevende afdichtstrip op maat en bevestig het op het apparaat zoals aangegeven op de afbeelding.
x
Boor in het scharnierdeksel A, zoals weergegeven op de afbeelding.
Bevestig de afdekkingen A en A1 (in het
zakje met accessoires) in de middelste
scharnier.
A1A
Page 16

www.electrolux.com
16
4 mm
44 mm
Plaats het apparaat in de nis.
Duw het apparaat in de richting van de pijl
(1) totdat het afdekplaatje van de opening
aan de bovenkant tegen het keukenmeubel
2
aankomt.
Duw het apparaat in de richting van de pijl
(2) tegen de kast tegenover het scharnier.
1
Stel het apparaat af in de nis.
Zorg ervoor dat de afstand tussen het apparaat en de voorste rand van de kast 44
mm is.
Het afdekplaatje voor het onderste scharnier (in de zak met accessoires) zorgt ervoor dat de afstand tussen het apparaat en
het keukenmeubel correct is.
Zorg ervoor dat er een ruimte van 4 mm
tussen het apparaat en de kast aanwezig
is.
Open de deur. Bevestig het afdekplaatje
van het onderste scharnier op de juiste
plek.
Bevestig het apparaat met 4 schroeven in
de nis.
I
I
Page 17

NEDERLANDS 17
Verwijder het juiste onderdeel van het afdekplaatje van het scharnier (E). Verwijder
onderdeel DX als het scharnier rechts staat,
of onderdeel SX als het scharnier links
staat.
Bevestig de afdekplaatjes (C, D) aan de uitsteeksels en de gaten van de scharnieren.
Installeer het ventilatierooster (B).
C
D
Bevestig de de afdekplaatjes (E) op het
scharnier.
E
E
B
Als het apparaat aan de zijkant moet aansluiten op de keukenkastdeur:
1.
Maak de schroeven in de bevestigingshaken (H) los.
2.
Verwijder de haken (H).
3.
Draai de schroeven weer vast.
H
H
Page 18

www.electrolux.com
18
Maak de onderdelen (Ha), (Hb), (Hc) en
(Hd) los.
ca. 50 mm
ca. 50 mm
Hc
Ha
8 mm
Monteer onderdeel (Ha) op de binnenkant
van de keukenkastdeur.
90°
21 mm
90°
21 mm
Duw onderdeel (Hc) op onderdeel (Ha).
Zet de deur van het apparaat en de keukenkastdeur open onder een hoek van 90°.
Plaats het kleine vierkantje (Hb) in de geleider (Ha).
Zet de deur van het apparaat en de keukenkastdeur tegen elkaar en markeer de
gaten.
Hb
Ha
Page 19

8 mm
K
Hb
NEDERLANDS 19
Verwijder de haken en markeer een afstand
van 8 mm vanaf de buitenrand van de deur
waar de spijker moet worden vastgemaakt
(K).
Ha
Plaats het kleine vierkantje terug op de geleider en bevestig het met de bijgeleverde
schroeven.
Lijn de deur van het keukenmeubel en de
deur van het apparaat uit met behulp van
het onderdeel (Hb).
Druk onderdeel (Hd) op onderdeel (Hb).
Hb
Voer een eindcontrole uit en verzeker u
ervan dat:
• alle schroeven zijn aangedraaid.
8. GELUIDEN
Tijdens normaal gebruik hoort u geluiden
(compressor, koelmiddelcirculatie).
Hd
• De afdichtingsstrip goed bevestigd is
aan de kast.
• De deur goed open en dicht gaat.
Page 20

www.electrolux.com
20
SSSRRR!
HISSS!
CLICK!
BRRR!
OK
CLICK!
BRRR!
CRACK!
BLUBB!
CLICK!
BRRR!
BLUBB!
BLUBB!
Page 21

HISSS!
NEDERLANDS 21
HISSS!
SSSRRR!
CRACK!
SSSRRR!
CRACK!
Page 22

www.electrolux.com
22
9. TECHNISCHE GEGEVENS
Afmetingen van de uitsparing
Hoogte 1780 mm
Breedte 560 mm
Diepte 550 mm
Tijdsduur 21 h
Spanning 230-240 V
Frequentie 50 Hz
De technische gegevens staan op het typeplaatje aan de linker binnenkant in het
apparaat en op het energielabel.
10. MILIEUBESCHERMING
Recycle de materialen met het symbool
. Gooi de verpakking in een geschikte
verzamelcontainer om het te recyclen.
Help om het milieu en de
volksgezondheid te beschermen en
recycle het afval van elektrische en
elektronische apparaten. Gooi apparaten
gemarkeerd met het symbool
met het huishoudelijk afval. Breng het
product naar het milieustation bij u in de
buurt of neem contact op met de
gemeente.
niet weg
Page 23

ENGLISH 23
CONTENTS
1. SAFETY INSTRUCTIONS . . . . . . . . . . . . . . . . . . . . . . . . . . . . . . . . . . . . . . . . . . . . . . . . . 24
2. CONTROL PANEL . . . . . . . . . . . . . . . . . . . . . . . . . . . . . . . . . . . . . . . . . . . . . . . . . . . . . . 26
3. DAILY USE . . . . . . . . . . . . . . . . . . . . . . . . . . . . . . . . . . . . . . . . . . . . . . . . . . . . . . . . . . . . 27
4. HELPFUL HINTS AND TIPS . . . . . . . . . . . . . . . . . . . . . . . . . . . . . . . . . . . . . . . . . . . . . . . 29
5. CARE AND CLEANING . . . . . . . . . . . . . . . . . . . . . . . . . . . . . . . . . . . . . . . . . . . . . . . . . . . 30
6. WHAT TO DO IF… . . . . . . . . . . . . . . . . . . . . . . . . . . . . . . . . . . . . . . . . . . . . . . . . . . . . . . 31
7. INSTALLATION . . . . . . . . . . . . . . . . . . . . . . . . . . . . . . . . . . . . . . . . . . . . . . . . . . . . . . . . . 33
8.
NOISES . . . . . . . . . . . . . . . . . . . . . . . . . . . . . . . . . . . . . . . . . . . . . . . . . . . . . . . . . . . . . . 39
9. TECHNICAL DATA . . . . . . . . . . . . . . . . . . . . . . . . . . . . . . . . . . . . . . . . . . . . . . . . . . . . . . 41
WE’RE THINKING OF YOU
Thank you for purchasing an Electrolux appliance. You’ve chosen a product that brings with it
decades of professional experience and innovation. Ingenious and stylish, it has been designed
with you in mind. So whenever you use it, you can be safe in the knowledge that you’ll get great
results every time.
Welcome to Electrolux.
Visit our website for:
Get usage advice, brochures, trouble shooter, service information:
www.electrolux.com
Register your product for better service:
www.electrolux.com/productregistration
Buy Accessories, Consumables and Original spare parts for your appliance:
www.electrolux.com/shop
CUSTOMER CARE AND SERVICE
We recommend the use of original spare parts.
When contacting Service, ensure that you have the following data available.
The information can be found on the rating plate. Model, PNC, Serial Number.
Warning / Caution-Safety information
General information and tips
Environmental information
Subject to change without notice.
Page 24

www.electrolux.com
24
1.
SAFETY INSTRUCTIONS
In the interest of your safety and to ensure
the correct use, before installing and first
using the appliance, read this user manual
carefully, including its hints and warnings.
To avoid unnecessary mistakes and accidents, it is important to ensure that all
people using the appliance are thoroughly
familiar with its operation and safety features. Save these instructions and make
sure that they remain with the appliance if
it is moved or sold, so that everyone using
it through its life will be properly informed
on appliance use and safety.
For the safety of life and property keep
the precautions of these user's instructions as the manufacturer is not responsible for damages caused by omission.
1.1 Children and vulnerable
people safety
• This appliance is not intended for use
by persons (including children) with reduced physical, sensory or mental capabilities, or lack of experience and
knowledge, unless they have been given supervision or instruction concerning
use of the appliance by a person responsible for their safety.
Children should be supervised to ensure that they do not play with the appliance.
• Keep all packaging well away from children. There is risk of suffocation.
• If you are discarding the appliance pull
the plug out of the socket, cut the connection cable (as close to the appliance
as you can) and remove the door to
prevent playing children to suffer electric shock or to close themselves into it.
• If this appliance featuring magnetic
door seals is to replace an older appliance having a spring lock (latch) on the
door or lid, be sure to make that spring
lock unusable before you discard the
old appliance. This will prevent it from
becoming a death trap for a child.
1.2 General safety
WARNING!
Keep ventilation openings, in the appliance enclosure or in the built-in structure,
clear of obstruction.
• The appliance is intended for keeping
foodstuff and/or beverages in a normal
household and similar applications such
as:
– staff kitchen areas in shops, offices
and other working environments;
– farm houses and by clients in hotels,
motels and other residential type environments;
– bed and breakfast type environ-
ments;
– catering and similar non-retail appli-
cations.
• Do not use a mechanical device or any
artificial means to speed up the thawing
process.
• Do not use other electrical appliances
(such as ice cream makers) inside of refrigerating appliances, unless they are
approved for this purpose by the manufacturer.
• Do not damage the refrigerant circuit.
• The refrigerant isobutane (R600a) is
contained within the refrigerant circuit of
the appliance, a natural gas with a high
level of environmental compatibility,
which is nevertheless flammable.
During transportation and installation of
the appliance, be certain that none of
the components of the refrigerant circuit become damaged.
If the refrigerant circuit should become
damaged:
– avoid open flames and sources of ig-
nition
– thoroughly ventilate the room in
which the appliance is situated
• It is dangerous to alter the specifications or modify this product in any way.
Any damage to the cord may cause a
short-circuit, fire and/or electric shock.
WARNING!
Any electrical component (power
cord, plug, compressor) must be
replaced by a certified service
agent or qualified service personnel to avoid hazard.
Page 25

1.
Power cord must not be lengthened.
2.
Make sure that the power plug is
not squashed or damaged by the
back of the appliance. A squashed
or damaged power plug may overheat and cause a fire.
3.
Make sure that you can come to
the mains plug of the appliance.
4.
Do not pull the mains cable.
5.
If the power plug socket is loose,
do not insert the power plug. There
is a risk of electric shock or fire.
6.
You must not operate the appliance without the lamp cover (if
foreseen) of interior lighting.
• This appliance is heavy. Care should be
taken when moving it.
• Do not remove nor touch items from
the freezer compartment if your hands
are damp/wet, as this could cause skin
abrasions or frost/freezer burns.
• Avoid prolonged exposure of the appliance to direct sunlight.
• Bulb lamps (if foreseen) used in this appliance are special purpose lamps selected for household appliances use
only. They are not suitable for household room illumination.
1.3 Daily Use
• Do not put hot pot on the plastic parts
in the appliance.
• Do not store flammable gas and liquid
in the appliance, because they may explode.
• Do not place food products directly
against the air outlet on the rear wall. (If
the appliance is Frost Free)
• Frozen food must not be re-frozen once
it has been thawed out.
• Store pre-packed frozen food in accordance with the frozen food manufacturer's instructions.
• Appliance's manufacturers storage recommendations should be strictly adhered to. Refer to relevant instructions.
• Do not place carbonated or fizzy drinks
in the freezer compartment as it creates
pressure on the container, which may
cause it to explode, resulting in damage
to the appliance.
ENGLISH 25
• Ice lollies can cause frost burns if consumed straight from the appliance.
1.4 Care and cleaning
• Before maintenance, switch off the appliance and disconnect the mains plug
from the mains socket.
• Do not clean the appliance with metal
objects.
• Do not use sharp objects to remove
frost from the appliance. Use a plastic
scraper.
• Regularly examine the drain in the refrigerator for defrosted water. If necessary, clean the drain. If the drain is
blocked, water will collect in the bottom
of the appliance.
1.5 Installation
For electrical connection carefully
follow the instructions given in
specific paragraphs.
• Unpack the appliance and check if
there are damages on it. Do not connect the appliance if it is damaged. Report possible damages immediately to
the place you bought it. In that case retain packing.
• It is advisable to wait at least four hours
before connecting the appliance to allow the oil to flow back in the compressor.
• Adequate air circulation should be
around the appliance, lacking this leads
to overheating. To achieve sufficient
ventilation follow the instructions relevant to installation.
• Wherever possible the back of the
product should be against a wall to
avoid touching or catching warm parts
(compressor, condenser) to prevent
possible burn.
• The appliance must not be located
close to radiators or cookers.
• Make sure that the mains plug is accessible after the installation of the appliance.
• Connect to potable water supply only (If
a water connection is foreseen).
Page 26

www.electrolux.com
26
1.6 Service
• Any electrical work required to do the
servicing of the appliance should be
carried out by a qualified electrician or
competent person.
• This product must be serviced by an
authorized Service Centre, and only
genuine spare parts must be used.
1.7 Environment Protection
This appliance does not contain
gasses which could damage the
2. CONTROL PANEL
ozone layer, in either its refrigerant
circuit or insulation materials. The
appliance shall not be discarded
together with the urban refuse and
rubbish. The insulation foam contains flammable gases: the appliance shall be disposed according
to the applicable regulations to
obtain from your local authorities.
Avoid damaging the cooling unit,
especially at the rear near the heat
exchanger. The materials used on
this appliance marked by the sym-
are recyclable.
bol
1 2 3 4 5 6
Pilot Light
1
Temperature Regulator
2
Fast Freeze light
3
Fast Freeze switch
4
FreeStore light
5
FreeStore switch
6
2.1 Switching on
Insert the plug into the wall socket.
Turn the Temperature Regulator clockwise to a medium setting.
The Pilot Light will light up.
2.2 Switching off
To turn off the appliance, turn the Temperature Regulator to the "O" position.
The Pilot Light will switch off.
2.3 Temperature regulation
The temperature is automatically regulated.
To operate the appliance, proceed as follows:
• turn the Temperature Regulator toward
lower settings to obtain the minimum
coldness.
• turn the Temperature Regulator toward
higher settings to obtain the maximum
coldness.
A medium setting is generally the
most suitable.
However, the exact setting should be
chosen keeping in mind that the temperature inside the appliance depends on:
• room temperature
• how often the door is opened
• the quantity of food stored
• the location of the appliance.
2.4 Fast Freeze function
Press the Fast Freeze switch to activate
the Fast Freeze function.
The Fast Freeze light will light up.
This function stops automatically
after 52 hours.
Page 27

Press the Fast Freeze switch to deactivate
the function at any time. The Fast Freeze
light will switch off.
2.5 FreeStore function
You can activate the FreeStore function
by pressing the FreeStore switch.
The FreeStore light will light up.
It is possible to deactivate the function at
any time by pressing the FreeStore
switch.
3. DAILY USE
ENGLISH 27
The FreeStore light will switch off.
If the function is activated automatically the FreeStore indicator is
not shown (refer to "Daily use").
The activation of the FreeStore
function increases the energy
consumption.
3.1 Before first use
Before using the appliance for the first
time, wash the interior and all internal accessories with lukewarm water and some
neutral soap so as to remove the typical
smell of a brand-new product, then dry
thoroughly.
Do not use detergents or abrasive
powders, as these will damage
the finish.
3.2 Freezing fresh food
The freezer compartment is suitable for
freezing fresh food and storing frozen and
deep-frozen food for a long time.
To freeze fresh food activate the Action
Freeze function at least 24 hours before
placing the food to be frozen in the freezer
compartment.
Place the fresh food to be frozen in the
bottom compartment.
The maximum amount of food that can be
frozen in 24 hours is specified on the rat-
ing plate, a label located on the inside of
the appliance.
The freezing process lasts 24 hours: during this period do not add other food to
be frozen.
3.3 Storage of frozen food
When first starting-up or after a period out
of use, before putting the products in the
compartment let the appliance run at least
2 hours on the higher settings.
In the event of accidental defrosting, for example due to a power
failure, if the power has been off
for longer than the value shown in
the technical characteristics chart
under "rising time", the defrosted
food must be consumed quickly
or cooked immediately and then
re-frozen (after cooling).
3.4 Thawing
Deep-frozen or frozen food, prior to being
used, can be thawed in the refrigerator
compartment or at room temperature, depending on the time available for this operation.
Small pieces may even be cooked still frozen, directly from the freezer: in this case,
cooking will take longer.
3.5 Ice-cube production
This appliance is equipped with one or
more trays for the production of icecubes. Fill these trays with water, then put
them in the freezer compartment.
Do not use metallic instruments to
remove the trays from the freezer.
3.6 Cold accumulators
One or more cold accumulators are supplied in the freezer; these increase the
length of time for which food will keep in
the event of a power failure or breakdown.
Page 28

www.electrolux.com
28
3.7 Temperature Indicator
3.8 Movable shelves
3.9 Positioning the door shelves
This appliance is sold in France.
In accordance with regulations
valid in this country it must be
provided with a special device
(see figure) placed in the lower
compartment of the fridge to indicate the coldest zone of it.
The walls of the refrigerator are equipped
with a series of runners so that the
shelves can be positioned as desired.
For better use of space, the front halfshelves can lie over the rear ones.
To permit storage of food packages of
various sizes, the door shelves can be
placed at different heights.
To make these adjustments proceed as
follow: gradually pull the shelf in the direction of the arrows until it comes free, then
reposition as required.
3.10 Humidity control
The glass shelf incorporates a device with
slits (adjustable by means of a sliding lever), which makes it possible to regulate
the temperature in the vegetable drawer(s).
When the ventilation slots are closed:
the natural moisture content of the food in
the fruit and vegetable compartments is
preserved for longer.
When the ventilation slots are opened:
more air circulation results in a lower air
moisture content in the fruit and vegetable
compartments.
Page 29

3.11 FreeStore
4. HELPFUL HINTS AND TIPS
ENGLISH 29
The refrigerator compartment is equipped
with a device that allows for rapid cooling
of foods and more uniform temperature in
the compartment.
This device activates by itself when needed, for example for a quick temperature
recovering after door opening or when the
ambient temperature is high.
Allows you to switch on the device manually when needed (refer to "FreeStore
Function").
The FreeStore device stops when the
door is open and restarts immediately after the door closing.
4.1 Hints for energy saving
• Do not open the door frequently or
leave it open longer than absolutely
necessary.
• If the ambient temperature is high and
the Temperature Regulator is set to low
temperature and the appliance is fully
loaded, the compressor may run continuously, causing frost or ice on the
evaporator. If this happens, set the
Temperature Regulator toward warmer
settings to allow automatic defrosting
and so a saving in electricity consumption.
4.2 Hints for fresh food
refrigeration
To obtain the best performance:
• do not store warm food or evaporating
liquids in the refrigerator
• do cover or wrap the food, particularly if
it has a strong flavour
• position food so that air can circulate
freely around it
4.3 Hints for refrigeration
Useful hints:
Meat (all types) : wrap in polythene bags
and place on the glass shelf above the
vegetable drawer.
For safety, store in this way only one or
two days at the most.
Cooked foods, cold dishes, etc..: these
should be covered and may be placed on
any shelf.
Fruit and vegetables: these should be
thoroughly cleaned and placed in the special drawer(s) provided.
Butter and cheese: these should be
placed in special airtight containers or
wrapped in aluminium foil or polythene
bags to exclude as much air as possible.
Milk bottles: these should have a cap and
should be stored in the bottle rack on the
door.
Bananas, potatoes, onions and garlic, if
not packed, must not be kept in the refrigerator.
4.4 Hints for freezing
To help you make the most of the freezing
process, here are some important hints:
Page 30

www.electrolux.com
30
• the maximum quantity of food which
can be frozen in 24 hrs. is shown on
the rating plate;
• the freezing process takes 24 hours.
No further food to be frozen should be
added during this period;
• only freeze top quality, fresh and thoroughly cleaned, foodstuffs;
• prepare food in small portions to enable
it to be rapidly and completely frozen
and to make it possible subsequently to
thaw only the quantity required;
• wrap up the food in aluminium foil or
polythene and make sure that the
packages are airtight;
• do not allow fresh, unfrozen food to
touch food which is already frozen, thus
avoiding a rise in temperature of the latter;
• lean foods store better and longer than
fatty ones; salt reduces the storage life
of food;
• water ices, if consumed immediately after removal from the freezer compart-
5. CARE AND CLEANING
ment, can possibly cause the skin to be
freeze burnt;
• it is advisable to show the freezing in
date on each individual pack to enable
you to keep tab of the storage time.
4.5 Hints for storage of frozen
food
To obtain the best performance from this
appliance, you should:
• make sure that the commercially frozen
foodstuffs were adequately stored by
the retailer;
• be sure that frozen foodstuffs are transferred from the foodstore to the freezer
in the shortest possible time;
• not open the door frequently or leave it
open longer than absolutely necessary;
• once defrosted, food deteriorates rapidly and cannot be refrozen;
• do not exceed the storage period indicated by the food manufacturer.
CAUTION!
Unplug the appliance before carrying out any maintenance operation.
This appliance contains hydrocarbons in its cooling unit; maintenance and recharging must therefore only be carried out by authorized technicians.
5.1 Periodic cleaning
The equipment has to be cleaned regularly:
• Many proprietary kitchen surface cleaners contain chemicals that can attack/
damage the plastics used in this appliance. For this reason use a soft cloth
rinsed in warm water and neutral soap
emulsion for cleaning internal and external surfaces.
Do not use detergents or abrasive
paste for external surfaces as
these will damage the paint, or
stainless steel anti finger print
coating.
• regularly check the door seals and wipe
clean to ensure they are clean and free
from debris.
• rinse and dry thoroughly.
• Clean the condenser (black grill) and
the compressor at the back of the appliance with a brush. This operation will
improve the performance of the appliance and save electricity consumption.
Do not pull, move or damage any
pipes and/or cables inside the
cabinet.
Take care of not to damage the
cooling system.
After cleaning, reconnect the equipment
to the mains supply.
Page 31

5.2 Periods of non-operation
When the appliance is not in use for long
periods, take the following precautions:
disconnect the appliance from elec-
•
tricity supply
• remove all food
• defrost (if foreseen) and clean the appliance and all accessories
5.3 Defrosting the refrigerator
5.4 Defrosting of the freezer
The freezer compartment of this model,
on the other hand, is a "no frost" type.
This means that there is no buildup of
frost when it is in operation, neither on the
internal walls nor on the foods.
ENGLISH 31
• leave the door/doors ajar to prevent unpleasant smells.
If the cabinet will be kept on, ask somebody to check it once in a while to prevent the food inside from spoiling in case
of a power failure.
Frost is automatically eliminated from the
evaporator of the refrigerator compartment every time the motor compressor
stops, during normal use. The defrost water drains out through a drain hole into a
special container at the back of the appliance, over the motor compressor, where
it evaporates.
It is important to periodically clean the defrost water drain hole in the middle of the
refrigerator compartment channel to prevent the water overflowing and dripping
onto the food inside.
The absence of frost is due to the continuous circulation of cold air inside the
compartment, driven by an automatically
controlled fan.
6. WHAT TO DO IF…
WARNING!
Before troubleshooting, disconnect the mains plug from the
mains socket.
Only a qualified electrician or competent person must do the troubleshooting that is not in this manual.
Problem Possible cause Solution
The appliance does
not operate. The
lamp does not operate.
The mains plug is not con-
The appliance is switched
off.
nected to the mains socket correctly.
There are some sounds during
normal use (compressor, refrigerant circulation).
Switch on the appliance.
Connect the mains plug to
the mains socket correctly.
Page 32

www.electrolux.com
32
Problem Possible cause Solution
The appliance has no
The lamp does not
work.
The lamp is defective. Refer to "Replacing the
The compressor operates continually.
The door is not closed
The door has been
The product temperature
The room temperature is
Water flows on the
rear plate of the refrigerator.
Water flows into the
refrigerator.
Products prevent that wa-
Water flows on the
ground.
The temperature in
the appliance is too
low.
The temperature in
the appliance is too
high.
Many products are stored
The temperature in
the refrigerator is
too high.
power. There is no voltage
in the mains socket.
cal appliance to the mains
socket.
Contact a qualified electrician.
The lamp is in stand-by. Close and open the door.
lamp".
Connect a different electri-
The temperature is not set
Set a higher temperature.
correctly.
Refer to "Closing the door".
correctly.
Do not keep the door open
opened too frequently.
longer than necessary.
Let the product tempera-
is too high.
ture decrease to room temperature before storage.
Decrease the room temper-
too high.
During the automatic de-
ature.
This is correct.
frosting process, frost defrosts on the rear plate.
The water outlet is clog-
Clean the water outlet.
ged.
Make sure that products do
ter flows into the water
not touch the rear plate.
collector.
The melting water outlet
does not flow in the evaporative tray above the
Attach the melting water
outlet to the evaporative
tray.
compressor.
The temperature regulator
Set a higher temperature.
is not set correctly.
The temperature regulator
Set a lower temperature.
is not set correctly.
Store less products at the
at the same time.
There is no cold air circulation in the appliance.
same time.
Make sure that there is cold
air circulation in the appli-
ance.
Page 33

Problem Possible cause Solution
The temperature in
the freezer is too
Products are too near to
each other.
Store products so that
there is cold air circulation.
high.
6.1 Replacing the lamp
1.
Switch off the appliance.
2.
Press on the rear hook and at the
same time slide the cover in the direction of the arrow.
1
2
6.2 Closing the door
1.
Clean the door gaskets.
2.
If necessary, adjust the door. Refer to
"Installation".
3.
Replace the lamp with one of the
same power and specifically designed
for household appliances. (the maximum power is shown on the lamp
cover).
4.
Slide the lamp cover into its original
position.
5.
Switch on the appliance.
6.
Open the door. Make sure that the
light comes on.
3.
If necessary, replace the defective
door gaskets. Contact the Service
Center.
ENGLISH 33
7. INSTALLATION
WARNING!
Read the "Safety Information"
carefully for your safety and correct operation of the appliance
before installing the appliance.
7.1 Positioning
Install this appliance at a location where
the ambient temperature corresponds to
the climate class indicated on the rating
plate of the appliance:
Climate
class
SN +10°C to + 32°C
N +16°C to + 32°C
ST +16°C to + 38°C
T +16°C to + 43°C
Ambient temperature
7.2 Electrical connection
Before plugging in, ensure that the voltage and frequency shown on the rating
plate correspond to your domestic power
supply.
The appliance must be earthed. The power supply cable plug is provided with a
contact for this purpose. If the domestic
power supply socket is not earthed, connect the appliance to a separate earth in
compliance with current regulations, consulting a qualified electrician.
The manufacturer declines all responsibility if the above safety precautions are not
observed.
This appliance complies with the E.E.C.
Directives.
Page 34

www.electrolux.com
34
7.3 Door reversibility
The door of the appliance opens to the
right. If you want to open the door to the
left, do these steps before you install the
appliance:
• Loosen the upper pin and remove the
spacer.
• Remove the upper pin and the upper
door.
• Unscrew the pins (B) and spacers (C).
C
B
C
• Remove the lower door.
• Loosen the lower pin.
On the opposite side:
• Install the lower pin.
• Install the lower door.
• Refit the pins (B) and the spacers (C) on
the middle hinge on the opposite side.
• Install the upper door.
• Tighten the spacer and the upper pin.
Page 35

7.4 Ventilation requirements
ENGLISH 35
5 cm
min.
200 cm
2
min.
200 cm
7.5 Installing the appliance
CAUTION!
Make sure that the mains cable
can move freely.
x
The airflow behind the appliance must be
sufficient.
2
Do these steps.
If necessary cut the adhesive sealing strip
and then apply it to the appliance as shown
in figure.
x
Drill the hinge cover A, as shown in figure.
Apply the covers A and A1 (in the accessories bag) in to the middle hinge.
A1A
Page 36

www.electrolux.com
36
4 mm
Install the appliance in the niche.
Push the appliance in the direction of the
arrow (1) until the upper gap cover stops
against the kitchen furniture.
2
Push the appliance in the direction of the
arrow (2) against the cupboard on the opposite side of the hinge.
1
Adjust the appliance in the niche.
Make sure that the distance between the
appliance and the cupboard front-edge is
44 mm.
The lower hinge cover (in the accessories
bag) makes sure that the distance between
the appliance and the kitchen furniture is
correct.
Make sure that the clearance between the
appliance and the cupboard is 4 mm.
Open the door. Put the lower hinge cover
in position.
44 mm
Attach the appliance to the niche with 4
screws.
I
I
Page 37

ENGLISH 37
Remove the correct part from the hinge
cover (E). Make sure to remove the part
DX, in the case of right hinge, SX in opposite case.
Attach the covers (C, D) to the lugs and the
hinge holes.
Install the vent grille (B).
C
Attach the hinge covers (E) to the hinge.
D
E
E
B
If the appliance must connect laterally to
the kitchen furniture door:
1.
Slacken the screws in fixing brackets
(H).
2.
Move the brackets (H).
3.
Retighten the screws.
H
H
Page 38

www.electrolux.com
38
Disconnect the parts (Ha), (Hb), (Hc) and
(Hd).
ca. 50 mm
ca. 50 mm
Hc
Ha
8 mm
Install the part (Ha) on the inner side of the
kitchen furniture.
90°
21 mm
90°
21 mm
Push the part (Hc) on the part (Ha).
Open the appliance door and the kitchen
furniture door at an angle of 90°.
Insert the small square (Hb) into guide (Ha).
Put together the appliance door and the
furniture door and mark the holes.
Hb
Ha
Page 39

8 mm
K
Hb
ENGLISH 39
Remove the brackets and mark a distance
of 8 mm from the outer edge of the door
where the nail must be fitted (K).
Ha
Place the small square on the guide again
and fix it with the screws supplied.
Align the kitchen furniture door and the appliance door by adjusting the part (Hb).
Press the part (Hd) on the part (Hb).
Do a final check to make sure that:
• All screws are tightened.
8. NOISES
There are some sounds during normal
running (compressor, refrigerant circulation).
Hb
Hd
• The sealing strip is attached tightly to
the cabinet.
• The door opens and closes correctly.
Page 40

www.electrolux.com
40
SSSRRR!
HISSS!
CLICK!
BRRR!
OK
CLICK!
BRRR!
CRACK!
BLUBB!
CLICK!
BRRR!
BLUBB!
BLUBB!
Page 41

HISSS!
ENGLISH 41
HISSS!
SSSRRR!
9. TECHNICAL DATA
Dimension of the recess
Height 1780 mm
Width 560 mm
Depth 550 mm
Rising Time 21 h
Voltage 230-240 V
Frequency 50 Hz
SSSRRR!
CRACK!
CRACK!
Page 42

www.electrolux.com
42
The technical information are situated in
the rating plate on the internal left side of
the appliance and in the energy label.
10. ENVIRONMENT CONCERNS
Recycle the materials with the symbol
. Put the packaging in applicable
containers to recycle it.
Help protect the environment and human
health and to recycle waste of electrical
and electronic appliances. Do not dispose
appliances marked with the symbol
with the household waste. Return the
product to your local recycling facility or
contact your municipal office.
Page 43

DEUTSCH 43
INHALT
1. SICHERHEITSHINWEISE . . . . . . . . . . . . . . . . . . . . . . . . . . . . . . . . . . . . . . . . . . . . . . . . . 44
2. BEDIENFELD . . . . . . . . . . . . . . . . . . . . . . . . . . . . . . . . . . . . . . . . . . . . . . . . . . . . . . . . . . 46
3. TÄGLICHER GEBRAUCH . . . . . . . . . . . . . . . . . . . . . . . . . . . . . . . . . . . . . . . . . . . . . . . . . 47
4. PRAKTISCHE TIPPS UND HINWEISE . . . . . . . . . . . . . . . . . . . . . . . . . . . . . . . . . . . . . . . . 50
5. REINIGUNG UND PFLEGE . . . . . . . . . . . . . . . . . . . . . . . . . . . . . . . . . . . . . . . . . . . . . . . . 51
6. WAS TUN, WENN … . . . . . . . . . . . . . . . . . . . . . . . . . . . . . . . . . . . . . . . . . . . . . . . . . . . . 53
7. MONTAGE . . . . . . . . . . . . . . . . . . . . . . . . . . . . . . . . . . . . . . . . . . . . . . . . . . . . . . . . . . . . 55
8.
GERÄUSCHE . . . . . . . . . . . . . . . . . . . . . . . . . . . . . . . . . . . . . . . . . . . . . . . . . . . . . . . . . . 61
9. TECHNISCHE DATEN . . . . . . . . . . . . . . . . . . . . . . . . . . . . . . . . . . . . . . . . . . . . . . . . . . . . 63
WIR DENKEN AN SIE
Vielen Dank, dass Sie sich für ein Electrolux Gerät entschieden haben. Sie haben ein Produkt
gewählt, hinter dem eine jahrzehntelange professionelle Erfahrung und Innovation steht. Bei der
Entwicklung dieses großartigen und eleganten Geräts haben wir an Sie gedacht. So haben Sie
bei jedem Gebrauch die Gewissheit, dass Sie stets großartige Ergebnisse erzielen werden.
Willkommen bei Electrolux.
Besuchen Sie uns auf unserer Website, um:
Anwendungshinweise, Prospekte, Fehlerbehebungs- und Service-Informationen zu
erhalten:
www.electrolux.com
Ihr erworbenes Produkt zu registrieren, um den besten Service dafür zu gewährleisten:
www.electrolux.com/productregistration
Zubehör, Verbrauchsmaterial und Original-Ersatzteile für Ihr Gerät zu erwerben:
www.electrolux.com/shop
KUNDENDIENST UND -BETREUUNG
Bitte verwenden Sie ausschließlich Original-Ersatzteile für Ihre Produkte.
Halten Sie folgende Angaben bereit, wenn Sie sich an den Kundendienst wenden
(diese Informationen finden Sie auf dem Typenschild): Modell, Produktnummer (PNC),
Seriennummer.
Warnungs-/ Sicherheitshinweise.
Allgemeine Hinweise und Ratschläge
Hinweise zum Umweltschutz
Änderungen vorbehalten.
Page 44

www.electrolux.com
44
1.
SICHERHEITSHINWEISE
Lesen Sie zu Ihrer Sicherheit und für eine
optimale Nutzung des Geräts vor der
Montage und dem ersten Gebrauch das
vorliegende Benutzerhandbuch einschließlich der Ratschläge und Warnungen aufmerksam durch. Es ist wichtig,
dass zur Vermeidung von Fehlern und Unfällen alle Personen, die das Gerät benutzen, mit der Bedienung und den Sicherheitsvorschriften vertraut sind. Heben Sie
die Gebrauchsanleitung gut auf und übergeben Sie sie bei einem Weiterverkauf
des Geräts dem neuen Besitzer, so dass
jeder während der gesamten Lebensdauer des Geräts über Gebrauch und Sicherheit informiert ist.
Halten Sie sich zu Ihrer Sicherheit und
zum Schutz Ihres Eigentums strikt an die
Vorsichtsmaßnahmen der vorliegenden
Gebrauchsanweisung, da der Hersteller
bei Missachtung derselben von jeder Haftung freigestellt ist.
1.1 Sicherheit von Kindern und
hilfsbedürftigen Personen
• Das Gerät darf von Personen (einschließlich Kindern), deren physische,
sensorische Fähigkeiten und deren
Mangel an Erfahrung und Kenntnissen
einen sicheren Gebrauch des Gerätes
ausschließen nur unter Aufsicht oder
nach ausreichender Einweisung durch
eine verantwortungsbewusste Person
benutzt werden, die sicherstellt, dass
sie sich der Gefahren des Gebrauchs
bewusst sind.
Kinder müssen beaufsichtigt werden,
damit sie nicht am Gerät herumspielen
können.
• Halten Sie das Verpackungsmaterial
unbedingt von Kindern fern. Erstickungsgefahr!
• Ziehen Sie vor der Entsorgung des Gerätes den Netzstecker, schneiden Sie
das Netzkabel (so nah wie möglich am
Gerät) ab und entfernen Sie die Tür, so
dass spielende Kinder vor elektrischem
Schlag geschützt sind und sich nicht in
dem Gerät einschließen können.
• Wenn dieses Gerät mit magnetischer
Türdichtung ein älteres Modell mit
Schnappverschluss (Türlasche) an der
Tür oder auf dem Deckel ersetzt, machen Sie den Schnappverschluss vor
dem Entsorgen des Altgerätes unbrauchbar. So verhindern Sie, dass das
Gerät nicht zu einer Todesfalle für Kinder wird.
1.2 Allgemeine
Sicherheitshinweise
WARNUNG!
Achten Sie darauf, dass die Belüftungsöffnungen im Gehäuse um das Gerät oder in
der Einbaunische nicht blockiert sind.
• Das Gerät ist für die Aufbewahrung von
Lebensmitteln und/oder Getränken in
einem normalen Haushalt und ähnliche
Zwecke vorgesehen, wie z. B.:
– Personalküchenbereiche in Geschäf-
ten, Büros und anderen Arbeitsumfeldern
– Bauernhöfe und für Gäste in Hotels,
Motels und anderen wohnungsähnlichen Räumlichkeiten
– Pensionen und vergleichbaren Unter-
bringungsmöglichkeiten
– Catering und einzelhandelsfremde
Anwendungen
• Benutzen Sie keine mechanischen oder
sonstigen Hilfsmittel, um den Abtauprozess zu beschleunigen.
• Verwenden Sie keine anderen Elektrogeräte (wie Speiseeisbereiter) in Kühlgeräten, wenn solche Geräte nicht ausdrücklich vom Hersteller für diesen
Zweck zugelassen sind.
• Beschädigen Sie nicht den Kältekreislauf.
• Das Kältemittel Isobutan (R600a) im
Kältekreislauf des Gerätes ist ein natürliches und sehr umweltfreundliches Gas,
das jedoch leicht entflammbar ist.
Achten Sie beim Transport und bei der
Montage des Gerätes darauf, nicht die
Komponenten des Kältekreislaufs zu
beschädigen.
Bei einer eventuellen Beschädigung des
Kältekreislaufs:
Page 45

– Offene Flammen und Zündfunken
vermeiden
– Den Raum, in dem das Gerät instal-
liert ist, gut lüften
• Technische und anderweitige Änderungen am Gerät sind gefährlich. Ein defektes Netzkabel kann Kurzschlüsse
und einen Brand verursachen und/oder
zu Stromschlägen führen.
WARNUNG!
Elektrische Bauteile (Netzkabel,
Stecker, Kompressor) dürfen zur
Vermeidung von Gefahren nur
vom Kundendienst oder einer
Fachkraft ausgewechselt werden.
1.
Das Netzkabel darf nicht verlängert
werden.
2.
Vergewissern Sie sich, dass der
Netzstecker nicht von der Geräterückseite eingeklemmt oder beschädigt wird. Ein eingeklemmter
oder beschädigter Netzstecker
überhitzt und kann einen Brand
verursachen.
3.
Vergewissern Sie sich, dass der
Netzstecker des Gerätes frei zugänglich ist.
4.
Ziehen Sie nicht am Netzkabel.
5.
Stecken Sie den Netzstecker niemals in eine lockere Steckdose. Es
besteht Brand- und Stromschlaggefahr.
6.
Betreiben Sie das Gerät nicht ohne
Lampenabdeckung (falls vorhanden) für die Innenbeleuchtung.
• Dieses Gerät ist schwer. Seien Sie vorsichtig beim Transport.
• Entnehmen oder berühren Sie nie mit
nassen/feuchten Händen Tiefkühlgut,
da dies zu Hautverletzungen oder Kälteverbrennungen führen kann.
• Setzen Sie das Gerät nicht über eine
längere Zeit direkter Sonneneinstrahlung aus.
• Die Leuchtmittel (falls vorhanden) in diesem Gerät sind Speziallampen, die nur
für Haushaltsgeräte geeignet sind! Sie
eignen sich nicht zur Raumbeleuchtung.
DEUTSCH 45
1.3 Täglicher Gebrauch
• Stellen Sie keine heißen Töpfe auf die
Kunststoffteile des Gerätes.
• Lagern Sie keine feuergefährlichen Gase oder Flüssigkeiten in dem Gerät. Explosionsgefahr.
• Legen Sie Lebensmittel nicht direkt vor
den Luftauslass in der Rückwand.
(Wenn es ein No-Frost-Gerät ist)
• Ein aufgetautes Produkt darf nicht wieder eingefroren werden.
• Abgepackte Tiefkühlkost immer entsprechend den Herstellerangaben aufbewahren.
• Die Lagerempfehlungen des Geräteherstellers sollten strikt eingehalten werden. Halten Sie sich an die betreffenden
Anweisungen.
• Keine kohlensäurehaltigen Getränke
oder Sprudel in den Tiefkühlschrank
stellen, da der Druckanstieg in den Behältern zur Explosion führen und das
Gerät beschädigen kann.
• Eis am Stiel kann Kälteverbrennungen
verursachen, wenn es direkt nach der
Entnahme aus dem Gefrierschrank gegessen wird.
1.4 Reinigung und Pflege
• Schalten Sie vor Wartungsarbeiten immer das Gerät ab und ziehen Sie den
Netzstecker aus der Steckdose.
• Reinigen Sie das Gerät nicht mit Metallgegenständen.
• Keine scharfen Gegenstände zum Entfernen von Reif und Eis im Gerät verwenden. Verwenden Sie einen Kunststoffschaber.
• Kontrollieren Sie den Tauwasserabfluss
im Kühlraum in regelmäßigen Abständen. Reinigen Sie den Ablauf, falls nötig. Bei verstopftem Wasserabfluss
sammelt sich das Wasser auf dem Boden des Geräts an.
1.5 Montage
Halten Sie sich für den elektrischen Anschluss strikt an die Anweisungen der betreffenden Abschnitte.
Page 46

www.electrolux.com
46
• Kontrollieren Sie nach dem Auspacken
• Lassen Sie das Gerät mindestens vier
• Ausreichenden Freiraum zur Luftzirkula-
• Das Gerät sollte zur Vermeidung von
• Das Gerät darf nicht in der Nähe von
• Vergewissern Sie sich, dass der Netz-
• Wenn ein Wasseranschluss vorgesehen
das Gerät auf eventuelle Beschädigungen. Nehmen Sie das Gerät nicht in Betrieb, wenn es beschädigt ist. Melden
Sie die Schäden umgehend dem Händler, bei dem Sie es erworben haben.
Bewahren Sie in diesem Fall die Verpackung auf.
Stunden stehen, bevor Sie es elektrisch
anschließen, damit das Öl in den Kompressor zurückfließen kann.
tion um das Gerät lassen; anderenfalls
besteht Überhitzungsgefahr. Halten Sie
sich für die Belüftung an die Installationsanweisungen.
Verbrennungen durch Berührung von
heißen Bauteilen (Kompressor, Kondensator) möglichst mit der Rückseite gegen eine Wand aufgestellt werden.
Heizkörpern oder Kochern installiert
werden.
stecker des Gerätes nach der Installation frei zugänglich ist.
ist, verbinden Sie das Gerät nur mit
dem Trinkwasseranschluss.
se nur von einem qualifizierten Elektriker
oder einem Elektro-Fachmann durchgeführt werden.
• Wenden Sie sich für Reparaturen und
Wartung nur an Fachkräfte der autorisierten Kundendienststellen und verlangen Sie stets Original-Ersatzteile.
1.7 Umweltschutz
Das Gerät enthält im Kältekreis
oder in dem Isoliermaterial keine
ozonschädigenden Gase. Das
Gerät darf nicht wie normaler
Hausmüll entsorgt werden. Die
Isolierung enthält entzündliche
Gase: das Gerät muss gemäß den
geltenden Vorschriften entsorgt
werden; sie erhalten diese bei Ihrer Gemeindeverwaltung. Nicht
das Kälteaggregat beschädigen,
insbesondere nicht in der Nähe
des Wärmetauschers. Die Materialien, die bei der Herstellung dieses Geräts verwendet wurden und
mit dem Symbol
können recycelt werden.
markiert sind,
1.6 Kundendienst
• Sollte die Wartung des Gerätes elektrische Arbeiten verlangen, so dürfen die-
2. BEDIENFELD
Kontrolllampe
1
Temperaturregler
2
Kontrolllampe Fast Freeze
3
Taste Fast Freeze
4
Kontrolllampe FreeStore
5
1 2 3 4 5 6
Taste FreeStore
6
2.1 Einschalten des Geräts
Stecken Sie den Stecker in die Netzsteckdose.
Page 47

Drehen Sie den Temperaturregler im Uhrzeigersinn auf eine mittlere Einstellung.
Die Kontrolllampe leuchtet auf.
2.2 Ausschalten
Drehen Sie den Temperaturregler zum
Ausschalten des Geräts in die Position
"O".
Die Kontrolllampe erlischt.
DEUTSCH 47
• und vom Standort des Geräts.
2.4 Funktion Fast Freeze
Drücken Sie die Taste Fast Freeze, um die
Funktion Fast Freeze einzuschalten.
Die Kontrolllampe Fast Freeze leuchtet
auf.
Diese Funktion endet automatisch
nach 52 Stunden.
2.3 Temperaturregelung
Die Temperatur wird automatisch geregelt.
Bedienen Sie das Gerät wie folgt:
• Drehen Sie den Temperaturregler auf
eine niedrigere Einstellung, um die minimal mögliche Kühlung zu erreichen.
• Drehen Sie den Temperaturregler auf
eine höhere Einstellung, um die maximal mögliche Kühlung zu erreichen.
Eine mittlere Einstellung ist im Allgemeinen am besten geeignet.
Allerdings muss für eine exakte Einstellung berücksichtigt werden, dass die
Temperatur im Innern des Gerätes von
verschiedenen Faktoren abhängt:
•Raumtemperatur
• von der Häufigkeit der Türöffnung
• von der Menge der eingelagerten Lebensmittel
3. TÄGLICHER GEBRAUCH
3.1 Vor der ersten
Inbetriebnahme
Bevor Sie das Gerät in Betrieb nehmen,
beseitigen Sie den typischen „Neugeruch“
am besten durch Reinigen der Innenteile
mit lauwarmem Wasser und einer neutralen Seife. Sorgfältig nachtrocknen.
Verwenden Sie keine Reinigungsmittel oder Scheuerpulver, da
hierdurch die Oberfläche beschädigt wird.
Drücken Sie die Taste Fast Freeze, um die
Funktion jederzeit auszuschalten. Die
Kontrolllampe Fast Freeze erlischt.
2.5 Funktion FreeStore
Sie können die Funktion FreeStore durch
Drücken der Taste FreeStore einschalten.
Die Kontrolllampe FreeStore leuchtet auf.
Diese Funktion kann jederzeit durch Drücken der Taste FreeStore ausgeschaltet
werden.
Die Kontrolllampe FreeStore erlischt.
Wird die Funktion automatisch aktiviert, leuchtet die Kontrolllampe
FreeStore nicht (siehe „Täglicher
Gebrauch“).
Durch das Einschalten der Funktion FreeStore erhöht sich der
Energieverbrauch.
3.2 Einfrieren frischer
Lebensmittel
Das Gefriergerät eignet sich zum Einfrieren von frischen Lebensmitteln und zum
Lagern von gefrorenen und tiefgefrorenen
Lebensmitteln über einen längeren Zeitraum.
Aktivieren Sie zum Einfrieren frischer Lebensmitteln die FunktionAction Freeze
mindestens 24 Stunden, bevor Sie die
einzufrierenden Lebensmittel in das Gefrierfach hinein legen.
Legen Sie die frischen Lebensmittel, die
eingefroren werden sollen, in das obere
Fach.
Page 48

www.electrolux.com
48
Die maximale Menge an Lebensmitteln,
die in 24 Stunden eingefroren werden
kann, ist auf dem Typenschild angegeben, das sich im Inneren des Geräts befindet.
Der Gefriervorgang dauert 24 Stunden.
Legen Sie während dieses Zeitraums keine weiteren einzufrierenden Lebensmittel
in den Gefrierraum.
3.3 Lagerung gefrorener
Produkte
Lassen Sie das Gerät vor der ersten Inbetriebnahme oder nach einer Zeit, in der
das Gerät nicht benutzt wurde, mindestens zwei Stunden lang auf den höheren
Einstellungen laufen, bevor Sie Lebensmittel in das Gefrierfach hinein legen.
Kam es zum Beispiel durch einen
Stromausfall, der länger dauerte
als der in der Tabelle mit den
technischen Daten angegebene
Wert (siehe "Ausfalldauer") zu einem ungewollten Abtauen, dann
müssen die aufgetauten Lebensmittel sehr rasch verbraucht oder
sofort gekocht und (nach dem Abkühlen) erneut eingefroren werden.
zur Verfügung stehenden Zeit im Kühlschrank oder bei Raumtemperatur aufgetaut werden.
Kleinere Teile können sogar direkt aus
dem Gefrierraum entnommen und anschließend sofort gekocht werden. In diesem Fall dauert der Garvorgang etwas
länger.
3.5 Eiswürfelbereitung
Dieses Gerät ist mit einer oder mehreren
Schalen für die Herstellung von Eiswürfeln
ausgestattet. Füllen Sie die Schalen mit
Wasser und stellen Sie diese in das Gefrierfach.
Bitte verwenden Sie zum Herausholen der Schalen aus dem Gefrierschrank keine Utensilien aus
Metall.
3.6 Kälteakku(s)
Der Gefrierschrank wird mit einem oder
mehreren Kälteakku(s) geliefert. Diese verlängern die Zeitdauer, in der die Lebensmittel bei einem Stromausfall oder einem
Ausfall des Gerätes gekühlt werden.
3.4 Auftauen
Tiefgefrorene oder gefrorene Lebensmittel
können vor der Verwendung je nach der
3.7 Temperaturanzeige
Das Gerät wird in Frankreich verkauft.
Entsprechend den Vorschriften in
diesem Land muss das Gerät mit
einer speziellen Vorrichtung ausgestattet sein (siehe Abbildung),
die im unteren Fach des Kühlraums angebracht ist, und den
kältesten Bereich des Kühlraums
anzeigt.
Page 49

3.8 Verstellbare Ablagen
3.9 Positionieren der Türablagen
DEUTSCH 49
Die Wände des Kühlschranks sind mit einer Reihe von Führungsschienen ausgestattet, die verschiedene Möglichkeiten für
das Einsetzen der Ablagen bieten.
Zur besseren Raumnutzung können die
vorderen Hälften der Ablagen auf die hinteren Hälften gelegt werden.
Die Türablagen können in unterschiedlicher Höhe positioniert werden, womit das
Lagern verschieden großer Lebensmittelpackungen ermöglicht wird.
Nehmen Sie die Einstellungen wie folgt
vor: Ziehen Sie den Einsatz langsam in
Pfeilrichtung, bis er sich herausheben
lässt, und setzen Sie ihn dann an der gewünschten Position wieder ein.
3.10 Feuchtigkeitsregulierung
In die Glasablage ist eine Vorrichtung mit
(über einen Schieber verstellbaren) Schlitzen integriert, die die Temperaturregelung
in den Gemüsefächern ermöglicht.
Bei geschlossenen Lüftungsschlitzen:
bleibt der natürliche Feuchtegehalt der
Lebensmittel in den Obst- und Gemüsefächern für längere Zeit erhalten.
Bei geöffneten Lüftungsschlitzen:
führt die höhere Luftzirkulation zu einem
niedrigeren Feuchtegehalt der Luft in den
Obst- und Gemüsefächer.
Page 50

www.electrolux.com
50
3.11 FreeStore
Der Kühlschrank ist mit einer Funktion
ausgestattet, die für eine rasche Kühlung
der Lebensmittel und eine gleichmäßigere
Temperatur im Innenraum sorgt.
Bei Bedarf schaltet sich diese Funktion
selbsttätig ein, z. B. zur raschen Wiederherstellung der Temperatur, nachdem die
Tür geöffnet wurde, oder wenn die Umgebungstemperatur hoch ist.
Sie können die Funktion bei Bedarf manuell einschalten (siehe Funktion „FreeStore“).
Die Funktion FreeStore schaltet sich ab,
wenn die Tür geöffnet wird und schaltet
sich wieder ein, sobald die Tür geschlossen wird.
4. PRAKTISCHE TIPPS UND HINWEISE
4.1 Energiespartipps
• Öffnen Sie die Tür nicht zu häufig, und
lassen Sie diese nicht länger offen als
unbedingt notwendig.
• Wenn die Umgebungstemperatur hoch
ist und der Temperaturregler auf eine
niedrige Temperatur eingestellt und das
Gerät voll beladen ist, kann es zu andauerndem Betrieb des Kompressors
und damit zu Reif- oder Eisbildung am
Verdampfer kommen. Stellen Sie in diesem Fall den Temperaturregler auf eine
höhere Einstellung ein, die ein automatisches Abtauen und damit auch einen
niedrigeren Energieverbrauch ermöglicht.
4.2 Hinweise für die Kühlung
frischer Lebensmittel
So erzielen Sie die besten Ergebnisse:
• Legen Sie bitte keine warmen Lebensmittel oder dampfenden Flüssigkeiten in
den Kühlschrank.
• Decken Sie die Lebensmittel ab oder
verpacken Sie diese entsprechend, besonders wenn sie stark riechen.
• Legen Sie die Lebensmittel so hinein,
dass um sie Luft frei zirkulieren kann.
4.3 Hinweise für die Kühlung
Tipps:
Fleisch (alle Sorten): wickeln Sie Fleisch in
lebensmittelechte Tüten und legen Sie
diese auf die Glasablage über der Gemüseschublade.
Bitte lagern Sie Fleisch aus Sicherheitsgründen nur einen oder maximal zwei Tage auf diese Weise.
Gekochte Lebensmittel, kalte Gerichte
usw.: diese können abgedeckt auf eine
Ablage gelegt werden.
Obst und Gemüse: bitte waschen Sie
Obst und Gemüse gründlich und legen
Sie es in die speziell dafür vorgesehene(n)
Schublade(n).
Butter und Käse: diese sollten stets in
speziellen luftdichten Behältern verpackt
sein oder in Aluminiumfolie bzw. in lebensmittelechte Tüten eingepackt werden, um so wenig Luft wie möglich in der
Verpackung zu haben.
Milchflaschen: bitte bewahren Sie Milchflaschen stets mit Deckel im Flaschenregal in der Tür auf.
Page 51

Bananen, Kartoffeln, Zwiebeln und Knoblauch sollten nicht im Kühlschrank aufbewahrt werden, außer diese sind dafür
speziell verpackt.
4.4 Hinweise zum Einfrieren
Im Folgenden finden Sie einige wertvolle
Tipps für einen optimalen Gefriervorgang:
• die maximale Menge an Lebensmitteln,
die innerhalb von 24 Stunden eingefroren werden kann. ist auf dem Typschild
angegeben;
• der Gefriervorgang dauert 24 Stunden.
Legen Sie während dieses Zeitraums
keine weiteren einzufrierenden Lebensmittel in das Gefrierfach;
• frieren Sie ausschließlich frische und
gründlich gewaschene Lebensmittel
von sehr guter Qualität ein;
• teilen Sie die Lebensmittel in kleinere
Portionen ein, damit diese schnell und
vollständig gefrieren und Sie später nur
die Menge auftauen müssen, die Sie
gerade benötigen;
• die einzufrierenden Lebensmittelportionen sollten stets luftdicht in Aluminiumfolie oder in lebensmittelechte Gefrierbeutel verpackt werden, um so wenig
Luft wie möglich in der Verpackung zu
haben;
• achten Sie beim Hineinlegen von frischen, noch ungefrorenen Lebensmitteln darauf, dass diese keinen Kontakt
mit Gefriergut bekommen, da dieses
sonst antauen kann;
DEUTSCH 51
• weniger fetthaltige Lebensmittel lassen
sich besser lagern als fetthaltigere; Salz
verkürzt die Lagerzeit von Lebensmitteln im Gefrierfach;
• werden Gefrierwürfel direkt nach der
Entnahme aus dem Gefrierfach verwendet, können Sie zu Frostbrand auf der
Haut führen;
• es empfiehlt sich, das Einfrierdatum auf
jeder einzelnen Packung zu notieren,
um einen genauen Überblick über die
Lagerzeit zu haben.
4.5 Hinweise zur Lagerung
gefrorener Produkte
So erzielen Sie die besten Ergebnisse mit
Ihrem Gerät:
• Vergewissern Sie sich, dass die gefrorenen Lebensmittel vom Händler angemessen gelagert wurden.
• Achten Sie unbedingt darauf, die eingekauften gefrorenen Lebensmittel in der
kürzest möglichen Zeit in das Gefriergerät zu bringen.
• Öffnen Sie die Tür nicht zu häufig, und
lassen Sie die Tür nicht länger offen als
notwendig.
• Aufgetaute Lebensmittel verderben sehr
schnell und eignen sich nicht für ein erneutes Einfrieren.
• Das Haltbarkeitsdatum auf der Tiefkühlkostverpackung darf nicht überschritten
werden.
5. REINIGUNG UND PFLEGE
VORSICHT!
Ziehen Sie bitte vor jeder Reinigungsarbeit immer den Netzstecker aus der Steckdose.
Der Kältekreis des Gerätes enthält
Kohlenwasserstoffe; Wartungsarbeiten und Nachfüllen von Kältemittel dürfen daher nur durch vom
Hersteller autorisiertes Fachpersonal ausgeführt werden.
5.1 Regelmäßige Reinigung
Das gesamte Gerät muss regelmäßig gereinigt werden:
• Viele Haushaltsreiniger für Küchen enthalten Chemikalien, die den im Gerät
verwendeten Kunststoff angreifen können. Aus diesem Grund ist es empfehlenswert, die Außen- und Innenseiten
des Geräts nur mit warmem Wasser
und Neutralseife zu reinigen.
Page 52

www.electrolux.com
52
• Prüfen und säubern Sie die Türdichtun-
• Spülen und trocknen Sie sie sorgfältig
• Reinigen Sie den Kondensator (schwar-
5.3 Abtauen des Kühlschranks
Verwenden Sie keine Reinigungsmittel oder Scheuerpulver für die
Außenseiten, da dies den Lack
oder die Antifinger-Edelstahl Beschichtung beschädigt.
gen in regelmäßigen Abständen, um zu
gewährleisten, dass diese sauber und
frei von Fremdkörpern sind.
ab.
zes Gitter) und den Kompressor auf der
Geräterückseite mit einer Bürste. Dadurch verbessert sich die Leistung des
Geräts und es verbraucht weniger
Strom.
Ziehen Sie nicht an Leitungen
und/oder Kabeln im Innern des
Kühlschranks und achten Sie darauf, diese nicht zu verschieben
oder zu beschädigen.
Bitte achten Sie darauf, das Kühlsystem nicht zu beschädigen.
Schließen Sie das Gerät nach der Reinigung wieder an die Netzversorgung an.
5.2 Stillstandzeiten
Bei längerem Stillstand des Gerätes müssen Sie folgendermaßen vorgehen:
trennen Sie das Gerät von der Netz-
•
versorgung
• entnehmen Sie alle Lebensmittel
• Tauen Sie das Gerät ab (sofern vorgesehen). Reinigen Sie den Innenraum
und das gesamte Zubehör.
• lassen Sie die Türen offen/angelehnt,
um das Entstehen unangenehmer Gerüche zu vermeiden.
Möchten Sie bei einer längeren Abwesenheit den Gefrierschrank weiter laufen lassen, bitten Sie jemanden, gelegentlich die
Temperatur zu prüfen, damit das Gefriergut bei einem möglichen Stromausfall
nicht im Innern des Gerätes verdirbt.
5.4 Abtauen des
Gefrierschranks
Das Gefrierfach dieses Modells ist vom
Typ "No Frost". Dies bedeutet, dass es
während des Betriebs weder an den In-
Bei normalem Betrieb wird Reif bei jedem
Anhalten des Kompressors automatisch
vom Verdampfer des Kühlschranks entfernt. Das Tauwasser läuft durch eine Abflussöffnung in einen speziellen Behälter
an der Rückseite des Geräts über dem
Motorkompressor, wo es verdampft.
Reinigen Sie deshalb regelmäßig die Abflussöffnung in der Mitte der Auffangrinne
an der Kühlraumrückwand, damit das
Tauwasser nicht überfließt und auf die gelagerten Lebensmittel tropft.
nenwänden noch auf den Lebensmitteln
zu Frostbildung kommt.
Die Bildung von Frost wird durch die ständig zirkulierende Kaltluft in diesem Fach
verhindert; eine automatische Lüfterregelung sorgt für den Ventilatorantrieb.
Page 53

6. WAS TUN, WENN …
DEUTSCH 53
WARNUNG!
Ziehen Sie vor der Fehlersuche
immer den Netzstecker aus der
Steckdose.
Die Fehlersuche, die in der vorliegenden Gebrauchsanweisung
nicht beschrieben ist, darf nur von
einem qualifizierten Elektriker oder
einer kompetenten Person durchgeführt werden.
Während das Gerät in Betrieb ist,
entstehen bestimmte Geräusche
(Kompressor und Kühlkreislauf).
Problem Mögliche Ursache Abhilfe
Das Gerät funktio-
niert nicht. Die Lam-
Das Gerät ist ausgeschaltet.
Gerät einschalten.
pe funktioniert nicht.
Der Netzstecker wurde
nicht richtig in die Steckdose gesteckt.
Das Gerät wird nicht mit
Spannung versorgt. Es
liegt keine Spannung an
der Netzsteckdose an.
Stecken Sie den Netzstecker richtig in die Steckdose.
Testen Sie, ob ein anderes
Gerät an dieser Steckdose
funktioniert.
Wenden Sie sich an einen
qualifizierten Elektriker.
Die Lampe funktioniert nicht.
Die Lampe befindet sich
im Standby-Modus.
Schließen und öffnen Sie
die Tür.
Die Lampe ist defekt. Siehe hierzu „Austauschen
der Lampe“.
Der Kompressor ist
durchgehend in Be-
Die Temperatur ist nicht
richtig eingestellt.
Stellen Sie eine höhere
Temperatur ein.
trieb.
Die Tür wurde nicht richtig
geschlossen.
Die Tür wurde zu häufig
geöffnet.
Die Temperatur der Le-
bensmittel ist zu hoch.
Siehe hierzu „Schließen der
Tür“.
Lassen Sie die Tür nicht
länger als erforderlich offen.
Lassen Sie die Lebensmittel
auf Raumtemperatur abkühlen, bevor Sie sie in das
Gerät legen.
Die Raumtemperatur ist zu
hoch.
Wasser fließt an der
Rückwand des Kühlschranks herunter.
Beim automatischen Abtauen fließt das Tauwasser
an der Rückwand des Ge-
Senken Sie die Raumtemperatur.
Das ist normal.
räts herunter.
Wasser fließt in den
Kühlschrank.
Der Wasserablauf ist verstopft.
Reinigen Sie den Wasserablauf.
Page 54

www.electrolux.com
54
Problem Mögliche Ursache Abhilfe
Die eingelagerten Lebens-
Wasser fließt auf
den Boden.
Die Temperatur im
Gerät ist zu niedrig.
Die Temperatur im
Gerät ist zu hoch.
Es wurden zu viele Pro-
Die Temperatur im
Kühlschrank ist zu
hoch.
Die Temperatur im
Gefrierraum ist zu
hoch.
6.1 Austauschen der Lampe für die Innenbeleuchtung
6.2 Schließen der Tür
1.
2.
mittel verhindern, dass das
Wasser in den Wassersammler fließt.
Das Tauwasser läuft nicht
in die Verdampferschale
über dem Kompressor.
Der Temperaturregler ist
nicht richtig eingestellt.
Der Temperaturregler ist
nicht richtig eingestellt.
dukte auf einmal eingelegt.
Die Kaltluft kann im Gerät
nicht zirkulieren.
Die Lebensmittel liegen zu
dicht aneinander.
1
Reinigen Sie die Türdichtungen.
Stellen Sie die Tür nach Bedarf ein.
Siehe hierzu „Montage“.
2
Stellen Sie sicher, dass das
Kühlgut nicht die Rückwand berührt.
Befestigen Sie den Tauwasserablauf an der Verdampferschale.
Stellen Sie eine höhere
Temperatur ein.
Stellen Sie eine niedrigere
Temperatur ein.
Legen Sie weniger Produkte auf einmal ein.
Stellen Sie sicher, dass die
Kaltluft im Gerät zirkulieren
kann.
Lagern Sie die Lebensmittel
so, dass die Kaltluft im Gerät zirkulieren kann.
1.
Schalten Sie das Gerät aus.
2.
Drücken Sie auf den hinteren Haken
und schieben Sie gleichzeitig die Abdeckung der Lampe in Pfeilrichtung.
3.
Ersetzen Sie die Lampe durch eine
mit der gleichen Leistung, die für
Haushaltsgeräte geeignet sein muss.
(Die maximale Leistung ist auf der
Lampenabdeckung angegeben.)
4.
Schieben Sie die Lampenabdeckung
in die ursprüngliche Position.
5.
Schalten Sie das Gerät ein.
6.
Öffnen Sie die Tür. Prüfen Sie, ob die
Lampe brennt.
3.
Ersetzen Sie die defekten Türdichtungen, falls erforderlich. Wenden Sie
sich hierzu an den Kundendienst.
Page 55

7. MONTAGE
DEUTSCH 55
WARNUNG!
Lesen Sie bitte die "Sicherheitshinweise" sorgfältig vor der Aufstellung des Geräts durch, um
Gefahren für Sie selbst zu vermeiden und einen korrekten Betrieb
des Geräts zu gewährleisten.
7.1 Aufstellung
Installieren Sie dieses Gerät an einem Ort,
an dem die Umgebungstemperatur mit
der Klimaklasse übereinstimmt, die auf
dem Typschild des Geräts angegeben ist:
Klima-
Umgebungstemperatur
klasse
SN +10°C bis + 32°C
N +16°C bis + 32°C
ST +16°C bis + 38°C
T +16°C bis + 43°C
7.3 Wechsel des Türanschlags
7.2 Elektrischer Anschluss
Kontrollieren Sie vor der ersten Benutzung
des Gerätes, ob die Netzspannung und frequenz Ihres Hausanschlusses mit den
auf dem Typenschild angegebenen Anschlusswerten übereinstimmen.
Das Gerät muss geerdet sein. Zu diesem
Zweck ist die Netzkabelsteckdose mit einem Schutzkontakt ausgestattet. Falls die
Steckdose Ihres Hausanschlusses nicht
geerdet sein sollte, lassen Sie das Gerät
bitte gemäß den geltenden Vorschriften
erden und fragen Sie dafür einen qualifizierten Elektriker.
Der Hersteller übernimmt keinerlei Haftung
für Schäden oder Verletzungen, die durch
Missachtung der oben genannten Sicherheitshinweise entstehen.
Das Gerät entspricht den EU- Richtlinien.
Die Tür des Geräts öffnet sich nach
rechts. Wenn Sie möchten, dass sich die
Tür nach links öffnet, gehen Sie vor dem
Einbau des Geräts bitte nach den folgenden Anweisungen vor:
• Lockern Sie den oberen Stift und entfernen Sie das Distanzstück.
• Entfernen Sie den oberen Stift und die
obere Tür.
• Lösen Sie die Stifte (B) und die Distanzstücke (C).
C
B
C
Page 56

www.electrolux.com
56
7.4 Anforderungen an die Belüftung
• Entfernen Sie die untere Tür.
• Lösen Sie den unteren Stift.
Auf der gegenüberliegenden Seite:
• Bringen Sie den unteren Stift an.
• Bringen Sie die untere Tür an.
• Bringen Sie die Stifte (B) und die Distanzstücke (C) am mittleren Scharnier
auf der gegenüberliegenden Seite an.
• Bringen Sie die obere Tür an.
• Legen Sie das Distanzstück ein und ziehen Sie den oberen Stift fest.
5 cm
min.
200 cm
2
7.5 Montage des Geräts
VORSICHT!
Achten Sie darauf, dass sich das
Netzkabel des Geräts frei bewegen lässt.
x
min.
200 cm
Hinter dem Gerät muss genug Platz für eine ausreichende Luftzirkulation sein.
2
Führen Sie die folgenden Schritte aus:
Schneiden Sie bei Bedarf den Dichtungsstreifen zu und bringen Sie ihn am Gerät
an, wie in der Abbildung dargestellt.
x
Page 57

4 mm
44 mm
DEUTSCH 57
Bohren Sie, wie in der Abbildung gezeigt,
die Scharnierabdeckung A auf.
Bringen Sie die Abdeckungen A und A1 (im
Beipack) am mittleren Scharnier an.
A1A
Setzen Sie das Gerät in die Einbaunische.
Schieben Sie das Gerät in Pfeilrichtung (1),
bis die obere Spaltabdeckung am Küchenmöbel anliegt.
2
Schieben Sie das Gerät auf der den Scharnieren gegenüberliegenden Seite in Pfeilrichtung (2) soweit wie möglich gegen die
Seitenwand des Küchenmöbels.
1
Richten Sie das Gerät in der Einbaunische
aus.
Vergewissern Sie sich, dass der Abstand
zwischen dem Gerät und der Schrankvorderkante 44 mm beträgt.
Mit der unteren Scharnierabdeckung (im
Beipack) können Sie sicherstellen, dass der
Abstand zwischen dem Gerät und dem Küchenmöbel richtig ist.
Achten Sie darauf, dass der Abstand zwischen dem Gerät und dem Schrank 4 mm
beträgt.
Öffnen Sie die Tür. Stecken Sie die untere
Scharnierabdeckung auf.
Page 58

www.electrolux.com
58
Befestigen Sie das Gerät mit 4 Schrauben
in der Einbaunische.
I
I
Entfernen Sie das entsprechende Teil aus
der Scharnierabdeckung (E). Achten Sie
darauf, im Falle eines rechten Scharniers
Teil DX bzw. bei einem gegenüberliegenden Scharnier Teil SX zu entfernen.
Setzen Sie die beiliegenden Abdeckkappen
(C, D) in die Befestigungs- und Scharnierlöcher ein.
C
D
E
E
Bauen Sie das Belüftungsgitter (B) ein.
Stecken Sie die Scharnierabdeckungen (E)
auf das Scharnier auf.
B
Page 59

DEUTSCH 59
Wenn das Gerät seitlich an die Küchenmöbeltür angeschlossen werden muss:
1.
Lockern Sie die Schrauben in den Haltewinkeln (H).
2.
Verschieben Sie die Haltewinkel (H).
3.
Ziehen Sie die Schrauben wieder an.
H
H
Trennen Sie die Teile (Ha), (Hb), (Hc) und
(Hd) ab.
ca. 50 mm
ca. 50 mm
Montieren Sie das Teil (Ha) an der Innenseite der Tür des Küchenmöbels.
90°
21 mm
90°
21 mm
Page 60

www.electrolux.com
60
Hc
Ha
8 mm
Hb
Drücken Sie das Teil (Hc) auf das Teil (Ha).
Öffnen Sie die Gerätetür und die Möbeltüre
in einem Winkel von 90°.
Setzen Sie das Führungsstück (Hb) in die
Führungsschiene (Ha) ein.
Halten Sie die Gerätetür an die Tür des Küchenmöbels, und markieren Sie die Bohrungen.
Ha
8 mm
K
Nehmen Sie die Halterungen wieder ab.
Markieren Sie 8 mm ab der Türaußenkante
die Stelle, an der der Nagel (K) eingesetzt
werden muss.
Ha
Page 61

Hb
DEUTSCH 61
Setzen Sie das Führungsstück erneut auf
die Führungsschiene und schrauben Sie es
mit den mitgelieferten Schrauben fest.
Richten Sie die Tür des Einbaumöbels und
die Gerätetür mit dem Führungsstück (Hb)
aus.
Hb
Drücken Sie Abdeckung (Hd) auf das Führungsstück (Hb).
Hd
Führen Sie eine Endkontrolle durch, um
sicherzustellen, dass:
• alle Schrauben fest angezogen sind.
8. GERÄUSCHE
Während das Gerät in Betrieb ist, entstehen bestimmte Geräusche (Kompressor
und Kühlkreislauf).
OK
• der Dichtungsstreifen sicher am Gerät
befestigt ist.
• die Tür korrekt öffnet und schließt.
SSSRRR!
CLICK!
HISSS!
BRRR!
CRACK!
BLUBB!
Page 62

www.electrolux.com
62
CLICK!
BRRR!
BLUBB!
CLICK!
BRRR!
BLUBB!
HISSS!
HISSS!
Page 63

DEUTSCH 63
SSSRRR!
CRACK!
9. TECHNISCHE DATEN
Abmessung der Aussparung
Höhe 1780 mm
Breite 560 mm
Tiefe 550 mm
Ausfalldauer 21 h
Spannung 230-240 V
Frequenz 50 Hz
Die technischen Informationen befinden
sich auf dem Typenschild innen links im
Gerät sowie auf der Energieplakette.
SSSRRR!
CRACK!
Page 64

www.electrolux.com
64
10. UMWELTTIPPS
Recyceln Sie Materialien mit dem Symbol
. Entsorgen Sie die Verpackung in den
entsprechenden Recyclingbehältern.
Recyceln Sie zum Umwelt- und
Gesundheitsschutz elektrische und
elektronische Geräte. Entsorgen Sie
Geräte mit diesem Symbol
dem Hausmüll. Bringen Sie das Gerät zu
Ihrer örtlichen Sammelstelle oder wenden
Sie sich an Ihr Gemeindeamt.
nicht mit
Page 65

ESPAÑOL 65
ÍNDICE DE MATERIAS
1. INSTRUCCIONES DE SEGURIDAD . . . . . . . . . . . . . . . . . . . . . . . . . . . . . . . . . . . . . . . . . . 66
2. PANEL DE MANDOS . . . . . . . . . . . . . . . . . . . . . . . . . . . . . . . . . . . . . . . . . . . . . . . . . . . . 68
3. USO DIARIO . . . . . . . . . . . . . . . . . . . . . . . . . . . . . . . . . . . . . . . . . . . . . . . . . . . . . . . . . . . 69
4. CONSEJOS ÚTILES . . . . . . . . . . . . . . . . . . . . . . . . . . . . . . . . . . . . . . . . . . . . . . . . . . . . . 72
5. MANTENIMIENTO Y LIMPIEZA . . . . . . . . . . . . . . . . . . . . . . . . . . . . . . . . . . . . . . . . . . . . . 73
6. QUÉ HACER SI… . . . . . . . . . . . . . . . . . . . . . . . . . . . . . . . . . . . . . . . . . . . . . . . . . . . . . . . 75
7. INSTALACIÓN . . . . . . . . . . . . . . . . . . . . . . . . . . . . . . . . . . . . . . . . . . . . . . . . . . . . . . . . . 77
8.
RUIDOS . . . . . . . . . . . . . . . . . . . . . . . . . . . . . . . . . . . . . . . . . . . . . . . . . . . . . . . . . . . . . . 83
9. DATOS TÉCNICOS . . . . . . . . . . . . . . . . . . . . . . . . . . . . . . . . . . . . . . . . . . . . . . . . . . . . . . 85
PENSAMOS EN USTED
Gracias por adquirir un producto Electrolux. Ha escogido un producto que contiene décadas de
experiencia e innovación profesionales. Ingenioso y elegante, se ha diseñado pensando en usted.
Así que, siempre que lo utilice puede tener la seguridad de que conseguirá excelentes resultados.
Bienvenido a Electrolux.
Visite nuestro sitio web para:
Obtener consejos, folletos, soluciones a problemas e información de servicio:
www.electrolux.com
Registrar su producto para recibir un mejor servicio:
www.electrolux.com/productregistration
Adquirir accesorios, artículos de consumo y recambios originales para su aparato:
www.electrolux.com/shop
ATENCIÓN Y SERVICIO AL CLIENTE
Le recomendamos que utilice recambios originales.
Al contactar con el Servicio, cerciórese de tener la siguiente información a mano.
La información se puede encontrar en la placa de características. Modelo, PNC, Número de
serie.
Advertencia - Precaución-Información sobre seguridad.
Datos y recomendaciones generales
Información medioambiental
Salvo modificaciones.
Page 66

www.electrolux.com
66
1.
INSTRUCCIONES DE SEGURIDAD
Por su seguridad y para garantizar el funcionamiento correcto del aparato, antes
de instalarlo y utilizarlo por primera vez lea
atentamente este manual del usuario, incluidos los consejos y advertencias. Para
evitar errores y accidentes, es importante
que todas las personas que utilicen el
aparato estén perfectamente al tanto de
su funcionamiento y de las características
de seguridad. Conserve estas instrucciones y no olvide mantenerlas junto al aparato en caso de su desplazamiento o venta para que quienes lo utilicen a lo largo
de su vida útil dispongan siempre de la información adecuada sobre el uso y la seguridad.
Por la seguridad de personas y bienes, siga las normas de seguridad indicadas en
estas instrucciones, ya que el fabricante
no se hace responsable de daños provocados por omisiones.
1.1 Seguridad de niños y
personas vulnerables
• Este electrodoméstico no está diseñado para que lo usen personas (incluidos
niños) con discapacidad física, sensorial o mental, o con experiencia y conocimiento insuficientes, a menos que
una persona responsable de su seguridad les supervise o instruya en el uso
del electrodoméstico.
No permita que los niños jueguen con
el electrodoméstico.
• Mantenga los materiales de embalaje
alejados de los niños. Existe riesgo de
asfixia.
• Si va a desechar el aparato, extraiga el
enchufe de la toma, corte el cable de
conexión (tan cerca del aparato como
pueda) y retire la puerta para impedir
que los niños al jugar puedan sufrir
descargas eléctricas o quedar atrapados en su interior.
• Si este aparato, que cuenta con juntas
de puerta magnéticas, sustituirá a un
aparato más antiguo con cierre de
muelle (pestillo) en la puerta, cerciórese
de inutilizar el cierre de muelle antes de
desechar el aparato antiguo. Evitará así
que se convierta en una trampa mortal
para niños.
1.2 Instrucciones generales de
seguridad
Mantenga libres de obstrucciones las
aberturas de ventilación del alojamiento
del aparato o de la estructura empotrada
• El aparato está diseñado para conservar los alimentos y bebidas de una vivienda normal, como se explica en este
folleto de instrucciones.
– áreas de cocina para el personal en
– granjas y por clientes en hoteles, mo-
– entornos de tipo hostales o pensio-
– servicios de catering y actividades si-
• No utilice dispositivos mecánicos ni
medios artificiales para acelerar el proceso de descongelación.
• No utilice otros aparatos eléctricos (como máquinas para hacer helados) dentro de los aparatos de refrigeración, a
menos que el fabricante haya autorizado su utilización para estos fines.
• No dañe el circuito del refrigerante.
• El circuito del refrigerante del aparato
contiene isobutano (R600a). Se trata de
un gas natural con un alto nivel de
compatibilidad medioambiental, aunque
es inflamable.
Durante el transporte y la instalación del
aparato, cerciórese de no provocar daños en el circuito de refrigeración.
Si el circuito de refrigeración se daña:
– mantenga el aparato alejado de las
– ventile bien la habitación en la que se
• Es peligroso alterar las especificaciones
o modificar este producto en modo alguno. Cualquier daño en el cable de alimentación puede provocar un cortocir-
ADVERTENCIA
tiendas, oficinas y otros entornos de
trabajo;
teles y otros entornos de tipo residencial;
nes;
milares al por mayor.
llamas y de cualquier fuente de encendido
encuentra el aparato
Page 67

cuito, un incendio o una descarga eléctrica.
ADVERTENCIA
Los componentes eléctricos (cable de alimentación, enchufe,
compresor) debe sustituirlos un
técnico autorizado o personal de
reparaciones profesional a fin de
evitar riesgos.
1.
El cable de alimentación no se debe prolongar.
2.
Compruebe que la parte posterior
del aparato no aplaste ni dañe el
enchufe. Un enchufe aplastado o
dañado puede recalentarse y provocar un incendio.
3.
Cerciórese de que tiene acceso al
enchufe del aparato.
4.
No tire del cable de alimentación.
5.
Si la toma de red está floja, no introduzca el enchufe. Existe riesgo
de descarga eléctrica o incendio.
6.
No utilice el aparato sin la tapa de
la bombilla (si está provisto de ella)
de iluminación interior.
• Este aparato es pesado. Debe tener
precauciones durante su desplazamiento.
• No retire ni toque elementos del compartimento congelador con las manos
húmedas o mojadas, ya que podría sufrir abrasión de la piel o quemaduras
por congelación.
• Evite la exposición prolongada del aparato a la luz solar directa.
• Las bombillas que se utilizan en este
aparato (si está provisto de ellas) son
especiales, y se han seleccionado exclusivamente para uso en aparatos domésticos. No pueden utilizarse para la
iluminación de la vivienda.
1.3 Uso diario
• No coloque recipientes calientes sobre
las piezas plásticas del aparato.
• No almacene gas ni líquido inflamable
en el aparato, ya que podrían estallar.
• No coloque alimentos directamente
contra la salida de aire de la pared posterior. (Si el aparato es No Frost, es decir, no acumula escarcha.)
ESPAÑOL 67
• Los alimentos que se descongelen no
deben volver a congelarse.
• Guarde los alimentos congelados, que
se adquieren ya envasados, siguiendo
las instrucciones del fabricante.
• Se deben seguir estrictamente las recomendaciones del fabricante del aparato
sobre el almacenamiento. Consulte las
instrucciones correspondientes.
• No coloque bebidas carbonatadas o
con gas en el congelador, ya que se
genera presión en el recipiente, que podría estallar y dañar el aparato.
• Si se consumen polos helados retirados directamente del aparato, se pueden sufrir quemaduras causadas por el
hielo.
1.4 Cuidado y limpieza
• Antes de realizar tareas de mantenimiento, apague el aparato y desconecte el enchufe de la toma de red.
• No limpie el aparato con objetos metálicos.
• No utilice objetos afilados para eliminar
el hielo del aparato. Utilice un raspador
plástico.
• Inspeccione habitualmente el desagüe
del agua descongelada del frigorífico. Si
es necesario, limpie el desagüe. Si el
desagüe se bloquea, el agua se acumulará en la base del aparato.
1.5 Instalación
Para realizar la conexión eléctrica,
siga atentamente las instrucciones
de los párrafos correspondientes.
• Desembale el aparato y compruebe
que no tiene daños. No conecte el aparato si está dañado. Informe de los posibles daños de inmediato a la tienda
donde lo adquirió. En ese caso, conserve el material de embalaje.
• Es recomendable esperar al menos dos
horas antes de conectar el aparato, para permitir que el aceite regrese al compresor.
• El aparato debe contar con circulación
de aire adecuada alrededor, ya que de
lo contrario se produce recalentamiento. Para conseguir una ventilación sufi-
Page 68

www.electrolux.com
68
ciente, siga las instrucciones correspondientes a la instalación.
• Siempre que sea posible, la parte posterior del producto debe estar contra
una pared, para evitar que se toquen
las partes calientes (compresor, condensador) y se produzcan quemaduras.
• El aparato no debe colocarse cerca de
radiadores ni de hornillas de cocina.
• Asegúrese de que es posible acceder
al enchufe después de instalar el electrodoméstico.
• Realice la conexión sólo a un suministro
de agua potable (si está prevista una
conexión de agua).
1.6 Servicio técnico
• Un electricista homologado deberá realizar las tareas que se requieran para
ejecutar el servicio o mantenimiento de
este electrodoméstico.
• Las reparaciones de este aparato debe
realizarlas un centro de servicio técnico
2. PANEL DE MANDOS
autorizado y sólo se deben utilizar recambios originales.
1.7 Protección del medio
ambiente
Este aparato no contiene gases
perjudiciales para la capa de ozono, ni en el circuito de refrigerante
ni en los materiales aislantes. El
aparato no se debe desechar junto con los residuos urbanos. La
espuma aislante contiene gases
inflamables: el aparato se debe
desechar de acuerdo con la normativa vigente, que puede solicitar a las autoridades locales. No
dañe la unidad de refrigeración,
en especial la parte trasera, cerca
del intercambiador de calor. Los
materiales de este aparato marca-
dos con el símbolo
clables.
son reci-
1 2 3 4 5 6
Indicador luminoso
1
Regulador de temperatura
2
Luz Fast Freeze
3
Interruptor Fast Freeze
4
Luz FreeStore
5
Interruptor FreeStore
6
2.1 Encendido
Introduzca el enchufe en la toma.
Gire el regulador de temperatura hacia la
derecha, a un ajuste intermedio.
Se ilumina el indicador.
2.2 Apagado
Para apagar el aparato, gire el regulador
de temperatura hasta la posición "O".
Se apaga el indicador.
2.3 Regulación de la
temperatura
La temperatura se regula automáticamente.
Para utilizar el aparato, proceda como se
indica:
• Gire el regulador de temperatura hacia
ajustes más bajos para obtener el frío
mínimo.
Page 69

• Gire el regulador de temperatura hacia
ajustes más altos para obtener el frío
máximo.
Lo más conveniente es ajustar la
temperatura en una posición intermedia.
Sin embargo, el ajuste exacto debe elegirse teniendo en cuenta que la temperatura
interior del aparato depende de:
• la temperatura ambiente
• la frecuencia con que se abre la puerta
• la cantidad de alimentos guardados
• la ubicación del aparato.
2.4 Función Fast Freeze
Pulse el conmutador Fast Freeze para activar la función Fast Freeze.
Se iluminará la luz Fast Freeze.
La función se detiene automáticamente después de 52 horas.
3. USO DIARIO
ESPAÑOL 69
Pulse el conmutador Fast Freezepara desactivar la función en cualquier momento.
Se apagará la luz Fast Freeze.
2.5 Función FreeStore
Para activar la función FreeStore basta
con pulsar el interruptor FreeStore.
Se iluminará la luz FreeStore.
La función se puede desactivar en cualquier momento con el interruptor FreeStore.
Se apagará la luz FreeStore.
Si la función se activa automáticamente, el indicador FreeStore no
se muestra (consulte la sección
"Uso diario").
La activación de la función FreeStore incrementa el consumo de
energía.
3.1 Antes del primer uso
Antes de utilizar el aparato por primera
vez, lave el interior y los accesorios internos con agua templada y un jabón neutro
para eliminar el típico olor de los productos nuevos. A continuación seque bien.
No utilice detergentes ni polvos
abrasivos, ya que podrían dañar el
acabado.
3.2 Congelación de alimentos
frescos
El compartimento congelador está ideado
para la congelación de alimentos frescos
y para la conservación a largo plazo de
alimentos congelados y ultracongelados.
Para congelar alimentos frescos active la
función Action Freeze al menos 24 horas
antes de introducir los alimentos en el
compartimento congelador.
Coloque los alimentos que vaya a congelar en el compartimento inferior.
La cantidad máxima de alimentos que
puede congelarse en 24 horas se indica
en la placa de datos técnicos, una etiqueta situada en el interior del aparato.
El proceso de congelación dura 24 horas:
durante ese periodo no deben añadirse
otros alimentos para congelación.
3.3 Almacenamiento de
alimentos congelados
Al poner en marcha el aparato por primera vez o después de un periodo sin uso,
déjelo en marcha al menos durante 2 horas con un ajuste alto antes de colocar los
productos en el compartimento.
En caso de producirse una descongelación accidental, por ejemplo, por un corte del suministro
eléctrico, si la interrupción ha sido
más prolongada que el valor indicado en la tabla de características
técnicas bajo "tiempo de elevación", los alimentos descongelados deben consumirse cuanto antes o cocinarlos de inmediato y
volverlos a congelar (después de
que se hayan enfriado).
Page 70

www.electrolux.com
70
3.4 Descongelación
Los alimentos ultracongelados o congelados, antes de utilizarlos, se pueden descongelar en el compartimento frigorífico o
a temperatura ambiente, dependiendo del
tiempo de que se disponga.
Es posible incluso cocinar piezas pequeñas congeladas, tomadas directamente
del congelador; en tal caso, el tiempo de
cocción será más prolongado.
3.5 Producción de cubitos de
hielo
Este aparato cuenta con una o varias
bandejas para la producción de cubitos
3.7 Indicador de temperatura
de hielo. Llene las bandejas con agua y
colóquelas en el compartimento congelador.
No utilice instrumentos metálicos
para retirar las bandejas del congelador.
3.6 Acumuladores de frío
El congelador está provisto de uno o varios acumuladores de frío que incrementan el tiempo de conservación de los alimentos en caso de que se produzca un
corte de corriente o una avería.
Este aparato está autorizado para
su venta en Francia.
En conformidad con la normativa
válida en dicho país, deberá ir
provisto de un dispositivo especial
(consulte la figura) situado en el
compartimiento inferior del frigorífico para indicar la zona más fría
del mismo.
3.8 Estantes móviles
Las paredes del frigorífico cuentan con
una serie de guías para colocar los estantes del modo que se prefiera.
Para aprovechar mejor el espacio, los estantes frontales más pequeños pueden
colocarse encima de los traseros.
Page 71

3.9 Colocación de los estantes de la puerta
Para poder guardar alimentos de distintos
tamaños, los estantes de la puerta se
pueden colocar a diferentes alturas.
Para realizar esos ajustes proceda como
se indica a continuación: mueva paulatinamente el estante en la dirección de las
flechas hasta retirarlo del soporte y colóquelo en la posición que desee.
3.10 Control de humedad
El estante de cristal incorpora un dispositivo con ranuras (ajustables mediante un
palanca deslizante), que permite regular la
temperatura de los cajones para verduras
Cuando las ranuras de ventilación están
cerradas:
la humedad natural de los alimentos guardados en los compartimentos para frutas
y verduras se mantiene durante más tiempo.
Cuando las ranuras de ventilación están
abiertas:
el aumento del aire circulante reduce el
contenido de humedad de los alimentos.
ESPAÑOL 71
Page 72

www.electrolux.com
72
3.11 FreeStore
4. CONSEJOS ÚTILES
El compartimento frigorífico cuenta con
un dispositivo que permite enfriar los alimentos con más rapidez y mantener una
temperatura más uniforme dentro del
compartimento.
El dispositivo se activa por sí solo cuando
es necesario, por ejemplo, para recuperar
rápidamente la temperatura después de
abrir la puerta o cuando la temperatura
ambiente sea elevada.
Permite encender el dispositivo manualmente cuando sea necesario (consulte la
sección "Función FreeStore").
El dispositivo FreeStore se detiene cuando la puerta está abierta y se reinicia inmediatamente después de cerrar la puerta.
4.1 Consejos para ahorrar
energía
• No abra la puerta con frecuencia ni la
deje abierta más tiempo del estrictamente necesario.
• Si la temperatura ambiente es elevada,
la temperatura del aparato se ha ajustado en los valores más altos y está totalmente lleno, el compresor podría funcionar de manera continua, provocando la formación de escarcha o hielo en
el evaporador. Si esto sucede, gire el
regulador de temperatura a valores inferiores para permitir la descongelación
automática y ahorrar en el consumo
eléctrico.
4.2 Consejos para la
refrigeración de alimentos
frescos
Para obtener los mejores resultados:
• no guarde en el frigorífico alimentos calientes ni líquidos en evaporación;
• cubra o envuelva los alimentos, en especial si tienen sabores fuertes;
• coloque los alimentos de modo que el
aire pueda circular libremente entre
ellos.
4.3 Consejos para la
refrigeración
Consejos útiles:
Carne (de todo tipo): guárdela en bolsas
de plástico y colóquela en el estante de
vidrio, sobre el cajón de las verduras.
Por razones de seguridad, guárdela de
ese modo durante uno o dos días, como
máximo.
Alimentos cocinados, platos fríos, etc..:
los debe cubrir y puede colocarlos en
cualquiera de los estantes.
Frutas y verduras: se deben limpiar a conciencia y colocar en los cajones especiales suministrados a tal efecto.
Mantequilla y queso: colóquelos en recipientes herméticos especiales o envueltos
en papel de aluminio o en bolsas de plástico, para excluir tanto aire como sea posible.
Page 73

Botellas de leche: deben tener tapa y se
colocarán en el estante para botellas de la
puerta.
Los plátanos, las patatas, las cebollas y
los ajos, si no están empaquetados, no
deben guardarse en el frigorífico.
4.4 Consejos sobre la
congelación
Estos consejos son importantes para poder aprovechar al máximo el proceso de
congelación:
• la cantidad máxima de alimentos que
puede congelarse en 24 horas se
muestra en la placa de datos técnicos;
• el proceso de congelación requiere 24
horas. Durante ese periodo no deben
añadirse otros alimentos para congelación;
• congele sólo productos alimenticios de
máxima calidad, frescos y perfectamente limpios;
• prepare los alimentos en porciones pequeñas para que se congelen de manera rápida y total, así como para poder descongelar posteriormente sólo
las cantidades necesarias;
• envuelva los alimentos en papel de aluminio o polietileno y compruebe que los
envoltorios quedan herméticamente cerrados;
• no permita que alimentos frescos y sin
congelar entren en contacto con alimentos ya congelados, para evitar el
aumento de temperatura de los segundos;
ESPAÑOL 73
• los alimentos magros se congelan mejor que los grasos; la sal reduce el tiempo de almacenamiento de los alimentos;
• el hielo, si se consume inmediatamente
después de retirarlo del compartimento
congelador, puede provocar quemaduras por congelación en la piel;
• es recomendable etiquetar cada paquete con la fecha de congelación para
controlar el tiempo que permanecen almacenados.
4.5 Consejos para el
almacenamiento de alimentos
congelados
Para obtener el máximo rendimiento de
este aparato, deberá:
• comprobar que el comerciante ha mantenido los productos congelados correctamente almacenados;
• procurar que los alimentos congelados
pasen de la tienda al congelador en el
menor tiempo posible;
• evitar la apertura frecuente de la puerta
o dejarla abierta más del tiempo estrictamente necesario;
• los alimentos descongelados se deterioran con rapidez y no pueden congelarse de nuevo;
• no supere el tiempo de almacenamiento indicado por el fabricante de los alimentos.
5. MANTENIMIENTO Y LIMPIEZA
PRECAUCIÓN
Antes de realizar tareas de mantenimiento, desenchufe el aparato.
Este equipo contiene hidrocarburos en la unidad de refrigeración;
por tanto, el mantenimiento y la
recarga deben estar a cargo exclusivamente de técnicos autorizados.
5.1 Limpieza periódica
El equipo debe limpiarse de forma regular:
• Muchas marcas de productos de limpieza para superficies de cocina contienen productos químicos que pueden
atacar o dañar los plásticos del aparato. Por ello, utilice un paño suave humedecido con agua tibia y una emulsión de jabón neutro para limpiar las
superficies internas y externas.
Page 74

www.electrolux.com
74
• revise y limpie periódicamente las jun-
• aclare y seque a fondo.
• Limpie el condensador (rejilla negra) y el
5.3 Descongelación del frigorífico
5.4 Descongelación del
congelador
El compartimento congelador de este
modelo es de tipo "no frost" y no produce
escarcha. Esto significa que, durante el
funcionamiento, no se forma escarcha ni
No utilice detergentes ni pastas
abrasivas para superficies externas, ya que podría dañar la pintura y el revestimiento anti huellas
del acero inoxidable.
tas de la puerta para mantenerlas limpias y sin restos.
compresor de la parte posterior del
aparato con un cepillo. Esa operación
mejorará el rendimiento del aparato y
reducirá el consumo eléctrico.
No mueva, dañe ni tire de los conductos o cables del interior del armario.
Tenga cuidado para no dañar el
sistema de refrigeración.
Después de la limpieza, vuelva a conectar
el aparato a la toma de red.
5.2 Periodos sin funcionamiento
Si el aparato no se utiliza durante un tiempo prolongado, tome las siguientes precauciones:
desconecte el aparato de la red
•
eléctrica;
• extraiga todos los alimentos;
• descongele (si así está previsto) y limpie
el aparato y todos sus accesorios.
• deje la puerta(s) entreabierta para prevenir olores desagradables.
Si va a mantener el armario en marcha,
solicite a alguien que lo inspeccione de
vez en cuando para evitar que los alimentos se echen a perder en caso de un corte de energía.
La escarcha se elimina automáticamente
del evaporador del frigorífico cada vez
que se detiene el compresor, durante el
funcionamiento normal. El agua de la descongelación se descarga a través de un
orificio hacia un recipiente especial situado en la parte posterior del aparato, sobre
el motor compresor, donde se evapora.
Es importante limpiar periódicamente el
orificio de salida del agua de descongelación situado en la mitad del canal del
compartimento frigorífico para evitar que
el agua se desborde y caiga sobre los alimentos del interior.
en las paredes internas del aparato ni sobre los alimentos.
La ausencia de escarcha se debe a la
continua circulación del aire frío en el interior del compartimento impulsado por un
ventilador controlado automáticamente.
Page 75

6. QUÉ HACER SI…
ESPAÑOL 75
ADVERTENCIA
Antes de realizar cualquier reparación, desenchufe el aparato de la
toma de corriente.
Sólo un electricista o un técnico
homologado debe llevar a cabo
cualquier reparación que no figure
en este manual.
Se producen ruidos durante el
funcionamiento normal (compresor, circulación del refrigerante).
Problema Posible causa Solución
El aparato no fun-
El aparato está apagado. Encienda el aparato.
ciona. La bombilla
no funciona.
El aparato no está correc-
tamente enchufado a la
toma de corriente.
El aparato no recibe sumi-
nistro eléctrico. No hay
tensión en la toma de corriente.
Enchufe el aparato correctamente a la toma de corriente.
Enchufe un aparato eléctrico diferente a la toma de
corriente.
Llame a un electricista cualificado.
La bombilla no funciona.
La bombilla está en espera.
Cierre y abra la puerta.
La bombilla es defectuosa. Consulte la sección “Cam-
bio de la bombilla”.
El compresor funciona continuamen-
La temperatura no se ha
ajustado correctamente.
Seleccione una temperatura más alta.
te.
La puerta no está bien ce-
rrada.
La puerta se ha abierto
con excesiva frecuencia.
Consulte la sección “Cierre
de la puerta”.
No mantenga abierta la
puerta más tiempo del necesario.
La temperatura de los ali-
mentos es demasiado alta.
Deje que la temperatura de
los alimentos descienda a
la temperatura ambiente
antes de guardarlos.
La temperatura ambiente
es demasiado alta.
El agua fluye por la
placa posterior del
frigorífico.
Durante el proceso de
descongelación automática, el hielo se descongela
Reduzca la temperatura
ambiente.
Es correcto.
en la placa posterior.
El agua fluye al interior del frigorífico.
La salida de agua está
obstruida.
Limpie la salida de agua.
Page 76

www.electrolux.com
76
Problema Posible causa Solución
Los alimentos impiden que
El agua fluye hacia
el suelo.
La temperatura del
aparato es demasiado baja.
La temperatura del
aparato es demasiado alta.
Se han guardado muchos
La temperatura del
frigorífico es demasiado alta.
La temperatura del
congelador es demasiado alta.
el agua fluya al colector.
El agua de la descongelación no fluye hacia la bandeja de evaporación situada sobre el compresor.
El regulador de temperatura no se ha ajustado correctamente.
El regulador de temperatura no se ha ajustado correctamente.
alimentos al mismo tiempo.
No hay circulación de aire
frío en el aparato.
Los alimentos están demasiado juntos.
Asegúrese de que los alimentos no entran en contacto con la placa posterior.
Fije la salida de agua de
descongelación a la bandeja de evaporación.
Seleccione una temperatura más alta.
Seleccione una temperatura más baja.
Guarde menos productos
al mismo tiempo.
Compruebe que el aire frío
circula libremente en el
aparato.
Disponga los alimentos de
modo que el aire frío pueda
circular entre ellos.
6.1 Cambio de la bombilla
1
2
6.2 Cierre de la puerta
1.
Limpie las juntas de la puerta.
2.
Si es necesario, ajuste la puerta. Consulte "Instalación".
1.
Apague el aparato.
2.
Pulse el gancho trasero al tiempo que
desliza la tapa en la dirección de la
flecha.
3.
Cambie la bombilla por otra de la
misma potencia y diseñada específicamente para aparatos domésticos
(la potencia máxima se indica en la
tapa de la bombilla).
4.
Deslice la cubierta de la bombilla en
su posición original.
5.
Encienda el aparato.
6.
Abra la puerta. Compruebe que la
bombilla se enciende.
3.
Si es necesario, cambie las juntas defectuosas. Póngase en contacto con
el servicio técnico.
Page 77

7. INSTALACIÓN
ESPAÑOL 77
ADVERTENCIA
Lea atentamente la "Información
sobre seguridad" para garantizar
su propia seguridad y el correcto
funcionamiento del electrodoméstico antes de instalar el electrodoméstico.
7.1 Colocación
Instale el aparato en un punto en el que la
temperatura ambiente se corresponda
con la clase climática indicada en la placa
de datos técnicos del aparato:
Clase
Temperatura ambiente
climática
SN +10°C a + 32°C
N +16°C a + 32°C
ST +16°C a + 38°C
T +16°C a + 43°C
7.3 Puerta reversible
7.2 Conexión eléctrica
Antes de conectar el aparato, compruebe
que el voltaje y la frecuencia que aparecen en la placa de datos técnicos se corresponden con el suministro de la vivienda.
El aparato debe tener conexión a tierra. El
enchufe del cable de alimentación se suministra con un contacto para tal fin. Si la
toma de red de la vivienda carece de conexión a tierra, conecte el aparato a una
toma de tierra conforme con la normativa,
después de consultar a un electricista
profesional.
El fabricante rechaza toda responsabilidad si no se toman las precauciones antes indicadas.
Este aparato es conforme con las directivas de la CEE.
La puerta del aparato se abre hacia la derecha. Si desea abrir la puerta hacia la izquierda, siga estas instrucciones antes de
instalar el aparato:
• Afloje el pasador superior y extraiga el
separador.
• Retire el pasador superior y la puerta
superior.
• Desatornille los pasadores (B) y los separadores (C).
C
B
C
Page 78

www.electrolux.com
78
7.4 Requisitos de ventilación
• Retire la puerta inferior.
• Afloje el pasador inferior.
En el lado opuesto:
• Instale el pasador inferior.
• Vuelva a colocar la puerta inferior.
• Vuelva a colocar los pasadores (B) y los
separadores (C) de la bisagra central en
el lado opuesto.
• Coloque la puerta superior.
• Apriete el separador y el pasador superior.
5 cm
min.
200 cm
2
min.
200 cm
7.5 Instalación del aparato
PRECAUCIÓN
Compruebe que el cable de alimentación de red pueda moverse
con facilidad.
x
El aire debe poder circular libremente por
la parte posterior del aparato.
2
Siga estos pasos.
Si es necesario, corte la cinta selladora adhesiva y péguela al aparato como se muestra en la figura.
x
Page 79

4 mm
ESPAÑOL 79
Taladre la tapa de la bisagra A como se
muestra en la figura.
Coloque las tapas A y A1 (en la bolsa de
accesorios) en la bisagra intermedia.
A1A
Instale el aparato en el hueco.
Empuje el aparato en el sentido de la flecha
(1) hasta que la cubierta de la separación
superior haga tope contra el mueble de co-
2
cina.
Empuje el aparato en el sentido de la flecha
(2) contra el mueble en el lado opuesto de
la bisagra.
1
Ajuste el aparato en el hueco.
Asegúrese de que haya una distancia de
44 mm entre el aparato y el borde delantero del mueble.
La tapa de la bisagra inferior (incluida en la
bolsa de accesorios) garantiza que la separación entre el aparato y el mueble de cocina sea la adecuada.
Asegúrese de que quede un espacio de 4
mm entre el aparato y el mueble.
Abra la puerta. Coloque la tapa de la bisagra inferior en su lugar.
44 mm
Page 80

www.electrolux.com
80
Fije el aparato al hueco con cuatro tornillos.
I
I
Retire la parte correcta de la tapa de la bisagra (E). No olvide extraer la pieza DX, en
el caso de la bisagra derecha, y la pieza SX
en el caso contrario.
Fije las tapas (C, D) a las lengüetas y a los
orificios de la bisagra.
Instale la rejilla de ventilación (B).
C
Fije las tapas (E) a la bisagra.
D
E
E
B
Page 81

ESPAÑOL 81
Si el aparato debe conectarse lateralmente
con la puerta del mueble de cocina:
1.
Afloje los tornillos y las abrazaderas de
sujeción (H).
2.
Retire las abrazaderas (H).
3.
Vuelva a apretar los tornillos.
H
H
Desconecte las piezas (Ha), (Hb), (Hc) y
(Hd).
ca. 50 mm
ca. 50 mm
Instale la pieza (Ha) en el lado interno del
mueble de cocina.
90°
21 mm
90°
21 mm
Page 82

www.electrolux.com
82
Hc
Ha
8 mm
Hb
Empuje la pieza (Hc) contra la pieza (Ha).
Abra la puerta del aparato y la puerta del
mueble de cocina en un ángulo de 90°.
Introduzca el cuadrado pequeño (Hb) en la
guía (Ha).
Coloque juntas la puerta del aparato y la
puerta del mueble de cocina y marque los
orificios.
Ha
8 mm
K
Quite los soportes y ponga una marca a
una distancia de 8 mm desde el borde exterior de la puerta en la que se debe colocar el clavo (K).
Ha
Page 83

Hb
ESPAÑOL 83
Vuelva a colocar el cuadrado pequeño en
la guía y fíjelo con los tornillos suministrados.
Alinee las puertas del mueble de cocina y
del aparato mediante el ajuste de la pieza
(Hb).
Hb
Presione la pieza (Hd) contra la pieza (Hb).
Hd
Finalmente, compruebe que:
• Todos los tornillos están apretados.
8. RUIDOS
Durante el funcionamiento normal del
aparato suelen producirse ciertos ruidos
(compresor, circulación del refrigerante).
OK
• La cinta selladora se ha fijado con firmeza al armario.
• La puerta abre y cierra correctamente.
SSSRRR!
CLICK!
HISSS!
BRRR!
CRACK!
BLUBB!
Page 84

www.electrolux.com
84
CLICK!
BRRR!
BLUBB!
CLICK!
BRRR!
BLUBB!
HISSS!
HISSS!
Page 85

ESPAÑOL 85
SSSRRR!
9. DATOS TÉCNICOS
Medidas de la cavidad
Altura 1780 mm
Anchura 560 mm
Profundidad 550 mm
Tiempo de estabilización 21 h
Voltaje 230-240 V
Frecuencia 50 Hz
La información técnica se encuentra en la
placa de características, situada en el la-
SSSRRR!
CRACK!
CRACK!
do interior izquierdo del aparato, y en la
etiqueta de consumo energético.
10. ASPECTOS MEDIOAMBIENTALES
Ayude a proteger el medio ambiente y la
Recicle los materiales con el símbolo
Coloque el material de embalaje en los
contenedores adecuados para su
reciclaje.
.
salud pública, así como a reciclar
residuos de aparatos eléctricos y
electrónicos. No deseche los aparatos
marcados con el símbolo
junto con los
Page 86

www.electrolux.com
86
residuos domésticos. Lleve el producto a
su centro de reciclaje local o póngase en
contacto con su oficina municipal.
Page 87

ESPAÑOL 87
Page 88

www.electrolux.com/shop
222367331-A-152013
 Loading...