

Electrolux EI12BF25US Owner’s Manual
EN REFRIGERATOR/FREEZER
FR RÉFRIGÉRATEUR/CONGÉLATEUR
ES FRIGORÍFICO/CONGELADOR
USE AND CARE GUIDE
GUIDE D’UTILISATION ET D’ENTRETIEN
GUÍA DE USO Y MANTENIMIENTO
A14363702 September 2018
2
Finding Information
Please read and save this
guide
Thank you for choosing Electrolux, our
new premium brand in home appliances.
This Use & Care Guide is part of our
commitment to customer satisfaction and
product quality throughout the service life of
your new appliance.
Keep a record for quick
reference
Purchase date
Electrolux model number
Electrolux serial number
NOTE
Registering your product with Electrolux
enhances our ability to serve you.
You can register online at www.
electroluxappliances.com or by sending
your Product Registration Card in the
mail.
Questions?
For toll-free telephone support in the U.S.
and Canada: 1-877-4ELECTROLUX (1877-435-3287)
For online support and product information visit
http://www.electroluxappliances.com
Table of contents
Finding Information .................................2
Safety .....................................................3
Feature Overview ....................................5
Installation ..............................................6
Reversing the Door .................................7
Controls ................................................13
Storage Features ..................................14
Storing Food and Saving Energy ..........15
Normal Operating Sounds ....................16
Care and Cleaning ................................17
Common Solutions for Concerns ..........19
Warranty ...............................................21
Installation Checklist
Doors
Door seals completely to
cabinet on all sides
Freezer door is level across the
top
Leveling
Refrigerator is level, side-to-side
and tilted 1/4 inch (6 mm) frontto-back
Cabinet is sitting solid on all
corners
Electrical Power
House power turned on
Refrigerator plugged in
Final Checks
Shipping material removed
Refrigerator and freezer
temperatures set
Important safety instructions
Safety
3
Safety Precautions
Do not attempt to install or operate your unit
until you have read the safety precautions
in this manual. Safety items throughout this
manual are labeled with a Danger, Warning,
or Caution based on the risk type.
Definitions
This is the safety alert symbol. It is
used to alert you to potential personal
injury hazards. Obey all safety messages
that follow this symbol to avoid possible
injury or death.
DANGER
DANGER indicates an imminently
hazardous situation which, if not
avoided, will result in death or serious
injury.
WARNING
WARNING indicates a potentially
hazardous situation which, if not
avoided, could result in death or serious
injury.
CAUTION
CAUTION indicates a potentially
hazardous situation which, if not
avoided, may result in minor or
moderate injury.
IMPORTANT
Indicates installation, operation, or
maintenance information which is
important but not hazard-related.
General Safety
WARNING
Please read all safety instructions before
using your new refrigerator.
• Do not store or use gasoline or other
flammable liquids near this or any
other appliance. Read product labels
for warnings regarding flammability
and other hazards.
• Do not operate the refrigerator in the
presence of explosive fumes.
• Avoid contact with any moving parts
of the automatic ice maker.
• Remove all staples from the carton to
avoid injury. Staples can also damage
finishes if they come in contact with
other appliances or furniture.
Child Safety
Packing Materials:
• Packing cartons covered with rugs,
bedspreads, plastic sheets, or stretch
wrap may become airtight chambers
and can quickly cause suffocation.
• Destroy or recycle the product’s
carton, plastic bags, and any
other exterior wrapping material
immediately after the refrigerator is
unpacked. Children should never play
with these items.
Child Entrapment and Suffocation:
• These problems are not limited to the
past. Whether junked, abandoned,
or temporarily stored (even for a few
hours), unattended refrigerators and
freezers are dangerous. Please take
the precautions listed below.
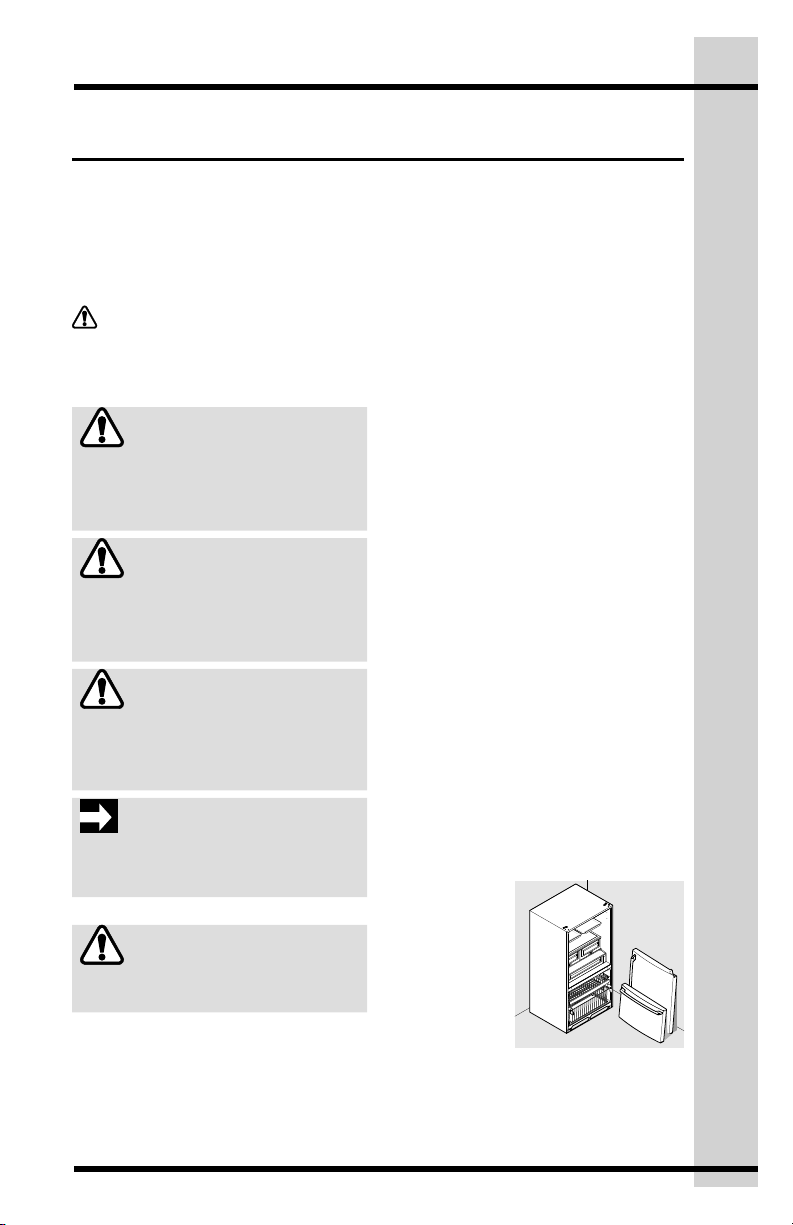
Proper Disposal of Refrigerators/
Freezers
We strongly encourage responsible
appliance recycling/disposal methods.
Check with your utility company or
visit www.energystar.gov/recycle for
more information on recycling your old
refrigerator.
Before you recycle or dispose of your old
refrigerator/freezer:
• Remove
the doors.
• Leave the
shelves and
baskets in
place so
children
may not
easily climb
inside.
• Have
refrigerant and compressor oil
removed by a qualified service
technician.
4
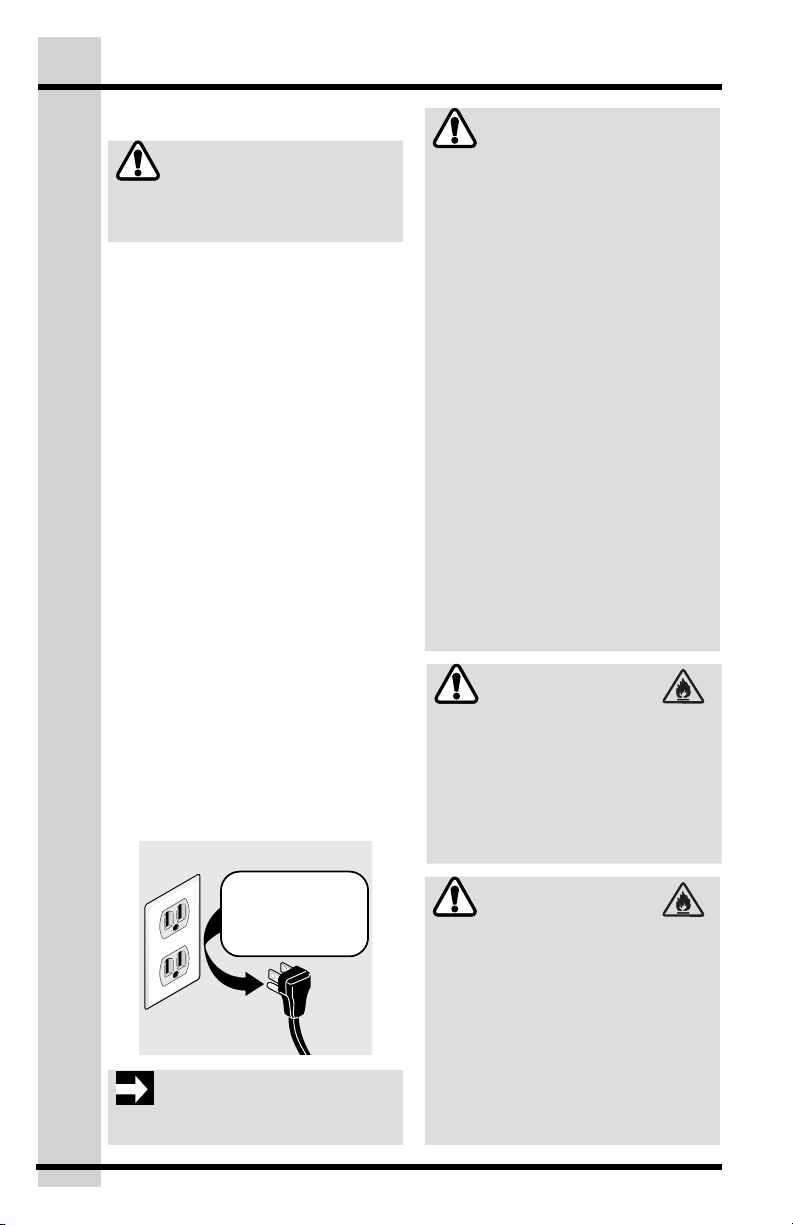
Grounding type wall receptacle
Power cord with
3-prong grounded plug
Do not, under
any circumstances,
cut, remove,
or bypass the
grounding prong.
Safety
Electrical information
WARNING
You must follow these guidelines to
ensure that your refrigerator’s safety
mechanisms are operating correctly.
• The refrigerator must be plugged into
its own dedicated 115 Volt, 60 Hz,
AC-only non-GFCI electric outlet. The
power cord of the appliance is equipped
with a three-prong grounding plug for
your protection against electrical shock
hazards. It must be plugged directly
into a properly grounded three-prong
receptacle. The receptacle must be
installed in accordance with local codes
and ordinances. Consult a qualified
electrician. Do not use an extension
cord or adapter plug.
• If the power cord is damaged, it should
be replaced by the manufacturer,
service technician, or a qualified person.
• Never unplug the refrigerator by
pulling on the power cord. Always
grip the plug firmly and pull straight
out from the receptacle to prevent
damaging the power cord.
• To avoid electrical shock, unplug the
refrigerator before cleaning and before
replacing a light bulb or LED light.
• Performance may be affected if
the voltage varies by 10% or more.
Operating the refrigerator with
insufficient power can damage the
compressor. Such damage is not
covered under your warranty.
• Do not plug the unit into an outlet
controlled by a wall switch or pull
cord to prevent the refrigerator from
being turned off accidentally.
CAUTION
RISK OF FIRE OR ELECTRIC SHOCK!
During transportation and installation of
the appliance, be certain that none of
the components of the refrigerant circuit
become damaged.
• Avoid open flames and sources of
ignition.
• Thoroughly ventilate the room in
which the appliance is situated.
• It is dangerous to alter the
specifications or modify this product
in any way. Any damage to the cord
may cause a short circuit, fire, and/or
electric shock.
• The power cord must not be
lengthened.
• Make sure that the power plug is not
crushed or damaged. A crushed or
damaged power plug may overheat
and cause a fire.
• Make sure that you can access the
main plug of the appliance.
• Do not pull the main cable.
• If the power plug socket is loose, do not
insert the power plug. There is a risk of
electric shock or fire.
• You must not operate the appliance
without the interior lighting lamp cover.
DANGER
DANGER Risk of fire or explosion.
Flammable refrigerant used. Do not use
mechanical devices to defrost refrigerator.
Do not puncture refrigerant tubing.
DANGER Risk of fire or explosion.
Flammable refrigerant used. To be
repaired only by trained service personnel.
Do not puncture refrigerant tubing.
To turn off power to your refrigerator, unplug
the power cord from the wall outlet.
IMPORTANT
CAUTION
CAUTION Risk of fire or explosion.
Flammable refrigerant used. Consult
repair manual/owner’s guide before
attempting to service this product. All
safety precautions must be followed.
CAUTION Risk of fire or explosion.
Dispose of property in accordance with
federal or local regulations. Flammable
refrigerant used.
CAUTION- Risk of fire or explosion
due to puncture of refrigerant tubing.
Follow handling instructions carefully.
Flammable refrigerant used.
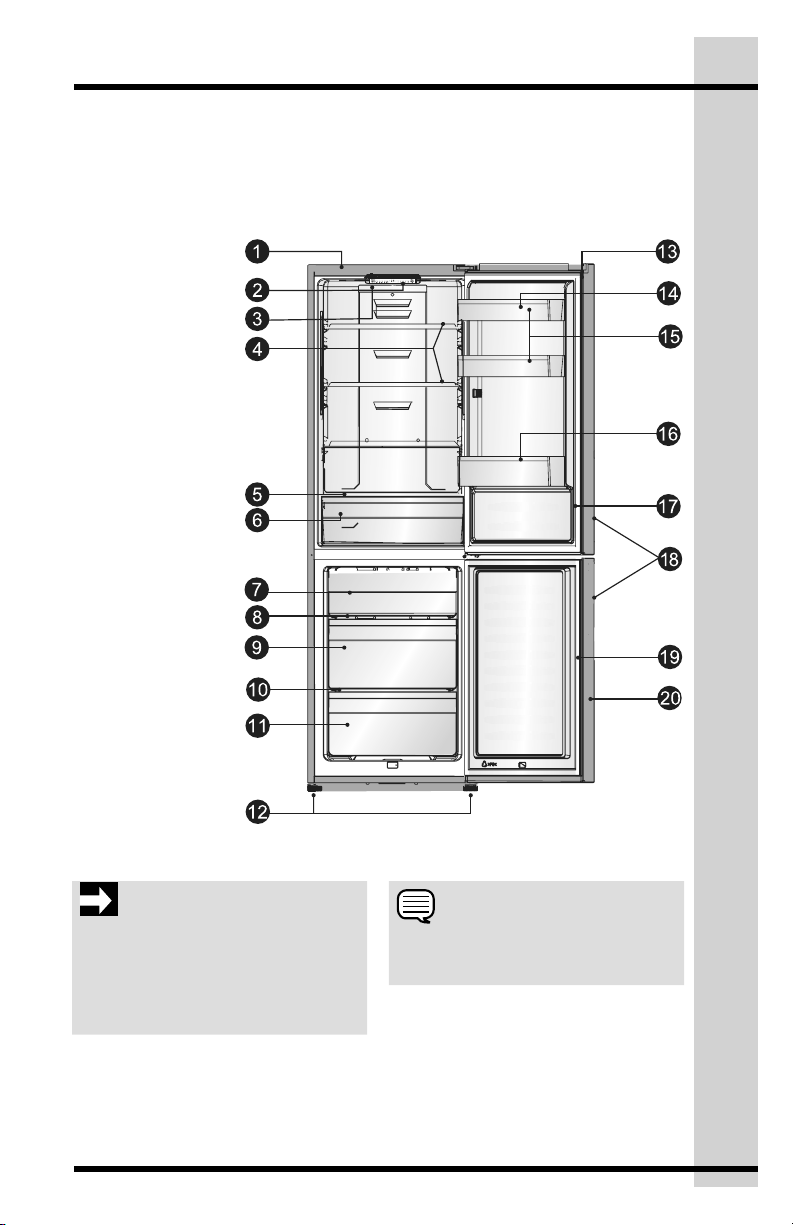
Understanding features and terms
Your Electrolux refrigerator is designed for optimal convenience and storage flexibility.
The illustration below is provided to assist you with familiarizing yourself with product
features and terminology.
1. Cabinet
2. Display Board
3. LED Light
4. Glass Shelves
5. Crisper Cover
6. Fruit and
Vegetable Crisper
7. Upper Freezer
Drawer
8. Upper Freezer
Glass Shelf
9. Middle Freezer
Drawer
10. Middle Freezer
Glass Shelf
11. Lower Freezer
Drawer
12. Adjustable Bottom
Feet
13. Fridge Door
14. Egg Tray
15. Middle Fridge
Door Shelves
16. Lower Fridge Door
Shelf
17. Fridge Door Seal
18. Pocket Handles
19. Freezer Door Seal
20. Freezer Door
5Feature Overview
IMPORTANT
If large quantities of food are to be
stored in the freezer, all the freezer
drawers (except the freezer lower
drawer) can be taken out of the
appliance and food stacked directly on
the freezer shelves or in the freezer.
NOTE
Features may vary according to model.
6
Installation
This Use & Care Guide provides general
installation and operating instructions
for your model. We recommend using a
service or kitchen contracting professional
to install your refrigerator. Use the
refrigerator only as instructed in this Use &
Care Guide. Before starting the refrigerator,
follow these important first steps.
Location
• Choose a place that is near a
grounded, non-GFCI, electrical outlet.
Do Not use an extension cord or an
adapter plug.
• If possible, place the refrigerator out
of direct sunlight and away from the
range, dishwasher, or other heat
sources.
• The refrigerator must be installed on
a floor that is level and strong enough
to support a fully loaded refrigerator.
• Consider water supply availability for
models equipped with an automatic
ice maker.
CAUTION
DO NOT install the refrigerator where
the temperature will drop below 55°F
(13°C) or rise above 110°F (43°C).
The compressor will not be able to
maintain proper temperatures inside the
refrigerator.
DO NOT block the toe grille on the lower
front of your refrigerator. Sufficient air
circulation is essential for the proper
operation of your refrigerator.
IMPORTANT
It is necessary to have good ventilation
around the refrigerator to allow for the
dissipation of heat, high efficiency,
and low power consumption. For this
reason, sufficiently cleared space should
be available around the refrigerator. It
is advisable for there to be 3 inches
(75 mm) separating the back of the
refrigerator from the wall; at least 4
inches (100 mm) of space on its two
sides; a height of over 4 inches (100
mm) from its top and a clear space in
front to allow the doors to open 160°.
Door opening
Your refrigerator should be positioned
to allow easy access to a counter when
removing food. For best use of refrigerator
drawers and freezer baskets, the
refrigerator should be in a position where
both doors can be fully opened.
Leveling
The appliance should be level in order to
eliminate vibration. To make the appliance
level, it should be upright and both
adjusters should be in stable contact
with the floor. You can also adjust the
level by unscrewing the appropriate level
adjustment in the front (use your fingers or
a suitable socket driver).
Installation
Allow the following clearances for ease
of installation, proper air circulation, and
plumbing and electrical connections:
Sides & Top 4 inches (100 mm)
Back 3 inches (75 mm)
Reversing the Door
7
Door Reversal
The side on which the door opens can be
changed from the right side (as supplied) to
the left side if the installation site allows.
WARNING
When reversing the door, the appliance
must not be connected to the power
source. Ensure that the plug is removed
from the power source.
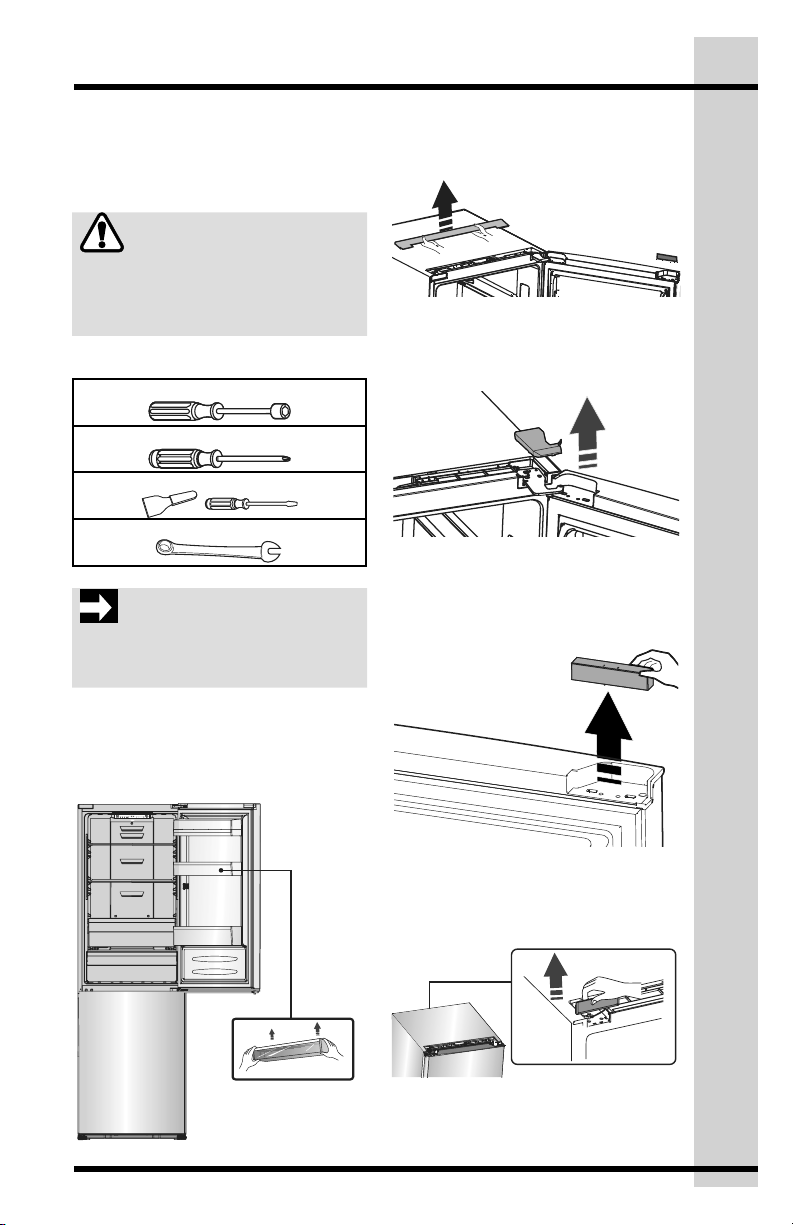
Tools you will need:
8 mm socket driver
Phillips screwdriver
Putty knife or thin-blade screwdriver
8 mm wrench
IMPORTANT
Door reversal kit included inside the unit
(top hinge cover, reed switch housing &
refrigerator door closer).
2 Pry off upper cover on top of unit
using putty knife and remove (see
Figure 1).
Figure 1
3 Remove the upper hinge cover (see
Figure 2).
Figure 2
4 Remove the reed switch magnet from
the corner of refrigerator door and set
aside (see Figure 3).
To reverse the door:
1 Remove door racks from inside of
refrigerator door.
Door
Racks
Figure 3
5 Lift up on reed switch cover and
remove from cabinet (see Figure 4).
Figure 4
 Loading...