

Electrolux E23CS75DSS1, E23CS75DSS0 Owner’s Manual

Use & Care
Sido By Sido
Guide
Guia de Uso y
Sido By Sido
Guide d'utiMisation
Side By Side
Cuidado
ge_ato_
et d'entretien
Re/_ige_a Lo__
241540100_eb_sxs_Use&Care_En.pmd 1 1/22/2004, 10:33 AM
Finding Information
IIII:::>LIIII!!!!!!!!!ASIIII!!!!!!!!!,IIII:::@IIII!!!!!!!!!AIII[::_ANDSAVIIII!!!!!!!!!,TIIIi""HSGUIIDIIII!!!!!!!!!,
[] [] [] [] [] [] [] [] [] [] [] [] [] [] [] [] [] [] [] [] [] []
Thank you for choosing EJectrolux, the new premium brand in home appliances.
This Use & Care Guide is part of our commitment to customer satisfaction and
product quality throughout the service life of your new refrigerator.
We view your purchase as the beginning of a relationship. To ensure our ability to
continue serving you, please use this page to record key product information.
MAKIIII!!!!!!!!!,AIIIi:::@IIII!!!!!!!!!,COIIII:::_DIII1:::::::'01111:::_QUIICKIIIRIIIEH!!!!!!!!!,IIh:::_IIh!!!!!!!!!,HClII'!!!!!!!!!,
[] [] [] [] [] [] [] [] [] [] [] [] [] [] [] [] [] [] [] [] [] []
Purchase Date
Electrolux Model Number
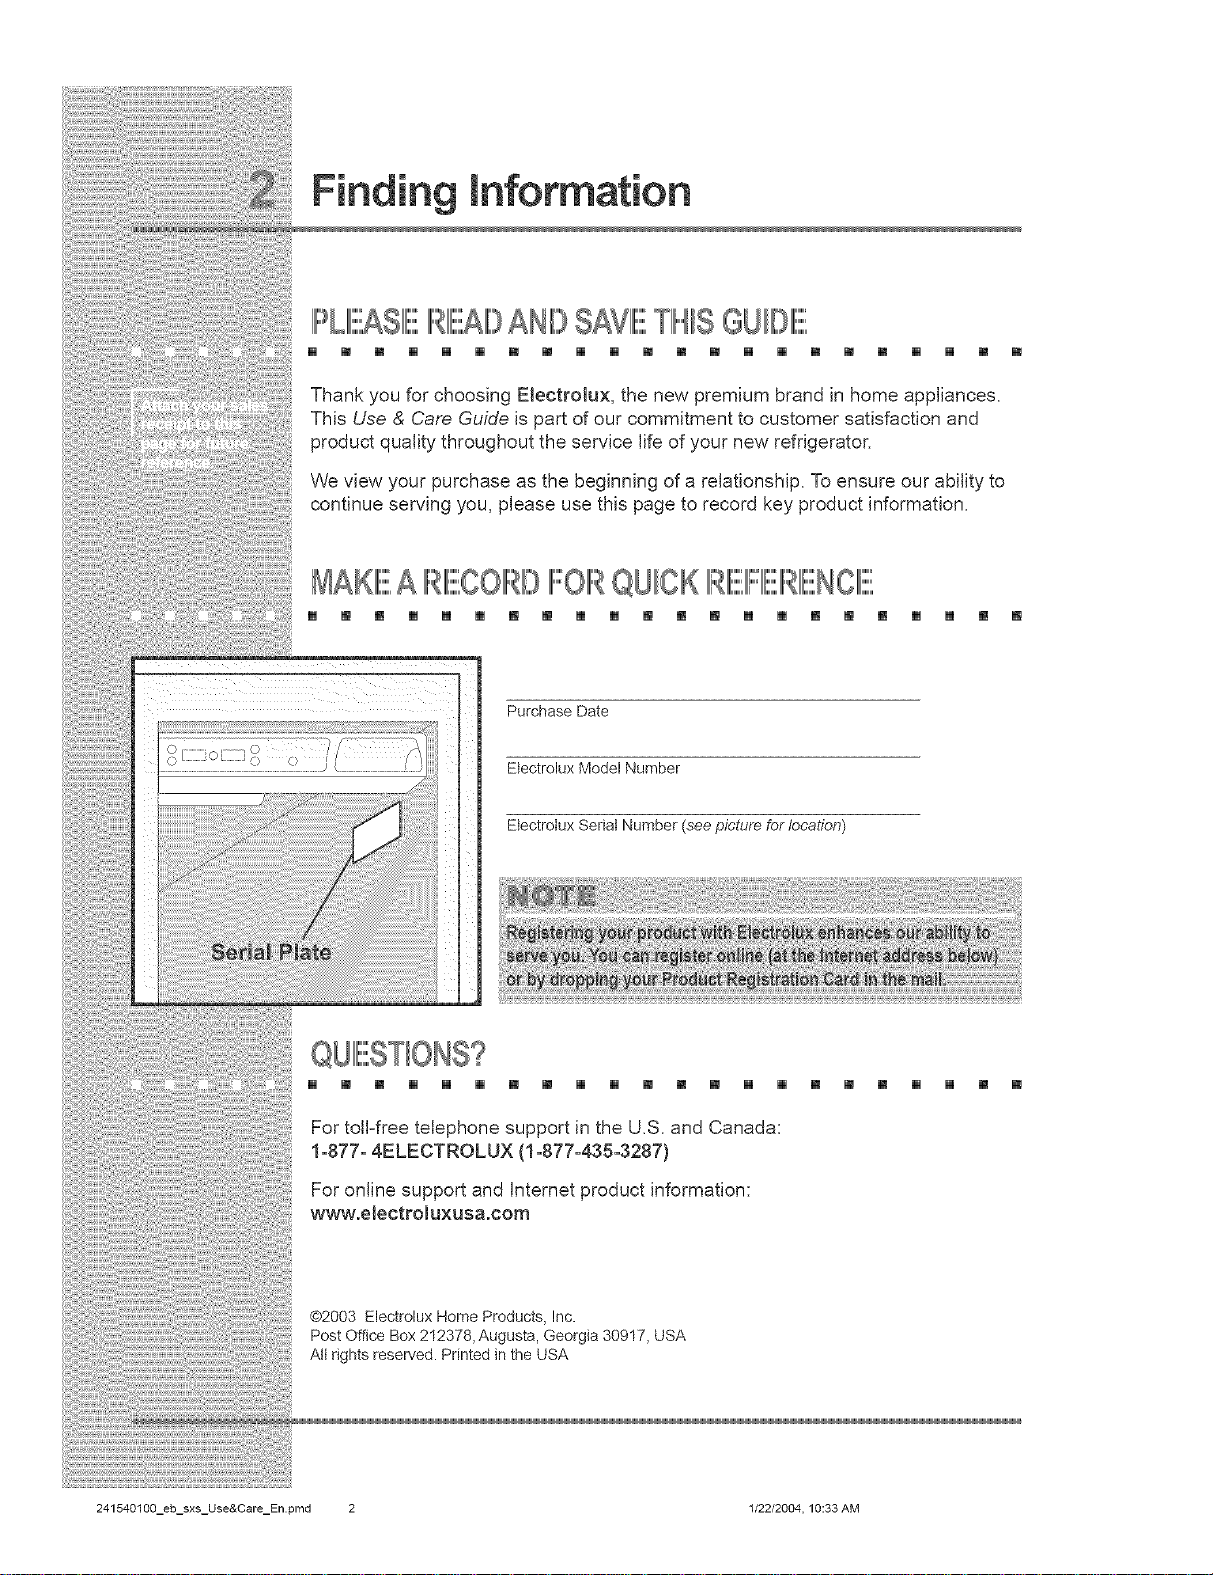
Etectrolux Serial Number (see picture Forlocation)
[] [] [] [] [] [] [] [] [] [] [] [] [] [] [] [] [] [] [] [] [] []
For toll=free telephone support in the U.S. and Canada:
1o877o4ELECTROLUX (1°877°435°3287)
For online support and Internet product information:
www.electroluxusa.com
@2003 Electrolux Home Products, Inc.
Post Office Box 212378, Augusta, Georgia 30917, USA
All rights reserved. Printed in the USA
241540100_eb_sxs_Use&Care_En.pmd 2 1/22/2004, 10:33 AM
Finding information
TABLEOFCONT NTS
[] [] m m [] [] [] m m [] [] m m m [] [] m m m [] [] m
Finding Information ........................................... 2
Please Read And Save This Guide ................. 2
Make A Record For Quick Reference ............... 2
Questions? ...................................................... 2
Table Of Contents ............................................ 3
Safety ................................................................... 4
Important Safety Instructions ........................... 4
Electrical information ........................................ 5
RemovingTheDoors ..........................................fi
GettingThroughNarrowSpaces......................6
Connecting TheWaterSupply..........................9
AboutYourRefrigerator'sVVeterSupply..........9
Feature Overview .............................................. 11
Understanding Features And Terms ................ 1I
Controls &Settings ..........................................12
AHowingCoolingTimeBeforeUse.................12
SettingCoolingTemperatures..................... 12
System-MonitoringAlarms.............................14
TurningTheCoolingSystemOnAnd Off .......15
Storage Features...............................................16
CantileverShelves.........................................16
Drawers.................................................... 17
Doors..........................................................18
Accessories............................................. 19
Storing Food & Saving Energy........................29
IdeasForStoringFoods.................................29
IdeasForSavingEnergy............................ 30
NormalOperating Sounds & Sights ....____...31
UnderstandingThe SoundsYouMayHear 31
Care & Cleaning ............................................... 32
Protecting Your Investment ............................ 32
Care & Cleaning Tips ..................................... 33
Vacation & Moving Tips ................................. 33
Replacing Light Bulbs .............................. 34
Warranty information ........................................ 35
Solutions To Common ProNems .................... 36
Before You Call .............................................. 36
Automatic Ice & Water Dispenser ................... 20
Using The Dispenser .................................... 20
Using The Dispenser Control Panel ............... 2I
Priming The Water Supply System ................ 22
Ice Dispenser Operation & Care .................... 23
Changing The Filter .........................................26
LocatingTheWaterFilter...............................26
OrderingReplacementFilters........................26
ReplacingTheWaterFilter........................ 26
241540100_eb_sxs_Use&Care_En.pmd 3 1/22/2004, 10:33 AM
IMIIII::::>OIIII:::@TANTSAIIIF'IIII!!!!!!!!!,TYINSTIIIRUCT ONS
[] [] [] [] [] [] [] [] [] [] [] [] [] [] [] [] [] [] [] [] [] []
GeneralSafety
• Do not store or use gasoline, or other flammable liquids, near this or any
other appliance. Read product labels for warnings regarding flammability and
other hazards.
• Do not operate the refrigerator in the presence of explosive fumes.
• Avoid contact with any moving parts of the automatic ice maker.
• Remove all staples from the carton to avoid cut injuries. Staples can also
damage finishes if they come in contact with other appliances or furniture.
Child Safety
Packing Materials:
• Packing cartons covered with rugs, bedspreads, plastic sheets or stretch
wrap may become airtight chambers and can quickly cause suffocation.
• Destroy or recycle the product's carton, plastic bags, and any other exterior
wrapping material immediately after the refrigerator is unpacked. Children
should never play with these items.
Child EntrapmentAnd Suffocation:
These problems are not limited to the past. Whether
junked, abandoned or temporarily stored (even for a
few hours), unattended refrigerators and freezers are
dangerous. Please take the precautions listed below.
ProperDisposalOf RefrigeratorsAnd Freezers
Before you throw away your old refrigerator/freezer:
• Remove the doors.
• Leave the shelves in place so children may not easily
cJimbinside.
• Have refrigerant removed by a qualified service
technician.
241540100_eb_sxs_Use&Care_En.pmd 4 1/22/2004, 10:33 AM

Safety
IELIIII!!!!!!!!!,CTIIII::: IICALINIIII::OIIII::: MAT ON
[] [] [] [] [] [] [] [] [] [] [] [] Bl [] [] [] [] [] [] [] [] []
The refrigerator must be plugged into its own dedicated 115 Vomt,60 Hz.,
AC-onmy electric outlet. The power cord of the appliance is equipped with a
three=prong grounding plug for your protection against electrical shock
hazards, it must be plugged directly into a properly grounded three=prong
receptacle. The receptacle must be installed in accordance with local codes
and ordinances. Consult a qualified electrician. Do not use an extension
cord or adapter pmug.
if the power cord is damaged, it should be replaced by
the manufacturer, service technician or a qualified
person to prevent any risk.
Never unplug the refrigerator by pulling on the power
cord. Always grip the plug firmly, and pql straight out
from the receptacle to prevent damaging the power
cord.
Unplug the refrigerator before cleaning and before
replacing a light bulb to avoid electrical shock.
Performance may be affected if the voltage varies by
10% or more. Operating the refrigerator with
insufficient power can damage the compressor. Such
damage is not covered under your warranty.
Do not plug the unit into an outlet controlled by a wall
switch or pull cord to prevent the refrigerator from being turned off
accidentally.
Avoid connecting refrigerator to a Ground Fault Interruptor (GF!) circuit.
Power cord with
3=prong grounded plug
241540100_eb_sxs_Use&Care_En.pmd 5 1/22/2004, 10:33 AM
Removing The Doors
[] [] [] [] [] [] [] [] [] [] [] [] [] [] [] [] [] [] [] [] []
if your refrigerator will not fit through an entrance area, you can reduce its size by
removing the doors. Check first by measuring the entrance.
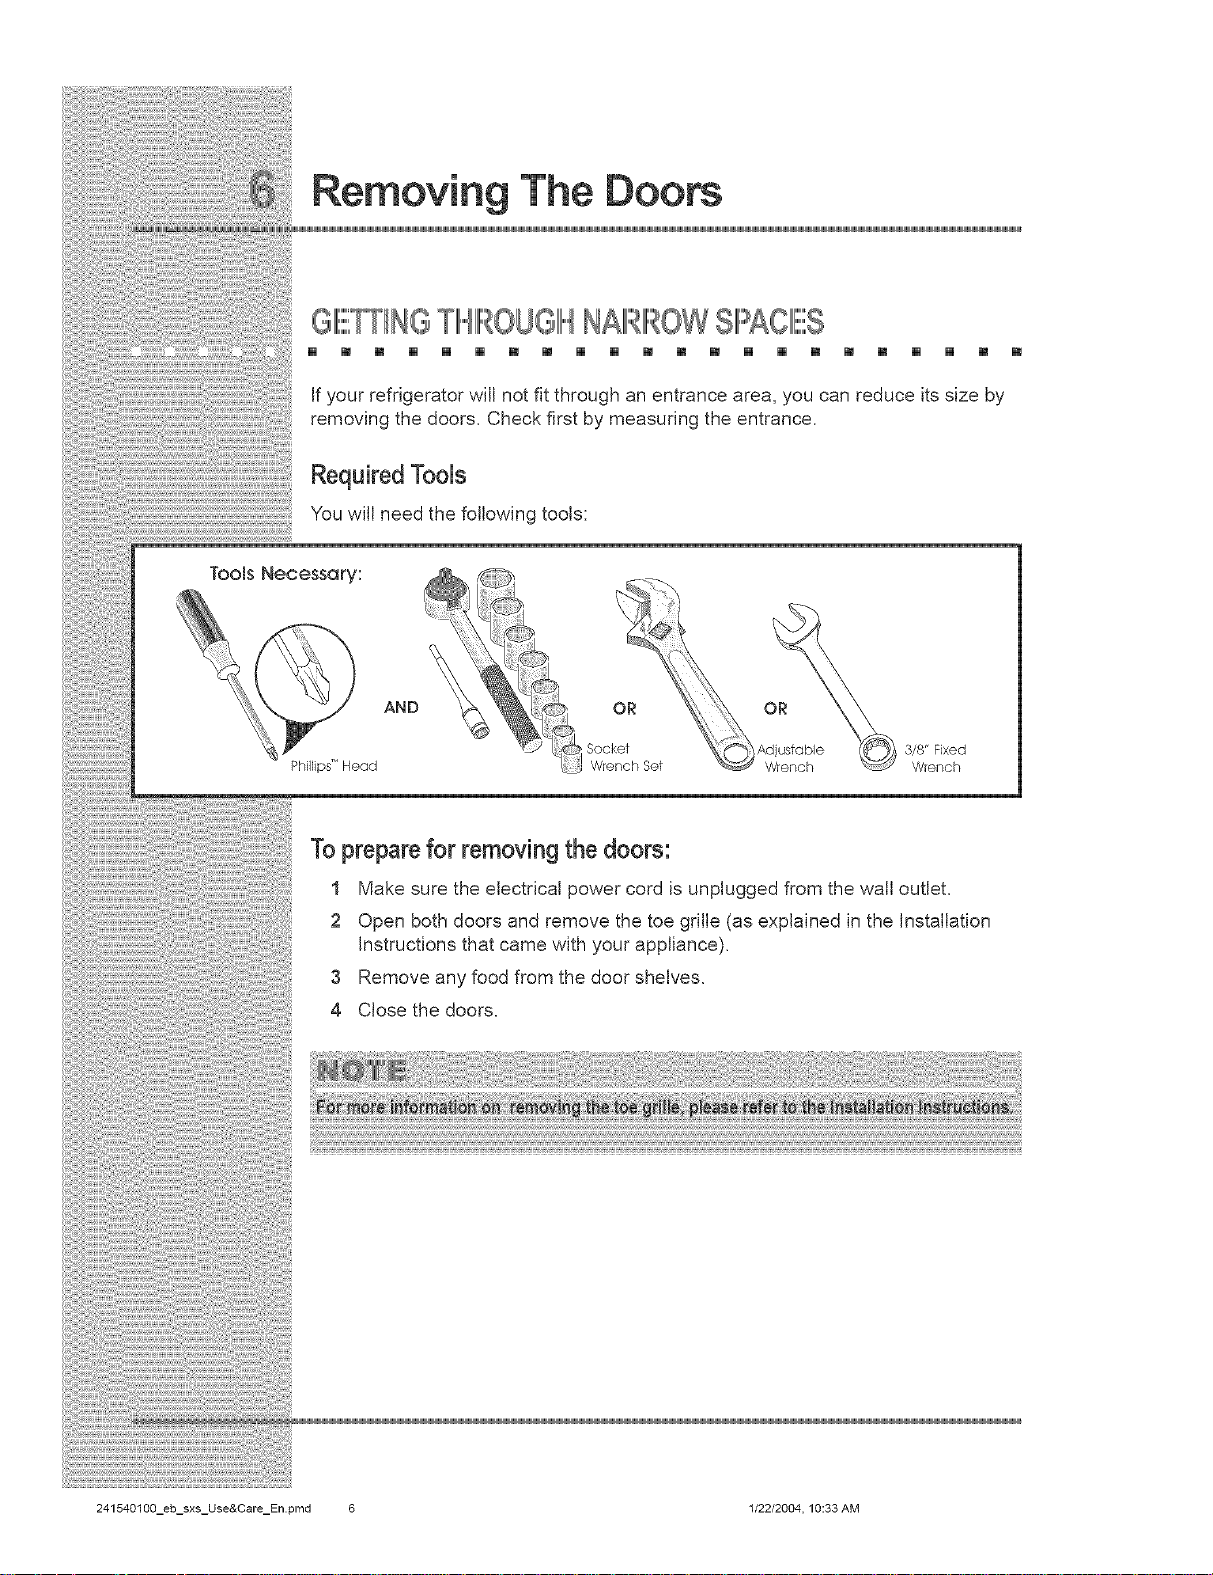
RequiredTools
You will need the following tools:
Tools Necessary:
TIIII""HI::: OUGII"" NAIIII::: IIII:::@,OWSIIII:::>AOlIII!!!!!!!!!,S
AND
Phillips'_'Head Wrench
3/8" Fixed
To prepare for removing the doors:
1 Make sure the electrical power cord is unplugged from the wall outlet.
2 Open both doors and remove the toe grille (as explained in the Installation
Instructions that came with your appliance).
3 Remove any food from the door shelves.
4 Close the doors.
241540100_eb_sxs_Use&Care_En.pmd 6 1/22/2004, 10:33 AM
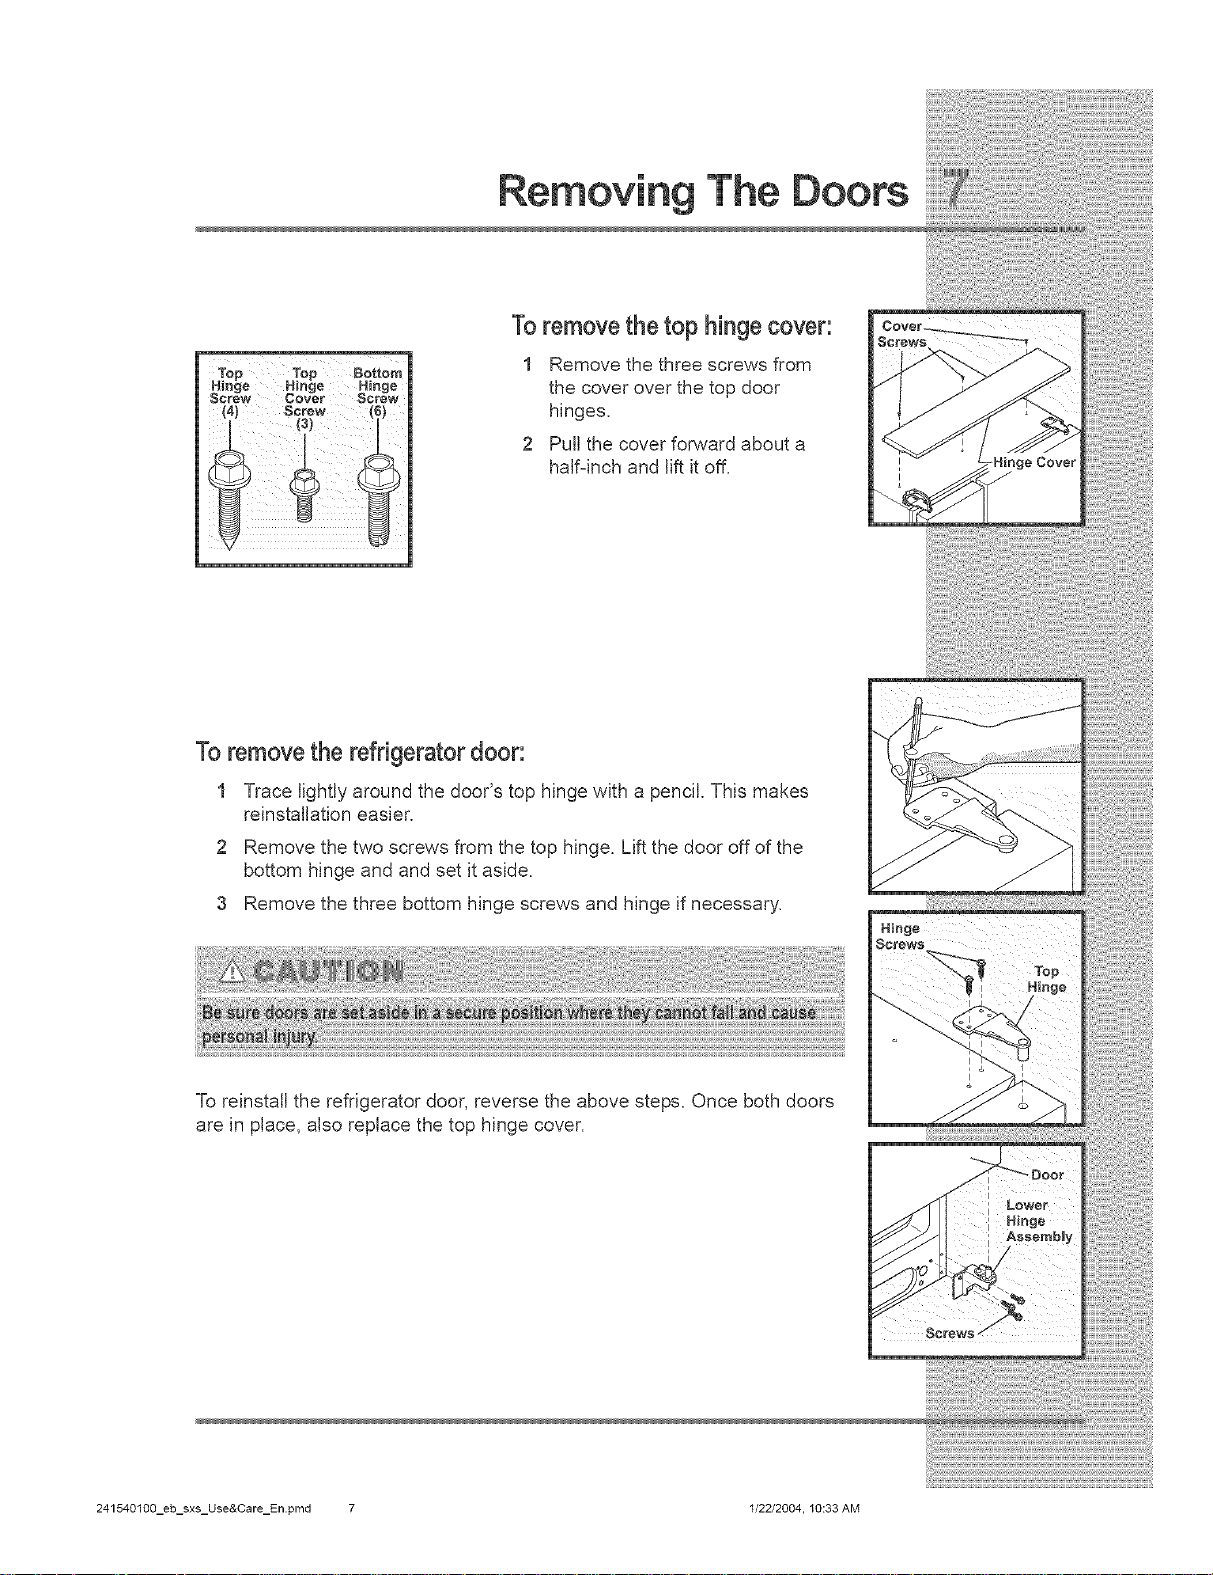
Removing The Doors
To remove the refrigerator door:
To remove the top hinge cover:
1 Remove the three screws from
the cover over the top door
hinges.
2 Pull the cover forward about a
half4nch and lift it off.
1 Trace lightly around the door's top hinge with a pencil. This makes
reinstallation easier.
2 Remove the two screws from the top hinge. Lift the door off of the
bottom hinge and and set it aside.
3 Remove the three bottom hinge screws and hinge if necessary.
To reinstall the refrigerator door, reverse the above steps. Once both doors
are in place, also replace the top hinge cover.
241540100_eb_sxs_Use&Care_En.pmd 7 1/22/2004, 10:33 AM
TO DISCONNECT
Press oater sleeve
reward connecter
2 Pu_mt_ remove tube
Removing The Doors
To remove the freezer door:
1 Detach the multi-wire cable connector located above the top hinge.
Grasp both sides of the connector firmly and pull apart.
2 Trace lightly around the hinge with a pencil.
This makes reinstallation easier.
3 Detach the water tube from the connector located below the freezer
door. The connector releases when you press its outer sleeve inward.
TO CONNECT
touches face of co_ne¢t_r
Assembly
Multi-Wire
H_nge
, Screws
I
i
4 Remove the screws from the top hinge and
pull the multi=wire cable through it. Lift the
door off of the bottom hinge,
5 Remove the three bottom hinge screws and hinge if necessary.
6 Lay the door on its side to avoid damage to the water tube extending
from the bottom hinge.
To reinstall the freezer door, reverse the above steps. Once both doors
are in place, also replace the top hinge cover (see Page 7).
241540100_eb_sxs_Use&Care_En.pmd 8 1/22/2004, 10:33 AM

Connecting The Water SuppJy
ABOUTYOUR WATIIE,IIIRSUIIIDIIII:::>LY
[] [] [] m [] [] [] [] m [] [] m m m [] [] [] m m [] []
The automatic ice & water dispenser on your refrigerator requires a permanent
water supply to function correctly. During installation, you (or a service
professional) establish this water supply by connecting a copper tube from your
household water system to a valve at the rear of the refrigerator.
You may have already followed the directions in the Installation Instructions to
connect the water supply. This information is repeated here for future reference if
you need to relocate your refrigerator.
What you will need:
• Access to a cold water line with pressure of 20z100 psi.
• Copper tubing with %dnch (6.4mm) OD. Length for this tubing is the distance
from the rear of the refrigerator to your household water supply line plus 7
feet (2.1 meters).
• A shut_off valve for the connection between your household water line and
the refrigerator supply line.
Do not use a self-piercing shut-off valve.
• A compression nut and ferrule (sleeve) for the water supply connection at the
rear of your refrigerator.
241540100_eb_sxs_Use&Care_En.pmd 9 1/22/2004, 10:33 AM

Connecting The Water Supply
Toconnect the water supply to the rear of your refrigerator:
1 Ensure that the refrigerator is not plugged in.
2 Flush the supply line until water is clear by placing the end of the copper tube
in a sink or bucket and opening the shut=off valve.
3 Unscrew the plastic cap from the water valve inlet at
the rear of your refrigerator. Discard the cap.
4 Slide the brass compression nut, then the ferrule
(sleeve) onto copper tube.
5 Push the copper tube into water valve inlet as far as it
will go (1/4 inch).
6 Slide the ferrule (sleeve) into valve and finger=tighten
the compression nut onto valve. Tighten another half
turn with a wrench. Do not over=tighten,
7 Secure the copper tube to your refrigerator's rear panel
with a steel clamp and screw (see illustration).
8 Coil the excess copper tubing (about 2½ turns) behind
your refrigerator as shown. Arrange coiled tubing to
avoid vibration or wear against other surfaces.
9 Open water supply shut=off valve and tighten any
connections that leak.
241540100_eb_sxs_Use&Care_En.pmd 10 1/22/2004, 10:33 AM
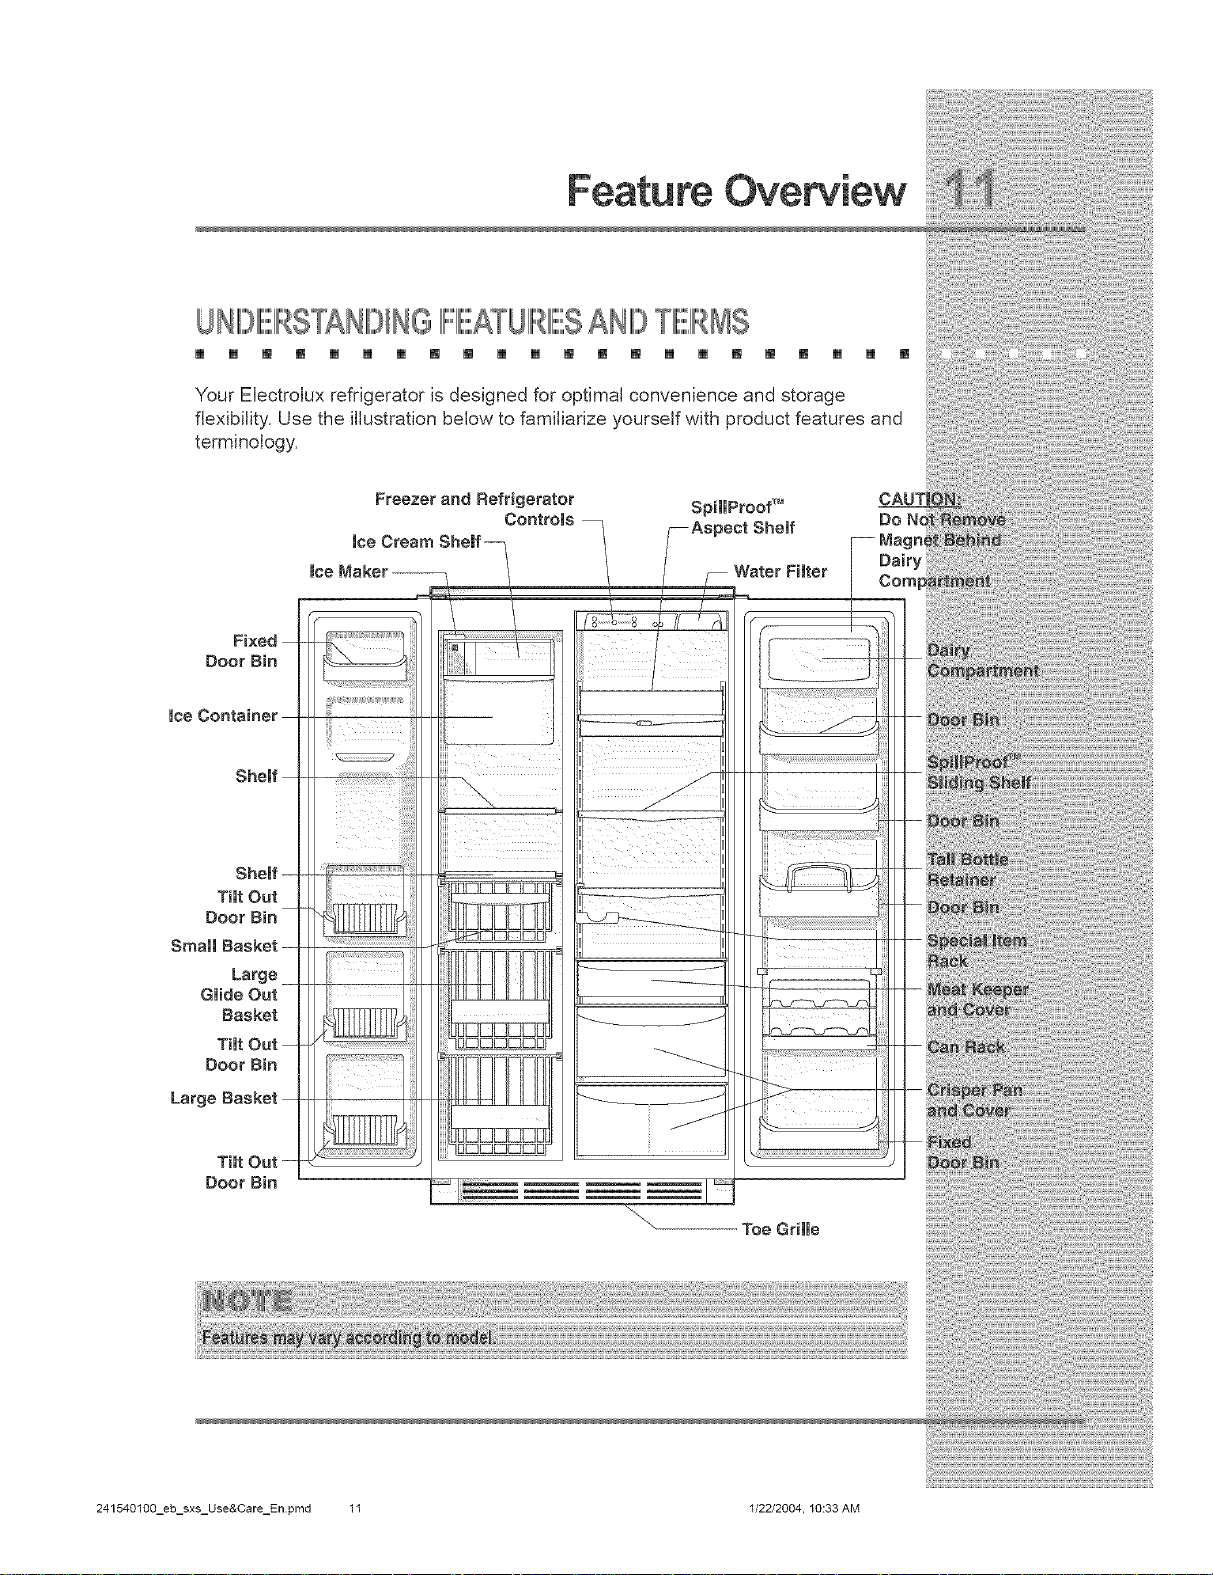
Feature Overview
UNIIDIIII!!!!!!!!!,IIII:::_STANIII_/NGIIII:::::::'IIII!!!!!!!!!,ATUIIIi:::_IIIi!!!!!!!!!,SANDTIIIE,IIII:::_MS
[] [] [] [] [] [] [] [] [] [] [] [] [] [] [] [] [] [] [] [] [] []
Your Electrolux refrigerator is designed for optima( convenience and storage
flexibi(ity. Use the illustration below to familiarize yourself with product features and
terminology,
Fixed
Door B(n
rose
Small
Large
Tilt Out
Door Bin
Large
Basket
Door Bin
241540100_eb_sxs_Use&Care_En.pmd 11 1/22/2004, 10:33 AM
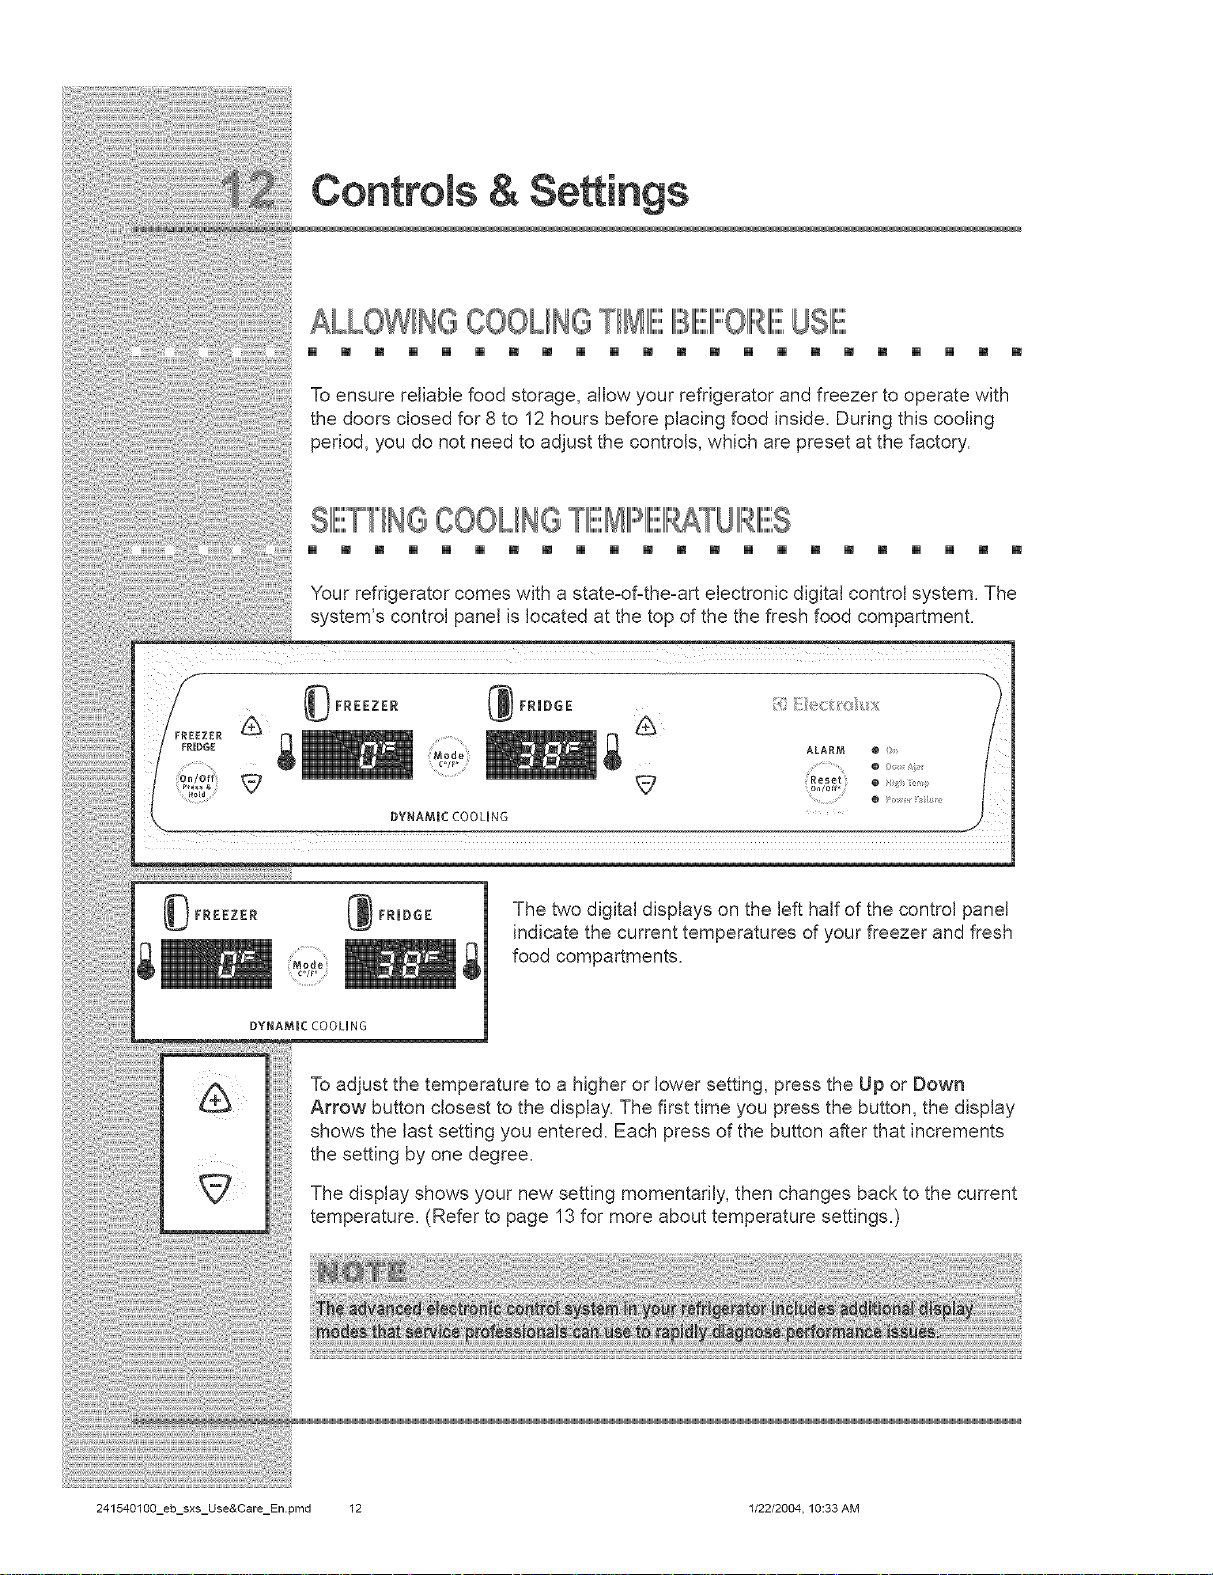
Controls & Settings
ALLOWINGCOOLING USIIE,
[] m m [] [] [] m m [] [] m m m [] [] m m m [] [] m m
Toensure reliable food storage, allow your refrigerator and freezer to operate with
the doors closed for 8 to 12 hours before placing food inside. During this cooling
period, you do not need to adjust the controls, which are preset at the factory.
SIIIl!! COOLINGTIIIE,
[] m m [] [] [] m [] [] [] m m m [] [] m m m [] [] m m
Your refrigerator comes with a statezofzthezart electronic digital control system. The
system's control panel is located at the top of the the fresh food compartment.
_FREEZER
DYNAMIC COOLING
Toadjust the temperature to a higher or lower setting, press the Up or Down
Arrow button closest to the display. The first time you press the button, the display
shows the last setting you entered. Each press of the button after that increments
the setting by one degree.
The display shows your new setting momentarily, then changes back to the current
temperature. (Refer to page 13 for more about temperature settings.)
FRmDGE
The two digital displays on the left half of the control panel
indicate the current temperatures of your freezer and fresh
_ food compartments.
241540100_eb_sxs_Use&Care_En.pmd 12 1/22/2004, 10:33 AM
 Loading...