

Electrolux 200, 93 B, 318 User Manual


2
Finding Information
MAKE A RECORD FOR FUTURE USE
Brand_______________________________________________________________
Purchase Date______________________________________________________
Model Number______________________________________________________
Serial Number______________________________________________________
NONO
TETE
NO
TE
NONO
TETE
See the Features page later in this manual for the location of your product’s serial
QUESTIONS?
For toll-free telephone support in the U.S. and Canada:
1-877-4ELECTROLUX (1-877-435-3287)
For on-line support and internet product information:
www.electrolux.com
2004 Electrolux Home Products, Inc.
Post Office Box 212378, Augusta, Georgia 30917, USA
All rights reserved. Printed in the USA

Finding Information
TABLE OF CONTENTS
3
Finding Information ........................................... 2
Make a Record for Future use .......................... 2
Questions? ........................................................ 2
Safety ................................................................ 4-6
Important Safety Instructions .............................. 4
Feature Overview ................................................ 7
Your Wall Oven ................................................. 7
Getting Started ................................................ 8-9
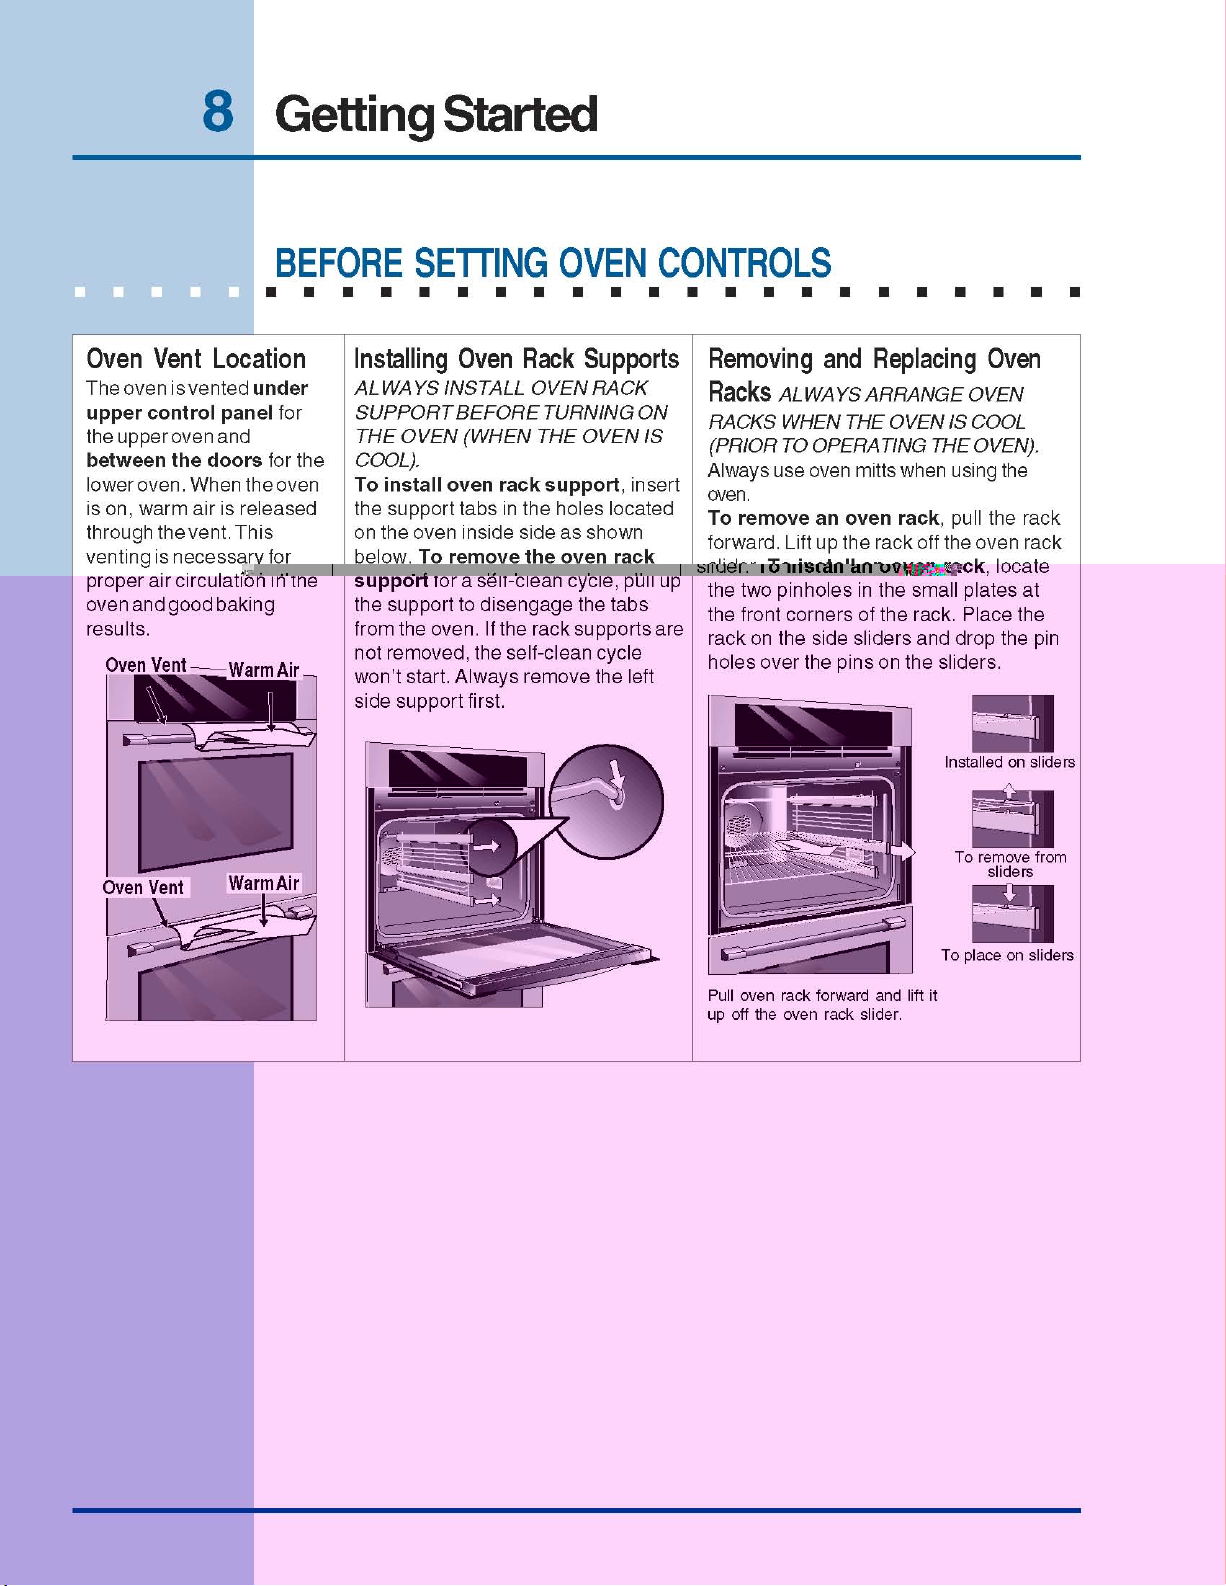
Oven Vent Location ........................................... 8
Installing Oven Rack Supports ........................... 8
Removing and Replacing Oven Racks .............. 8
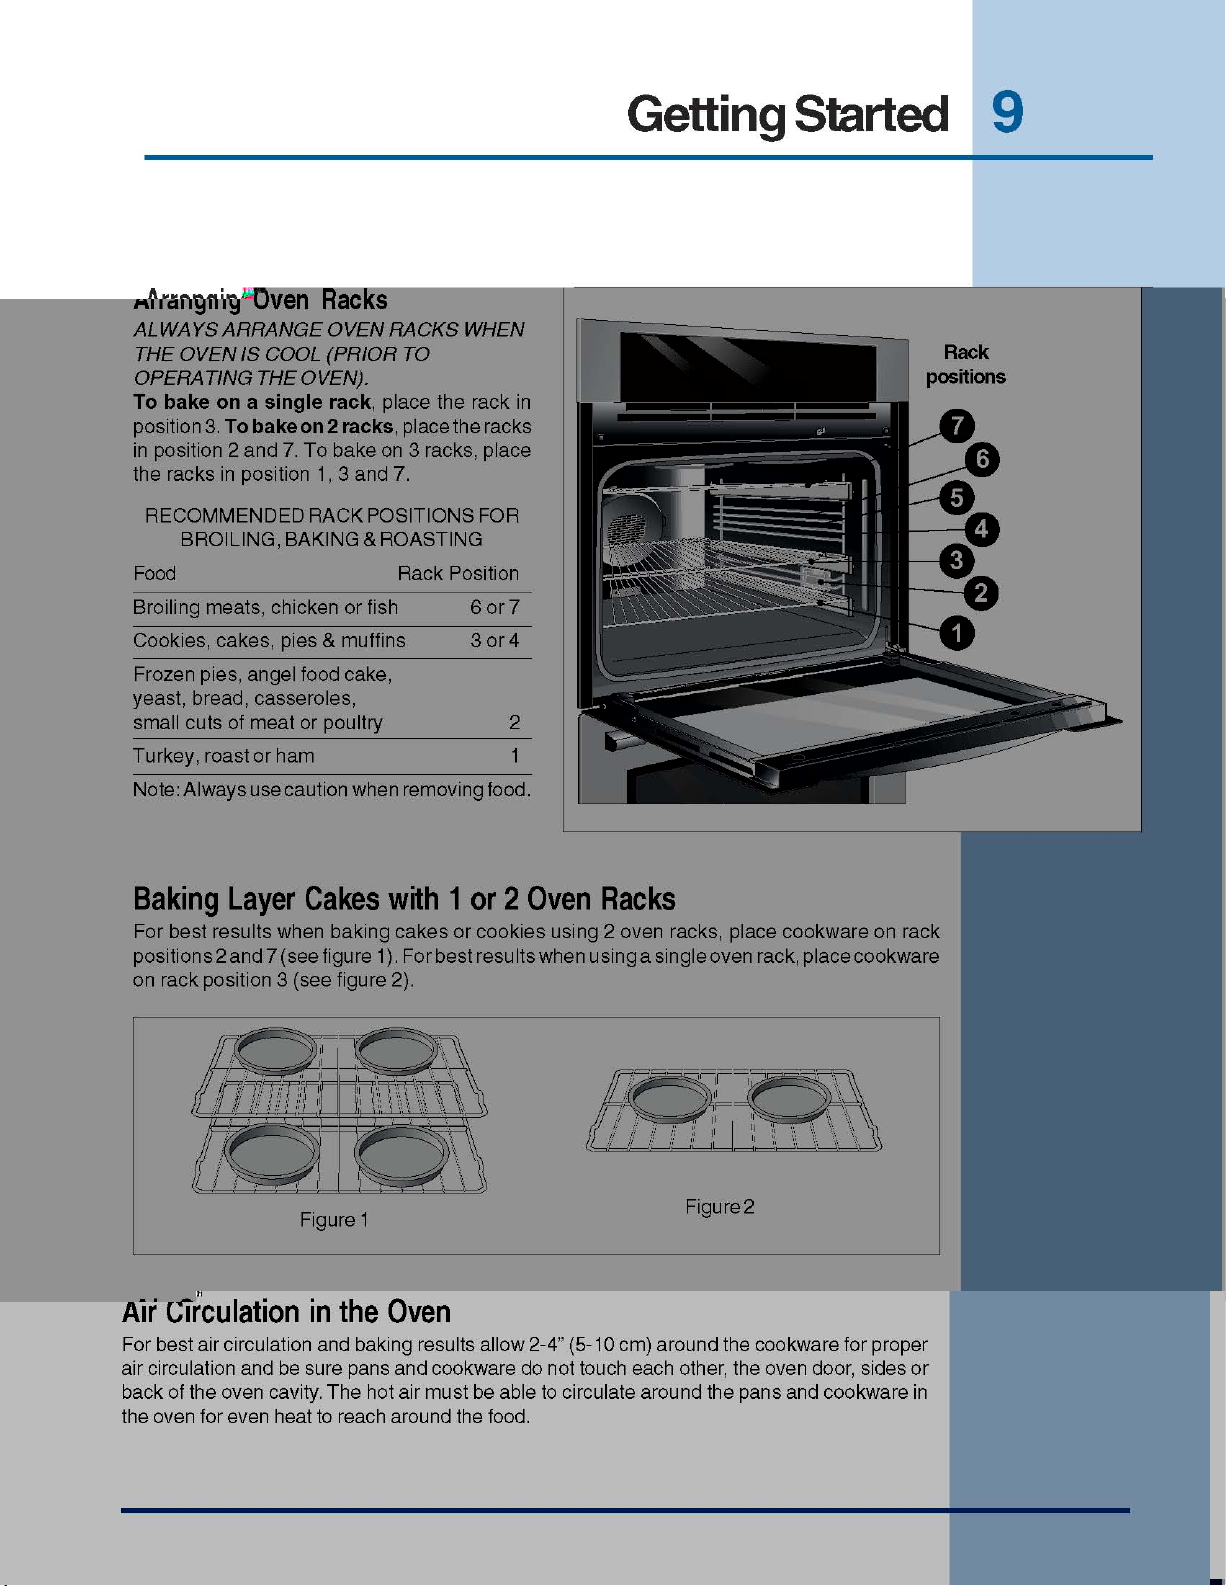
Arranging Oven Racks ...................................... 9
Air Circulation in the Oven ................................. 9
Setting oven controls ................................. 10-16
Control Pads Functions ................................... 10
Setting the Clock ............................................... 11
Setting Continuous Bake
or 12 hours Energy Saving ............................. 12
Setting the Kitchen Timer ................................. 13
Setting Oven Lockout Feature ......................... 14
Setting Temperature Display ............................ 15
Setting Silent Control Operation ....................... 16
Cooking Instructions .................................. 17-33
Preheating ...................................................... 17
Baking ............................................................. 18
Baking Problems ............................................. 19
Convection Baking ..................................... 20-21
Convection Roasting ....................................... 22
Setting Convection Convert ............................. 23
Setting Delayed Bake or
Delayed Convection Bake ............................... 24
Setting Timed Bake or
Timed Convection Bake ................................... 25
Setting Delayed Timed Bake or
Delayed Timed Convection Bake ............... 26-27
Setting the Keep Warm Feature .................. 28-29
Broiling ....................................................... 30-31
Sabbath Feature (for use on the
Jewish Sabbath & Holidays) ....................... 32-33
Care & Cleaning ........................................... 34-39
Using the Self-Clean Feature ........................... 34
Starting Self-Cleaning Cycle ....................... 35-36
General Cleaning ............................................ 37
Care and Cleaning of Stainless Steel ............... 38
To Remove and Replace Oven Door .............. 38
Special Door Care Instructions ........................ 38
To Remove the “Hidden Bake
Element” Cover ............................................... 39
Oven Light ...................................................... 39
Adjusting Oven Temperature ........................... 40
Solutions to Common Problems ................ 41-43
Oven Controls Beeps and Displays “F” Code . 41
Installation ....................................................... 41
Entire Oven Does Not Operate ................... 41-42
Oven Light Does Not Operate ......................... 42
Self-Clean Cycle Does Not Work ..................... 42
Oven Smokes Excessively During Broiling ...... 42
Soil Not Completely Removed After
Self-Cleaning Cycle Is Completed .................... 43
Poor Baking Results ........................................ 43
Flames Inside Oven Or Smoke From Vent ....... 43
Warranty Information ....................................... 44

4
Safety
IMPORTANT SAFETY INSTRUCTIONS
Please read all safety instructions before using your new Electrolux wall oven.
• Remove all tape and packaging wrap before using the appliance. Destroy the
carton and plastic bags after unpacking the appliance. Never allow children to play
with packaging material. Do not remove the wiring label and other literature attached to the
back of the wall oven. Do not remove model/serial number plate.
• Proper Installation—Be sure your appliance is properly installed and grounded by a
qualified electrician or installer in accordance with the National Electrical Code
ANSI/NFPA No. 70 (U.S.A.) or CSA C22.1, PART 1 (Canada)—latest editions and local
code requirements. Install only per installation instructions provided in the literature
package for this appliance.
Ask your dealer to recommend a qualified technician and an authorized repair service. Know how
to disconnect the electrical power to the appliance at the circuit breaker or fuse box in case of
an emergency.
Electronic controllers can be damaged by cold temperatures. When
you use your appliance for the first time, or if it has not been used for a long period of
time, make sure that it has been exposed to a temperature above 0°C/32°F for at least
3 hours before connecting it to the power supply.
• User Servicing—Do not repair or replace any part of the appliance unless specifically
recommended in the manuals. All other servicing should be done only by a qualified
technician to reduce the risk of personal injury and damage to the appliance.
• Never modify or alter the construction of the appliance by removing panels, wire
covers, or any other part of the product.
• Remove the oven door from any unused appliance if it is to be stored or discarded.

Safety
To reduce the risk of tipping of the appliance. The appliance must be
secured by properly install the mounting brackets. To check if brackets are installed properly
open the oven door and verify that the mounting brackets are engaged see installation
instructions.
• Do not leave children alone—Children should not be left alone or unattended in
the area where an appliance is in use. They should never be allowed to sit or stand on
any part of the appliance.
• DO NOT TOUCH INTERIOR OVEN ELEMENTS OR INTERIOR SURFACES OF THE WALL
OVEN UNTIL THEY HAVE COOLED. The oven heating elements may be hot even though the
elements are dark in color. Areas near the elements may become hot enough to cause burns.
During and after use, do not touch, or let clothing or other flammable materials touch these
areas until they have had sufficient time to cool. Among these areas are the oven vent
openings, the surfaces near these openings, oven door and window.
• Wear Proper Apparel—Loose-fitting or hanging garments should never be worn
while using the appliance. Do not let clothing or other flammable materials contact hot
surfaces.
5
Never use your appliance for warming or heating the room.
• Do Not Use Water or Flour on Grease Fires—Smother the fire with a pan lid, or use
baking soda, a dry chemical or foam-type extinguisher.
• When heating fat or grease, watch it closely. Fat or grease may catch fire if allowed to
become too hot.
• Use Only Dry Pot holders—Moist or damp pot holders on hot surfaces may result in
burns from steam. Do not let the pot holders touch the hot heating elements. Do not use a
towel or other bulky cloth instead of a pot holder.
• Do Not Heat Unopened Food Containers—Build-up of pressure may cause the
container to burst and result in injury.
IMPORTANT INSTRUCTIONS FOR USING YOUR OVEN
• Use Care When Opening an Oven Door—Stand to the side of the appliance when opening
the door of a hot oven. Let hot air or steam escape before you remove or replace food in the
oven.
• Keep Oven Vent Ducts Unobstructed. The wall oven is vented at the upper control panel or
at the center trim depending of the model. Touching the surfaces in this area when the wall
oven is operating may cause severe burns. Also, do not place plastic or heat-sensitive items
near the oven vent. These items could melt or ignite.
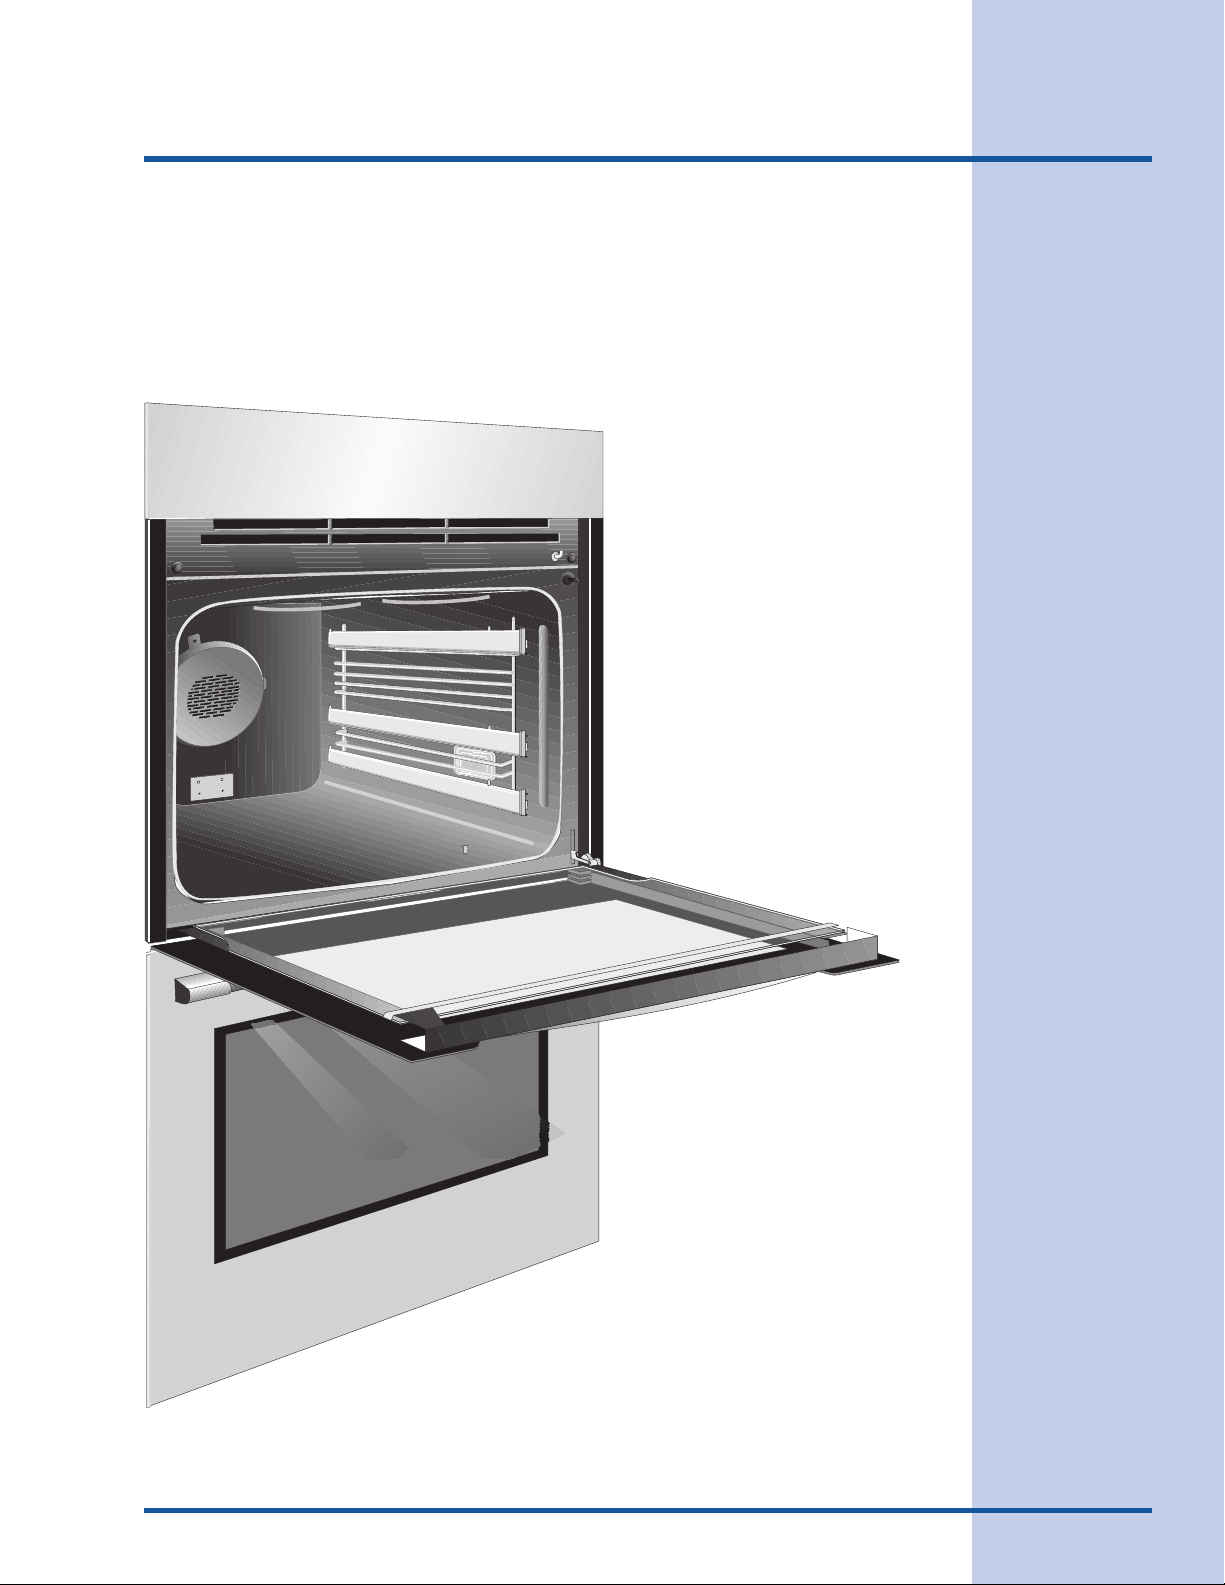
• Placement of Oven Racks. Always place oven racks in desired location while oven is cool.
Remove all utensils from the rack before removing rack. If rack must be moved while oven is
hot, use extreme caution. Use pot holders and grasp the rack with both hands to reposition.
Do not let pot holders contact the hot oven element or interior of the oven.
• Do not use the broiler pan without its insert. The broiler pan and insert allow dripping fat
to drain and be kept away from the high heat of the broiler.
6
Safety
IMPORTANT SAFETY INSTRUCTIONS
• Do not cover the broiler pan insert or oven bottom with aluminum foil. Exposed fat and
grease could ignite.
• Do not touch a hot oven light bulb with a damp cloth. Doing so could cause the bulb to
break. Disconnect the appliance or shut off the power to the appliance before removing and
replacing the bulb.
IMPORTANT INSTRUCTIONS FOR CLEANING YOUR
OVEN
• Clean the appliance regularly to keep all parts free of grease that could ignite.
Exhaust fan ventilation hoods and grease filters should be kept clean. Do not allow grease
to accumulate. Greasy deposits in the fan could ignite. Refer to the hood manufacturer's
instructions for cleaning.
SELF CLEANING OVENS
• Clean in the self-cleaning cycle only the parts of the appliance listed in this Owner's
Guide. Before using the self-cleaning cycle of the appliance, remove the broiler pan, oven racks
and any utensils stored in the appliance. Also the side rails of the oven racks must be removed
for the self-clean function to operate.
• Do not clean the oven door gasket. The door gasket is essential for a good seal. Care should
be taken not to rub, damage or move the gasket.
• Do not use oven cleaners. No oven cleaner or oven liner protective coating of any kind should
be used in or around any part of the appliance
The health of some birds is extremely sensitive to the fumes given off during
the self-clean cycle of any wall oven. Move birds to another well ventilated room.
IMPORIMPOR
IMPOR
IMPORIMPOR
The California Safe Drinking Water and Toxic Enforcement Act requires the Governor of
California to publish a list of substances known to the state to cause cancer, birth
defects or other reproductive harm, and requires businesses to warn customers of
potential exposure to such substances.
NONO
TETE
NO
TE
NONO
TETE
TT
ANT SAFETY NOANT SAFETY NO
T
ANT SAFETY NO
TT
ANT SAFETY NOANT SAFETY NO
TICETICE
TICE
TICETICE
Save these important safety instructions for future reference.
7
10
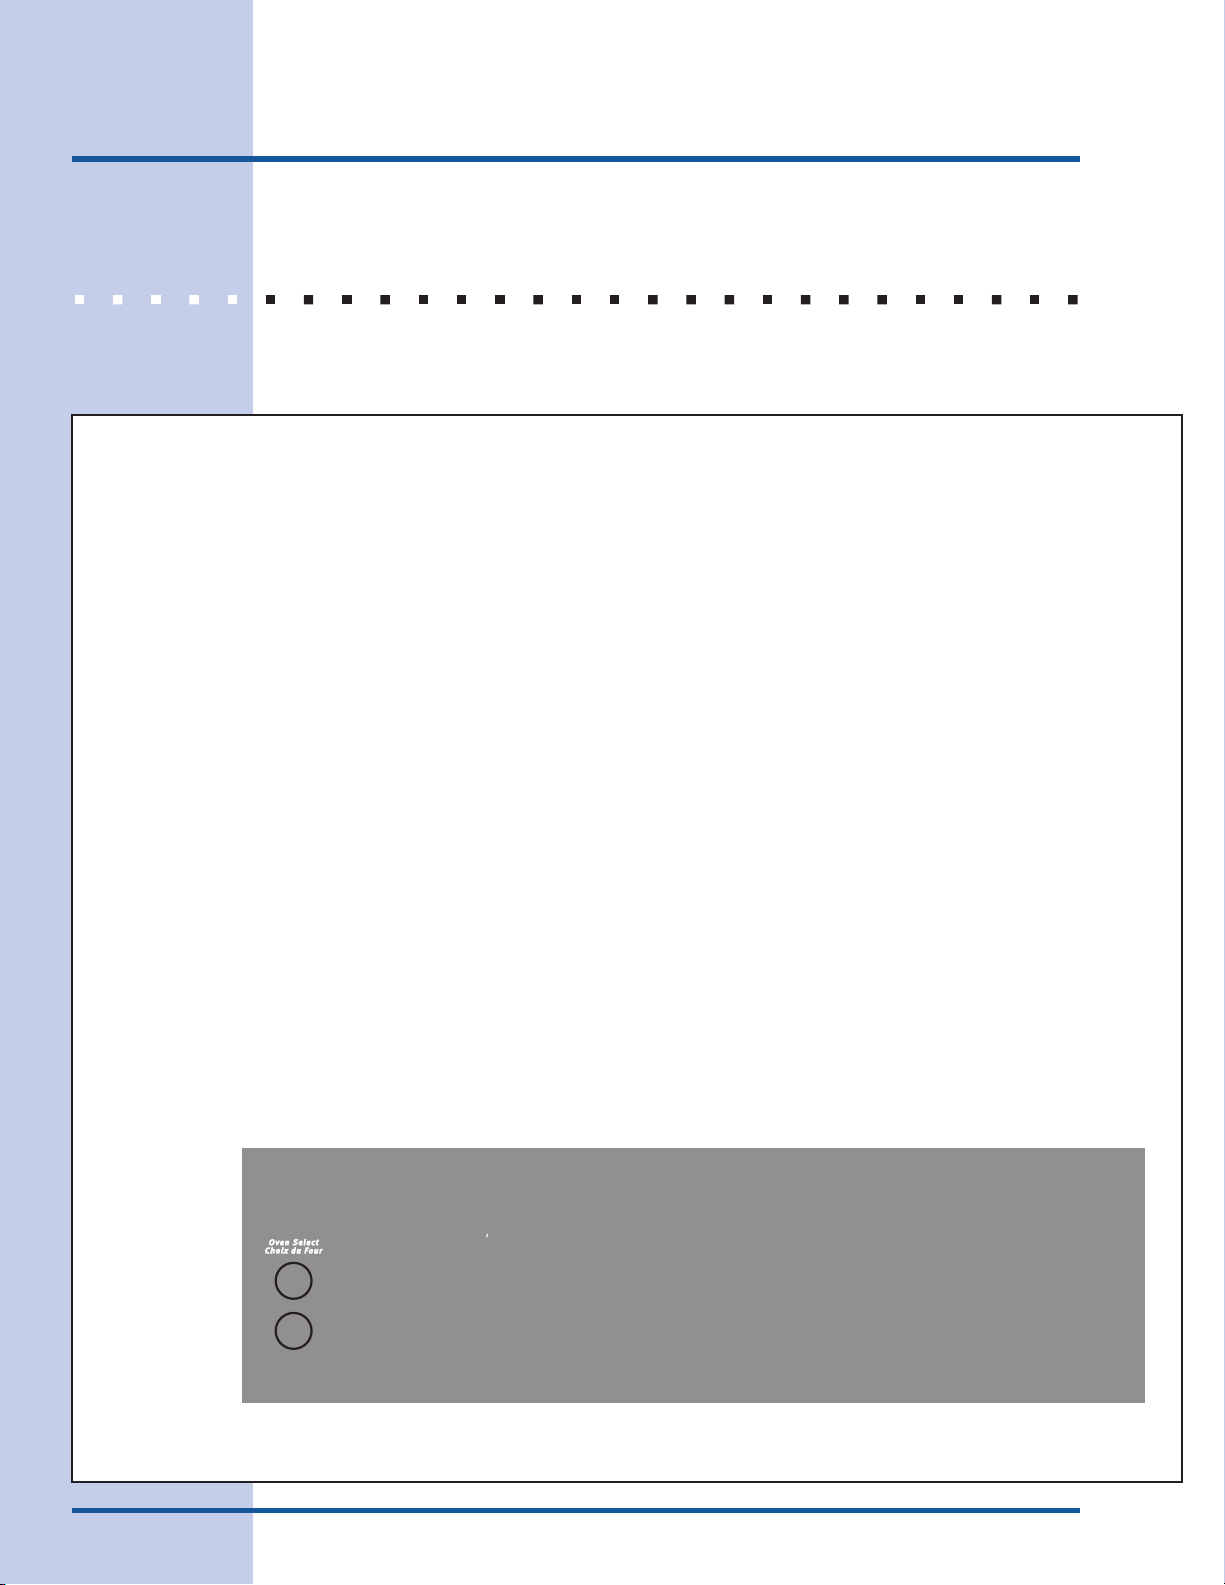
Setting Oven Controls
CONTROL PAD FUNCTIONS
Read the instructions carefully before using the oven. For satisfactory use of your oven,
become familiar with the various functions of the oven as described below. Note: The
graphics on your timer looks like one of those shown. Both are operating the same way.
Note: See illustration above for pad description.
Setting Oven Controls
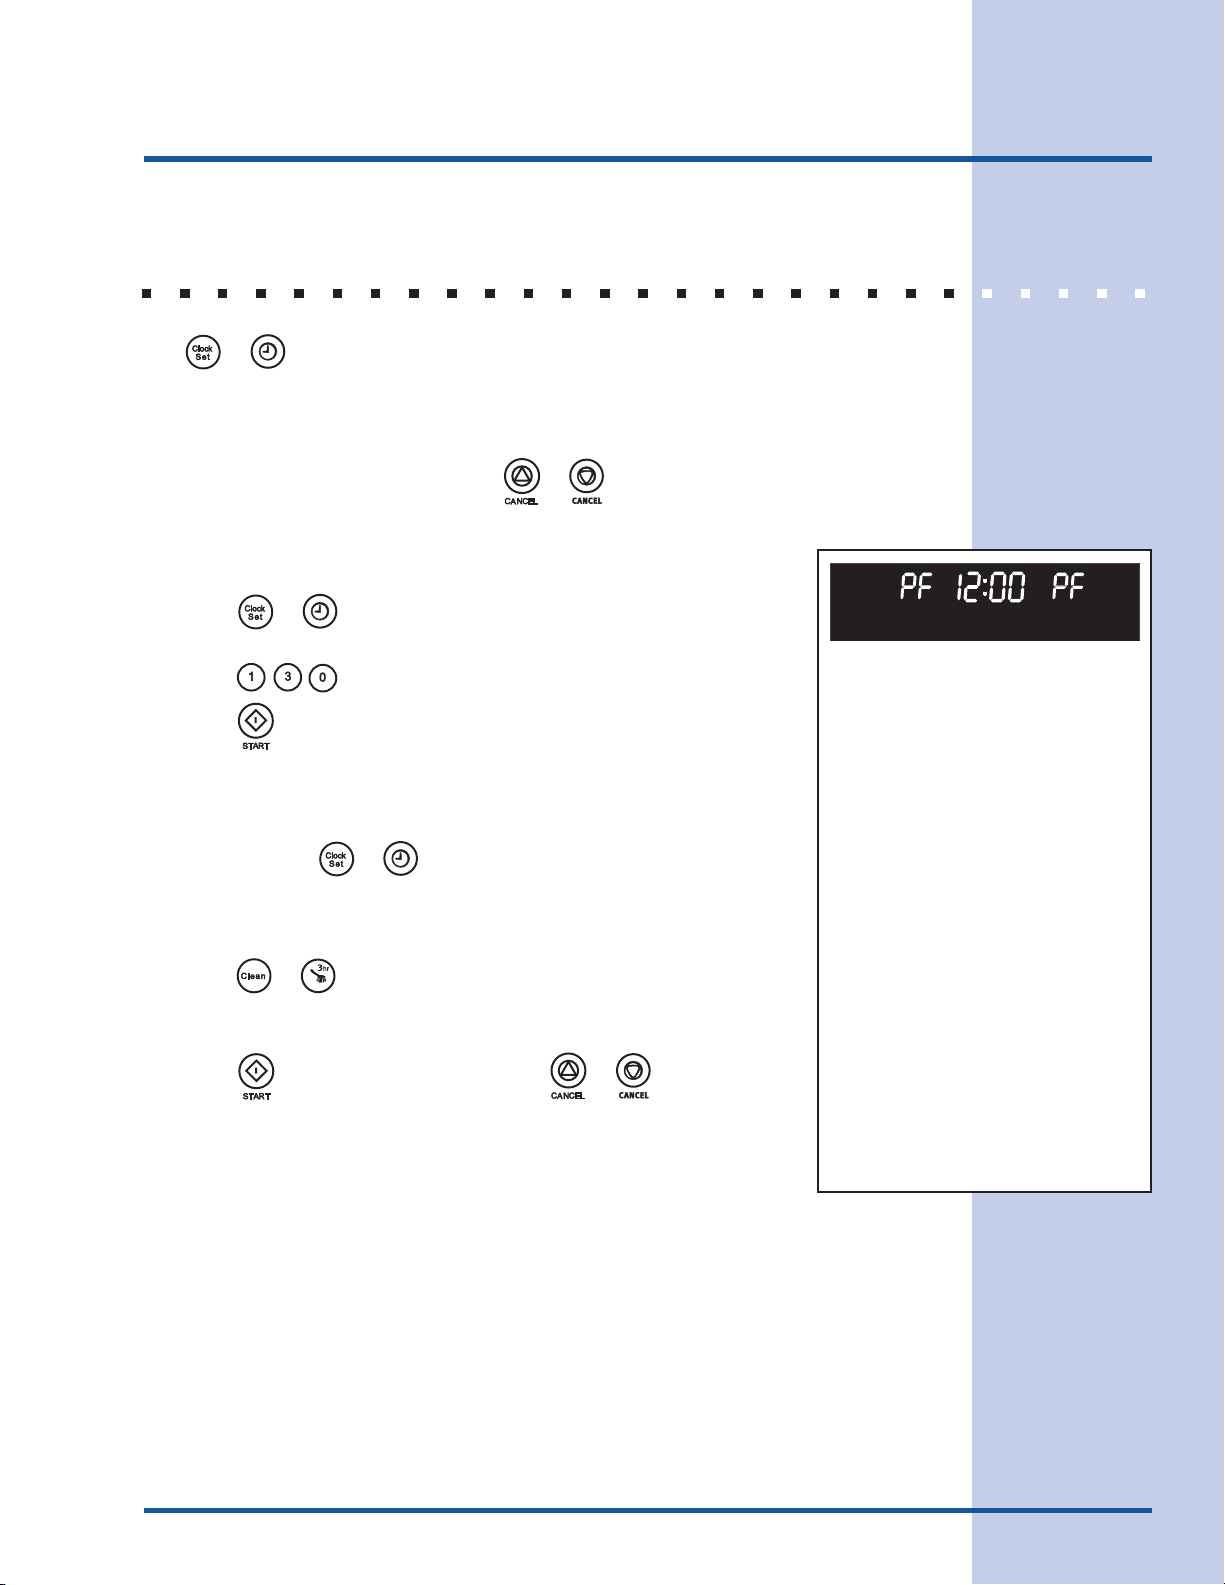
SETTING THE CLOCK
The or pad is used to set the clock. The clock may be set for 12 or 24 hour time of
day operation. The clock is preset at the factory for the 12 hour operation. When the wall
oven is first plugged in or when the power supply to the wall oven has been interrupted, the
display will flash with
"PF"
When
disappear.
appears in the display, press or . A beep will sound and
To set the clock (example below for 1:30):
"PF"
(power failure, See Figure 1).
"PF"
will
11
1. Press or .
display (Figure 2).
2. Press pads to set the time of day to 1:30 (Figure 3).
Press . The time of day will appear in the display (Figure 4).
"CLO"
anf the current time of day will appear in the
Changing between 12 or 24 hour time of day display:
1. Press and hold or for 6 seconds (Figure 3).
current time of day will appear in the display (Figure 4). A beep will
sound and
display.
3. Press or to switch between the 12 and 24 hour time of day
display. The display will show either
6).
4. Press to accept the change or press or to reject the
change.
5. Reset the correct time as described in To set the Clock above.
Please note that if the 24 hour time of day mode was chosen, the
clock will now display time from 0:00 through 23:59 hours.
"12h"
(Figure 5) or
"24h"
(Figure 6) will appear in the
"12h"
(Figure 5) or
"CLO"
"24h"
and the
(Figure

12
Setting Oven Controls
To set the control for Continuous Bake or 12 Hour Energy
Saving
1. Press and hold
Setting Oven Controls
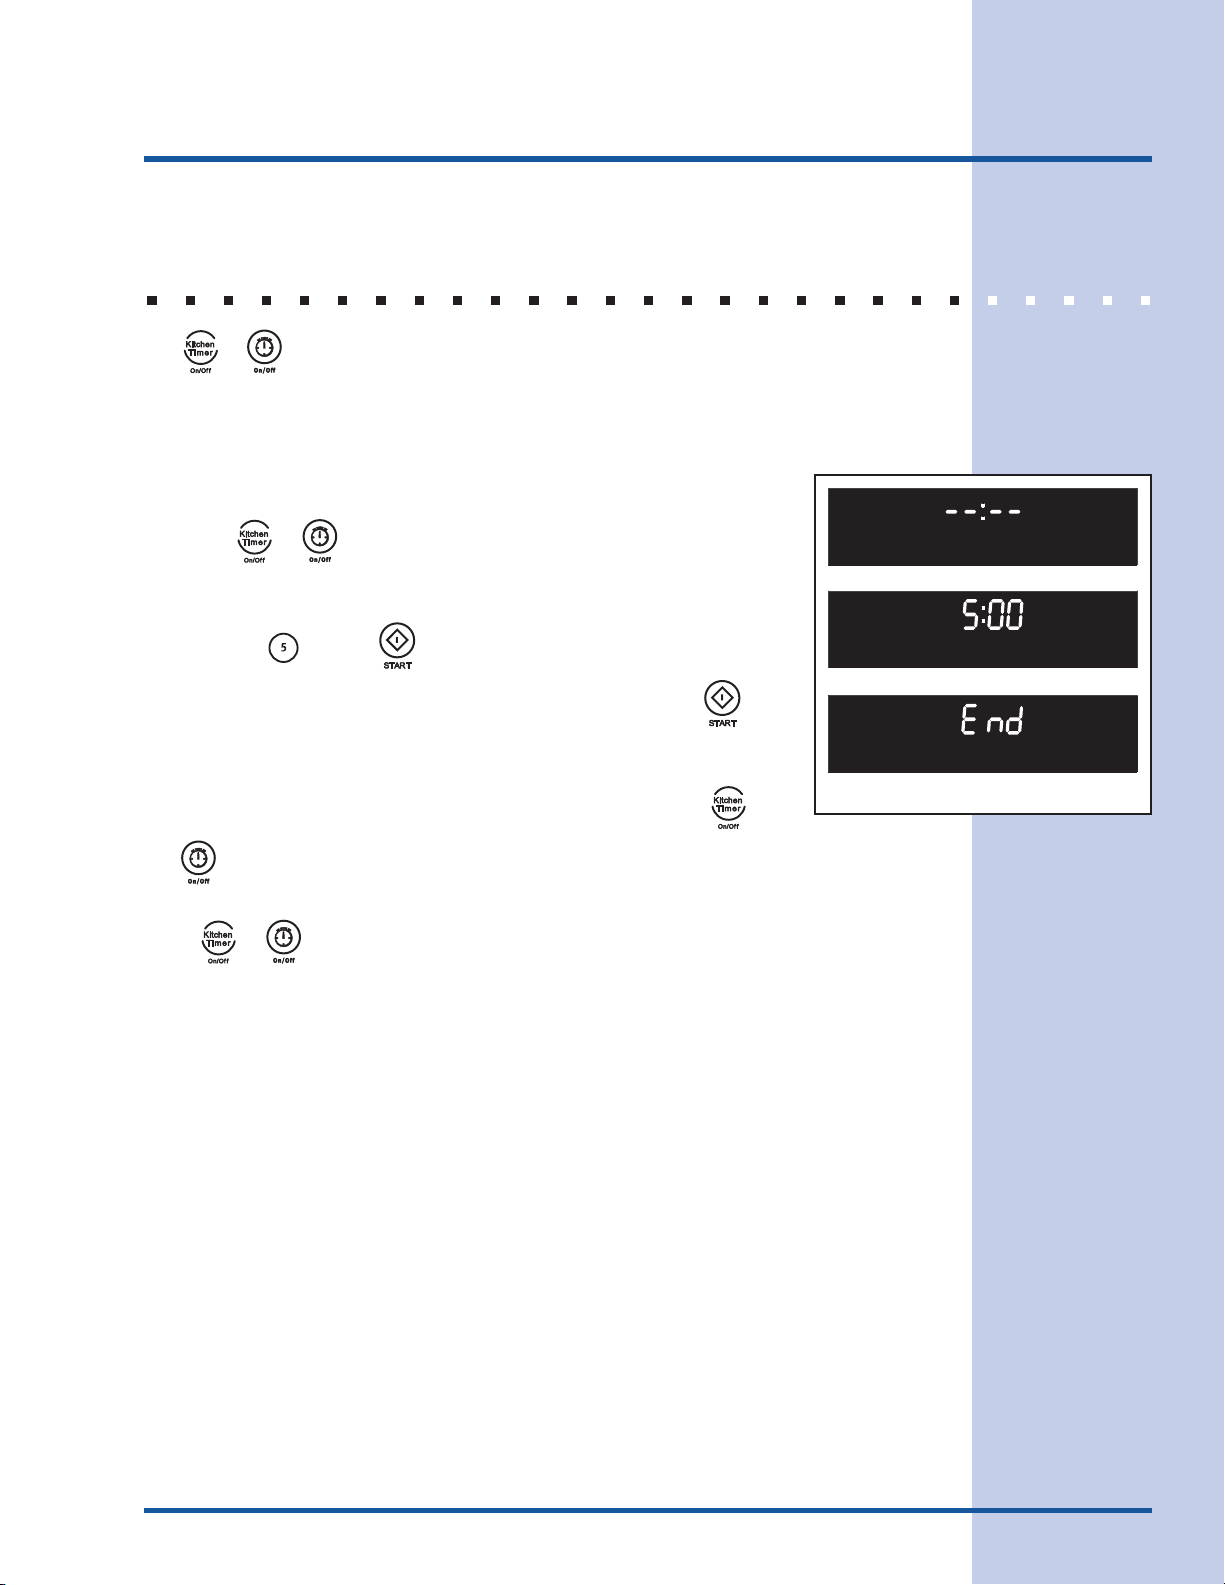
SETTING THE KITCHEN TIMER
The or pad controls the Timer feature. The Timer serves as an extra timer in the
kitchen that will beep when the set time has run out. It does not start or stop cooking. The
Timer feature can be used during any of the other oven control functions, except during a
self clean operation.
To set the Timer (example for 5 minutes):
13
1. Press or .
"- -:- -"
will appear and
"TIMER"
will flash in the
display (Figure 1).
2. Press the number pads to set the desired time in the display
(example
"5:00"
and
). Press . The time will begin to countdown with
"TIMER"
will stay in the display (Figure 2). Note: If is
not pressed the timer will return to the time of day.
3. When the set time has run out,
"End"
will show in the display (Figure
3). The clock will sound with 3 beeps every 15 seconds until or
is pressed.
To cancel the Timer before the set time has run out:
Press or . The display will return to the time of day.
UPPER
ROAST
LOCKED
UPPER
ROAST
LOCKED
WARM
DELAY
WARM
BAKE
DELAY
TIMER
Figure 1
WARM
CONV
UPPER
TIMER
REMOVE
LOWER
DOOR
RACKS
CLEAN
BROIL
BAKE
TIMED
CONV
BROIL
TIMED
DELAY
LOWER
BAKE
ROAST
LOCKED
Figure 2
CONV
UPPER
TIMED
TIMER
REMOVE
LOWER
DOOR
RACKS
BROIL
CLEAN
TIMED
CONV
WARM
LOWER
BROIL
BAKE
ROAST
DELAY
LOCKED
Figure 3

14
Setting Oven Controls
SETTING OVEN LOCKOUT FEATURE
To activate the Oven Lockout feature on the Upper Oven:
1. Press or . (Note: To Lock the lower oven instead of the upper
oven, press
2. Press and hold
3. After 3 seconds a beep will sound,
"UPPER", "Loc"
oven door is locked the
flashing and remain on.
or at this time.)
or for 3 seconds.
"DOOR", "LOCKED"
and will appear in the display (Figure 1). Once the
"DOOR"
and
"LOCKED"
indicator will stop
will flash and
To reactivate normal Upper Oven operation:
 Loading...