

Page 1
LAVATHERM T37840
Exhaust air dryer
Operating instructions
Ablufttrockner
Gebrauchsanweisung
Sèche-linge
Mode d'emploi
Trommeldroger
Gebruiksaanwijzing
PERFEKT IN FORM UND FUNKTION
125987510_UK_I.qxp 2007-03-30 13:15 Page 1
Page 2

2
Dear customer,
Please read these operating instructions carefully and pay particular
attention to the safety notes indicated in the first pages. We recommend that you keep this instruction booklet for future reference and
pass it on to any future owners.
The warning triangle and/or the key words (Warning!, Caution!) emphasize information that is particularly important for your safety or correct
functioning of the appliance.
This symbol guides you, step by step, in the operation of the appliance.
The information marked with this symbol provides additional instruc-
tions and practical tips on the use of the appliance.
Tips and information about economical and ecological use of the
machine are marked with the clover symbol.
Should any problems arise, this booklet provides instructions on how to
solve them by yourself; see section “Something not working?”.
If this information is not sufficient, please contact our nearest Service
centre (address and telephone numbers are indicated on the enclosed
leaflet).
Printed on recycled paper.
People who think ecologically, act accordingly...
125987510_UK_I.qxp 2007-03-30 13:15 Page 2
Page 3

3
Contents
Safety instructions . . . . . . . . . . . . . . . . . . . . . . . . . . . . . . . . . . . . . . . . . . . . . 4-6
General instructions . . . . . . . . . . . . . . . . . . . . . . . . . . . . . . . . . . . . . . . . . . . . . 6
Discarding . . . . . . . . . . . . . . . . . . . . . . . . . . . . . . . . . . . . . . . . . . . . . . . . . . . . . . 7
Tips for environmental protection . . . . . . . . . . . . . . . . . . . . . . . . . . . . . . . 8-9
Structure of the appliance. . . . . . . . . . . . . . . . . . . . . . . . . . . . . . . . . . . . . 10-16
Front view . . . . . . . . . . . . . . . . . . . . . . . . . . . . . . . . . . . . . . . . . . . . . . . . . . . . . . 10
Rear view . . . . . . . . . . . . . . . . . . . . . . . . . . . . . . . . . . . . . . . . . . . . . . . . . . . . . . . 10
Control panel . . . . . . . . . . . . . . . . . . . . . . . . . . . . . . . . . . . . . . . . . . . . . . . . . 11-16
Brief operating instructions . . . . . . . . . . . . . . . . . . . . . . . . . . . . . . . . . . . . . . . 16
Drying. . . . . . . . . . . . . . . . . . . . . . . . . . . . . . . . . . . . . . . . . . . . . . . . . . . . . . . 17-19
Before the first drying cycle . . . . . . . . . . . . . . . . . . . . . . . . . . . . . . . . . . . . . . . 17
Sort out the laundry. . . . . . . . . . . . . . . . . . . . . . . . . . . . . . . . . . . . . . . . . . . . . . 17
Open the door . . . . . . . . . . . . . . . . . . . . . . . . . . . . . . . . . . . . . . . . . . . . . . . . . . . 17
Load the laundry . . . . . . . . . . . . . . . . . . . . . . . . . . . . . . . . . . . . . . . . . . . . . . . . . 17
Switch the machine on, Select the drying programme/time. . . . . . . . . . . . . 18
Start the machine . . . . . . . . . . . . . . . . . . . . . . . . . . . . . . . . . . . . . . . . . . . . . . . . 18
Remove or add laundry . . . . . . . . . . . . . . . . . . . . . . . . . . . . . . . . . . . . . . . . . . . 18
End of drying cycle. . . . . . . . . . . . . . . . . . . . . . . . . . . . . . . . . . . . . . . . . . . . . . . 19
Switch the tumble dryer off . . . . . . . . . . . . . . . . . . . . . . . . . . . . . . . . . . . . . . . 19
Clean the filters. . . . . . . . . . . . . . . . . . . . . . . . . . . . . . . . . . . . . . . . . . . . . . . . . . 19
Adjusting the level of conductivity. . . . . . . . . . . . . . . . . . . . . . . . . . . . . . . . . 20
Programme charts . . . . . . . . . . . . . . . . . . . . . . . . . . . . . . . . . . . . . . . . . . . . . . . 21
Hints & tips on drying . . . . . . . . . . . . . . . . . . . . . . . . . . . . . . . . . . . . . . . . . . . 22
Care symbols . . . . . . . . . . . . . . . . . . . . . . . . . . . . . . . . . . . . . . . . . . . . . . . . . . . . 22
Cleaning and care . . . . . . . . . . . . . . . . . . . . . . . . . . . . . . . . . . . . . . . . . . . . 23-24
External cleaning. . . . . . . . . . . . . . . . . . . . . . . . . . . . . . . . . . . . . . . . . . . . . . . . . 23
Cleaning the door . . . . . . . . . . . . . . . . . . . . . . . . . . . . . . . . . . . . . . . . . . . . . . . . 23
Cleaning the filters . . . . . . . . . . . . . . . . . . . . . . . . . . . . . . . . . . . . . . . . . . . . 23-24
Cleaning the drum . . . . . . . . . . . . . . . . . . . . . . . . . . . . . . . . . . . . . . . . . . . . . . . 24
Cleaning the panel and the controls . . . . . . . . . . . . . . . . . . . . . . . . . . . . . . . . 24
Something not working? . . . . . . . . . . . . . . . . . . . . . . . . . . . . . . . . . . . . . . 25-26
Technical specifications . . . . . . . . . . . . . . . . . . . . . . . . . . . . . . . . . . . . . . . . . . 27
Electrical connection. . . . . . . . . . . . . . . . . . . . . . . . . . . . . . . . . . . . . . . . . . . . . 27
Unpacking . . . . . . . . . . . . . . . . . . . . . . . . . . . . . . . . . . . . . . . . . . . . . . . . . . . . . . 28
Special accessory . . . . . . . . . . . . . . . . . . . . . . . . . . . . . . . . . . . . . . . . . . . . . . . . 28
Kit washing/drying column . . . . . . . . . . . . . . . . . . . . . . . . . . . . . . . . . . . . . . . . 28
Door reversal . . . . . . . . . . . . . . . . . . . . . . . . . . . . . . . . . . . . . . . . . . . . . . . . . . . . 28
Service . . . . . . . . . . . . . . . . . . . . . . . . . . . . . . . . . . . . . . . . . . . . . . . . . . . . . . . . . 29
Guarantee Conditions . . . . . . . . . . . . . . . . . . . . . . . . . . . . . . . . . . . . . . . . . . . . 30
125987510_UK_I.qxp 2007-03-30 13:15 Page 3
Page 4
4
Safety instructions
Safety instructions
It is most important that this instruction book should be retained with
the appliance for future reference. Should the appliance be sold or
transferred to another owner, or should you move house and leave the
appliance, always ensure that the book is supplied with the appliance in
order that the new owner can get to know the functioning of the appliance and the relevant warnings.
The safety of AEG appliances complies with the industry standards and
with legal requirements on the safety of appliances. However, as manufacturers, we feel it is our duty to provide the following safety notes.
You MUST read them carefully before installing or using the appliance.
General safety
• Under no circumstances should you attempt to repair the machine
yourself. Repairs carried out by inexperienced persons may cause
injury or serious malfunctioning. Contact your local Service Force
Centre or your AEG dealer . . Always insist on genuine AEG spare parts.
• Before starting the appliance check that the rated voltage and the
type of current indicated on the rating plate correspond to those
which exist where the dryer is installed. The type of fuse is also indicated on the rating plate.
• Never start the appliance if the electrical supply cable is damaged or
the control panel or worktop are so damaged that inner components
can be reached.
• Risk of fire: items that have been spotted or soaked with vegetable or
cooking oil constitute a fire hazard and should not be placed in the
tumble dryer
• If you have washed your laundry with stain remover you must execute an extra rinse cycle before loading your tumble dryer.
• Unplug the appliance before carrying out any cleaning or maintenance operations.
• Never pull the power supply cable to remove the plug from the
socket; always take hold of the plug itself.
• Do not lean on the open door, the appliance could turn over.
• Never spray the machine with a jet of water . Danger of electric shock!
• If the drying programme is interrupted in order to remove the laundry: the laundry and the drum could be very hot.
125987510_UK_I.qxp 2007-03-30 13:15 Page 4
Page 5

5
Child safety
• Children are often not aware of how dangerous electrical appliances
can be. When the machine is working, they should be carefully supervised and not be allowed to play with the appliance - there is a risk
that they could become trapped inside.
• The packaging components (e.g. plastic film, polystyrene) can be dangerous to children - danger of suffocation! Keep them out of children’s reach.
• Make sure that children or pets do not climb into the drum.
Positioning and connection
• Follow the separate instructions for positioning and connection.
• Check that the appliance has not been damaged during transport.
Never connect a damaged appliance! If this is the case, contact your
dealer.
• The dryer must not be installed in a room where the temperature can
fall below zero or is higher than + 35°C.
• The dryer must be levelled.
• The dryer must not be positioned on a thick pile carpet as this would
prevent air from circulating freely through the ventilation slots.
• If the appliance is installed near a gas, coal or electric heater, an insulating non-inflammable panel must be inserted between the dryer
and the heater (size: 85x57.5 cm).
• The plug of the dryer must always be accessible.
• The dryer’s exhaust must not be fed into a cooker hood, or a chimney
or flue pipe designed to carry the exhaust from a fuel burning appliance.
• Ensure the room is well ventilated.
• A permanent connection to the mains power supply can only be carried out by a qualified electrician.
Safety instructions
125987510_UK_I.qxp 2007-03-30 13:15 Page 5
Page 6
6
Proper use
• For safety reasons, the appliance must not be modified.
• This appliance is designed for domestic use only. If the dryer is used
for any other purposes or is not used correctly, the manufacturer
accepts no responsibility for any possible damage that might occur.
• Dry only items that have been washed with water. Never dry items
that have been in contact with inflammable solvents (petrol, methylated spirits, dry cleaning fluid and the like). These are of a volatile
nature and could cause an explosion or a fire.
• Items containing rubber foam or materials similar to rubber foam
must not be dried in the appliance. Fire danger!
General instructions
• Starched fabrics leave traces of starch in the drum, therefore they
should not be dried in the appliance.
• If the load to be dried exceeds the maximum weight indicated, creasing may occur. For particularly delicate fabrics, the maximum load
should not exceed 1.5 kg.
• For your information: 70 per cent of fabric wear is caused by wearing the garments, 20 percent by washing and only 10 per cent by drying them in a tumble
dryer. In your appliance, fluff accumulates in the filter. Only 0.03g fluff per Kilo
will be lost by your laundry when being machine dried.
Safety instructions
125987510_UK_I.qxp 2007-03-30 13:15 Page 6
Page 7

7
Discarding
Discarding
Packaging materials
Dispose of your tumble dryer’s packaging materials correctly. All materials are
environmentally friendly and can be disposed of without any danger .
The plastic parts can be reused:
• The external plastic cover and the bags inside are made of polyethylene (>PE<).
• The padding is made of CFC free polystyr ene foam (>PS<=).
Cartons are made of recycled paper and should be disposed of in paper
collection containers.
Appliance
Warning! When the appliance is disposed of, pull the plug out of the
socket, cut off the electrical supply cable and destroy the plug with the
remaining cable. Disable the door catch in order to prevent children
from becoming trapped inside while playing.
Use an authorised disposal site for your old appliance.
The symbol on the product or on its packaging indicates that this product
may not be treated as household waste. Instead it shall be handed over to the
applicable collection point for the recycling of electrical and electronic equipment. By ensuring this product is disposed of correctly, you will help prevent
potential negative consequences for the environment and human health, which
could otherwise be caused by inappropriate waste handling of this product. For
more detailed information about recycling of this product, please contact your
local city office, your household waste disposal service or the shop where you
purchased the product.
125987510_UK_I.qxp 2007-03-30 13:15 Page 7
Page 8

8
Tips for environmental protection
Tips for environmental protection
• During washing, try not to use fabric softeners!
If the laundry is machine dried, it will remain soft even without using
fabric softeners.
• Shake out your laundry!
Shake out the laundry before putting it into the dryer in order to
reduce the drying time and creasing.
• Spin the laundry properly before drying it!
As a general rule, the more the laundry is spun, the more economically your dryer works.
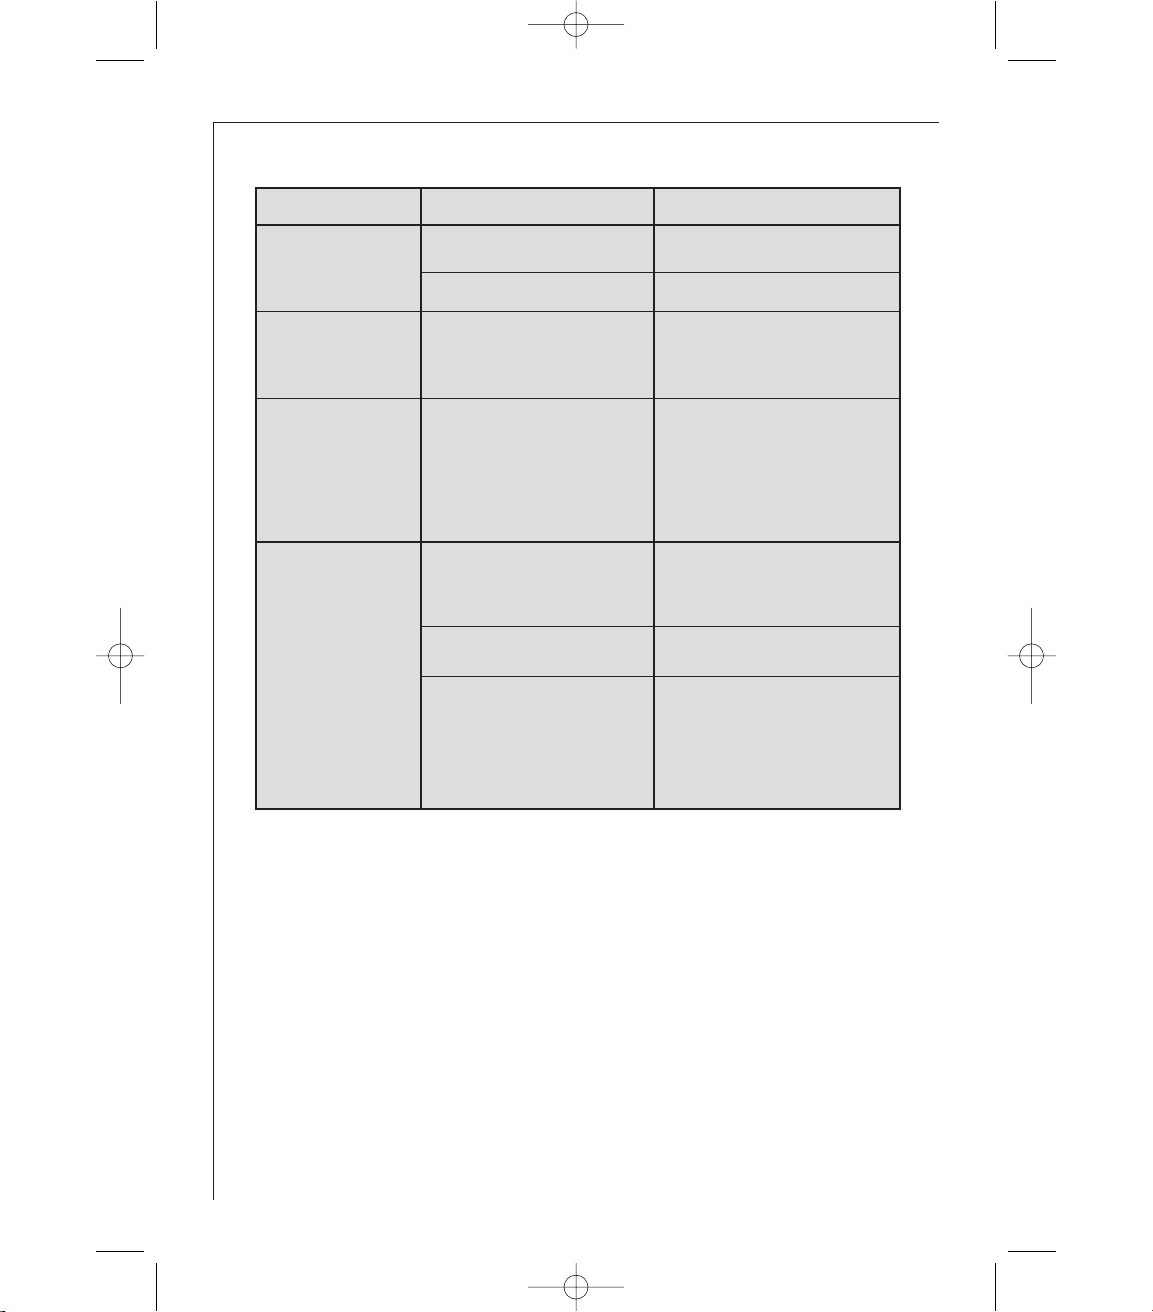
In the following table, indications on consumption are provided,
according to the spin speed. The data refers to 7 kg of laundry that
have to be store dried.
• Please observe the full load specifications!
The machine works more economically if it is fully loaded, as indicated in the programme charts.
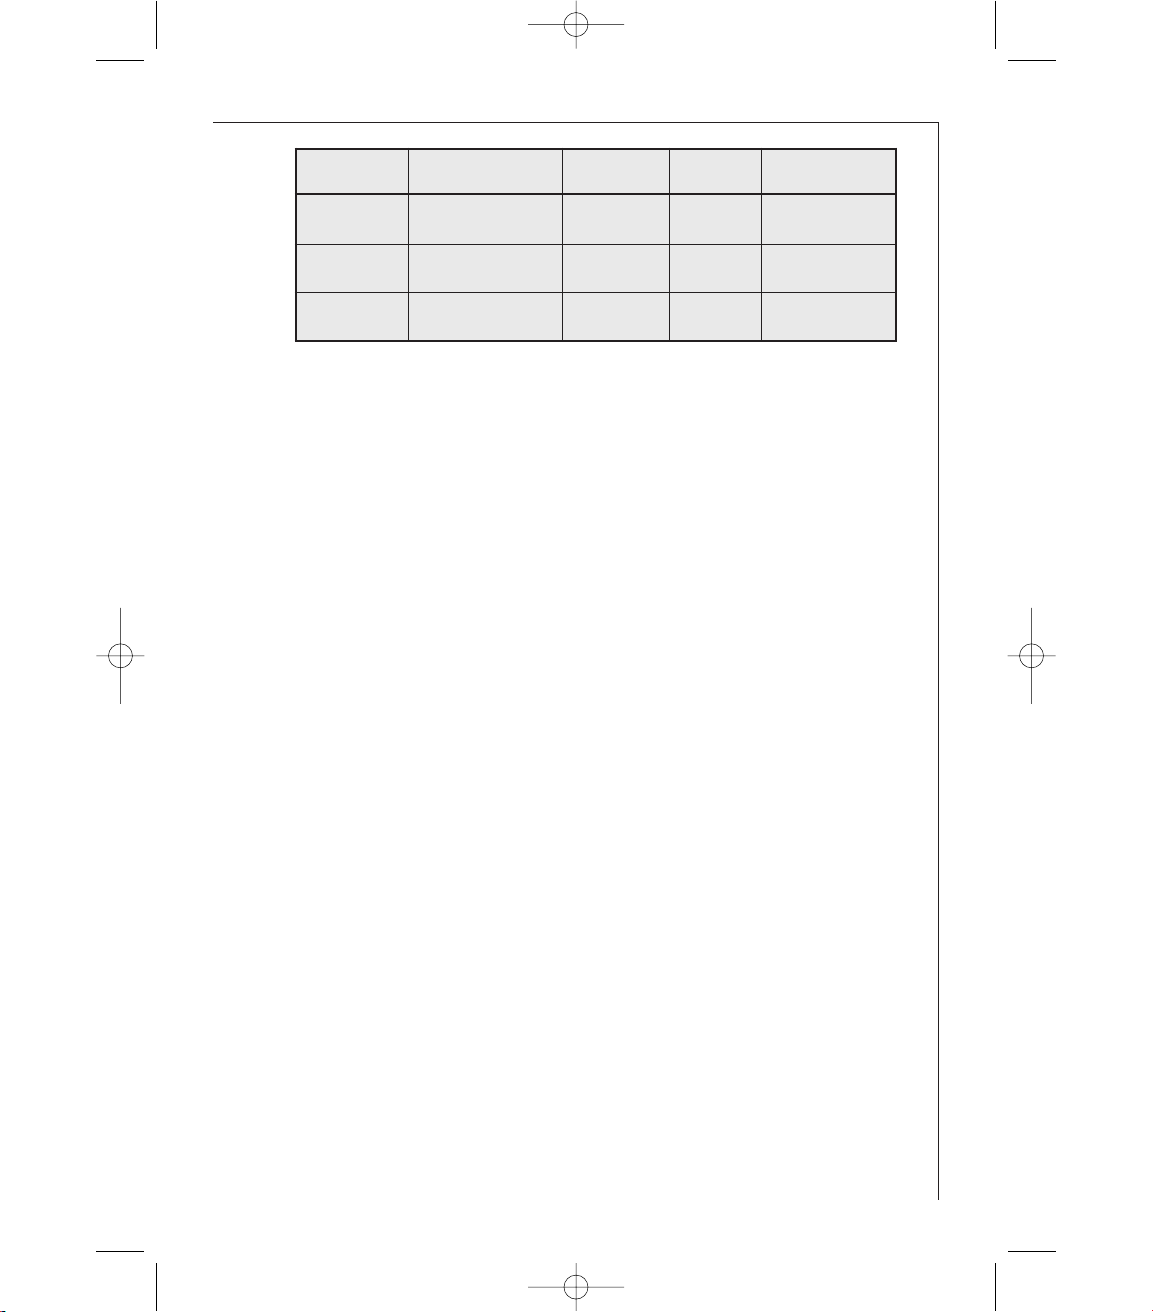
• Select the correct drying programme!
Select the drying programme suited to the type and quantity of laundry, so that your dryer will work more economically. Some consumption values:
Spinning: Drying cycle:
Revolutions
per minute
Residual dampness
Time required
in minutes
Energy requirement
kWh
in
litres
in
%
1000 4,2 60 103 3,9
1400 3,64 52 94 3,7
1600 3,43 49 83 3,2
125987510_UK_I.qxp 2007-03-30 13:15 Page 8
Page 9
9
Tips for environmental protection
1) previously spun at 1000 rpm
2) previously spun at 1200 rpm.
• The “DELICAAT/DELICAT” function: can only be used for loads up to 3 kg!
• Clean the fluff filter after each drying cycle!
Type of laundry
Desired degree
of dryness
Load in kg
Duration in
minutes
Energy consumpti-
on in kWh
Cotton
1
KASTDROOG/A
RANGER
7 103 3,9
Cotton
1
STRIJKDROOG/A
REPASSER
7 78 3,05
Mixed fabrics
2
KASTDROOG/A
RANGER
3 32 1,15
125987510_UK_I.qxp 2007-03-30 13:15 Page 9
Page 10

Structure of the appliance
Front view
Rear view
Side vent outlet
Ring nut
Rear vent outlet
Intake grille
Power
supply cable
Control panel
Adjustable feet
Fluff filters
Rating plate
Door (opening direction
can be changed)
Drum light
10
Structure of the appliance
125987510_UK_I.qxp 2007-03-30 13:15 Page 10
Page 11

Structure of the appliance
Control panel
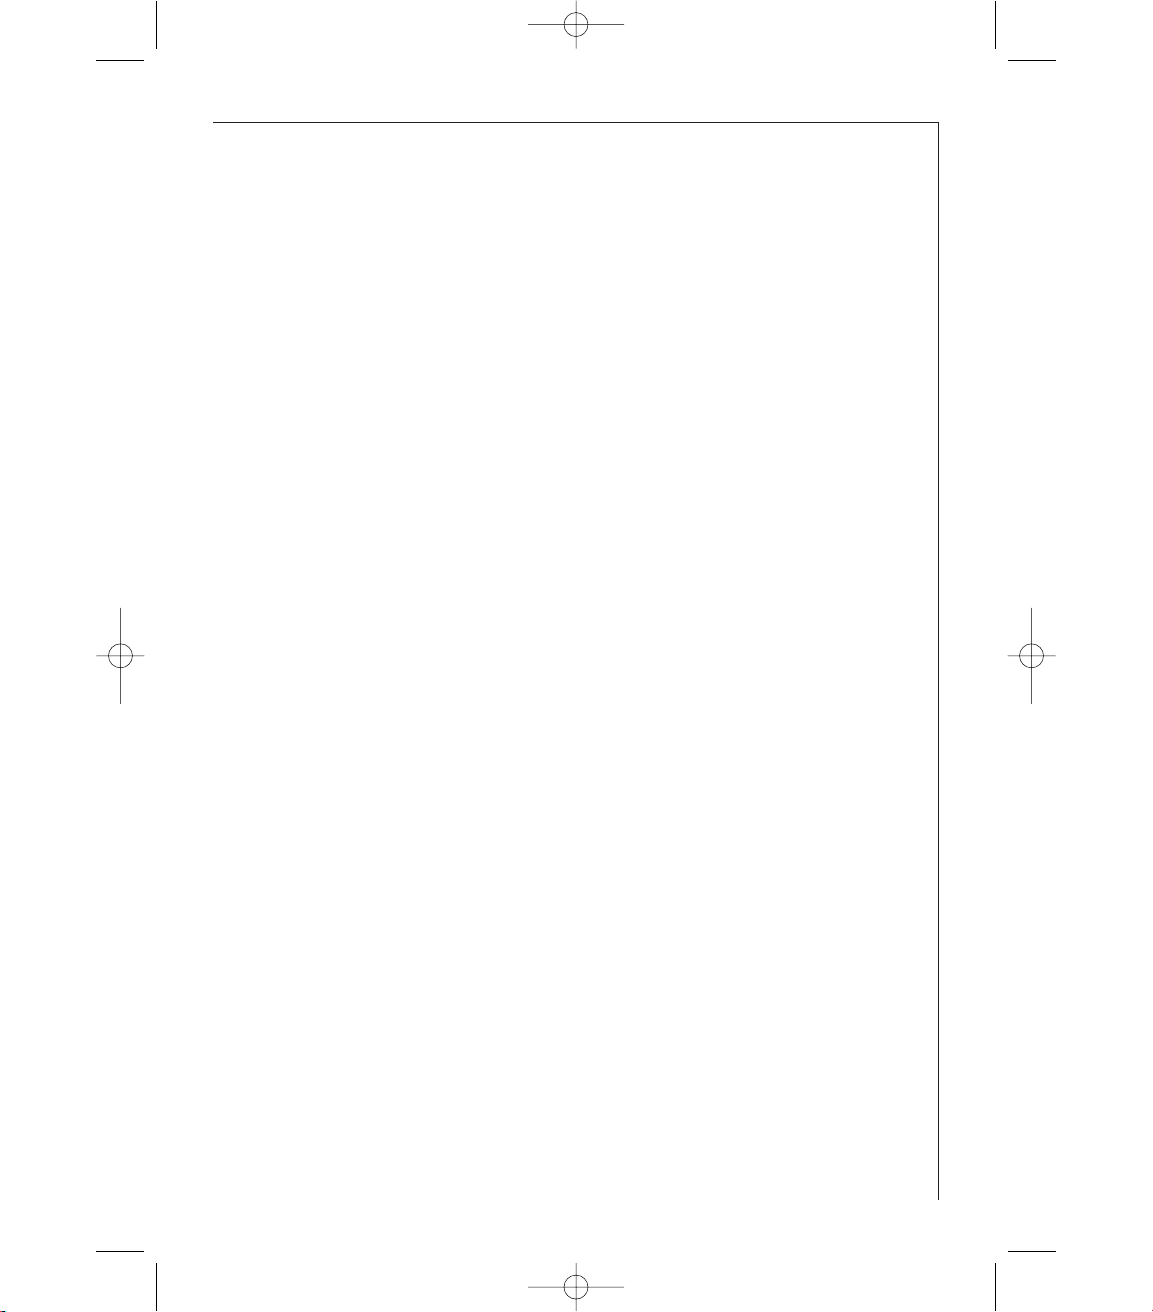
1 Programme/Time Selector Dial
Allows you to select electronically controlled or time controlled drying.
Turn the dial to the required programme or time.
Electronically controlled drying (automatic)
The appliance runs these programmes with the help of probes which
detect the degree of dampness of the laundry.
Simply select the programme according to the type of laundry and
degree of drying required.
Time controlled drying
This can be used to finish off drying if necessary. Select the 90 or 60
minute programme for cottons or the 30 minute programme for synthetics.
To cancel a programme which is running, turn the programme selector dial to “UIT/ARRET”.
At the end of drying, turn the selector dial to “UIT/ARRET” to switch
the machine off before removing the laundry.
2 START/PAUSE-DEPART/PAUSE button
Press this button to start the dryer after having selected the programme and the options.
The relevant light will stop flashing. If you have chosen a “STARTUITSTEL/D.DIFF.” delayed start, the machine will begin the countdown.
11
125987510_UK_I.qxp 2007-03-30 13:15 Page 11
Page 12

12
Structure of the appliance
If the door of the appliance or the small door at the bottom is
opened while the programme is running, this button must be
pressed again after closing the door in order to restart the programme from the point at which it was interrupted.
This button must also be depressed after a power failure.
In both cases the light of the “START/PAUSE-DEPART/PAUSE” button
flashes to remind you that the start button needs to be pressed again.
3 “STARTUITSTEL/D.DIFF.” button
This button allows you to delay the starting of the programme by 12
hours max.
This option must be selected after having selected the programme
and before pressing“START/PAUSE-DEPART/PAUSE” to start the programme.
Every time the button is pressed, the time is increased by 30 minutes, until the display shows a delay of “2 hours”. After this, the
delay is displayed hour by hour.
The minutes or hours of delay that have been selected are displayed
for 2 seconds, then the display shows the duration of the previously
selected programme.
The countdown begins after you have pressed the “START/PAUSEDEPART/PAUSE” button.
To cancel the delay time press the “START/PAUSE-DEPART/PAUSE”
button and after press the “STARTUITSTEL/D.DIFF.” button until the
display indicates
00
h. Then press the “START/PAUSE-DEPART/PAUSE”
button again.
When the delay is cancelled, the display shows
00
h and after the dura-
tion of the programme.
During the delayed start, it is not possible to change the programme
or the delay time that have been selected. To do this, you must first
switch off the machine by setting the programme selector dial to
“UIT/ARRET”. Select the new programme, the options and the delayed
start, then press the “START/PAUSE-DEPART/PAUSE” button.
During the delayed start, to cancel or change functions that have
been selected, simply set the appliance to PAUSE. Once you perform
the desired operation, press once again the “START/PAUSEDEPART/PAUSE” button.
If you wish to add more laundry while the machine is performing
the countdown, simply open the door. When you close the door,
press the “START/PAUSE-DEPART/PAUSE” button again to cause the
countdown to be resumed.
125987510_UK_I.qxp 2007-03-30 13:15 Page 12
Page 13
13
4 “DELICAAT/DELICAT” button
Pressing this button allows drying to be performed at a lower temperature, for delicate items.
The corresponding pilot light comes on.
This option can also be used for time controlled drying.
This option cannot be selected with “KORT/COURT”.
5 “KORT/COURT” button
By depressing this button the drying time is reduced in the following cotton programmes:
• EXTRADROOG/TRES SEC
• INTENSIEFDROOG/INTENSIVE
• KASTDROOG/A RANGER
The corresponding pilot light comes on.
This option cannot be selected with “DELICAAT/DELICAT” function.
6 “ZOEMER/ALARME” button
A buzzer sounds
• when selecting the programme
• when depressing the buttons
• when an incorrect option selection is made
• when the programme selector dial is turned to another position
during the programme or when you depress an option button
during the cycle
• at the end of the programme and during the anticrease phase
• if the machine is not working correctly
By depressing the button the acoustic signal is switched on.
7 ”DEUR/PORTE” button
Press this button to open the door . The light above the button will light up.
Opening the door by means of this button is possible only if the
tumble dryer is on (programme selector dial set to a programme
or drying time).
If you open the door during a programme, in order to restart the
programme you must press the “START/PAUSE-DEPART/PAUSE” button again after having closed the door.
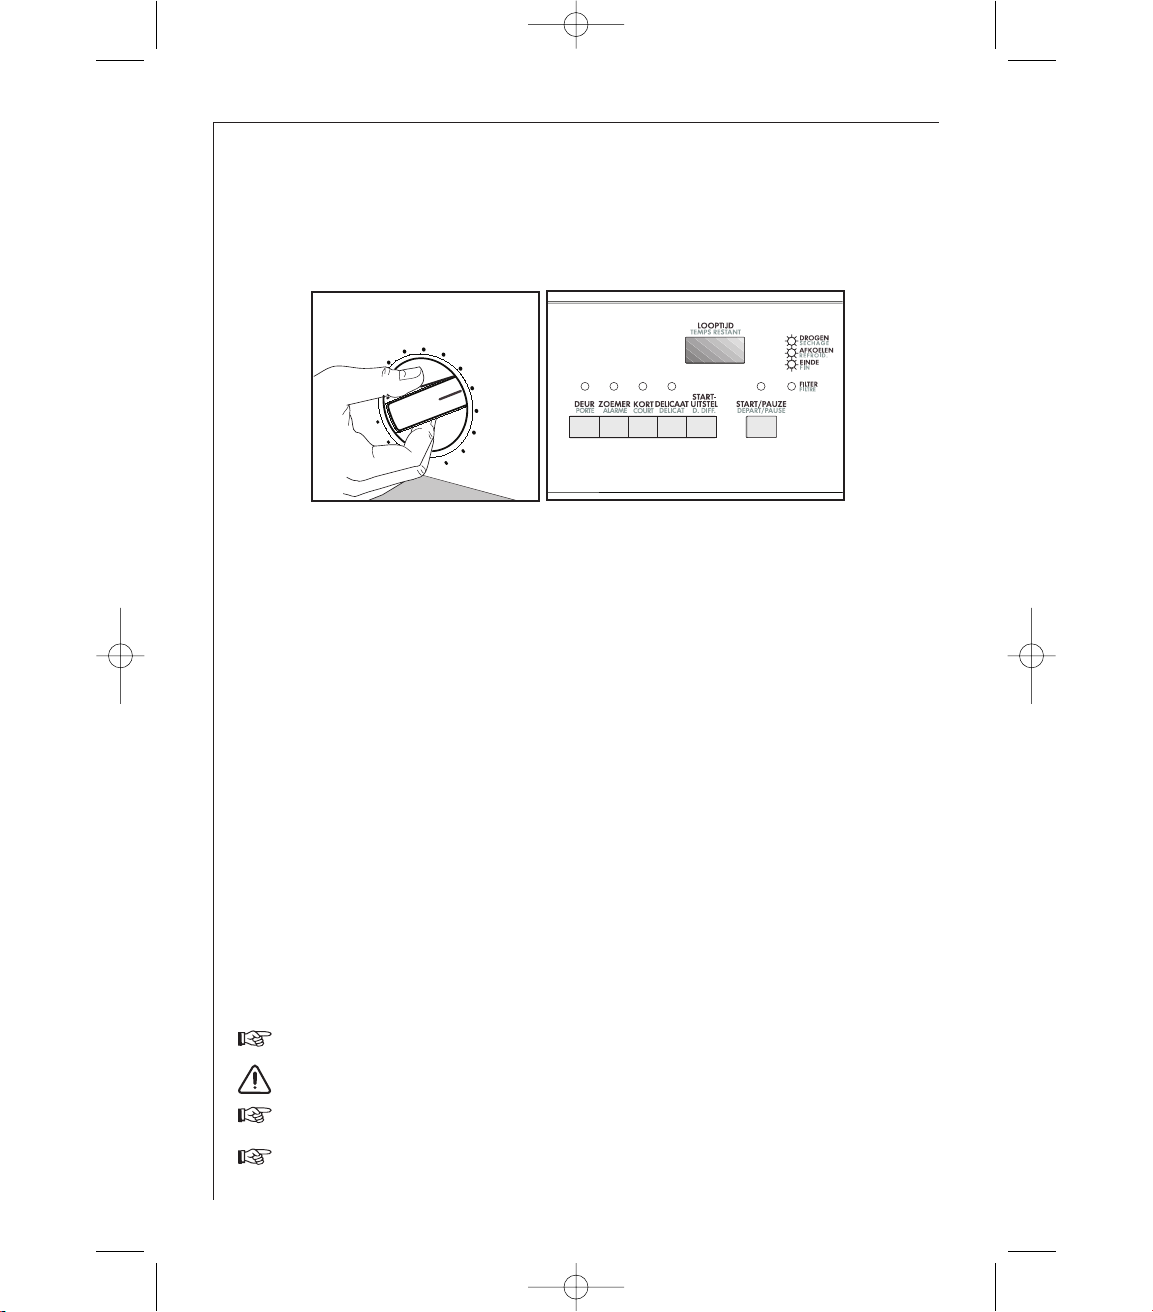
8 Display ”LOOPTIJD/TEMPS RESTANT”
The display shows the following information:
• duration of selected programme
• delayed start
• end of programme
• incorrect option selection
• alarm code
Structure of the appliance
125987510_UK_I.qxp 2007-03-30 13:15 Page 13
Page 14

Duration of selected programme
After you have selected the programme, its duration (in hours and
minutes) appears on the display. It is calculated automatically on
the basis of the maximum load accepted for each type of fabric and
of the required degree of drying.
When the programme starts, the remaining time is displayed every 5
minutes.
Delayed start
If you have selected a delay time by means of the relevant button,
the display shows it for 2 seconds;then it shows the duration of the
previously selected programme.
The countdown is displayed every 30 minutes until it displays “90
minutes” and then hour by hour.
End of programme
A flashing zero indicates the end of the programme and it is displayed after the “anticreasing” phase.
3
1.20
14
Structure of the appliance
125987510_UK_I.qxp 2007-03-30 13:15 Page 14
Page 15

Incorrect option selection
If you select an option that is not compatible with the programme
you have selected, the display shows
EErrrr
(error)
This code will reappear during the execution of the programme if
you press one of the option buttons or turn the programme selector.
Alarm code
In the case of a functional problem, the display shows an alarm
code (e.g.
EE2211
).
E21
0
15
Structure of the appliance
125987510_UK_I.qxp 2007-03-30 13:15 Page 15
Page 16

9 INDICATOR LIGHTS
These lights indicate the following functions:
• “DROGEN/SECHAGE” light.
This light indicates that the appliance is in the drying phase.
• “AFKOELEN/REFROID.” light.
This light indicates that the appliance is in the cooling phase. At the
end of drying, there is a 10 minute cooling phase to cool the laundry.
• “EINDE/FIN” light.
This light is on at the end of the cooling phase, during the anticreasing phase and at the end of the programme.
• “FILTER/FILTRE” light.
This light illuminates at the end of the programme to remind you
that the filters must be cleaned.
Brief operating instructions
• Spin the laundry as much as possible.
• Sort out the laundry.
• Put the laundry into the tumble dryer.
• Switch the machine on by selecting the drying programme/time.
• If necessary, press the “ZOEMER/ALARME” and/or “KORT/COURT”
and/or “DELICAAT/DELICAT” (This option cannot be selected with
“KORT/COURT” function) and/or “STARTUITSTEL/D.DIFF.” button.
• Press the “START/PAUSE-DEPART/PAUSE” for about 2 seconds to start
the dryer.
When the programme is in progress, the door can be opened in order
to remove laundry or to add other items.
At the end of the programme:
• Switch off the tumble dryer.
• Remove the laundry.
• Clean the fluff filters.
16
Structure of the appliance; Brief operating instructions
125987510_UK_I.qxp 2007-03-30 13:15 Page 16
Page 17

17
Drying
Drying
Before the first drying cycle
Before using your tumble dryer for the first time, we recommend to
place a few damp cloths inside the appliance and dry for 30 minutes.
There may be dust inside a brand new tumble dryer.
Sort out the laundry
• To prevent bundling of laundry: close zips, button up pillow cases and
duvet covers; tie any strings, such as apron strings.
• Empty pockets.
• Remove any metal parts (paper clips, safety pins, etc. ....).
• Turn garments made of double layer fabrics inside out (e. g. turn
anoraks with cotton lining inside out), so that they will dry better.
• Shake out the laundry.
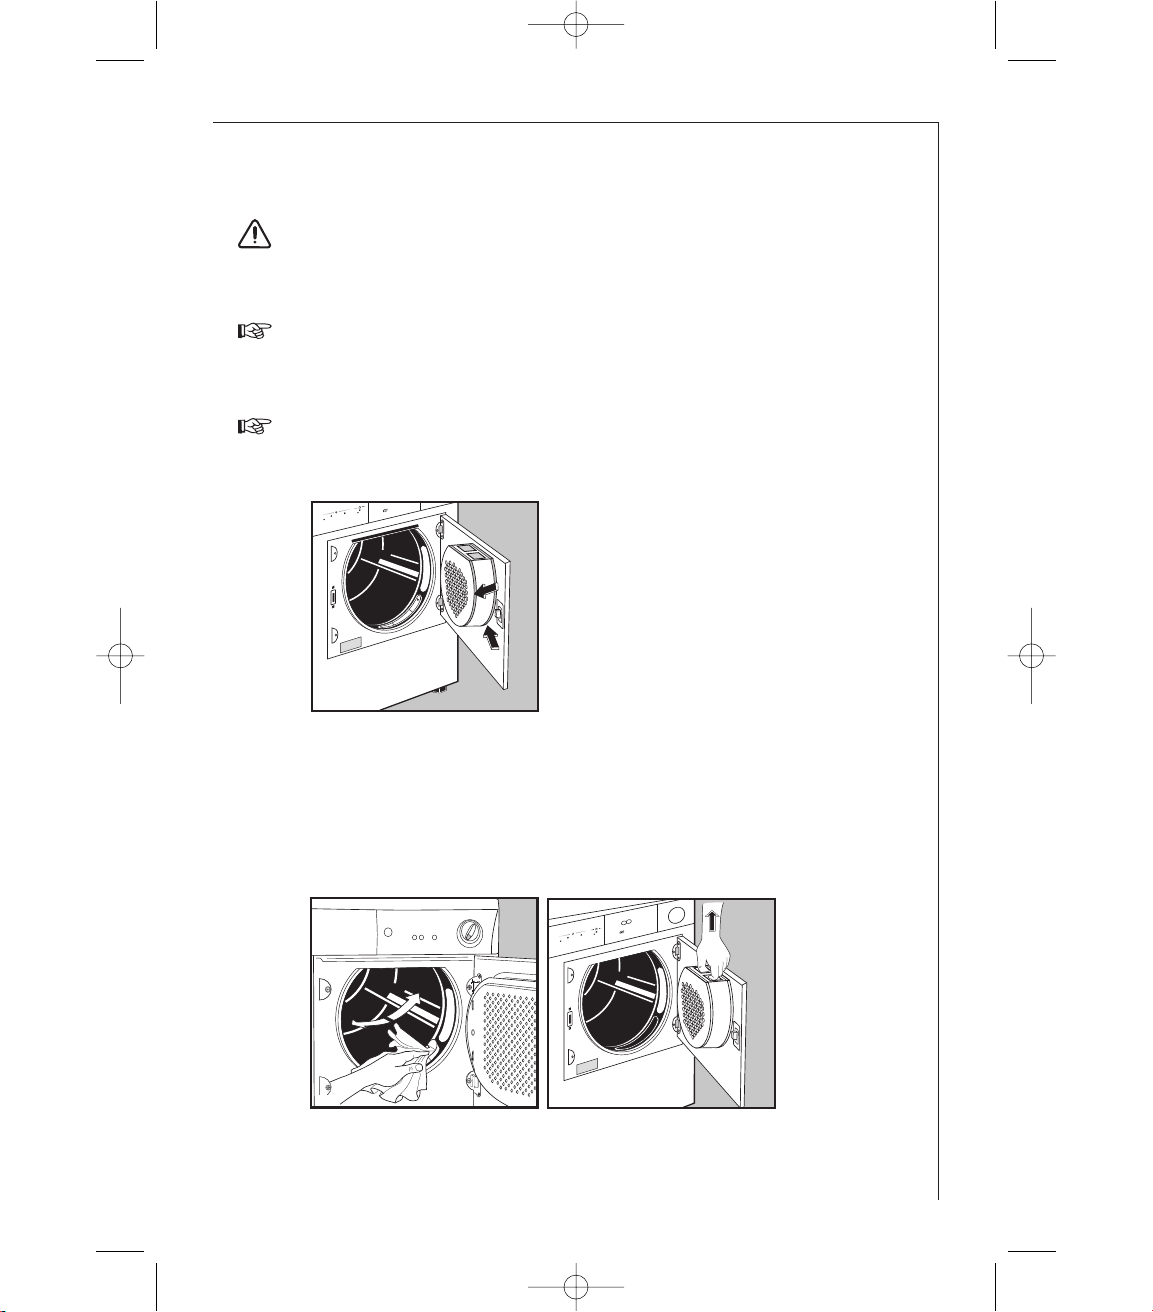
Open the door
• Open the door by presing on the left side as per picture
Load the laundry
Warning! When closing the door, do not trap any garments! The
fabrics could get damaged. Please check the laundry does not get
caught between the door and filter.
• Put the prepared and shaken out laundry into the dryer.
P1108
P1104
125987510_UK_I.qxp 2007-03-30 13:15 Page 17
Page 18
Switch the machine on - select the drying programme/time
• Select the drying programme or time. The lights “DROGEN/SECHAGE”,
“AFKOELEN/REFROID.” and “EINDE/FIN” come on. The light of the
“START/PAUSE-DEPART/PAUSE” button flashes and the display shows
the duration of the programme.
If required, press the “DELICAAT/DELICAT” button and/or the “ZOEMER/ALARME” button or the “KORT/COURT” button.
Select the “STARTUITSTEL/D.DIFF.” if required. The selected delay
appears on the display for 2 seconds, then the duration of the selected
programme is displayed.
Start the machine
Press the “START/PAUSE-DEPART/PAUSE” button: the corresponding
light stops flashing and drying starts. Only the “DROGEN/SECHAGE”
light stays lit. If you have selected the “STARTUITSTEL/D.DIFF.”, the
machine begins its countdown.
The drum turns alternately in both directions during drying.
All drying programmes end with a 10 minute cooling phase (light
“AFKOELEN/REFROID.” is on).
The “EINDE/FIN”and “FILTER/FIL TRE” lights illuminate. The display shows a static zero and the buzzer sounds to indicate the end of the cycle.
You may remove the laundry after this phase.
Remove or add laundry
It is possible to interrupt the drying cycle at any time in order to
remove or add laundry.
Open the door.
Caution! Laundry and drum can be hot.
Remove or add laundry.
Close the door and press “START/PAUSE-DEPART/PAUSE” button to
continue the drying cycle.
nexxt02
18
Drying
125987510_UK_I.qxp 2007-03-30 13:15 Page 18
Page 19

End of drying cycle
If the laundry is not removed at the end of the cycle, the dryer performs an anti-creasing phase (duration: 30 minutes maximum).
If you do not remove the laundry, the dryer will stop automatically at
the end of the anti-creasing phase.
The “EINDE/FIN” and “FILTER/FILTRE” lights remain lit and the buzzer
sounds for 2 minutes.
The light of the “START/PAUSE-DEPART/PAUSE” button goes off and
a flashing zero appears on the display.
Switch the tumble dryer off
Turn the programme selector dial to “UIT/ARRET”; all the lights go out.
The appliance is switched off.
Remove the laundry.
If you open and then close the door before turning the programme selector dial to “UIT/ARRET”, all the lights corresponding to the
phases making up the performed programme come on and the display shows the duration of the programme.
Important!
If the drying programme has to be stopped before it reaches the
end, we recommend that you turn the programme selector dial to
position “AFKOELEN/REFROID.” and wait until the end of thi s phase
before removing the laundry. This will avoid a build-up of heat
inside the appliance. To do this first turn the dial to “UIT/ARRET”
and then to “AFKOELEN/REFROID.” and depress “START/PAUSEDEPART/PAUSE” button.
Clean the filters
To ensure free circulation of air during the drying cycle, the fluff filters must be cleaned after each drying cycle, before removing the
laundry.
19
Drying
125987510_UK_I.qxp 2007-03-30 13:15 Page 19
Page 20

20
Adjusting the level of conductivity
Water contains, a variable quantity of limestone and mineral salts of
which quantities vary according to geographical locations thus varying its conductivity values.
Relevant variations of the conductivity of the water compared to
those prefixed by the factory could slightly influence the residual
humidity of the laundry at the end of the cycle.
Your dryer allows you to regulate the sensitivity of the drying sensor based on
conductivity values of the water by using the following procedure.
Procedure:
Turn the programme selector dial to switch on the appliance
In selection mode press simultaneously the buttons 3and 6until «
CC00
»
appears on the digits.
Adjusting the level of conductivity:
Press the button 5 sequentially: the level of conductivity is indicated
by the lighting of the horizontal hyphens.
Normally, the appliance is factory-set to the highest level; however, certain models may be configured differently.
Memorizing the new setting:
Simultaneously press down the buttons 3 and 6 until the previous
drying cycle time appears again on the display and the buzzer sounds.
DISPLAY
Conductivity degree
Approximative value
µS/cm (25°C)
CC00
--
Low < 300
CC00 --
Medium 300 - 600
CC00 --
High > 600
12345 6
Adjusting the level of conductivity
--
--
--
125987510_UK_I.qxp 2007-03-30 13:15 Page 20
Page 21

21
Programme Chart
Automatic drying (electronic programmes)
(*) According to CEI 1121 Standards.
• JEANS. Special programme for leisure clothing, such as jeans, sweat-shirts,
etc., of different material thicknesses (e.g. at the cuffs and seams).
Time controlled drying
(1) Never overfill the drum (do not load large quilts, for example).
Programm “AFKOELEN/REFROID.”
This position on the programme selector dial can be used to freshen the laundry (e.g. to
remove a persistent odour of moth-balls).
Load
It is often difficult to estimate the weight of items to be dried. We therefore r ecommend that
you adopt the following guidelines:
• cotton, linen: drum full but not too tightly packed;
• synthetics: drum no more than half full;
• delicate fabrics: drum no more than one third full.
Type of laundry
Drying time
Max-load
(1)
Programme
selector dial position
COTTON 90 min
7 kg 90 MIN
COTTON 60 min
7 kg 60 MIN
SYNTHETICS 30 min
3 kg 30 MIN
Type of laundry Programme
Max-load
(1)
COTTON
EXTRADROOG/TRES SEC
7 kg
INTENSIEFDROOG/INTENSIVE
7 kg
KASTDROOG/A RANGER
7 kg (*)
STRIJKDROOG/FER SEC
7 kg
STRIJKDROOG/A REPASSER
7 kg (*)
STRIJKDROOG/EN MACHINE
7 kg
SYNTHETICS
EXTRADROOG/TRES SEC
3 kg
KASTDROOG/A RANGER
3 kg (*)
STRIJKDROOG/A REPASSER
3 kg
Jackets, shirts, chemises.
LICHT STRIJKEN/
FACILE A REPASSER
2 kg
Jeans, sweat-shirts,
etc.,
JEANS
7 kg
Programme Chart
125987510_UK_I.qxp 2007-03-30 13:15 Page 21
Page 22

22
Hints & Tips on drying
Hints & Tips on Drying
Care symbols
Before placing articles of laundry in your tumble dryer, check the care
labels to ensure they are recommended for tumble drying.
Basically, this fabric can be tumble dried; however the manufactur er does not
specify whether it can be dried with normal or low temperature.
Normal drying (normal temperature)
Gentle drying (low temperature)
Do not tumble dry
If none of these symbols is found:
Dry cottons, as well as mixed fabrics, at normal temperature. Press the
“DELICAAT/DELICAT” button when delicate cottons have to be dried.
It is advisable to take into consideration the care symbols on garment
labels when buying them.
• Wool, eiderdowns
Do not dry any woollen items in the tumble dryer! They can felt!
Eiderdowns can be tumble dried only if the corresponding care symbol is present.
• Fabrics sensitive to high temperatures
Dry fabrics sensitive to high temperatures (such as acrylic or viscose)
and items bearing the care symbol using a synthetic drying programmes.
• Tricot garments, knitwear
Tricot garments and knitwear tend to shrink.
Do not overdry these items. High quality products are less likely to
shrink.
• New coloured fabrics
Do not dry new coloured fabrics with light-coloured laundry. This
could lead to discoloration!
125987510_UK_I.qxp 2007-03-30 13:15 Page 22
Page 23
Cleaning and care
Warning! You must disconnect the appliance from the electricity supply,
before you can carry out any cleaning or maintenance work.
External cleaning
Use only soap and water and then dry thoroughly.
Important: do not use methylated spirit, diluents or similar products.
Cleaning the door
Clean periodically the interior part of the door to remove any fluff from
the seals around the filter.
Regular cleaning ensures correct drying.
Cleaning the filters
Your dryer will only function well if the filters are clean.
The filters collect all the fluff which accumulates during drying and
they must therefore be cleaned at the end of each programme, before
removing the laundry, with a damp cloth.
The filter in the inner door must be removed for cleaning.
Do not be alarmed by the amount of fluff. It is not due to excessive
wear caused by the dryer. All fabric looses fluff when drying but it
A
U
T
O
R
E
V
E
R
S
E
k
g
5
k
g
2
,5
8
0
0
/
9
0
0
7
0
'
-
9
0
'
3
5
'
-
5
0
'
1
0
0
0
/
1
2
0
0
6
5
'
-
8
5
'
3
0
'
-
4
5
'
8
0
0
/
9
0
0
8
0
' -
1
0
0
'
5
5
'
-
7
0
'
1
0
0
0
/
1
2
0
0
7
5
'
-
9
5
'
5
0
'
-
6
5
'
6
5
0
5
0
'
-
6
0
'
3
0
'
-
3
5
'
k
g
2
,5
k
g
1
P1111
P1110
A
U
T
O
R
E
V
E
R
S
E
k
g
5
k
g
2
,5
8
0
0
/
9
0
0
7
0
'
-
9
0
'
3
5
'
-
5
0
'
1
0
0
0
/
1
2
0
0
6
5
'
-
8
5
'
3
0
'
-
4
5
'
8
0
0
/
9
0
0
8
0
'
-
1
0
0
'
5
5
'
-
7
0
'
1
0
0
0
/
1
2
0
0
7
5
'
-
9
5
'
5
0
'
-
6
5
'
6
5
0
5
0
'
-
6
0
'
3
0
'
-
3
5
'
k
g
2
,5
k
g
1
P1109
23
Cleaning and care
125987510_UK_I.qxp 2007-03-30 13:15 Page 23
Page 24

goes un-noticed in the air. In a tumble dryer it simply collects in the
filter.
If necessary the filters can be cleaned under running water using a brush. In
this case, remove the filter in the door opening as per picture (it can be positioned with the tongue facing to the left or to the right).
Cleaning the drum
Warning! Do not clean the stainless steel drum with abrasive detergent
or steel wool.
Wipe the inside of the drum and the drum paddles with a standard household detergent (e.g. vinegar solution).
Cleaning the panel and the controls
Warning! Do not use household furniture polish or abrasive detergents.
Wipe the panel and the controls with a damp cloth only . Use only warm
water.
A
U
T
O
R
E
V
E
R
S
E
k
g
5
k
g
2
,5
8
0
0
/
9
0
0
7
0
'
-
9
0
'
3
5
'
-
5
0
'
1
0
0
0
/
1
2
0
0
6
5
'
-
8
5
'
3
0
'
-
4
5
'
8
0
0
/
9
0
0
8
0
' -
1
0
0
'
5
5
'
-
7
0
'
1
0
0
0
/
1
2
0
0
7
5
'
-
9
5
'
5
0
'
-
6
5
'
6
5
0
5
0
'
-
6
0
'
3
0
'
-
3
5
'
k
g
2
,5
k
g
1
P1112
24
Cleaning and care
125987510_UK_I.qxp 2007-03-30 13:15 Page 24
Page 25
Something not working?
If a problem occurs, you can try to solve it yourself following the
instructions below. If you call out an engineer when one of the following problems occurs, or to repair a fault due to incorrect use, the callout will be charged even if requested within the guarantee period.
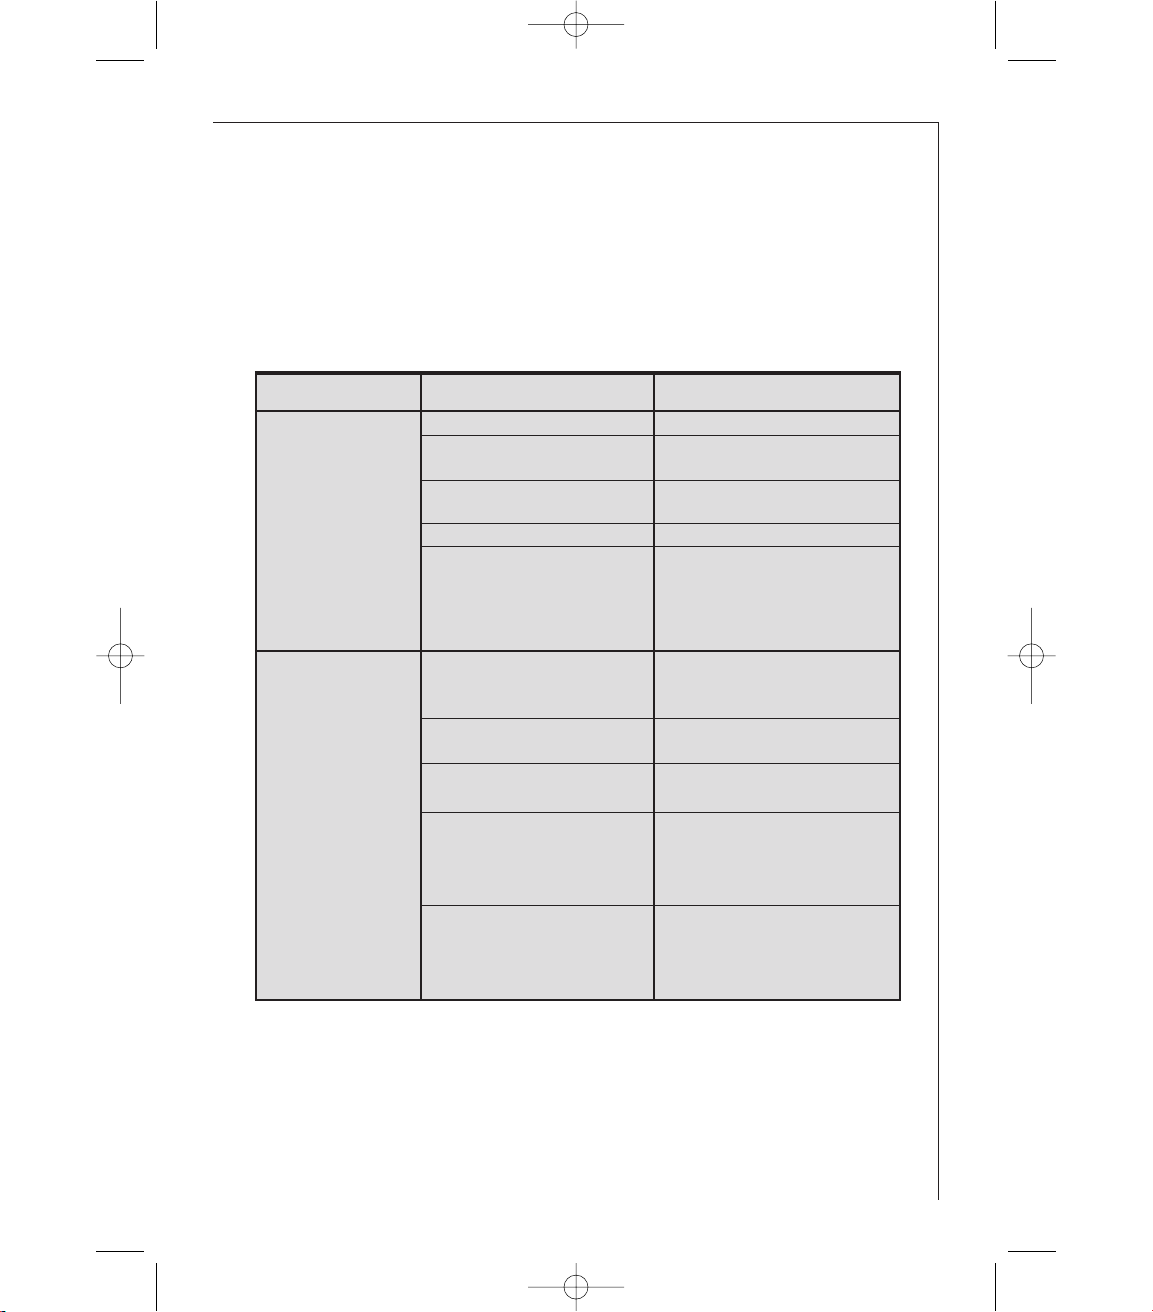
Problem Possible cause
Remedy
The drier is not working
properly
Mains plug disconnected Plug in mains plug
The “START/PAUSE-DEPART/PAUSE”
button has not been depressed.
press “START/PAUSE-DEPART/PAUSE”
button
No programme selected Select programme
Loading door open Close loading door
Fuse or residual current circuit
breaker in fuse box (domestic
installation) faulty
Check fuse or residual current circuit
breaker. Faults can be eliminated by
an electrical engineer
The drying results
are not satisfactory
Wrong programme selected
Select another (time) programme for
the next drying cycle
Lint filter blocked Clean lint filter
Wrong filling quantity Observe recommended filling quantity
Laundry not sufficiently dried Pre-dry laundry sufficiently
Deposit on the drum inner surface-
or on the drum ribs
Clean drum inner surface and drum
ribs
25
Something not working?
125987510_UK_I.qxp 2007-03-30 13:15 Page 25
Page 26
If these operating instructions do not offer sufficient advice to eliminate a specific fault, please contact our customer service.
Problem Possible cause
Remedy
The drying cycle
exceptionally takes a
long time
Vented air transport disrupted
Straighten N- air venting hose and/or
clean air venting ducts
Lint filter blocked Clean lint filter
The loading door
cannot be closed
Lint filter not installed and/or filter
lid not locked in position
Install lint filter and/or lock filter lid
in position
The drier ends the
drying cycle automa-
tically: “EINDE/FIN”
indicator is illuminated shortly after pro-
gramme start
Too little or too dry laundry loaded
for selected programme
Select time programme or higher
drying level (for instance EXT-
RADROOG/TRES SEC instead of
KASTDROOG/A RANGER)
The drying cycle
exceptionally takes a
long time. 4,5 hours
after starting the
drying cycle:
“EINDE/FIN” indicator
is illuminated - dry-
ing cycle is aborted
- programme run
indicator flashes
“DELICAAT/DELICAT”- button depres-
sed and filling quantity too large
Check programme selection: only use
“DELICAAT/DELICAT” -button for
laundry quantities up to 3 kg. Clean
lint filter.
Filling quantity too large Reduce filling quantity
Laundry too wet Pre-dry laundry more thorougly
26
Something not working?
125987510_UK_I.qxp 2007-03-30 13:15 Page 26
Page 27
Technical specifications
Height x Width x Depth 85x60x57 cm
Depth with the door open 107 cm
Height adjustment 6 mm
Empty weight ca. 32 kg
Load (according to the programme) max. 7 kg
(Different load sizes in some countries are due to different measuring
methods)
Use Domestic
Permissible ambient temperature +5°C to +35°C
This appliance complies with the following EC directives:
- 73/23/EEC of 19/2/1973 “Low voltage directive”
- 89/336/EEC of 3/5/1989 “EMC directive” including modification
directive 92/31/EEC.
Electrical connection
The manufacturer declines any liability should this safety measure not
be observed.
Specifications concerning the power supply are indicated on the
rating plate. The rated voltage and the type of current stated on the
plate must correspond to those which exist where the dryer is installed. Also refer to the rating plate for the type of fuse required.
Before switching on, make sure the electricity supply voltage is the
same as that indicated on the appliance’s rating plate. (See picture on
page 10).
Check that your domestic electrical installation can take the maximum
load required, also taking into account any other appliances in use.
Warning! THIS APPLIANCE MUST BE EARTHED.
Important:
The plug must be accessible after the appliance has been installed.
27
Technical specifications
125987510_UK_I.qxp 2007-03-30 13:15 Page 27
Page 28

Unpacking
Slide out the polythene bag with the polystyrene stuffing before
using the appliance. .
Pull off adhesive strips from inside machine on top of drum.
Special accessory
You can obtain the following special accessory through the AEG
customer service organisation or from your dealer:
Kit Washing/drying column
With this kit you can combine your dryer with any LAVAMAT automatic washing machine to a washing and drying column. The appliances are stacked in space-economising manner in this arrangement,
the washing machine at the bottom and the dryer at the top.
It should be possible to stack your new dryer on top of a front loading washing machine with cover’s depth between 48 and 60 cm.
Read carefully the instructions supplied with the kit.
Door reversal
To make it easier to load or unload the laundry the door can be
reversed.
This operation must be carried out by qualified personnel.
Please contact the nearest Service Force Centre. This is a chargeable
option.
P1107
P1106
28
Unpacking/ Special accessory/Door reversal
125987510_UK_I.qxp 2007-03-30 13:15 Page 28
Page 29

Service
In the chapter “Something not working?” some problems that can be
solved by yourself are listed. Read this section in the event of problems.
If you are not able to find a solution, contact the Service centre. It is
close by and, if necessary, an engineer will soon be with you. (Addresses and telephone numbers are given on the enclosed form).
In all cases, set your speech before calling, in order to facilitate
troubleshooting: the engineer will be able to decide whether a service
visit is necessary.
Take note of the serial number (Ser . No.) and the pr oduct number (Pr od.
No.) indicated on the rating plate.
Prod. No. . . . . . . . . . . . . . . . . . . . . . .
Ser. No. . . . . . . . . . . . . . . . . . . . . . . . .
Try to specify, as precisely as possible:
• The symptoms of the fault.
• When the fault occurs.
When can a service visit be charged during the guarantee period?
- when it should have been possible to solve the problem by yourself,
with the help of the troubleshooting chart (see section “Something
not working?”)
- when the engineer has to come out several times because he has
not been given all the relevant information he needs and so, for
example, has to fetch spare parts. Repeated trips can be avoided if
you prepare your call to the Service centre as described above.
IPX4
Mod. xxxxxx Type xxxxxxx
Prod.No. xxxxxxxxx xx
xxx-xxxV~xxHz xxxxW xx A
Ser.No.
29
Service
125987510_UK_I.qxp 2007-03-30 13:15 Page 29
Page 30
30
Guarantee Conditions
Belgium
DECLARATION OF GUARANTEE TERMS.
Our appliances are produced with the greatest of care. However, a defect may still occur. Our consumer services
department will repair this upon request, either during or after the guarantee period. The service life of the appliance will not, however, be reduced as a result.
This declaration of guarantee terms is based on European Union Directive 99/44/EC and the provisions of the Civil
Code. The statutory rights that the consumer has under this legislation are not affected by this declaration of guarantee terms. This declaration does not affect the vendor's statutory warranty to the end user. The appliance is guaranteed within the context of and in adherence with the following terms:
1. In accordance with provisions laid down in paragraphs 2 to 15, we will remedy free of
charge any defect that occurs within 24 months from the date the appliance is delivered
to the first end user. These guarantee terms do not apply in the event of use for professional or equivalent purposes.
2. Performing the guarantee means that the appliance is returned to the condition it was in
before the defect occurred. Defective parts are replaced or repaired. Parts replaced free of
charge become our property.
3. So as to avoid more severe damage, the defect must be brought to our attention immediately.
4. Applying the guarantee is subject to the consumer providing proof of purchase showing
the purchase and/or delivery date.
5. The guarantee will not apply if damage caused to delicate parts, such as glass (vitreous
ceramic), synthetic materials and rubber, is the result of inappropriate use.
6. The guarantee cannot be called on for minor faults that do not affect the value or the
overall reliability of the appliance.
7. The statutory warranty does not apply when defects are caused by:
• a chemical or electrochemical reaction caused by water,
• abnormal environmental conditions in general,
• unsuitable operating conditions,
• contact with harsh substances.
8. The guarantee does not apply to defects due to transport which have occurred outside of
our responsibility. Nor will the guarantee cover those caused by inadequate installation or
assembly, lack of maintenance or failure to respect the assembly instructions or directions
for use.
9. Defects that result from repairs or measures carried out by people who are not qualified
or expert or defects that result from the addition of non-original accessories or spare
parts are not covered by the guarantee.
10. Appliances that are easy to transport may be delivered or sent to the consumer services
department. Home repairs are only anticipated for bulky appliances or built-in appliances.
11. If the appliances are built-in, built-under, fixed or suspended in such a way that removing and replacing them in the place where they are fitted takes more than half an hour,
the costs that result therefrom will be charged for. Connected damage caused by these
removal and replacement operations will be the responsibility of the user.
12. If, during the guarantee period, repairing the same defect repeatedly is not conclusive, or
125987510_UK_I.qxp 2007-03-30 13:15 Page 30
Page 31

31
if the repair costs are considered disproportionate, in agreement with the consumer, the
defective appliance may be replaced with another appliance of the same value. In this
event, we reserve the right to ask for a financial contribution calculated according to the
length of time it has been used.
13. A repair under guarantee does not mean that the normal guarantee period will be extended nor that a new guarantee period begins.
14.We give a twelve month guarantee for repairs, limited to the same defect.
15. Except in the event where liability is legally imposed, this declaration of guarantee terms
excludes any compensation for damage outside the appliance for which the consumer
wishes to assert his rights. In the event of legally admitted liability, compensation will not
exceed the purchase price paid for the appliance.
These guarantee terms are only valid for appliances purchased and used in Belgium. For
exported appliances, the user must first make sure that they satisfy the technical conditions (e.g.: voltage, frequency, installation instructions, type of gas, etc.) for the country
concerned and that they can withstand the local climatic and environmental conditions.
For appliances purchased abroad, the user must first ensure that they meet the qualifications required in Belgium. Non-essential or requested adjustments are not covered by the
guarantee and are not possible in all cases. Our consumer services department is always at
your disposal, even after the guarantee period has expired.
Address for our consumer services department:
ELECTROLUX HOME PRODUCTS BELGIUM
Bergensesteenweg, 719 - 1502 LEMBEEK
Tel.: 02.363.04.44
Customer Service Centres
Belgium
Electrolux Home Products Belgium
ELECTROLUX SERVICE
Bergensesteenweg 719
1502 Lembeek
E-mail:
consumer.services@electrolux.be
Consumer services
Tel.
02/363.04.44
Fax.:
02/363.04.00
02/363.04.60
125987510_UK_I.qxp 2007-03-30 13:15 Page 31
Page 32

32
125987510_UK_I.qxp 2007-03-30 13:15 Page 32
Page 33

32
Sehr geehrte Kundin, sehr geehrter Kunde,
lesen Sie bitte diese Gebrauchsanweisung sorgfältig durch.
Beachten Sie vor allem die Sicherheitshinweise auf den ersten Seiten
dieser Gebrauchsanweisung! Bewahren Sie bitte die Gebrauchsanweisung zum späteren Nachschlagen auf. Geben Sie sie an eventuelle
Nachbesitzer des Geräts weiter.
Mit dem Warndreieck und/oder durch Signalwörter (W arnung!, Vorsicht!,
Achtung!) sind Hinweise hervorgehoben, die für Ihre Sicherheit oder für
die Funktionsfähigkeit des Geräts wichtig sind.
Bitte unbedingt beachten.
Dieses Zeichen leitet Sie Schritt für Schritt beim Bedienen des Geräts.
Nach diesem Zeichen erhalten Sie ergänzende Informationen zur Bedie-
nung und praktischen Anwendung des Geräts.
Mit dem Kleeblatt sind Tipps und Hinweise zum wirtschaftlichen und
umweltschonenden Einsatz des Geräts gekennzeichnet.
Für eventuell auftretende Störungen enthält die Gebrauchsanweisung
Hinweise zur selbständigen Behebung, siehe Abschnitt “Was tun,
wenn...”
Beachten Sie dazu den Abschnitt “Service”.
Gedruckt auf umweltschonend hergestelltem Papier.
Wer ökologisch denkt, handelt auch so...
125987510_D_II.qxp 2007-03-30 13:19 Page 32
Page 34

33
Inhalt
Sicherheitshinweise. . . . . . . . . . . . . . . . . . . . . . . . . . . . . . . . . . . . . . . . . . 34-36
Allgemeine Hinweise. . . . . . . . . . . . . . . . . . . . . . . . . . . . . . . . . . . . . . . . . . . . 37
Entsorgung . . . . . . . . . . . . . . . . . . . . . . . . . . . . . . . . . . . . . . . . . . . . . . . . . . . . 37
Umwelttips . . . . . . . . . . . . . . . . . . . . . . . . . . . . . . . . . . . . . . . . . . . . . . . . . 38-39
Die wichtigsten Merkmale Ihres Gerätes. . . . . . . . . . . . . . . . . . . . . . . . . 40-46
Geräteaufbau. . . . . . . . . . . . . . . . . . . . . . . . . . . . . . . . . . . . . . . . . . . . . . . . . . . . 40
Vorderansicht. . . . . . . . . . . . . . . . . . . . . . . . . . . . . . . . . . . . . . . . . . . . . . . . . . . . 40
Rückansicht . . . . . . . . . . . . . . . . . . . . . . . . . . . . . . . . . . . . . . . . . . . . . . . . . . . . . 40
Bedienblende . . . . . . . . . . . . . . . . . . . . . . . . . . . . . . . . . . . . . . . . . . . . . . . . . 41-46
Kurzanleitung . . . . . . . . . . . . . . . . . . . . . . . . . . . . . . . . . . . . . . . . . . . . . . . . . . . 46
Trocknen . . . . . . . . . . . . . . . . . . . . . . . . . . . . . . . . . . . . . . . . . . . . . . . . . . . . 47-49
Wäsche vorbereiten. . . . . . . . . . . . . . . . . . . . . . . . . . . . . . . . . . . . . . . . . . . . . . . 47
Einfülltür öffnen . . . . . . . . . . . . . . . . . . . . . . . . . . . . . . . . . . . . . . . . . . . . . . . . . 47
Wäsche einfüllen. . . . . . . . . . . . . . . . . . . . . . . . . . . . . . . . . . . . . . . . . . . . . . . . . 47
Gerät einschalten, Programm einstellen. . . . . . . . . . . . . . . . . . . . . . . . . . . . . . 48
Programm starten. . . . . . . . . . . . . . . . . . . . . . . . . . . . . . . . . . . . . . . . . . . . . . . . 48
Wäsche herausnehmen oder nachlegen . . . . . . . . . . . . . . . . . . . . . . . . . . . . . . 49
Ende des Trockengangs. . . . . . . . . . . . . . . . . . . . . . . . . . . . . . . . . . . . . . . . . . . . 49
Trockner ausschalten. . . . . . . . . . . . . . . . . . . . . . . . . . . . . . . . . . . . . . . . . . . . . . 49
Flusensieb reinigen . . . . . . . . . . . . . . . . . . . . . . . . . . . . . . . . . . . . . . . . . . . . . . . 49
Einstellung der Leitfähigkeit des Wassers. . . . . . . . . . . . . . . . . . . . . . . . . . . 50
Programmtabellen . . . . . . . . . . . . . . . . . . . . . . . . . . . . . . . . . . . . . . . . . . . . . . . 51
Eine kleine Textilkunde. . . . . . . . . . . . . . . . . . . . . . . . . . . . . . . . . . . . . . . . . . . 52
Pflegesymbole . . . . . . . . . . . . . . . . . . . . . . . . . . . . . . . . . . . . . . . . . . . . . . . . . . . 52
Reinigen und Pflegen . . . . . . . . . . . . . . . . . . . . . . . . . . . . . . . . . . . . . . . . . . . . 53
Reinigung des Trocknergehäuses. . . . . . . . . . . . . . . . . . . . . . . . . . . . . . . . . . . . 53
Einfülltür reinigen. . . . . . . . . . . . . . . . . . . . . . . . . . . . . . . . . . . . . . . . . . . . . . . . 53
Reinigung der Flusensiebe . . . . . . . . . . . . . . . . . . . . . . . . . . . . . . . . . . . . . . 53-54
Trommel reinigen. . . . . . . . . . . . . . . . . . . . . . . . . . . . . . . . . . . . . . . . . . . . . . . . . 54
Blenden und Bedienteile reinigen. . . . . . . . . . . . . . . . . . . . . . . . . . . . . . . . . . . 54
Was tun, wenn ...?. . . . . . . . . . . . . . . . . . . . . . . . . . . . . . . . . . . . . . . . . . . . 55-56
Technische Daten. . . . . . . . . . . . . . . . . . . . . . . . . . . . . . . . . . . . . . . . . . . . . . . . 57
Elektrischer Anschluß . . . . . . . . . . . . . . . . . . . . . . . . . . . . . . . . . . . . . . . . . . . . 57
Entfernen der Transportsicherung. . . . . . . . . . . . . . . . . . . . . . . . . . . . . . . . . . 58
Sonderzubehör . . . . . . . . . . . . . . . . . . . . . . . . . . . . . . . . . . . . . . . . . . . . . . . . . . 58
Bausatz Wasch-Trocken-Säule. . . . . . . . . . . . . . . . . . . . . . . . . . . . . . . . . . . . . . 58
Türanschalgwechsel. . . . . . . . . . . . . . . . . . . . . . . . . . . . . . . . . . . . . . . . . . . . . . 58
Service . . . . . . . . . . . . . . . . . . . . . . . . . . . . . . . . . . . . . . . . . . . . . . . . . . . . . . . . . 59
125987510_D_II.qxp 2007-03-30 13:19 Page 33
Page 35

34
Sicherheitshinweise
Sicherheitshinweise
Die Sicherheit von AEG-Elektrogeräten entspricht den anerkannten
Regeln der Technik und dem Gerätesicherheitsgesetz. Dennoch sehen wir
uns als Hersteller veranlasst, Sie mit folgenden Sicherheitshinweisen
vertraut zu machen:
Allgemeine Sicherheit
• Reparaturen am Trockner dürfen nur von Fachkräften durchgeführt
werden. Durch unsachgemäße Reparatur en können erhebliche Gefahren für den Benutzer entstehen. Wenden Sie sich im Reparaturfall an
unseren Kundendienst oder an einen von AEG autorisierten Fachhändler.
• Vergewissern Sie sich vor Inbetriebnahme, dass die auf dem Typschild
des Geräts angegebene Nennspannung und Stromart mit Netzspannung und Stromart am Aufstellort übereinstimmen. Die erforderliche
elektrische Absicherung ist ebenfalls dem Typschild zu entnehmen.
• Nehmen Sie den Trockner niemals in Betrieb, wenn Netzkabel beschädigt ist oder Bedienblende, Arbeitsplatte oder Sockelbereich so
beschädigt sind, dass das Geräteinnere offen zugänglich ist.
• Schalten Sie vor Reinigung, Pflege und Wartungsarbeiten den Trockner aus. Ganz sicher gehen Sie, wenn Sie den Netzstecker aus der
Steckdose ziehen oder – bei Festanschluss – den LS-Schalter im
Sicherungskasten ausschalten oder die Schraubsicherung ganz herausdrehen
• Netzkabel nie am Kabel aus der Steckdose ziehen, sondern am Stecker .
• Stützen Sie sich nicht auf die geöffnete Tür, das Gerät könnte kippen
• Spritzen Sie den Trockner nicht mit einem Wasserstrahl ab. Stromschlaggefahr!
• Beim Schließen der Einfülltür darauf achten, dass die Wäsche nicht
eingeklemmt wird.
• Wenn Sie den Trockengang unterbrechen, um Wäsche zu entnehmen:
Wäsche und Trommel können heiß sein.
• Vielfachstecker, Kupplungen und Verlängerungskabel dürfen nicht
verwendet werden. Brandgefahr durch Überhitzung!
• Mit Öl getränkte oder befleckte Wäschestücke dürfen nicht in
dem Trockner getrocknet werden. Brandgefahr!
• Falls Sie Ihre Wäsche mit einem Fleckentferner behandelt haben,
führen Sie in Ihrem Waschprogramm einen extra Spülgang durch.
125987510_D_II.qxp 2007-03-30 13:19 Page 34
Page 36

35
Sicherheit von Kindern
• Kinder können Gefahren, die im Umgang mit Elektrogeräten liegen,
oft nicht erkennen. Sorgen Sie deshalb für die notwendige Aufsicht
während des Betriebs und lassen Sie Kinder nicht mit dem Trockner
spielen - es besteht die Gefahr, daß Kinder sich einschließen.
• Verpackungsteile (z.B. Folien, Styropor) können für Kinder gefährlich
sein. Erstickungsgefahr! Verpackungsteile von Kindern fernhalten.
• Stellen Sie sicher, daß Kinder oder Kleintiere nicht in die Trommel des
Trockners klettern. Halten Sie dazu die Tür des Trockners geschlossen,
wenn er nicht benutzt wird.
Bestimmungsgemäße Verwendung
• Umbauten oder Veränderungen am Trockner sind aus Sicherheitsgründen nicht zulässig.
• Verwenden Sie den Trockner nur zum Trocknen haushaltsüblicher
Wäsche. Wird das Gerät zweckentfremdet oder falsch bedient, kann
vom Hersteller keine Haftung für eventuelle Schäden übernommen
werden.
• Trocknen Sie nur Wäsche, die in Wasser gewaschen wurde. Besonders
mit feuergefährlichen Reinigungs- und Lösungsmitteln (Waschbenzin, Alkohol, Fleckentferner und ähnliches) behandelte Textilien dürfen nicht im Trockner getrocknet werden. Brandgefahr! Explosionsgefahr!
• Wäschestücke, die Schaumgummi oder gummiähnliches Material enthalten, dürfen nicht im Trockner getrocknet werden. Brandgefahr!
• Wäschestücke in sehr schlechtem Zustand (starker Verschleiß) und
Wäschestücke mit losen Füllungen (Kissen), die undicht sein können,
dürfen nicht getrocknet bzw. aufgefrischt werden. Brandgefahr!
• Wäschestücke mit starren Bestandteilen (Fussmatten) und überfüllte
Trommeln verdecken die Luftschlitze. Halten Sie die Füllmenge von
max. 7 kg ein. Überhitzung! Brandgefahr.
• Nur Wäsche trocknen, in der sich keine explosiven Gegenstände
(Feuer-zeuge, Spraydosen) befinden. Brandgefahr! Explosionsgefahr!
• Nach jedem Trockengang das Flusensieb reinigen.
• Bei Wasch-Trockensäulen keine Gegenstände auf den T rockner stellen,
da diese während des Betriebs herunterfallen könnten.
Sicherheitshinweise
125987510_D_II.qxp 2007-03-30 13:19 Page 35
Page 37

36
Aufstellung und Anschluß
• Beachten Sie die separate Aufstell- und Anschluß-Anweisung. Holen
Sie gegebenenfalls den Rat Ihres Bezirksschornsteinfegers oder der
örtlichen Baubehörde ein.
• Trockner auf Transportschäden überprüfen. Ein beschädigtes Gerät
auf keinen Fall anschließen! Wenden Sie sich im Schadensfall an Ihren
Lieferanten.
• Wenn der Trockner getragen werden soll, vorher Sockelblende entfernen!
• Trockner nicht in frostgefährdeten Räumen aufstellen!
• Trockner waagrecht aufstellen!
• Bei Aufstellung neben einem Gas-, Kohle- oder Elektroherd: Zwischen
Trockner und Herd muß eine wärmeisolierende, nicht brennbare Platte
eingefügt werden (Abmessungen: 85x57,5cm).
• Der Trockner darf nicht auf hochflorigen Teppichböden aufgestellt
wer-den. Behinderung der Luftzirkulation an den Luftschlitzen!
• Achten Sie darauf, dass der Trockner nicht auf dem Netzkabel steht.
• Der Stecker des Gerätes muss auch nach der Aufstellung zugänglich
bleiben.
• Die Abluft des Trockners darf nicht in einen Rauch- oder Abgasschorn-stein eingeleitet werden.
• Abluft nicht in einen Schacht einleiten, welcher der Entlüftung von
Aufstellräumen von Feuerungsstätten dient.
• Trockner nicht in einem Raum aufstellen, in dem sich kamingebundene Feuerungsstätten mit Kohle- und Ölöfen oder Gasthermen befinden und in denen der Unterdruck 0,04mbar oder mehr beträgt.
• Für ausreichende Raumbelüftung sorgen, um die Ausbildung von
Unterdruck zu vermeiden
• Gemäß den technischen Anschlußbedingungen der Elektroversorgungsunternehmen darf ein Festanschluß an das elektrische Netz nur
von einem autorisierten Elektroinstallateur durchgeführt werden.
• Der Ablufttrockner saugt Luft an. Halten Sie deshalb die Umgebung
des Gerätes sauber und lagern Sie am Gerät keine ansaugbaren und
brenn-baren Teile (z. B. Kleintierstreu, Späne). Brandgefahr!
Sicherheitshinweise
125987510_D_II.qxp 2007-03-30 13:19 Page 36
Page 38

37
Allgemeine Hinweise
Allgemeine Hinweise
• Gestärkte Wäsche hinterläßt einen Stärkebelag in der Trommel und
gehört deshalb nicht in den Trockner.
• Wenn Sie die in der Programmtabelle angegebenen Füllmengen überschreiten, müssen Sie mit Knitterbildung rechnen! Bei sehr empfindlichen Geweben sollten Sie höchstens 1,5 kg Wäsche einfüllen.
• Bei Verwendung von sogenannten 'Weichpflegetüchern' kann es zu einer Belagbildung am Flusensieb kommen, die bis zu einer Verstopfung des Flusensiebs
führen kann. Wir empfehlen deshalb, auf W eich-pflegetücher zu verzichten.
• Zu Ihr er Information: Der Gewebeabrieb entsteht zu 70 Prozent beim T ragen, zu 20 Prozent beim Waschen und nur zu 10 Pr ozent beim Trocknen im Wäschetrockner . Bei Ihrem
Trockner sammelt sich der Gewebeabrieb in Form von Flusen im Flusensieb. Beim
maschinellen Trocknen fallen nur ca. 0,03g Flusen pro Kilogr amm Wäsche an.
Entsorgung
Verpackungsmaterial entsorgen!
Entsorgen Sie das Verpackungsmaterial Ihres Wäschetr ockners sachgerecht. Alle V er-
packungsmaterialien sind umweltverträglich und können gefahrlos deponiert oder
in der Müllverbrennungsanlage verbrannt werden.
Die Kunststoffe können auch wiederverwendet werden:
• Die äußere Hülle und die Beutel im Innern bestehen aus Polyethylen (K ennzeichnung >PE<).
• Die P olsterteile bestehen aus geschäumtem, FCKW-freiem P olystyrol (Kennzeichnung >PS<).
Die Kartonteile wurden aus Altpapier hergestellt und sollten auch wieder
der Altpapiersammlung beigegeben werden.
Altgerät entsorgen!
Warnung! Bei der Entsorgung des Trockners: Netzstecker ziehen, elektrische Zuleitung abschneiden, Stecker mit Restleitung beseitigen und Türschloß zerstören. So
können spielende Kinder sich nicht einsperren und damit in Lebensgefahr geraten.
Warnung! Bei der Entsorgung des Trockners: Netzstecker ziehen, elektrische Zuleitung
abschneiden, Stecker mit Restleitung beseitigen und Türschloß zerstören. So können
spielende Kinder sich nicht einsperren und damit in Lebensgefahr geraten.
Das Symbol auf dem Produkt oder seiner Verpackung weist darauf hin, dass
dieses Produkt nicht als normaler Haushaltsabfall zu behandeln ist, sondern an
einem Sammelpunkt für das Recycling von elektrischen und elektronischen
Geräten abgegeben werden muss. Durch Ihren Beitr ag zum korr ekten Entsor gen
dieses Produkts schützen Sie die Umwelt und die Gesundheit Ihrer Mitmenschen.
Umwelt und Gesundheit werden durch falsches Entsorgen gefähr det. W eiter e
Informationen über das Recycling dieses Produkts erhalten Sie von Ihrem Rathaus,
Ihrer Müllabfuhr oder dem Geschäft, in dem Sie das Produkt gekauft haben.
125987510_D_II.qxp 2007-03-30 13:19 Page 37
Page 39

38
Umwelttipps
Umwelttips
• Beim Waschen auf Weichspüler verzichten!
Im Wäschetrockner wird Ihre Wäsche auch ohne Weichspüler flauschig
und weich. Versuchen Sie es einmal!
• Wäsche auflockern!
Lockern Sie die Wäsche auf, bevor Sie sie in den Trockner einfüllen. So
vermeiden Sie längere Laufzeit und Knitterbildung.
• Wäsche ausreichend vorentwässern!
Grundsätzlich gilt: Je besser Sie Ihre Wäsche vor dem Trocknen ausschleudern, desto wirtschaftlicher arbeitet der Trockner.
Konkrete Angaben zu Verbr auchsdaten und Kosten in Abhängigkeit von
der Schleuderdrehzahl haben wir in der folgenden Tabelle zusammengestellt. Die Angaben gelten für 7 kg Wäsche, die bis zum Trockengrad
Schranktrocken getrocknet werden:
• Füllmengenangaben beachten!
Sparsam arbeitet der Wäschetrockner dann, wenn Sie die in der Programmtabelle angegebenen Füllmengen einhalten. Nutzen Sie möglichst die angegebene Füllmenge aus.
• Richtiges Trockenprogramm wählen!
Wählen Sie das für Wäscheart und -menge passende Trockenprogr amm.
So arbeitet der Trockner am wirtschaftlichsten. Einige Verbr auchswerte:
Vorentwässerung: Trockengang:
Umdrehungen
pro Minute
Restfeuchte
Zeitbedarf in
Minuten
Energiebedarf
in
kWh
in
Liter
in
%
1000 4,2 60 103 3,9
1400 3,64 52 94 3,7
1600 3,43 49 83 3,2
125987510_D_II.qxp 2007-03-30 13:19 Page 38
Page 40

39
Umwelttipps
1) mit 1000 Umdrehungen pro Minute vorentwässert
2) mit 1200 Umdrehungen pro Minute vorentwässert
• Einsatz der “DELICAAT/DELICAT”-Taste nur bei Füllmengen bis 3 kg!
• Flusensieb nach jedem Trockengang reinigen!
Wäscheart
gewünschter
Trockengrad
Füllmenge inkgDauer in
Minuten
Energieverbrauch in
kWh
Baumwolle
1
KASTDROOG/A
RANGER
7 103 3,9
Baumwolle
1
STRIJKDROOG/A
REPASSER
7 78 3,05
Mischgewebe
2
KASTDROOG/A
RANGER
3 32 1,15
125987510_D_II.qxp 2007-03-30 13:19 Page 39
Page 41

Geräteaufbau
Vorderansicht
Rückansicht
Seitliche
Abluftöffnung
Anschlußring
Hintere
Abluftöffnung
Luftansauggitter
Netzkabel
Bedienblende
Innenbeleuchutng
Einschraubfüße
Flusensieb
Typschild
Einfülltür
(Anschlag wechselbar)
40
Geräteaufbau
125987510_D_II.qxp 2007-03-30 13:19 Page 40
Page 42

Bedienelemente und Anzeigen
Bedienblende
1 Programmwähler
Mit dem Programmwähler stellen Sie die automatische und zeiteingestellte Trocknung ein. Das Gerät ist somit eingeschaltet. Bei
geöffneter Tür leuchtet die Trommel-Innenbeleuchtung.
Trocknung durch elektronische Programme
Diese arbeiten mit Feuchtigkeitssensoren. Sie müssen einfach den
Programmwähler auf das gewünschte Programm einstellen und die
Wäsche wird solange getrocknet, bis sie den gewünschten
Feuchtigkeitsgrad erreicht hat.
Zeiteingestellte Trocknung
Zeitliches Trocknen für individuelles Trocknen oder Nachtrocknen von
Wäschestücken.
Drehen Sie den Programmwähler auf 90 oder 60 Minuten für Baumwolle u. Leinen oder auf 30 Minuten für pflegeleichte Wäsche.
Zur Annullierung eines bereits laufenden Programms drehen Sie den
Programmwähler auf “UIT/ARRET”.
2 START/PAUSE-DEPART/PAUSE-Taste.
Durch Drücken der Taste, starten Sie das gewählte Trocknungsprogramm. Die darüberliegende Lampe leuchtet nun konstant.
Hinweis! Wird das laufende Trocknungsprogramm durch Öffnen der
Gerätetür, muss nachdem die Tür wieder geschlossen wurde, das Programm neu gestartet werden.
Diese Taste soll auch nach einem Stromausfall wieder gedrückt werden. Die “START/PAUSE-DEPART/PAUSE”-Anzeige blinkt während der
Unterbrechung.
41
125987510_D_II.qxp 2007-03-30 13:19 Page 41
Page 43

42
Bedienelemente und Anzeigen
3 “STARTUITSTEL/D.DIFF.” Taste
Durch diese Taste wird eine Startzeit-Vorwahl von max. 12 Stunden
ermöglicht.
Diese Funktion kann erst nach erfolgter Programmauswahl und vor
dem Drücken der “START/PAUSE-DEPART/PAUSE“-Taste gewählt
werden.
Nach jedem Drücken der Taste erhöht sich die Zeit um 30 Minuten,
bis am Display ein verzögerter Start von „2 Stunden“ aufscheint. In
Folge wird die Startzeit jede Stunde angezeigt.
Die Minuten und Stunden der gewählten Startzeit werden zwei
Sekunden lang angezeigt, anschließend erscheint erneut die Dauer
des vorher eingestellten Programms.
Nach dem Drücken der “START/PAUSE-DEPART/PAUSE“-Taste
beginnt das Gerät in umgekehrter Reihenfolge zu zählen.
Um die Eingabe zu löschen, ist zuerst die “START/PAUSE-
DEPART/PAUSE“-Taste zu drücken und dann die “STARTUITSTEL/
D.DIFF.“-Taste so lange zu drücken, bis am Display die Zahl
00
h aufscheint. Nun erneut die “START/PAUSE-DEPART/PAUSE“-Taste drücken.
Nach dem Löschen des verzögerten Starts erscheint am Display
wieder die Dauer des Trockenprogramms.
Während der laufenden Funktion der “STARTUITSTEL/ D.DIFF.“ ist es
nicht möglich, das Programm oder die gewählte Startzeit zu ändern.
Sollte dies erforderlich sein, muss zuerst das Gerät durch Drehen des
Programm-Wahlschalters auf die Position „UIT/ARRET“ abgeschaltet
werden. Nun das neue Programm, die Funktionen und die Startzeit
auswählen und die “START/PAUSE-DEPART/PAUSE“-Taste drücken.
Sollte das Gerät während des umgekehrten Zählvorgangs zusätzlich
mit Wäsche angefüllt werden, ist nach dem Schließen der Gerätetür
erneut die “START/PAUSE-DEPART/PAUSE“-Taste zu drücken, damit
der Zählvorgang fortgesetzt wird.
4 “DELICAAT/DELICAT” Taste
Drücken, wenn empfindliche Gewebe wie Feinwäsche, Acryl usw.
getrocknet wird.
Durch Drücken der Taste wird in allen Trocknungsprogrammen, auch
bei zeitlicher Trocknung, die Heizleistung von 2400W auf 1400W
reduziert.
Die darüberliegende Lampe leuchtet.
Wird die Taste nicht gedrückt, laufen alle Programme mit voller
125987510_D_II.qxp 2007-03-30 13:19 Page 42
Page 44

43
Heizleistung (2400W) ab.
Nicht wählbar zusammen mit “KORT/COURT“.
5 “KORT/COURT” Taste
Bei gedrückter Taste laufen die Programme Baumwolle:
• EXTRADROOG/TRES SEC
• INTENSIEFDROOG/INTENSIVE
• KASTDROOG/A RANGER
mit verkürzter Programmdauer bei gleichem Trockengrad ab.
Die betreffende Lampe leuchtet.
Diese Funktion kann nicht zusammen mit “DELICAAT/DELICAT“
gewählt werden.
6 “ZOEMER/ALARME” Taste
Das akustische Signal ertönt
• beim Wählen des Programms und beim Einschalten der Tasten
• bei der Wahl einer Funktion, die mit dem eingestellten Programm
nicht vereinbar ist
• wenn der Programmwähler während eines laufenden Programms
verdreht wird
• wenn die Tasten im Laufe des Programms gedrückt werden
• während der Knitterschutzphase
• am Ende des Programms
• bei Störungen am Gerät
Durch Drücken der Taste wird das Signal eingeschaltet
7 ”DEUR/PORTE” Taste
Durch Drücken dieser Taste wird die Gerätetür geöffnet. Die darüberliegende Lampe leuchtet.
Das Öffnen der Tür ist nur dann möglich, wenn der Wäschetrockner eingeschaltet ist (der Programm-Wahlschalter wurde auf ein
Programm oder eine Trockenzeit eingestellt).
Wird die Tür während des laufenden Trockenprogramms geöffnet,
muss nach dem Schließen der Tür erneut die “START/PAUSE-
DEPART/PAUSE“ -Taste gedrückt werden, um das Programm neu zu
starten.
8 Display ”LOOPTIJD/TEMPS RESTANT”
Das Display zeigt folgende Informationen an:
• Dauer des gewählten Programms
• Startzeit- Vorwahl
• Programmende
• Fehlerhafte Funktionsauswahl
• Fehlercode
Bedienelemente und Anzeigen
125987510_D_II.qxp 2007-03-30 13:19 Page 43
Page 45

Dauer des gewählten Programms
Nachdem das Programm ausgewählt wurde, erscheint seine Dauer
(in Stunden und Minuten) auf dem Display. Die Dauer wird automatisch je nach der, für jede Stoffart vorgesehenen maximalen Füllmenge und dem gewünschten Trockengrad berechnet.
Am Programmbeginn wird die verbleibende Zeit alle 5 Minuten
angezeigt.
Startzeit-Vorwahl
Wurde durch Drücken der betreffenden Taste eine verzögerte Startzeit ausgewählt, erscheint diese Zeit zwei Sekunden lang am Display; in Folge wird erneut die Dauer des vorher eingestellten Programms angezeigt.
Der umgekehrte Zählvorgang wird Stunde für Stunde von einer verspäteten Startzeit von „90 Minuten“ bis zu „12 Stunden“ angezeigt.
Bis zur Zeit von „90 Minuten“ wird der umgekehrte Zählvorgang alle
30 Minuten aktualisiert.
Programmende
Die blinkende Zahl „0“ zeigt das Programmende an und erscheint im
Display am Ende der Knitterschutzphase.
3
1.20
44
125987510_D_II.qxp 2007-03-30 13:19 Page 44
Page 46

Fehlerhafte Funktionsauswahl
Falls eine Funktion gewählt wurde, die nicht mit dem eingestellten
Programm vereinbar ist, wird auf dem Display „Err“ (Fehler) angezeigt.
Dieser Code erscheint auch dann während des Programmablaufs,
wenn eine der Funktionstasten gedrückt oder der Programm-Wahlschalter verdreht wird.
Fehlercode
I Im Falle von Betriebsstörungen zeigt das Display einen Fehlercode
an (z.B. E21). Gleichzeitig blinkt die Lampe “EINDE/FIN” und AkustikSignale ertönen. Schalten Sie das Gerät aus und wenden Sie sich
bitte an unseren Kundendienst.
E21
0
45
125987510_D_II.qxp 2007-03-30 13:19 Page 45
Page 47

9 KONTROLLLAMPEN
Die Kontrolllampen zeigen folgende Funktionen an:
• Kontrolllampe “DROGEN/SECHAGE” leuchtet. Die Trocknungsphase
mit Heizung wird durchgeführt
• Kontrolllampe “AFKOELEN/REFROID.” leuchtet. Die Abkühlphase von
ca. 10 Minuten läuft ab
• Kontrolllampe “EINDE/FIN” leuchtet. Die Abkühlphase ist beendet,
die Wäsche kann entnommen werden.
Wird die Wäsche nicht entnommen, läuft automatisch die Knitterschutzphase von 30 Minuten ab. Die Lampe bleibt eingeschaltet.
• Kontrolllampe “FILTER/FILTRE” leuchtet. Die Flusensiebe müssen ger-
einigt werden.
Kurzanleitung
• Wäsche möglichst gründlich vorentwässern.
• Wäsche vorbereiten.
• Wäsche einfüllen.
• Trockenprogramm, entsprechend der Wäscheart, wählen.
• Eventuell “ZOEMER/ALARME“, “KORT/COURT“ “DELICAAT/DELICAT”
(nicht wählbar zusammen mit “KORT/COURT“),
“STARTUITSTEL/D.DIFF.”-Taste drücken.
• Gerät durch Drücken der “START/PAUSE-DEPART/PAUSE“- Taste starten.
Während das Programm läuft, können Sie die Einfülltür öffnen, um
Wäsche zu entnehmen oder nachzulegen.
Nach Programmende:
• Trockner ausschalten.
• Flusensieb reinigen.
• Wäsche entnehmen.
46
Kontrolllampen; Kurzanleitung
125987510_D_II.qxp 2007-03-30 13:19 Page 46
Page 48

47
Trocknen
Tr ocknen
Reihenfolge der Arbeitsschritte
Vor der ersten Inbetriebnahme empfiehlt es sich, den Trockner mit
einigen feuchten Tüchern zu beschicken und ca. 30 Minuten laufen
zu lassen. Dadurch wird sichergestellt, dass sich kein Staub und
Schmutz mehr in der Trommel befindet.
Wäsche vorbereiten
• Zur Verhinderung von Wäscheknäueln: Reißverschlüsse schließen;
Bett- und Kissenbezüge zuknöpfen; lose Bänder, etwa von Schürzen,
zusammenbinden.
• Taschen leeren.
• Metallteile (Büroklammern, Sicherheitsnadeln, ...) entfernen.
• Kleidung aus doppelschichtigem Gewebe wenden (etwa bei baumwollgefütterten Anoraks die Baumwollschicht nach außen). Diese
Gewebe trocknen dann besser.
• Wäsche auflockern.
Einfülltür öffnen
• Kräftiger Druck gegen die Tür
Wäsche einfüllen
• Achtung!Klemmen Sie keine Wäschestücke beim Schließen der Tür ein!
Die Textilien könnten beschädigt werden!
P1108
P1104
125987510_D_II.qxp 2007-03-30 13:19 Page 47
Page 49

Gerät einschalten, Programm einstellen
•Trockenprogramm oder Trockenzeit entsprechend der Wäscheart
wählen. Die Kontrolllampen “DROGEN/SECHAGE”, “AFKOELEN/REFROID.” und “EINDE/FIN” leuchten.
Bei Bedarf “DELICAAT/DELICAT”- und/oder “ZOEMER/ALARME” oder
“KORT/COURT”-Taste drücken. Trockenprogramm wählen (siehe Programmtabelle)
Wenn der Programmstart später erfolgen soll, “STARTUITSTEL/D.DIFF.”
einstellen.
Programm starten
“START/PAUSE-DEPART/PAUSE”-Taste drücken: die darüberliegende
Lampe leuchtet nun konstant. Das Trocknungsprogramm beginnt. Nur
die Lampe “DROGEN/SECHAGE” bleibt eingeschaltet. Haben Sie die
“STARTUITSTEL/D.DIFF.” gewählt, beginnt die Maschine die eingestellte
Zeit zurückzuzählen.
Wird während des Progr amms der Pr ogrammwähler ver dreht, wir d dies
durch Signaltöne und “Err” im Display angezeigt.
Damit die Wäsche abkühlen kann, wird 10 Minuten vor Programmende automatisch die Abkühlphase eingeschaltet. Die Kontrolllampe
“AFKOELEN/REFROID.” leuchtet auf.
Die Lampen “EINDE/FIN” und “FILTER/FILTRE” leuchten.
Die Wäsche kann entnommen werden.
nexxt02
48
Trocknen
125987510_D_II.qxp 2007-03-30 13:19 Page 48
Page 50

Wäsche herausnehmen oder nachlegen
Sie können jederzeit den Trockengang unterbrechen, um Wäsche zu
entnehmen oder nachzulegen.
Einfülltür öffnen.
Vorsicht! Wäsche und Trommel können heiß sein.
Wäsche entnehmen oder nachlegen.
Einfülltür schließen und “START/PAUSE-DEPART/PAUSE” Taste erneut
drücken, um den Trockengang fortzusetzen.
Ende des Trockengangs
Wird die Wäsche am Ende des Programms nicht entnommen, schaltet
sich automatisch das Knitterschutzprogramm, das ca. 30 Minuten
dauert, ein.
Am Programmende und während der Knitterschutzphase ertönt alle
25 Sekunden ein kurzer Signalton (falls Sie die “ZOEMER/ALARME”Taste gedrückt haben)
Während der Knitterschutzphase können Sie jederzeit die Wäschestücke entnehmen.
Wird dies nicht gemacht, bleibt die Maschine am Ende des Programms
automatisch stehen, die Lampen “EINDE/FIN” und “FILTER/FILTRE” bleiben eingeschaltet und ein akustisches Signal ertönt für 2 Minuten.
Trockner ausschalten
Den Programmwähler auf “UIT/ARRET” drehen, alle Kontrolllampen
erlöschen. Das Gerät ist ausgeschaltet. Ganz sicher gehen Sie, wenn
Sie den Netzstecker aus der Steckdose ziehen.
Einfülltür öffnen und Wäsche entnehmen.
Wird die Tür vor dem Ausschalten des Geräts geöffnet und dann
geschlossen, leuchten die Lampen der Programmschritte des von
der Maschine ausgeführten Programms.
Flusensieb reinigen
Um eine ungehinderte Luftzirkulation während des Trockengangs zu
gewährleisten, sollten Sie nach jedem Trockengang, vor der Trocken-
gutentnahme, das Flusensieb reinigen. Verwenden Sie dazu ein
feuchtes Tuch.
49
Trocknen
125987510_D_II.qxp 2007-03-30 13:19 Page 49
Page 51

50
Einstellung der Leitfähigkeit des Wassers
Die Empfindlichkeit des Leitfähigkeitsfühlers, kann entsprechend dem
Wert der Wasserleitfähigkeit im jeweiligen Wohngebiet, wie folgt eingestellt werden:
Einstellungsvorgang
Den Programmwähler drehen und das Gerät einschalten
Gleichzeitig die Tasten 3 und 6 drücken und gedrückt halten, bis auf
dem Display «
CC00
» erscheint.
Ändern des Leitfähigkeits-wertes:
Die Taste 5 sooft drücken, bis der gewünschte Leitfähigkeitsgrad
durch Aufleuchten der entsprechenden Anzahl Striche im Display
angezeigt wird (siehe Tabelle):
Für gewöhnlich wird werkseitig der hohe Wert eingestellt.
Speichern der Einstellung:
Die Tasten 3 und 6 gleichzeitig drücken und gedrückt halten bis auf
dem Display wieder die Programmdauer des gewählten Programms
erscheint und ein akustisches Signal ertönt.
Hinweis: Auskunft über die Wasser-leitfähigkeit im Wohngebiet geben
die Wasserversorgungsunternehmen.
DISPLAY
Leitfähigkeitsgrad µS/cm bei 25°C
CC00
--
Niedrig < 300
CC00 --
Mittel 300 - 600
CC00 --
Hoch > 600
12345 6
Einstellung der Leitfähigkeit des Wassers
--
--
--
125987510_D_II.qxp 2007-03-30 13:19 Page 50
Page 52

51
Programmtabellen
Elektronische Trocknung
(*) Vergleichsprogramme nach IEC 61121.
• LICHT STRIJKEN/ FACILE A REPASSER ist ein spezielles Trockenprogramm mit
Antiknittermechanik für Oberhemden und Blusen.
• “JEANS” Spezialprogramm für Freizeitkleidung, wie Jeans, Sweat-Shirts, etc.,
mit unterschiedlichen Materialstärken (z. B. an Bündchen und Nähten).
Zeitliches Trocknen
(1) Niemals die Trommel überfüllen (z.B. nicht mit Steppdecken beladen).
Achtung! Beachten Sie bitte das Wäscheetikett für das Trocknen von Mischgeweben.
Programm “Lüften”
Diese Programmstellung kann zum Auslüften von Pullis, Kleidern usw . verwendet wer den.
Füllmenge
Sie brauchen die Wäsche nicht abzuwiegen, wenn Sie sich an folgende Faustregeln halten:
• Baumwolle, Leinen: volle Trommel, aber nicht überladen.
• Pflegeleichte Gewebe: Trommel bis zur Hälfte füllen.
• Besonders empfindliche Gewebe: Trommel nicht mehr als 1/3 füllen.
Bei einer gemischten Ladung (z.B. Baumwolle und pflegeleichte Gewebe) empfehlen wir, die Trockenzeit nach dem empfindlichsten Gewebe zu wählen.
Wäscheart
Trockenzeiten
Wäschemenge
(1)
kg
Programm-
Wahlschalter Stellung
Baumolle 90 min
7 90 MIN
Baumolle 60 min
7 60 MIN
Mischgewebe 30 min
3 30 MIN
Wäscheart Programme
Wäschemenge
(1)
kg
Baumolle
EXTRADROOG/TRES SEC
7
INTENSIEFDROOG/INTENSIVE
7
KASTDROOG/A RANGER
7 (*)
STRIJKDROOG/FER SEC
7
STRIJKDROOG/A REPASSER
7 (*)
STRIJKDROOG/EN MACHINE
7
Mischgewebe
EXTRADROOG/TRES SEC
3
KASTDROOG/A RANGER
3 (*)
STRIJKDROOG/A REPASSER
3
Oberhemden und
Blusen, für minimalen
Bügelwand
LICHT STRIJKEN/
FACILE A REPASSER
bis 2
Jeans, Sweat-Shirts,
etc.
JEANS
7
Programmtabellen
125987510_D_II.qxp 2007-03-30 13:19 Page 51
Page 53

52
Eine kleine Textilkunde
Eine kleine Textilkunde
Pflegesymbole
Prüfen Sie, ob Ihre Textilien zum Trocknen geeignet sind. Auf dem Pflegekennzeichen-Etikett sollte eines der folgenden Symbole zu finden
sein:
Grundsätzlich ist das Trocknen im Trockner möglich, der Textilhersteller legt nicht fest, ob das betreffende Wäschestück normal oder schonend getrocknet werden kann.
Normales Trocknen
Schonendes Trocknen
Trocknen im Trommeltrockner nicht zulässig
Wenn Sie keines dieser Pflegesymbole finden:
Trocknen Sie Koch- und Buntwäsche sowie Mischgewebe bei normaler
Temperatur. Drücken Sie die “DELICAAT/DELICAT”-Taste, wenn Sie empfindliche Baumwollgewebe trocknen.
Wir empfehlen Ihnen, schon beim Wäschekauf auf die Kennzeichnung
der Textilien mit Pflegesymbolen zu achten.
• Wolle, Daunen
Trocknen Sie keine Wolle im Trockner! Verfilzungsgefahr!
Trocknen Sie Daunen nur dann im Trockner, wenn Sie einen entsprechenden Pflegehinweis finden.
• Temperaturempfindliche Textilien
Trocknen Sie temperaturempfindliche Textilien (etwa Acryl oder
Viskose) und Textilien mit dem Pflegekennzeichen mit gedrückter
“DELICAAT/DELICAT” Taste
• Trikotwäsche, Wirkware
Trikotwäsche und Wirkware neigen zum Einlaufen! Trocknen Sie diese
Wäschearten nicht mit dem Programm “EXTRADROOG/TRES SEC”. Bei
hochwertiger Markenwäsche ist die Gefahr des Einlaufens jedoch
gering.
• Neue, farbige Textilien
Trocknen Sie neue, farbige Textilien nicht gemeinsam mit hellen
Wäschestücken. Es könnte zu Verfärbungen kommen!
125987510_D_II.qxp 2007-03-30 13:19 Page 52
Page 54

Reinigen und Pflegen
Reinigung des Trocknergehäuses
Verwenden Sie nur Seifenwasser und trocknen Sie das Gerät danach
sorgfältig.
Wichtig: Alkohol, Lösungsmittel und dgl. dürfen nicht verwendet werden.
Einfülltür reinigen
Die Tür regelmäßig reinigen, um eventuelle Flusen zu entfernen.
Reinigung der Flusensiebe
Der Wäschetrockner funktioniert nur bei gereinigten Flusensieben
einwandfrei. Deshalb müssen sie nach jedem Trocknungsprogramm vor
der Wäscheentnahme kontrolliert und ggf. gereinigt werden. Verwenden Sie dazu ein feuchtes Tuch.
Das Sieb in der Innentür an seinem Griff nach oben herausziehen, Flusen abstreifen und Sieb wieder einsetzen.
Die angesammelte Flusenmenge ist nicht etwa auf die Wäschebeanspruchung im Trockner zurückzuführen; vielmehr handelt es sich um
abgetragene Fasern vom Tragen und Waschen. Beim Trocknen auf der
Leine werden die Flusen vom Wind fortgetragen, während sie beim
Wäschetrockner im Sieb gesammelt werden. Am Gewicht der Flusen
können Sie feststellen, wie gering der Anteil im Verhältnis zur
getrockneten Wäschemenge ist.
A
U
T
O
R
E
V
E
R
S
E
k
g
5
k
g
2
,5
8
0
0
/
9
0
0
7
0
'
-
9
0
'
3
5
'
-
5
0
'
1
0
0
0
/
1
2
0
0
6
5
'
-
8
5
'
3
0
'
-
4
5
'
8
0
0
/
9
0
0
8
0
' -
1
0
0
'
5
5
'
-
7
0
'
1
0
0
0
/
1
2
0
0
7
5
'
-
9
5
'
5
0
'
-
6
5
'
6
5
0
5
0
'
-
6
0
'
3
0
'
-
3
5
'
k
g
2
,5
k
g
1
P1111
P1110
A
U
T
O
R
E
V
E
R
S
E
k
g
5
k
g
2
,5
8
0
0
/
9
0
0
7
0
'
-
9
0
'
3
5
'
-
5
0
'
1
0
0
0
/
1
2
0
0
6
5
'
-
8
5
'
3
0
'
-
4
5
'
8
0
0
/
9
0
0
8
0
'
-
1
0
0
'
5
5
'
-
7
0
'
1
0
0
0
/
1
2
0
0
7
5
'
-
9
5
'
5
0
'
-
6
5
'
6
5
0
5
0
' -
6
0
'
3
0
'
-
3
5
'
k
g
2
,5
k
g
1
P1109
53
Wartung und Pflege
125987510_D_II.qxp 2007-03-30 13:19 Page 53
Page 55

Falls nötig können beide Siebe unter laufendem Wasser mit einer Bürste
gereinigt werden. Das Sieb in der Einfüllöffnung kann auch herausgenommen
werden (siehe Abb.). Beim Wiedereinsetzen kann der Zapfen nach rechts oder
links zeigen.
Achtung, den Trockner nicht ohne oder mit verstopften oder beschädigten
Sieben betreiben.
Trommel reinigen
Achtung! Reinigen Sie die Edelstahltrommel nicht mit Scheuermitteln
oder Stahlwolle!
Trommelinnenfläche und Trommelrippen mit einem haushaltsüblichen
Reiniger (z.B. Essigreiniger) feucht auswischen.
Blenden und Bedienteile reinigen
Achtung! Verwenden Sie keine handelsüblichen Möbelpflege- oder
aggressiven Reinigungsmittel.
Blenden und Bedienteile mit einem feuchten Tuch abwischen.
Nur warmes Wasser verwenden.
A
U
T
O
R
E
V
E
R
S
E
k
g
5
k
g
2
,5
8
0
0
/
9
0
0
7
0
'
-
9
0
'
3
5
'
-
5
0
'
1
0
0
0
/
1
2
0
0
6
5
'
-
8
5
'
3
0
'
-
4
5
'
8
0
0
/
9
0
0
8
0
' -
1
0
0
'
5
5
'
-
7
0
'
1
0
0
0
/
1
2
0
0
7
5
'
-
9
5
'
5
0
'
-
6
5
'
6
5
0
5
0
'
-
6
0
'
3
0
'
-
3
5
'
k
g
2
,5
k
g
1
P1112
54
Wartung und Pflege
125987510_D_II.qxp 2007-03-30 13:19 Page 54
Page 56

Was tun, wenn ...?
Versuchen Sie im Störungsfall mit Hilfe der hier aufgeführten Hinweise
das Problem selbst zu beheben. Wenn Sie bei einer der hier aufgeführten Störungen oder zur Behebung eines Bedienfehlers den Kundendienst in Anspruch nehmen, erfolgt der Besuch des KundendienstTechnikers auch während der Garantiezeit nicht kostenlos.
Problem mögliche Ursache
Abhilfe
Der Trockner arbeitet
nicht
Netzstecker ausgesteckt Netzstecker einstecken
“START/PAUSE-DEPART/PAUSE” -
Taste gedrückt
“START/PAUSE-DEPART/PAUSE”-Taste
erneut drü-cken
Kein Programm einge-stellt Programm einstellen
Einfülltür offen Einfülltür schließen
Sicherung oder FI-Schutz-schalter
im Sicherungskasten (Hausin-
stallation) fehlerhaft
Sicherung oder FI-Schutzschalter
prüfen. Störun-gen an der Hausin-
stalla-tion behebt Ihr Elektro-fach-
mann
Das Trockenergebnis
ist nicht zufrieden-
stellend
Falsches Programm gewählt
Beim nächsten Trocknen anderes
(Zeit-)Programm einstellen
Flusensieb verstopft Flusensieb reinigen
Falsche Füllmenge Empfohlene Füllmenge einhalten
Wäsche nicht ausreichend
entwässert
Wäsche ausreichend vorentwässern
Belag an der Trommelin-nenfläche
oder an den Trommelrippen
Trommelinnenfläche und Trommelrip-
pen reinigen
55
Was tun, wenn ...?
125987510_D_II.qxp 2007-03-30 13:19 Page 55
Page 57

Wenn Sie zur Behebung einer Störung in dieser Gebrauchsanweisung
keinen Hinweis finden, wenden Sie sich bitte an den Kundendienst.
Problem mögliche Ursache
Abhilfe
Der Trockengang
dauert ungewöhnlich lang
Die Einfülltür lässt
sich nicht schließen
Trockner beendet
automatisch den
Trockengang:
Anzeige ENDE
leuchtet kurz nach
Programmstart auf
Ablufttransport gestört
NAbluftschlauch knickfrei ausrichten
und/oder Abluftwege reinigen
Flusensieb verstopft Flusensieb reinigen
Flusensieb nicht einge-setzt
und/oder Siebde-ckel nicht
eingerastet
Flusensieb einsetzten und/oder Sieb-
deckel ein-rasten lassen
Für gewähltes Programm zu wenig
oder zu trockene Wäsche eingelegt
Zeitprogramm oder höhere Trockenstufe (etwa EXTRADROOG/ TRES SEC
statt KASTDROOG/A RANGER wählen)
Der Trockengang
dauert ungewöhnlich lang. 4,5 Stunden nach Beginn des
Trockengangs: Anzeige ENDE
leuchtet - Abbruch
des Trockengangs Programmablaufanzeige blinkt
“DELICAAT/DELICAT”- Taste gedrückt
und Füllmenge zu groß
Programmwahl überprüfen: “DELI-
CAAT/DELICAT” -Taste nur bei
Wäschemengen bis 3kg sinnvoll Flu-
sensieb reinigen
Füllmenge zu groß Füllmenge reduzieren
Wäsche zu feucht Wäsche gründlicher vorentwässern
56
Was tun, wenn ...?
125987510_D_II.qxp 2007-03-30 13:19 Page 56
Page 58

Technische Daten
HöhexBreitexTiefe 85x60x57 cm
Tiefe bei geöffneter Tür 107 cm
Höhenverstellbarkeit 6 mm
Leergewicht ca. 32 kg
Füllmenge (programmabhängig) max. 7 kg
(Abweichende Füllgewichtsangaben in einigen Ländern sind durch
unterschiedliche Meßmethoden bedingt)
Einsatzbereich Haushalt
zulässige Umgebungstemperatur +5°C bis +35°C
Dieses Gerät entspricht den folgenden EG-Richtlinien:
- 73/23/EWG vom 19.2.1973 'Niederspannungsrichtlinie'
- 89/336/EWG vom 3.5.1989 'EMV-Richtlinie' einschließlich
Änderungsrichtlinie 92/31/EWG
Elektrischer Anschluß
Angaben über Netzspannung, Stromart und die erforderliche Absiche-
rung sind dem Typschild zu entnehmen. Das Typschild ist im Bereich
der Einfüllöffnung angebracht (siehe Kapitel „Geräteaufbau“)
Stecker und Steckdose sollen direkt, d.h. ohne Anwendung von Adaptern, Vielfachsteckdosen u.ä. verbunden werden.
Besondere Vorschriften des örtlichen Elektrizitätswerks sind gegebenenfalls zu beachten.
Achtung!
Für Unfälle, die durch Nichtbeachtung der Sicherheitsvorschriften
entstehen, kann der Hersteller nicht haft bar gemacht werden
.
Achtung:
Der Stecker muss nach Aufstellung des Gerätes zugänglich bleiben
57
Technische Daten
125987510_D_II.qxp 2007-03-30 13:19 Page 57
Page 59

Entfernen der Transportsicherung
Ziehen Sie den Folienschlauch mit dem Polystyrolpolster heraus,
bevor Sie das Gerät zum ersten Mal in Betrieb nehmen.
Klebestreifen innen an der Trommeloberseite abziehen
Sonderzubehör
Über den AEG-Kundendienst oder Ihren Fachhändler können Sie folgendes Sonderzubehör beziehen:
Bausatz Wasch-Trocken-Säule
Mit diesem Bausatz können Sie Ihren Wäschetrockner mit jedem
LAVAMAT-Waschautomaten zu einer Wasch-Trocken-Säule kombinieren. Die Geräte sind dann platzsparend übereinander angeordnet,
der Waschautomat unten, der Wäschetrockner oben.
Der Aufbau zur platzsparenden Wasch-/ Trockensäule ist mit allen
Waschvollautomaten mit Deckeltiefe zwischen 48 und 60 cm und
Frontbeschickung möglich. Hierzu benötigen Sie einen Bausatz, der
bei Ihrem Händler erhältlich ist. Eine ausführliche Montagean weisung liegt dem Bausatz bei. Lesen Sie bitte diese sorgfältig durch.
Türanschlagwechsel
Falls erwünscht ist es möglich, die Tür auf Linksanschlag zu ändern.
Zu diesem Zweck wenden Sie sich bitte an die nächste Kunden dienststelle.
P1107
P1106
58
Sonderzubehôr
125987510_D_II.qxp 2007-03-30 13:19 Page 58
Page 60

Service
Im Kapitel “Was tun, wenn…" sind einige Störungen zusammengestellt,
die Sie selbst beheben können. Sehen Sie im Störungsfall zunächst dort
nach. Wenn Sie dort keine Hinweise finden, wenden Sie sich bitte an
unseren Kundendienst oder einen unserer Service-Partner
Bereiten Sie das Gespräch in jedem Fall gut vor. Sie erleichtern so die
Diagnose und die Entscheidung, ob ein Kundendienstbesuch nötig ist.
Mit unserer Checkliste können Sie wichtige Informationen vor dem
Telefonat zusammenstellen.
Notieren Sie die PNC-Nummer und die Serie-Nummer. Beide finden Sie
auf dem Typschild im Bereich der Einfüllöffnung.
Prod. No. . . . . . . . . . . . . . . . . . . . . . .
Ser. No. . . . . . . . . . . . . . . . . . . . . . . . .
Halten Sie weiterhin möglichst genau fest:
• Wie äußert sich die Störung?
• Unter welchen Umständen tritt die Störung auf?
* 0.09 Euro/Min
Wann entstehen Ihnen auch während der Garantiezeit Kosten?
- wenn Sie die Störung mit Hilfe der Störungstabelle (siehe Abschnitt
“Was tun, wenn…") selbst beseitigen können hätten,
- wenn mehrere Anfahrten des Kundendienst-Technikers erforderlich
sind, weil er vor seinem Besuch nicht alle wichtigen Informationen
erhalten hat und jetzt z.B. Ersatzteile holen muss. Diese Mehrfahrten können Sie vermeiden, wenn Sie Ihren Telefonanruf in der oben
beschriebenen Weise gut vorbereiten.
IPX4
Mod. xxxxxx Type xxxxxxx
Prod.No. xxxxxxxxx xx
xxx-xxxV~xxHz xxxxW xx A
Ser.No.
59
Service
125987510_D_II.qxp 2007-03-30 13:19 Page 59
Page 61

60
Guarantee Conditions
Belgium
Unsere Geräte werden mit größter Sorgfalt hergestellt. Trotzdem kann es einmal zu einem Defekt kommen. Unser
Kundendienst übernimmt auf Anfrage gerne die Reparatur, und zwar sowohl während des Garantiezeitraums als
auch danach. So ist gewährleistet, dass ein Defekt nicht zu einer Verkürzung der Lebensdauer des Geräts führt.
Die vorliegenden Garantiebedingungen beruhen auf der Richtlinie der Europäischen Union 99/44/ EG sowie den
Bestimmungen des Bürgerlichen Gesetzbuches. Die dem Kunden aufgrund dieser Gesetze zustehenden Rechte können durch die vorliegenden Garantiebedingungen nicht geändert werden.
Diese Garantiebedingungen ziehen keine Einschränkung der Garantieverpflichtungen des Verkäufers gegenüber dem
Endbenutzer nach sich. Die Garantie für das Gerät erfolgt im Rahmen und unter Beachtung folgender Bedingungen:
1. Bei Beachtung der in den Absätzen 2 bis 15 niedergelegten Bestimmungen beheben wir
kostenlos jeden Defekt, der während eines Zeitraums von 24 Monaten ab dem Datum der
Übergabe des Geräts an den ersten Endkunden auftritt. Diese Garantiebedingungen gelten
nicht im Falle einer Nutzung des Geräts zu gewerblichen oder vergleichbaren Zwecken.
2. Die Garantieleistung zielt auf eine Wiederherstellung des Gerätezustands vor dem Auftreten des Defekts ab. Die defekten Bestandteile werden ausgetauscht oder repariert. Kostenlos ausgetauschte Bestandteile gehen in unser Eigentum über.
3. Um schwereren Schäden vorzubeugen, müssen wir über den Defekt unverzüglich in Kenntnis gesetzt werden.
4. Bedingung für die Gewährung der Garantieleistung ist, dass der Kunde die Kaufbelege mit
dem Kauf- und/oder Übergabedatum vorlegt.
5. Die Garantie greift nicht, wenn Schäden an empfindlichen Bestandteilen, wie z.B. Glas (Glaskeramik), Kunststoffen oder Gummi, auf unsachgemäßen Gebrauch zurückzuführen sind.
6. Eine Inanspruchnahme der Garantie ist nicht möglich bei kleinen Veränderungen ohne
Auswirkungen auf Gesamtwert und -stabilität des Geräts.
7. Die Garantieverpflichtung erlischt, wenn der Defekt auf eine der folgenden Ursachen
zurückzuführen ist:
• eine chemische oder elektrochemische Reaktion infolge von Wassereinwirkung,
• allgemein anomale Umweltbedingungen,
• unsachgemäße Betriebsbedingungen,
• Kontakt mit aggressiven Substanzen.
8. Die Garantie erstreckt sich nicht auf außerhalb unseres Verantwortungsbereichs auftretende Transportschäden. Auch Schäden infolge unsachgemäßer Aufstellung oder Installation,
mangelnder Wartung, oder Nicht-Beachtung der Aufstellungs- und Installationshinweise
sind durch die Garantie nicht gedeckt.
9. Durch die Garantie nicht gedeckt sind ferner Defekte infolge von Reparaturen oder Eingriffen durch nicht-qualifizierte oder nicht-kompetente Personen, oder infolge des Einbaus von nicht-originalen Zubehör- oder Ersatzteilen.
10. Leicht zu transportierende Geräte müssen beim Kundendienst abgegeben bzw . dorthin geschickt werden. Heimkundendienst kommt nur bei großen Geräten oder bei Einbaugeräten in Frage.
11. Bei Einbau- oder Unterbaugeräten sowie bei Geräten, die derart befestigt oder aufgehängt
sind, dass für den Aus- und Wiedereinbau in die betreffende Einbaunische mehr als eine halbe
Stunde erforderlich ist, werden die anfallenden Zusatzleistungen in Rechnung gestellt. Etwaige
Schäden infolge derartiger Aus- und Wiedereinbauarbeiten gehen zu Lasten des Kunden.
12.Wenn während des Garantiezeitraums eine wiederholte Reparatur ein und desselben
Defekts zu keinem befriedigenden Ergebnis führt, oder bei unverhältnismäßig hohen Reparaturkosten kann, in Abstimmung mit dem Kunden, ein Austausch des defekten Geräts durch ein
gleichwertiges anderes erfolgen. In diesem Fall behalten wir uns das Recht vor , vom Kunden eine
finanzielle Beteiligung zu verlangen, die anteilig zum verstrichenen Nutzungszeitraum berechnet wir d.
13. Eine Reparatur im Rahmen der Garantie zieht weder eine Verlängerung des normalen
125987510_D_II.qxp 2007-03-30 13:19 Page 60
Page 62

61
Garantiezeitraums ?noch den Beginn eines neuen Garantiezyklus nach sich.
14. Auf Reparaturen gewähren wir eine Garantie von 12 Monaten, unter Beschränkung auf
das Wiederauftreten desselben Defekts.
15. Mit Ausnahme der Fälle, in denen eine Haftung gesetzlich vorgeschrieben ist, wird durch die vorliegenden Garantiebedingungen jede durch den Kunden u.U. geforderte Entschädigung für über das
Gerät hinausgehende Schäden ausgeschlossen. Im Falle der gesetzlich niedergelegten Haftung erfolgt
maximal eine Entschädigung in Höhe des Kaufpreises des Geräts.
Diese Garantiebedingungen gelten ausschließlich für in Belgien gekaufte und benutzte Geräte. Bei
Geräten, die exportiert werden, muss sich der Kunde zunächst vergewissern, dass sämtliche technischen Vorgaben (z.B. Netzspannung und -fr equenz, Anschlussvor schriften, Gasart usw.) für das
betreffende Land erfüllt sind und dass das Gerät sich für die Klima- und Umweltbedingungen vor
Ort eignet. Bei im Ausland gekauften Geräten muss der Kunde sich zunächst vergewissern, dass sie
die Vorschriften und Anforderungen für Belgien erfüllen. Etwaige erfor derliche oder gewünschte
Änderungen sind durch die Garantie nicht abgedeckt und sind nicht in allen Fällen möglich.
Der Kundendienst steht auch nach Ablauf des Garantiezeitraums jederzeit gerne zu Ihrer V erfügung.
Adresse unseres Kundendiensts:
ELECTROLUX HOME PRODUCTS BELGIUM
Bergensesteenweg, 719 - B-1502 LEMBEEK
Tel.: 02.363.04.44
Guarantee Conditions
Belgium
Electrolux Home Products Belgium
ELECTROLUX SERVICE
Bergensesteenweg 719
1502 Lembeek
E-mail:
consumer.services@electrolux.be
Adres service-afdeling
België
Electrolux Home Products Belgium
ELECTROLUX SERVICE
Bergensesteenweg 719
1502 Lembeek
E-mail:
consumer.services@electrolux.be
Consumer services
Telefon
02/363.04.44
Telefax
02/363.04.00
02/363.04.60
125987510_D_II.qxp 2007-03-30 13:19 Page 61
Page 63

62
Cher client,
Veuillez lire ce manuel d'utilisation avec soigneusement et en faisant
particulièrement attention aux consignes de sécurité indiquées dans les
premières pages. Nous vous recommandons de garder ce manuel d'uti-
lisateur pour vous y référer plus tard ou le donner a de futurs propriétaires.
Le triangle d'attention et/ou les mots clés (Attention ! Précaution !) mettent en relief l'information étant prticulièrement importante pour votre
sécurité ou un fonctionnement correct de l'appareil.
Ce symbole vous guide, étape par étape, dans le fonctionnement de
l'appareil.
L'information marquée par ce symbole vous donne des instructions supplémentaires et des astuces pratiques pour l'utilisation de l'appareil.
Les astuces et l'information concernant l'utilisation économique et écologique de cet appareil sont marquées par un symbole trèfle.
En cas de problèmes, ce livret fournit les instructions sur la manière de
les résoudre par vous-même; voir section "Quelque chose ne fonctionne
pas?".
Si cette information n'est pas suffisante, veuillez contacter votre centre de services le plus proche (les adresses et numéros de téléphone sont
indiqués sur le feuillet joint).
Imprimé sur du papier recyclable.
Les gens qui pensent écologie agissent en conséquence…
125987510_F_III.qxp 2007-03-30 13:08 Page 62
Page 64

63
Contenus
Consignes de sécurité . . . . . . . . . . . . . . . . . . . . . . . . . . . . . . . . . . . . . . 64-66
Sécurité générale. . . . . . . . . . . . . . . . . . . . . . . . . . . . . . . . . . . . . . . . . . . . . . 67
Mise au rebut. . . . . . . . . . . . . . . . . . . . . . . . . . . . . . . . . . . . . . . . . . . . . . . . . 67
Astuces pour la protection de l'environnement . . . . . . . . . . . . . . 68-69
Les principales caractéristiques de votre appareil . . . . . . . . . . . . . 70-76
Structure de l'appareil. . . . . . . . . . . . . . . . . . . . . . . . . . . . . . . . . . . . . . . . . . . . 70
Vue de face . . . . . . . . . . . . . . . . . . . . . . . . . . . . . . . . . . . . . . . . . . . . . . . . . . . . . 70
Vue arrière . . . . . . . . . . . . . . . . . . . . . . . . . . . . . . . . . . . . . . . . . . . . . . . . . . . . . . 70
Tableau de commande . . . . . . . . . . . . . . . . . . . . . . . . . . . . . . . . . . . . . . . . . 71-76
Mode d'emploi rapide . . . . . . . . . . . . . . . . . . . . . . . . . . . . . . . . . . . . . . . . . . 76
Séchage . . . . . . . . . . . . . . . . . . . . . . . . . . . . . . . . . . . . . . . . . . . . . . . . . . . . 77-79
Avant le premier séchage. . . . . . . . . . . . . . . . . . . . . . . . . . . . . . . . . . . . . . . . . . 77
Triez le linge. . . . . . . . . . . . . . . . . . . . . . . . . . . . . . . . . . . . . . . . . . . . . . . . . . . . . 77
Ouvrez la porte . . . . . . . . . . . . . . . . . . . . . . . . . . . . . . . . . . . . . . . . . . . . . . . . . . 77
Chargez le linge. . . . . . . . . . . . . . . . . . . . . . . . . . . . . . . . . . . . . . . . . . . . . . . . . . 77
Mettez l'appareil en marche,Sélectionnez le programme de séchage . . . . . 78
Sélectionnez le programme ou le temps de séchage . . . . . . . . . . . . . . . . . . . 78
Mettez l'appareil en marche . . . . . . . . . . . . . . . . . . . . . . . . . . . . . . . . . . . . . . . 78
Retirez ou ajoutez du linge . . . . . . . . . . . . . . . . . . . . . . . . . . . . . . . . . . . . . . . . 79
Fin du cycle de séchage . . . . . . . . . . . . . . . . . . . . . . . . . . . . . . . . . . . . . . . . . . . 79
Après chaque utilisation. . . . . . . . . . . . . . . . . . . . . . . . . . . . . . . . . . . . . . . . . . . 79
Nettoyez les filtres . . . . . . . . . . . . . . . . . . . . . . . . . . . . . . . . . . . . . . . . . . . . . . . 79
Réglage de la conductibilité . . . . . . . . . . . . . . . . . . . . . . . . . . . . . . . . . . . . 80
Tableaux des programmes . . . . . . . . . . . . . . . . . . . . . . . . . . . . . . . . . . . . . . 81
Petit résumé d'informations sur les tissus. . . . . . . . . . . . . . . . . . . . . . . 82
Symboles de soin. . . . . . . . . . . . . . . . . . . . . . . . . . . . . . . . . . . . . . . . . . . . . . . . . 82
Nettoyer le filtre a peluches . . . . . . . . . . . . . . . . . . . . . . . . . . . . . . . . . . . . 83
Nettoyage extérieur . . . . . . . . . . . . . . . . . . . . . . . . . . . . . . . . . . . . . . . . . . . . . . 83
Nettoyage de la porte. . . . . . . . . . . . . . . . . . . . . . . . . . . . . . . . . . . . . . . . . . . . . 83
Nettoyage des filtres. . . . . . . . . . . . . . . . . . . . . . . . . . . . . . . . . . . . . . . . . . . 83-84
Nettoyez le tambour. . . . . . . . . . . . . . . . . . . . . . . . . . . . . . . . . . . . . . . . . . . . . . 84
Nettoyez la plaque et les commandes . . . . . . . . . . . . . . . . . . . . . . . . . . . . . . . 84
Quelque chose ne fonctionne pas ? . . . . . . . . . . . . . . . . . . . . . . . . . . 85-87
Spécifications techniques . . . . . . . . . . . . . . . . . . . . . . . . . . . . . . . . . . . . . . . 87
Branchement électrique . . . . . . . . . . . . . . . . . . . . . . . . . . . . . . . . . . . . . . . . 87
Déballage . . . . . . . . . . . . . . . . . . . . . . . . . . . . . . . . . . . . . . . . . . . . . . . . . . . . . . 88
Accessoires spéciaux . . . . . . . . . . . . . . . . . . . . . . . . . . . . . . . . . . . . . . . . . . . 88
Colonne Lavage/Séchage en kit. . . . . . . . . . . . . . . . . . . . . . . . . . . . . . . . . . . . . 88
Inversion de la porte. . . . . . . . . . . . . . . . . . . . . . . . . . . . . . . . . . . . . . . . . . . . . 88
Service. . . . . . . . . . . . . . . . . . . . . . . . . . . . . . . . . . . . . . . . . . . . . . . . . . . . . . . . . 89
125987510_F_III.qxp 2007-03-30 13:08 Page 63
Page 65

64
Consignes de sécurité
Consignes de sécurité
La sécurité des appareils électriques AEG satisfait aux règles techniques
reconnues ainsi qu’à la loi sur la sécurité des appareils. Toutefois, en
qualité de constructeur, nous nous sentons obligé de vous familiariser
avec les consignes de sécurité suivantes:
Sécurité générale
• Les réparations du sèche-linge ne peuvent être effectuées que par du
personnel spécialisé. Des réparations inadéquates peuvent engendrer
des risques énormes pour l’utilisateur. Pour faire procéder à une réparation, adressez-vous a notre service apres-vente ou a un revendeur
spécialisé agréé AEG.
• Avant de mettre l'appareil en marche, vérifiez que la tension nominale et le type de courant indiqués sur la plaque signalétique correspondent à ceux existant là où le séchoir est installé. Le type de fusible est aussi indiqué sur la plaque signalétique.
• Ne mettez jamais l'appareil en marche si le câble d'alimentation électrique, le panneau de contrôle ou le plan de travail sont tellement
endommagés que les composants internes peuvent être atteints.
• Mettez le s èche-linge hors tension avant tout nettoyage, entretien et
opération de maintenance! Pour être absolument sûr, retirez la fiche
d’alimentation de la prise ou, en cas de raccordement fixe, coupez le
coupe-circuit protecteur de ligne dans la boîte à fusibles ou dévissez
entierement le fusible à vis.
• Débranchez l'appareil avant d'effectuer des opérations de nettoyage
ou de maintenance.
• Veillez a ne pas coincer le linge lors de la fermeture de la porte de
chargement.
• Risque d'incendie: ne faites pas sécher dans votre appareil du linge
qui a été taché ou imbibé d'huile végétale ou d'huile de cuisson.
• Risque d'incendie: si vous avez prétraité votre linge avec du détachant (spray ou liquide) avant lavage, effectuez un cycle de rinçage supplémentaire avant de le charger dans votre sèche linge.
• Ne jamais tirer sur le câble d'alimentation électrique pour débrancher
la prise de la douille ; toujours prendre la prise elle-même.
• De vous appuyez pas sur la porte ouverte, l'appareil pourrait se
retourner.
• N'aspergez jamais l'appareil avec un jet d'eau. Danger de choc électrique !
125987510_F_III.qxp 2007-03-30 13:08 Page 64
Page 66

65
• Si le programme de séchage est interrompu afin de retirer le linge:
lelinge et le tambour peuvent être très chaud.
• Il est défendu d'utiliser des fiches multiples, raccords et rallonges.
Danger d'incendie par surchauffe!
Sécurité enfant
• Les enfants ignorent souvent que les appareils électriques peuvent
être dangereux. Lorsque l'appareil est en marche, il faut les surveiller
attentivement et il ne faut pas les laisser jouer avec l'appareil - il existe le risque qu'ils restent coincer à l'intérieur.
• Les composants de l'emballage (par exemple film plastique, polystyrène) peuvent être dangereux pour les enfants - risque de suffocation !
Mettez-les hors de portée des enfants.
• Assurez-vous qu'aucun enfant ou animal ne grimpe dans le tambour.
Utilisation conforme a la destination
• Pour des raisons de sécurité, il est inter dit de tr ansformer ou de modifier le sèche-linge.
• Le sèche-linge ne peut être utilisé que pour sécher du linge domestique! Lorsque l’appareil sert à d’autres fins ou est mal utilisé, le constructeur n’assume aucune responsabilité pour des dommages éventuels.
• Séchez uniquement du linge qui a été lavé dans de l’eau. Des textiles
qui ont particulierement été traités au moyen de nettoyants et solvants inflammables (éther de pétrole, alcool, détachant, etc.) ne peuvent être séchés dans le sèche-linge. Danger d’incendie! Danger d’explosion!
• Les pieces de vetements qui contiennent du caoutchouc mousse ou
un matériau caoutchouteux ne peuvent etre séchées dans le sechelinge. Danger d’incendie!
• Les pièces de linge en mauvais état (usure importante) ou contenant
des rembourrages mous (coussins) susceptibles de prendre l'eau ne
doi-vent pas être séchées ou rafraîchies. Danger d’incendie!
• Le linge renfermant des éléments rigides (tapis de sol) et les tambours
trop remplis obturent les fentes d’aération. Respectez le remplissage
maximal de 7kg. Surchauffe! Danger d’incendie!
• Sécher uniquement du linge qui ne contient pas d’objets explosifs
(briquets, sprays). Danger d’incendie! Danger d’explosion!
• Nettoyez le filtre à peluches apres chaque cycle de séchage.
• En cas d’utilisation de colonne de lavage ou de séchage, ne pas poser
d’objets sur le sèche-linge, car ceux-ci pourraient tomber pendant le
fonctionnement.
Consignes de sécurité
125987510_F_III.qxp 2007-03-30 13:08 Page 65
Page 67

66
Installation et raccordement
• Observez les instructions d’installation et de raccordement séparées.
Si nécessaire, faites-vous conseiller par votre ramoneur ou par les
autorités locales compétentes en matière de construction.
• Vérifiez que le sèche-linge n’a pas été endommagé par le transport.
Ne raccordez en aucun cas un appareil endommagé! En présence de
dommages, adressez-vous à votre fournisseur.
• Lorsque le sèche-linge doit être porté, retirez au préalable le cache du
socle!
• N’installez pas le sèche-linge dans des locaux qui risquent de geler!
• Installez le sèche-linge a l’horizontale!
• En cas d’installation a côté d’une cuisiniere a gaz, a charbon ou électrique: il faut intercaler une plaque incombustible calorifuge entre le
seche-linge et la cuisiniere (dimensions: 85x57,5cm).
• Apres l’installation, la fiche de l’appareil doit demeurer accessible.
• Veillez a ce que le sèche-linge ne repose pas sur le câble d'alimentation.
• L’air évacué par le sèche-linge ne peut être amené dans une cheminée
de fumée ou de gaz de fumée. N’amenez pas l’air d’évacuation dans
un conduit qui sert à aérer des locaux ou sont installés des équipements de chauffage.
• N’installez pas le sèche-linge dans un local abritant des équipements
de chauffage dotés de fours au charbon et au pétrole ou des aérothermes au gaz reliés à une cheminée et ou la dépression s’éleve a
0,04mbar où plus.
• Veillez à assurer une aération suffisante du local afin d’éviter toute
formation de dépression. Le sèche-linge à évacuation aspire l’air de la
pièce.
• Conformément aux conditions techniques de raccordement des
sociétés distributrices d’électricité, un raccordement fixe au réseau
électrique ne peut etre effectué que par un installateur agréé.
• Le sèche-linge à évacuation d'air aspire de l'air. Pour cette raison,
maintenez propre l'environnement de l'appareil et ne rangez pas
d'éléments combustibles pouvant être aspirés (p. ex. litière pour petits
animaux, copeaux) devant celui-ci. Danger d'incendie !
Consignes de sécurité
125987510_F_III.qxp 2007-03-30 13:08 Page 66
Page 68

67
Instructions générales
Instructions générales
• Les tissus amidonnés laissent des traces d'amidon dans le tambour, ils
ne peuvent donc pas être séchés dans cet appareil
• Si la charge à sécher dépasse le poids maximum indiqué, il peut se
froisser. La charge maximum ne doit pas dépasser 1.5 kg pour les tissus particulierement délicats.
• Pour votre information: 70% de l'usure des tissus est causée par le fait
d'être portés, 20% par les lavages et seulement 10% par le séchage
dans un séchoir à tambour. Dans votre appareil, les peluches s'accumulent dans le filtre. Votre linge ne perdra que 0.03g de peluche par
kilo lorsqu'il sera séché en machine.
Mise au rebut
Matériaux d'emballage
Débarrassez-vous correctement des matériaux d'emballage de votre
séchoir à tambour. Tous les matériaux respectent l'environnement et
vous pouvez vous en défaire sans danger, ou ils peuvent être brûlés
dans une unité de combustion des ordures ménagères.
Les pièces en plastique peuvent être réutilisées:
• Le couvercle en plastique externe et les sacs internes sont faits en polyéthylène (>PE<).
• Le rembourrage est fait de CFC mousse de polystyrène libre (>PS<=).
Les cartons sont faits avec du papier recyclable et doivent être laissés
dans des containers de récupération des papiers.
Appareil
Attention! Lorsque vous vous débarrassez de l'appareil, retirez la prise de
la douille, coupez le câble d'alimentation électrique et détruisez la prise
et le câble restant. Immobilisez la poignet de porte afin d'éviter que des
enfants puissent rester coincés à l'intérieur de l'appareil en jouant.
Attention! Utilisez un site de dépôt autorisé pour votre vieil appareil.
Le symbole sur le produit ou son emballage indique que ce produit ne peut être traité comme déchet ménager. Il doit être remis au
point de collecte dédié à cet effet (collecte et recyclage du matériel
électrique et électronique). En procédant à la mise au rebut réglementaire de l’appareil, nous preservons l’environnement et notre sécurite,
s’assurant ainsi que les déchets seront traités dans des conditions
appropriées. Pour obtenir plus de détails sur le recyclage de ce produit, veuillez prendre contact avec les services de votre commune ou
le magasin où vous avez effectué l’achat.
125987510_F_III.qxp 2007-03-30 13:08 Page 67
Page 69

68
Astuces pour la protection de l’environnement
Astuces pour la protection de l'envir onnement
• Pendant le lavage, essayez de ne pas utiliser de produits assoupplissants !
Si le linge est séché en machine, il restera doux plus longtemps même
sans utiliser de produits assouplissants.
• Secouez votre linge!
Secouez votre linge avant de le mettre dans le séchoir afin de réduire le
temps de séchage et le froissement.
• Essorez correctement le linge avant de le faire sécher!
En règle générale, plus le linge est essoré, plus votre séchoir fonctionne
de manière économique
Dans le tableau suivant sont fournies des indications sur la consommation selon la vitesse d'essorage. Les données se réfère à 7 kg de linge
devant être séché.
• Veuillez respcetez les spécifications concernant les charges pleines !
L'appareil fonctionne de manière plus économique s'il est complètement chargé, comme indiqué dans les tableaux.
• Sélectionnez le programme de séchage correct!
Sélectionnez le programme de séchage correspondant au type et à la
quantité de linge, de telle façon que votre séchoir travaille de manière
plus économique. Quelques valeurs de consommation:
Essorage: Cycle de séchage:
Tours
par minute
Humidité résiduelle
Temps demandé
en minutes
Énergie demandée
en kWh
en litres en %
1000 4,2 60 103 3,9
1400 3,64 52 94 3,7
1600 3,43 49 83 3,2
125987510_F_III.qxp 2007-03-30 13:08 Page 68
Page 70

69
Umwelttipps
1) essoré au préalable à 1000 tpm
2) essoré au préalable à 1200 tpm.
• “DELICAAT/DELICAT”: ne peut être utilisé que pour des charges
supérieures à 3kg !
• Nettoyez le filtre à peluche après chaque cycle de séchage!
Type de linge
Degré de séchage
souhaité
Charge enkgDurée en
minutes
Consommation
d'énergie en kWh
Coton
1
KASTDROOG/A
RANGER
7 103 3,9
Coton
1
STRIJKDROOG/A
REPASSER
7 78 3,05
Tissus mixtes
2
KASTDROOG/A
RANGER
3 32 1,15
125987510_F_III.qxp 2007-03-30 13:08 Page 69
Page 71

Structure de l'appareil
Vue de face
Vue arriere
Plaque
signalétique
Pied ajustable
Filters
Illumination
interne
Tableau de commande
70
Les principales caractéristiques de votre appareil
125987510_F_III.qxp 2007-03-30 13:08 Page 70
Page 72

Les principales caractéristiques de votre appareil
Tableau de commande
1 Programmateur/Minuteur
Il vous permet de sélectionner un séchage électronique ou
chronométrique. Tournez la manette sur le programme ou le temps
désiré.
Le séchage à contrôle électronique (automatique)
L’appareil fonctionne avec ces programmes à l’aide de sondes qui testent le degré d’humidité du linge. Il vous suffit d’afficher le programme en fonction de la catégorie de linge et du degré de séchage
désiré.
Le séchage chronométrique
A utiliser pour parfaire le séchage si nécessaire. Sélectionnez le programme 90 ou 60 minutes pour le linge en coton ou 30 minutes pour
les synthétiques.
Pour annuler un programme en cours tournez le programmateur sur
“UIT/ARRET”. A la fin du séchage tournez-le sur “UIT/ARRET” pour
mettre l’appareil hors tension avant de sortir le linge. s'allume
lorsqs'allume lorsq.
2 Touche “START/PAUSE-DEPART/PAUSE”
Appuyez sur cette touche pendant 1 seconde environ pour mettre le
sèche-linge en fonctionnement après avoir sélectionné le programme
et les options.
Le voyant correspondant arrête de clignoter et reste fixe. Si l’option
“STARTUITSTEL/ D.DIFF.”a été choisie, le décompte commence.
Si la porte de l’appareil ouvert en cours de programme, cette
71
125987510_F_III.qxp 2007-03-30 13:08 Page 71
Page 73

72
Les principales caractéristiques de votre appareil
touche doit être enclenchée à nouveau après fermeture pour que
le programme démarre là où il a été interrompu.
Cette touche doit être enclenchée aussi après une coupure de courant
et après avoir remis en place le bac d’eau de condensation s’il a été
vidé en cours de programme.
Le voyant au-dessus de la touche clignote pour vous rappeler que la
touche départ doit être enclenchée à nouveau.
3 Touche “STARTUITSTEL/D.DIFF.”
Le départ différé vous permet de retarder le départ d’un programme
jusqu’à 12 heures (pour profiter éventuellement d’un tarif de nuit
avantageux).
Il faut appuyer sur cette touche après avoir sélectionné le programme souhaité et avant d'appuyer sur la touche “START/PAUSEDEPART/PAUSE”.
A chaque pression de la touche le temps augmente de 30 minutes
jusqu’à affichage de “2 heures”, ensuite il s’affiche d’ heur e en heure.
Le nombre de minutes ou d’heures au bout desquelles vous souhaitez
que le programme commence apparaît sur l'écran d'affichage pendant 2 secondes environ. La durée du programme s'affiche ensuite.
Le décompte commence après avoir appuyé sur la touche
“START/PAUSE-DEPART/PAUSE”
Pour annuler le départ différé, appuyez sur la touche
DEPART/PAUSE, appuyez ensuite sur la touche “STARTUITSTEL/
D.DIFF.” jusqu’à ce que le symbole
00
h apparaisse sur l'écran.
Appuyez de nouveau sur la touche “START/PAUSE-DEPART/PAUSE”.
En annulant le départ différé, l'écran affiche la durée du programme
de séchage préalablement sélectionné.
Durant la durée du départ différé il n’est pas possible de changer
celui-ci et le programme sélectionné. Si cela est nécessaire, tournez le
programmateur sur “UIT/ARRET”, sélectionnez le nouveau programme et les options souhaitées, affichez le nombre de minutes ou
d’heures au bout desquelles vous souhaitez que le programme commence et appuyez sur la touche “START/PAUSE-DEPART/PAUSE”.
Par contre il est possible de changer ou annuler les options seulement
après avoir mis l’appareil en “START/PAUSE-DEPART/PAUSE”.
Appuyez de nouveau sur la touche “START/PAUSE-DEPART/PAUSE” à
la fin de cette operation.
Si vous devez ajouter d’autre linge il vous suffit d’ ouvrir la porte.
Après fermeture appuyez de nouveau sur la touche “START/PAUSE-
DEPART/PAUSE” pour que le décompte recommence.
125987510_F_III.qxp 2007-03-30 13:08 Page 72
Page 74

73
4 Touche “DELICAAT/DELICAT”
L’enclenchement de cette touche permet d’effectuer un séchage à
une température inférieure pour du linge délicat. Le voyant correspondant s’allume. Cette option est utilisable aussi dans le séchage
chronométrique.
Si la touche n’est pas enclenchée le chauffage s’effectuera à pleine
puissance.
Cette fonction n’est pas compatible avec l’option KORT/COURT.
5 Touche “KORT/COURT”
En appuyant sur cette touche on obtient une réduction de la durée
des programmes COTON “EXTRADROOG/TRES SEC“, “INTENSIEFDROOG/INTENSIVE“ et “KASTDROOG/A RANGER“. Le voyant correspondant s’allume.
Cette fonction n’est pas compatible avec l’option DELICAAT/ DELICAT.
6 Touche “ZOEMER/ALARME”
Des signaux sonores retentissent
• lors de la sélection du programme et l’enclenchement des touches;
• en cas de sélection erronée des options;
• si l’on essaie de changer le programme ou les options en cours de
programme
• à la fin du programme;
• en cas d’anomalie de fonctionnement;
• lorsque la porte ou le portillon en bas sont ouverts.
Enclenchez cette touche lors de la programmation si vous souhaitez
embrayer l’alarme
Le voyant correspondant s’allume.
7 Touche ”DEUR/PORTE”
Appuyez sur cette touche pour ouvrir la porte. Le voyant correspondant s'allume.
Cela n’est possible que lorsque la machine est sous tension
(manette du programmateur sur un programme/temps de séchage).
Si la porte est ouverte en cours de programme, celui-ci s’interrompt.
Pour faire redémarrer le programme après fermeture de la porte il
faut enclencher la touche “START/PAUSE-DEPART/PAUSE”.
8 Ecran d’affichage ”LOOPTIJD/TEMPS RESTANT”
L’écran fournit les informations suivantes:
• Durée du programme choisi
• Départ différé
• Fin du programme
• Sélection erronée des options
Les principales caractéristiques de votre appareil
125987510_F_III.qxp 2007-03-30 13:08 Page 73
Page 75

• Code d’alarme
Durée du programme choisi
Après avoir sélectionné le programme, sa durée (en heures et minutes) apparaît sur l’écran. Elle est calculée automatiquement en fonction de la charge maximum prévue pour chaque type de linge et les
différents dégrés de séchage.
Après le départ du programme, le temps restant s’actualise toutes
les 5 minutes.
Départ différé
Si on a sélectionné cette option à l’aide de la touche correspondante (12 heures maximum), le nombre d’heures ou de minutes au bout
desquelles vous souhaitez que le programme commence apparaît sur
l’écran pendant 2 secondes environ. La durée du programme s’affiche ensuite.
Le décompte s’actualise toutes les 30 minutes jusqu’à affichage de
“90 minutes” et ensuite toutes les heures.
3
1.20
74
Les principales caractéristiques de votre appareil
125987510_F_III.qxp 2007-03-30 13:08 Page 74
Page 76

Fin du programme
Un zéro clignotant apparaît sur l’écran à la fin du programme après
la phase anti-froissage.
Sélection erronée des options
Si lors de la sélection du programme de séchage vous choisissez une
option non compatible avec ce programme, le code Err apparaît sur
l’écran d’affichage.
Ce code apparaît aussi en cours de programme si vous enclenchez
une des touches ou si l’on tourne le programmateur sur une autre
position.
Code d’alarme
En cas d’anomalie de fonctionnement un code d’alarme apparaît sur
l’écran (p.ex. E21). Voir informations plus détaillées au chapitre “En
cas d’anomalie de fonctionnement”
E21
0
75
Les principales caractéristiques de votre appareil
125987510_F_III.qxp 2007-03-30 13:08 Page 75
Page 77

9 VOYANTS DÉROULEMENT PROGRAMME
Ces voyants vous indiquent les différentes phases du programme
que l’appareil est en train d’effectuer et vous rappellent des opérations d’entretien:
• Voyant de “DROGEN/SECHAGE”
Ce voyant indique que l’appareil est en phase de séchage.
• Voyant “AFKOELEN/REFROID.” (Refroidissement)
Ce voyant indique que l’appareil est en phase de refroidissement. En
fin de séchage, une phase de refroidissement de 10 minutes est
prévue pour éviter le froissement du linge.
• Voyant “EINDE/FIN” de programme.
Il est allumé pendant la phase anti-froissage et reste allumé à la fin
du programme.
• Voyant “FILTER/FILTRE”
Il s’ allume à la fin du programme pour vous rappeler que les filtres
doivent être nettoyés.
Mode d'emploi rapide
• Secouez le linge autant que possible.
• Triez le linge.
• Mettez le linge dans le séchoir à tambour.
• Sélectionnez le programme/temps de séchage.
• Si nécessaire, appuyez sur le bouton “DELICAAT/DELICAT” et/ou
“ZOEMER/ALARME” et/ou “KORT/COURT” (Cette fonction n’est pas
compatible avec l’option “DELICAAT/DELICAT”) et/ou “STARTUIT-
STEL/D.DIFF.”
• Démarrez le programme en appuyant sur la touche “START/PAUSEDEPART/PAUSE”.
Lorsque le programme est en cours, la porte peut être ouverte pour
retirer le linge ou ajouter d'autres éléments.
Á la fin du programme:
• Éteignez le séchoir à tambour.
• Retirez le linge.
• Nettoyez les filtres à peluche.
76
Les principales caractéristiques de votre appareil
125987510_F_III.qxp 2007-03-30 13:08 Page 76
Page 78

77
Séchage
Séchage
Avant le premier séchage
Essuyez le tambour du seche-linge a l'aide d'un chiffon humide ou
effectuez le cycle de séchage court (30 min.) avec des chiffons humides.
Triez le linge
• Pour éviter les paquets de linge: fermez les fermetures éclair, boutonnez les taies d'oreillers et les housses de couettes; attachez les ficelles, telles que les ficelles de tabliers.
• Videz les poches.
• Enlevez toutes les pièces métalliques (trombones, goupilles de sécu-
rité, etc ....).
• Retournez vers l'intérieur les vêtements faits de deux couches de tissus (par exemple retournez les anoraks avec une doublure en coton),
ils sécheront mieux.
• Secouez votre linge.
Ouvrez la porte
• Ouvrez la porte en appuyant sur le point de pression marqué sur la
porte (voir croquis).
Chargez le linge
Attention! Lorsque vous fermez la porte, ne coincez aucun vetement !
Les tissus pourraient être endommagés. Veuillez vérifier que le linge ne
soit pas coincé entre la porte et le filtre.!
• Mettez le linge préparer et essoré dans le séchoir.
P1108
P1104
125987510_F_III.qxp 2007-03-30 13:08 Page 77
Page 79

Sélectionnez le programme ou le temps de séchage
• Les voyants “DROGEN/SECHAGE”, “AFKOELEN/REFROID.”,
“EINDE/FIN” (correspondant aux phases composant le programme)
s’allument.
Appuyez sur le bouton “ZOEMER/ALARME” et/ou “DELICAAT/DELI-
CAT” et/ou “KORT/COURT”, si vous devez faire sécher des éléments
particulièrement délicats.
Le programme réglé est exécuté avec une puissance de chauffage moindre.
Enfoncez la touche “DELICAAT/DELICAT” pour les textiles portant le symbole
d’entretien S. Pour les textiles sensibles a la tempér ature, (tels que l’acrylique et
la viscose), il est recommandé de recourir au.
Sélectionnez éventuellement l’option “STARTUITSTEL/D.DIFF.”
Avant de faire démarrer le programme, si vous souhaitez en retarder le
départ, appuyez sur la touche “STARTUITSTEL/D.DIFF.” pour sélec-
tionner le nombre d’heures au bout desquelles vous souhaitez que le
programme démarre. Le voyant correspondant s’allume.
Mettez l'appareil en marche
Démarrez le programme en appuyant sur la touche “START/PAUSE-
DEPART/PAUSE”: le voyant correspondant arrête de clignoter et seul
le voyant de la phase en cours reste allumé.
Si le départ différé a été sélectionné, le décompte en heures commence.
Aucune modification au programme ou au départ différé ne peut être
faite après le départ.
Si le programmateur est tourné sur une autre position au cour s du programme,
les voyants des phases clignotent et un signal acoustique retentit.
Durant le séchage le tambour tourne alternativement dans les deux
directions.
Tous les programmes de séchage se terminent par une phase de refroidissement de 10 minutes (le voyant “ AFKOELEN/REFROID.” est allumé). Le
linge peut être retiré à la fin de cette phase lorsque les voyants
“EINDE/FIN” et “FILTER/FILTRE” sont allumés.
nexxt02
78
Séchage
125987510_F_III.qxp 2007-03-30 13:08 Page 78
Page 80

Retirez ou ajoutez du linge
Il est possible d'interrompre le cycle à tout moment afin de afin de
retirer ou d'ajouter du linge.
Ouvrez la porte.
Attention! Le linge et le tambour peuvent être chauds.
Retirez ou ajoutez du linge.
Fermez la porte et appuyez sur le bouton “START/PAUSE-
DEPART/PAUSE” pour continuer le cycle de séchage.
Fin du cycle de séchage
Une phase de refroidissement est effectuée avant la fin du cycle de
séchage : la chaleur est réduite pendant cette phase. Après la phase
de refroidissement, il est possible de retirer le linge du séchoir.
Si le linge n’est pas retiré en fin de cycle, le sèche-linge effectue la
phase anti-froissage (durée: 30 minutes maximum).
Si vous n’intervenez pas durant cette phase, le sèche-linge s’arrête
automatiquement à la fin de la phase anti-froissage. Des signaux
acoustiques retentissent pendant 2 minutes (si la touche pas été
enclenchée). Les voyants “EINDE/FIN” et “FILTER/FILTRE” restent
allumés.
Après chaque utilisation
Tournez le programmateur sur “UIT/ARRET”, tous les voyants s’éteignent.
Si vous ouvrez et puis fermez la porte avant de tourner le programmateur sur “UIT/ARRET”, les voyants correspondant aux phases du programme qui vient d’être achevé s’allument et l’appareil
est prêt à recommencer le même programme.
Sortez le linge.
Nettoyez les filtres
Pour assurer la libre circulation de l'air pendant le cycle de séchage,
les filtres à peluche doivent être nettoyés après chaque cycle de
séchage, avant de retirer le linge.
79
Séchage
125987510_F_III.qxp 2007-03-30 13:08 Page 79
Page 81

80
Réglage de la conductibilité
L’eau, selon les zones géographiques, contient en quantité variable des
sels calcaires et minéraux qui changent la valeur de la conductibilité.
Des variations importantes de la conductibilité, par rapport aux
valeurs affichées par l’usine, pourraient légèrement influeucer l’humidité résiduelle à la fin du séchage.
Votre séche-linge permet de régler la sensibilité du capteur conductimétrique sur la base de la valeur de la conductibilité de l’eau au
moyen de la procédure suivante:
Pour accéder à la modalité de réglage:
Mettez l’appareil sous tension en tournant le sélecteur.
En mode sélection pressez les touches 3 et 6 ensemble jusqu'a l'appa-
rition de «
CC00
» sur l'écran digital.
Pour modifier la valeur de conductibilité:
Pressez ensuite le bouton 5 : le niveau de conductivité est indiqué par
le trait horizontal qui s'allume.
Normalement, l’appareil est réglé à l’usine sur le niveau le plus
haut; certains modèles pourraient cependant être configurés de
façon différente.
Pour mémoriser le réglage:
Pressez les touches 3 et 6 ensemble jusqu'a ce que le minutage du
cycle de séchage précédent réapparaisse et que la sonnerie retentisse.
LED allumée
Degré de
conductibilité
Valeur indicative
µS/cm (25°C)
CC00
--
Faible < 300
CC00 --
Moyen 300 - 600
CC00 --
Élevé > 600
12345 6
Réglage de la conductibilité
--
--
--
125987510_F_III.qxp 2007-03-30 13:08 Page 80
Page 82

81
Tableaux des programmes
Séchage électronique
(*) Suivant normes CEI 1121.
• “LICHT STRIJKEN/ FACILE A REPASSER” - programme spécial doté d’un mécanisme antifroissage pour un léger repassage des textiles mélangés tels que les chemises et les
blouses
• JEANS
- Programme spécial pour vêtements de sport comme les jeans, les sweats, etc., en
tissus de résistances diverses (par ex. au niveau du poignet et du col ou des coutures).
Séchage chronométrique
(1) En aucun cas, le tambour ne doit être rempli en totalité (exclure par exemple les
grandes couettes).
La durée du séchage est variable selon:
• la nature du linge
• l’importance de la charge
• l’intensité de l’essorage
• la degré de séchage souhaité
Charge
Il est souvent difficile d’estimer le poids des articles à sécher. C’est pour quoi nous vous conseillons de remplir le tambour:
• en totalité mais sans pression excessive, pour le linge en coton, lin, métis;
• à moitié de son volume pour les cotons traités et les fibres synthétiques;
• au tiers environ de son volume pour les articles très fragiles.
Type de linge
Durée de
séchage
Charge maxi
(1)
Position du
programmateur
COTON 90 min
7 kg 90 MIN
COTON 60 min
7 kg 60 MIN
TEXTILES MELANGES 30 min
3 kg 30 MIN
Type de linge Programmes
Charge maxi
(1)
kg
COTON
EXTRADROOG/TRES SEC
7
INTENSIEFDROOG/INTENSIVE
7
KASTDROOG/A RANGER
7 (*)
STRIJKDROOG/FER SEC
7
STRIJKDROOG/A REPASSER
7 (*)
STRIJKDROOG/EN MACHINE
7
TEXTILES MELANGES
EXTRADROOG/TRES SEC
3
KASTDROOG/A RANGER
3 (*)
STRIJKDROOG/A REPASSER
3
Blouses
LICHT STRIJKEN/
FACILE A REPASSER
env 2
Jeans, sweats, etc. JEANS
7
Tableaux des programmes
125987510_F_III.qxp 2007-03-30 13:08 Page 81
Page 83

82
Petit résumé d’informations sur les tissus
Petit résumé d'informations sur les tissus
Symboles de soin
Vérifiez si les tissus peuvent être séchés dans un séchoir à tambour . L'un
des symboles suivants devraient apparaître sur l'étiquette de soin:
Normalement, ce tissu peut être séché dans un séchoir à tambour,
cependant le fabricat n'indique pas s'il peut être séché à une
température normale ou basse.
Séchage normal (température normale)
Séchage doux (température douce)
Ne pas utiliser de séchoir à tambour
Si aucun de ces symboles n'est indiqués :
Séchez les cotons, de même que les tissus mixtes, à température nor-
male. Appuyez sur le bouton “DELICAAT/DELICAT” lorsqu'il s'agit de
cotons délicats.
Il est conseillé de prendre en considération les symboles de soin sur les
étiquettes de vêtements lors de l'achat.
• Laine, duvets
Ne pas faire sécher d'éléments en laine dans le séhoir à tambour ! Ils
peuvent s'abîmer ! Les duvets ne peuvent être séchés en tambour que
si le symbole de soin correspondant est présent.
• Tissus sensibles aux températures élevées
Faites sécher les tissus sensibles aux températures élevées (tels que
acrylique ou viscose) et les éléments comportant le symbole de
soin en utilisant des programmes de séchage pour synthétiques.
• Vêtements tricotés, tricot
Les vêtements tricotés et le tricot ont tendance a rétrécir. Ne pas uti-
liser de séchoir pour ces éléments. Les produits de grande qualité ont
moins tendance à rétrécir.
• Nouveaux tissus colorés
Ne faites pas sécher les nouveaux tissus colorés avec le linge coloré.
Cela peut provoquer une décoloration!
125987510_F_III.qxp 2007-03-30 13:08 Page 82
Page 84

Nettoyer le filtre a peluches
Débranchez l'appareil avant toute opération d'entretien.
Nettoyage extérieur
Utilisez de l'eau savonneuse. Rincez et séchez soigneusement.
Important: N’utilisez jamais de produits abrasifs ou caustiques.
Nettoyage de la porte
Nettoyez périodiquement l’intérieur de la porte pour enlever d’éventuelles peluches des joints autour du filtre. Un nettoyage soigneux est
indispensable pour un séchage correct.
Nettoyage des filtres
Situés à l’intérieur de la porte et dans l’ouverture du hublot, les filtres
doivent être nettoyés après chaque utilisation à l’aide d’un chiffon
humide avant de sortir le linge. L’allumage du voyant correspondant
sur le bandeau de commandes vous rappelle cette opération d’entretien.
Le filtre à l’intérieur de la porte doit être enlevé pour pouvoir le nettoyer. A cet effet, tirez sur la poignée vers le haut.
La quantité de peluches recueillies ne doit pas vous inquiéter, elle est
due à une usure normale du linge et non à un mauvais fonctionnement de l’appareil.
A
U
T
O
R
E
V
E
R
S
E
k
g
5
k
g
2
,5
8
0
0
/
9
0
0
7
0
'
-
9
0
'
3
5
'
-
5
0
'
1
0
0
0
/
1
2
0
0
6
5
'
-
8
5
'
3
0
'
-
4
5
'
8
0
0
/
9
0
0
8
0
'
-
1
0
0
'
5
5
'
-
7
0
'
1
0
0
0
/
1
2
0
0
7
5
'
-
9
5
'
5
0
'
-
6
5
'
6
5
0
5
0
'
-
6
0
'
3
0
'
-
3
5
'
k
g
2
,5
k
g
1
P1111
P1110
A
U
T
O
R
E
V
E
R
S
E
k
g
5
k
g
2
,5
8
0
0
/
9
0
0
7
0
'
-
9
0
'
3
5
'
-
5
0
'
1
0
0
0
/
1
2
0
0
6
5
'
-
8
5
'
3
0
'
-
4
5
'
8
0
0
/
9
0
0
8
0
' -
1
0
0
'
5
5
'
-
7
0
'
1
0
0
0
/
1
2
0
0
7
5
'
-
9
5
'
5
0
'
-
6
5
'
6
5
0
5
0
'
-
6
0
'
3
0
'
-
3
5
'
k
g
2
,5
k
g
1
P1109
83
Nettoyer le filtre a peluches
125987510_F_III.qxp 2007-03-30 13:08 Page 83
Page 85

Un frottement des fibres et du tissu se produit pendant l’utilisation et le
lavage du linge provoquant une formation de peluches. Si le séchage du
linge est effectué sur un séchoir ou un fil ces peluches s’envolent, tandis qu’à
l’intérieur du sèche-linge elles s’accumulent et se gonflent fortement sous
l’action du séchage.
Si une légère couche blanchâtre due aux résidus de lessive dans le linge, se
forme sur les filtres, ceux-ci doivent être nettoyés à l’eau chaude à l’aide
d’une brosse. En ce cas, enlevez aussi le filtre situé dans l’ouverture du hublot
comme indiqué dans le croquis. Il peut être remis en place la languette
tournée à gauche ou à droite.
N’utilisez jamais votre sèche-linge sans filtres.
Trommel reinigen
Attention! Ne nettoyez pas le tambour en acier inoxydable avec un
produit abrasif ou de la paille de fer.
Essuyez l'intérieur du tambour et les aubes du tambour avec un détergent domestique standard (par exemple solution de vinaigre).
Nettoyez la plaque et les commandes
Attention! N'utilisez pas d'encaustique domestique ou de détergents
abrasifs.
Essuyez la plaque et les commandes avec un chiffon humide uniquement. Utilisez de l'eau chaude uniquement.
A
U
T
O
R
E
V
E
R
S
E
k
g
5
k
g
2
,5
8
0
0
/
9
0
0
7
0
'
-
9
0
'
3
5
'
-
5
0
'
1
0
0
0
/
1
2
0
0
6
5
'
-
8
5
'
3
0
'
-
4
5
'
8
0
0
/
9
0
0
8
0
'
-
1
0
0
'
5
5
'
-
7
0
'
1
0
0
0
/
1
2
0
0
7
5
'
-
9
5
'
5
0
'
-
6
5
'
6
5
0
5
0
'
-
6
0
'
3
0
'
-
3
5
'
k
g
2
,5
k
g
1
P1112
84
Nettoyer le filtre a peluches
125987510_F_III.qxp 2007-03-30 13:08 Page 84
Page 86

Quelque chose ne fonctionne pas?
Si un problème survient, vous pouvez essayer de le régler vous-même
en suivant les indications ci-après. Si vous appelez un technicien si l'un
des problèmes suivant survient, ou pour réparer une défaillance due à
une utilisation incorrecte, cette réparation sera à votre charge même si
elle est demandée au cours de la période de garantie.
Problème Cause possible
Remède
Le sèche-linge ne tra-
vaillepas.
Fiche de secteur débranchée Enficher la fiche de secteur.
Pas de programme sélectionné. Sélectionnez un programme.
Touche “START/PAUSE-
DEPART/PAUSE” non enclenchée
Touche “START/PAUSE-
DEPART/PAUSE” enclenchée
Hublot ouvert. Fermer hublot
Fusible ou disjoncteur de protection
interne dans la boîte à fusibles
(installation domestique)
défectueux.
Vérifiez fusible ou disjoncteur de pro-
tection interne. C'est votre installa-
teur électriquequi remédie aux pan-
nes de votre installation électrique.
Le résultat du
séchagen'est pas
satisfaisant.
Sélection d'un mauvais programme.
Lors du prochain séchage sélec-
tionnez un autre programme (de
durée)
Filtre à peluches bouché Nettoyer filtre à peluches
Mauvaise quantité de remplissage
Respecter quantité de remplissage
conseillée
Linge pas suffisammentdrainé
Drainer le linge suffisamment au
préalable.
Couche sur la surface intérieure du
tambour ou sur lesnervures du
tambour
Nettoyer la surface intérieure du
tambour et les nervures du tambour.
85
Quelque chose ne fonctionne pas?
125987510_F_III.qxp 2007-03-30 13:08 Page 85
Page 87

Si, pour l'élimination d'une panne vous ne trouvez pas de mention dans
ce mode d'emploi, veuillez-vous tourner vers votre service aprèsventes.
Problème Cause possible
Remède
Le cycle de séchage
est atypiquement
long
Die Einfülltür lässt
sich nicht schließen
Le sèche-linge
quitte automatiquement le cycle de
séchage: Affichage
FIN s'allume juste
après le début du
programme.
Dérivation d'air dérangée.
Aligner le tuyau d'évacuation d'air sans plis
et/ou nettoyer les accès d'air d'évacuation
Filtre à peluches bouché. Nettoyer filtre à peluches
Filtre à peluches pas inséré et/ou
couvercle du filtre pas enclenché.
Insérez filtre à peluches et/ou couver-
cle du filtre
Pour programme sélectionné trop
peu de linge inséré ou encore il
était trop sec.
Sélectionnez autre programmeou
niveau de séchage différent (p.ex
EXTRADROOG/ TRES SEC au lieu de
KASTDROOG/A RANGER )
Le cycle de séchage
est atypiquement
long. 4,5 heures
après le début du
cycle de séchage:
Affichage FIN s'allumearrêt du cycle
de séchageaffichage fin du
programme clignote
Touche “DELICAAT/DELICAT”- enfon-
cée et quantité de remplissage trop
grande
Vérifier sélection du programme: La
touche “DELICAAT/DELICAT” -a de
sens uniquement pour des quantités
de linge jusqu' a 3kg ; nettoyer filtre
à peluches judicieuceusement
Quantité de remplissage trop
grande
Réduire quantité de remplissage
Linge trop mouillé Drainer davantage le linge
86
Quelque chose ne fonctionne pas?
125987510_F_III.qxp 2007-03-30 13:08 Page 86
Page 88

Spécifications techniques
Hauteur x Largeur x Profondeur 85x60x57 cm
Profondeur avec la porte ouverte 107 cm
Ajustement de la hauteur 6 mm
Poids vide 32 kg environ
Charge (selon le programme) max. 7 kg
(Volumes de charges différents dans certains pays dus aux différentes
méthodes de mesures)
Utilisation Domestique
Température ambiante autorisée +5°C bis +35°C
Cet appareil répond aux directives EC suivantes:
- 73/23/EEC of 19/2/1973 “Directive basse tension”
- 89/336/EEC of 3/5/1989 “directive EMC” icomprenant la directive de
modification 92/31/EEC.
Branchement électrique
Les spécifications concernant l'alimentation électrique sont indiquées
sur la plaque signalétique. La tension nominale et le type de courant
indiqués sur la plaque signalétique doivent correspondre à ceux existant là où le séchoir est installé. Référez-vous aussi à la tension nominale pour le type de fusible demandé.
Un branchement permanent ne peut être réalisé que par un technicien qualifié.
Attention! CET APPAREIL DOIT ETRE MIS Á LA TERRE
Le fabricant décline toute responsabilité si cette mesure n'est pas
observée.
Avant le branchement, assurez-vous que la tension d'alimentation
électrique est la même quelle celle indiquée sur la plaque signalétique
de l'appareil.
Vérifiez que le compteur et les fusibles peuvent supporter l'intensité
absorbée par l'appareil, en tenant compte des autres appareils électriques branchés.
Attention! Couper une prise insérée dans une douille de 16 amp est
un risque sérieux pour la sécurité (choc).
Assurez-vous que la coupe de la prise est réalisée prudemment.
Avertissement : La prise doit être accessible après l’installation de l’appareil.
87
Spécifications techniques
125987510_F_III.qxp 2007-03-30 13:09 Page 87
Page 89

Déballage
Faites glisser le sac de polythène avec le rembourrage avant d'utiliser l'appareil. Retirez les bandes adhésives de l'intérieur de
l'appareil sur le haut du tambour.
Accessoires spéciaux
Vous pouvez obtenir les accessoires spéciaux suivants par l'intermédiaire de l'organisation de service au client AEG ou de votre distributeur:
Colonne Lavage/Séchage en kit
Grâce à ce kit, vous pouvez combiner votre séchoir avec une machine à laver automatique LAVAMAT avec une colonne de séchage et de
lavage. Les appareils sont empilés de manière a gagner de l'espace, la
machine à laver en-dessous et le séchoir au-dessus.
Inversion de la porte
Pour faciliter le chargement ou le déchargement du linge, la porte
peut être inversée.
Cette opération doit être réalisée par une personne expérimentée.
Veuillez contacter le centre de force de service le plus proche.
P1107
P1106
88
Déballage/Accessoires spéciaux/Inversion de la porte
125987510_F_III.qxp 2007-03-30 13:09 Page 88
Page 90

Service
Dans le chapitre "Quelque chose ne fonctionne pas ? " vous trouverez la
liste des problèmes pouvant être résolus par vous-même. Lisez cette
section en cas de problèmes. Si vous ne trouvez pas de solution, contactez le centre de service. Il se trouve près de chez vous, au besoin, un
technician viendra aussitôt vous voir. (Les adresses et numéros de téléphone sont fournis dans le formulaire joint).
Dans tous les cas, préparez votre discours avant de téléphoner, afin de
faciliter le dépannage: le technicien pourra décider si une visite de service est nécessaire.
Notez le numéro de série (Ser. N°.) et le numéro du produit (Prod. N°.)
indiqués sur la plaque signalétique.
Prod. N° . . . . . . . . . . . . . . . . . . . . . .
Ser. N° . . . . . . . . . . . . . . . . . . . . . . . .
Essayez de définir, aussi précisément que possible:
• Les symptomes de la défaillance.
• Quand cette défaillance a-t-elle eu lieu.
Quand une visite de service peut-elle être prise en charge au cours de
la période de garantie?
- s'il vous aurait été possible de résoudre vous-même le problème, à
l'aide du tableau de dépannage (voir section "Quelque chose ne
fonctionne pas ? ")
- si le technicien doit venir plusieurs fois parce qu'il n'a pas reçu tou-
tes les informations importantes dont il a besoin et qu'il doit, par
exemple, aller chercher des pièces de rechange. Des déplacements
répétés peuvent être évités si vous préparez votre appel au centre
de service comme décrit ci-dessus.
IPX4
Mod. xxxxxx Type xxxxxxx
Prod.No. xxxxxxxxx xx
xxx-xxxV~xxHz xxxxW xx A
Ser.No.
89
Service
125987510_F_III.qxp 2007-03-30 13:09 Page 89
Page 91

90
Garantie
Belgique
DÉCLARATION DE CONDITIONS DE GARANTIE.
Nos appareils sont produits avec le plus grand soin. Malgré cela, un défaut peut toujours se présenter. Notre service
clientèle se chargera de réparer ceci sur demande, pendant ou après la période de garantie. La durée de vie de l'appareil n'en sera pas pour autant amputée.
La présente déclaration de conditions de garantie est basée sur la Directive de l'Union Européenne 99/44/CE et les
dispositions du Code Civil. Les droits légaux dont le consommateur dispose au titre de cette législation ne peuvent
être altérés par la présente déclaration de conditions de garantie. Cette déclaration ne porte pas atteinte aux obligations de garantie du vendeur envers l'utilisateur final. L'appareil est garanti dans le cadre et dans le respect des
conditions suivantes :
1. Compte tenu des dispositions stipulées aux paragraphes 2 à 15, nous remédierons sans
frais à toute défectuosité qui se manifeste au cours de la période de 24 mois à compter de
la date de livraison de l'appareil au premier consommateur final. Ces conditions de garantie ne sont pas d'application en cas d'utilisation à des fins professionnelles ou de façon
équivalente.
2. La prestation sous garantie implique que l'appareil est remis dans l'état qu'il avait avant
que la défectuosité ne survienne. Les composants défectueux sont remplacés ou réparés.
Les composants remplacés sans frais deviennent notre propriété.
3. Afin d'éviter des dommages plus sévères, la défectuosité doit immédiatement être portée à
notre connaissance.
4. L'application de la garantie est soumise à la production par le consommateur des preuves
d'achat avec la date d'achat et/ou la date de livraison.
5. La garantie n'interviendra pas si des dommages causés à des pièces délicates, telles que le
verre (vitrocéramique), les matières synthétiques et le caoutchouc, résultent d'une mauvaise utilisation.
6. Il ne peut pas être fait appel à la garantie pour des anomalies bénignes qui n'affectent pas
la valeur et la solidité générales de l'appareil.
7. L'obligation de garantie perd ses effets lorsque les défectuosités sont causées par :
• une réaction chimique ou électrochimique provoquée par l'eau,
• des conditions environnementales anormales en général,
• des conditions de fonctionnement inadaptées,
• un contact avec des produits agressifs.
8. La garantie ne s'applique pas pour les défectuosités, dues au transport, survenues en
dehors de notre responsabilité. Celles causées par une installation ou un montage inadéquat, par un manque d'entretien, ou par le non-respect des indications de montage et
d'utilisation, ne seront pas davantage couvertes par la garantie.
9. Ne sont pas couvertes par la garantie, les défectuosités qui proviennent de réparations ou
d' interventions pratiquées par des personnes non qualifiées ou incompétentes, ou qui ont
pour cause l'adjonction d'accessoires ou de pièces de rechange non d'origine.
10. Les appareils aisément transportables doivent être délivrés ou envoyés au service clientèle. Les interventions à domicile ne peuvent s'entrevoir que pour des appareils volumineux ou pour des appareils encastrables.
11. Si des appareils sont encastrés, sous-encastrés, fixés ou suspendus de telle sorte que le
125987510_F_III.qxp 2007-03-30 13:09 Page 90
Page 92

91
retrait et la remise en place de ceux-ci dans leur niche d'encastrement prennent plus d'une
demi-heure, les frais de prestation qui en découlent seront portés en compte. Les dommages connexes causés par ces opérations de retrait et de remise en place sont à charge de
l'utilisateur.
12. Si au cours de la période de garantie, la réparation répétée d'une même défectuosité
n'est pas concluante, ou si les frais de réparations sont jugés disproportionnés, le remplacement de l'appareil défectueux par un autre de même valeur peut être accompli en concertation avec le consommateur. Dans ce cas nous nous réservons le droit de réclamer une
participation financière calculée au prorata de la période d'utilisation écoulée.
13. La réparation sous garantie n'entraîne pas de prolongation de la période normale de
garantie, ni le départ d'un nouveau cycle de garantie.
14. Nous octroyons une garantie de douze mois sur les réparations, limitée à la même défectuosité.
15. Hormis les cas où une responsabilité est imposée légalement, cette déclaration de conditions de garantie exclut toute indemnisation de dommages extérieurs à l'appareil dont le
consommateur voudrait faire prévaloir les droits. Dans le cas d'une responsabilité reconnue légalement, la compensation n'excèdera pas la valeur d'achat de l'appareil. Ces conditions de garantie sont valables uniquement pour des appareils achetés et utilisés en Belgique. Pour les appareils exportés, l'utilisateur doit d'abord s'assurer qu'ils satisfont aux conditions techniques (p. ex. : la tension, la fréquence, les prescriptions d'installation, le type
de gaz, etc.) pour le pays concerné, et qu'ils supportent les conditions climatiques et environnementales locales. Pour les appareils achetés à l'étranger, l'utilisateur doit d'abord
s'assurer qu 'ils répondent bien aux qualifications requises en Belgique. Des adaptations
indispensables ou souhaitées ne sont pas couvertes par la garantie et ne sont pas possibles
dans tous les cas.
Le service clientèle se tient à votre disposition, également après expiration de la période
de garantie.
Adresse de notre service clientèle :
Luxembourg
ELECTROLUX HOME PRODUCTS
Rue de Bitbourg. 7
L-1273 Luxembourg-Hamm
Belgium
ELECTROLUX HOME PRODUCTS BELGIUM
Bergensesteenweg, 719 - 1502 LEMBEEK
Tél.: 02.363.04.44
125987510_F_III.qxp 2007-03-30 13:09 Page 91
Page 93

92
Si vous devez nous contacter
Belgique
Electrolux Home Products Belgium
ELECTROLUX SERVICE
Bergensesteenweg 719
1502 Lembeek
E-mail: consumer.services@electrolux.be
Pièces détachées, accessoires et produits d'entretien
Pour la Belgique: vous pouvez commander des pièces détachées, accessoires
et consommables
online à l'adresse http://www.aeg-home.be/fr
Luxembourg
Grand-Duché de Luxembourg
ELECTROLUX HOME PRODUCTS
Rue de Bitbourg. 7
L-1273 Luxembourg-Hamm
E-mail: consumer-service.luxembourg@electrolux.lu
Consumer services
Téléphone
02/363.04.44
Téléfax
02/363.04.00
02/363.04.60
Consumer services
Téléphone
00 352 42 431-1
Téléfax
00 352 42 431-360
125987510_F_III.qxp 2007-03-30 13:09 Page 92
Page 94

93
125987510_F_III.qxp 2007-03-30 13:09 Page 93
Page 95

94
Geachte klant,
Lees deze gebruiksaanwijzing aandachtig door.
Lees vooral de aanwijzingen m.b.t. de veiligheid op de eerste pagina's
van deze gebruiksaanwijzing! Bewaar de gebruiksaanwijzing goed,
zodat u nog eens iets kunt nalezen en geef hem door aan een eventuele volgende eigenaar van het toestel.
Met de waarschuwingsdriehoek en/of door signaalwoorden (Waar schu-
wing!, Voorzichtig!, Attentie!) geven wij aanwijzingen die belangrijk zijn
voor uw veiligheid of voor het functioneren van de machine. Let goed op
deze aanwijzingen.
Dit symbool voert u stap voor stap door de bediening van het toestel.
Bij dit symbool vindt u aanvullende informatie m.b.t. bediening en
praktisch gebruik van het toestel.
Het klaverblad staat voor tips en aanwijzingen m.b.t. eonomisch en
milieuvriendelijk gebruik van het toestel.
Mocht er een storing optreden, dan vindt u onder "Wat is er aan de
hand als ..." aanwijzingen om kleine storingen zelf op te heffen.
Bij technische problemen kunt u altijd contact opnemen met de AEG
fabrieksservice, zie hoofdstuk "Service".
Gedrukt op chloorvrij papier -
wie milieubewust denkt, handelt ook zo...
125987510_NL_IV.qxp 2007-03-30 13:04 Page 94
Page 96

Inhoud
Aanwijzingen m.b.t. de veiligheid. . . . . . . . . . . . . . . . . . . . . . . . . . . . . . 96-98
Algemene aanwijzingen . . . . . . . . . . . . . . . . . . . . . . . . . . . . . . . . . . . . . . . . . 99
Afvalverwerking . . . . . . . . . . . . . . . . . . . . . . . . . . . . . . . . . . . . . . . . . . . . . . . . 99
Milieutips . . . . . . . . . . . . . . . . . . . . . . . . . . . . . . . . . . . . . . . . . . . . . . . . 100-101
De belangrijkste kenmerken van uw machine . . . . . . . . . . . . . . . . . . 102-108
Beschrijving van de machine. . . . . . . . . . . . . . . . . . . . . . . . . . . . . . . . . . . . . 102
Frontaanzicht. . . . . . . . . . . . . . . . . . . . . . . . . . . . . . . . . . . . . . . . . . . . . . . . . . . 102
Achteraanzicht. . . . . . . . . . . . . . . . . . . . . . . . . . . . . . . . . . . . . . . . . . . . . . . . . . 102
Bedieningspaneel . . . . . . . . . . . . . . . . . . . . . . . . . . . . . . . . . . . . . . . . . . . 103-108
Beknopte gebruiksaanwijzing . . . . . . . . . . . . . . . . . . . . . . . . . . . . . . . . . . . . 108
Drogen . . . . . . . . . . . . . . . . . . . . . . . . . . . . . . . . . . . . . . . . . . . . . . . . . . . . 109-112
Wasgoed voorbereiden. . . . . . . . . . . . . . . . . . . . . . . . . . . . . . . . . . . . . . . . . . . 109
Deur openen . . . . . . . . . . . . . . . . . . . . . . . . . . . . . . . . . . . . . . . . . . . . . . . . . . . 109
Wasgoed in de droger doen. . . . . . . . . . . . . . . . . . . . . . . . . . . . . . . . . . . . . . . 109
Droogprogramma of droogtijd instellen. . . . . . . . . . . . . . . . . . . . . . . . . . . . . 110
Droogprogramma starten. . . . . . . . . . . . . . . . . . . . . . . . . . . . . . . . . . . . . . . . . 110
Wasgoed uitnemen of inleggen. . . . . . . . . . . . . . . . . . . . . . . . . . . . . . . . . . . . 110
Beëindiging van het droogproces. . . . . . . . . . . . . . . . . . . . . . . . . . . . . . . . . . . 111
Droger uitschakelen. . . . . . . . . . . . . . . . . . . . . . . . . . . . . . . . . . . . . . . . . . . . . . 111
Pluizenzeef reinigen. . . . . . . . . . . . . . . . . . . . . . . . . . . . . . . . . . . . . . . . . . . . . . 111
Het geleidingsvermogen aanpassen . . . . . . . . . . . . . . . . . . . . . . . . . . . . . . . 112
Programmatabellen . . . . . . . . . . . . . . . . . . . . . . . . . . . . . . . . . . . . . . . . . . . . . 113
Informatie over textiel . . . . . . . . . . . . . . . . . . . . . . . . . . . . . . . . . . . . . . . . . . 114
Wasetiketten . . . . . . . . . . . . . . . . . . . . . . . . . . . . . . . . . . . . . . . . . . . . . . . . . . . 114
Reiniging en onderhoud . . . . . . . . . . . . . . . . . . . . . . . . . . . . . . . . . . . . . . . . . 115
De buitenkant . . . . . . . . . . . . . . . . . . . . . . . . . . . . . . . . . . . . . . . . . . . . . . . . . . 115
Het zeefgedeelte . . . . . . . . . . . . . . . . . . . . . . . . . . . . . . . . . . . . . . . . . . . . . . . . 115
Pluizenzeef reinigen . . . . . . . . . . . . . . . . . . . . . . . . . . . . . . . . . . . . . . . . . 115-116
Trommel reinigen. . . . . . . . . . . . . . . . . . . . . . . . . . . . . . . . . . . . . . . . . . . . . . . . 116
Paneel en bedieningselementen reinigen . . . . . . . . . . . . . . . . . . . . . . . . . . . . 116
Wat is er aan de hand als ...?. . . . . . . . . . . . . . . . . . . . . . . . . . . . . . . . . 117-118
Technische gegevens . . . . . . . . . . . . . . . . . . . . . . . . . . . . . . . . . . . . . . . . . . . . 119
Opstelling en elektrische aansluiting. . . . . . . . . . . . . . . . . . . . . . . . . . . . . . 119
Utipakken . . . . . . . . . . . . . . . . . . . . . . . . . . . . . . . . . . . . . . . . . . . . . . . . . . . . . 120
Extra leverbare accessoires. . . . . . . . . . . . . . . . . . . . . . . . . . . . . . . . . . . . . . . 120
Verbindingsset. . . . . . . . . . . . . . . . . . . . . . . . . . . . . . . . . . . . . . . . . . . . . . . . . . 120
Deurdraairichting. . . . . . . . . . . . . . . . . . . . . . . . . . . . . . . . . . . . . . . . . . . . . . . 120
Service . . . . . . . . . . . . . . . . . . . . . . . . . . . . . . . . . . . . . . . . . . . . . . . . . . . . . . . . 121
125987510_NL_IV.qxp 2007-03-30 13:04 Page 95
Page 97

96
Aanwijzingen m.b.t. de veiligheid
Aanwijzingen m.b.t. de veiligheid
De veiligheid van elektrische toestellen van AEG voldoet aan de Europese en Nederlandse normen. Toch zien wij ons als fabrikant genoodzaakt, u en uw eventuele medegebruikers op het volgende te wijzen.
Algemene veiligheid
• Reparaties aan elektrische toestellen mogen alleen door vakmensen worden uitgevoerd. Onvakkundige reparaties kunnen tot aanzienlijke risico's
voor de gebruiker leiden. Wend u daarom altijd tot onze afdeling Klantenservice. Alleen originele AEG-onderdelen voldoen aan alle eisen!
• Controleert u vóór het in gebruik nemen of de op het typeplaatje
aangegeven netspanning en stroomsoort overeenkomen met netspanning en stroomsoort bij u thuis. Op het typeplaatje kunt u ook
zien welke zekering nodig is.
• De droger nooit in gebruik nemen, als het aansluitsnoer beschadigd is
of als bedieningspaneel, bovenblad of sokkel zo beschadigd zijn, dat
de binnenkant van het toestel toegankelijk is.
• Als u het toestel gaat schoonmaken, moet het altijd uitgeschakeld
zijn: stekker uit het stopcontact trekken of bij vaste aansluiting de
groepenhoofdschakelaar uitschakelen of de zekering in de huisinstallatie uitschakelen resp. uitdraaien.
• Stekker nooit aan het snoer uit het stopcontact trekken, maar aan de stekker.
• Brandgevaar: Textiel wat is bevlekt of doorweekt met plantaardige
olie of olie wat geschikt is voor het bereiden van voedsel vormt een
brandgevaar en is niet geschikt om in de wasdroger te plaatsen.
• Indien u de was met een vlekkenverwijderaar hebt behandeld dient u
een extra spoelgang in te stellen alvorens de was in de wasdroger te
plaatsen.
• Leun niet op de deur als deze open staat. De machine zou dan kunnen kantelen!
• Droger niet met een waterstraal afsproeien. Kans op kortsluiting!
• Let er bij het sluiten van de deur op, dat er geen wasgoed tussen
wordt geklemd.
• Als u een droogproces onderbreekt om wasgoed uit de droger te
nemen: wasgoed en trommel kunnen heet zijn.
• Meerwegstekkers, koppelingen en verlengsnoeren mogen niet
gebruikt worden. Brandgevaar door oververhitting!
125987510_NL_IV.qxp 2007-03-30 13:04 Page 96
Page 98

97
Veiligheid van kinderen
• Kinderen zien de gevaren niet die ontstaan door ondeskundige
omgang met elektrische toestellen. Zorg daarom voor het nodige toezicht als de machine aanstaat en laat kinderen niet met de machine
spelen - ze zouden zichzelf of andere kinderen in de machine kunnen
opsluiten.
• Houd de verpakking uit de buurt van kinderen; vooral folie en styropor kunnen gevaren opleveren. Verstikkingsgevaar!
• Zorg ervoor dat kinderen of kleine huisdieren niet in de trommel van
de droger kunnen klimmen. Houd daarom de deur van de droger gesloten, als hij niet gebruikt wordt.
Gebruik volgens de voorschriften
• Constructieve wijzigingen of veranderingen aan het toestel zijn uit
veiligheidsoverwegingen niet toegestaan.
• Gebruik het toestel alleen voor het drogen van huishoudtextiel. Als
het voor verkeerde doeleinden wordt gebruikt of foutief wordt
bediend, wordt eventueel ontstane schade niet door de garantiebepalingen gedekt.
• Alleen in water gewassen textiel drogen. Goed dat met brandgevaarlijke reinigings- of oplosmiddelen (wasbenzine, alcohol, middelen om
vlekken te verwijderen enz.) behandeld is, mag niet in de wasdroger
gedroogd worden. Brandgevaar! Explosiegevaar!
• Stukken wasgoed die schuimrubber of op rubber lijkend materiaal
bevatten mogen niet in de machine gedroogd worden. Brandgevaar!
• Was in zeer slechte toestand (sterke slijtage) en was met losse vullingen (kussens) die open zouden kunnen zijn, mogen niet gedroogd
resp. opgefrist worden. Brandgevaar!
• Was met onbuigzame onderdelen (vloermatten) en te volle trommels
bedekken de luchtspleet. Houd een vulhoeveelheid aan van max. 6kg.
Oververhitting! Brandgevaar!
• Alleen was drogen waarin zich geen explosieve voorwerpen (aanstekers, spuitbussen) bevinden. Brandgevaar! Explosiegevaar!
• Na ieder droogproces de pluizenzeef reinigen.
• Bij was/droogzuilen geen voorwerpen op de droger zetten, omdat
deze er tijdens het drogen af kunnen vallen.
Aanwijzingen m.b.t. de veiligheid
125987510_NL_IV.qxp 2007-03-30 13:04 Page 97
Page 99

98
Opstelling en aansluiting
• Lees de aparte Installatie-aanwijzingen! Vraag eventueel een schoorsteenveger of de afdeling bouw- en woningtoezicht van de gemeente om raad.
• Controleer de droger op transportschade. Een beschadigd toestel in
geen geval aansluiten! Neem in dat geval contact op met de leverancier.
• Als u de droger gaat vervoeren, eerst het sokkelpaneel verwijderen!
• Plaats de wasdroger niet in een ruimte waar het kan gaan vriezen!
• Zet de droger waterpas!
• Bij opstelling direct naast een fornuis: tussen fornuis en wasdroger
moet een warmte-isolerende, niet brandbare plaat worden geplaatst
(afmeting 85 x 57,5 cm).
• De stekker van het toestel moet ook na de opstelling goed bereikbaar
zijn.
• De afgevoerde lucht mag niet in een schoorsteen of centraal afvoersysteem geleid worden; de droger dient een eigen afvoerkanaal te
hebben.
• De wasdroger niet opstellen in een ruimte waarin zich afvoergebonden kolen-, olie- of gastoestellen bevinden en waarin de onderdruk
0,04 mbar of meer bedraagt.
• Zorg voor voldoende ventilatie in de ruimte waar de wasdroger staat,
om onderdruk te voorkomen.
• Een vaste aansluiting aan het elektriciteitsnet mag alleen door een
erkend installateur worden gemaakt.
• De droger zuigt lucht aan. Houd daarom de omgeving van het apparaat schoon en leg er ook geen aanzuigbare en brandbare voorwerpen (bijv. stro, zaagsel) voor neer. Brandgevaar!
Aanwijzingen m.b.t. de veiligheid
125987510_NL_IV.qxp 2007-03-30 13:04 Page 98
Page 100

99
Algemene aanwijzingen;Afvalverwerking
Algemene aanwijzingen
• Gesteven wasgoed laat aanslag in de trommel achter en hoort daaromniet in de droger.
• Als u meer goed in de droger doet dan in de programmatabel aangegeven, moet u rekening houden met kreukvorming! Bij erg teer textiel
max. 1,5 kg in de droger doen.
• Te uwer informatie: slijtage (en daardoor pluizen) ontstaat voor 70 procent bij
het dragen van kleding, voor 20 procent bij het wassen en slechts voor 1 0 pr ocent bij het drogen in de wasdroger. De pluizen verzamelen zich in de pluizenzeef. Bij machinaal drogen ontstaat slechts ca. 0,03 gram pluizen per kilo wasgoed.
Afvalverwerking
Verpakkingsmateriaal
Alle gebruikte verpakkingsmaterialen zijn niet milieu-onvriendelijk en kunnen her-
gebruikt worden.
De kunststof delen zijn voorzien van een internationaal gebruikte codering:
• PE<voor polyethyleen, bijv. de folieverpakking,
• PS<voor polystyreen, bijv. de hoekbeschermers (volkomen CFK-vrij),
• PP<voor polypropyleen,
Het karton is van oud papier gemaakt en wij adviseren u dit ook weer in
een container voor oud papier te deponeren.
Oude machine
Waarschuwing! Als u de machine afdankt, neem dan de volgende maatregelen:
stekker uit het stopcontact trekken, aansluitsnoer afsnijden, stekker en snoer weggooien en deurslot onbruikbaar maken. U voorkomt daarmee, dat spelende kinderen elkaar of zichzelf in de machine opsluiten en daardoor in levensgevaar
komen. Zorg voor milieuvriendelijke verwerking van het toestel. Informeer bij uw
gemeente naar de mogelijkheden voor afvalverwerking in uw woonplaats.De
materialen zijn conform hun aanduiding opnieuw te gebruiken. Oude apparaten
kunnen met standaardgereedschap (kruiskop-schroevendr aaier, hamer) gedemonteerd worden.
Het symbool op het product of op de verpakking wijst erop dat dit product
niet als huishoudafval mag worden behandeld. Het moet echter naar een plaats
worden gebracht waar elektrische en elektronische apparatuur wordt gerecycled.
Als u ervoor zorgt dat dit product op de correcte manier wordt verwijderd,
voorkomt u mogelijk voor mens en milieu negatieve gevolgen die zich zouden
kunnen voordoen in geval van verkeerde afvalbehandeling. Voor meer details in
verband met het recyclen van dit product, neemt u het best contact op met de
gemeentelijke instanties, het bedrijf of de dienst belast met de verwijdering van
huishoudafval of de winkel waar u het product hebt gekocht.
125987510_NL_IV.qxp 2007-03-30 13:04 Page 99
 Loading...