

Electrix RC ECX2000AU, ECX2100, ECX2000EU, ECX2000UK, ECX2100AU Instruction Manual
...
INSTRUCTION MANUAL
BEDIENUNGSANLEITUNG
MANUEL D’UTILISATION
MANUALE
1/10 ELECTRIC MONSTER TRUCK
RUCKUS
TM
Congratulations on your purchase of the Electrix
RC
TM
Ruckus
TM
Monster Truck.
This 1/10 scale model introduces you to the sport
of RC driving.
Herzlichen Glückwunsch zum Kauf des Electrix
RC
TM
RuckusTM Monster Truck. Dieses 1/10 Scale
Model öffnet Ihnen die Welt des RC Car Sports.
Nous vous félicitons pour l’achat du Electrix RC
TM
Ruckus
TM
Monster Truck. Ce modèle 1/10 vous
introduit au sport de la conduite RC.
Congratulazioni per l’acquisto di questo RC
Ruckus Monster Truck Electrix. Questa vettura in
scala 1/10 vi introdurrà nel mondo dei modelli RC.
ECX2000 | ECX2000AU | ECX2000EU | ECX2000UK
ECX2100 | ECX2100AU | ECX2100EU | ECX2100UK
2
RUCKUS
EN
NOTICE
All instructions, warranties and other collateral documents are subject to change at the sole discretion of Horizon Hobby, Inc. For up-to-date
product literature, visit http://www.horizonhobby.com and click on the support tab for this product.
Safety Precautions and Warnings
As the user of this product, you are solely responsible for operating in
a manner that does not endanger yourself and others or result in
damage to the product or the property of others.
This model is controlled by a radio signal subject to interference
from many sources outside your control. This interference can cause
momentary loss of control so it is advisable to always keep a safe
distance in all directions around your model, as this margin will help
avoid collisions or injury.
Age Recommendation: Not for children under 14 years. This is
not a toy.
• Never operate your model with low transmitter batteries.
• Always operate your model in an open area away from cars, traffi c
or people.
• Never operate the model in the street or in populated areas for
any reason.
• Carefully follow the directions and warnings for this and any
optional support equipment (chargers, rechargeable battery packs,
etc.) you use.
• Keep all chemicals, small parts and anything electrical out of the
reach of children.
• Moisture causes damage to electronics. Avoid water exposure to
all equipment not specifi cally designed and protected for
this purpose.
• Never lick or place any portion of your model in your mouth as it
could cause serious injury or even death.
• First-time builders should seek advice from people with building
experience to operate the model correctly and meet its
performance potential.
• Exercise caution when using tools and sharp instruments.
• Take care when building, as some parts may have sharp edges.
• Immediately after using your model, do NOT touch equipment on
the model such as the motor, electronic speed control and battery,
because they generate high temperatures. You may burn yourself
seriously touching them.
• Do not put fi ngers or any objects inside rotating and moving parts,
as this may cause damage or serious injury.
• Be sure that your operating frequency is clear before turning on or
running your model, and never share the same frequency with
somebody else at the same time.
• Ensure that others are aware of the operating frequency you are
using and when you are using it.
• Always turn on your transmitter before you turn on the receiver
in the car. Always turn off the receiver before turning your
transmitter off.
• Keep the wheels of the model off the ground when checking the
operation of the radio equipment.
WARNING: Read the ENTIRE instruction manual to become familiar with the features of the product before
operating. Failure to operate the product correctly can result in damage to the product, personal property and cause
serious injury.
This is a sophisticated hobby product and NOT a toy. It must be operated with caution and common sense and
requires some basic mechanical ability. Failure to operate this Product in a safe and responsible manner could result
in injury or damage to the product or other property. Do not attempt disassembly, use with incompatible components
or augment product in any way without the approval of Horizon Hobby, Inc. This manual contains instructions for
safety, operation and maintenance. It is essential to read and follow all the instructions and warnings in the manual,
prior to assembly, setup or use, in order to operate correctly and avoid damage or serious injury.
Meaning of Special Language:
The following terms are used throughout the product literature to indicate various levels of potential harm when operating this product:
NOTICE: Procedures, which if not properly followed, create a possibility of physical property damage AND little or no possibility of injury.
CAUTION: Procedures, which if not properly followed, create the probability of physical property damage AND a possibility of serious injury.
WARNING: Procedures, which if not properly followed, create the probability of property damage, collateral damage, and serious injury OR
create a high probability of superfi cial injury.
Safety Precautions and Warnings .......................................................2
Specifi cations .......................................................................................3
Components .........................................................................................3
Vehicle Preparations
Installing Antenna Tube and Body .......................................................3
Installing Transmitter Battery .............................................................4
Installing Transmitter Antenna ............................................................4
Charging the Battery ............................................................................4
Installing Vehicle Battery .....................................................................5
Operation
Transmitter controls .............................................................................6
Getting Started.....................................................................................7
Finishing ...............................................................................................7
Setting the Gear Mesh.........................................................................8
Electronic Speed Control (ESC) ............................................................8
Electrical Layout ...................................................................................8
Wheel Assembly ..................................................................................8
Maintenance ........................................................................................9
Shock Cleaning.....................................................................................9
Fasteners ..............................................................................................9
Troubleshooting Guide ........................................................................10
Warranty Information ..........................................................................10
Contact Information ............................................................................11
FCC and Compliance Information for the European Union .................11
TABLE OF CONTENTS
3
RUCKUS
EN
Transmitter
Frequency 27MHz
Modulation Pulse Proportional Modulation (PPM)
Battery AA x 8
Current Consumption 200mAh
Size 17 x 23.5 x 7.5mm
Weight 382 g
Servo
Power Supply 4.8V~6V (shared with receiver)
Output Torque 41.66 oz (3 kg-cm)
Operating Speed 0.23sec/60 degrees of travel
Size 40.5 x 20 x 36.8mm
Receiver
Frequency 27MHz
Intermediate Frequency 445kHz
Current Consumption 18mAh
Weight 15 g
Electronic Speed Control (ESC)
Input Voltage 7.2–8.4V
Electric Capacity (FET) Forward 80 A/240 A
Electric Capacity (FET) Reverse 60 A/160 A
PWM Frequency 1kHz
BEC Voltage 5 V/1 A
Size 27 x 35 x 17.3mm
Weight 34 g - 36 g
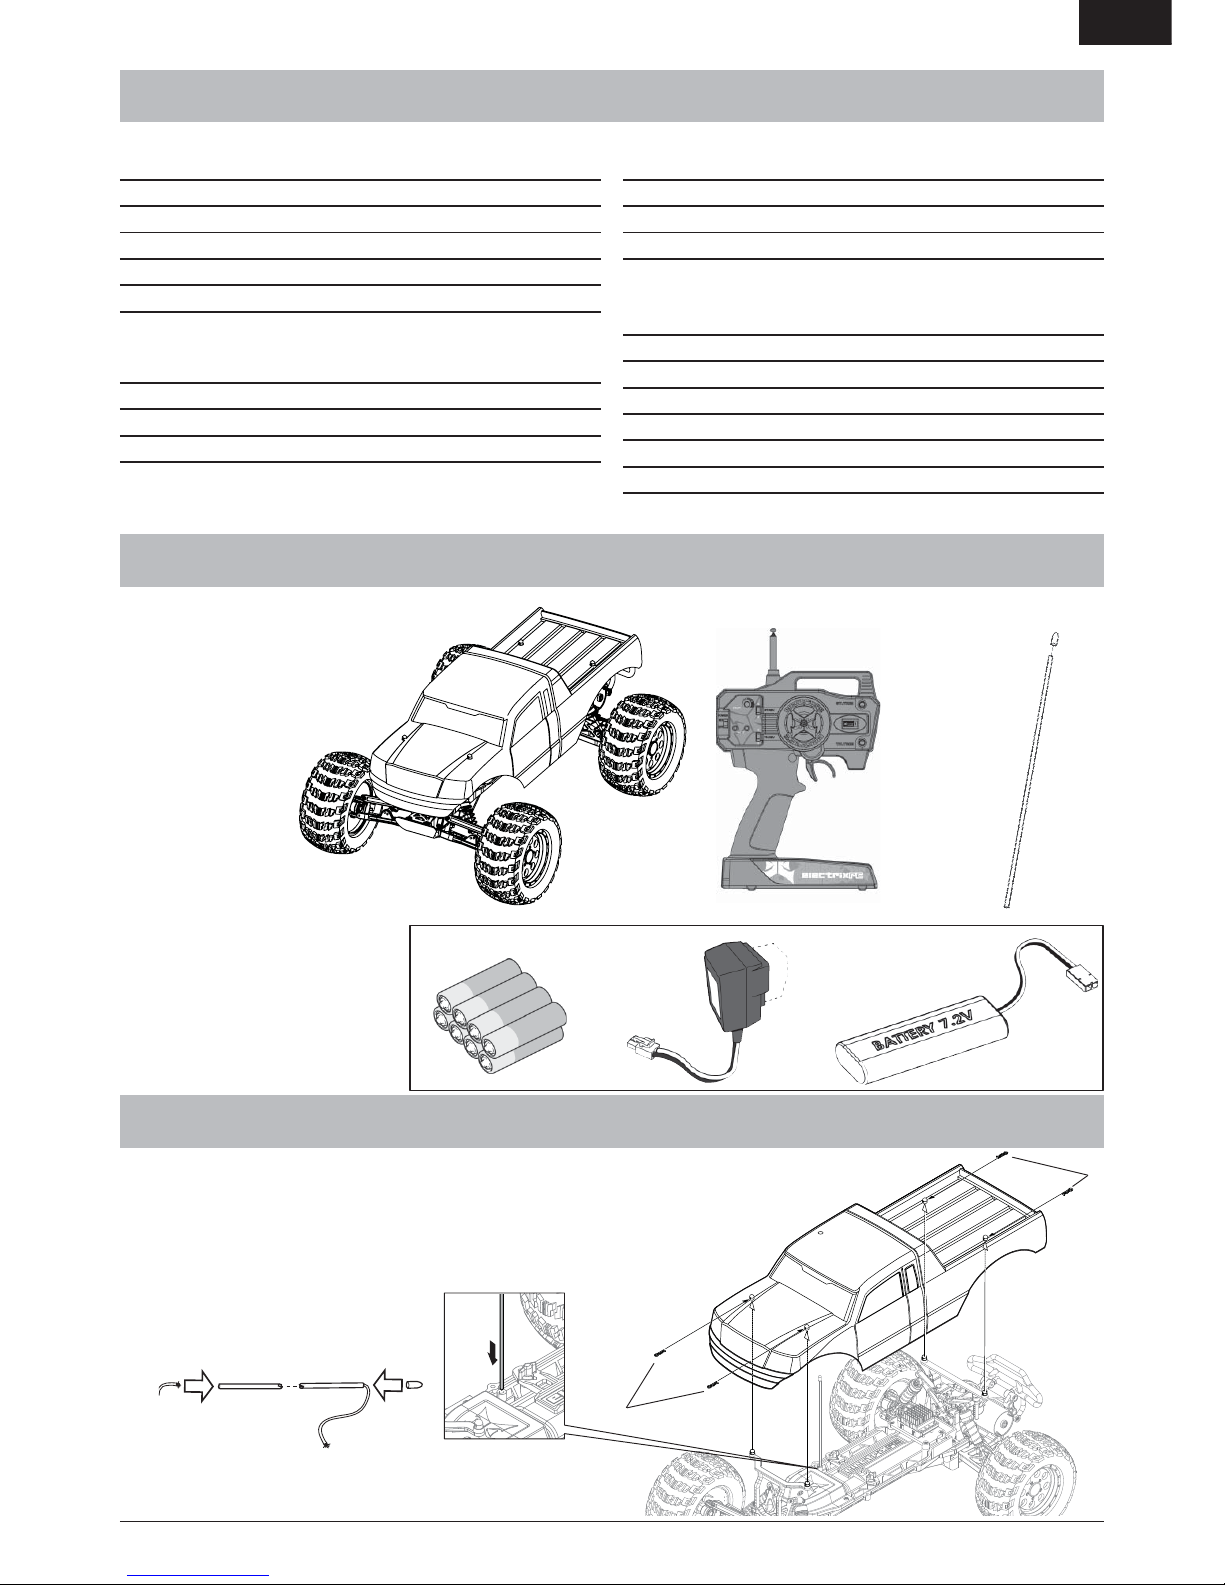
1. Electrix RCTM RuckusTM 1/10 Monster Truck
2. Transmitter
3. Antenna Tube (ECX1066)
Included Items
4. AA (8)
5. ECX1075 Battery Charger
ECX1075AU Battery Charger (AU)
ECX1075EU Battery Charger (EU)
ECX1075UK Battery Charger (UK)
Note: Charger power outlet terminals
not shown.
6. 7.2V NiMH battery (DYN1050)
7. Alternate Crystal Set (not shown)
21
3
546
SPECIFICATIONS
COMPONENTS
VEHICLE PREPARATIONS
1
2
INSTALLING ANTENNA TUBE AND BODY
1. Body Clips (ECX1048)
2. Antenna Tube (ECX1087)
1
4
RUCKUS
EN
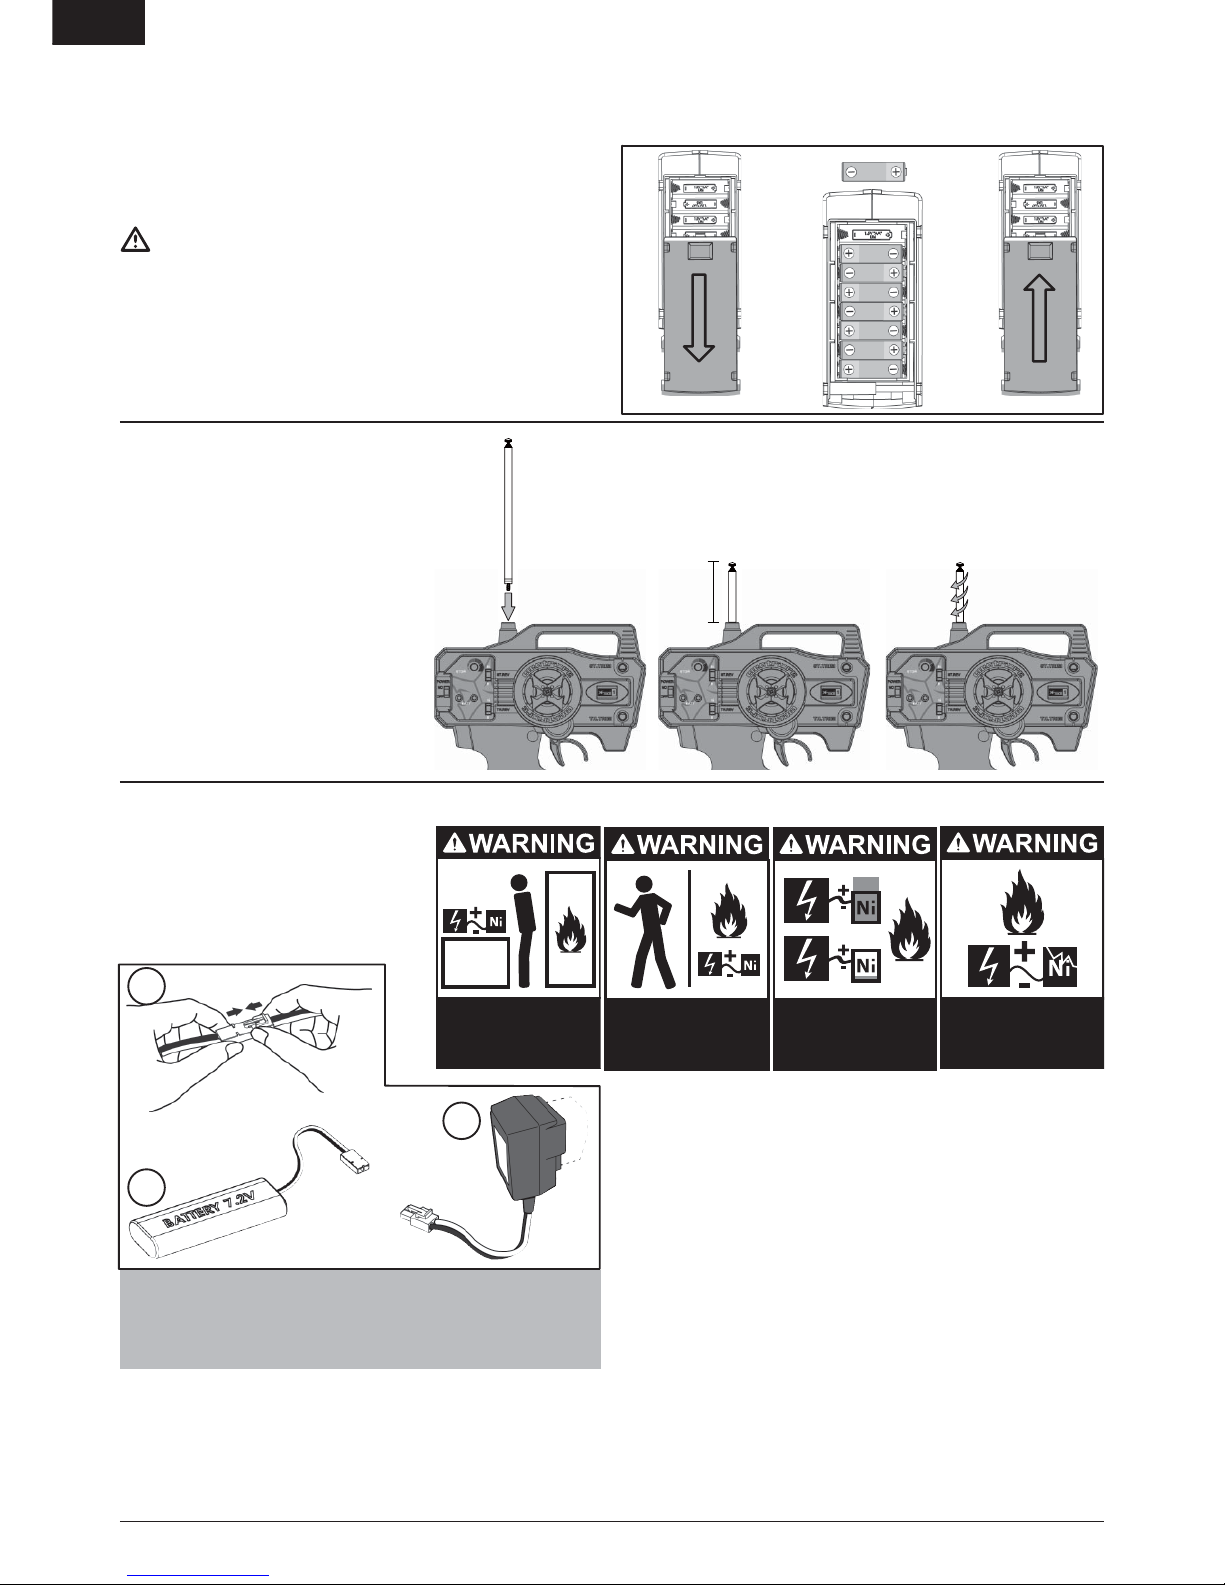
CHARGING THE BATTERY
A. Attach battery connector to the
charger correctly.
B. 7.2V NiMH battery
C. Compatible Battery Charger
Note: Charger power outlet terminals
not shown.
Note: The vehicle battery charger produces 300 milliAmps per
hour. Divide the mAh capacity on the label of a battery by 300
to know how long battery charging will require. For example, an
1800mAh battery requires 6 hours to charge.
• Read all safety precautions and literature prior to use of
this product.
• Never allow minors to charge battery packs without adult
supervision.
• Never attempt to charge dead or damaged batteries.
• Never charge a battery if the cable has been pinched or shorted.
213
Always charge
Batteries away from
flammable materials.
Never leave
charging Batteries
unattended.
Never charge
Batteries outside
recommended levels.
Never charge
damaged Batteries.
• Never allow batteries or charger to come into contact with
moisture at any time.
• Never charge batteries in extremely hot or cold places
(recommended between 50–80 degrees Fahrenheit) or place in
direct sunlight.
• Always use only NiMH rechargeable batteries. This charger cannot
charge batteries such as “heavy duty,” “alkaline battery,” or
“mercury battery.”
• Always connect the positive red lead (+) and negative black lead
(-) terminals of the battery to the charger terminals correctly.
• Always disconnect the battery and charger after charging, and let
them cool between charges.
• Always inspect the battery before charging.
• Always terminate all processes and contact Horizon Hobby if the
product malfunctions.
• Always make sure you know the specifi cations of the battery to
be charged or discharged to ensure it meets the requirements of
this charger.
• Never connect more than one battery pack to this charger at a time.
• Always constantly monitor the temperature of the battery pack
while charging.
• Always end the charging process if the charger or battery becomes
hot to the touch or starts to change form during the charge process.
INSTALLING TRANSMITTER BATTERIES
1. Slide panel open on bottom of transmitter.
2. Obey battery plus (+) and minus (-) diagram in transmitter to install
8 AA batteries.
3. Slide panel closed on transmitter.
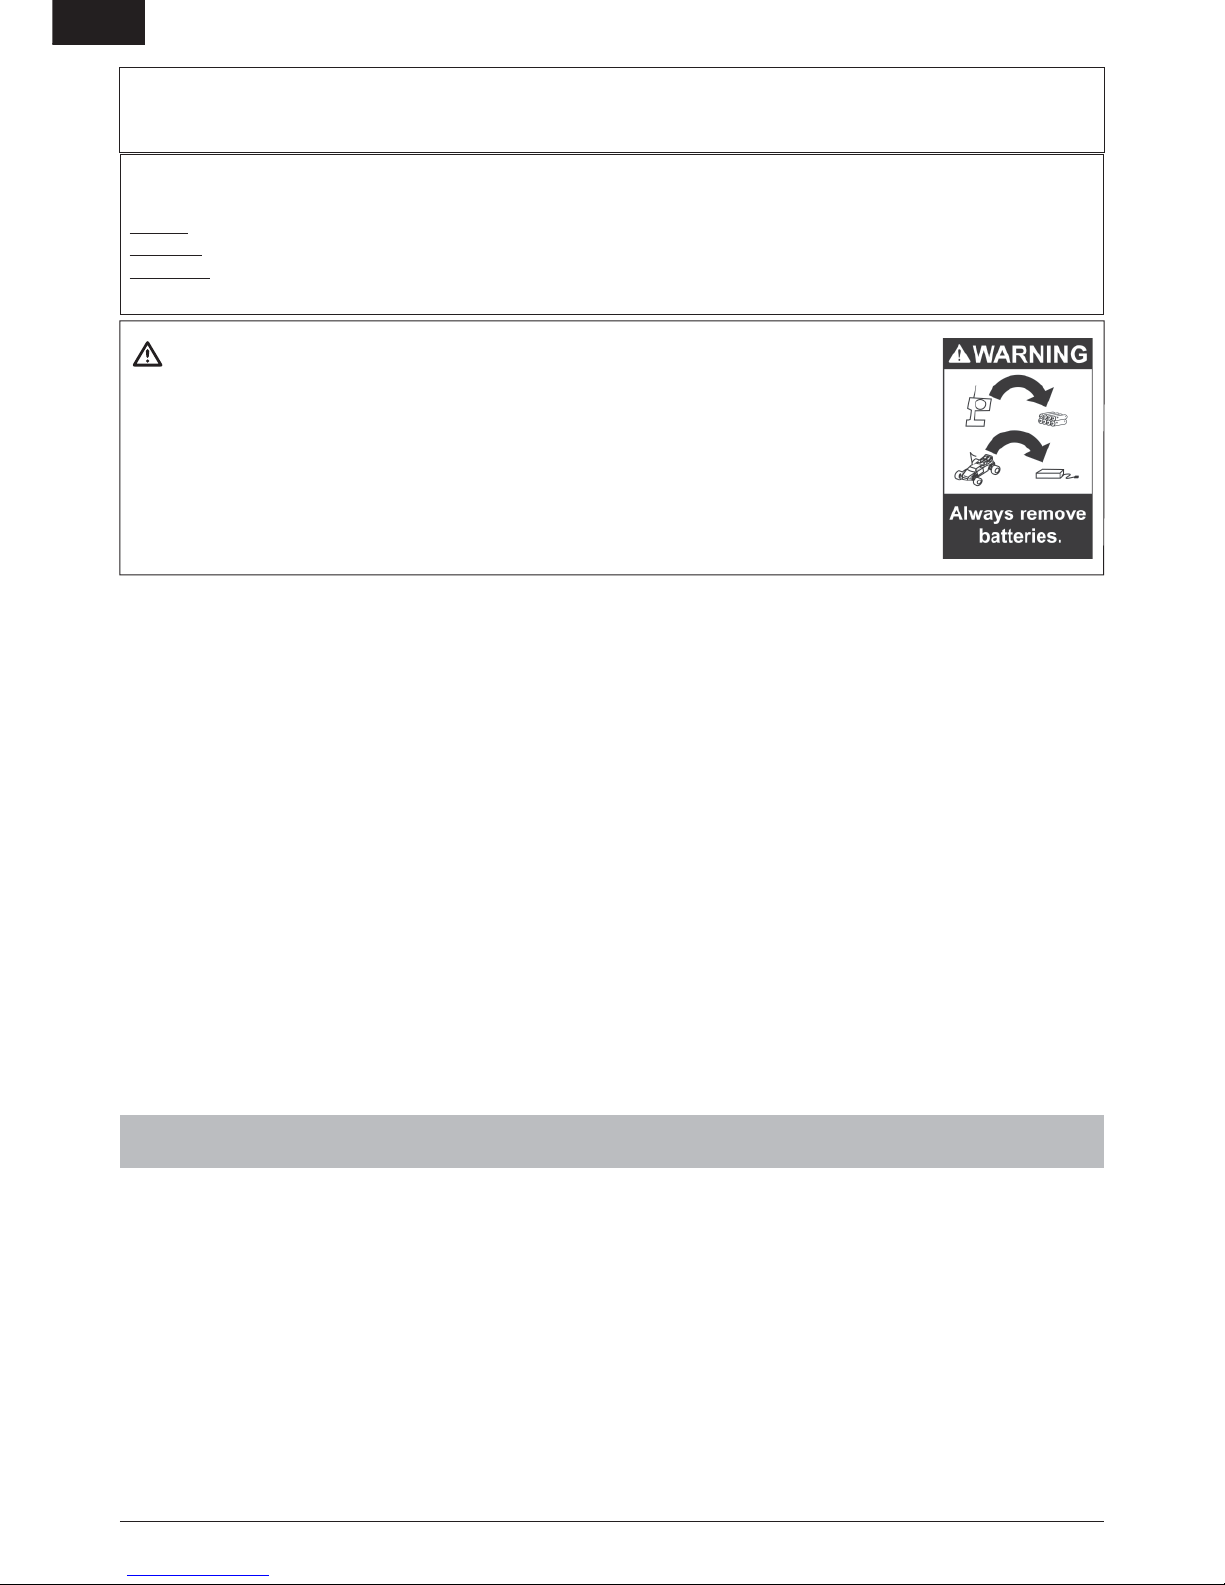
WARNING: ALWAYS use fully charged batteries in the
transmitter. Low battery power can result in loss of control of
the RC vehicle.
NEVER install damaged batteries, batteries of mixed types or batteries
of different ages in the transmitter. Remove exhausted batteries.
NEVER store transmitter with batteries installed.
Note: Alkaline AA size batteries are recommended.
Note: Optional AA NiMH battery charger DYN1970 is available. Use
only batteries approved for use with that charger. DYN1970 2300mAh
Tx NiMH Conversion Kit: FUT, ECX
A
B
C
INSTALLING TRANSMITTER
ANTENNA
1. Put antenna in hole in top of the transmitter.
2. The collapsed antenna will be 2-1/4 inches
long when fully inserted.
3. Turn the antenna clockwise until it is tight.
1
2-1/4 in
(57mm)
23

5
RUCKUS
EN
Always keep
vehicle in sight
and under control.
WARNING
OPERATION
ALWAYS turn on your transmitter before you turn on the receiver in the
car. Always turn off the receiver before turning your transmitter off.
ALWAYS operate vehicle in a wide open area. Operating the vehicle
in a small space or indoors can cause overheating at low speeds.
Operating at low speed makes heat in the electronic speed control
(ESC). Overheating can damage the vehicle and failure may result.
MOTOR CARE
• Seat motor brushes by driving smoothly on a fl at surface during
use of the fi rst battery charge.
• Prolong motor life by preventing overheat conditions. Undue
motor wear results from frequent turns, stops and starts,
pushing objects, driving in deep sand and tall grass and driving
continuously up hill.
• Over-temperature protection is installed on the ESC to prevent
circuit damage, but cannot protect the motor from driving
against heavy resistance.
INSTALLING VEHICLE BATTERY
• Turn the thumb nuts on the chassis to remove the battery strap
holding the battery. Remove or install a battery and replace the
battery strap, locking the strap in place by turning the thumb nuts.
• You can put the foam blocks (ECX2015) in front of the battery so
the weight of the battery increases rear traction or in back of the
battery to increase steering response.
6
RUCKUS
EN
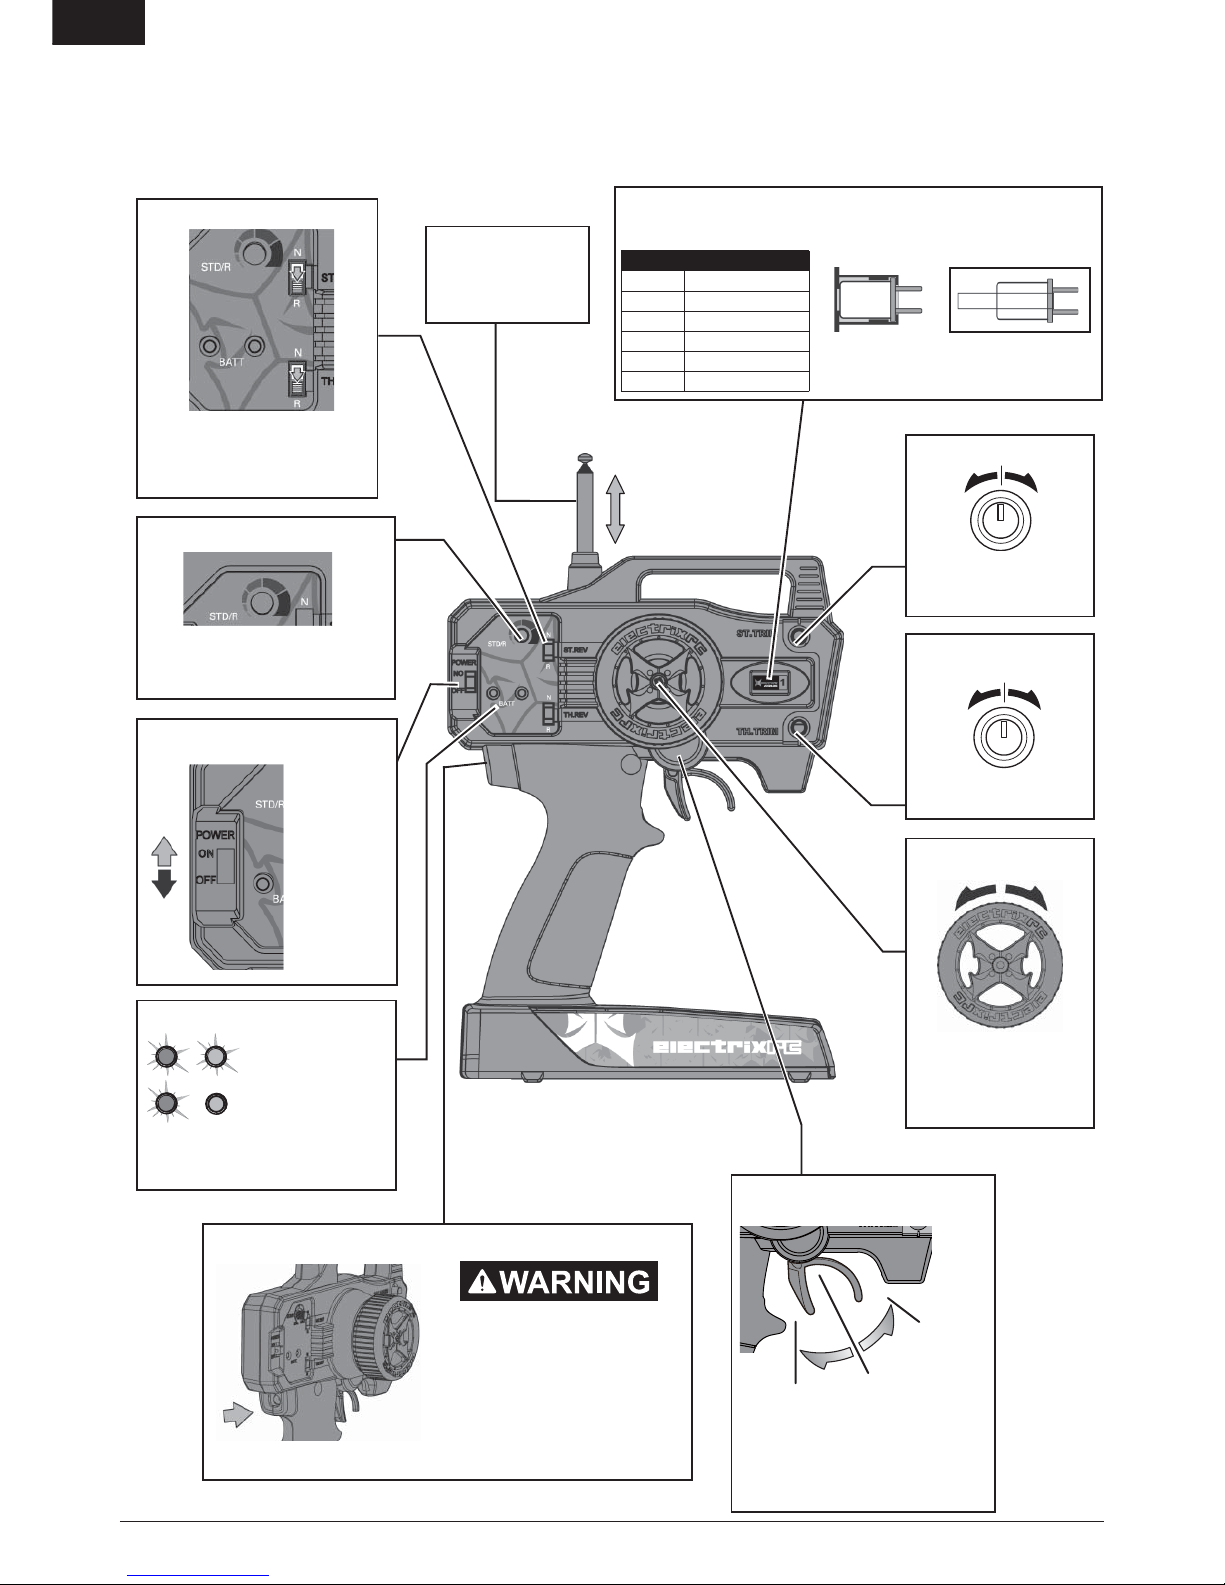
POWER SWITCH
REVERSE SWITCH
THROTTLE TRIM
STEERING TRIM
STEERING WHEEL
ANTENNA
Pull antenna out to its
full length
(ECX1067 Antenna
Only)
Adjusts the neutral point of
the electronic speed control
Adjust to make the vehicle
drive straight with no input
at the steering wheel
Control steering. Right and
Left steering with ST. REV
Switch on N (See ST. REV
switch)
Allows you to change the
direction of steering (ST. REV)
and throttle (TH. REV) controls.
(Default settings are “N”)
Power on
or off the
transmitter
BATTERY LEVEL INDICATOR
Note: Red light will fl ash with an
audible signal (beep) when batteries
are low
Good battery power
Low battery power
THROTTLE TRIGGER
Controls power to motor for forward
or reverse (See TH. REV switch)
Stop
Reverse
(when TH.
REV switch
on N)
Forward (when
TH. REV switch
on N)
AM 27MHZ TRANSMITTER CRYSTAL
AM Transmitter Crystal
(Tx)
AM Receiver Crystal
(Rx)
Note: Paired AM crystals must
be replaced to change control
frequencies. Do NOT use FM Crystals.
ST. D/R
Adjusts the amount the front wheels
move when turned left or right
(Steering Dual Rate)
CHARGER PORT
Read instructions before charging.
Charge only rechargeable batter-
ies. Non-rechargeable batteries
may burst causing injury to persons
and/or damage to property.
Note: The center pin on the charge jack is positive.
Part # Description
ECX1081 Crystal Set 1 26.995
ECX1082 Crystal Set 2 27.045
ECX1083 Crystal Set 3 27.095
ECX1084 Crystal Set 4 27.145
ECX1085 Crystal Set 5 27.195
ECX1086 Crystal Set 6 27.255
TRANSMITTER CONTROLS
AM Tx
AM Rx
 Loading...