

ElectrIQ 702A7CAM, 702A7GCAM User Manual

702A7CAM
702A7GCAM
2K Super HD
Micro SD
GPS Logger (702A7GCAM Only)

2 of 17
User Manual
CONTENTS
Quick Start Guide………………………………………………………………3
Product Overview………………………………………………………………3
Button Functions……………………………………………………………….4
LED Status Lights……………………………………………………………….5
Operation.…………………………………………………………………………6
Menu Settings……………………………………………………………………9
Connection………………………………………………………………………15
DVR Player………………………………………………………………………16
Product Specifications……………………………………………………..16
Appendix…………………………………………………………………………17
3 of 17
QUICK START GUIDE
Connect the camera to the camera mount by sliding the two parts together until they click
into place. Mount the camera in the desired location in the vehicle. Connect the power
supply cable to a 12V outlet in your vehicle and to the camera mount USB port. The camera
will power on and start recording video automatically. To stop video recording press the OK
button. To restart recording, press the OK button.
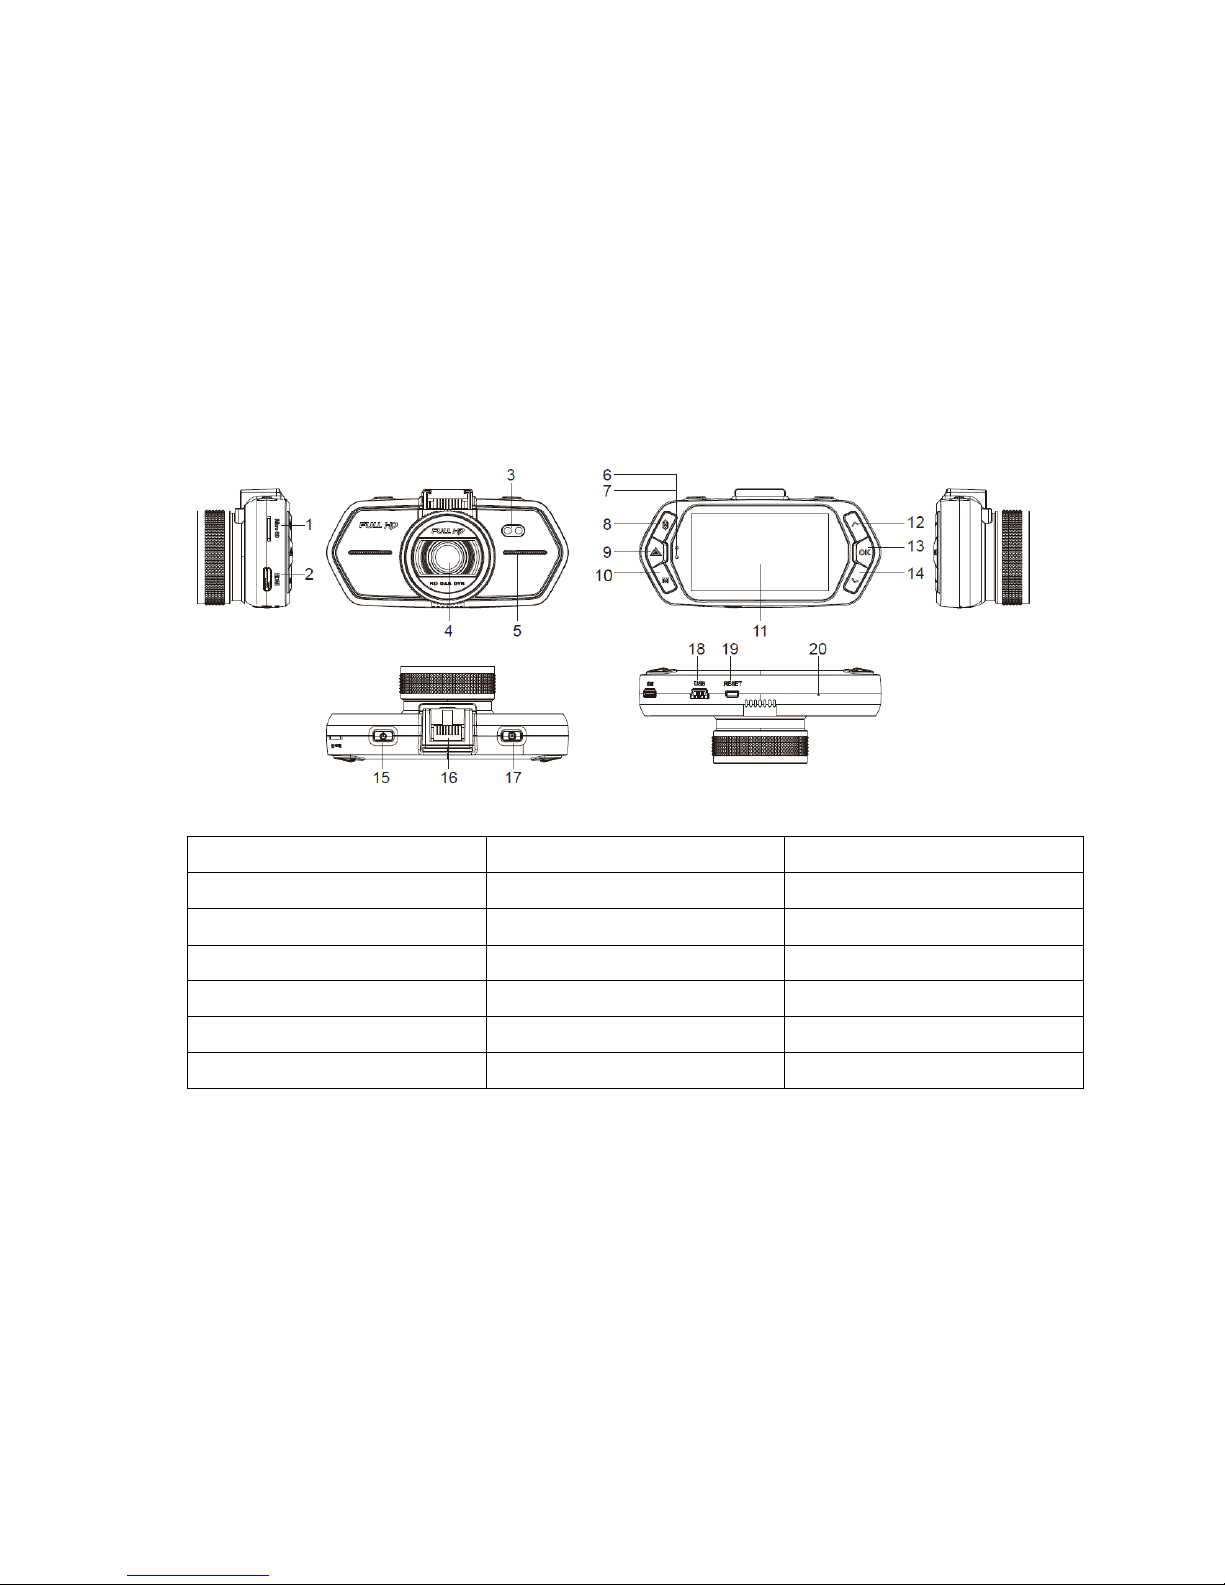
PRODUCT OVERVIEW
1. Micro SD Card Slot
2. HDMI Port
3. LED Light
4. Lens
5. Speaker
6. Status Light (Blue)
7. Charging Light (Red)
8. Menu Button
9. File Protection Button
10. Mode Button
11. LCD Display
12. Up Button
13. OK Button
14. Down Button
15. Power Button
16. Holder Connector
17. Photo Button
18. USB Port
19. Reset Button
20. Microphone
4 of 17
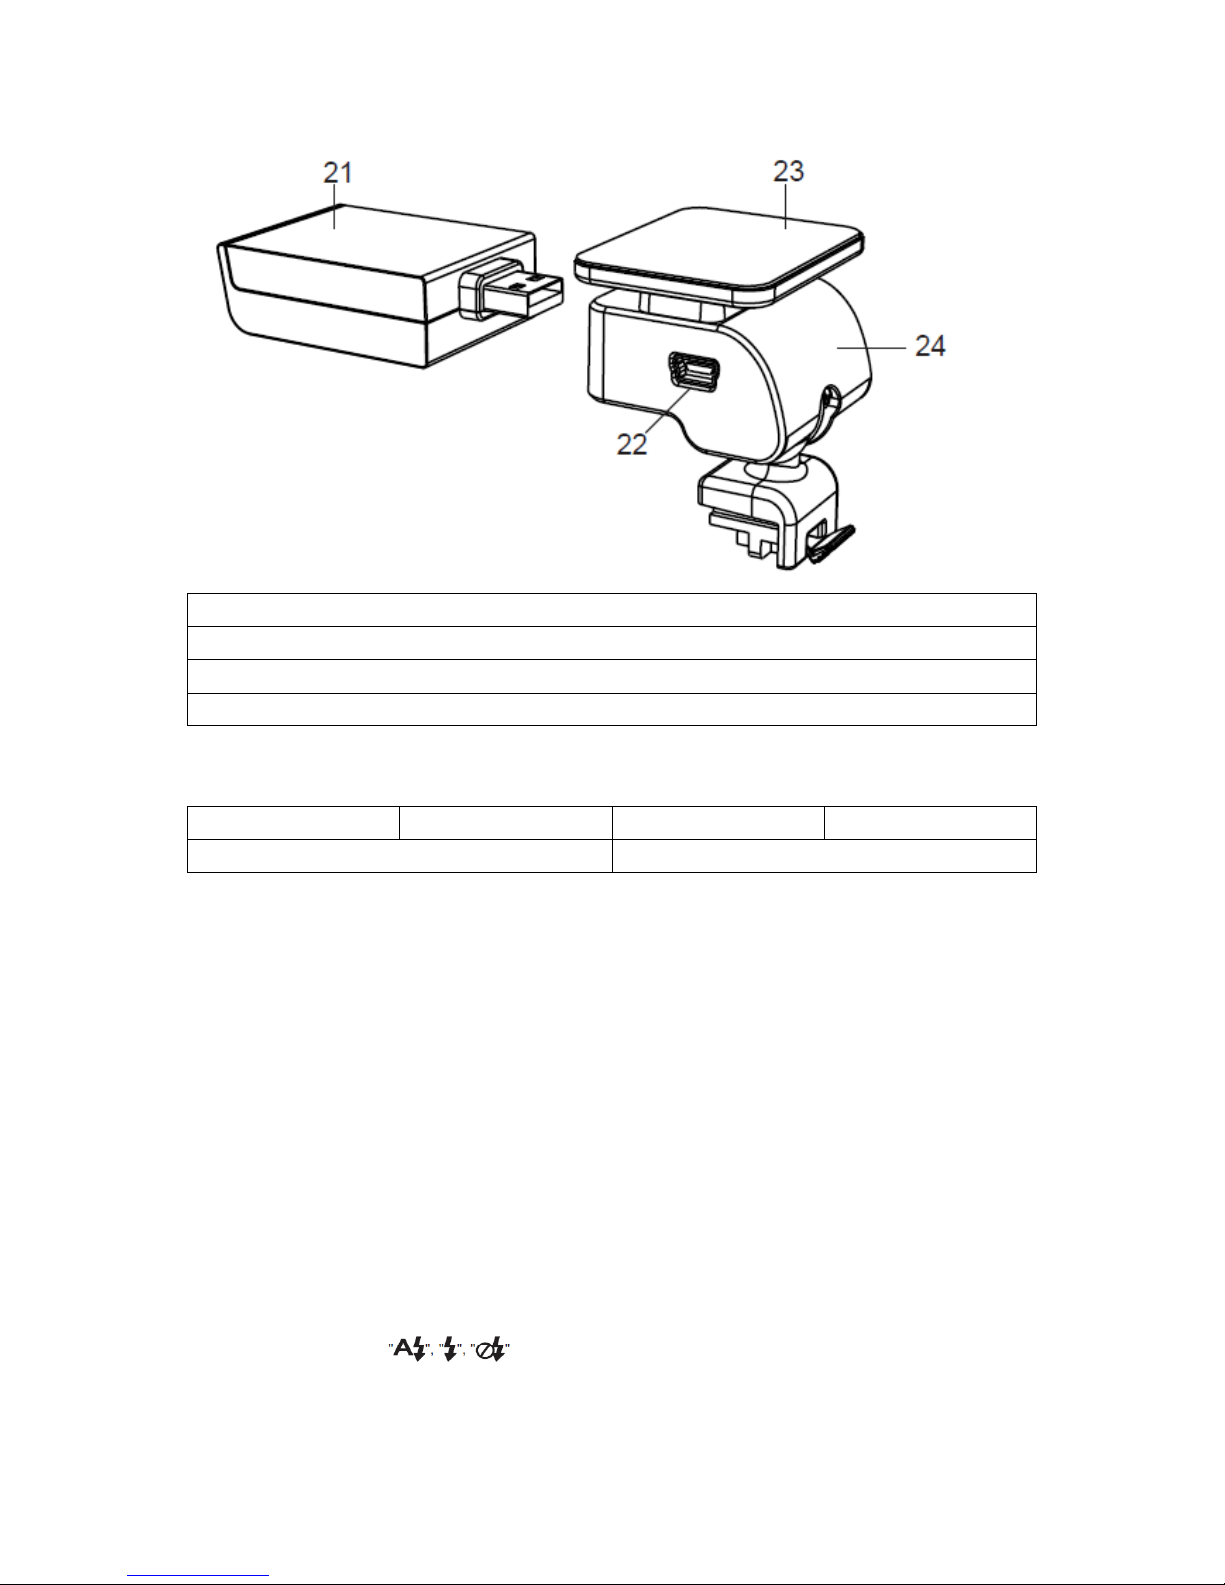
21. GPS/ Radar Detector Module
22. USB Port
23. Sticker/Suction Mount attachment
24. Camera Holder
Accessories:
Car Charger x1
Sticker x1
Suction cup x1
USB cable x1
GPS Module x1 (702A7GCAM only)
CPL Lens
BUTTON FUNCTIONS
Power Button – Press this button for 2-3 seconds to turn on/off the device.
Power will only come on if the camera is connected to a power source.
Camera Button – In video mode, pressing the camera button will capture a still
image.
Reset Button – Should the system crash for any reason, press the reset button
to reset the device.
Menu Button – Pressing the menu button will access all the menus for the
camera. If this is pressed whilst the camera is recording the flash status will be
changed between (Autoflash, forced flash, no flash). Stop the
recording to access the menus.

5 of 17
File Protection Button – In video mode, when the device is recording, press
this button to set the video recording to be protected manually. This will stop
it from being overwritten by loop recording.
In playback mode, press this button to lock or unlock the video/picture file.
When file protection is active, the will appear on the LCD display.
Mode Button – The camera only has 2 modes, video and playback mode.
Pressing this button during standby will switch between playback and video
mode. If this is pressed whilst the camera is recording nothing will happen.
Up Button – In video and standby mode, pressing this button will turn on/off
the LCD display.
In the menu screen pressing this button will navigate upwards
In playback mode pressing this button will choose the previous file.
When playing a video in playback mode pressing this button will rewind the
video
OK Button – In video mode pressing this button will start/stop video recording.
In playback mode pressing this button will play/pause a video file.
In menu pressing this button will confirm the selection.
Down Button – In vide mode pressing this button will turn on/off the sound
recording function.
In menu pressing this button will navigate downwards.
In playback mode pressing this button will chose the next file.
When playing a video in playback mode pressing this button will fast forwards
the video.
LED STATUS LIGHTS
LED Light
Status
Meaning
Status Light (Blue)
Flashing
Video is recording
On
Camera is in standby or playback mode
Off
Device is off
Charging Light (Red)
On
Battery charging
Off
Charging complete
6 of 17
OPERATION
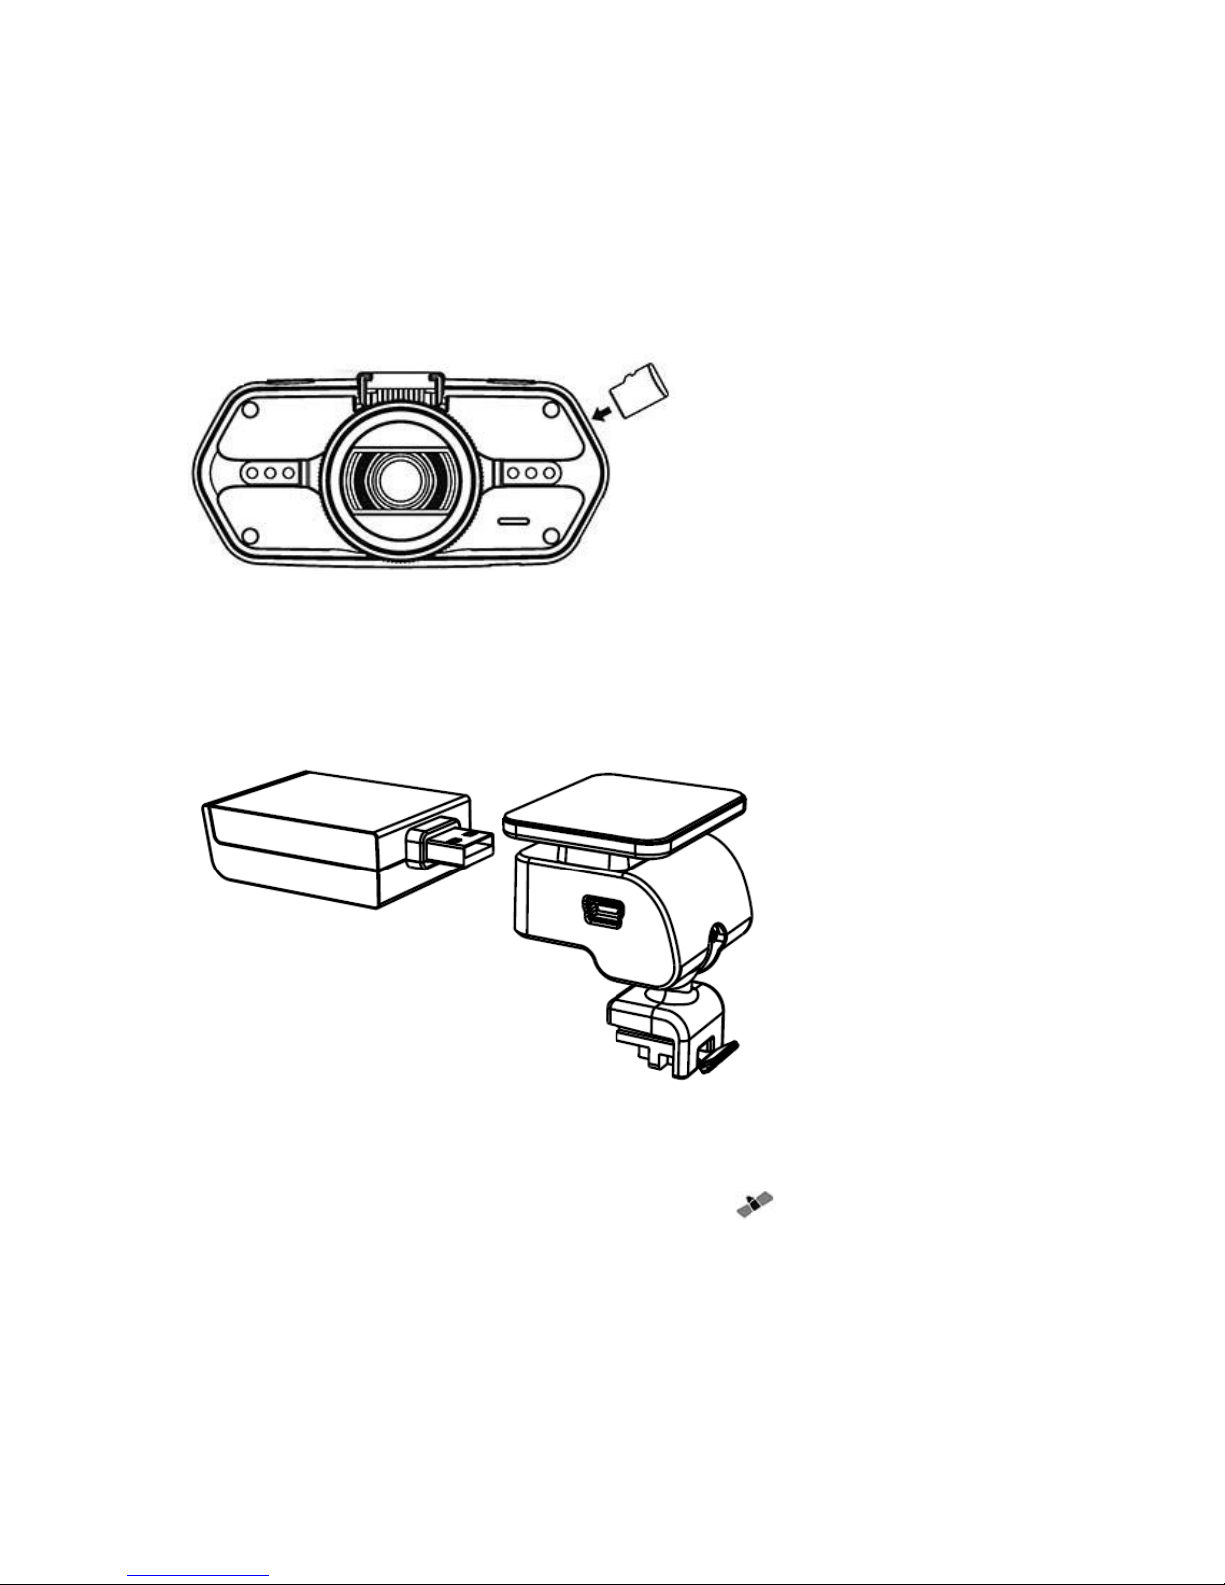
Micro SD Card Installation
Install the Micro SD card as shown below:
GPS Module Installation (702A7GCAM only)
Insert the GPS module into the camera holder as shown below:
Install the device on the windscreen using the sticker or sucker.
When the power is on, the device will automatically search and find GPS signal
where available.
When the unit has found a GPS signal the GPS icon will be shown on the
camera display.
 Loading...