

Page 1
Verse Fender Set Installation Instructions
(EBC PN: #350114 and 350113)
ELECTRA BICYCLE COMPANY , LLC. • 3270 CORPORATE VIEW, SUITE A, VISTA, CA 92081
TEL 760-607-2453 • ORDERLINE 800-261-1644 • FAX 760-598-7350 • ELECTRABIKE.COM
Page 2
Verse Fender Set Installation Instructions
DIFFICULTY LEVEL: Moderate
NOTE: Installation requires removal and reinstallation of both wheels and brakes. If you are not
comfortable doing these tasks, consult your Electra dealer for installation.
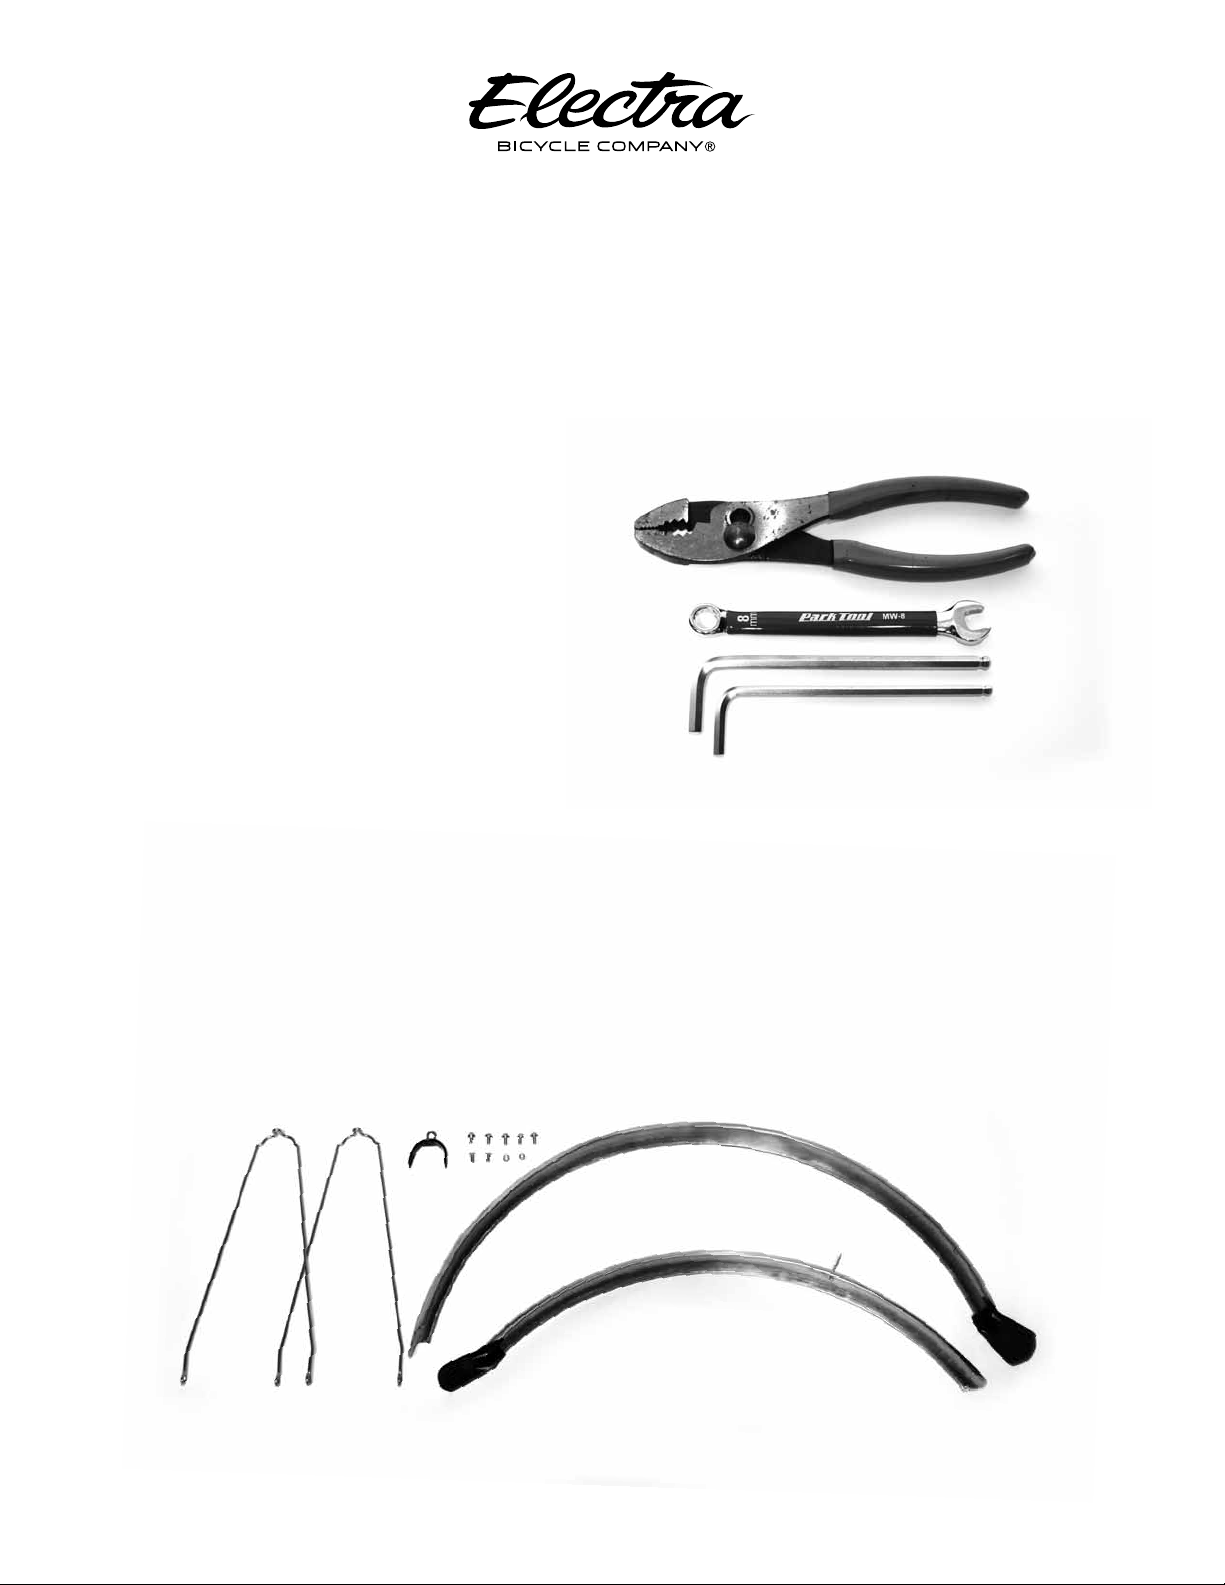
1) Tools Needed
Required:
· 3mm hex wrench
· 4mm hex wrench
· 8mm or adjustable wrench
Optional:
· Adjustable/slip joint pliers
· Bicycle repair stand
2) Parts List
(2) Fenders, front and rear
(2) Fender stays
(1) Rear fender hanger, vinyl coated
(5) M5 hex head machine screws
w/washers, 11mm long
(2) M4 hex head machine screws
w/washers, 9mm long
(2) M4 nylon thread lock nuts
ELECTRA BICYCLE COMPANY , LLC. • 3270 CORPORATE VIEW, SUITE A, VISTA, CA 92081
TEL 760-607-2453 • ORDERLINE 800-261-1644 • FAX 760-598-7350 • ELECTRABIKE.COM
Page 3

INSTALL
STEP 1: Installation of front fender
Place bicycle in stand (if available) and
remove front wheel.
1)
Install fender stay to fender, using M4x9mm
machine screw and lock nut.
2)
Remove front brake mounting bolt from
back of fork using 5mm hex wrench.
3)
Thread brake caliper mounting bolt through
fender bracket.
Reattach brake and tighten mounting bolt.
4)
Attach stay ends to fork dropout eyelets.
STEP 1:1
Reattach front wheel.
Close brake quick release, spin wheel and
make sure brake pads are not rubbing on
rim and that fenders are not rubbing on tire.
Check brake operation.
STEP 1:2
STEP 1:4STEP 1:3
ELECTRA BICYCLE COMPANY , LLC. • 3270 CORPORATE VIEW, SUITE A, VISTA, CA 92081
TEL 760-607-2453 • ORDERLINE 800-261-1644 • FAX 760-598-7350 • ELECTRABIKE.COM
Page 4

STEP 2: Installation of rear fender
Place bicycle in stand (if available) and
remove rear wheel.
1)
Remove rear brake mounting bolt from back
side of caliper using 5mm hex wrench. Be
sure not to lose any hardware.
Hold rear fender in rear triangle and line up
placement. Fender mounting slot should be
lined up and centered.
2)
Attach lower fender mount to kickstand plate
using M5x11mm machine screw, tighten.
3)
While holding fender in place, note
orientation of fender to brake bridge.
STEP 2:1
STEP 2:2
STEP 2:3
ELECTRA BICYCLE COMPANY , LLC. • 3270 CORPORATE VIEW, SUITE A, VISTA, CA 92081
TEL 760-607-2453 • ORDERLINE 800-261-1644 • FAX 760-598-7350 • ELECTRABIKE.COM
Page 5

Bend tabs on fender hanger, making sure tabs
4)
completely wrap around fender edges.
Fender hanger is designed to be mounted so
that it sits under the brake bridge and within
the frame.
Reattach brake and tighten mounting bolt,
making sure that the brake is centered
Using M5x11mm machine screw, fasten
bottom edge of fender to frame kickstand/
fender mounting plate.
Attach stay to rear fender using M4x9mm
5)
machine screw and lock nut.
Attach stay to lower dropout mount using
6)
M5x11mm machine screws.
STEP 2:4
IMPORTANT: Check front and rear brake
operation prior to riding. If brake rubs
on rims, center caliper and ensure that
mounting bolt is tight.
STEP 2:5
STEP 2:6
ELECTRA BICYCLE COMPANY , LLC. • 3270 CORPORATE VIEW, SUITE A, VISTA, CA 92081
TEL 760-607-2453 • ORDERLINE 800-261-1644 • FAX 760-598-7350 • ELECTRABIKE.COM
 Loading...