

Electra APE.1S1.x&x, APE.1F0.x&x, APE.1S0.x&x, APE.1F1.x&x Installation Instructions Manual
Page 1
Staple here!
www.electra.ro
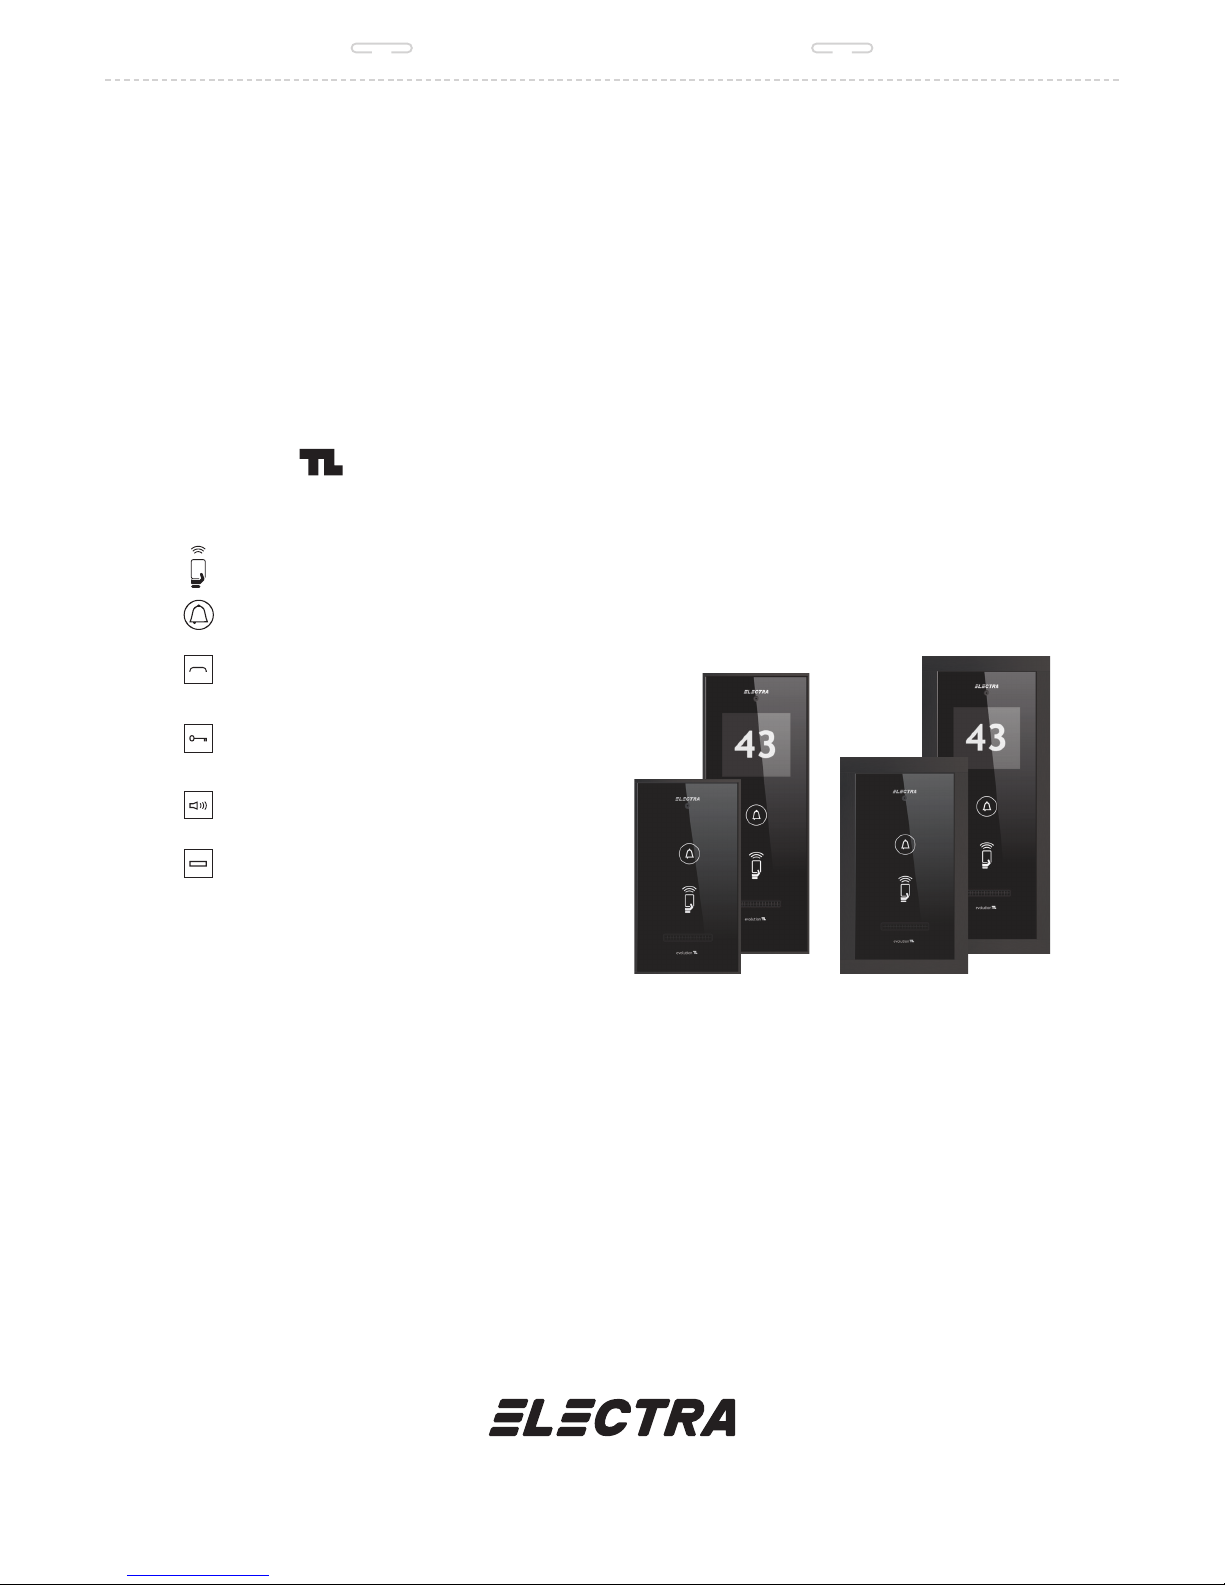
AP E .1F1.x & x
APE.1S1.x&x
AP E .1F0 .x& xAPE.1S0.x&x
RFID secure keyless entry
Call
Communication: FULL-DUPLEX hands-free
Audio monitoring
Gate opening
Open lock alert
3 volume levels + turned off
Different ringtones to choose from
Auxiliary function:
e.g.: auto gate/garage door opening
Extensions:
+3 additional indoor terminals
+3 additional outdoor panels
+1 doorbell: main indoor terminal connection
Installation instructions
Resident building intercom 1 family
touch line evolution
Page 2
page 2/6
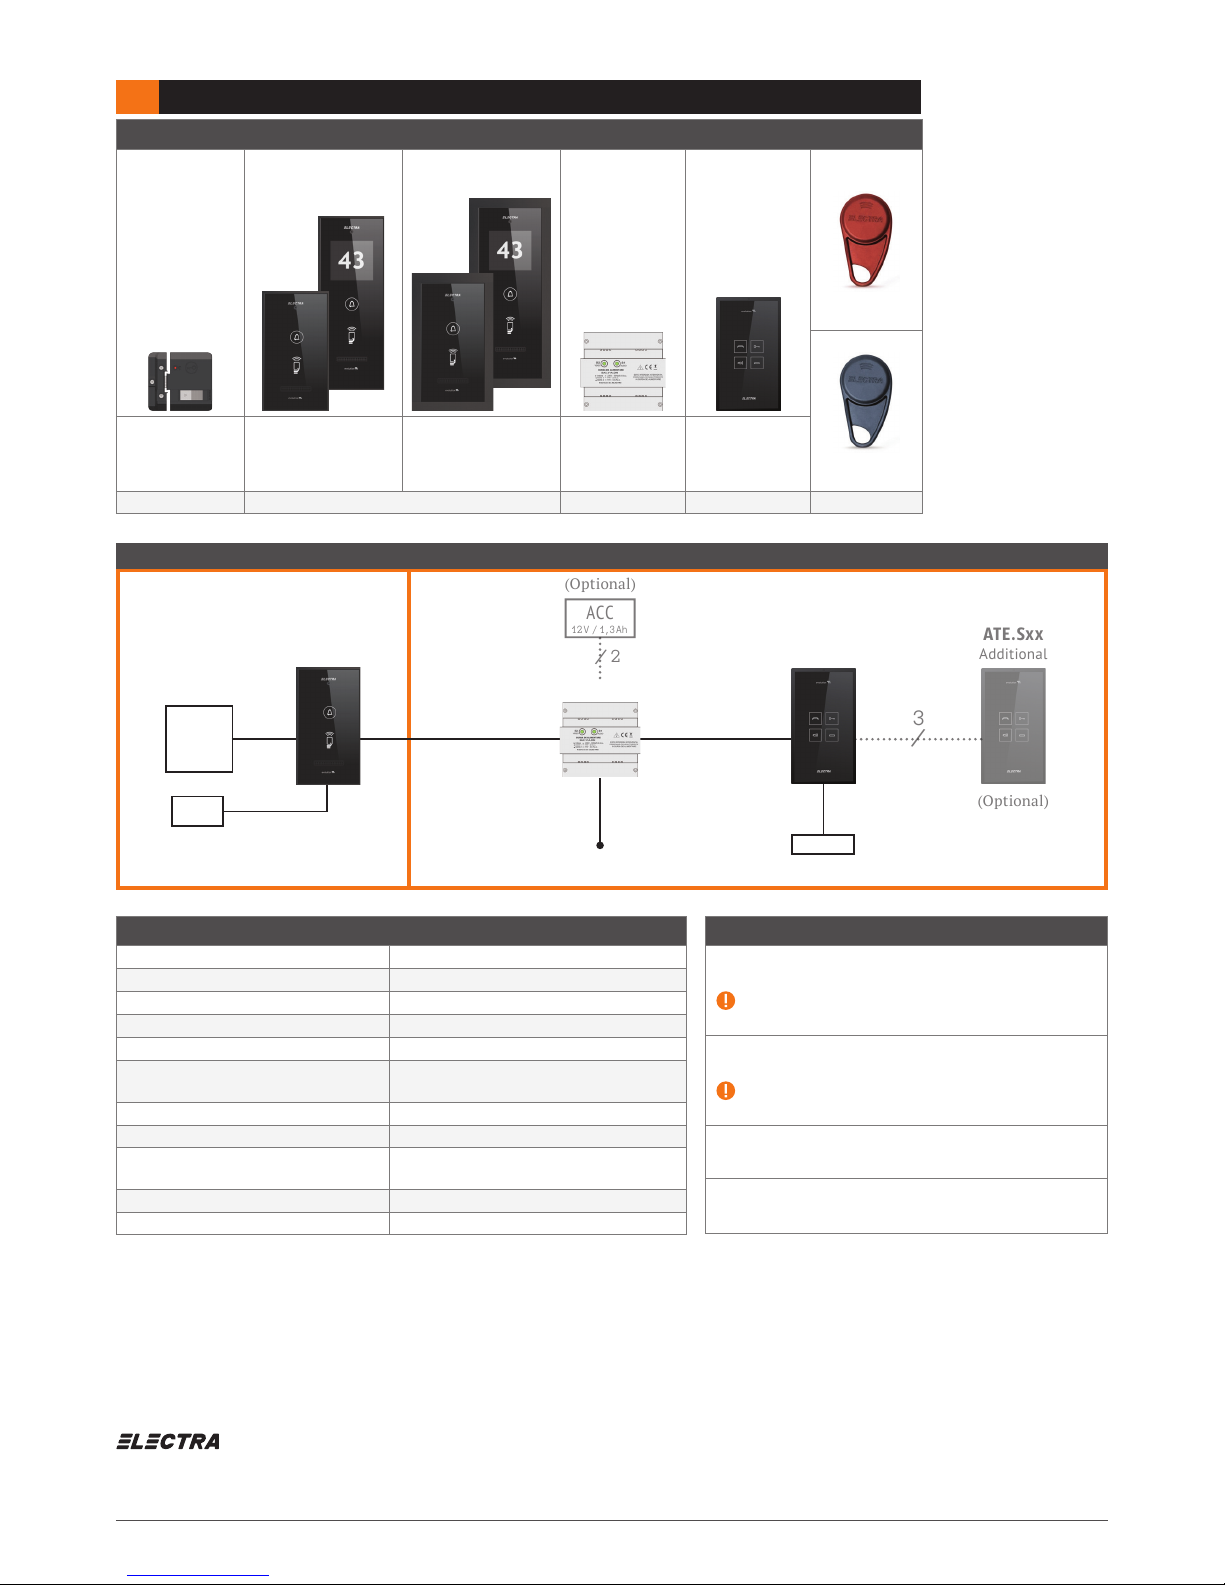
1 OVERVIEW
1.1 Essential components of the installation
( aparent ) ( îngropa t )
Programming
TAG.ELT.PRG
35 × 62 × 7 mm
Access
TAG.ELT.000
35 × 62 × 7 mm
YEM.21x (DC)
140 × 125 × 42 m m
YEM.32x (AC)
140 × 125 × 42 m m
APE .1S1.x&x
260 × 110 × 35 mm
APE.1S0.x&x
200 × 110 × 35 m m
APE .1F1.x&x
225 × 135 × 55 mm
APE .1F0.x&x
225 × 135 × 55 mm
SAC.V1A.DIN
141 × 130 × 73 mm
ATE .Sxx
170 × 96 × 28 m m
Electromagnetic lock Outdoor panel Power supply Indoor terminal TAGs
(Red)
1.3 Technical features
Power tension for SAC.V1A.DIN power supply 180 ... 256 V / 50 Hz
Power tension internal to the installation
12,0
... 14,3 V d.c.
Power expenditure from the 230
V
a.c. network Max. 0,2 A a.c.
Access code memory
80 access codes for every outdoor panel
Extra outdoor panels
main +max. 3 additional panels
Extra indoor terminals
main +max. 3 additional terminals:
audio A T E. S x x or audio A T B.S x x
Lock timer
5 seconds (cannot be modied)
Auxiliary command operates only on the main outdoor panel (address 1)
Operating temperature range
-30
... +45 °C for outdoor components
0 ... +40 °C for indoor components
Maximum relative humidity
90% at +20
°C
Outdoor panel protection class IP 34
1.4 Wiring
APE.1xx.x& x ⟶ SAC.V1A.DIN
UTP CAT5 (AWG 24) cable for distances of max. 30m.
For longer distances: an additional cable (C u 2 × 0,25 mm2) will
be installed, doubling the power intake.
SAC.V1A.DIN ⟶ ATE.Sx x
UTP CAT5 (AWG 25) cable for distances of max. 100 m .
For longer distances: an additional cable (C u 2 × 0,25 mm2) will
be installed, doubling the power intake.
APE.1xx.x& x ⟶ Electromagnetic lock
Flexible, multistrand cable, [Cu] 0,5
mm2 for distances of max. 20m.
ATE.35S.x&x ⟶ Doorbell
2
×
0,25 mm2 Cable
OUTDOOR INDOOR
DC/AC
Lock
ATE .S xx
Main
ATE .S xx
Additional
(Optional)
APE.1S0
Doorbell
230 V a.c.
(Optional)
3
/
/
2
3
/
3
/
3
/
/
2
SAC.V1A.DIN
AUX
ACC
12 V / 1,3 Ah
Installation Instructions - edition: 17.09.2012
Bd. Chimiei 8 • 700291
Iași, ROM ÂNIA
J22/1225/1991 • RO1962470
Tel. +40 232 2 14.370
Fax +4 0 232 232.830
clientfeedback@electra.ro
ofce@electra.ro
www.electra.ro
1.2 Block diagram
Page 3

page 3/6
2 MOUNTING THE COMPONENTS OF THE INSTALLATION
2.1 Outdoor panel
Name/Address
Module
Print the label using:
Print Label ELT
www.electra.ro
Sticker
Fastening clips
Before beginning ...
The outdoor panel is
mounted at the entrance
to the property, on the
body that is closest to the
pedestrian access gate.
A. Flush mounting
Main cabl e Lock ca ble
Cable f astening
and guiding piece
Special s crew with wr ench
1
2
3
-5 cm
≈17cm
cable length
Align the edges
of the shell to
the surface of the
wall.
No inset/offset!
B. Surface mounting
1
2
3
TORKS S crewB4,2 × 60 Sc rew
(4 pcs .)
Main cabl e Loc k cable
Cable f astening and
guiding piece
≈17cm
cable length
(from the wall)
2.2 Power supply + Connection box (similar)
A. DIN bar mounting B. Surface mounting
Fastening clipDIN bar
1
2
3
A3,5 × 32 Screw
(2 pc s.)
B2,9 × 9,5 Screw
(4 pcs .)
Protection lid
(2 pc s.)
2.3 Indoor terminal
Before beginning ...
The indoor terminal is mounted
at the location and height
discussed with the owner
(140cm recommended height).
A3,5 × 35(32) Scre w
(4 pcs .)
Cable f astening
and guidi ng
pieces
1
2
≈18 cm
cable length
(from the wall)
Page 4

page 4/6
3 ELECTRICAL CONNECTIONS
3.1 Installation connections
SAC.V1A.DIN
ATE .Sxx
ATE .Sxx
ATB.Sxx
APE.1Sx
APE.1Fx
F
N
+14 V
GND
C/D
(DA TA)
-Uv
GNV
Vin
+14 V
GND
C/D
(DA TA)
+Uv
GNV
Vin
+14 V
GND
C/D
Dbl
+14 V
GND
C/D
+14 V
GND
C/D
AUX
BUT
LC
LA/C
LA
-ACC
+ACC
UTP CAT 5
(AWG 24)
UTP CAT 5
(AWG 24)
UTP CAT 5
(AWG 24)
ACC
12 V/1,3 Ah
2 x 0,5 mm
2
Cable
3 x 0,75 mm
2
Cable
(Optional)
Electrical panel
Door
opening
button
Auxiliary
command
(Open collector)
BLUE BLUE BLUE
BROWN BROWN BROWN
ORANGE ORANGE ORANGE
GREEN GREEN GREEN
Indoor terminal
Additional
Indoor terminal
Main
Power Supply
Outdo or panel
230 Va.c./50Hz
Accumulator
(Optional)
Electromagnetic
Lock
AC
DC
+14 V
GND
C/D
DBL
(Optional)
Doorbell
button
Indoor terminal
Main
3.2 Lock connections
Drive current (DC)
BUT
LC
LA/C
LA
YEM.22x
BY
+Y
Y
Electromagnetic lock
Drive Current (DC)
3 x 0,5 mm
2
Cable
Outdo or panel
...
GND
...
BUT
LC
LA/C
LA
YEM.21x
GND
BY
+Y
Y
Electromagnetic lock
Drive Current (DC)
4 x 0,5 mm
2
Cable
Outdo or panel
Alternative current (AC)
YEM.32x
BY Y2 Y1
BUT
LC
LA/C
LA
Tran sfo rmer
Electromagnetic lock
Altern ative curre nt (AC)
Outdo or panel
12 Va.c. 230 V
a.c.
2 x 0,5 mm
2
Cable
BUT
LC
LA/C
LA
Electromagnetic lock
Altern ative curre nt (AC)
Outdo or panel
12 Va.c. 230 V
a.c.
Tran sfo rmer
2 x 0,5 mm
2
Cable
Hub details
+14 V
+
(+14 V d.c.; 2A ) general feed o f the instal lation
(except for video communication)
GND
0 V (mass) gen eral feed of th e installa tion
C/D
audio and d ata communic ation
+Uv
+
monito r display feed ( +14 V d.c.)
-Uv
0 V (mass)mon itor display f eed
GNV
0 V (mass) vid eo signal refer ence
Vin
(1 V vv) video sign al input (also v alid for V1, V2 , V3 and V4)
Vout
(1 V vv) video sign al output
Ucam
+
(+12 V d.c.; 0,2 A) extern al video camera fee d
AUX
auxilia ry command o utput (open co llector)
Dbl
connection for a doorbell button
BUT
connection for opening the lock
LC
DC lock co mmand
LA/C
DC/AC lo ck common
LA
AC lock co mmand
+ACC
+
accumu lator conne ction (+12V; max. 7 Ah)
-ACC
-
accumulator connection
F
phase ( 230 V a.c. / 50 Hz)
N
null
earthing
Hubs sp ecifi c to ELECTRA locks
BY
connection for opening the lock
+Y
feed fo r Electra DC l ock
Y
Y1
feed fo r Electra AC lo ck
Y2
Recommendation:
Connection to the grounding system: locally or
from the distance (cable 1 x 0,75 mm2).
Page 5

page 5/6
4 INSTALLATION SETUP
4.1 Verifying the accuracy of the connections and connecting the power supply
Check the correctness of the connections in the installation!
The +14 V, C/D and GND signals are the same for all components of the install ation.
Any short-circuit between them will affect all the indoor terminals, causing them not to function.
Connect the power supply to the 230 V a.c. network through a 10 A automated fuse!
Optionally, the accumulator is connected to the +ACC;-ACC hubs of the SAC.V1A.DIN power supply.
Pay attention to the connection to the correct polarit y of the outdoor accumulator!
Check the correct functioning of the power supply:
• The measured tension at the hubs of the power supply: +14 V⟷GND / 13,8 ÷ 14,3 V d.c.
• Power supply signaling, according to the following table:
Signaling Observations Network tension
Tension presence: +14
V, +Uv
1
S1 permanent Green
S2 permanent Green
The installation is ready to function.
If the audio or video communication is not functioning, check the
status of fuses Sig.1 and Sig.2 from the power supply.
230
V ± 10%
50 Hz
+14 V⟷GND 1 3,8 ÷ 14,3 V d.c.
+Uv⟷-Uv 13,5 ÷ 1 5,0 V d.c.
2
S1 alternating Red/Green
S2 permanent Green
The installation is functioning.
Charging accumulator.
3
S1 alternating Red/Green
+ acoustic signaling
S2 permanent Green
The installation is functioning.
Faulty or uncharged accumulator: replace the accumulator!
4
S1 permanent /ashing Red
S2 turned off
The installation is functioning only on audio communication,
for a limited amount of time.
Check the power fuse from the network and fuse Sig. 3.
NO: 0
V
+14 V⟷GND 10,5 ÷ 13,8 V d.c.
+Uv⟷-Uv NO: 0 V
5
S1 ashing Green
S2 turned off
The installation is NOT functioning.
Shortcircuit in the installation on +14
V and/or +Uv.
Eliminate the shortcircuit and re-establish the connection!
230
V ± 10%
50 Hz
NO: 0 V
4.2 Programming the Tags
The Red Programming TAG contains the unique code of the installation company.
When an outdoor panel reads a Programming TAG for the rst time, it is personalized with the company’s unique code.
The code is permanently registered in the panel’s memory and can only be erased at the producer.
The personalized panel will not accept the Programming TAGs of other installation companies.
How to program the TAGs’ Access Codes in the memory of the outdoor panel:
The door on which the lock is mounted will remain closed the entire time it takes to program the TAGs! Entering the programming mode with the
door open will erase all acces codes.
1. Use the Red Programming TAG! The panel enters the Programming Mode: [
BEEP BEEP
BEEEEEEP
]
The Programming mode closes automatically if the panel is idle for more than 10 seconds or imediately by using the Programming TAG once more.
2. You now have a maximum of 10 sec. for each Access TAG. You will hear the following sounds:
• [
BEEP BEEP
] when the Access Code has been succesfully memorized,
• [
BEEP
BEEP
] when the TAG’s Access Code is already in the panel’s memory,
• [
BEEP
] when the panel has been idle for 10 seconds and is no longer in the Programming Mode.
To erase ALL the Access Codes from the panel’s memory:
This action cannot be undone! The panel will not recognize any Access TAG.
1. Enter the Programming Mode! (by using the Programming TAG)
2. Operate the lock’s button* for at least 6 seconds! Acoustic conrmation: [
BEEP BEEP
BEEP
]
*
If the lock does not have a button, you need to short-circuit between the BUT and LC hubs (of the outdoor panel) for at least 6 seconds.
4.3 Programming the address of the additional outdoor panel
Remember:
The default address of all oudoor panels is 1.
The installation must have one outdoor panel with the adress 1. This will be the main panel.
The outdoor panels must have unique addresses within the installation.
The installation does not work if 2 panel’s share the same address!
How to program the additional outdoor panel:
The door on which the lock is mounted will remain closed the entire time it takes to program the additional panel!
1. Use the Red Programming TAG on the additional panel! The panel enters the Programming Mode: [
BEEP BEEP
BEEEEEEP
]
The Programming mode closes automatically if the panel is idle for more than 10 seconds or imediately by using the Programming TAG once more.
2. Press any key! [
BEEP
] when the panel’s address increases by +1, [
BEEP BEEP
BEEP
] when the panel is bak to having address 1.
For the following 10 seconds, the additional panel is still in the Programming Mode and you may proceed to program its Access TAGs.
Page 6

page 6/6
4.4 Programming the additional indoor terminals
If the installation contains just 1 indoor terminal, these steps are not necessary.
All indoor terminals leave the producer with address 1.
The main indoor terminal will nOT be programmed.
Operatorul 1 is programming from the main outdoor panel (address 1).
Operator 1
Main outdoor panel
Steps
Operator 2
Additional terminal
Step 0
All LEDs are off.
ENTERING
programming mode
Operator 1 will hear [
BEEEEEEEEP
] in the outdoor
panel. Afterwards proceed to Step 2.
Step 1
Press both keys at the same time and
hold until Operator 1 is done programming*.
* You will hear the rst [
BEEP
] by touching the two keys and
the second [
BEEP
] when the terminal has been programmed
Hold the keys pressed until you hear
the second
[
BEEP
]
!
ENTERING
programming mode
Step 2
Press the apartment’s key, as many times as it
is shown in the table below:
( for ever y key you press you hear: [
BEEP
] )
Operator 2 Main Additional 1 Additional 2 Additional 3
Indoor
terminal
×2
(twice)
×3
(three times)
×4
(four times)
Red/ White LED
during programming mode
Keep hold ing the keys
pressed!
EXITING
programming mode
Step 3
The panel makes a [
BEEP
] for conrmation.
Step 3
You will hear the second [
BEEP
].
You can now release the keys!
EXITING
programming mode
You have succesfully programmed an indoor terminal.
Call to check!
We encourage you to program the additional indoor terminals at the head ofce. With the devices laid out on a table, one operator follows the same steps.
Label the devices you program so you don’t misplace them in the installation.
4.5 Functions and adjustments
1. Check anywhere within the installation, during the
call and the communication, that the power tension
between +14 V ⟷ GND is higher than 1 2,0 V.
2. Check the functions of the indoor terminals and the outdoor
panels: call, communication, access, audio monitoring.
When calling from outside, all indoor terminals will ring, but
just the one you answer from can be used during the call.
The installation has been adjusted by the producer for audio
communication to suit standard functioning conditions.
How to adjust the volume of the indoor terminal:
When the LED is Red, the terminal is silent.
By pressing the key you change between
different volume levels ( White LED).
Aftertheverications,leavetheindoorterminalonOpenVolume:
→ white LED on.
How to choose the terminal’s ringtone:
1. Simultaneously press and hold keys:
!
2. Release the keys a few seconds after begins ashing Red/White!
3. Press to switch between ringtones.
4. Press to set the ringtone.
 Loading...