

Electia SDA-9 Owner's Manual
2007/6/22 - A
SDA-9
OWNERS MANUAL
AArrtt.. 3366..33227755

2007/6/22 - A
UK Smoke Detector (SDA-9)
1. LED
When the battery voltage is low, the LED will flash every 30 sec.
While the smoke Detector is transmitting the signal, the LED will on.
While the batteries are inserted and the Smoke Detector is in warming and calibration process, the LED
will flash for 8~22 min.
2. Test Button
The Test Button is pressed in the following situations:
Learning – In the Smoke Detector.
To test the radio communication range.
To test if the Smoke Detector is functioning normally.
To silence the alarm
3. Battery compartment
4. Mounting Hole
5. Mounting Bracket
6. Hook
1
2 5
6
4
3

2007/6/22 - A
Battery
3 “AA” Alkaline batteries are used to supply power. The battery can last over 4 years.
When the Smoke Detector has low battery, a low battery signal will be transmitted along with regular
signal transmissions. If the battery voltage is low, the LED will flash accompanied with a Low-volume
beep once every 30 sec and inform the Control Panel regularly. Low Battery warning (<3.2 +/- 0.1V
typically starts 1 month before complete exhaustion.
Installation Procedures
1. Insert the 3 “AA” batteries into the battery compartment taking care that the connection respects correct
polarity showing on the battery holder.
2. While the 4 batteries are inserted, the Smoke Detector will sound 2 short beeps, LED start flashing and
begin the 6-minute warming period.
3. During the 6-minute warming period, you can learn the Smoke Detector into the Panel.
To do the learning process:
1. Put the Control Panel into “Add Device” Mode (or “learning” mode) to learn the ID code of the Smoke
Detector. (Please refer to operation manual of the panel.)
2. Press the Test Button on the Smoke Detector, the LED will be on for 2 sec and the buzzer will sound a
2-tone beep to indicate it’s functioning normally with successfully radio transmitting.
3. If the Control Panel successfully receives the signal, the panel will respond accordingly to indicate the
completion of the learning-in process. Please refer to the manual of the panel.
<Note>
When the 6-minute warming period is over, one short beep will sound to indicate that the Smoke
Detector is starting calibration process. The process will be repeated every 100 sec and notified by a
short beep respectively. The completion of calibration process will be notified by a 2-tone beep and the
LED will be turned off.
4. Normally it takes about 2 ~ 16 minutes to do the calibration. However, after 16 minutes, if the Smoke
Detector gives out continuous beeps instead, it indicates that the Smoke Detector is failed in the
calibration and its battery should be removed to silence the beeps. Then, start from step 1 to try again
after a pause of at least 30 seconds.
<Note>
During the calibration period, pressing the Test Button is prohibited. If you are not able to do the
learning process (Step 3) during the 6-minute warming period, you are requested to do the learning
process after the calibration period (Step 4).
5. After the completion of the warming and calibration process, put the Control Panel into “Walk Test”
mode. Then, decide upon a suitable location for the Smoke Detector’s installation and from there, press
the Test button to confirm this location is within signal range of the Control Panel.

2007/6/22 - A
6. Using the bracket as a template, drill two holes in the exact location, the device is
to be mounted and insert the dowels.
7. Screw the bracket on with the two hooks facing down by using the screws and
screwing them into the dowels.
8. Locate the single line mark on the detector and line it up with one of the hook of
the bracket. After both hooks fits in the two mounting holes on the detector,
rotate the detector counter-clockwise to lock it in onto the bracket. The
installation is now completed.
Testing the Smoke Detector
By pressing the Test button on the Smoke Detector, you can test if the Smoke Detector is functioning normally.
If the Smoke Detector functions normally, the LED will be on for 2 Sec. then it will sound a 2-tone beep.
If the buzzer sounds 3 times of 2-tone beep, which means the “Optical Chamber” on the Smoke
Detector is either dirty or out-of-order.
If the LED doesn’t light and no beep is sounded, it means the Smoke Detector is out-of-order.
Supervisory Signal
After installation, the Smoke Detector will automatically transmit Supervisory Signals periodically to the
Control Panel at intervals of 60 min. to 100 min. randomly.
If the Control Panel has not received the signal from the Smoke Detector for a preset period of time, the
Control Panel will indicate it on its display to show that particular Smoke Detector is experiencing an
out-of-signal problem.
Detecting the Smoke
Once the concentration of the smoke exceeds the set threshold value, the Smoke Detector lights up its
LED to indicate it’s sending the Smoke Alarm signal to the Control Panel. After the transmission is
completed, SDA-9 then activates its buzzer with LED flashing rapidly for 10 seconds for local warning.
After this 10-second local warning period, SDA-9 proceeds to perform a follow-up smoke check. If the
smoke concentration is found to be alarming still, SDA-9 will repeat another 10 seconds of local warning
with buzzer and rapid flashing LED.
SDA-9 will repeatedly perform follow-up checks until the smoke concentration is lower than the set
value, then the alarm will be stopped automatically or the alarm can be stopped manually by using the
“Alarm Silence” function.
Once a Smoke Alarm Signal has been transmitted, SDA-9 will continue to send alarm signals at every 2
minutes when the smoke concentration continues to be higher than allowed. This 2-minute cycle will
be repeated until the smoke concentration is lower than the set value, then the alarm will be stopped
automatically or the alarm can be stopped manually by using the “Alarm Silence” function.
2007/6/22 - A
Alarm Silence
Once the alarm is sounding, pressing the Test button will put the Smoke Detector into Alarm Silence
mode for 10 min. and the alarm will be stopped.
During this 10-min. Alarm Silence period, the LED will flash once per second.
After this 10-min. period is over, the Smoke Detector will sound a 2-tone beep and then returns to
normal operation mode. If the Smoke concentration is still over the set threshold value, the Smoke
Detector will sound the warning alarm again.
Taking New Reference Value
As the operation condition of the smoke detector may vary after being installed for some time, you may wish to
take a new reference value to ensure the best use of the smoke detector. To do this:
Press 10 seconds on the TEST button and hold until the LED start to flash. The SDA-9 will sound 2 short
beeps then follow the process described in calibration process to take the new reference value
Every time re-insert the batteries, the SDA-9 will also take the new reference value following the
warming and calibration process.
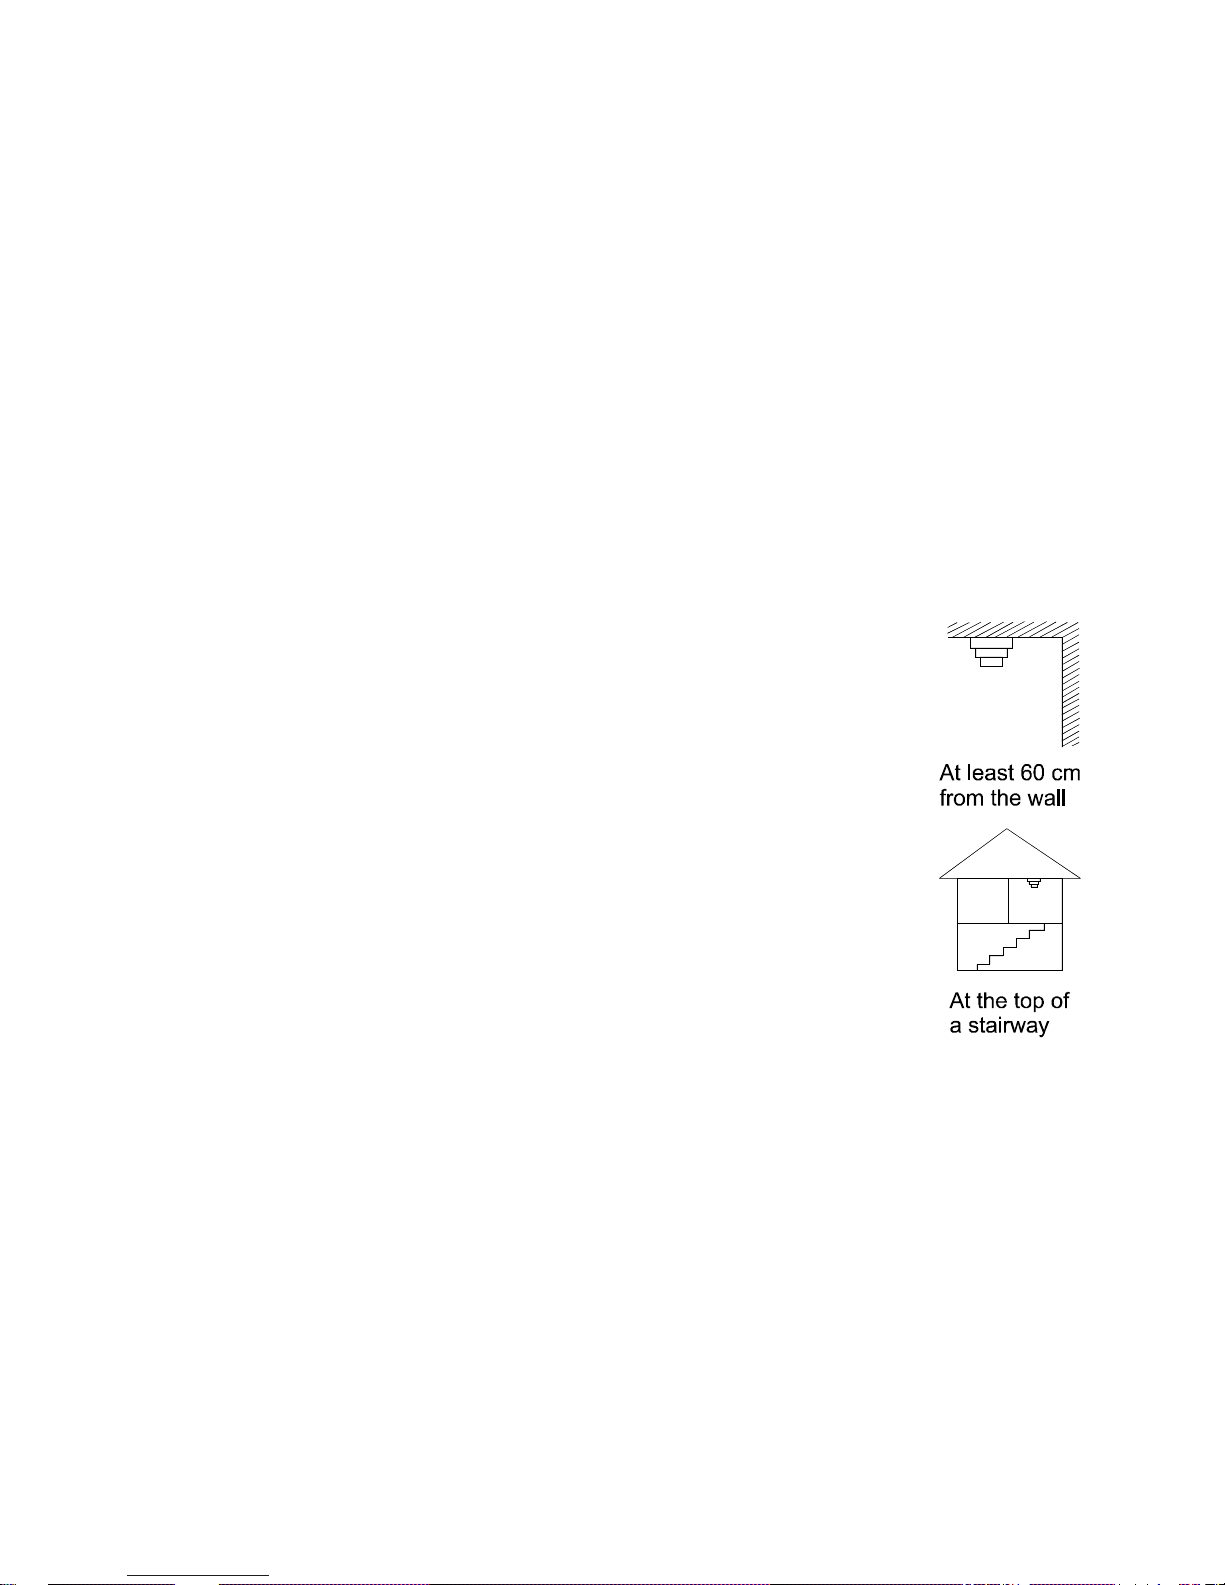
Installation Note
It is recommended that the installation site be in the center area of the ceiling and only to be
used indoors. The operational temperature range for the device is 10 – 40°C.
Do not locate the detector in the following locations:
The Kitchen – Smoke from cooking might cause an unwanted alarm.
Near a ventilating fan, florescent lamp or air-conditioning equipment – air drafts
from them may affect the sensitivity of the detector.
Near ceiling beams or over a cabinet – stagnant air in these areas may affect
the sensitivity of the detector.
In the peak of an “A” frame type of ceiling.

2007/6/22 - A
SE Rökdetektor (SDA-9)
1. Lysdiod
Lysdioden blinkar var 30:e sekund när rökdetektorn har låg batterinivå.
Då rökdetektorn kommunicerar med larmpanelen tänds lysdioden.
Lysdioden kommer att blinka i ca 8-22 minuter efter det att batterierna har satts i, under den här tiden
är rökdetektorn i uppstartningsläge/inställningsläge.
2. Testknapp
Testknappen trycks ned i följande situationer:
När rökdetektorn skall vara i inlärningsläge.
När du skall testa radio kommunikationen mellan rökdetektor och larmpanel.
För att kontrollera att rökdetektorn fungerar normalt.
För att kvittera och stänga av den inbyggda sirenen.
3. Batterifack
4. Monteringshål
5. Monteringsplatta
6. Hållare
Batterier
Använd 3st “AA” Alkalibatterier. Dessa batterier har en livslängd på ca fyra år.
Vid låg batterinivå skickar rökdetektorn regelbundet signaler till larmpanelen. Samtidigt blinkar
lysdioden och en låg signal ljuder var 30:e sekund. Varning för låg batterinivå, <3.2 +/- 0.1V, brukar
påbörjas en månad innan batterierna helt slutar att fungera.
Installation av rökdetektorn
1. Ta bort batteriluckan som sitter på baksidan av rökdetektorn och sätt i 3st “AA” batterier i batterifacket,
var noga med att sätta i batterierna åt rätt håll (polaritet). Sätt tillbaka batteriluckan.
2. Nu börjar uppstartningsprocessen som är på ca6 minuter, rökdetektorn ger ifrån sig två korta toner och
lysdioden på rökdetektorn blinkar.
3. Det är under denna period som du ska registrera in rökdetektorn i larmpanelen.
1
2 5
6
4
3
 Loading...