

Electia Home Prosafe Sc9100 User Manual
WIRELESS SECURITY SYSTEM
Home Prosafe
Sc9100
Introduction alarmconsole page 2
Installing page 3
Registering sensors and remotes page 5-7
Storing Phone Numbers page 8
Recording an own message page 8
Using the Security System page 9
What happens when the alarm is triggered page 9
Home Automation functions page 10
Setting Timers page 11
Changing the access code (PIN) page 12
Removing/De-registering a sensor page 13
Trouble shooting page 16
GB
GB User's manual
SE Användarmanual
FI Manuaali
Artnr 36.1990
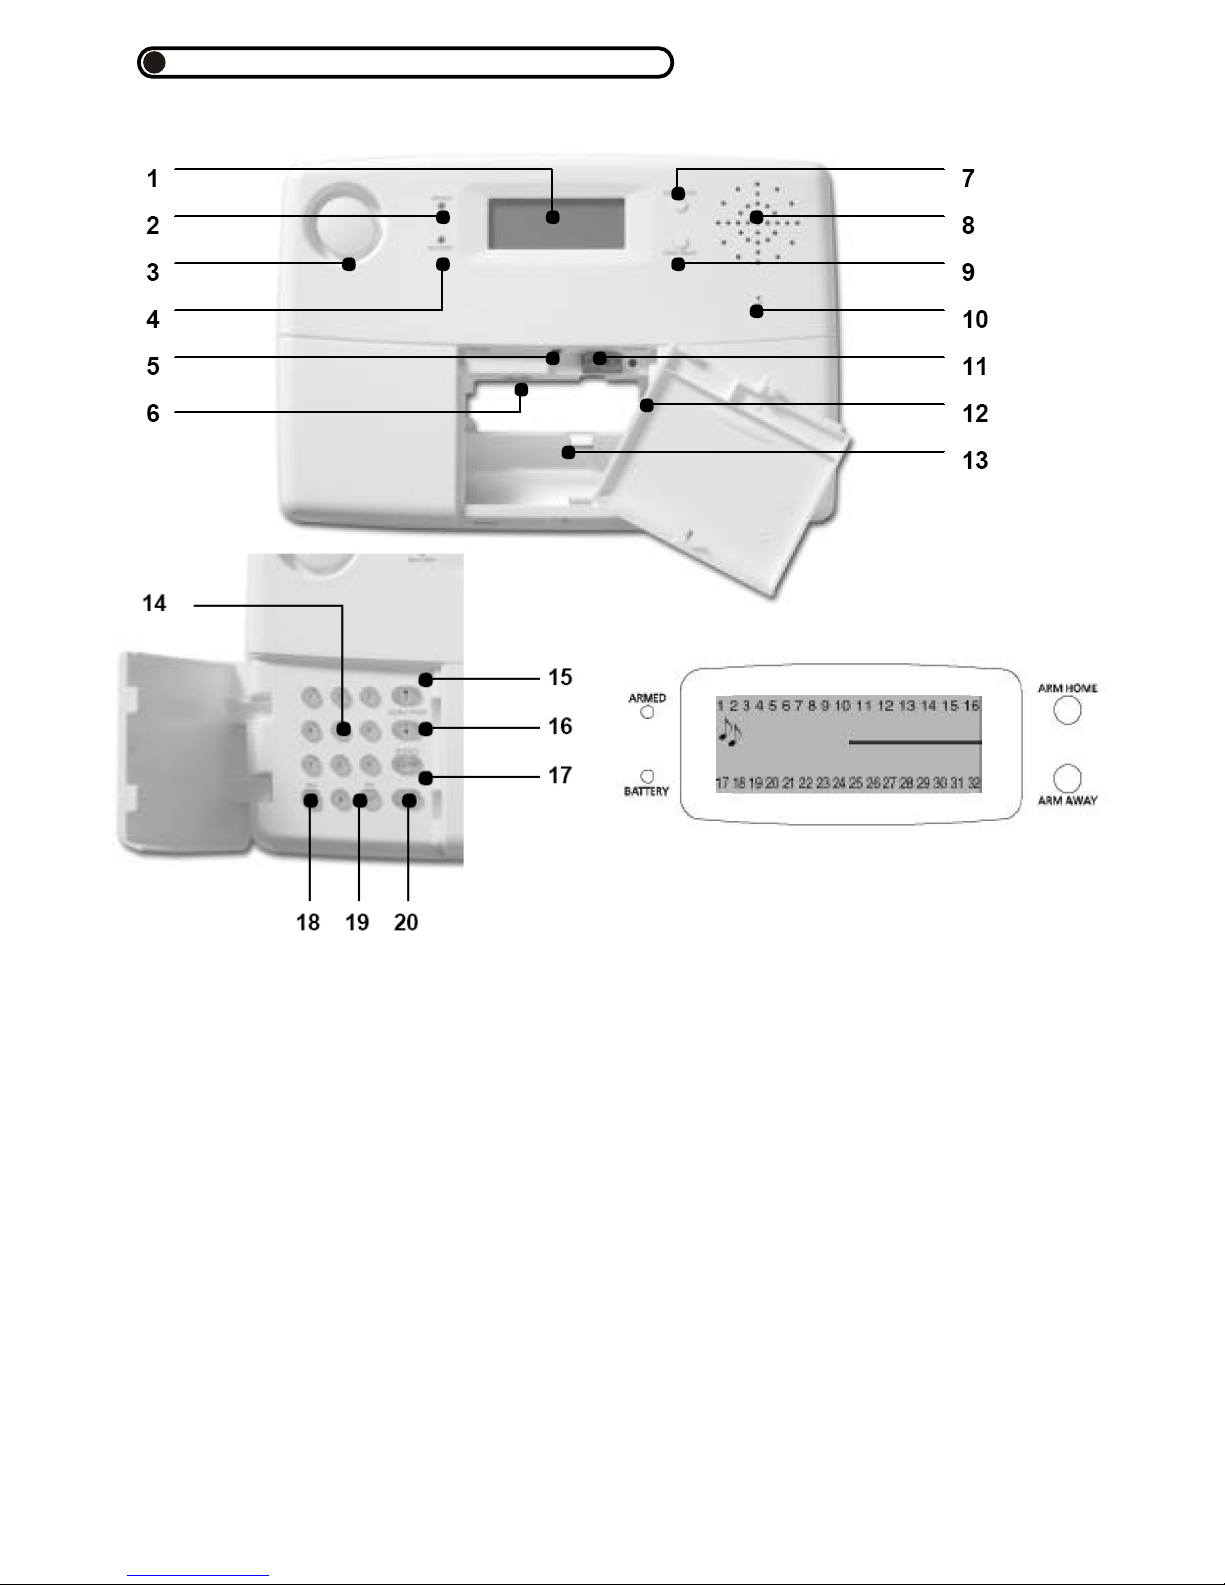
The security consoleThe security console
1. Display
2. Armed - Indicator lights up when the alarm is
switched on.
3. Sirén
4. Battery - Indicator lights up when the backup
batteries are empty or not installed.
5. Tamper contact
6. AC Adapter connections.
7. Arm Home button Alarm function for when you are at
home. All Door/Window Sensors are activated, but the
Motion Detectors remain unarmed.
8. Built-in Speaker.
9. Arm Away button Full alarm. All sensors are
activated.
10. Built-in Microphone.
11. Wired inputs.
12. Telephone connection.
13. Emergency battery compartment. “Rechargeable
batteries only!”.
14. Console Keypad Buttons. Used for all number
entries.
15. Menu Start Up - Used to initially enter the menu
and then to move up through the items.
16. Menu Start Down - Used to initially enter the menu
and to move down through the items.
2
17. On - Switch on a X10 Module.
18. Off - Switch off a X10 Module.
19. OK - Confirm setting.
20. Clear/Bypass - Clear/bypass Used to clear
entries back up through the menu levels, and to
bypass problem Door/Window Sensors or Motion
Detectors.
LCD-Display
Zone numbers - Every sensor represents a so-
called zone in the system. There are 30 zones for
wireless sensors (numbers 1-30 on the display) and
2 zones for wired sensors (numbers 31 and 32 on
the display).
Zone numbers on: Door or window is open.
Zone number flashing slowly: There is a problem
with the sensor(page 9)
Zone number flashing quickly: The sensor has been
“overruled” with the Bypass Function (page 9)
Chime - Chime is switched on when the system is
switched off. When this function is activated, you
hear a pleasant ding-dong when someone enters the
house (page 13).

! Chose a good space for the console and make sure you have a wall socket (230V) and a telephone connection
close by. For optimal range it is best to mount the console central to the objects you wish to secure. This
ensures that the distance between the console and the sensors is as short as possible and the range will be
sufficient. Plan the location of the Door/Window Sensors and Motion Detectors so that the RF path which runs
in a straight line from sensor to Console is not obstucted by large metal objects such as a refrigerators or
freezers, and passes through as few walls as possible.
! You can place the console on any flat surface or mount it onto the wall.
Connecting the AC adapter. Connect the AC adapter to the corresponding connection(6). Plug the flying lead of
the adapter into a 230V/50Hz wall socket. You can fixate the wire by looping it behind the hooks on the back of the
console. When connecting the adapter and opening the top compartment of your console, you will see the word
TAMPER on the display. After closing the compartment, enter your PIN code(facyory settings 0000se page 12) to
remove the word TAMPER. The display now shows DISARMED and you will hear a double tone to confirm.
NOTE: Only use the Ps18 AC adapter included in the set..
Installing the emergency batteries
Just take off the discharge protection before installing the system(plastic flap with text “PULL”).Use always
rechargeable batteries.After inserting the batteries and closing the compartment,enter your pin code to remove the
word TAMPER. The display now shows DISARMED and you will hear a double tone to confirm.
Telephone connection
Open the top compartment on your console. Connect the telephone wire to the corresponding connection (12).
You can fixate the wire by looping it behind the hooks on the back of the console.Console can share line with a
standard phone but not a FAX. The console cannot be directly connected to an ISDN connection.Se page8
InstallingInstalling
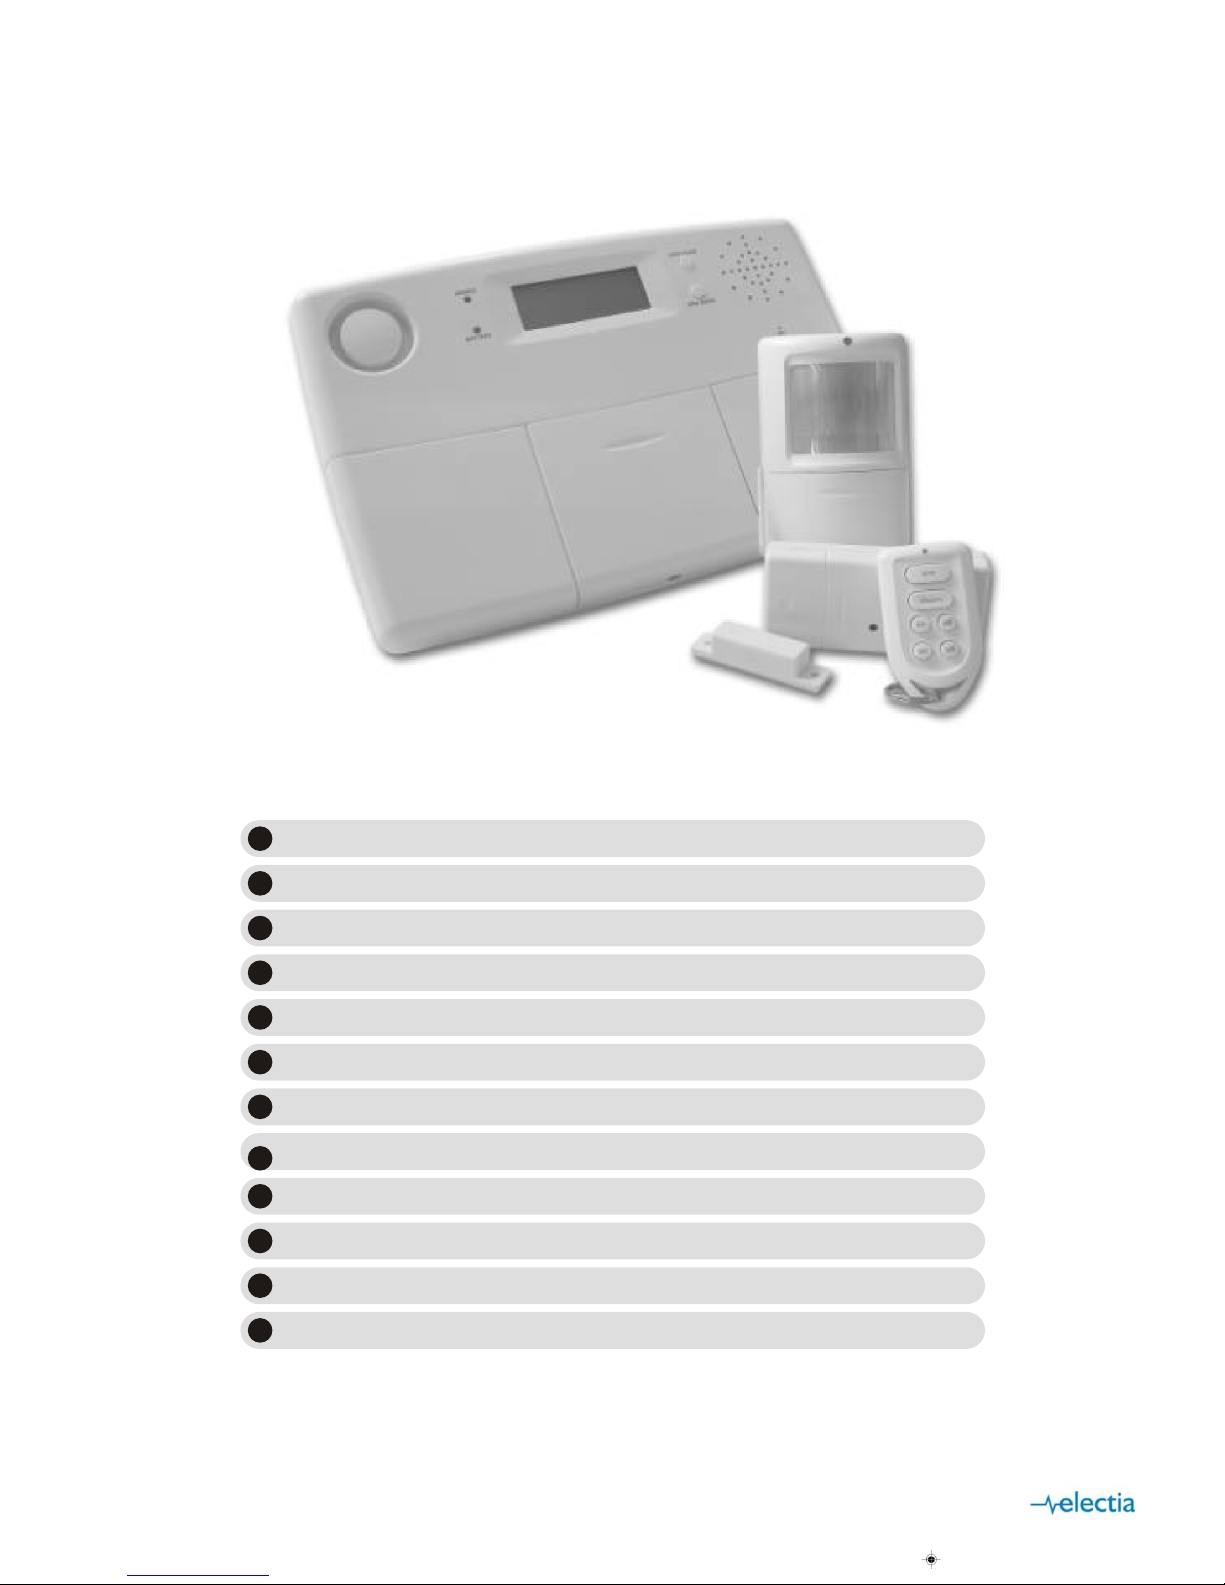
The contents of the Home Prosafe system.The contents of the Home Prosafe system.
After connecting the console, the display will read HOME CONTROL. The time will be displayed on the bottom line(for
setting the time, see page 8. If you do not see the words HOME CONTROL but TAMPER, you need to close the top
compartment on the console. After closing the compartment, enter your PIN code(factory settings 0000) to remove the
word TAMPER. The display now shows DISARMED and you will hear a double tone to confirm. Then the text HOME
CONTROL will be shown.
Choosing your language
All menu items are displayed in English for default. You can choose any of the other available languages as follows:
1.To access the menu press the menu upp or menu down button. The display now shows ENTER PIN.
2.Enter the 4-digit PIN code(factory setting 0000). The display is cleared and shows a * for each number entered. When
the PIN code has been entered correctly, the first menu item will show up on the display.
3.Use the menu buttons upp/down to go to menu item 7. OPTIONS. Press OK to select this menu item. You can also
go to this menu item directly by pressing a 7 on the keypad.
4.Use the menu buttons upp/down to go to submenu item LANGUAGES. Press OK to select this submenu item.
5.Use the menu buttons upp/down to select your language. Press OK to select and confirm.
7.Press Clear and afterwards 1(=Yes) to quit the menu.
The menusThe menus
! Security base console SC28/SC9100
! Motion detector MS18
! Door/Window sensor DS18
! Key chain remote KR18
! Phoneplugs for Se and FI
! Register up to 30 wireless sensors with console.
! Emergency, The built-in telephone dialler (Tone and Pulse) can dial up to six different telephone numbers..
! Can register up to 16 wireless remote controls (KR18/KR21/SH600).
! 2 different alarm messages:custom recordable message + fixed multi lingual emergency message.
! Use the phone to listen to what is causing the alarm.
! Silent alarm possible (no siren). Additional Ph7208 siren available..
! 2 inputs for wired sensors.
! Intelligent sensor control: The console checks functions and battery status.
! Trigged alarm (possible with lights are swiched O and OFF. Prevention with so called “LIVED IN LOOK”:
Your lights are switched ON and OFF in such a way that it appears as if you are home, in respond to the 7
days timer.
! Can use up to 4 Thermostats Ts10. Temperature points to create e.g: Comfort, Economy and Frost level.
Important Properties and FeaturesImportant Properties and Features
3

The menu in EnglishThe menu in English
! To access the menu, press the menu upp or menu down button. The display now shows ENTER PIN. Use the
menu buttons upp/down to go trough the menues.
1. INSTALL Registering and de-registering sensors, remote controls and thermostats.
2. SET CLOCK Setting the clock se page 8
3. PHONE NUMBERS Setting the phone numbers se page 8
Sub menu:
PHONE 1
PHONE 2
PHONE 3
PHONE 4
PHONE 5
PHONE 6
4.MESSAGE: Recording and checking your own spoken message se page 8
Sub menu:
RECORD Record your own spoken message.
REPLAY Listen to your own spoken message.
5. NEW PIN Change your PIN code (se page 12).
6. MEMORY CLEAR Clear all sensors, remote controlls, thermostats, timers or settings (se page 5-7).
Sub-menu:
CLEAR ALL SENSORS Remove a registered sensor.
CLEAR ALL REMOTES Remove a registered remote control.
CLEAR ALL TIMERS Remove all timer settings at once.
CLEAR ALL THERMOSTATS Remove all thermostat settings at once.
CLEAR LOG Remove the Event Log.
MASTER RESET Clear the memory.
7. OPTIONS
Sub menu:
CHIME - CHIME ON/CHIME OFF When the chime function is activated, the display will show a sound
symbol.(se page13).
SIREN - SIREN ON / SIREN OFF Switch off siren for silent alarm ( page 13).
HOUSE CODE: Change the House Code for Home Automation functions (page 15).
UNIT CODE: Change the Unit Code for Home Automation functions (page13).
ANSWER TYPE: Answer ON/OFF/VOICE MAIL(page 15)
SENSOR MODE: Use sensors as emergency sensor
SENSOR 27-32: NO+ON/OFF Used for settings zones 27 to 32 to send Home Automation ON or OFF
commands on House Code +1 and Unit Code 7-12, in respond alarm trigger from respective zones 27-32
(E.g.zone 27 is related to UC 7,29 to 9 etc).
COMFORT: To set COMFORT ,ECONOMY and FROST level temperatures.
LANGUAGE: English/Francais/Deutsch/Nederlands/Italiano/Espanol/Portugese/Svenska/Romana/Turke
8. DELAYS
Sub menu:
ENTRY DELAY The time you get to switch off the system after entering your house (page 12).
EXIT DELAY before the system will be armed on whenyou leave your house (page 12).
DIAL DELAY before the system calls out in case of an alarm (page 12).
ANSWERS DELAY before the system picks up the phone when dialling in (page 12).
9. SET TIMER
NEW TIMER Setting a new timer or thermostat setback (page 11).
0. EVENTS LOG
VIEW LOG Overview of last 40 security events.
4
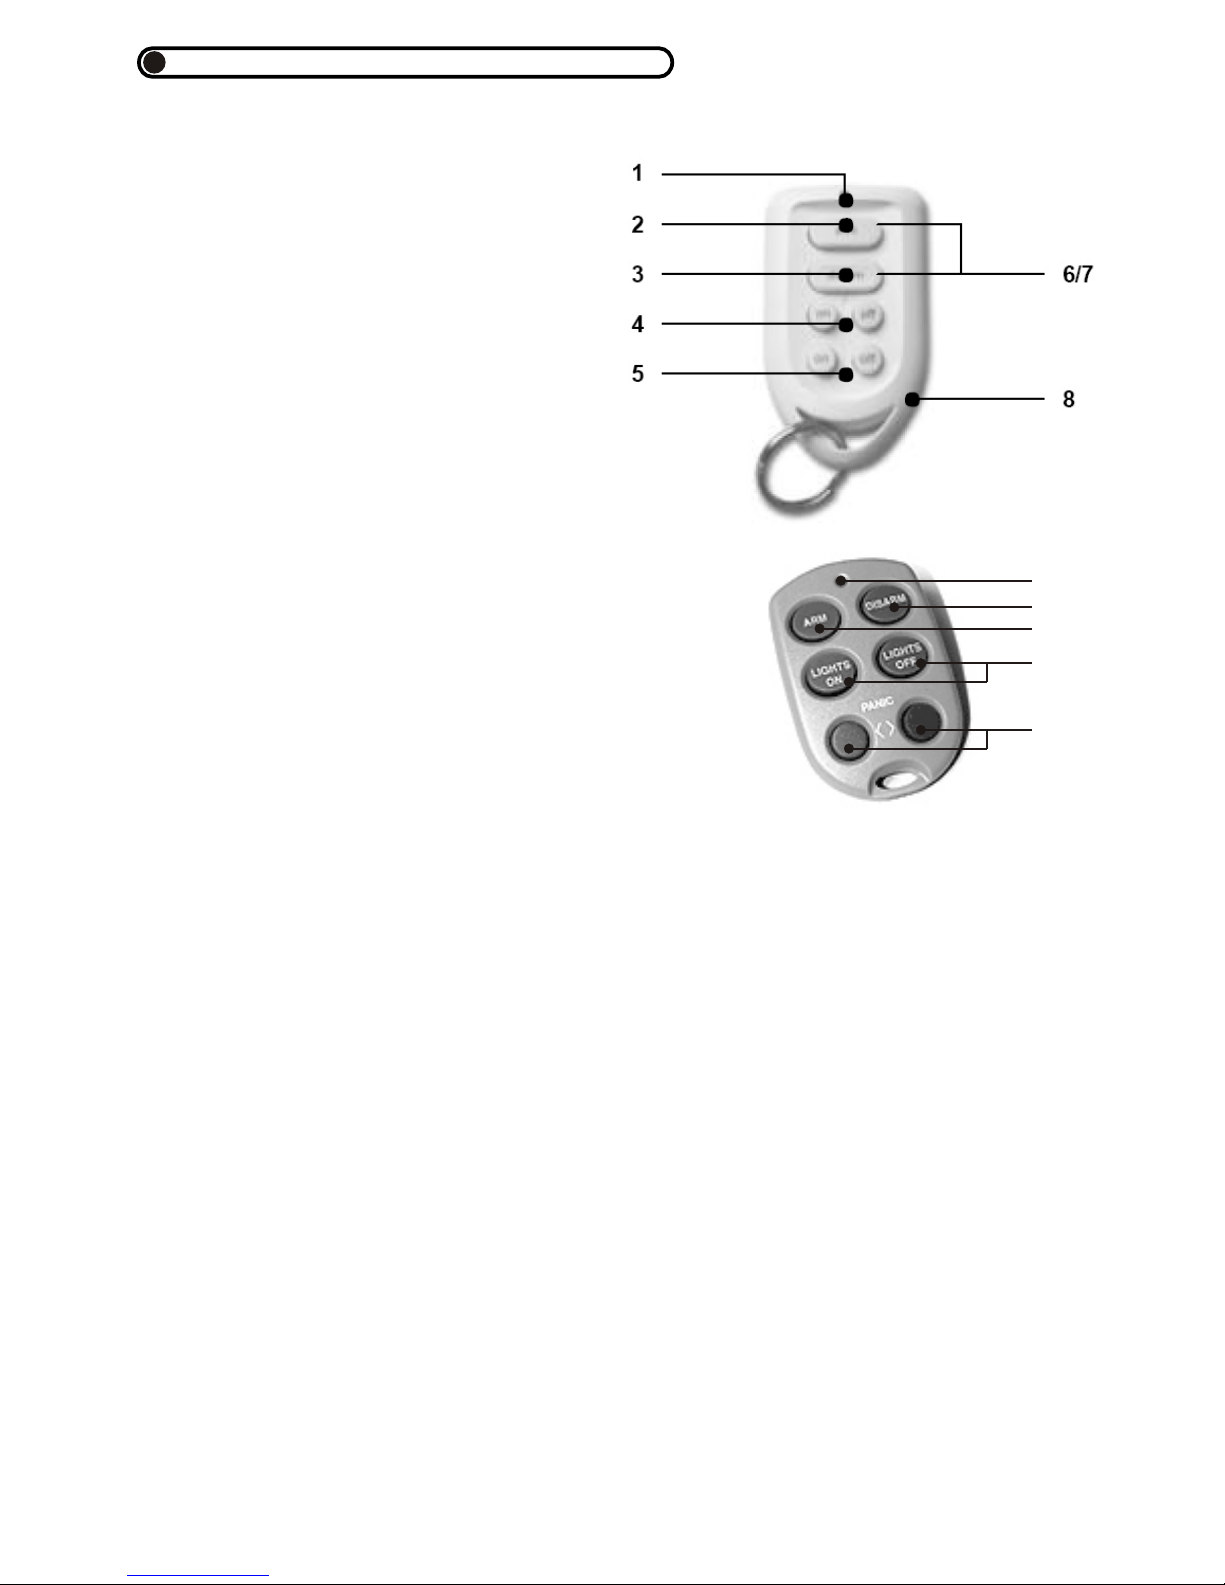
1.Control indicator -Comes on when the remote
control sends a radio signal when the key are pressed.
When the indicator lblinks only weakly , the batteries
have to be replaced.
2. Arm - Switches on the Security System in the Arm
Away Mode. All sensors are activated.
3. Disarm - Switches off the Security Systemt.
4. A on/off - Switches on/off the lights connected to the
Lamp Module set to the Home Automation Base
Address.
5. B on/off -Switches on/off the lights connected to the
Lamp Module set to the Home Automation Base Adress
+1.
6/7. Panic -When both keys ARM(2) and DISARM(3)
are pressed simultaneously, an immediate alarm is
initiated by the Security System. (NOTE! ON KR21E Press the both
reed key simultaneously).
8. Battery holder - The back of the remote can be easily opened by
taking the two parts apart. Use Cr2016 (2xCR2016, 3V lithium
batteries.
Using the Key Chain Remote Control
A new Kr18 contains batteries for default. INITIALIZING THE
KR18:Press the ARM key for more than 3 seconds and release the
button; the indicator blinks. Release the button.The remote control has
now chosen a unique code, which can be registered with your console.
When pressing the Arm button the LED should flash quickly a few times. When the LED lights up and stays lit,
you need to re-initialiaze the KR18.
Registering the Key Chain Remote Control with the Console
1. To access the menu, press either the menu upp or down button. The display now shows ENTER PIN.
2.Enter your 4-digit PIN code (facyory setting 0000). The display is cleared and shows a * for each number
entered.
3. When the PIN code has been entered correctly, the word INSTALL will show up on the display.
4. Press OK. The display now reads INSTALL ZONE.
5. Press the ARM button on your key chain remote control. The console will beep to confirm. The display will read
RMOT 1 SET.If you have more than 1 remote control installed, it will show e.g. RMOT 2 SET, RMOT 3 SET.
- RMOT 16 SET. You can register up to 16 remote controls.
6. Repeat step 5 for every remote control you wish to register.
7. Press CLEAR to go back to the first menu item. Press CLEAR again to quit the menu. To confirm your choice,
press 1 for Yes or 2 for No. If you choose Yes, you will quit the menu. If you choose No, you go back to the first
menu item.You can also remove remote controls from the menu e.g when you have lost a remote control(page 12)
.
Key Chain RemoteKey Chain Remote
5
1
2
4
6/7
KR21E
KR18E
3
 Loading...