

Elecrow CRT45259M User Manual

Elecrow on-line store, make your making easier.
https://www.elecrow.com/
Crowtail Start Kit for micro:bit User Guide
The BBC micro:bit is a pocket-sized computer that can easily realize your creativity without
much electrical and coding knowledge. There are numerous possibility of creation you can dig
out by micro:bit, from robots to musical instruments. However if you want to create more things,
just 1 micro:bit is barely not enough, That’s why we introduce the Crowtail Start Kit for micro:bit
to you.
The crowtail start kit for micro:bit can make you do a lot of interesting things and brings
endless possibilities to your micro:bit. The core board in this kit is Crowtail- Base shield for
micro:bit,with which you can use plenty of crowtail sensors.All of that you need to know about
Crowtail, there is no need any soldering or jump wire. We have prepared 17 species basic
crowtail modules that let you get started with micro:bit. And we also write 20 lessons to teach
you use the micro:bit with the sensors step by step. Now, let us enjoy them.

Elecrow on-line store, make your making easier.
https://www.elecrow.com/
Contents
Lesson 1,How to use button control LED...................................................................................................3
Lesson2, Brightness Measurement............................................................................................................ 4
Lesson3, Make a Beeping Noise.................................................................................................................5
Lesson4. Motor Control............................................................................................................................. 6
Lesson5.Motion Detection.........................................................................................................................6
Lesson6. Relay ON/OFF.............................................................................................................................. 7
Lesson7.Soil Moisture Detection............................................................................................................... 8
Lesson8.Sound Detection.......................................................................................................................... 9
Lesson9.Breathing LED.............................................................................................................................10
Lesson10.Servo Calibrator....................................................................................................................... 11
Lesson11.Magnetic Field Detection......................................................................................................... 12
Lesson12.Control the MOSFET as a Switch.............................................................................................. 13
Lesson13.Obstacle Detection...................................................................................................................14
Lesson14. IR Distance Measurement.......................................................................................................15
Lesson15.Use Microwave Detect Movement..........................................................................................16
Lesson16.Stairs Lights.............................................................................................................................. 17
Lesson17.Alarm Clock.............................................................................................................................. 18
Lesson18.Anti-theft Device......................................................................................................................19
Lesson19.Mini Fan................................................................................................................................... 20
Lesson20.Automatic Watering.................................................................................................................21
Elecrow on-line store, make your making easier.
https://www.elecrow.com/
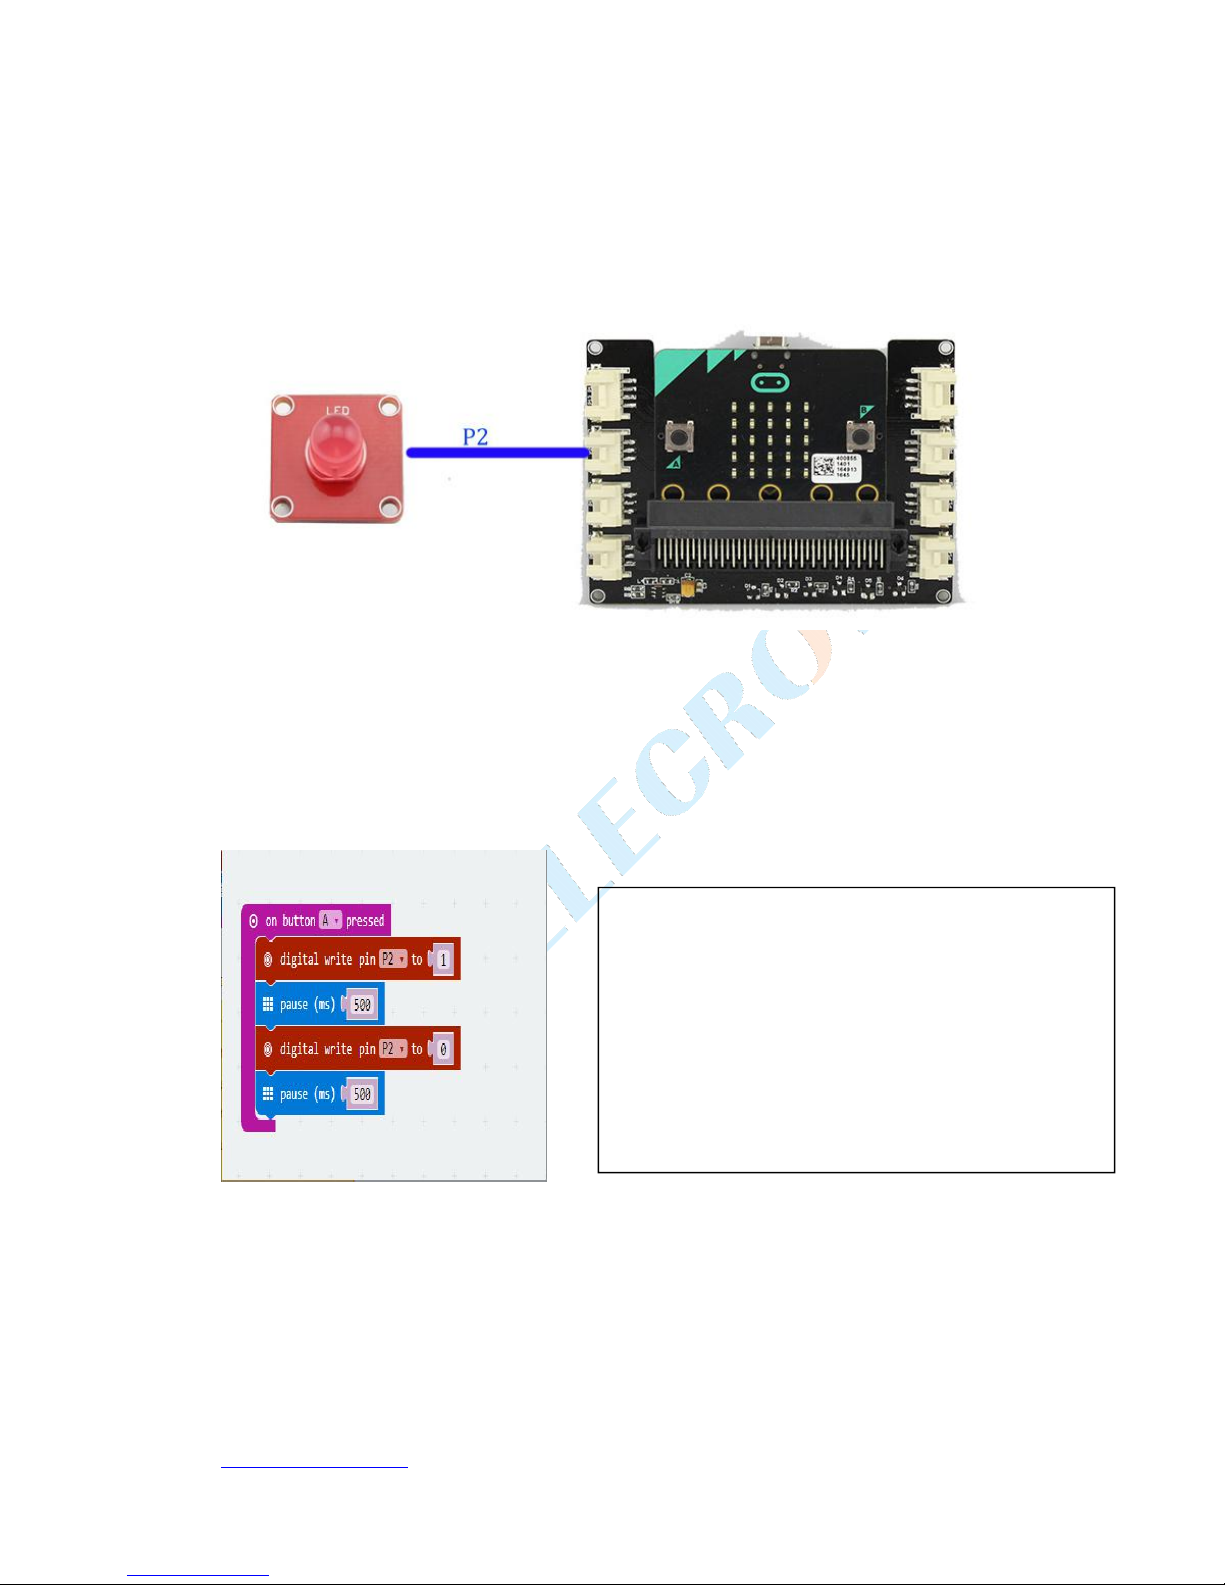
Lesson 1,How to use button control LED
This is a easy experiment, everyone will easy handle it. Connect Crowtail- LED to the P2
interface, upload the bellow code to micro:bit, then click the button A on the micro:bit, the LED
will light.
Material:
Micro:bit x1
Crowtail- Base Shield for Micro:bit x1
Crowtail- LED x1
Sofware:
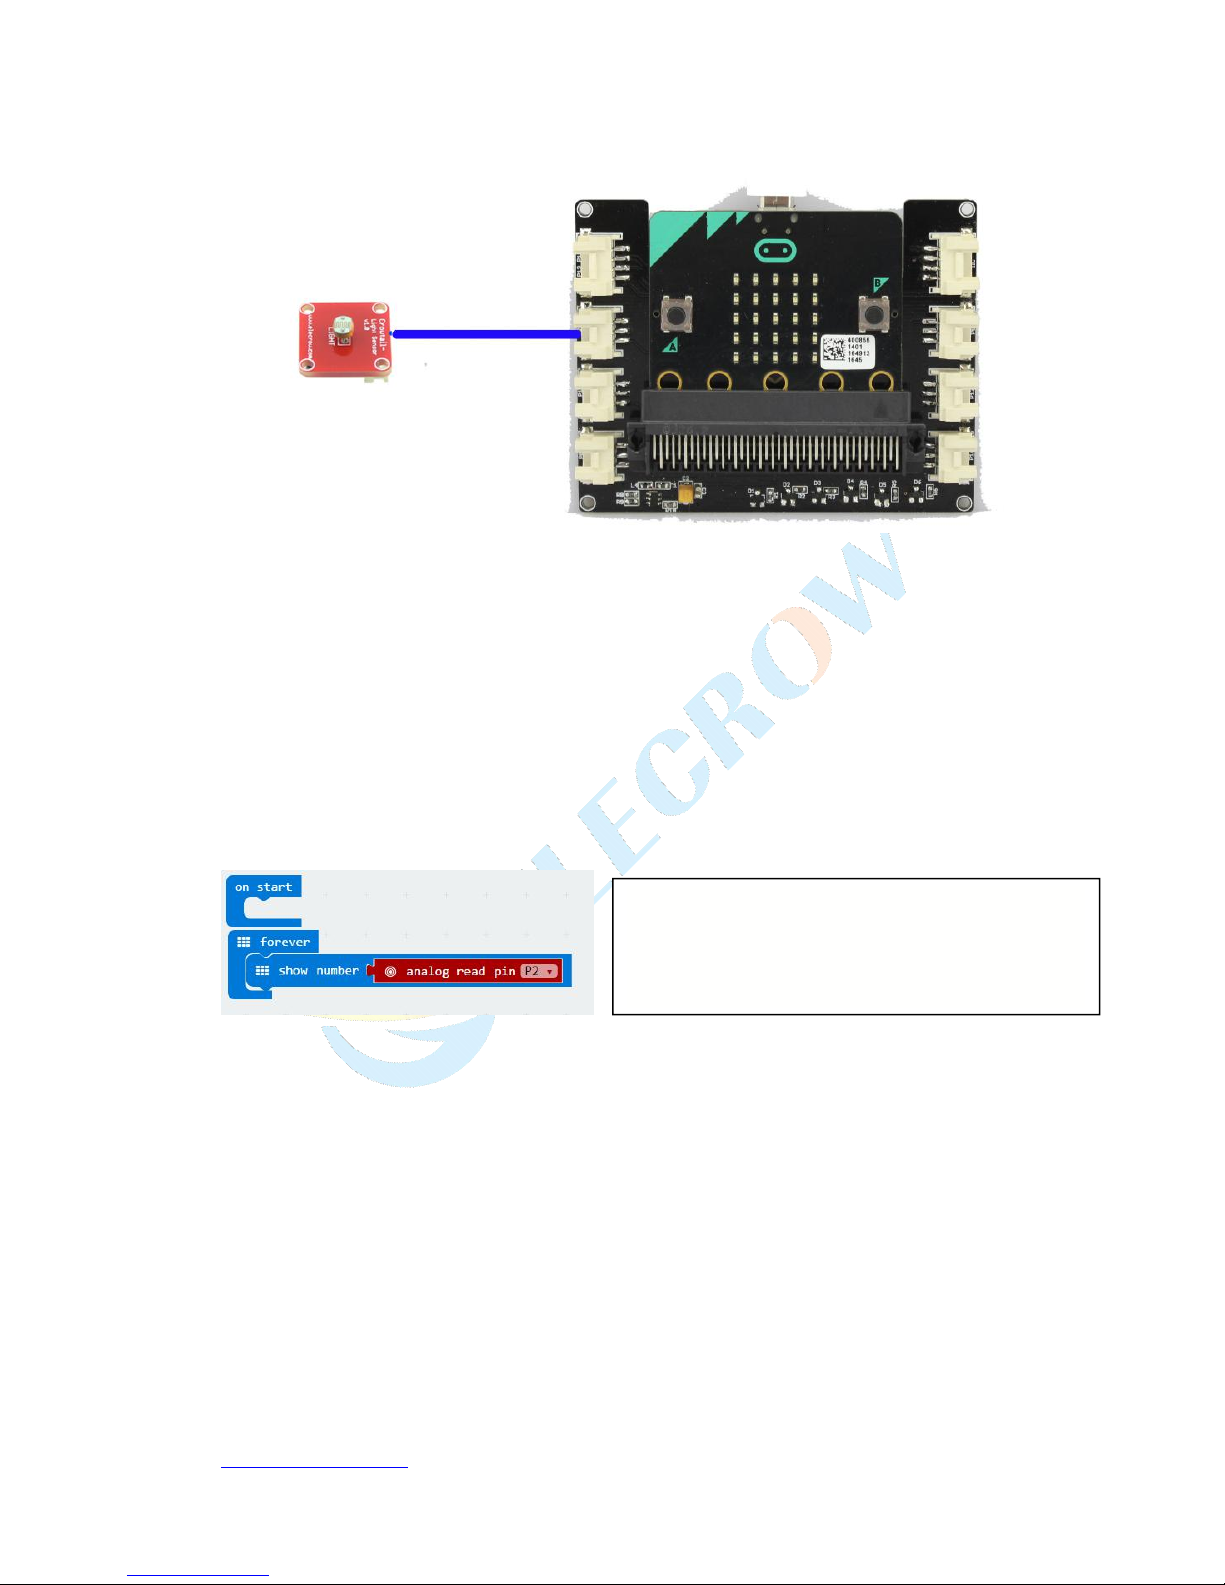
Lesson2, Brightness Measurement
Our eyes can sense the brightness of the light, but it not a accurate value, just a sense, now
let us begin to measure the brightness. Please connect Crowtail- Light sensor to P2 interface,
upload the bellow code to micro:bit. You will see the brightness value on the LED dot matrix.
input.onButtonPressed(Button.A, () => {
pins.digitalWritePin(DigitalPin.P2, 1)
basic.pause(500)
pins.digitalWritePin(DigitalPin.P2, 0)
basic.pause(500)
})
Elecrow on-line store, make your making easier.
https://www.elecrow.com/
Material:
Micro:bit x1
Crowtail- Base Shield for Micro:bit x1
Crowtail- Light Sensor x1
Sofware:
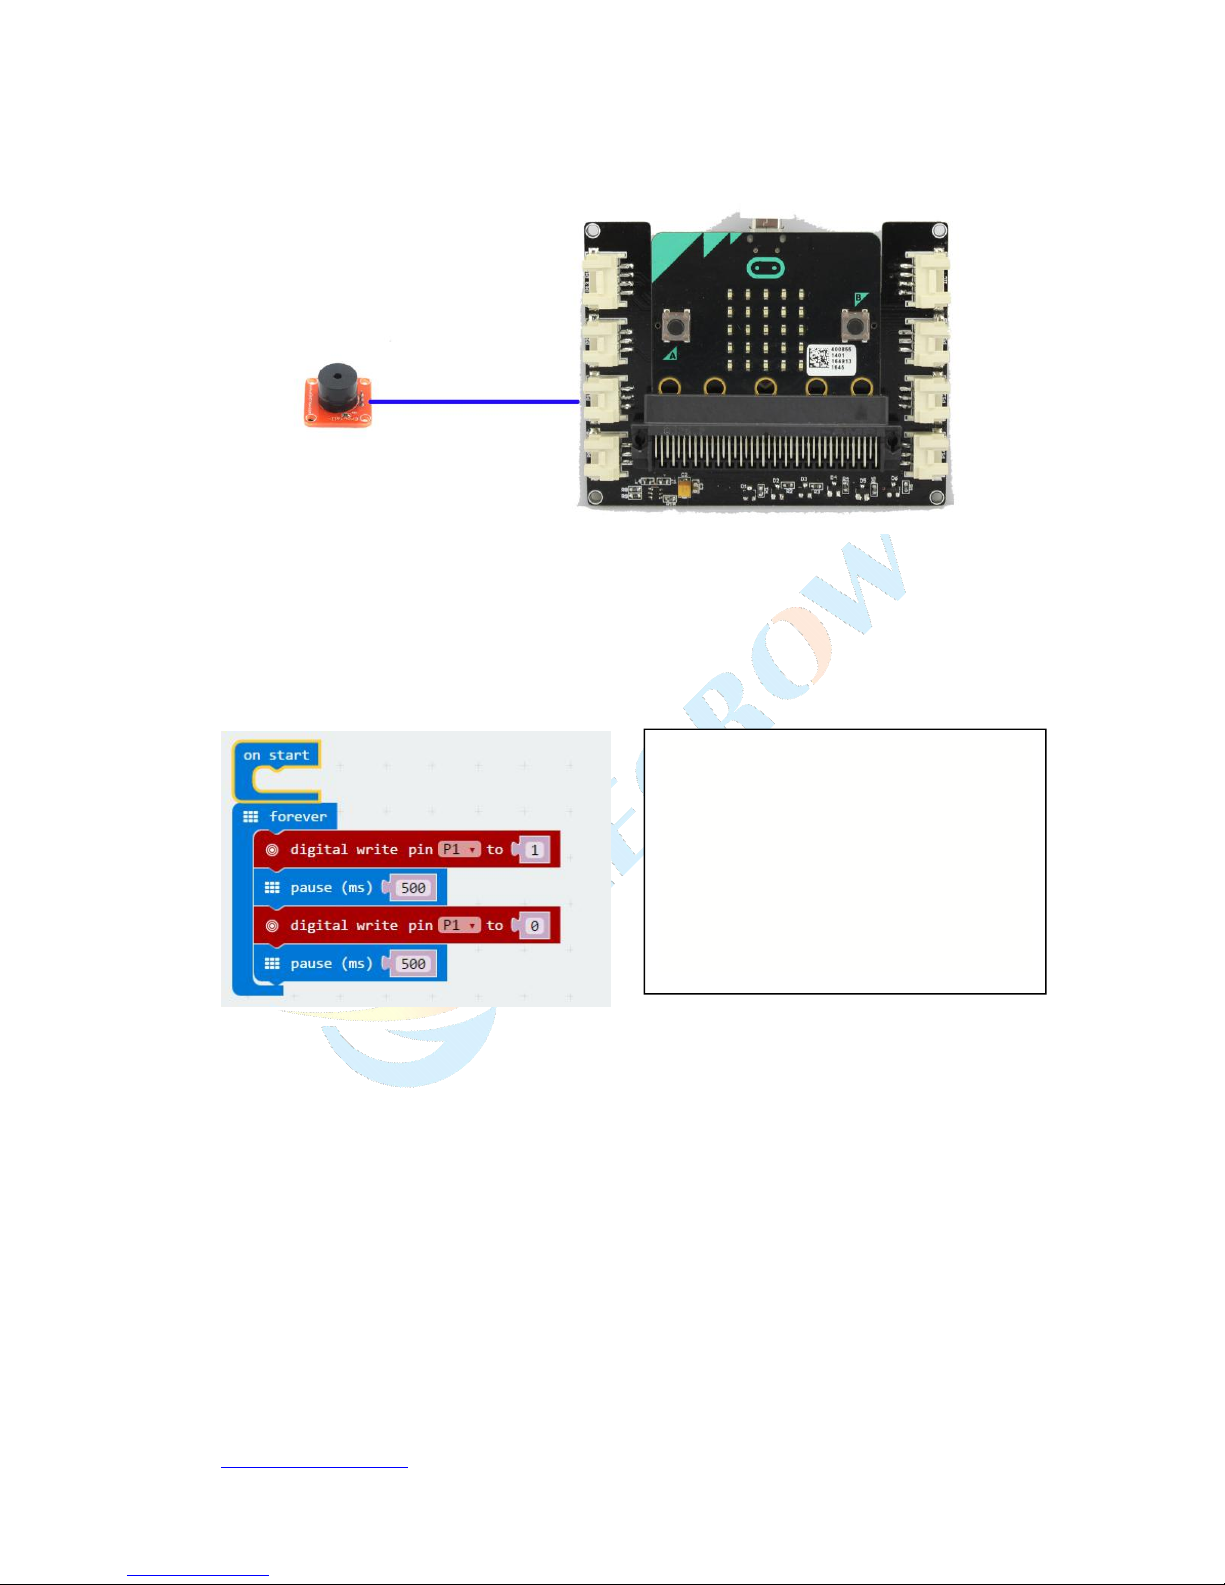
Lesson3, Make a Beeping Noise
This Lesson teach you how to use a buzzer with Micro:bit, Connect the Crowtail- Buzzer to P1
interface, after you upload the code into the micro:bit, you will hear a beeping noise, and you can
adjust the delay time to control the beeping frequency.
basic.forever(() => {
basic.showNumber(pins.analogReadPin(AnalogPin.P2)
)
Elecrow on-line store, make your making easier.
https://www.elecrow.com/
Material:
Micro:bit x1
Crowtail- Base Shield for Micro:bit x1
Crowtail- Buzzer x1
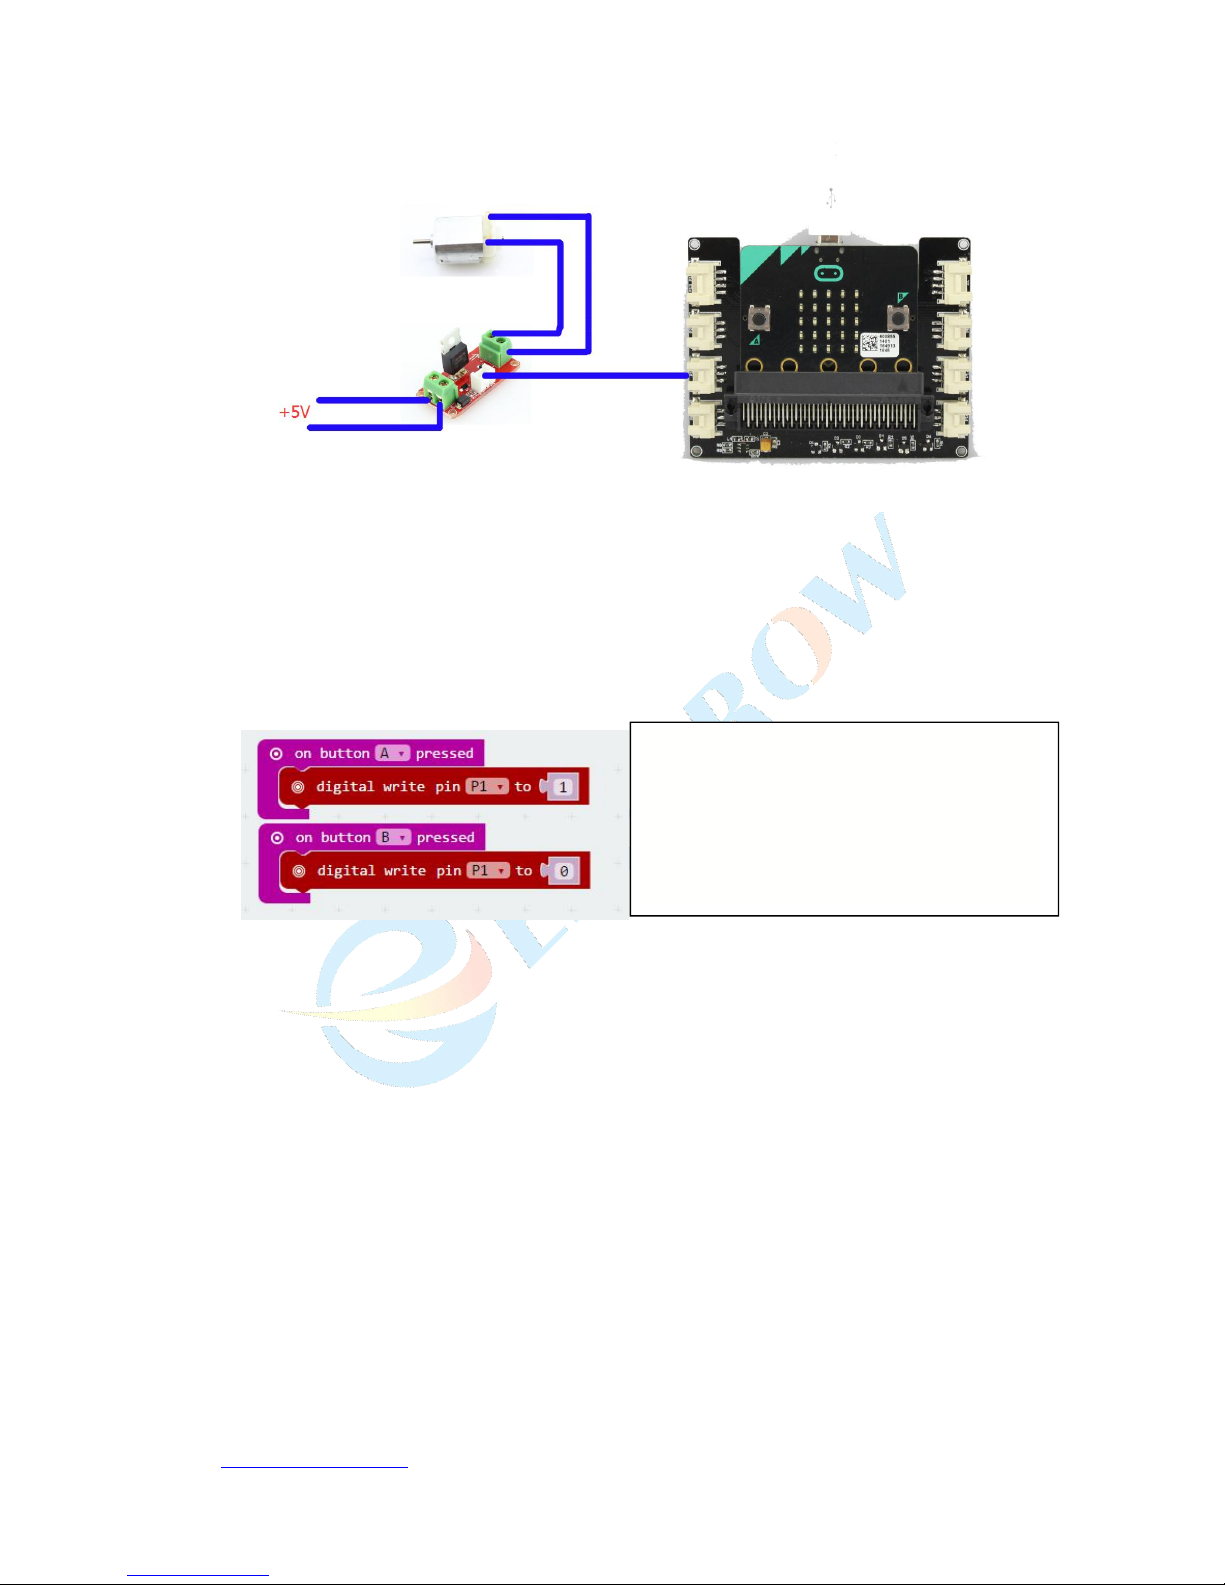
Lesson4. Motor Control
DC motor is a very common component in DIY, this lesson will teach you control the motor
rotation. As we know, the motor need a large current to drive itself, so we need a mosfet to
control the motor run and stop. Connect the Crowtail- MOSFET to P1 interface and connect the
DC motor to the output terminal of the MOSFET. Upload the code, when press button A, the
motor start run, when press button B, the motor stop run.
basic.forever(() => {
pins.digitalWritePin(DigitalPin.P1,
1)
basic.pause(500)
pins.digitalWritePin(DigitalPin.P1,
0)
basic.pause(500)
})
Elecrow on-line store, make your making easier.
https://www.elecrow.com/
Material:
Micro:bit x1
Crowtail- Base Shield for Micro:bit x1
Crowtail- MOSFET x1
DC Motor x1
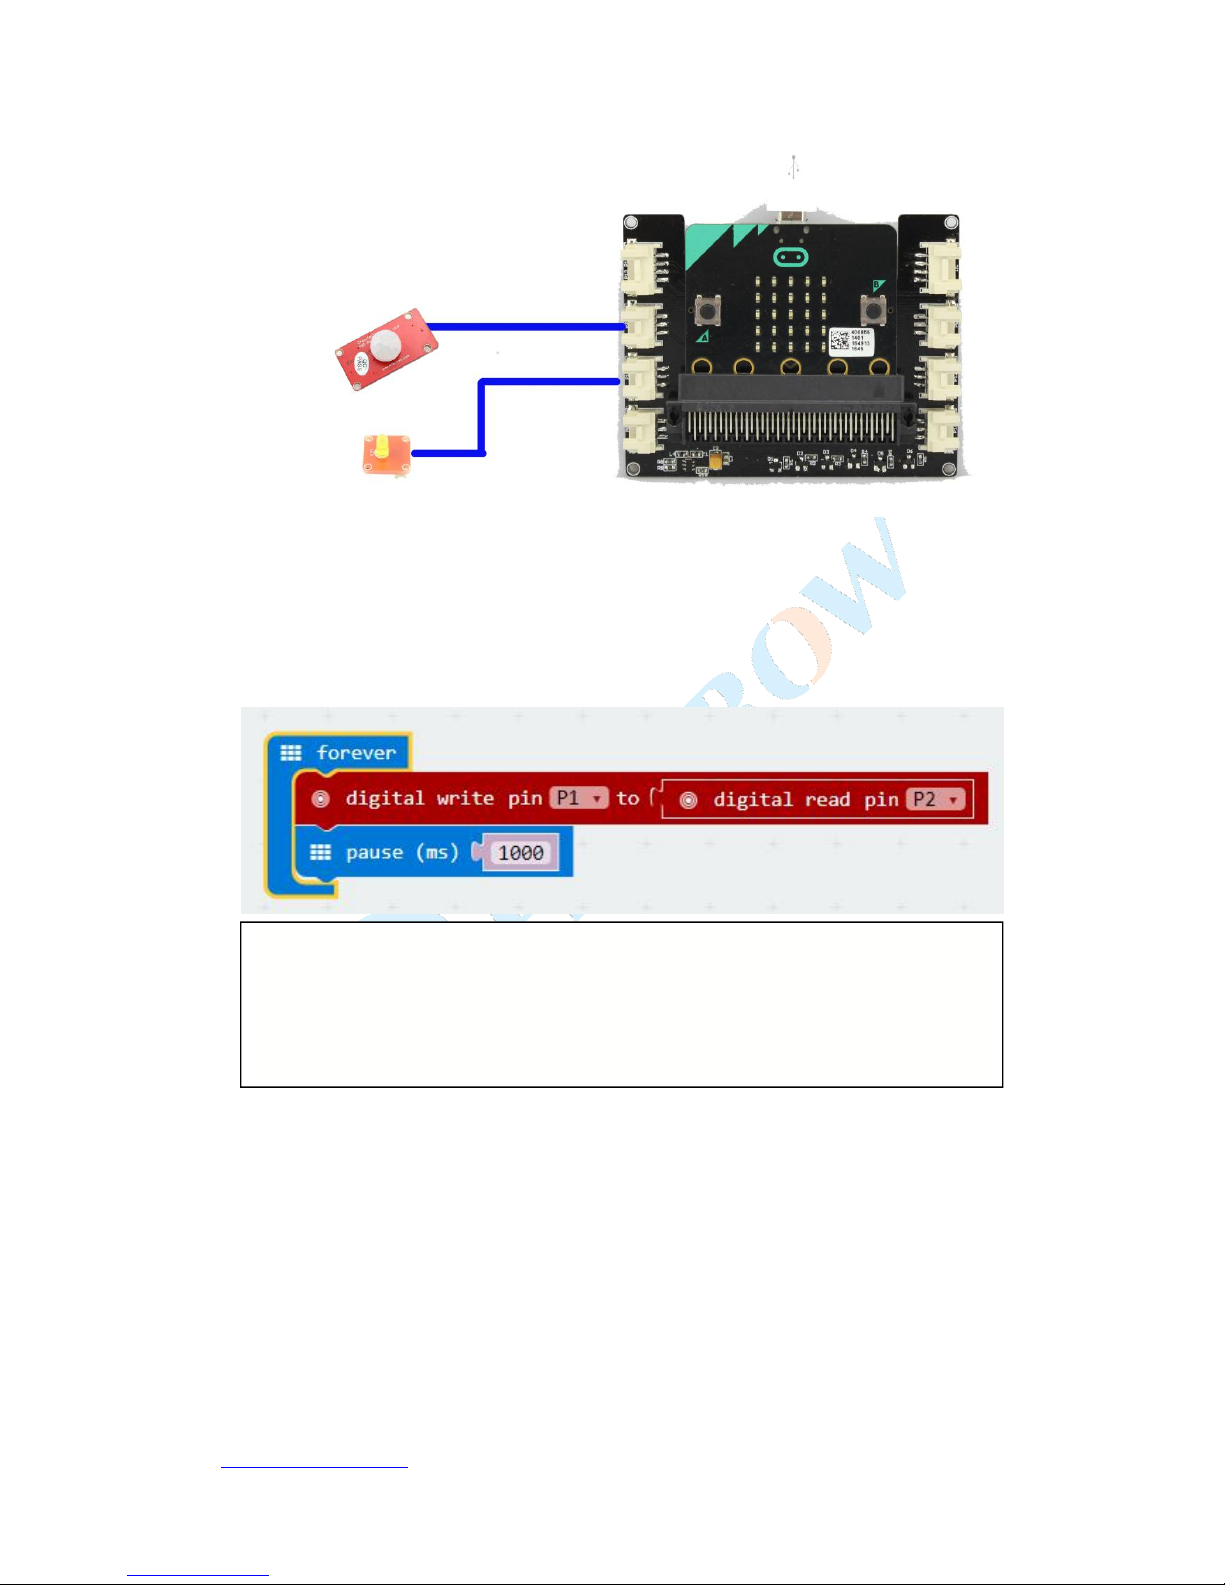
Lesson5.Motion Detection
This lesson teach you use the PIR Motion sensor to detect movement, then with other parts
can do many interest application. Connect the Crowtail- PIR sensor to P2 interface, and connect
one LED to P1 interface, then upload the code, when a person or other animals move close to
this motion sensor the LED will light on 1 second.
input.onButtonPressed(Button.A, () => {
pins.digitalWritePin(DigitalPin.P1, 1)
})
input.onButtonPressed(Button.B, () => {
pins.digitalWritePin(DigitalPin.P1, 0)
})
Elecrow on-line store, make your making easier.
https://www.elecrow.com/
Material:
Micro:bit x1
Crowtail- Base Shield for Micro:bit x1
Crowtail- PIR Motion Senor x1
Crowtail- LED x1
Lesson6. Relay ON/OFF
The relay has used in may place in our daily life, so we must to know how to use it. Connect the
Crowtail- Relay to P1 interface,then upload the code into Micro:bit, you will hear a mechanical
on/off sound from the relay every 2 seconds, if you connect some other high voltage device to
the output terminal of the relay, then we can control this device on/off.
basic.forever(() => {
pins.digitalWritePin(DigitalPin.P1, pins.digitalReadPin(DigitalPin.P2))
basic.pause(1000)
})
 Loading...