

Elecrow CrowPi All-in-One Kit Quick Start Manual

Please read this instruction carefully before using this Kit and keep it for
future reference.
by Elecrow
CrowPi All-in-One Kit
Quick Start Guide
* Product pictures are for reference only

Table of Contents
The CrowPi
About the CrowPi development board --------------------------------------------- 1-2
Enclosure and materials ----------------------------------------------------------------- 3
Hardware, sensors & GPIO usage -------------------------------------------------- 4-7
Safety notes and warnings ------------------------------------------------------------ 7-8
Initial Installation
CrowPi Pre-installation Requirements --------------------------------------------- 8-9
Downloading CrowPi image --------------------------------------------------------- 9-10
Burning the image into an Micro SD Card -------------------------------------- 10-11
Attaching the Raspberry Pi to the CrowPi board ----------------------------- 11-13
First time booting into the Operating System----------------------------------- 14-16
Summary
Summary and downloadable Lessons --------------------------------------------- 17

After months of dedicated working with our top R&D engineers and teams at Elecrow,
We are proudly presenting the “CrowPi” , a one of a kind Raspberry Pi Development
board, Which we truly believe you'll like just as we do.
The CrowPi Board was specially crafted for those who are passionate about STEM
education, Making, Computer Science, Robotics, teaching others or just learning out of
curiosity!
We've been working hard to make the CrowPi board as easy as possible so anyone
(literally) will be able to learn how to code and make incredible projects using the
Raspberry Pi Single Board Computer.
The CrowPi
About the CrowPi development board
Thank you for supporting and purchasing our Elecrow CrowPi Board!
1
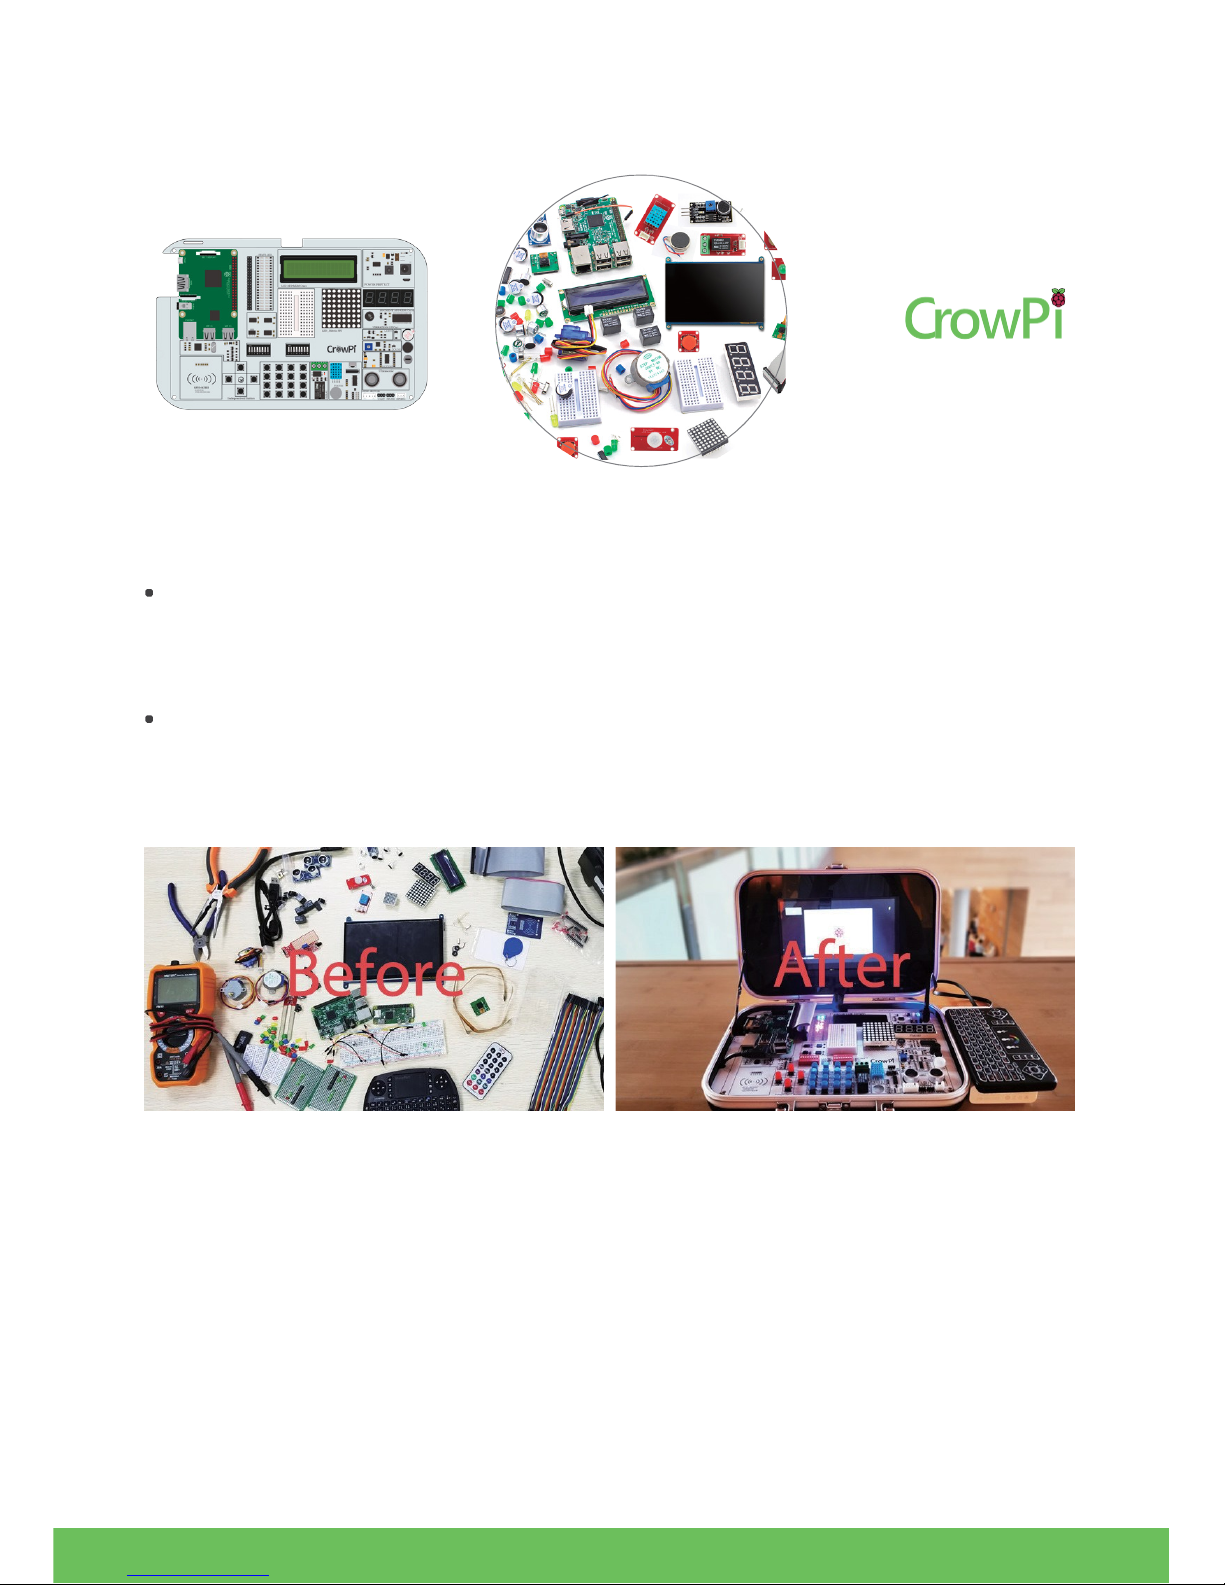
All-in-One Kit, CrowPi embeds regular materials for doing RPI projects
+
CrowPi Development Board
Sensors
LCD display
Switches
Button
Buzzer
Relay
Servo
Bread boards
Steper motor
IR receiver I2C
LCD
NFC moudle
LED matrix
4 Bite segment
Button arry
Jumpers
...
With our board we are solving issues that have been in the wild for quite a while .. issues
like:
Being in an unproductive, messy environment - full of sensors, jumpers, bread boards and
cables. Our CrowPi solves it by offering an all-in-one board with on-board necessary
sensors for learning and rapid development.
Being unable to start using Raspberry Pi or Python Coding due to the complex, old
fashionable learning methods. We offer 21 lessons to get started with hands-on, detailed
examples that anyone can make.
The Raspberry CrowPi Kit can be used as laptop, gaming console, IOT project, studying,
making, prototyping and more! The imagination is the limit.
You can fit Raspberry Pi 3 into the CrowPi and extend support of sensors and modules
using the on-board breadboard.
We'd like to thank you again for supporting us and purchasing your first CrowPi Develop-
ment board. We can't wait to see what you'll make with it!
=
2
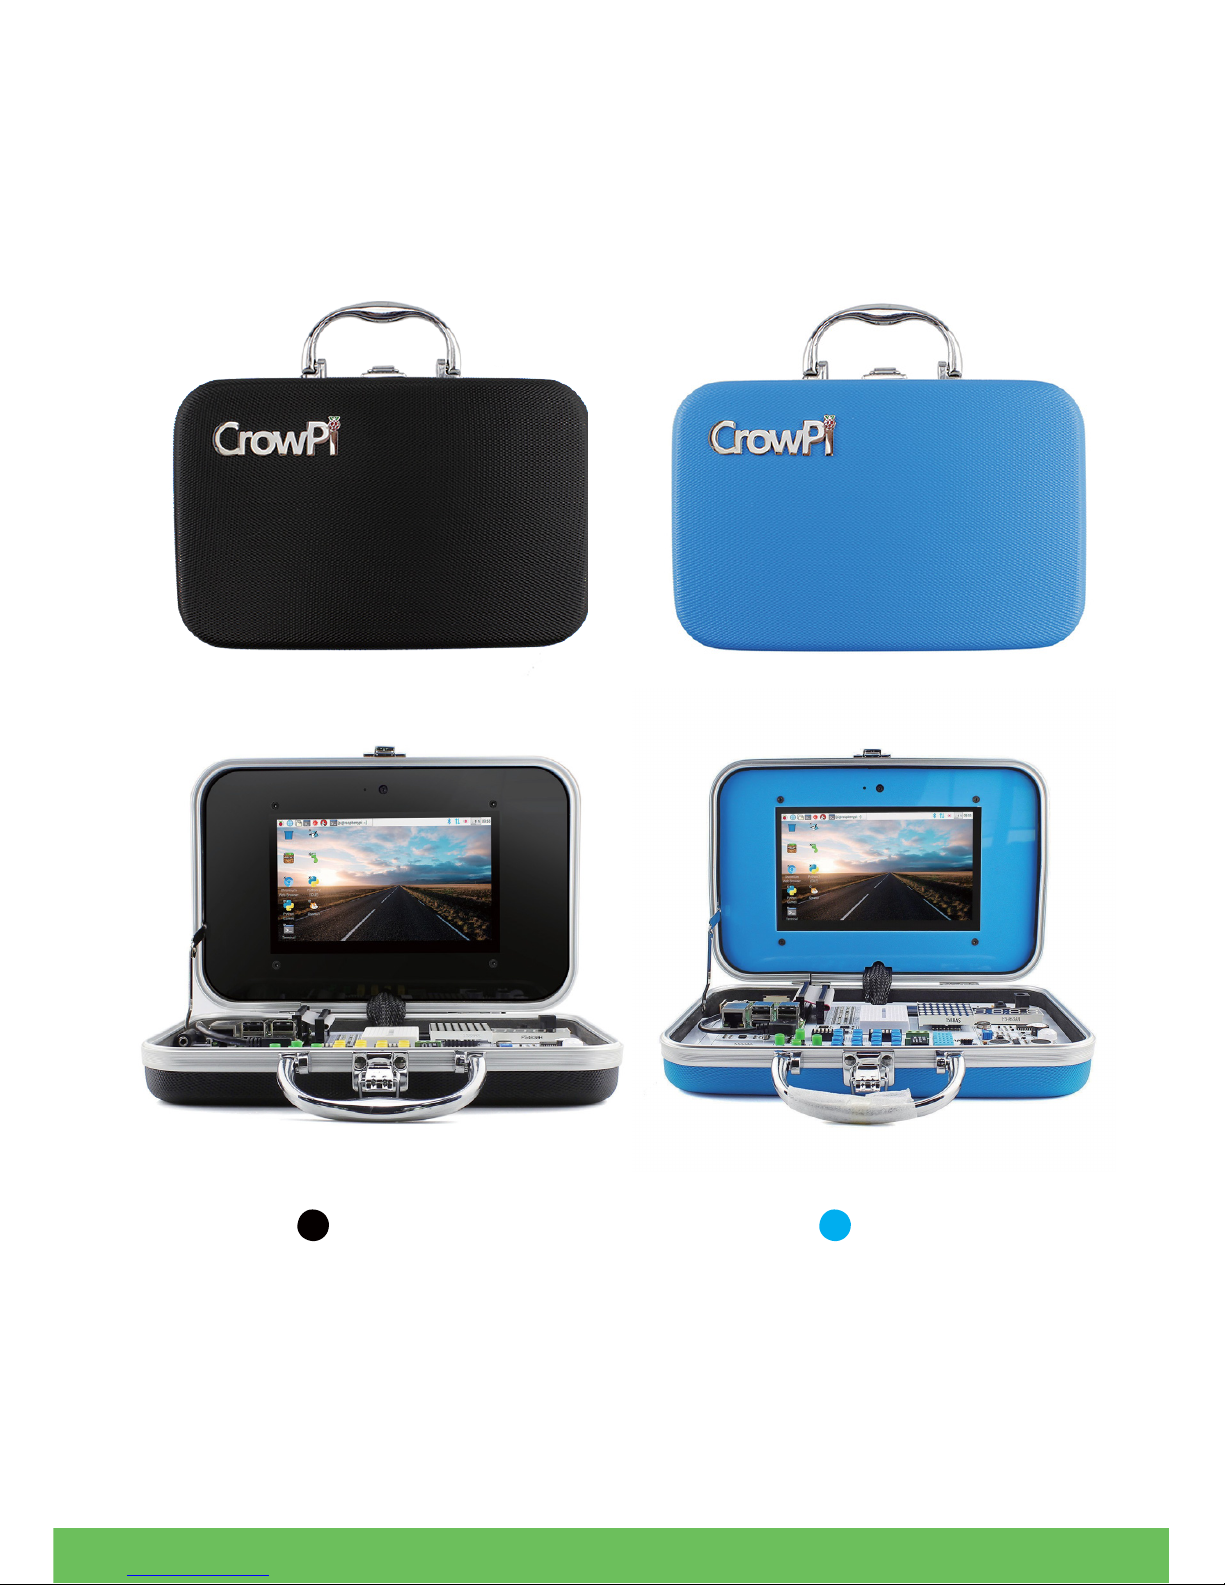
Enclosure & Materials
Beautifully Designed for Everyday Life
Black Blue
CrowPi case is made of ABS plastic. The case edge is made of Aluminium alloy. The
monitor frame is made of arcylic.The fastener and hinge is made of iron. The handle is
made of plastic with metal coating. The development board is made of hasl lead free
FR-4. All the materials we use are non-toxic.
3
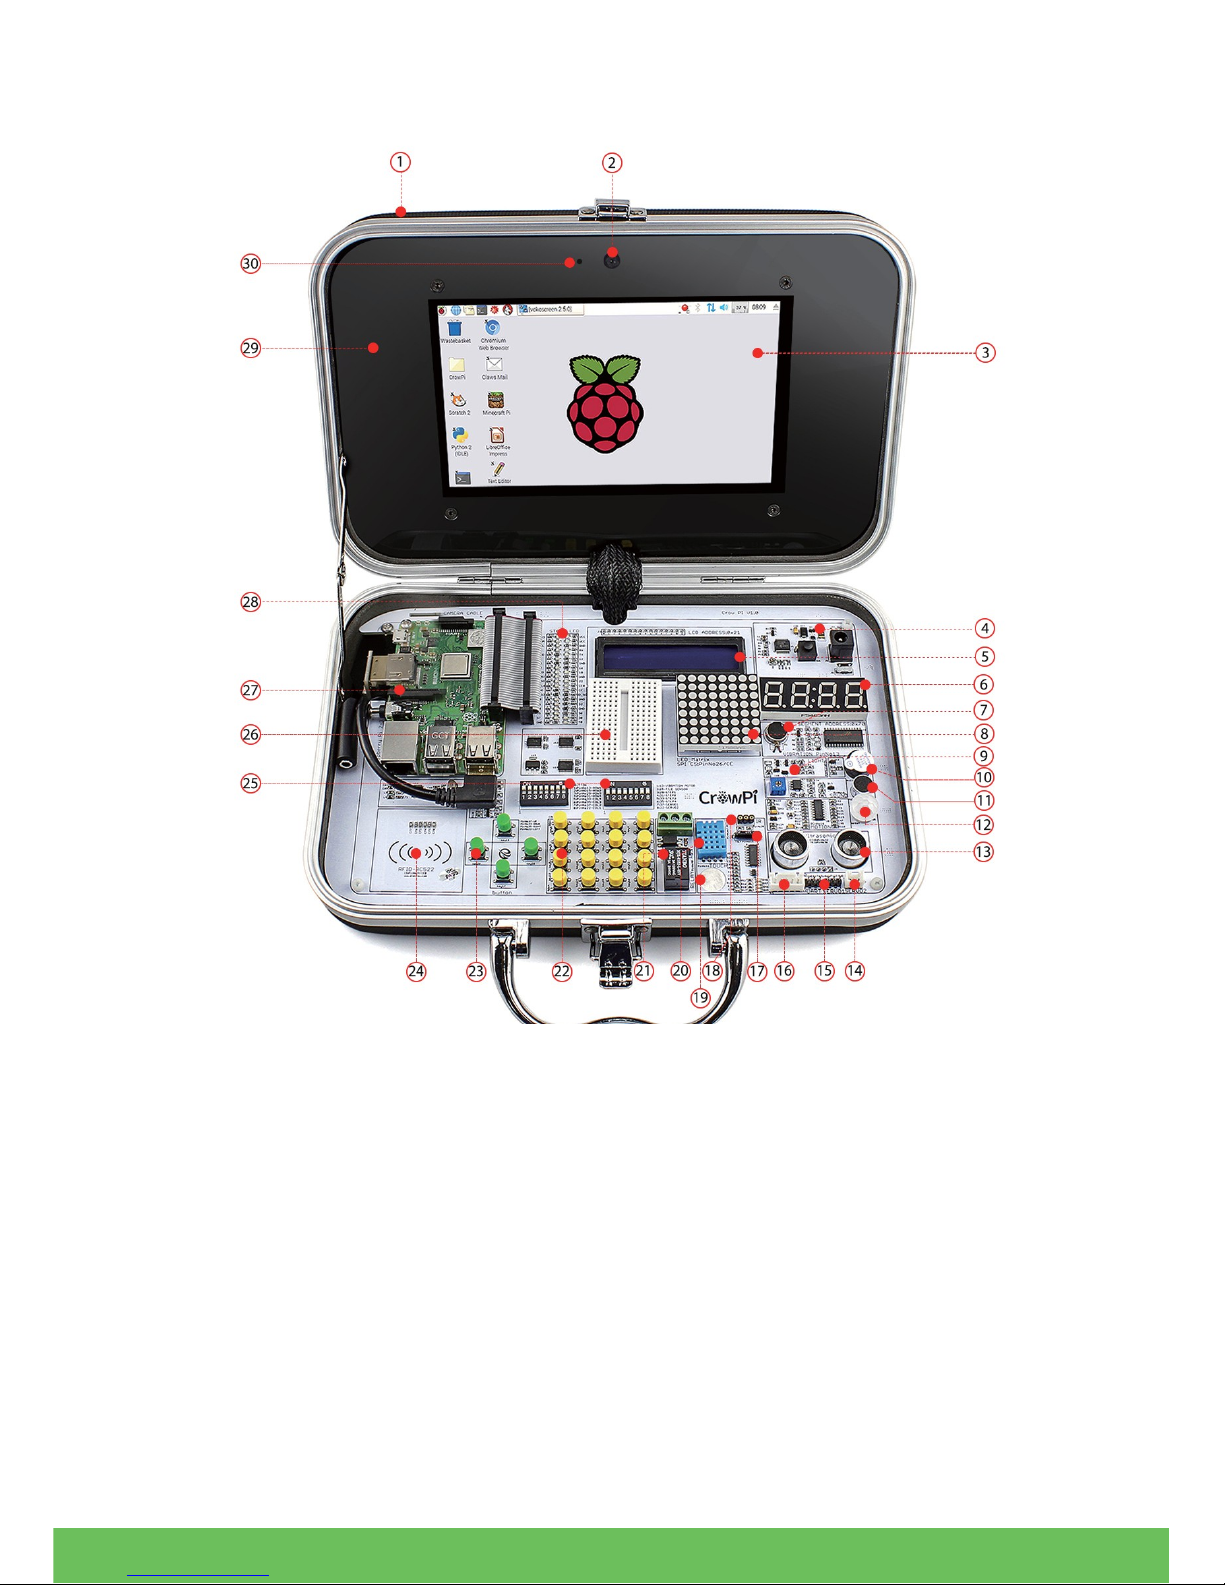
Hardware, Sensors & GPIO Usage
Module List:
1. ABS Plastic Case
2. Camera
11. Sound Sensor
12. PIR Motion Sensor(LH1778)
21. Relay
22. Matrix Buttons
3. 7inch HDMI Touch Screen
13. Ultrasonic Sensor
23. Independent Buttons
4. Power Circuit
14. Servo Inteface
24. RFID Module(MFRC522)
5. LCD Module(MCP23008)
15. UART
25. Switches
6. Segment LED (HT16K33)
16. Step Motor Interface
26. Bread board
7. Vibration Motor
17. Tilt Sensor(SW-200D)
27. Raspberry Pi
8. Matrix LED(MAX7219)
18. IR Sensor
28. GPIO LED Indicator
9. Light sensor(BH1750)
19. Touch Sensor(TTP223)
29. Acrylic board
10. Buzzer
20. Temperature and Humidity
30. Microphone
Sensor (DH11)
Note: The CHIP name (module) of each sensor is inside the parenthesis
4
 Loading...