

iStickUserManual
Revision1.6

Tableofcontents
1.Introduction
2.BoxContents
3.
System
Requirements
4.PhysicalDescriptions
5.iStickAppInstallation
6.
Using
iStick
App
6.1 iStickAppDescription
6.2 Copy/MoveFiles
6.3 FormattingiStick
6.4 MusicPlayback
6.5 VideoPlayback
6.6 PhotoLibrary
6.7 ContactsBackup
6.8 About

1.
Introduction
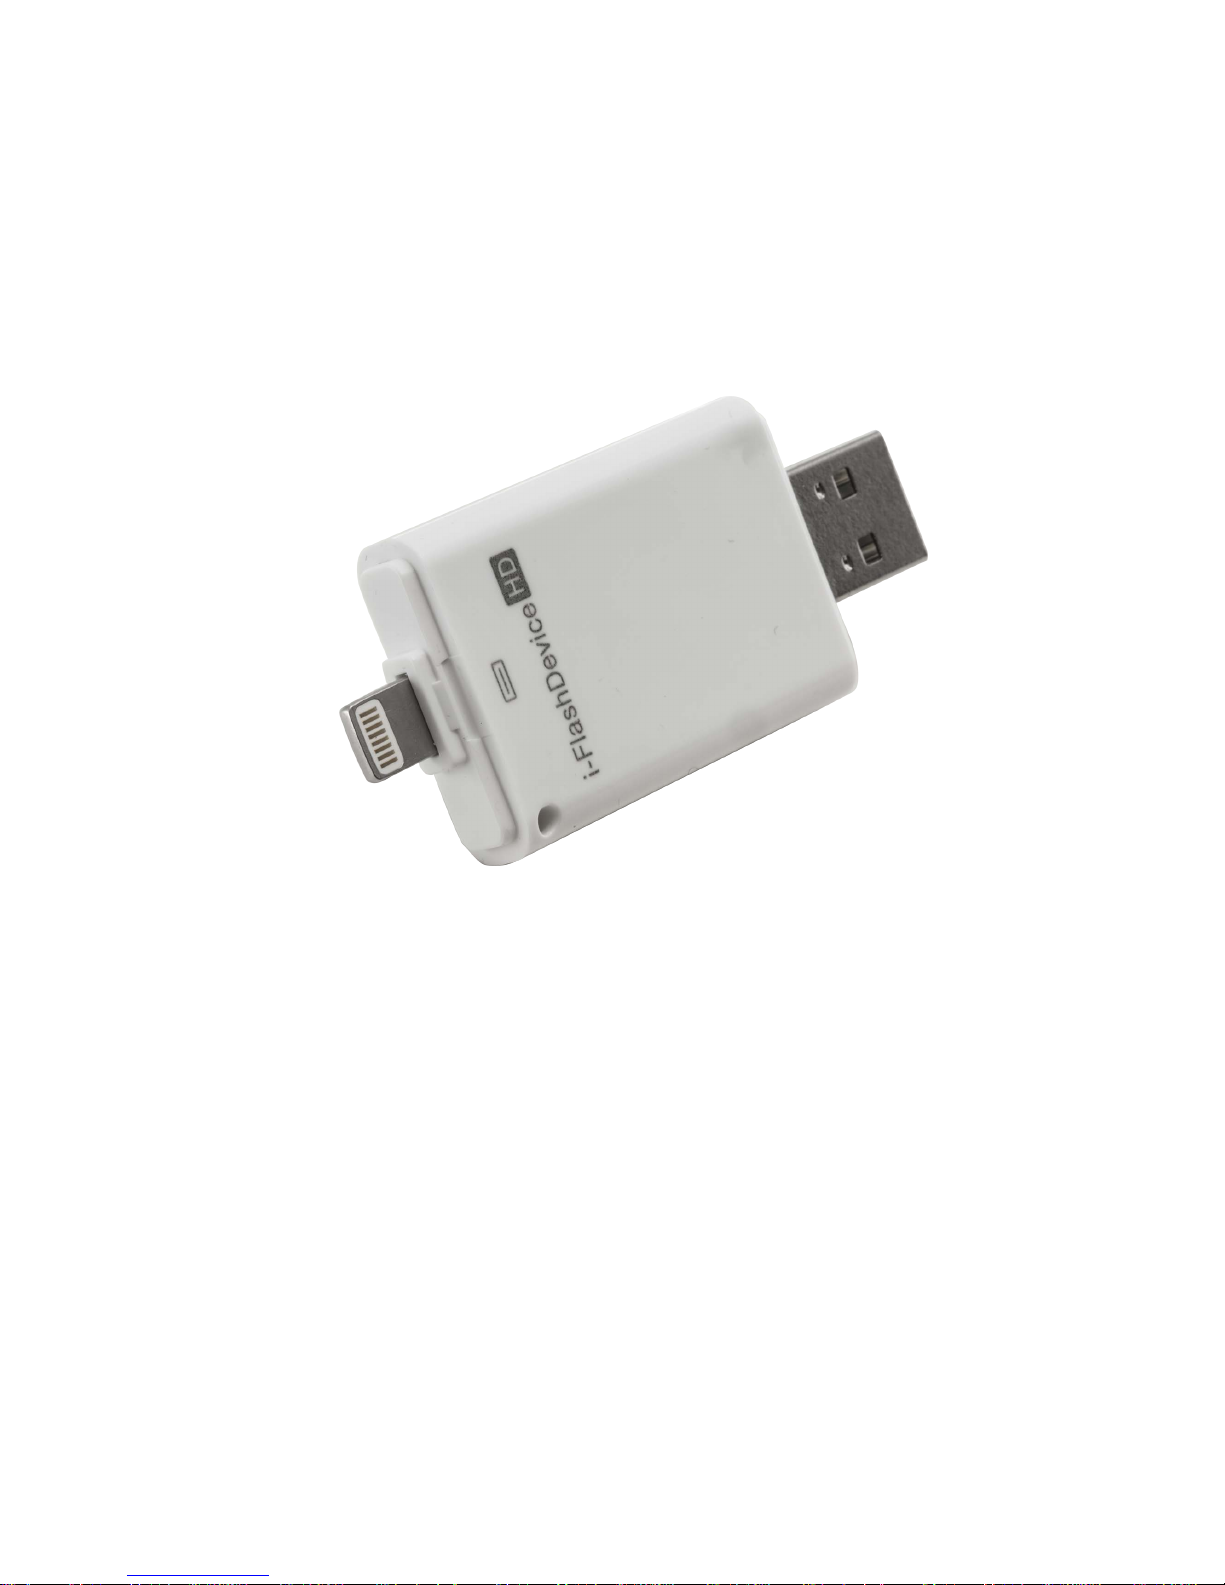
iStickisaUSBflashdrivewithanintegratedAppleLightningconnectorthatnotonlyworkswith
Mac/PCcomputersbutalsowithiOSdevices(iPhone,iPad,iPodtouch)aswell.iStickallowsusersto:
• EasilytransferfilesbetweenMac/PCcomputersandiOSdevices(iPhone,iPad,iPodtouch)
• Performfilemanagement(Copy,Paste,Deleteetc.)onMac/PC,iOSdevicesandiStick
•
Browseandopendocuments,photos,musicandvideofilesstoredoniStickandiOSdevicewithaid
ofafreecompanioniOSapp
• BackupandrestoreiOScontactlist
•
UseiStickasanordinaryUSBflashdriveonMacandPC
2.
Box
Contents
• iStick
• QuickReferenceGuide
3.
System
Requirements
• iOSdevice:iPhone5/5s/6/6Plus,iPadmini,iPadminiwithRetinadisplay,iPad(4thgeneration),
iPadAir,iPodtouch(5thgeneration)andlatermodels
• iOS:iOS6.x/7.x/8.xandabove
• PC:WindowsXP/7/8andabove
• Linux2.6.xandabove
• MacOS10.xandabove
4.
Physical
Descriptions
5. iS
tick App Installation (as shown on an iPhone 5s running iOS8)
TherearefourwaystoinstalltheiStickAppasdescribedbelow.
Note:
AppinstallationrequiresanAppleIDandInternetconnectiontoperform.IfyoudonothaveanApple
ID,pleaserefertothefollowinglinkstoapplyforanAppleID:
English: http://support.apple.com/kb/HT5622
C
hinese: http://support.apple.com/kb/HT5622?viewlocale=zh_CN&locale=en_US
Me
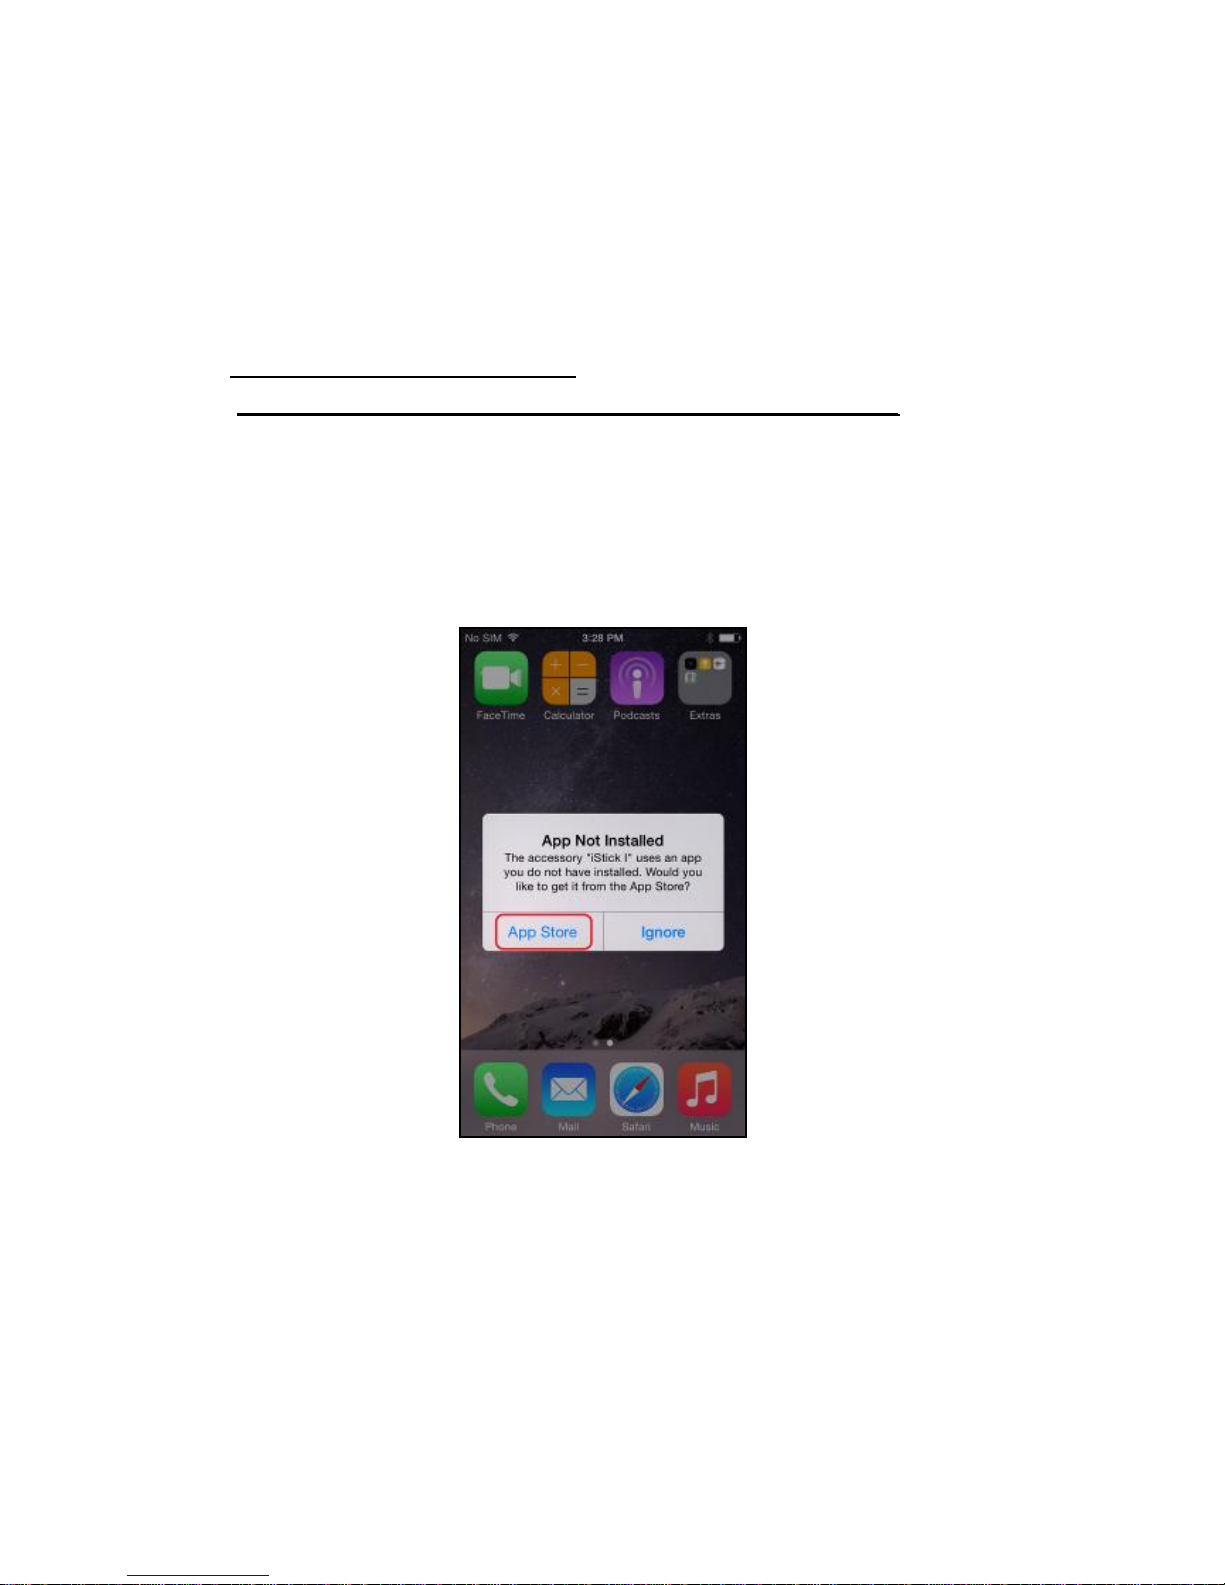
thod1: AutomaticInstallation
ConnecttheiSticktotheiOSdevice,a“AppNotInstalled” dialogboxwillpopup.
Selectthe “AppStore” optiontobebroughttotheAppStoretofindanddownloadtheiStickapp.
Note:
Besuretoselectthe “AppStore” option,ifyouselect “Ignore”,the“AppNotInstalled” dialogbox
wouldnotshowupagain.Ifthathappens,pleasefollow Method2toinstalltheapp.
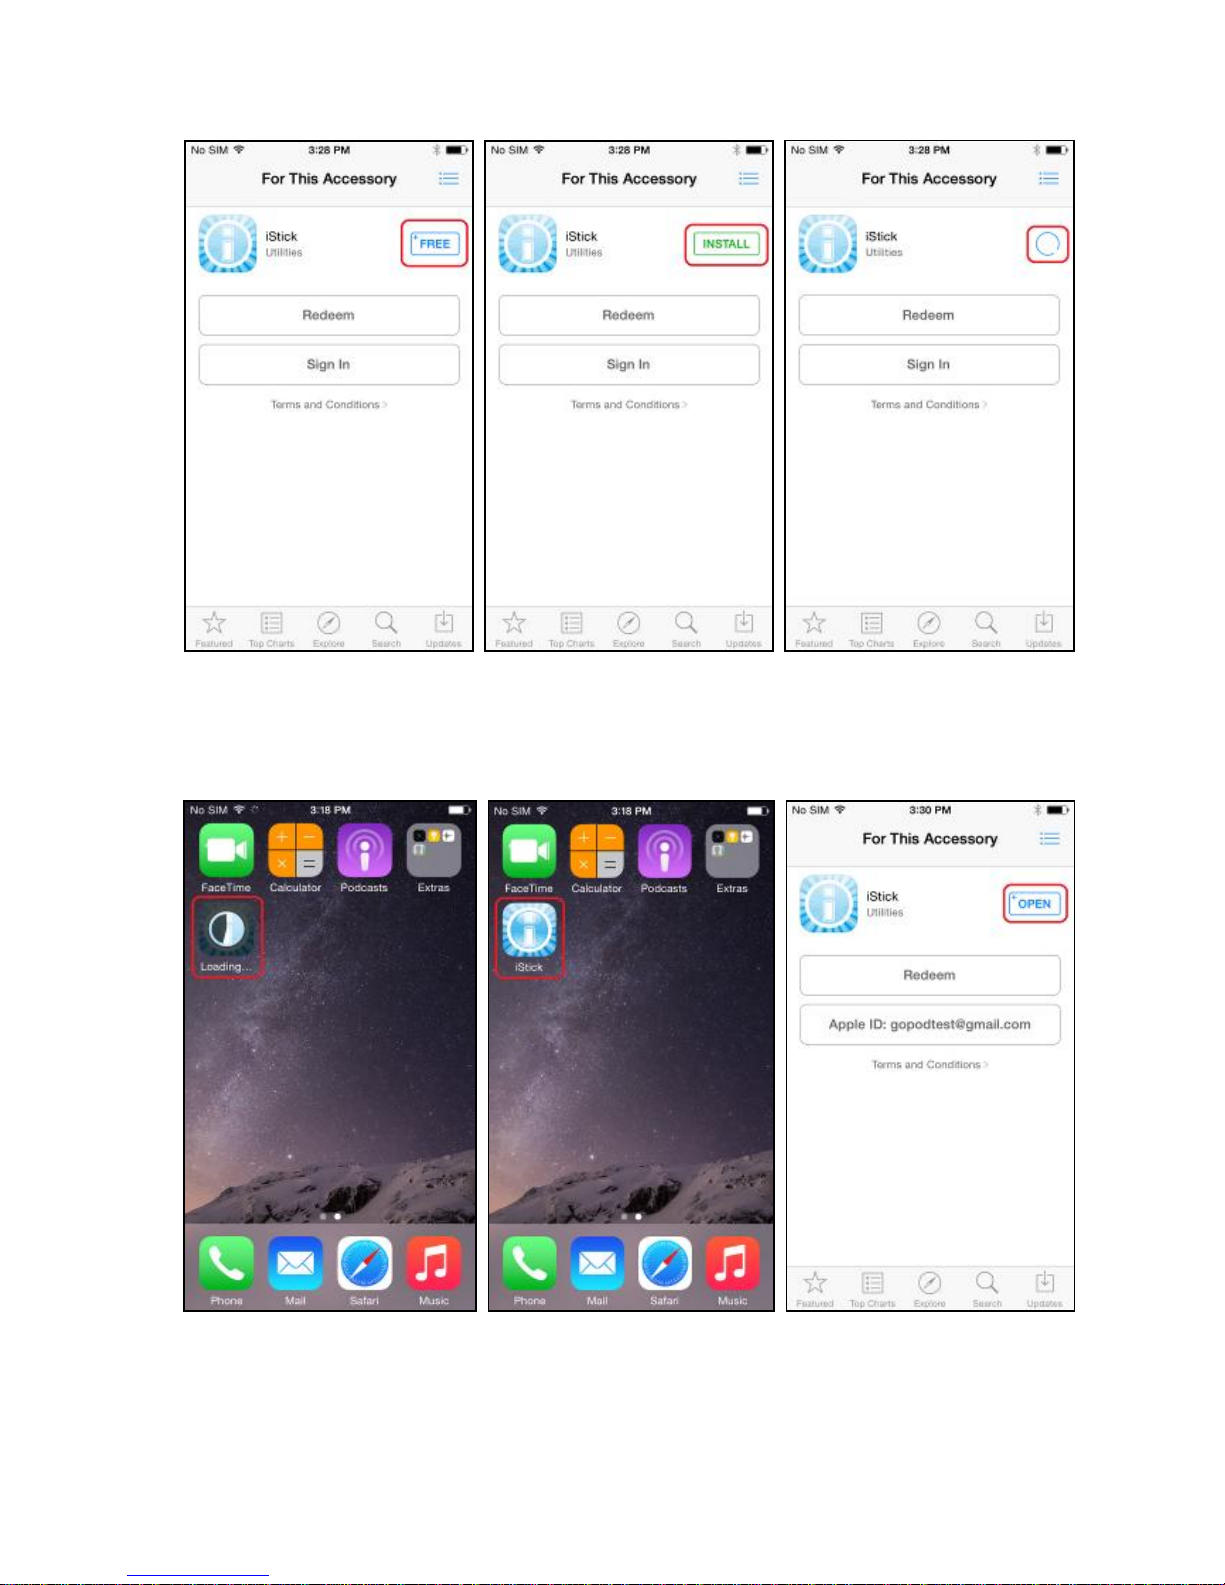
FindtheiStickapp,tapthe “FREE” buttonfollowedbythe “INSTALL” buttontoinstalltheapp.
EnteryourAppleIDandpasswordtodownloadtheapp.Afterinstallationiscompleted,tapthe"OPEN"
buttonortapontheiStickappicononthehomescreentostarttheapp.
6.
Using
iStick
App
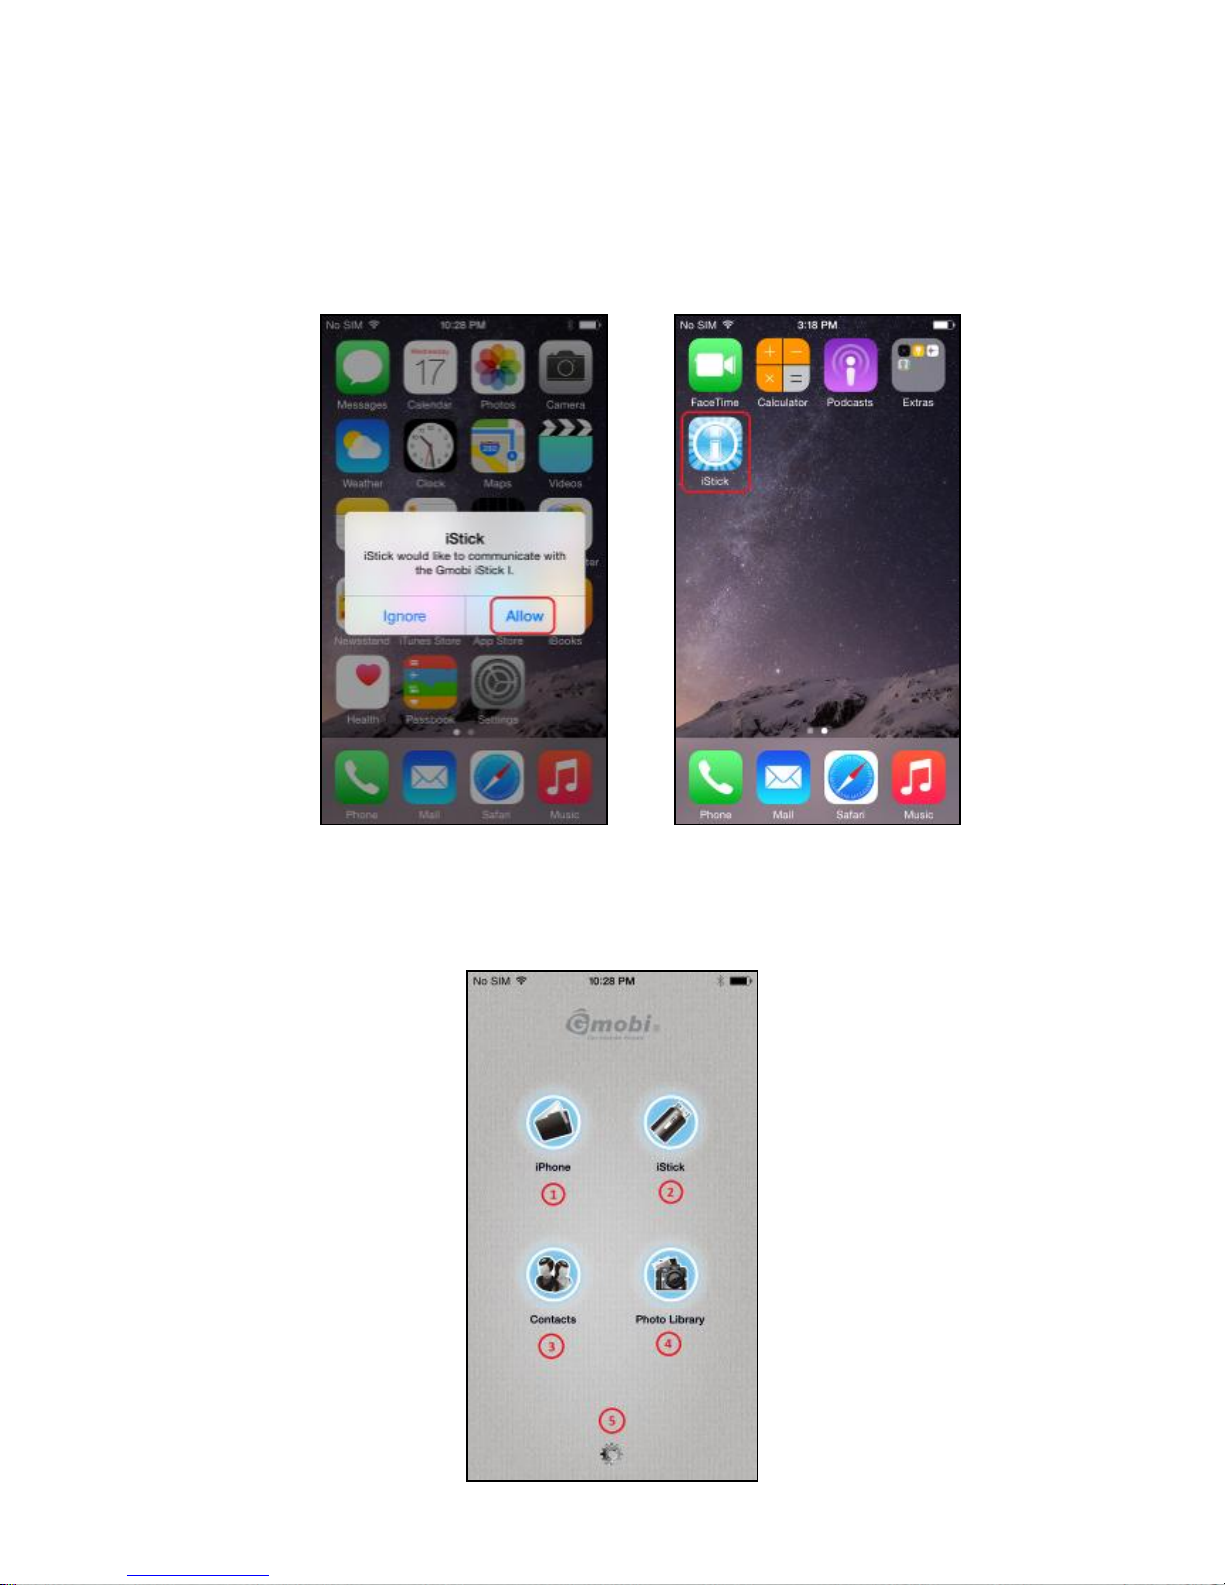
WiththeiStickappinstalled,connectingtheiStickhardwaretotheiOSdevicewillautomaticallytrigger
adialogboxrequestingpermissionfortheiStickapptocommunicatewiththeiStick.Select “Allow” or
justtaptheiStickappicontostarttheapp.
6.1
iStick
App
Description

No. Name Description
1
iPhone(ifiStickis
connectedtoan
iPhone)
iPad(ifiStickis
connectedtoaniPad)
Browselocalfilesstoredwithinthe
iStickappontheiPhone/iPad
2 iStick BrowsefilesstoredoniStick
3 Contacts ContactsBackup&Restore
4 PhotoLibrary SelectphotostobackuptoiStick
5 About Supportinformation
6.2
Copy/Move
files
Openanyfolder(e.g.Photos)andselect “Edit”
Selectthefilesandchoosethe “Copy” or “Move” iconfromthebottomtoolbarandselectthe
destination(e.g.iPhone, iStick or CameraRoll)

Selectthedestinationfolder(e.g.Copy)andselect “Copytohere”
Note:
Youcanfollowtheabovestepstoperform Delete, Moveand Email functionbychoosingthe
appropriateiconatthebottomtoolbar.
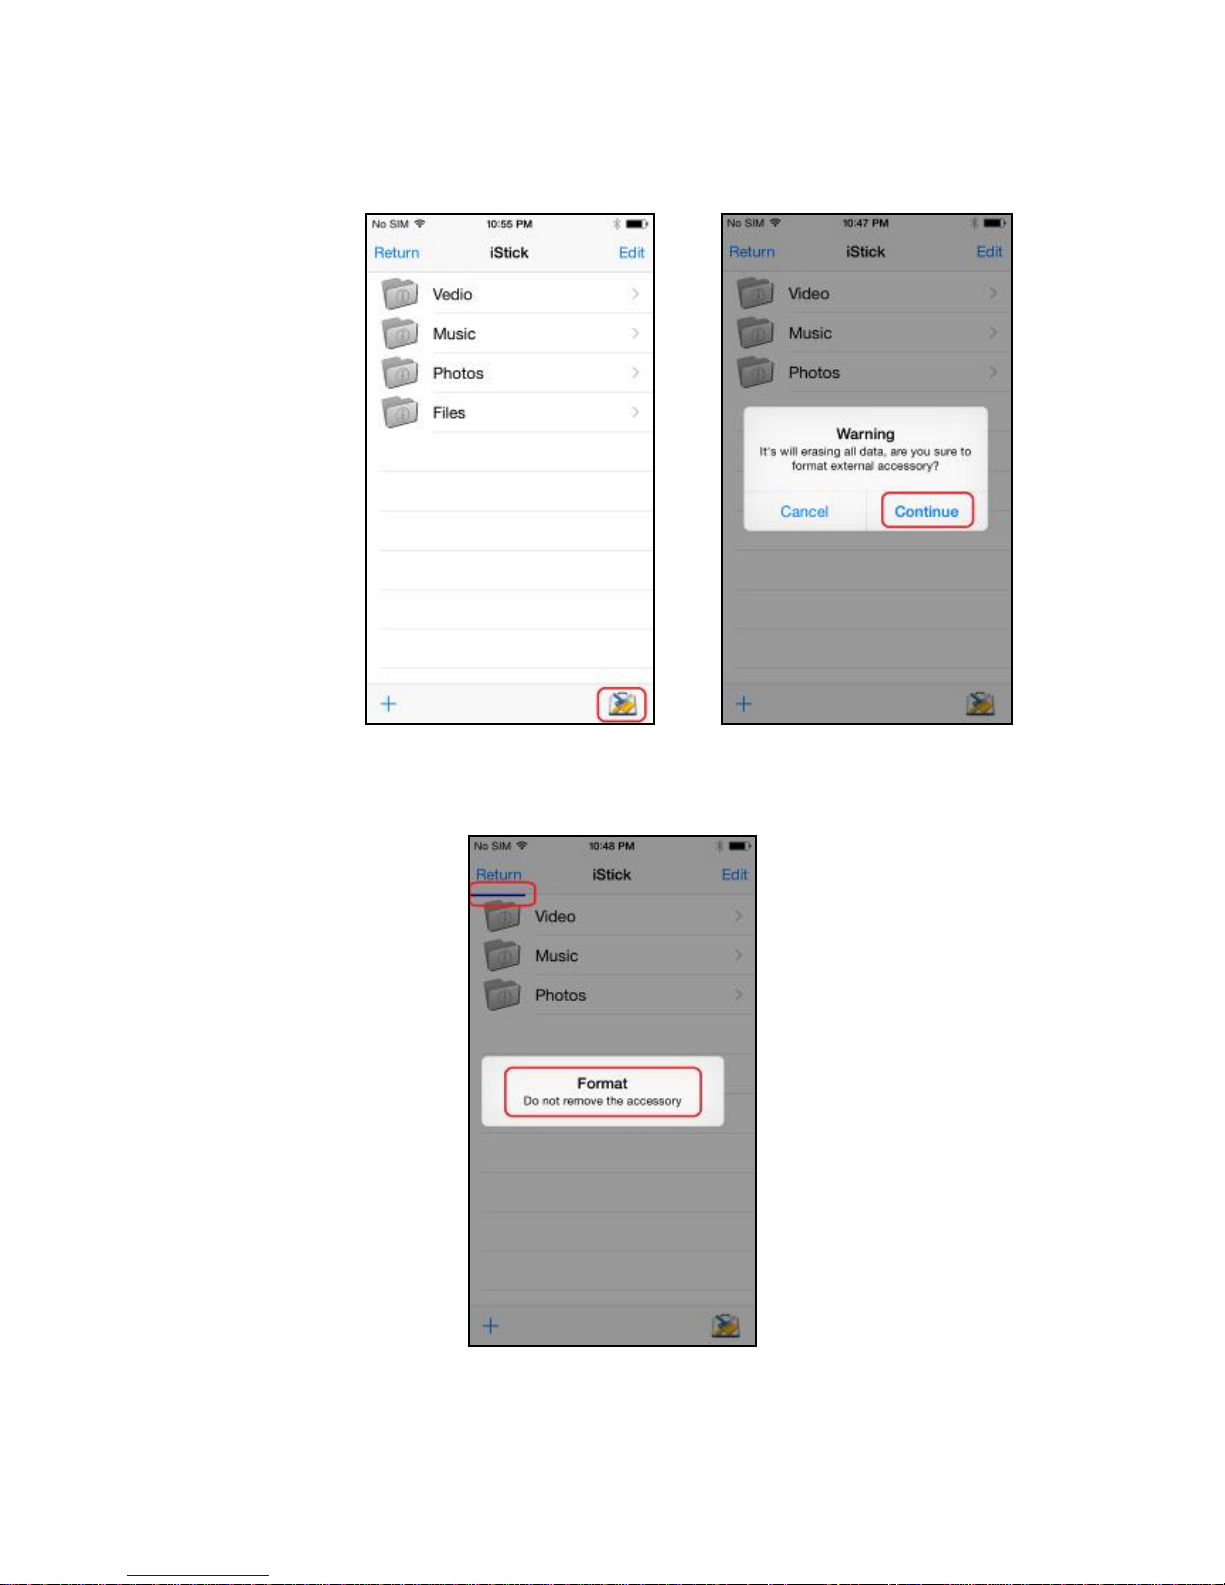
6.3FormattingiStick
ToformatanderaseallcontentsontheiStick,selecttheformaticonatthelowerrightcorneras
shownandselect “Continue” inthepop-up “Warning” dialogbox.
Theformattingprogressisshownatthetopofthescreen.
Note:
DonotremovetheiStickwhileitisformatting.Otherwiseitmaybecomeunrecognizableto
connecteddevicesandyouwillhavetoreformattheiStickagainwithacomputer.

6.4MusicPlayback
Taptoenterthe “Music” folderandtaponanymusicfiletostartmusicplayback.
6.5
Video
Playback
Taptoenterthe “Video” folderandtaponanyvideofiletostartplayback.

6.6PhotoLibrary
ThisfeatureallowsyoutoaccesstheiOSdevicephotolibrary,fromwhichyoucanselectphotos
tocopyfromtheiOSdevicetotheiStick.
Selectthefilesyouwanttocopyandtap “Done”,thenSelectthedestination(e.g.iStick)

6.7ContactsBackup
YoucanusetheiStickandtheiStickapptobackupandrestoreyouriOScontacts.Firstyouneed
toensurethattheiStickapphasaccesstoyourcontacts.Goto Settings > Privacy > Contacts >
EnableiStickapp
A “Warning” dialogboxwillpopupIftherearenoiOScontactsavailable
Tapon"Contacts"iconandtap"Backup"toperformcontactsbackup,theninthe"Contact
Backup"pop-up,tap"OK"

ContactswillbebackedupintheiStick “ContactsBackup” folderasa.abbackupfile.
Torestorecontacts,tap “Restore ” inthe “ContactBackup” sectionm,thentap"OK"toconfirm
the “ContactsRestore”

6.8About
“Done”:Returntothemainmenu
“iStickv2.8.6”:CurrentiStickappversion
“OperatingInstructions”:iStickappusermanual
“Support”:Onlinehelpinformation
“ReportBug”:Emailbugs/feedbackabouttheapp
 Loading...