

eldoLED DimWheel Colour Quick Start Manual
© 2011 eldoLED. All rights reserved. V2.2
More product documentation and eldoLED’s terms and conditions are available at www.eld oled.com.
Quick Start Guide DimWheel Colour DimWheel Series
How to connect, configure, mount and operate your DimWheel
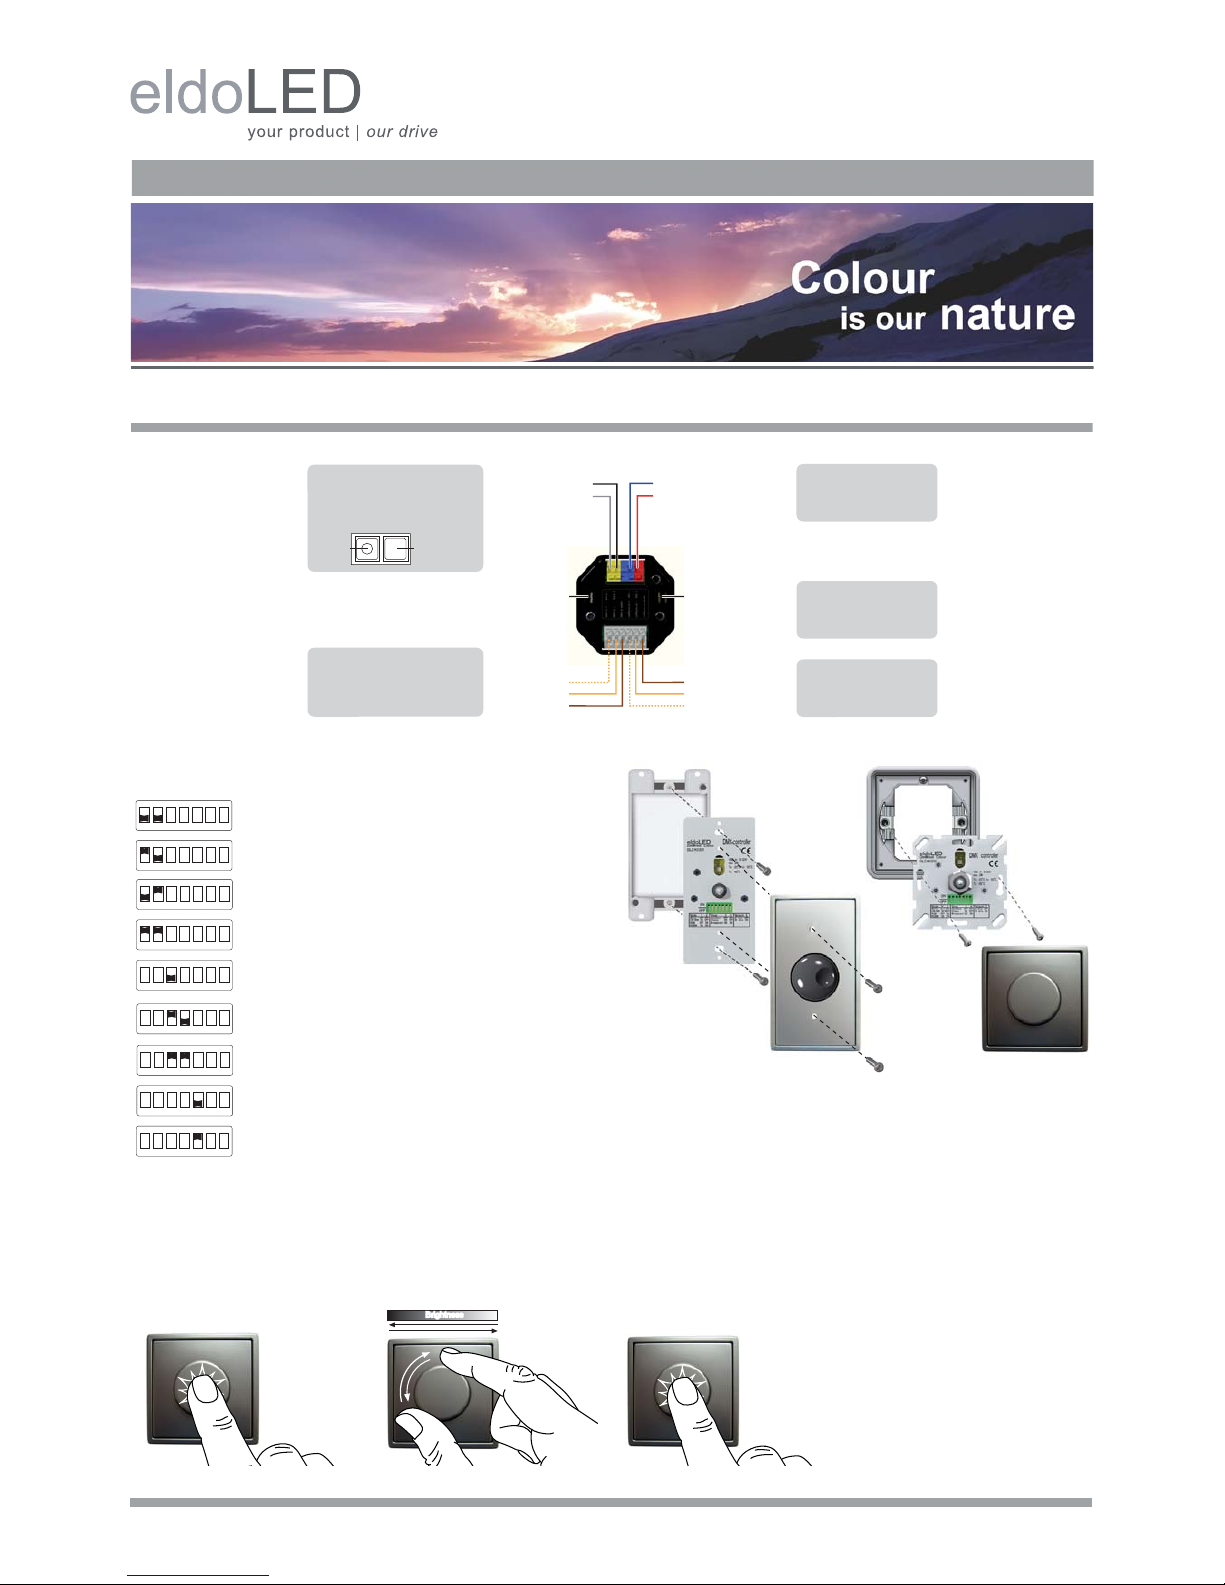
1. Connecting your DimWheel
Strain relief
Recommended: Fixate wires
with tie-wraps that are looped
through indicated holes.
DMX in +
DMX in
-
DMX in shield
LedSync out shield
LedSync out
-
LedSync out +
Strain relief
Strain relief
Ext in +
Ext in
-
Show mode
When operating DimWheel in show
mode, you can connect a momentary
action switch to the ‘Ext in’ connectors
for show selection (optional).
ShowMaster
To upload show sequences you have
created with ShowMaster, connect your
TOOLbox to the DimWheel’s ‘DMX in’
connectors (optional).
Power
Connect the DimWheel to a
12-32V DC, SELV equivalent
power supply.
DMX
Connect your DMX network to
the DimWheel’s ‘LedSync out’
connectors.
VDC
-
VDC +
12-32V
DC IN
{
DimWheel
Show
Selection Switch
2. Configuring your DimWheel
Configure your DimWheel by setting the DIP switches on the front:
DIP switch 6 and 7 are non-influential.
3. Mounting your DimWheel
The DIP switches remain accessible after installation. When carrying out
changes in the DIP switch settings, turn the DimWheel off and on again (by
pressing the knob twice) to activate the new settings.
The DimWheel is compatible with most standard faceplates. For UK-style electrical wall mounting boxes (BS4662), you can use the eldoLED faceplate kit with
lightpipe.
Faceplate, wallbox and screws are not included with your DimWheel.
1-channel mode for general white lighting applications
2-channel mode for colour temperature control
3-channel mode for full colour (RGB) applications
4-channel mode for full colour (RGB-W/A) applications
colour mode
show mode (chase)
show mode (broadcast)
8-bit network resolution
16-bit network resolution
12ON34567
12ON34567
12ON34567
12ON34567
12ON34567
12ON34567
12ON34567
12ON34567
12ON34567
4. Operating your DimWheel
Turn the light on Change brightness Turn the light off
BrightnessBrightness
eldoLED Europe bv Luchthavenweg 18a 5657 EB Eindhoven The Netherlands T +31 40 2054050 F +31 40 2054058 info@eldoled.com
eldoLED America, Inc. 1762 Technology Drive # 226 San Jose, CA95110 USA T +1 408 451 9333 F +1 408 451 9335 nasales@eldoled.com
Quick Start Guide DimWheel Colour DimWheel Series
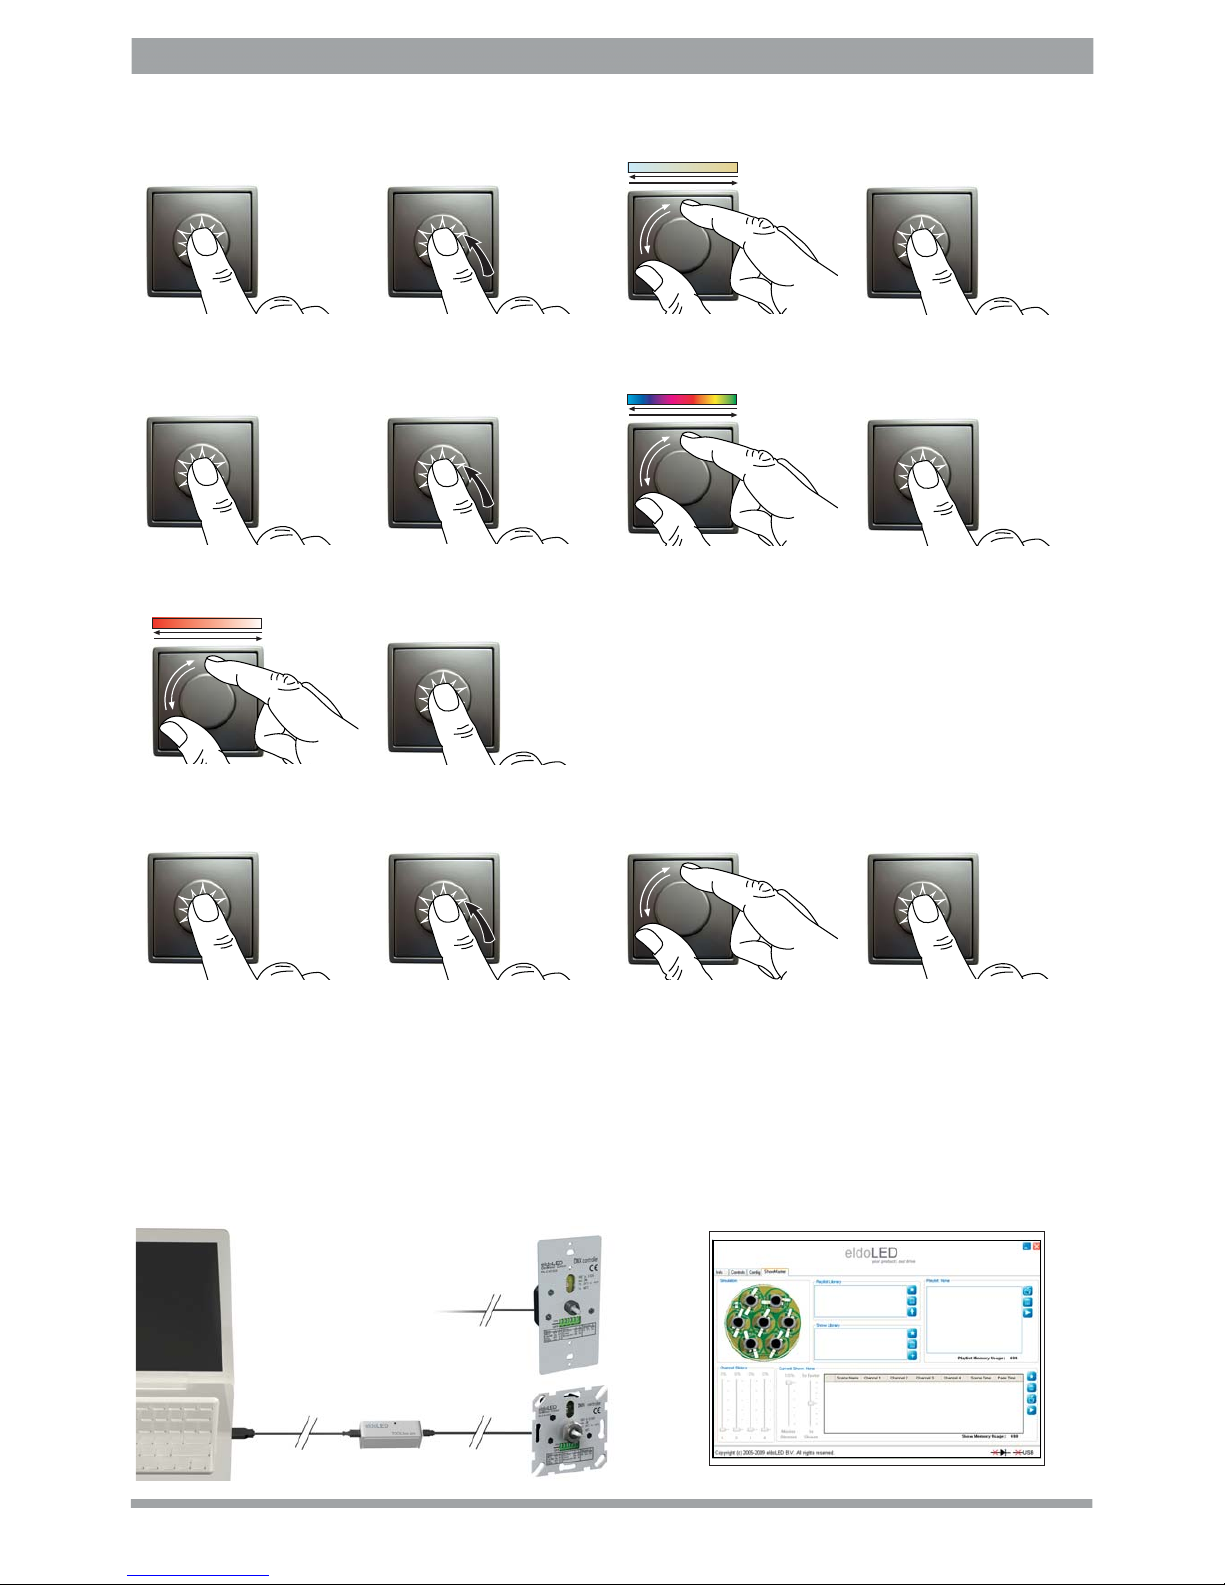
Advanced operation for 2-channel mode (CW/WW)
Advanced operation for 3/4-channel (RGB/RGBW) colour mode
Advanced operation for 3/4-channel (RGB/RGBW) show mode
5. Creating/uploading show sequences
The DimWheel comes with 4 default show sequences and is set to show 2 by default:
Show 1: red fading into green, green into blue, blue into red, red... etc.
Show 2: red fading into green, green into blue, blue into white, white into red... etc.
Show 3: red changing into green, green into blue, blue into red, red... etc.
Show 4: red changing into green, green into blue, blue into white, white into red... etc.
You can create and manage your own custom show sequences and upload these to your DimWheel with ShowMaster. Upload the shows you created with the
TOOLbox via the DimWheel’s DMX in connectors. To fi nalize the upload of a pla ylist, turn the DimW heel of f an d on agai n by pressin g the knob. For more det ails abo ut
working with ShowMaster, see the TOOLbox user manual (www.eldoled.com/support).
Turn the light on
Activate configuration mode Set colour temperature Save setting and return
to basic operation
Turn the light on Activate configuration mode Set colour Save colour setting
Set saturation Save setting and return
to basic operation
Turn the light on Activate configuration mode Set show speed Save setting and return
to basic operation
2 sec
Cool white / Warm white
2 sec
Saturation
100% 50% 0%
2 sec
 Loading...