

Elcomponent MMTCPBCONV User Manual

MMTCPBCONV
@
Serial/Ethernet
Converter
&
Modbus Gateway
USER GUIDE
Unit 5 Southmill Trading Centre, Southmill Road, Bishop’s Stortford, Herts. CM23 3DY
01279 503173 sales
elcomponent.co.uk www.elcomponent.co.uk
01/12/2006 V02

Ethernet Gateway Set-Up
Please refer to the following pages for detailed instructions on the correct
procedures for setting up the Ethernet gateway.
Please note the following settings should be used:
Module IP The IP address being allocated to the gateway
Default Gateway IP The default gateway IP address being allocated.
If this is not available (enter zeroes in these fields)
Subnet Mask The desired subnet mask
Socket Timeout 90
Converter Mode 0
Char Timeout 0
Port Number N/A
Server IP N/A
Baud Rate 4800
Data Bits 8
Stop Bits 1
Parity None
RS232/RS485 RS485
Serial Reply Timeout 25
RS485 On Delay 5
RS485 Off Delay 0
7.4 Connecting To a PC which is not Connected to a Network.
If the PC is equipped with an Ethernet card but not connected to a network, a local
network address should be used for communication between the Converter Module and
the PC. The Converter Module is shipped with a default IP address 169.254.111.111.
This address is in the address area reserved for local networks not connected to the
Internet. For direct connection between the PC and the Converter Module, a crossover
Ethernet cable is required.
To setup your PC to connect directly to the Converter Module, an IP address in the same
range as the Converter Module must be assigned to the PC. In Windows environments,
this should be done as follows:
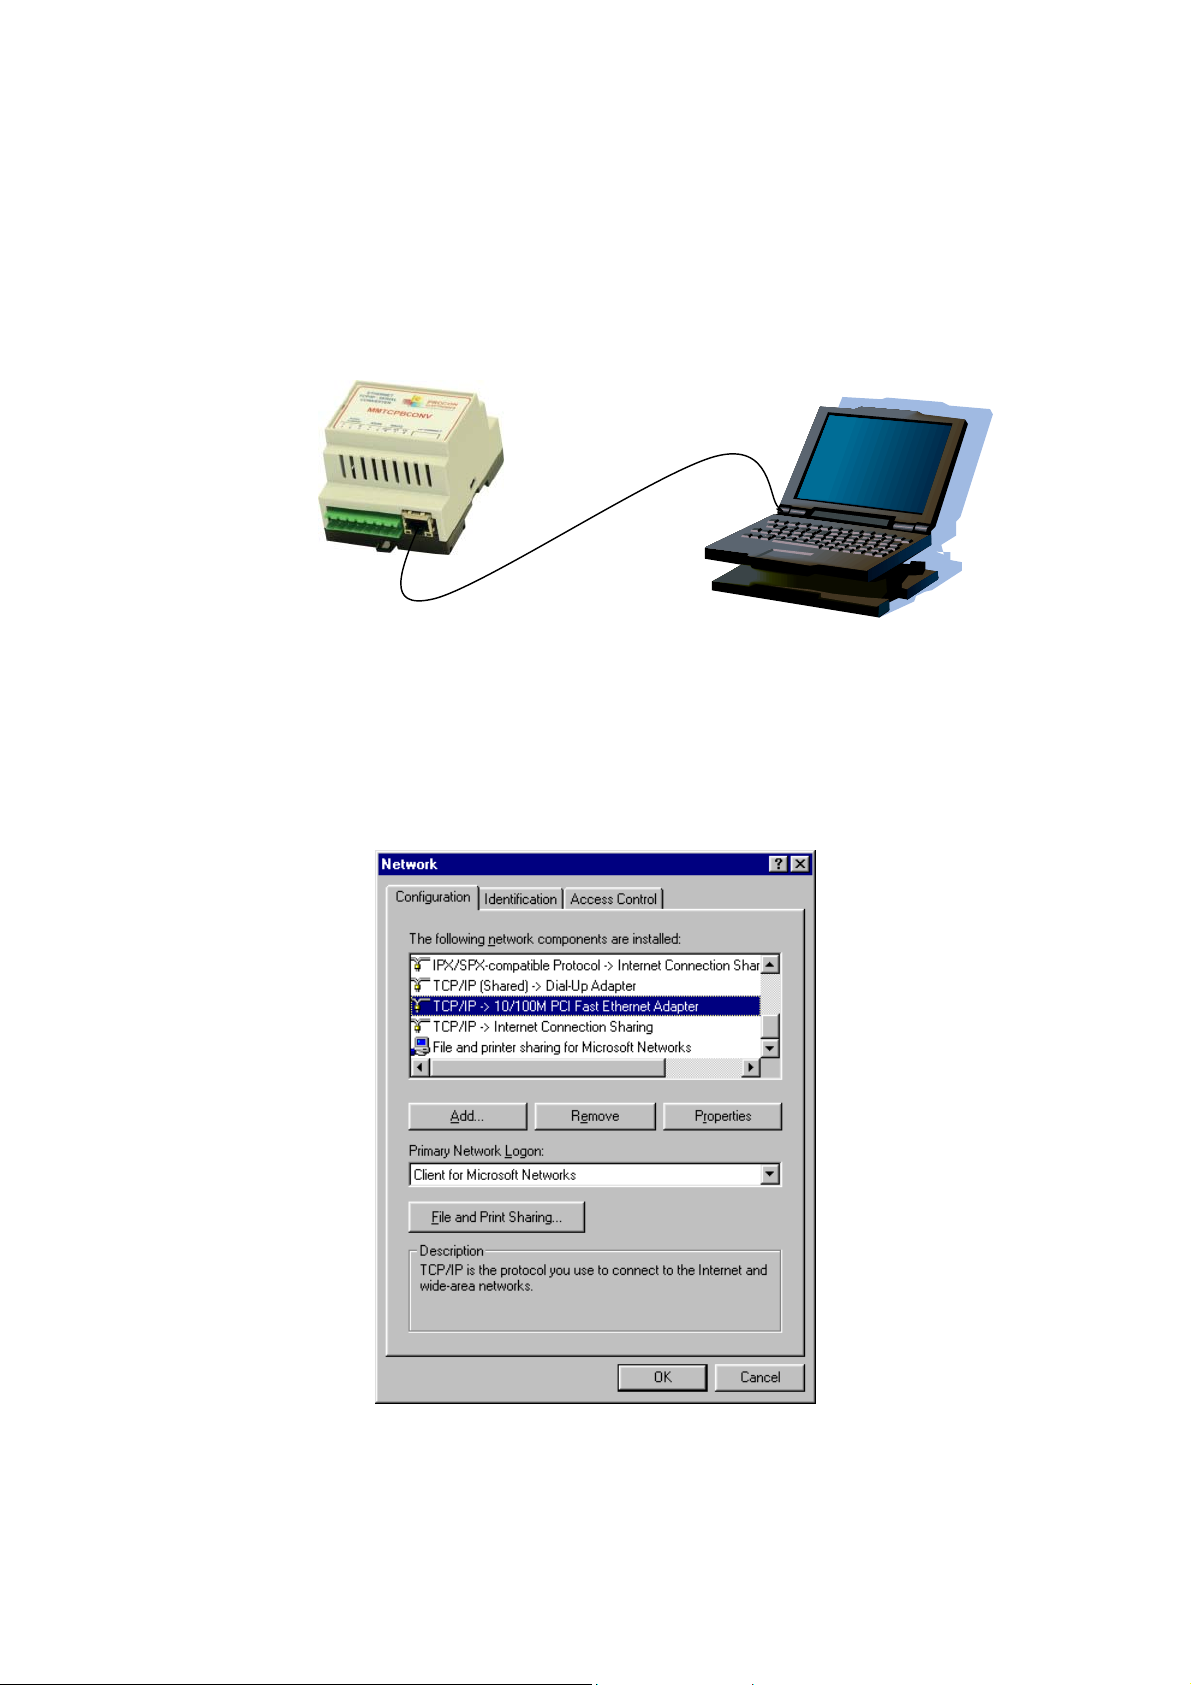
• Connect the PC and the Converter Module together using a crossover cable
• Open the Windows Control Panel
• Select Network
• Select TCP/IP -> the PC's Ethernet adaptor from the Configuration tab as shown
below
PROCON ELECTRONICS 10 Ethernet/Serial Converter
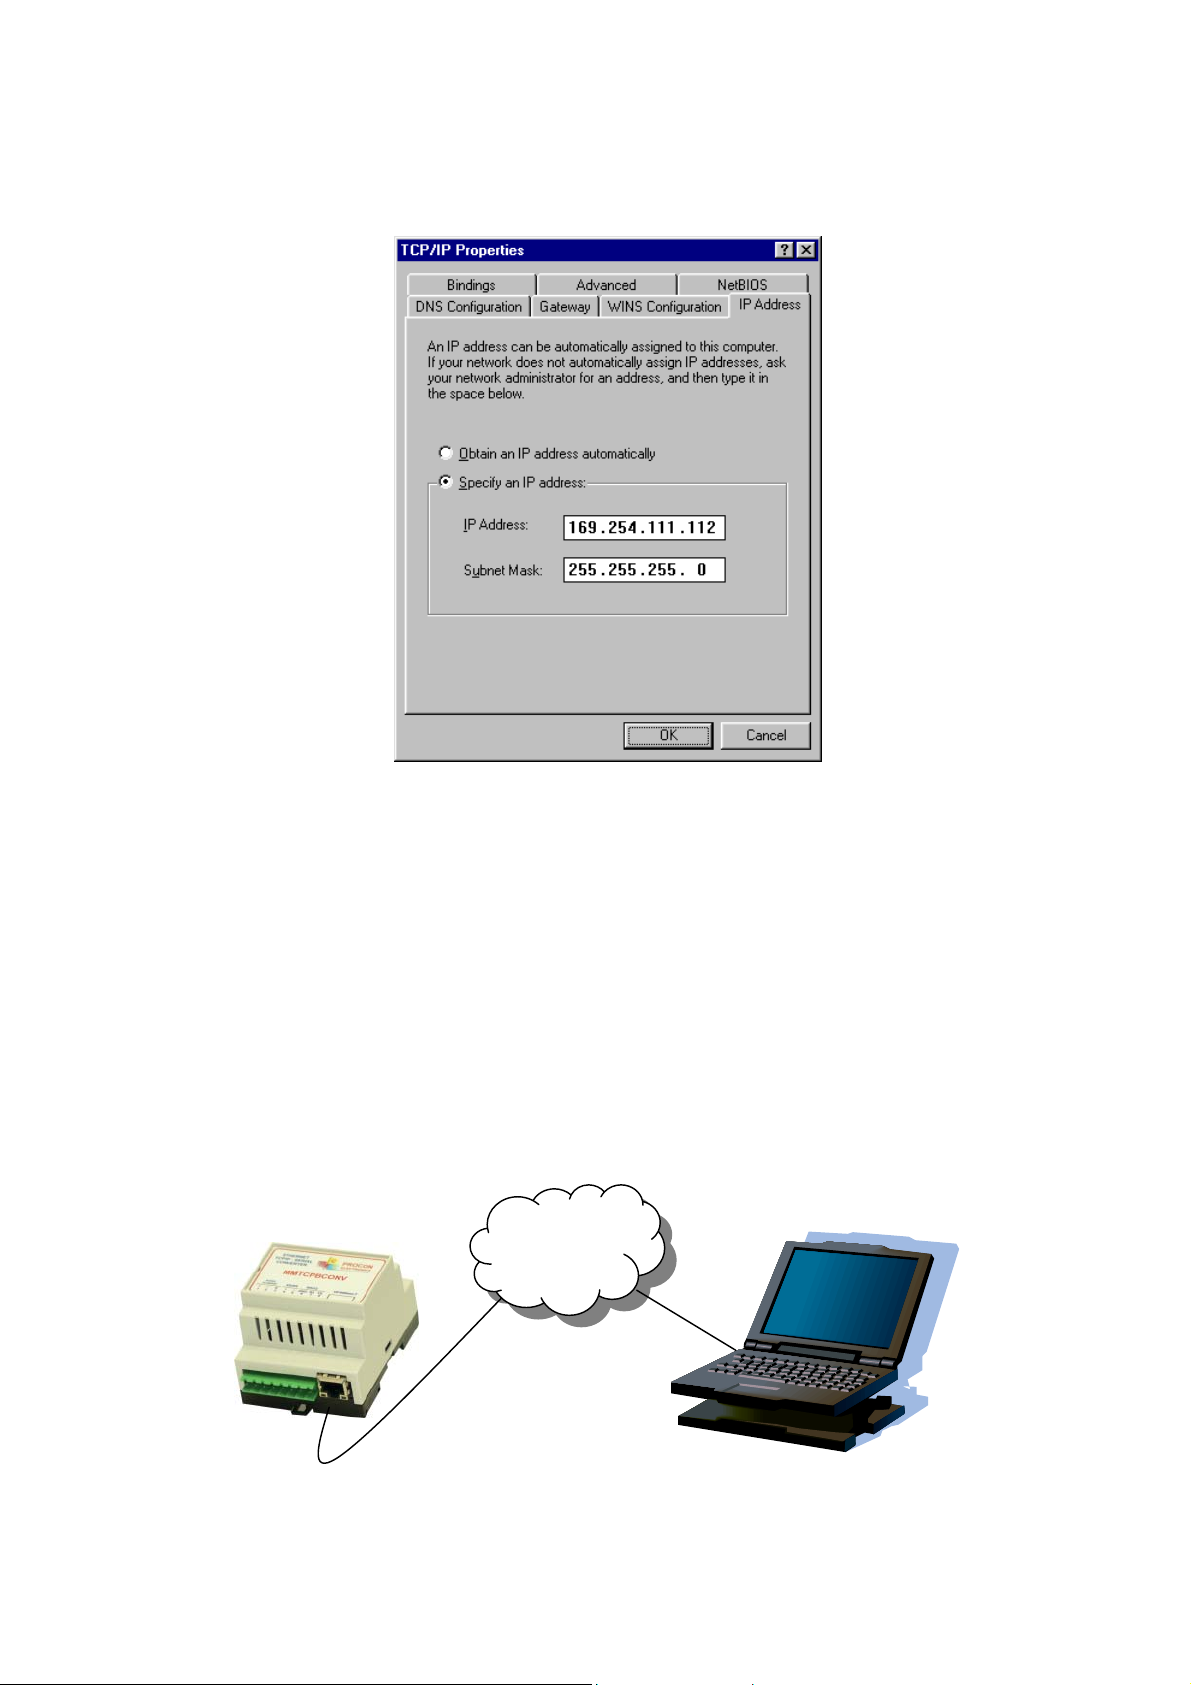
• Click the properties button. A TCP/IP Properties box similar to the one below should
appear
• Select the IP Address tab
• Choose to Specify an IP address as shown in the figure
• Insert the IP address 169.254.111.112 and the corresponding subnet mask as shown
• Save your settings by pressing OK in both TCP/IP properties and Network properties
• Reboot your PC
7.5 Connecting to a PC which is Connected to a Network.
If there is an Ethernet network available, the Converter Module can be connected to any
Ethernet connection or hub belonging to the network. If the PC is connected to a network,
there is a strong possibility that the default IP address of the Converter Module is outside the
range of the network (the address doesn't belong to the IP subset of the network). If the
Ethernet network is connected to the Internet, this is certain. In this case a new IP address for
the Converter Module is required. Contact the local network administrator to be assigned a
free IP address for the Converter Module. The new IP address is programmed into the
Converter Module using a Web browser software such as Internet explorer. In this case the
Converter Module must first be connected directly to a PC as described above.
In the remainder of this chapter, the IP address 169.254.111.111 is used as an example.
Exchange this IP address with the IP address you have set up in all the occurrences.
Lan/
Internet
PROCON ELECTRONICS 11 Ethernet/Serial Converter
 Loading...