

El-Björn Alfa-II Instruction
Instruktion/Instruction
Alfa-II
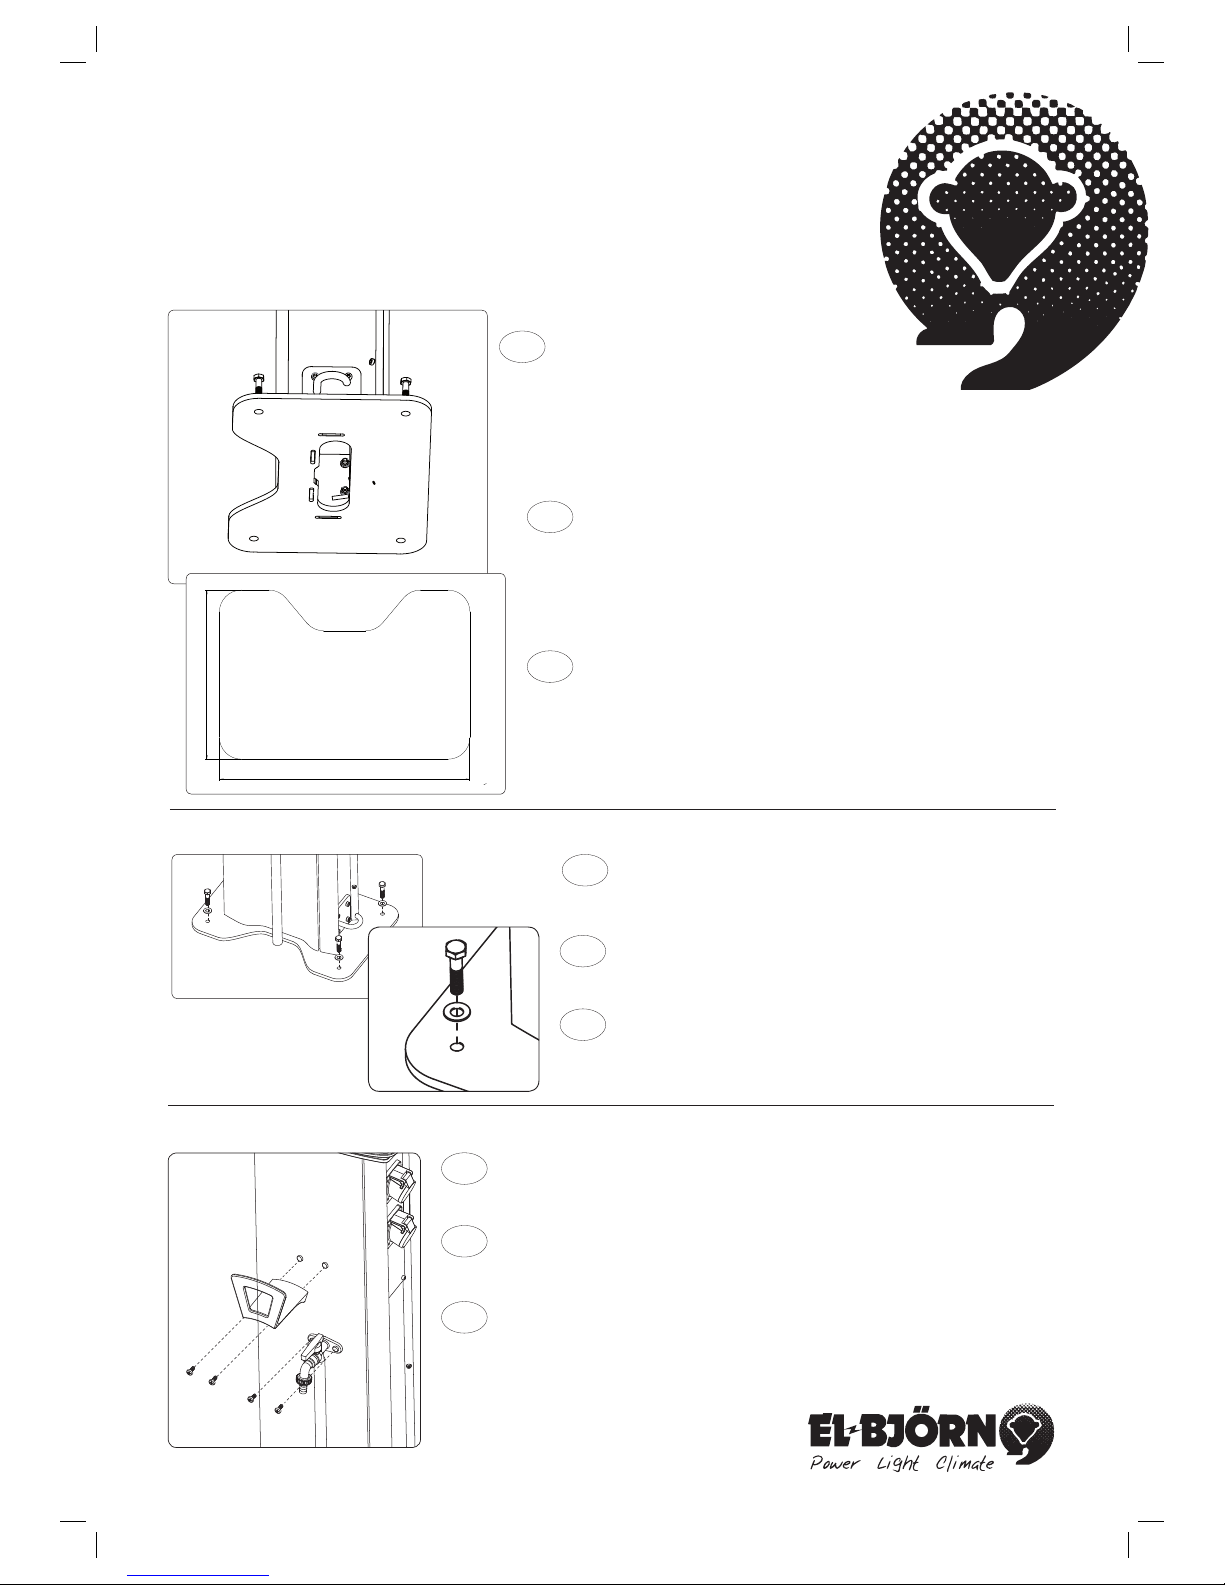
Slanghållare/Vattenkran
Vid montering av slanghållare och vattenkran ta bort de 4 st plastpluggarna
och använd medföljande skruvar till tillbehören. Montera enl. bild.
Slangeholder/Kran
Ved montering av slangeholder og vannkran ta bort de 4 plastpluggene og
bruk medfølgende skruer til tilbehøret. Monter ifølge bilde.
Cable holder/Water tap
To install the cable holder and water tap, first remove the four plastic plugs
and use the screws supplied with the accessories. Install as shown.
Tätningsplatta vid montering på
träbryggor.Vid montering på brygga
där det är öppet undertill, skall en
tätningsplatta monteras. Tätningsplattan
monteras under foten av elstolpen, så att
förskruvningen lätt kan kommas åt.
Vid anslutning gör hål efter anv. plåt.
Tetteplate for trebrygger
Når strømsøylen monteres på en brygge hvor det er åpent under,
skal denne tetteplaten benyttes.
Tetteplaten monteres under foten til strømsøylen, slik at nippelen
kan betjenes i koblingsrommet.
Ved tilkobling lag hull etter anv. plate.
Sealing plate for installing on wooden jetties
A sealing plate must be used when installing on a jetty where the
underside will be exposed. The sealing plate is fitted underneath
the base of the power pole to give easy access to the screws.
Connections can be made through holes drilled in plate.
Fastsättning av elstolpe
Använd de 4st medföljande plastbrickorna. Se till att stolpen
är väl förankrad.
Montering av strømsøyle
Bruk de 4 medfølgende plastskivene. Sørg for at søylen er
godt forankret.
Installing power pole
Use the four plastic washers supplied. Make sure the pole is
securely anchored.
SE
SE
SE
NO
NO
NO
GB
GB
GB
Slanghållare och vattenkran/ Vannkran og slangeholder / Cable holder/Water tap
Tätningsplatta vid montering på träbryggor/ Tetteplate for trebrygger /
Sealing plate for installing on wooden jetties
Fastsättning av elstolpe/ Montering av strømsøyle / Installing power pole
400
270
El-Björn AB, Box 29, 334 21 Anderstorp
Tel: +46 (0)371-588 100, Fax:+46 (0)371-181 34
E-post: info@elbjorn.se, www.elbjorn.com
4 x
2 x
6 x
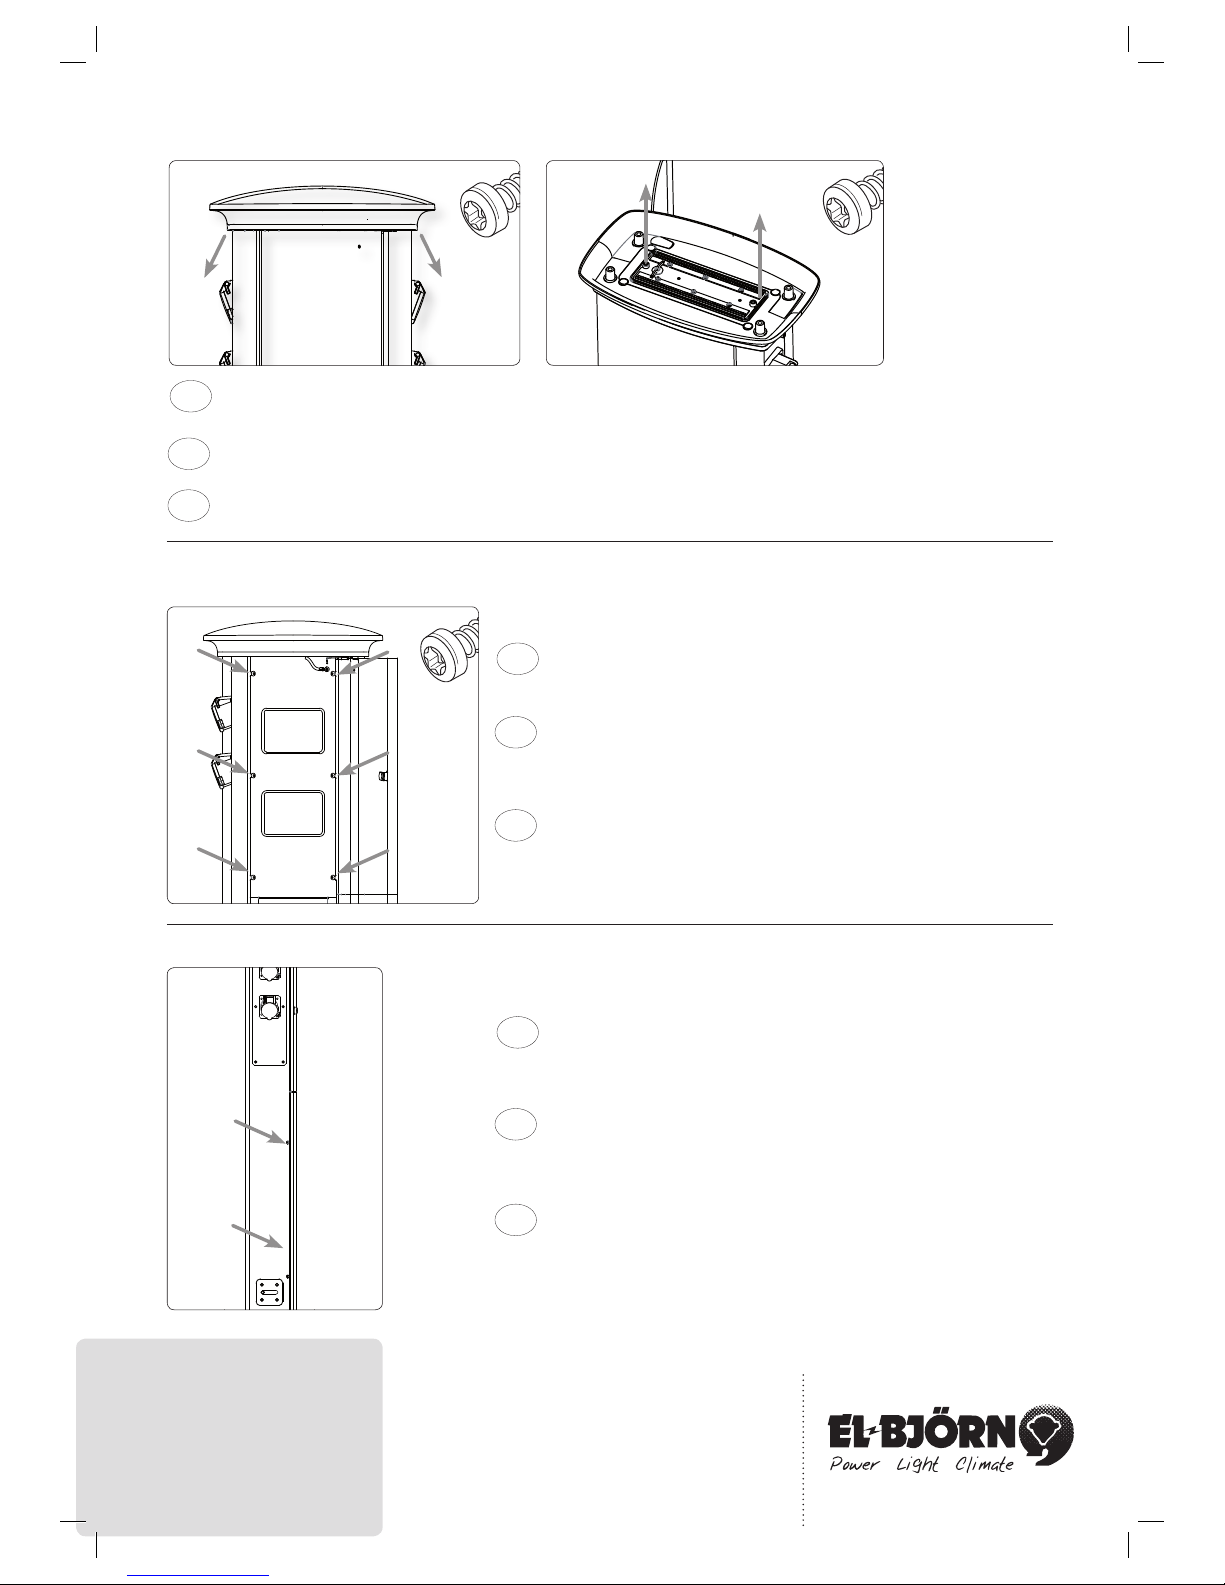
1 Lossa de 4 skruvarna på toppen.
2 Lossa de 2 skruvarna till LED plattan och byt ut.
1 Skru ut 4 stk. skruer på toppen av lysdekslet.
2 Løsne de 2 skruene til LED-platen og bytt ut.
1 Remove the four screws from the top.
2 Remove the two screws securing the LED unit and replace it.
1 Ta bort luckan genom att lossa de 6 skruvarna.
2 Lyft luckan i nederkant.
Byte av dvärgbrytare/jordfelsbrytare får endast utföras av behörig elektriker.
1 Fjern sikringsdeksel ved å skru ut 6 stk. skruer i fronten av dekslet.
2 Vipp ut dekslet i nedkant.
Bytte av automatsikring-/jordfeilbryter skal kun utføres av autorisert
installatør.
1 Remove the cover by undoing the six screws.
2 Lift up the panel from the bottom edge.
The miniature circuit breaker/RCD must only be replaced by a qualified
electrician.
Lossa de 2 skruvarna på sidan.
Lossa nedre täckplåt för att komma åt inkopplingsplint.
Anslutning sker på plint enl. märkning.
Anslutning får endast utföras av behörig elektriker.
Løsne de 2 skruene på siden.
Løsne nedre deksel for å komme til tilkoblingsklemmene.
Tilkobling skjer på koblingsstykket i henhold til instruksjon.
Tilkobling må bare utføres av kvalifisert elektriker.
Remove the two screws from the side of pole.
Unbolt the lower cover plate to access the connection terminal.
Connection is done on the terminal according to instructions.
Electrical connections must be made by a qualified electrician.
SE
SE
SE
NO
NO
NO
GB
GB
GB
1. 2.
Byte av ljuskälla / Bytte av lyskilde / Replacing the LED unit
Byte av dvärgbrytare/jordfelsbrytare / Bytte av Automatsikring-/Jordfeilbryter /
Replacing miniature circuit breaker/RCD
Anslutning / Tilkobling / Connecting to supply
CAUTION
This product has been designed for
environment A. Use of this product in
environment B may cause unwanted
electromagnetic disturbances in which
case the user may be required to take
adequate mitigation measures.
Art.nr:195044 160310
 Loading...