

Page 1
1
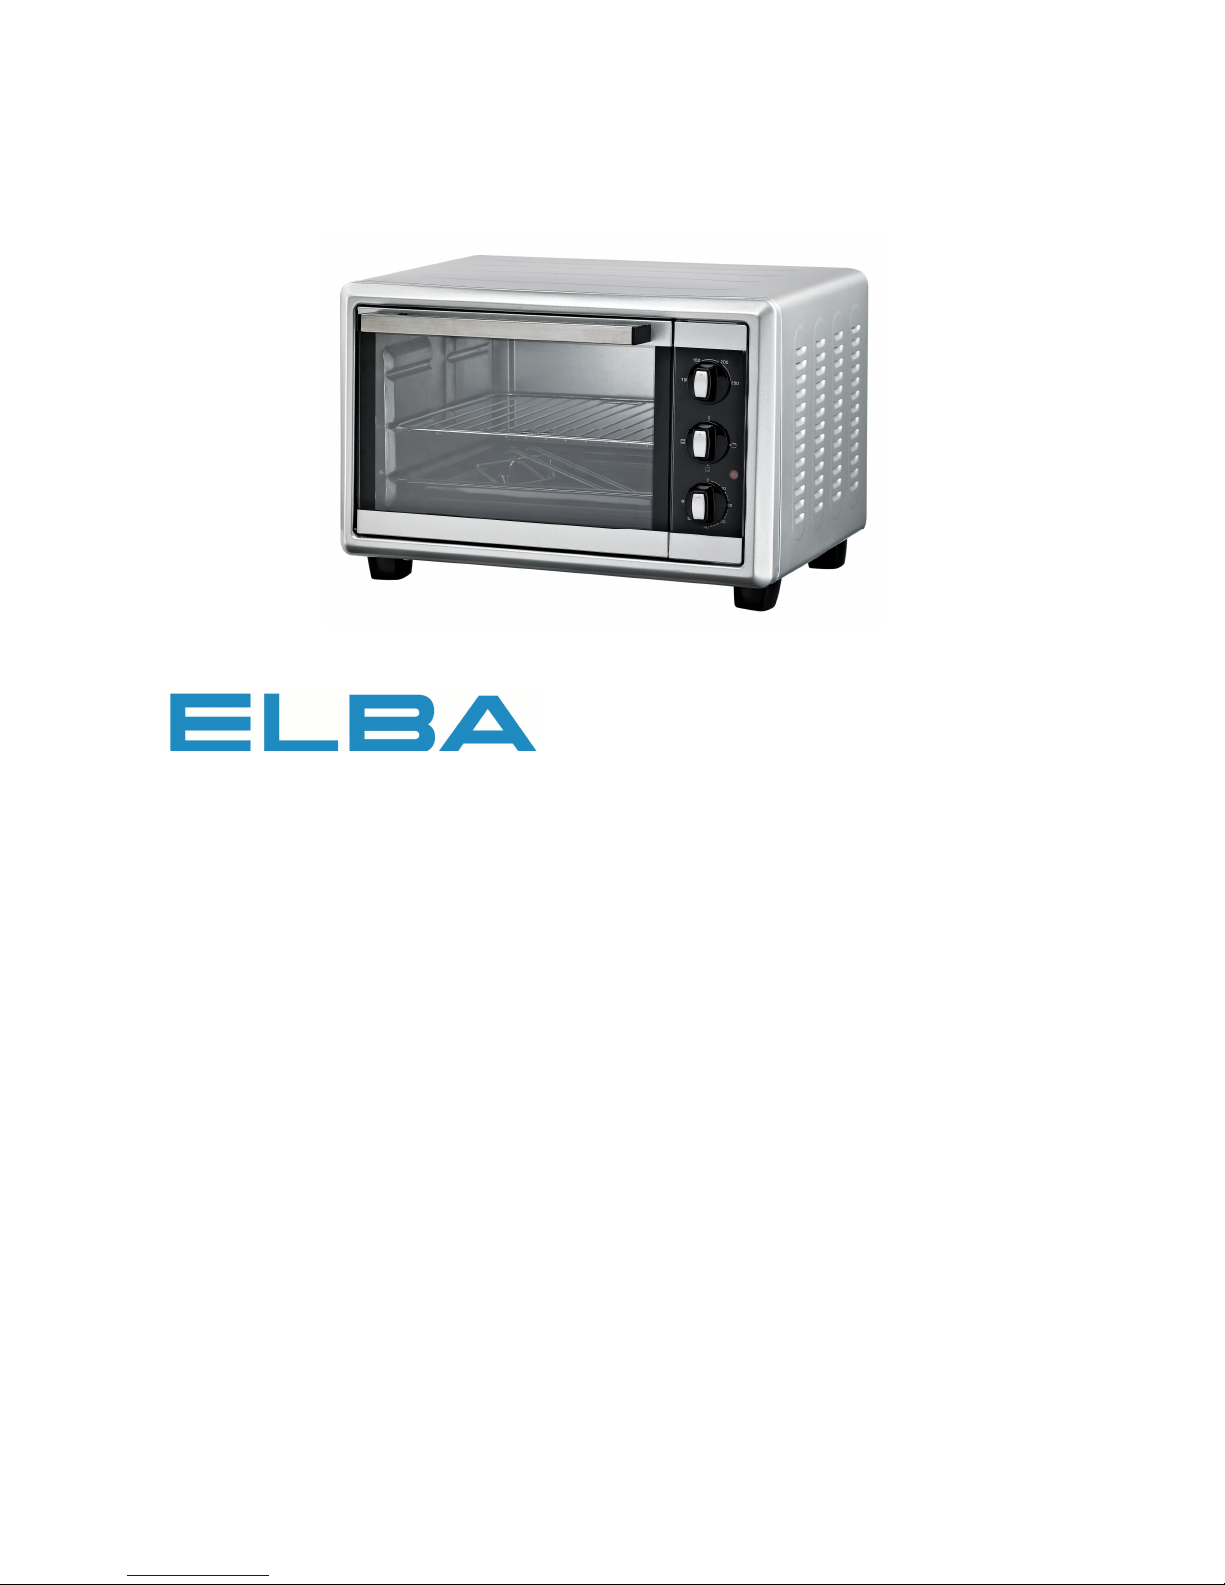
ELECTRIC OVEN
MODEL: EEO-A1713(SV)
Owner’s Manual
Please read this manual carefully
before operating your set.
Retain it for future reference.
Record model number and serial
number of the set.
See the label attached on the set and
quote this information to your dealer
when you require service.
For The Warranty Terms & Conditions, Please Refer To Warranty Certificate.
Page 2
2
IMPORTANT SAFEGUARDS
When using this appliance, basic precautions should always be followed, including
the following:
1. Read all instructions before using.
2. Do not operate the appliance with a damaged power cord or plug or after the
appliance malfunctions, or it is dropped or damaged in any manner. Return the
appliance to the nearest authorized dealer or after-sales service centre for
examination, repair or mechanical adjustment.
3. Do not let the power cord hang over edge of table or hot surface.
4. To protect against electric shock, do not immerse power cord, plug, or the product
body of the appliance in water or any other liquids.
5. Unplug the plug from wall outlet when not in use.
6. Do not place the appliance on or near the gas or electric burner, or in a heated
oven.
7. The use of accessories that are not recommended by the manufacturer may
cause injuries to persons.
8. While operating the appliance, the product surface will be very hot, use only the
door handle or knobs. Let the oven to cool down before removing any parts of the
oven for cleaning.
9. Be careful when moving the appliance especially when it contains hot oil or other
hot liquids.
10. Always wear protective insulated oven gloves when inserting and removing foods
from the oven.
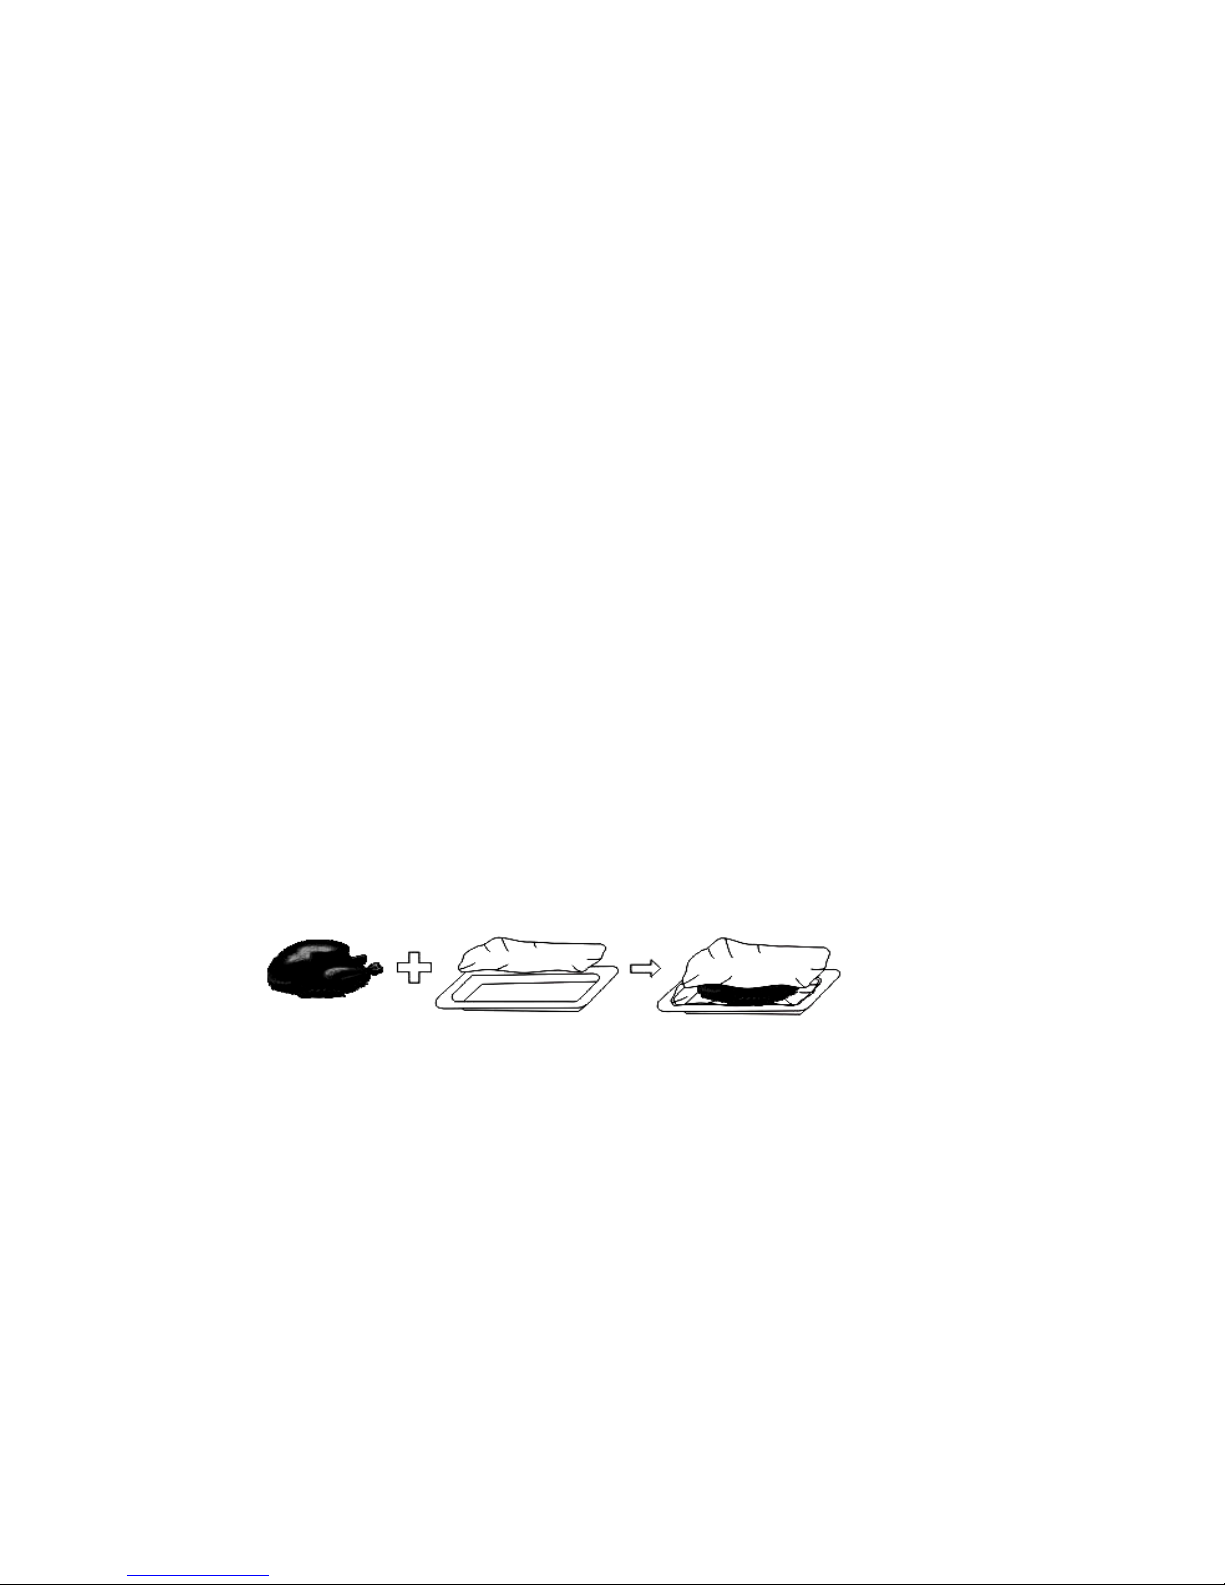
11. It is recommended to insert 2 sheets of aluminum foils to cover the chicken (as per
following picture) placed on the baking tray in order to avoid oil splashing.
12. Never leave the oven unattended while broiling or toasting.
13. Oversized foods or metal utensils must not be inserted into the oven as it may
cause fire or the risk of electric shock.
14. Do not store any items such as cardboard, plastic, paper, etc. into the inner oven
other than its recommended accessories.
15. Do not cover any parts of the oven with metal foil curtains, cloths, wall as it will
cause fire easily.
16. Do not clean the oven with metal scouring pads as it can break off easily and
touches the electrical parts that causes electric shock.
17. Do not use this appliance outdoors.
18. Do not operate the appliance for other than its intended use.
19. This appliance is not intended for use by persons (including children) with reduced
physical, sensory or mental capabilities, or lack of experience and knowledge,
Page 3
3
unless they have been given supervision or instruction concerning the use of the
appliance by a person responsible for their safety.
20. Children should be supervised to ensure that they do not play with the appliance.
21. While operating the appliance, keep the appliance out of reach of children.
22. Save these instructions for future reference.
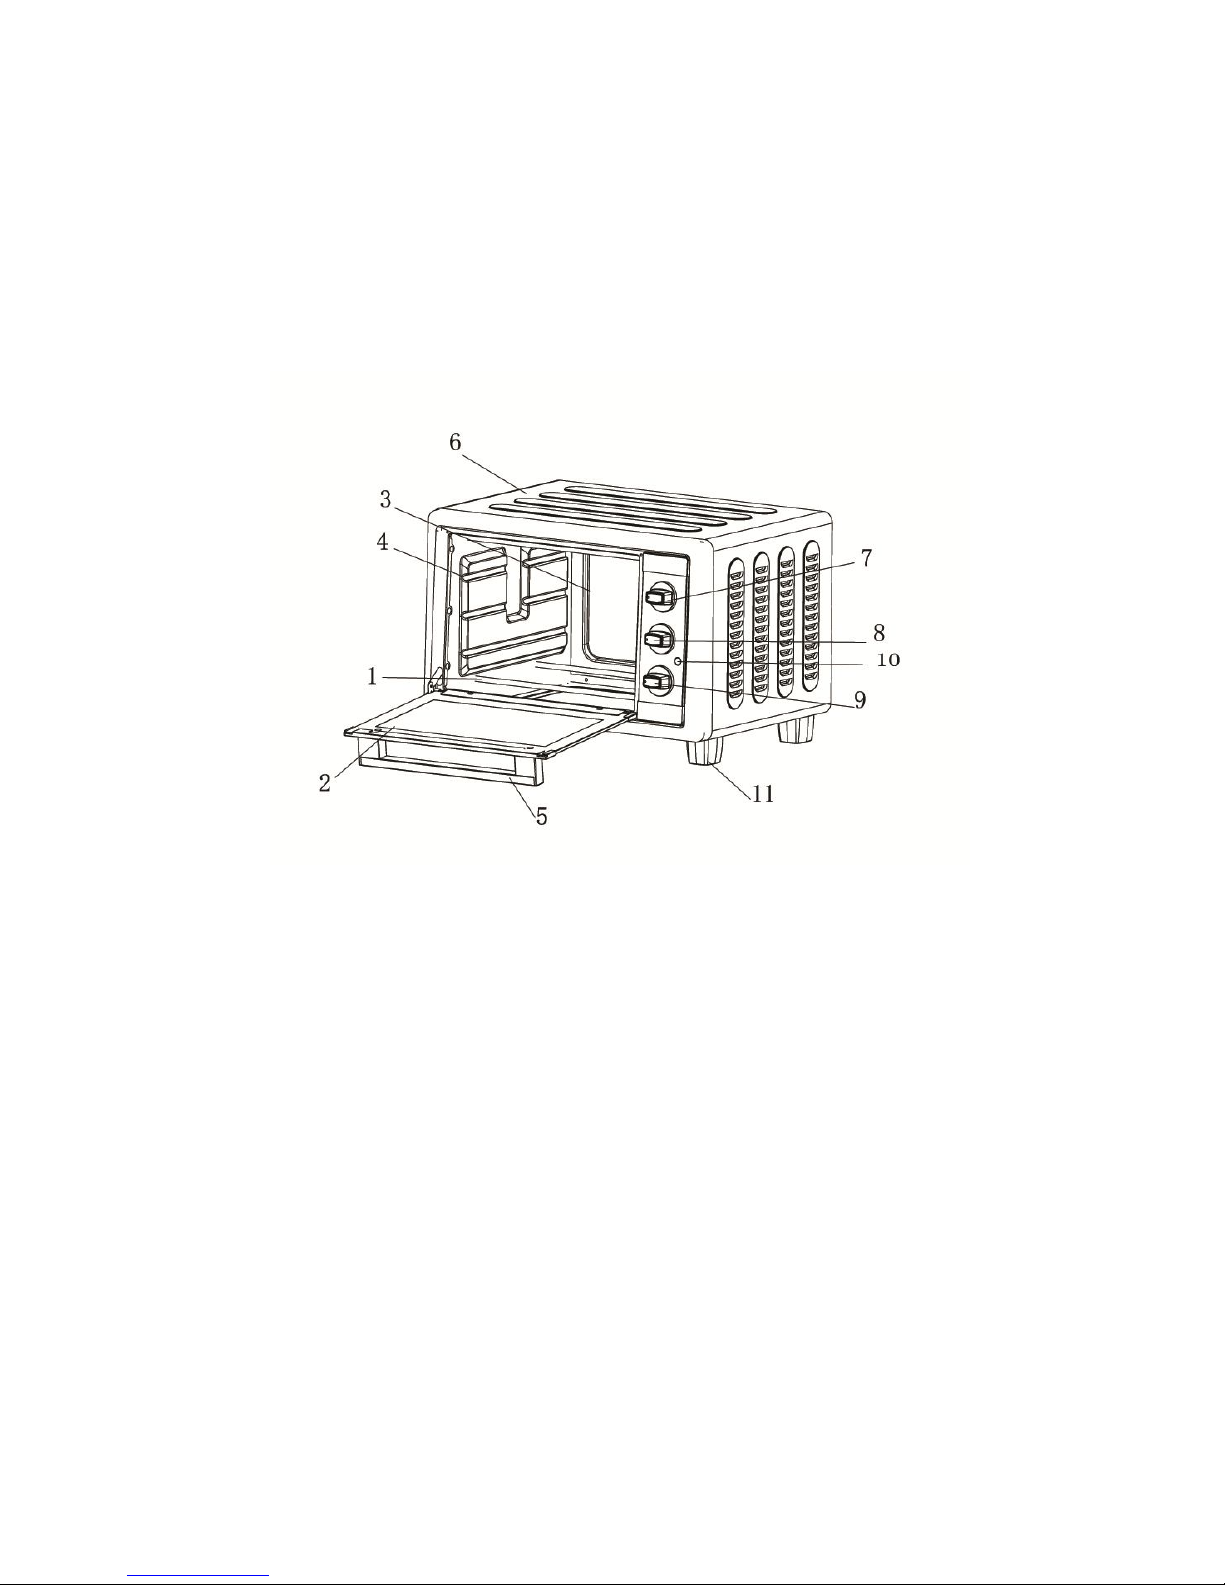
PRODUCT DESCRIPTION
1. Heating element
2. Door glass
3. Inner oven
4. Rack support
5. Door handle
6. Product body
7. Temperature knob
8. Heating selection knob
9. Timer knob
10. Indicator light
11. Oven leg
Page 4
4
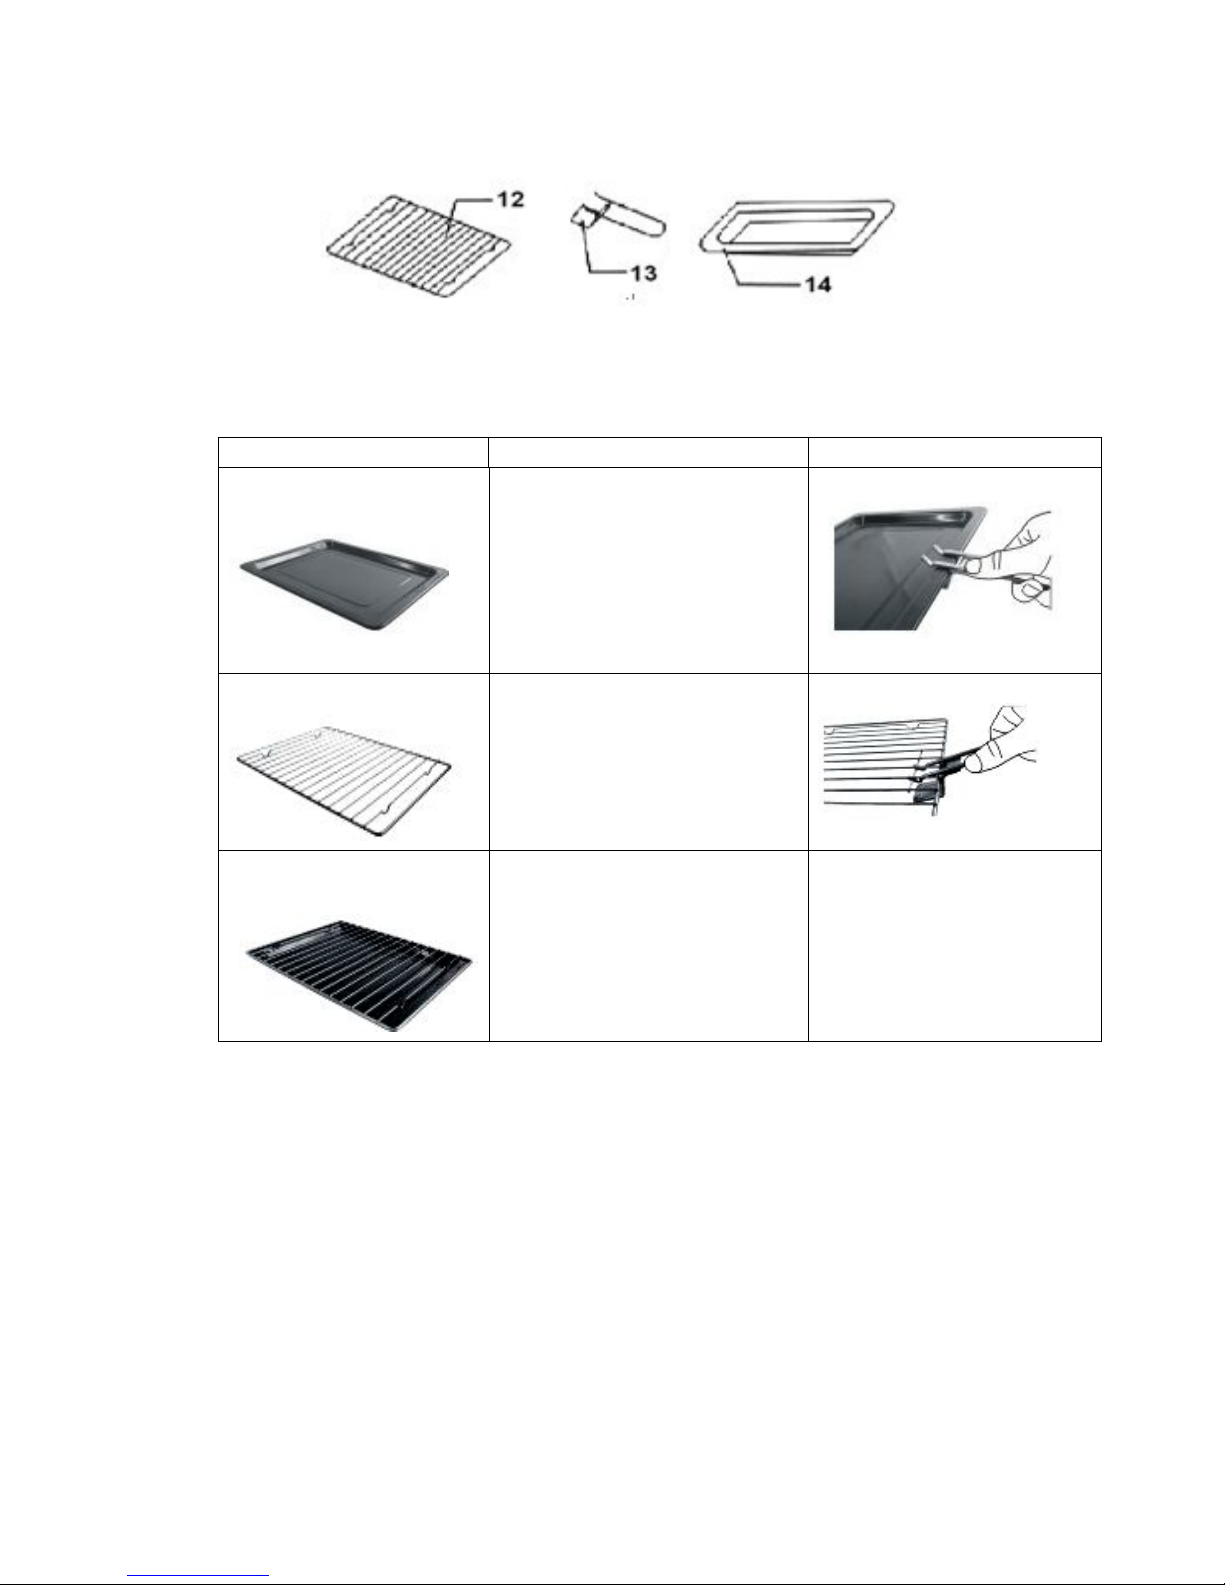
ACCESSORIES
12. Wire rack
13. Tray handle
14. Baking tray
Accessories Foods (for reference only) To use the tray handle
Baking tray
1. Roast chicken wing
2. Hamburg steak
3. Gratin
4. Cake
5. Other oven-cooked foods
Wire rack
1. Baked potatoes
2. Dry food
Baking tray and wire rack
1. Broiled fish
The tray is not perfectly square.
Note: Be careful when removing pudding or any others hot liquids from the oven after
cooking.
Page 5
5
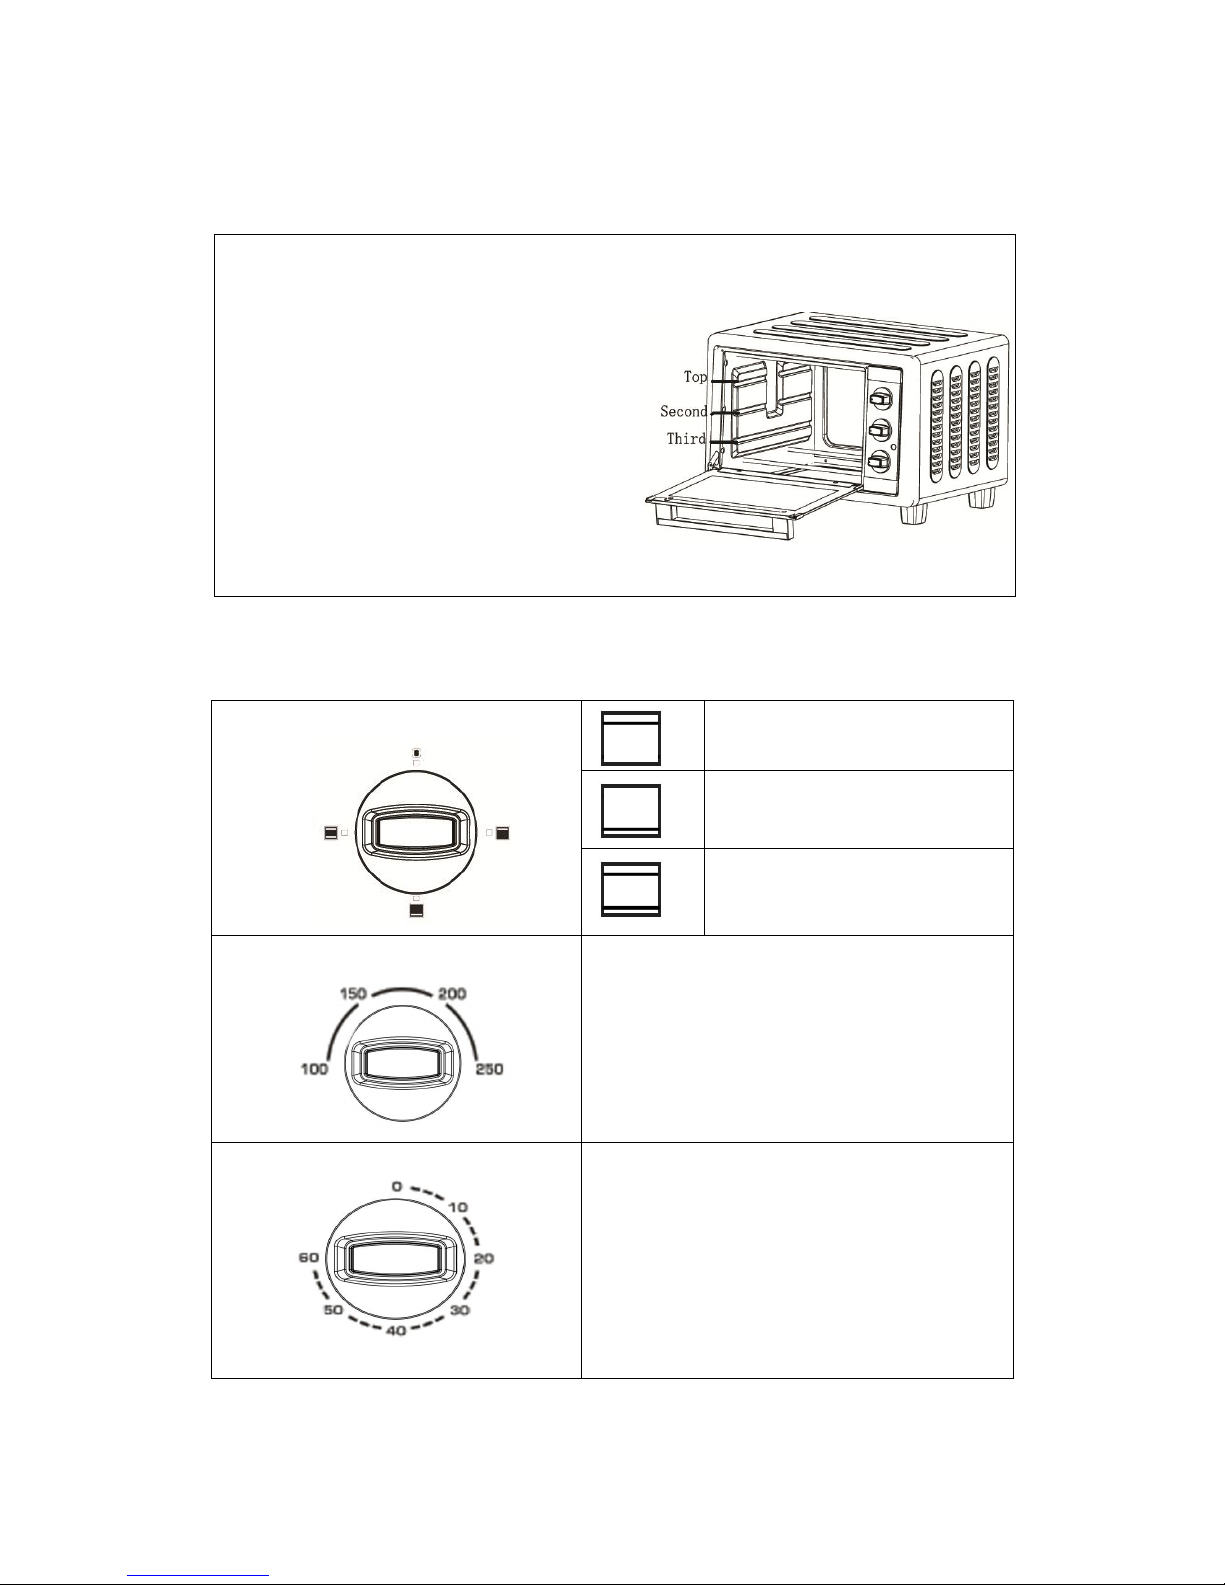
RACK SUPPORT
CONTROL KNOB
Heating selection knob
Top heating
Bottom heating
Top and bottom heating
Temperature knob : 100- 250C
Set the temperature control knob that
suits the foods by turning the knob
clockwise.
Timer knob: 0 – 60 minutes
Set the timer knob according to your
desire cooking time.
Caution: Do not open the door glass
while the oven is operating!
1. There are 3 trays cater for different type of
dishes you want to cook. You can adjust the
cooking position by slotting the baking tr
ay and
wire rack at top, second and third rack support
(refer to right picture).
2. For example, when making
macaroni gratin
and you want to have the top part to be
cooked the most, use the top or secon
d rack
support. For roasting a chicken, you can u
se
the third rack support.
Page 6
6
OPERATING THE APPLIANCE FOR THE FIRST TIME
1. Unpack the appliance and place it on a flat horizontal counter top. Check all the
accessories whether all in good condition.
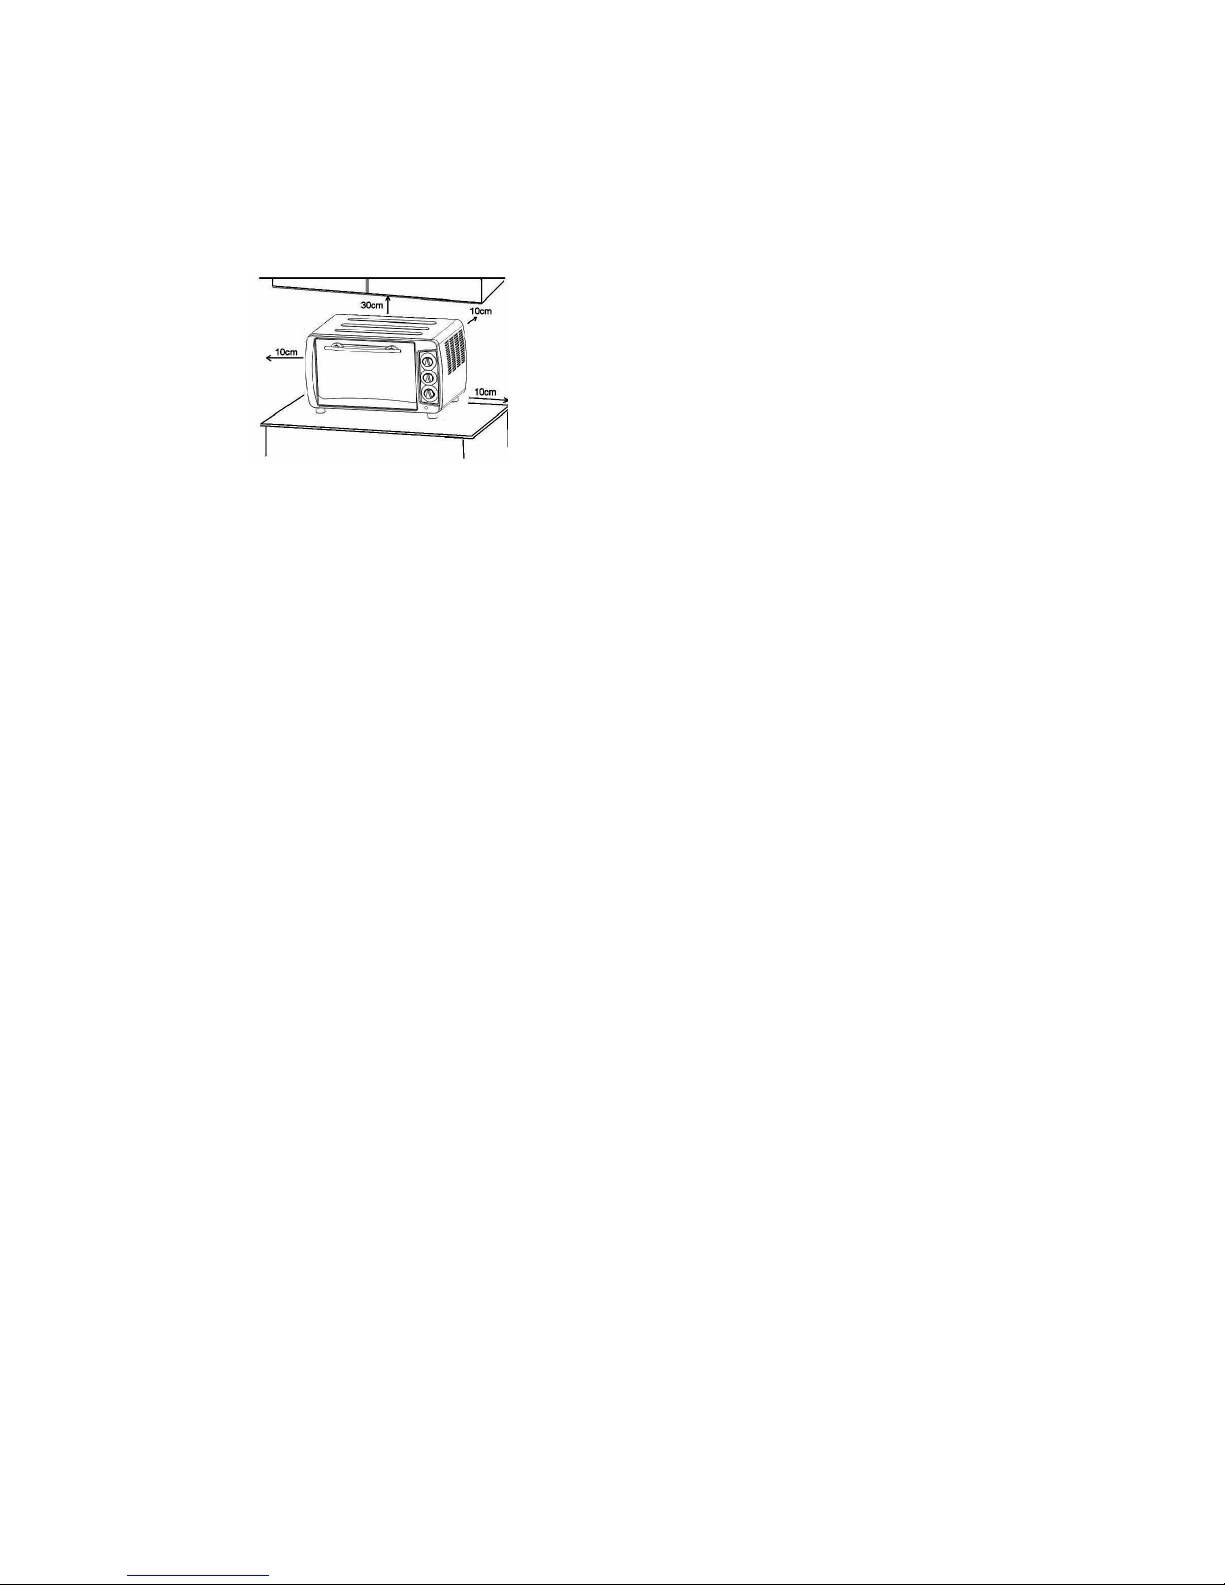
2. For correct operation, the oven must have sufficient airflow. Please follow the
picture above for the correct position.
3. For initial use, please clean the accessories with detergent and water. Wipe the
inner oven with dry cloth.
4. Re-assemble the accessories into the inner oven and insert the plug into the wall
outlet.
Note: Ensure the timer knob is switched to “off” sign position.
5. Turn the temperature knob to max level- 250C while set the timer button
approximately 15 minutes to eliminate the oil that still remain in the inner oven.
Caution: The body and inner oven can be very hot after preheating.
6. Do not worry about the smoke as it is normal for the first time heating. The smoke
will be disappear after about 20 minutes.
7. Insert foods that need to be preheat and adjust the temperature, timer and heating
type that suits the food.
OPERATING THE APPLIANCE
1. In general, it is not necessary to preheat the oven but for better cooking result,
complete step 5 (under operating the appliance for the first time) every time before
storing food into the oven.
Caution: The body oven can be very hot after preheating.
2. Insert foods that need to preheat and adjust the temperature, timer and heating
knob that suit the foods.
Note: Temperature set at 100C, the heating element will appear grey color (it is
normal). When the temperature set at 200C, the heating element will turn to red
color.
Warning: Do not touch the heating element while operating the oven even it looks
grey. At this stage, the heating elements have start to preheat and it might be very
hot at the surface. Due to life cycle of the heating elements, after several usage,
the heating element might not have the same color like the first time use. However,
it is normal and the cooking result is still well.
** When setting the timer for less than 5 minutes, turn the temperature knob more
than 6 minutes and then back to the selected time.
Page 7
7
BAKING REFERENCE
Type of foods Number
Temperature (C)
Timer (min.)
Sandwich 2~3pcs 200 2~3
Toast 2~4pcs 250 2~5
Hamburger 2~3pcs 200 3~5
Fish / 200 7~10
Ham 2cm 200 7~12
Sausage 2~4pcs 200~250 8~10
Cake / 150 20~30
Steak 1~2cm 250 10~15
Chicken Half chicken 175~200 30~40
CLEANING AND MAINTENANCE
1. After use, power off the switch and unplug the plug from the wall outlet. Allow the
appliance to cool down before cleaning.
2. Wipe the baking tray, wire rack and tray handle with absorbent paper or towel or
soft cloth.
WARNING: Never immerse the appliance in water or any other liquids for
cleaning.
3. Store the appliance in a safe clean place.
ENVIRONMENT-FRIENDLY DISPOSAL
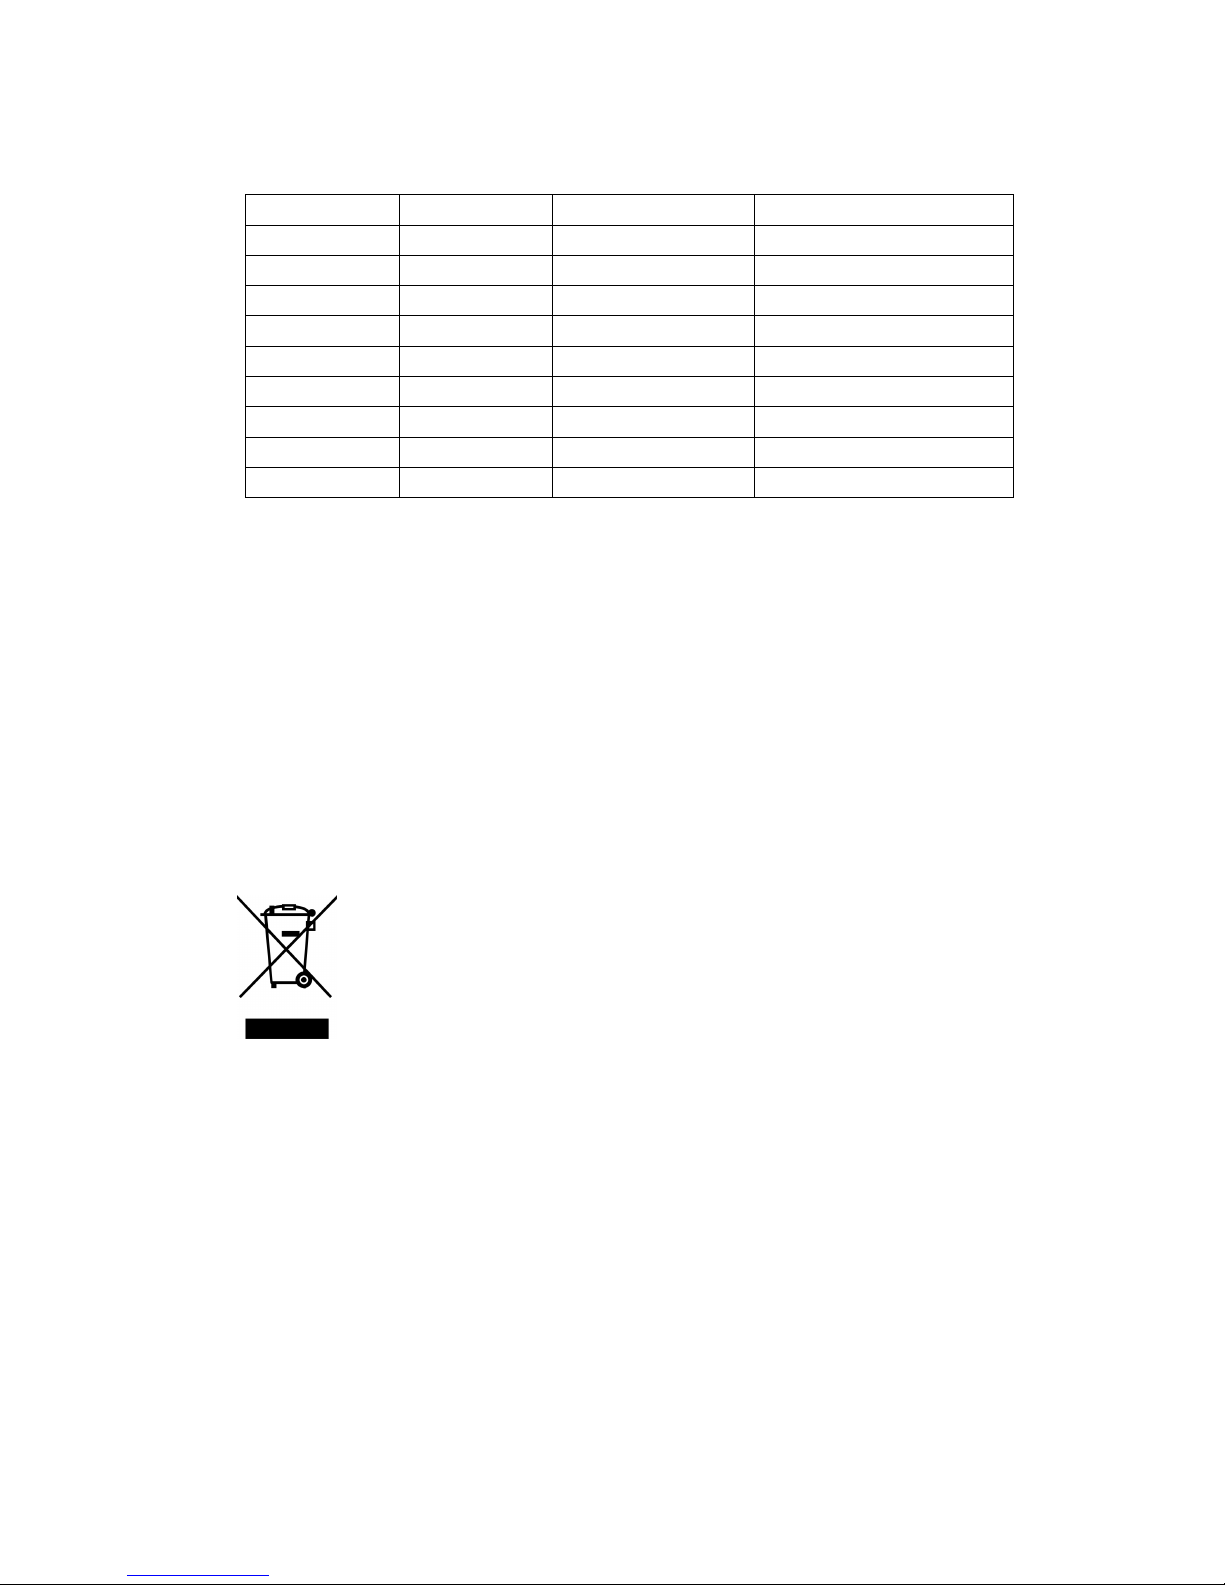
You can help to protect the environment!
Please remember to respect the local regulations: hand in the
non-working electrical equipments to an appropriate waste disposal
centre.
Page 8

8
 Loading...