

Page 1

@LB
Installationinstructions
U5
Page 2
the
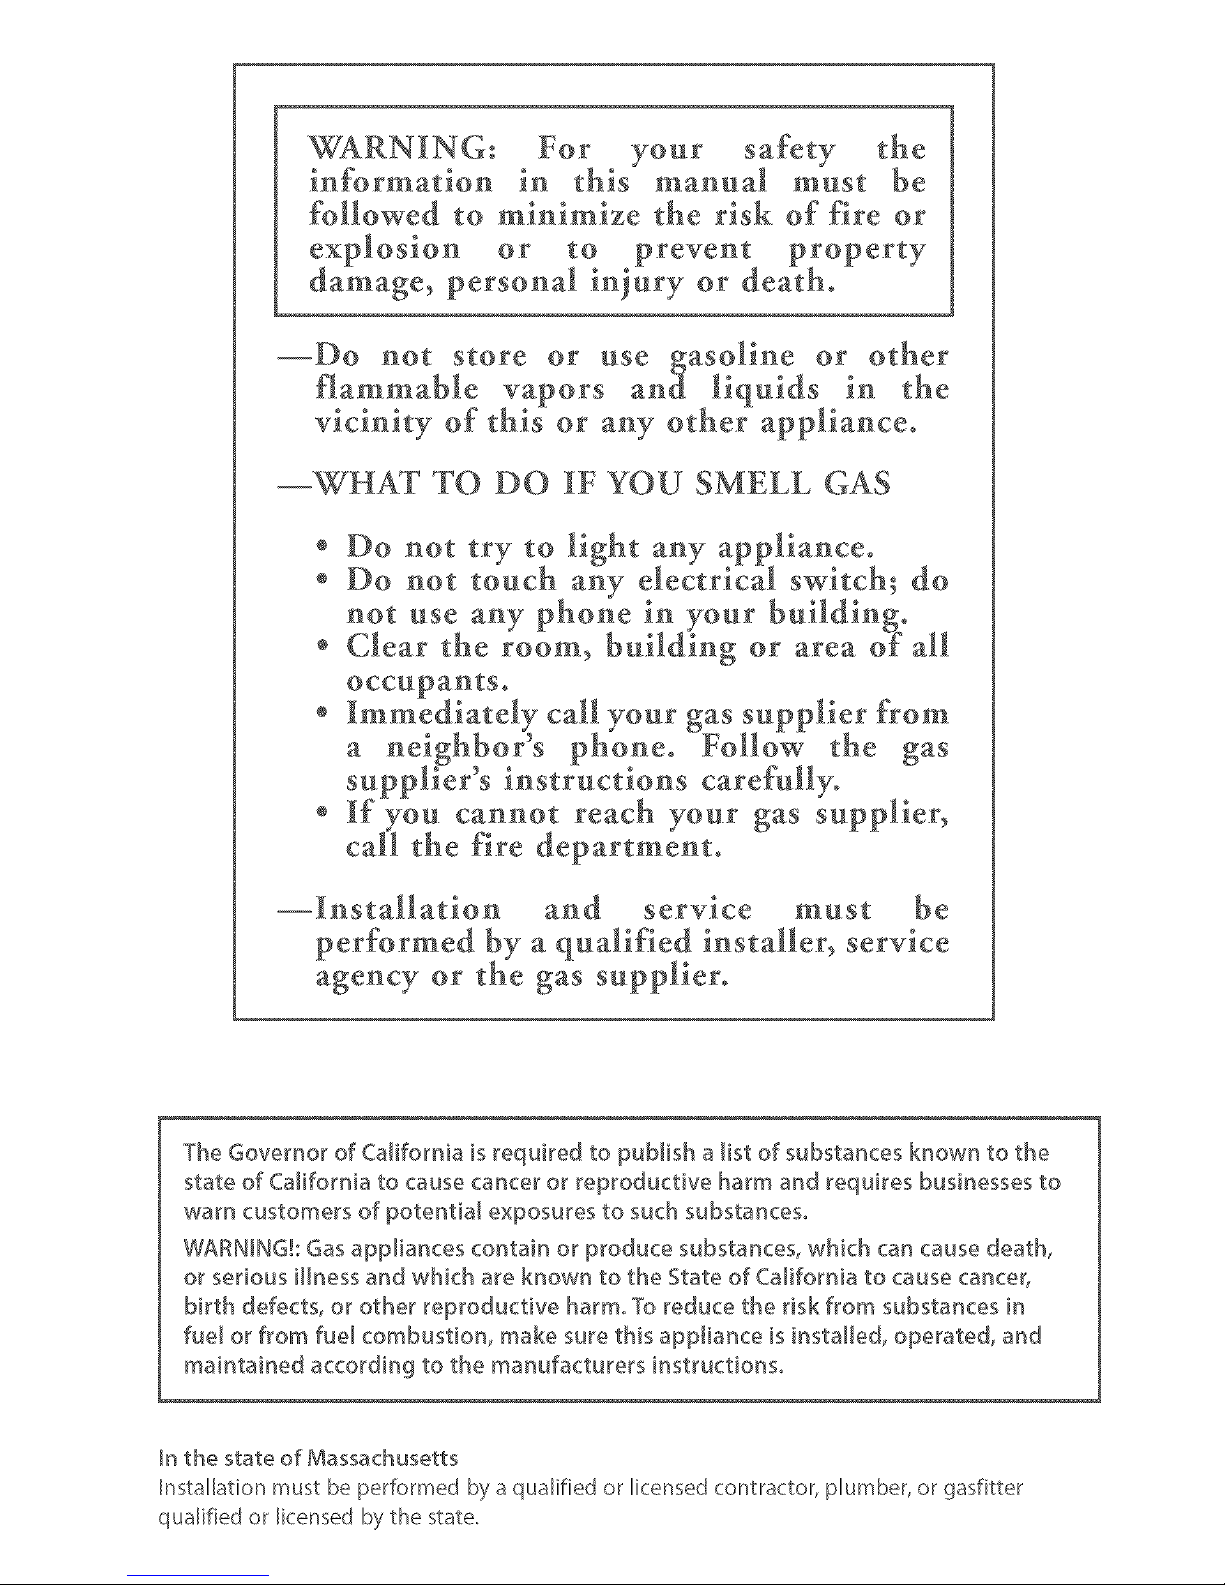
in must be
followed to minbnize the .risk of fire or
--\VHAT TO DO IF YOU SMELL GAS
° Do not try to light any appliance°
÷ Do not touch any electrical switch; do
not use. any phone _oinyour°....building.
÷ Clear the room> baddmg or area o_ all
occapaatso
÷ Immediately call your gas supplier from
a neighbors phone° Follow the gas
supplier's instructions carefully°
÷ If you. cammt .reach your gas supplier,
call the fire departmemo
must be
per_brmed by a qualified installer, service
agency or the gas supplier°
The Governor of California is required to publish a list of substances known to the
state of Califorma to cause cancer or reproductive harm and requires businesses to
warn customers of potential exposures to such substances,
WARNING!: Gas appliances con'tain or produce substa_ces, which can cause death,
or serious illness and which are known to the State of California to cause cancer,
birth defects, or other reproductive harm, To reduce the risk from subs'tances in
fuel o_ from fuel combus't[on, make sure this app[[ance is installed, operated, and
maintained according to the manufacturers instructions,
In the state of Massachusetts
hsta[[ation must be performed by a qualified or licensed contractor, plumber, or gasfitter
qualified or licensed by the state.
Page 3
Safety and warnings
Installation instructions
Installer responsibilities, Location requirements
Dimensions
Maximum length of exhaust duct
Alternative exhaust directions
Exhaust venting
Installation
Electrical requirements
Gas requirements
Level machine, Final installation check list
Features
Operating instructions
Reversing the door
Care labels
Drying special items
Other features
Limited warranty
3
4
6
7
8
10
11
13
15
17
18
19
2O
23
26
27
28
30
31
36
37
38
39
41
43
SAVE THESEINSTRUCTIONS
7hemodds showr_in thi UserCuid_,mdTyi'_otbedTvc_i/dTb/ein _;I/mdTrket_dT_d_re
subj_ tto chcmgeotony time.Forcurrer_tdet:;ils <;boutmodalondspe<ifJu;tion
ov(;i/obi/ity inyour country,p/eosevisitour/oc(;/webs/re listedon thebook(:over
or <:onto;tryout/oct';/%ors deo/et:
Page 4
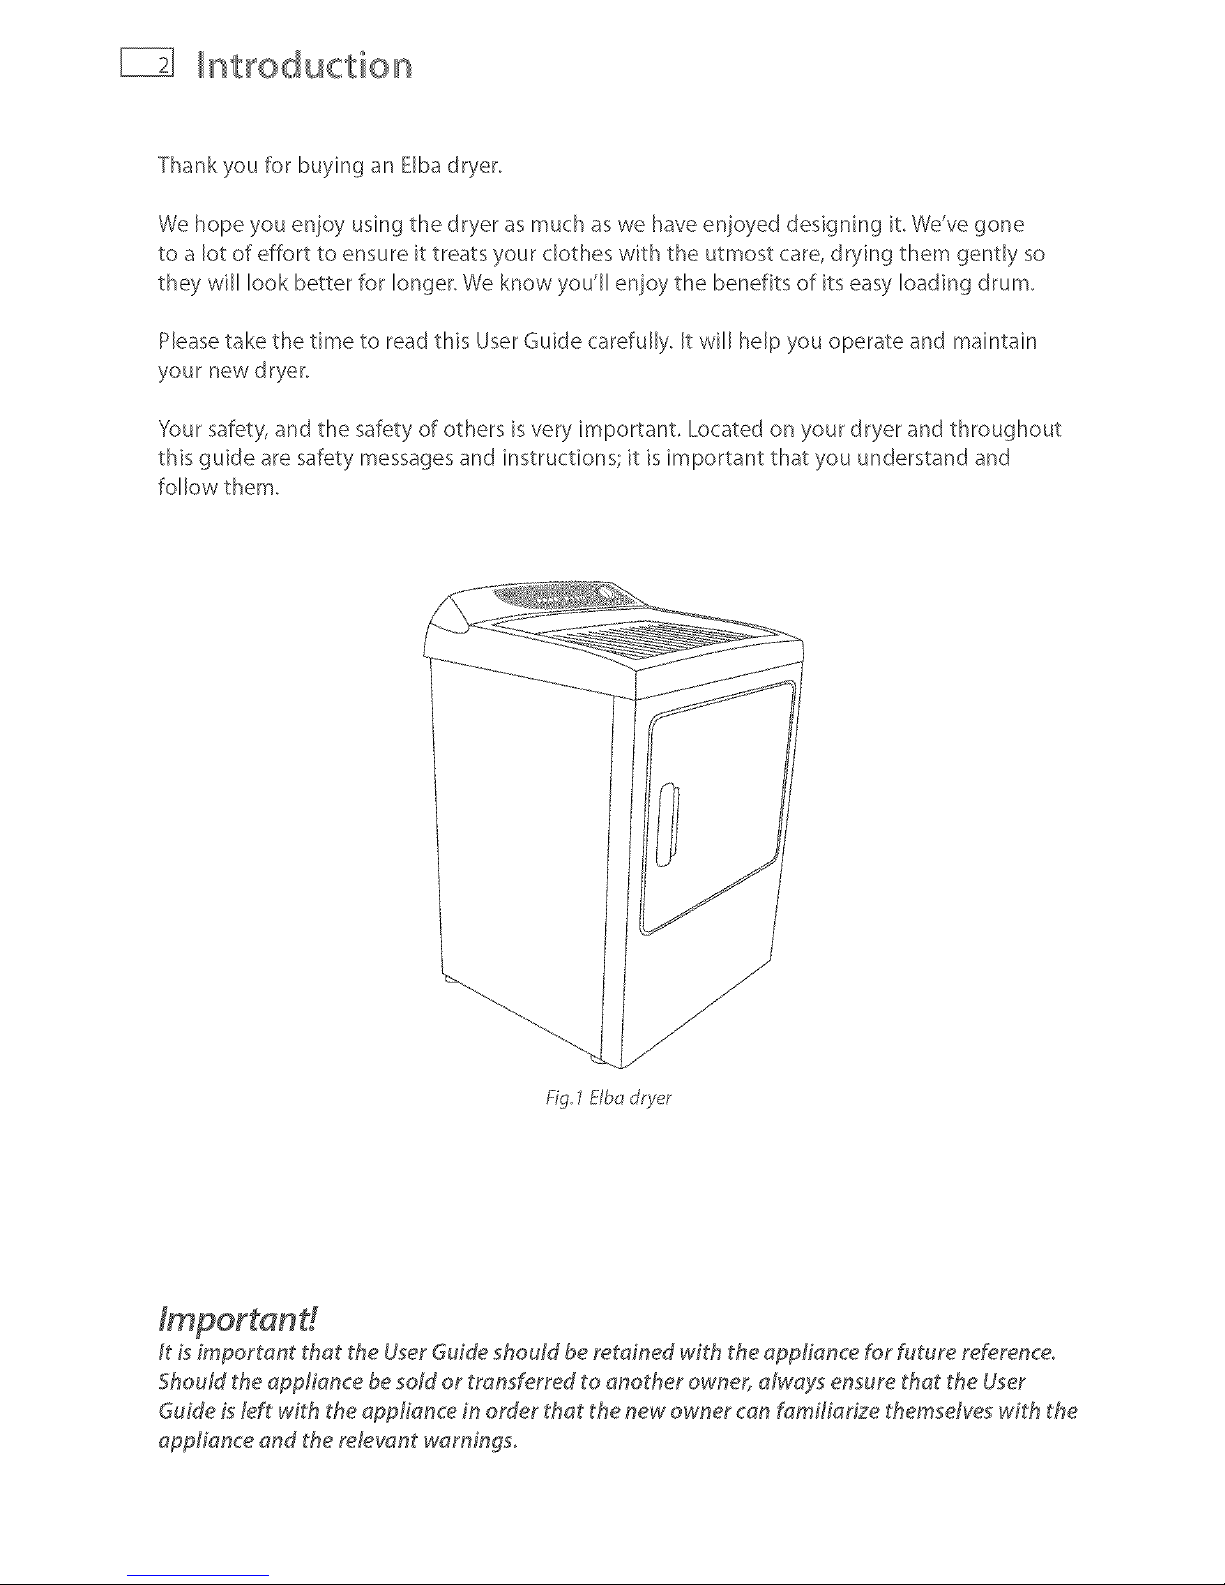
Thankyou for buying an Elba dryer.
We hope you en}oy using the dryer as much as we have enioyed designing it, We've gone
to a lot of effort to ensure it treats your clothes with the utmost care, drying them gently so
they will look better for longer. We know you'll enjoy the benefits of its easy loading drum.
Please take the time to read this User Guide carefully. It will help you operate and maintain
your new dryer.
Your safety, and the safety of others is very important, Located on your dryer and throughout
this guide are safety messages and instructions it is important that you understand and
follow them.
Fig 1Elba dry_r
It is _mportant that the User Guide should be retained with the appliance for future reference°
Should the appliance be sold or transferred to another owner, Mways ensure that the User
Guide Lsleft with the appliance in order that the new owner can familiarize themsdves with the
appliance and the rdevant warnin#s.
Page 5
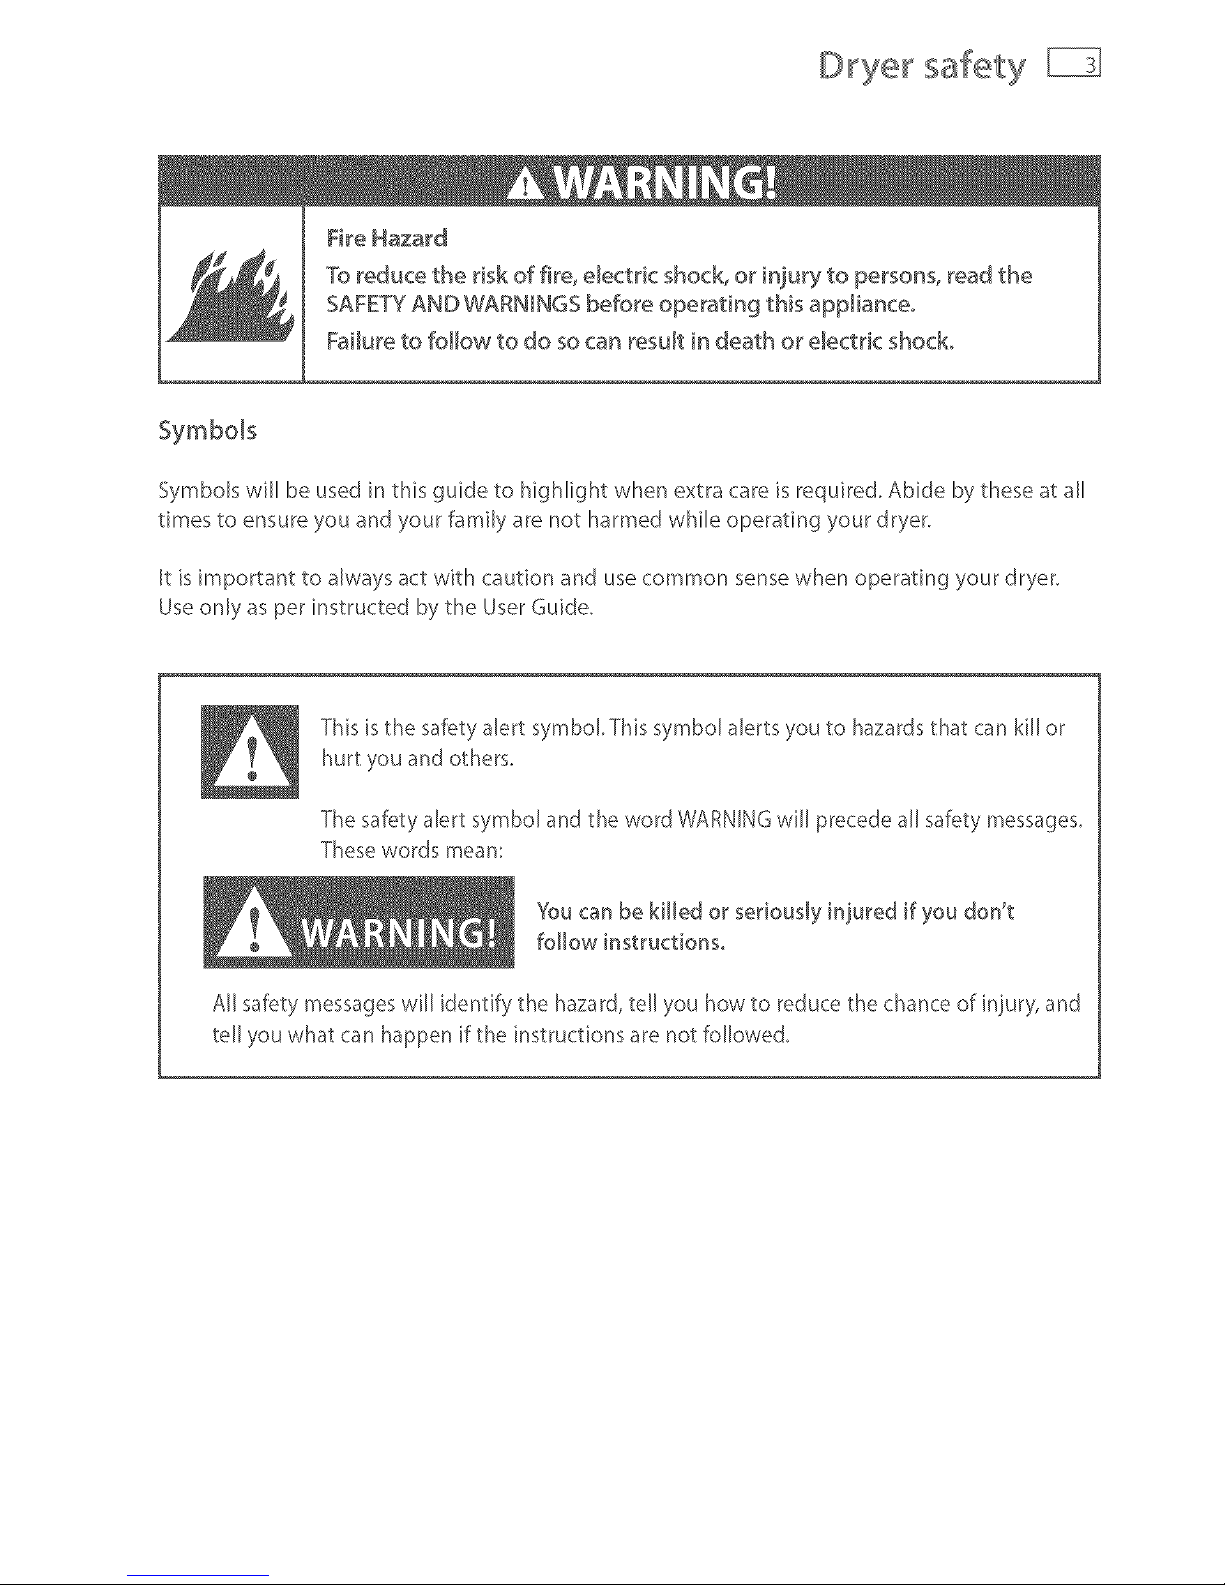
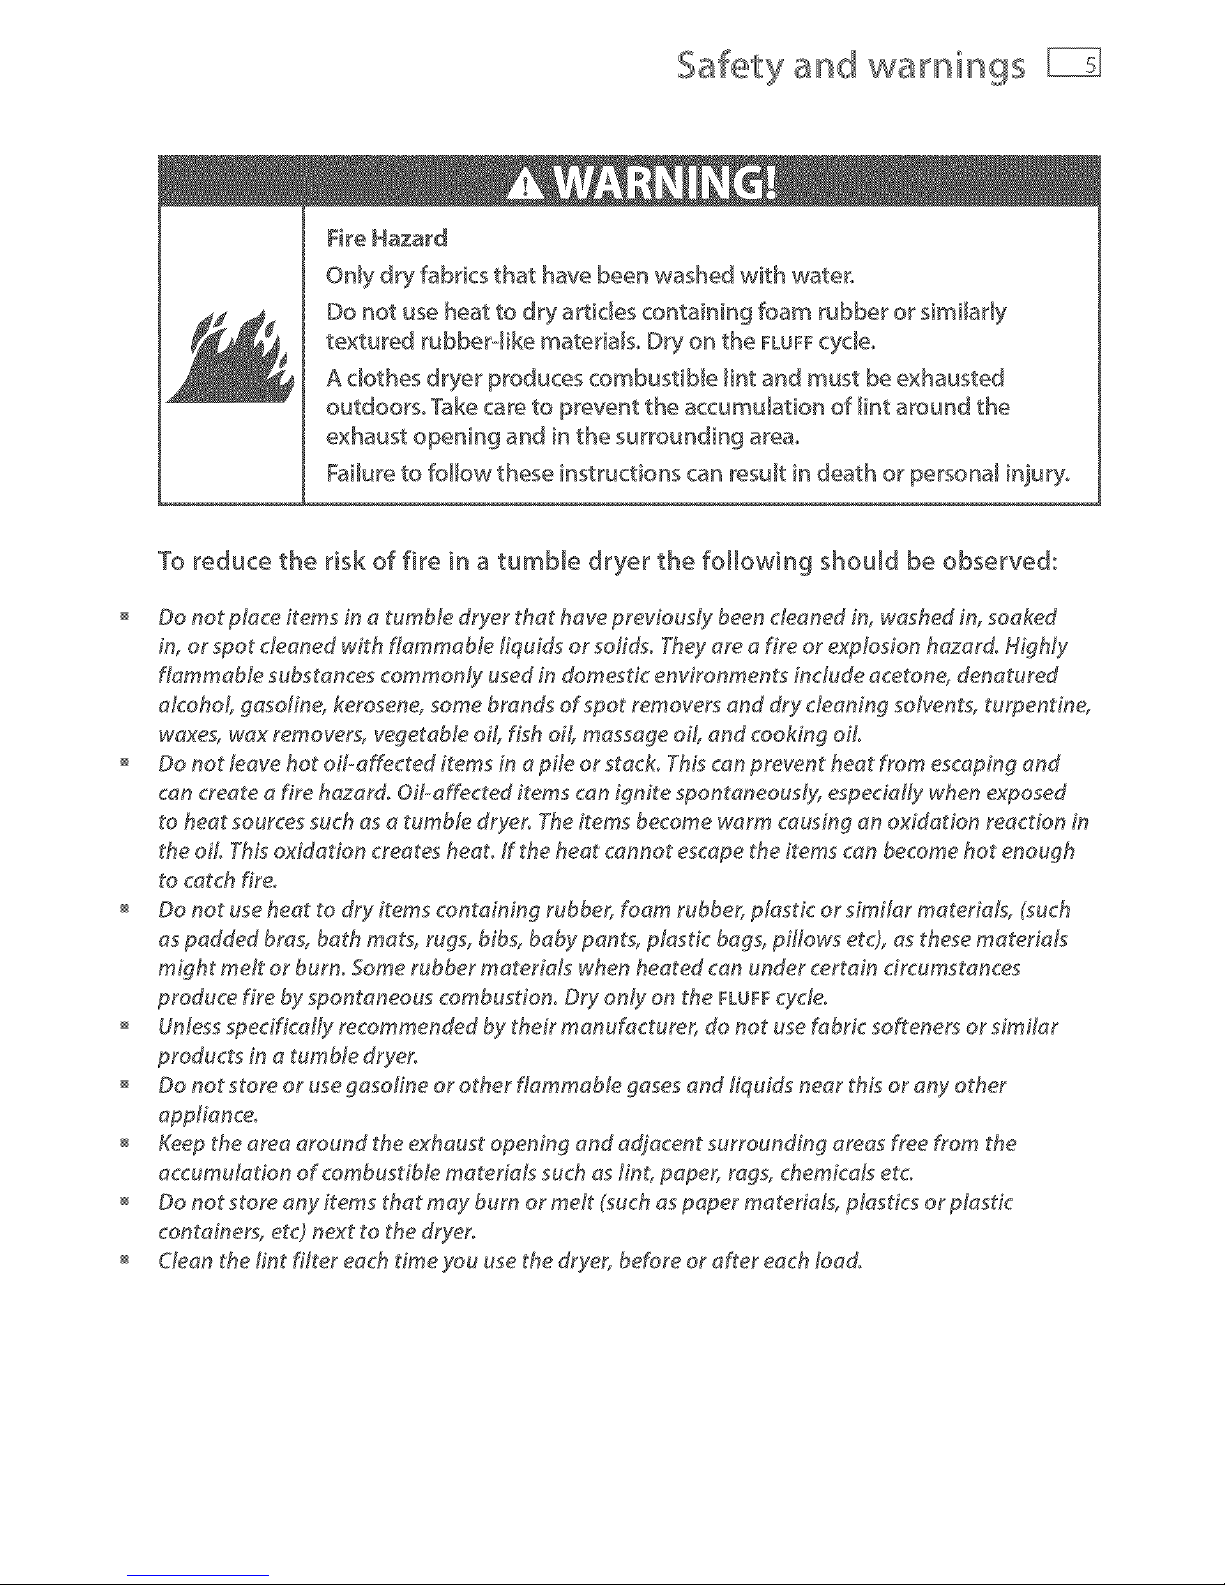
D yer safety
Fire Hazard
To reduce the risk of fire, e_ectric shock, or injury to persons, read the
SAFETYAND WARNINGS before operating this app[ianceo
Failure to follow to do so can _esu[t in death or e[ectdc shock°
Symbols
Symbols will be used in this guide to highlight when extra care is required. Abide bythese at all
times to ensure you andyour family are not harmed while operating your dryer.
[t isimportant to always act with caution and usecommon sensewhen operating ;,,ourdryer.
Useonly as per instructed by the UserGuide.
This isthe safety alert symbol.This symbol alerts you to hazardsthat can kiJ[or
hurt you and others.
The safetyalert symbol and the word WARNINGwill precedeall safety messages.
Thesewords mean:
YOu can be killed or seriously injured if you don't
follow instructions,
All safety messageswill identify the hazard,tell you how to reduce the chanceof in}ury,and
tell you what can happen if the instructions are not followed.
Page 6

Safety and warnings
£_ectM¢Shock Hazard
Fo#ow the safety precautions outlined in this User'Guide°
Failure to de so can result in death or e_ectric shock°
Important sa@ty instructions
Read aH instructions carefu@ before using this dryer°
Use this dryer oMy for its intended purpose as described in this User Guide°
Tominimize the possibility of electric shock, unplug this dryer from the power supply or
disconnect the dryer at the household d\_stribution panel (by removing the fuse or switching off
the circuit breaker) before attempting any user maintenance or cleaning°
InstMlation must conform with local codes, or in absence of local codes, with the National Fuel
Gas Code, ANSi Z223° 1iNEPA 54 or the @nadian Natural Gas and Propane Installation Code,
CSA B149° 1°
Insta#ations and service must be performed bY a quafified or ticensed contractor, plum bet or
gas#trot qualified or ficensed by the state, province, or region where this appliance is being
installe&
This dryer must be property installed and located in accordance with the installation Instructions
before it Lsused°
ThLsdryer, when installed, must be electrically grounded in accordance with IocM codes, or in
the absence of local codes, with the Nadonal Electr£al Code, ANSb'TVEPA70, or the @nadian
Electr£al Code, CSA C22° 1°
Do not install or store the dryer where it will be exposed to water or exposed to the weather°
Connect to a properly protected, rated and sized power supply c#cuit to avoid electrical ovedoa&
Do not repa# or replace any part of the appliance or attempt any servicing, unless specifically
recommended in the published user repair instructions that you understand and have the skills to
carry out.
When disconnecting the dryer, pull by the plug rather than the cord or junction of the cord plug,
to avoid damage to the cord or junction of the cord plug°
Make sure the cord is located so that it will not be stepped on, tripped over or otherwise subject
to stress or damage,
Do not tamper with the controJs°
Note: Turning the cycle selector dim to an OFF position does NOT d_sconnect the appliance gem
the power supp_yo
Do not operate this dryer if it is damaged, maffunctioning, pardaHy d_sassembled or has missing
or broken parts, including a damaged cord or plug°
This dryer must be directly connected to an approved fixed dectr£M outlet, It cannot be plugged
into an extension cord or an adaptor plug,
Page 7
Safety and warnings
Fire Hazard
Only dry fabrics that have been washed with waters
Do not use heat to dry articles containing foam rubber or similaHy
textured rubber4ike materiabo Dry on the FLUFF cyc_e_
A clothes dryer produces combustible _intand must be exhausted
outdoors° Take care to prevent the accumulation of Hnt around the
exhaust opening and in the surrounding area°
Failure to follow these instructions can result in death or personal injury,
To reduce the risk of fire in a tumble dryer the following should be observed:
Do not place items in a tumble dryer that have previously been cleaned in, washed in, soaked
in, or spot cleaned with flammable fiquids or solids. They are a fire or explosion hazard, H@Ny
flammable substances commonly used in domestic environments include acetone, denatured
a£ohoL gasdine, kerosene, some brands of spot removers and dry cleaning sob/ants, turpentine,
waxes, wax removers, vegetable oil, fish off, massage oil, and cooking off,
Do not _eave hot of-affected items in a pile or stack. This can prevent heat from escaping and
can create a fire hazard. OiJ...affected items can ignite spontaneously, especially when exposed
to heat sources such as a tumble dryer, The items become warm causing an oxidation reaction in
the oil This oxidation creates heat. ff the heat cannot escape the items can become hot enough
to catch fire.
Do not use heat to dry items containing rubber, foam rubber, plasdc or similar materials, (such
as padded bras, bath mats, rugs, bibs, baby pants, plastic bags, pillows etc), as these materials
might melt or burn. Some rubber materials when heated can under certain drcumstances
produce fire by spontaneous combustion. D#tyonly on the FLUFFcydeo
Unless specifically recommended by their manufacturer, do not use fabric softeners or similar
products in a tumble dryer,
Do not store or use gasoline or other flammable gases and flquids near this or any other
applianceo
Keep the area around the exhaust opening and adjacent surrounding areas free from the
accumulation of combustible materials such as lint, paper, rags, chemicals etco
Do not store any items that may burn or melt (such as paper materials, p_astics or plastic
containers, etc) next to the d#iyer,
Clean the tint filter each time you use the dryer, before or after each toado
Page 8

Safety and warnings
The dryer must be exhausted to the outside. Carefully follow the venting details in the
'Installation instructions_
Keep the floor around your dryer dean and dry to reduce the possibility of slipping°
If your dryer is running and you want to unload or add dothes, open the dryer dooro
Do not reach into the appliance if the drum is moving.
Close supervL_ion is necessary if this dryer is used near children. Do not aNow children to p_ay
inside, around or with this dryer or any other appliance.
Never climb on, climb into, or stand on the dryer top or drum.
Undergarments that contain metM reinforcements shouM not be placed direcdy in the dryer
Damage to the dryer can result ff the metal reinforcements come _oose during drying, ff you wish
to dry these items use a drying rack (available as an optional accessory refer to page 7).
The interior of the appliance and exhaust duct should be deaned periodically by qualified service
personnel
When discarding or storing old clothes dryer, remove the door.
Your dryer has been made to the highest standards. Years of development and rigorous testing
ensure that you have bought a world-class product, in the unlikely event that a problem should
occur, refer to the 'Limited warranty' section at the back of this guide (refer to page 43).
If you have a problem with your dryer refer to our troubleshooting section. If your problem is not
referenced, please always contact your Fisher & Payke[ Authorized Service Agent or our Customer
Care Center (Tb[[ Free 1.888.9.FNRUSA (1.888.936.7872)) rather than attempting to fix it yourself.
Page 9
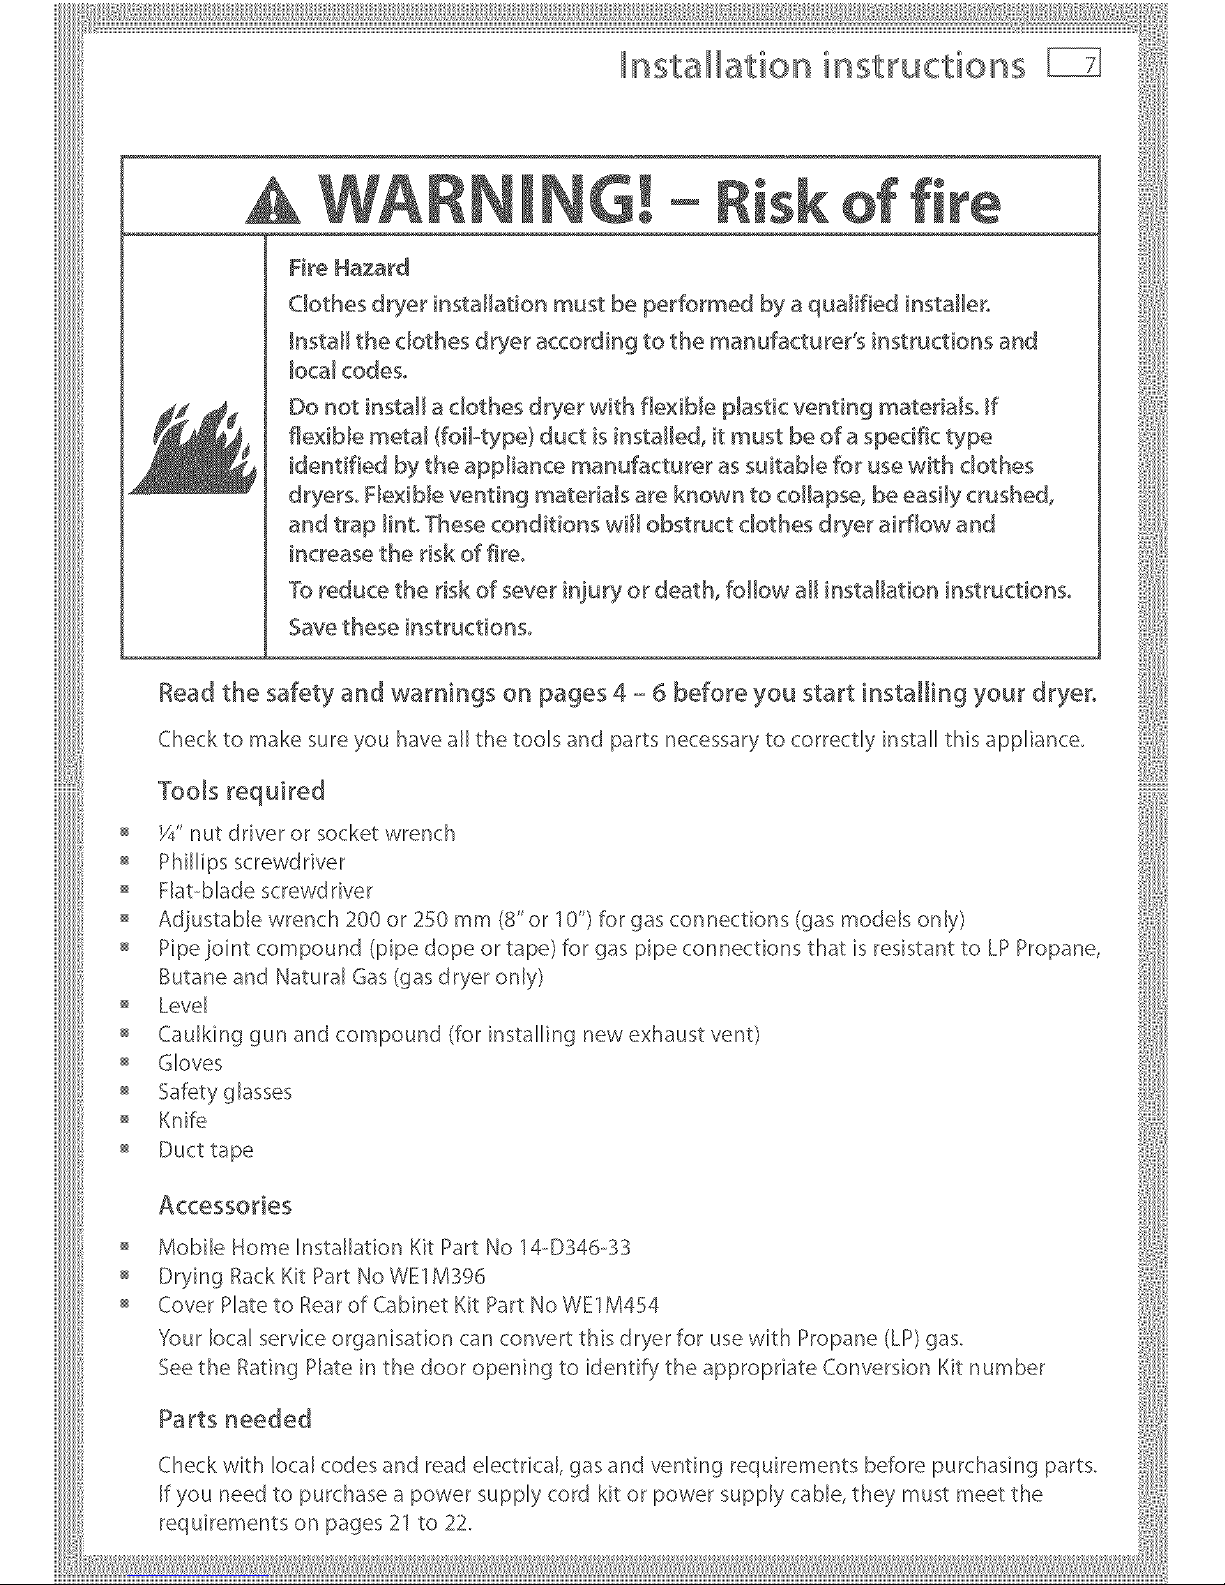
_nsta_ation instructions
[ G[- of fire
Fire Hazard
C_othesdryer installation must be performed by a qualified installer,
hstaH the clothes dryer according to the manufacturer's instructions and
_ocalcodes°
Do not install a clothes dryer with flexiMe p_astic venting mateda_soif
flexiMe meta_ {foil-type) duct isinstalled, it must be of a specific type
identified by the app_bnce manufacturer as suitable for use with clothes
dryers° FlexiMe venting materials are known to collapse, be easily crushed,
and trap lintoThese conditions will obstruct clothes dryer airflow and
increase the risk of fire°
To reduce the risk of sever injury or death, follow aHinstallation instructions°
Save these instructions,
Readthe safety and warnings on pages 4 - 6 before you start installing your dryer.
Check to make sure you have all the tools and parts necessary to correctly install this appliance.
Toomsrequired
: ZZI S IiT?
Fht-bhde screwd river i
o Adiustab[ewrench_00or2SOmmlS"or_0">forgasconnectionslgasmodelsonly>
Pipe joint compound (pipe dope or tape) for gas pipe connections that is resistant to LP Propane,
Butane and Natural Gas (gas dryer only) i
Level
o Cauminggunandcompound{forinstaUingnewexhaustvent)
Gloves
Safety ghsses i }
Knife !,
Duct tape
Accessories
Mobile Home [nstalhtion Kit Part No 14--D346<:]3
o DryingRackK_tPart.owE_M396
Cover Plate to Rear of Cabinet Kit Part No WE1M4S4 i:
Your local service organisation can convert this dryer for use with Propane (LP) gas.
See the Rating Plate in the door opening to identify the appropriate Conversion Kit number
Parts needed
Checkwithlocalcodesandreadelectrical,gasandventingrequirementsbeforepurchasingparts.
[f you need to purchase a power supply cord kit or power supply cable, they must meet the
requirements on pages 21 to 22.
Page 10
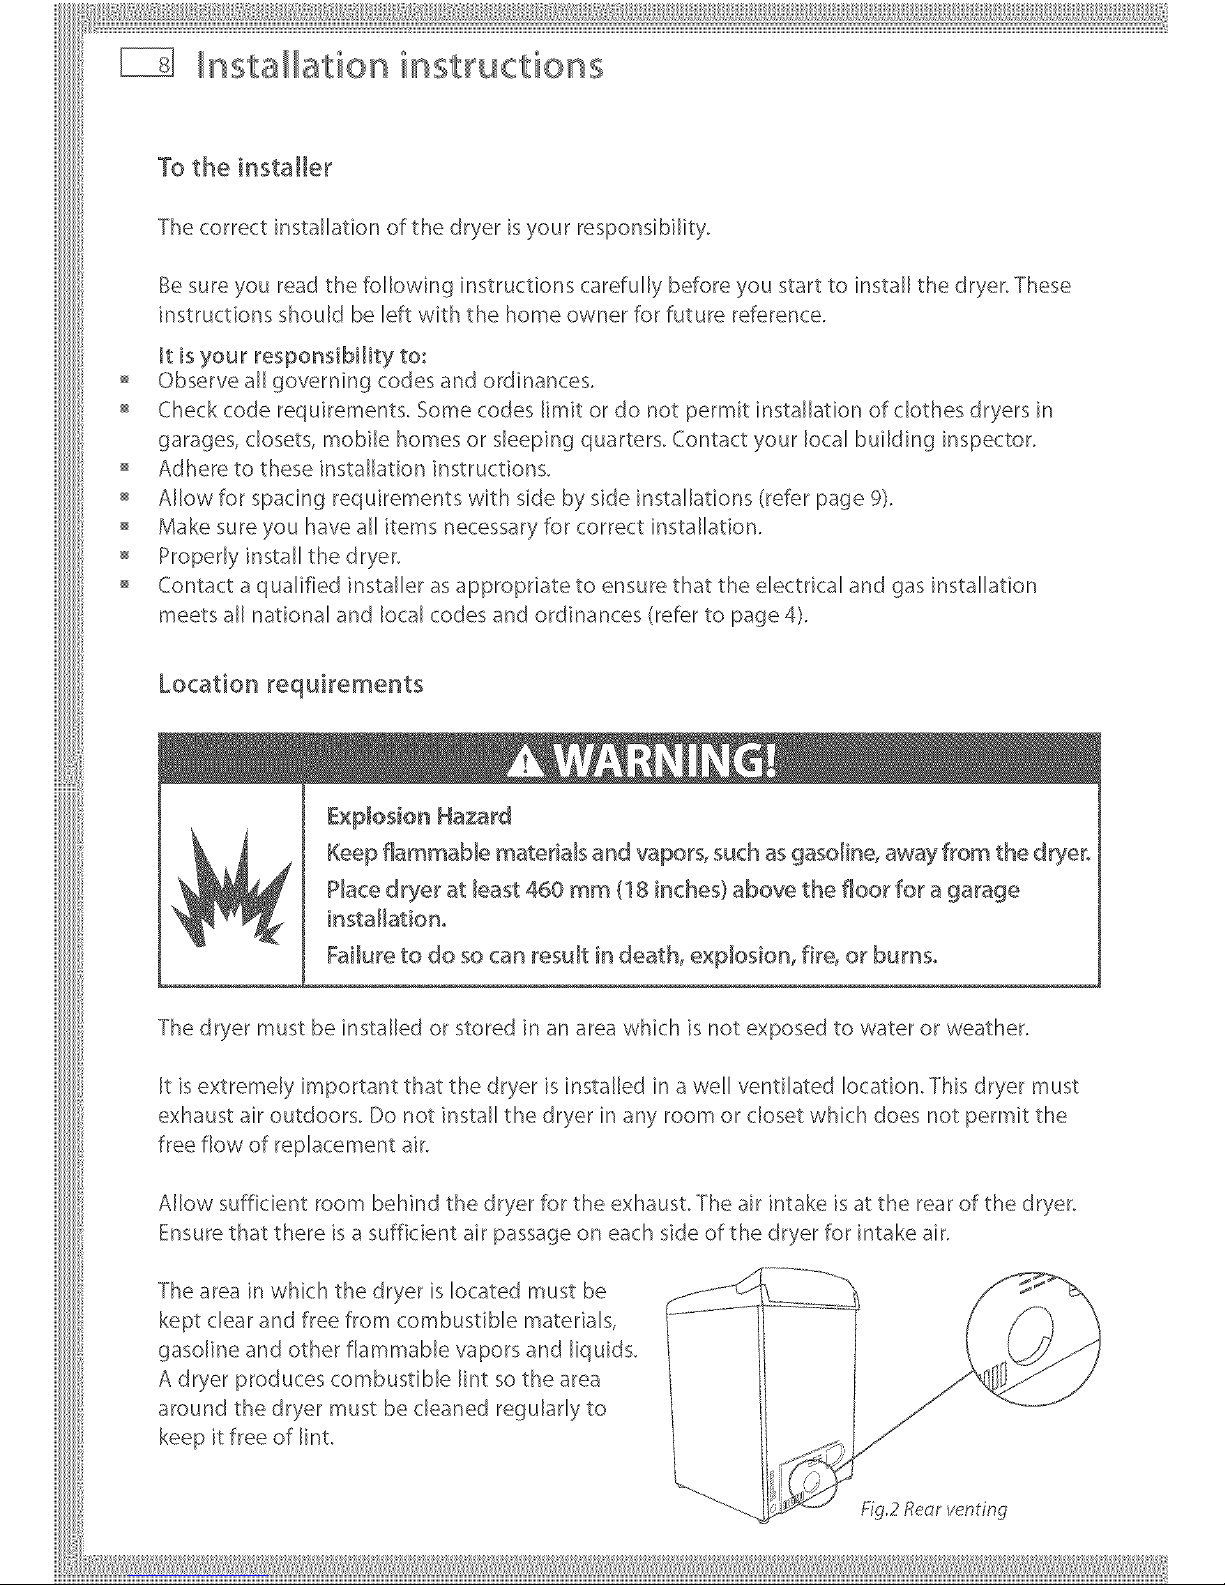
nsta ation instructions
To the installe_
The correct installation of the dryer isyour responsibility.
Be sure you read the following instructions carefully before you start to install the dryer. These
instructions should be left with the home owner for future reference.
It is your responsibiJity to:
Observe all governing codes and ordinances.
Check code requirements. Some codes limit or do not permit installation of clothes dryers in
garages, closets, mobile homes or sleeping quarters. Contact your local building inspector.
Adhere to these installation instructions.
Allow for spacing requirements with side by side installations (refer page 9).
Make sure you have all items necessary for correct installation.
Properly install the dryer.
Contact a qualified installer as appropriate to ensure that the electrical and gas installation
meets all national and local codes and ordinances (refer to page 4).
Location _equi_ements
£xpIosion Hazard
KeepflammaNe mateMaBand va_rs, such as gasoline, away from the d_er,
P_acedryer at least 460 mm {18 inches} above the floor for a garage
instaHationo
Failure to do so can result in death, explosion, fire, or burns,
The dryer must be installed or stored in an area which is not exposed to water or weather.
It is extremely important that the dryer is installed in a well ventilated location. This dryer must
exhaust air outdoors. Do not install the dryer in any room or closet which does not permit the
free flow of replacement air.
Allow sufficient room behind the dryer for the exhaust. The air intake is at the rear of the dryer.
Ensure that there is a sufficient air passage on each side of the dryer for intake air.
The area in which the dryer is located must be
kept dear and free from combustible materials,
gasoline and other flammable vapors and liquids.
A dryer produces combustible lint so the area
around the dryer must be cleaned regularly to
keep it free of lint.
Page 11
iiilI!i!,!,!!!!!, I,liiiliii,ill¸IIII IIIiiiiliill,i, iliiii_illiiillIIIlilil_ill,i_,lilii_ii!iI,lii!IIIilII,iiiiiiiil,i iiiliiil!
Ilstallatiol ilstluctiols
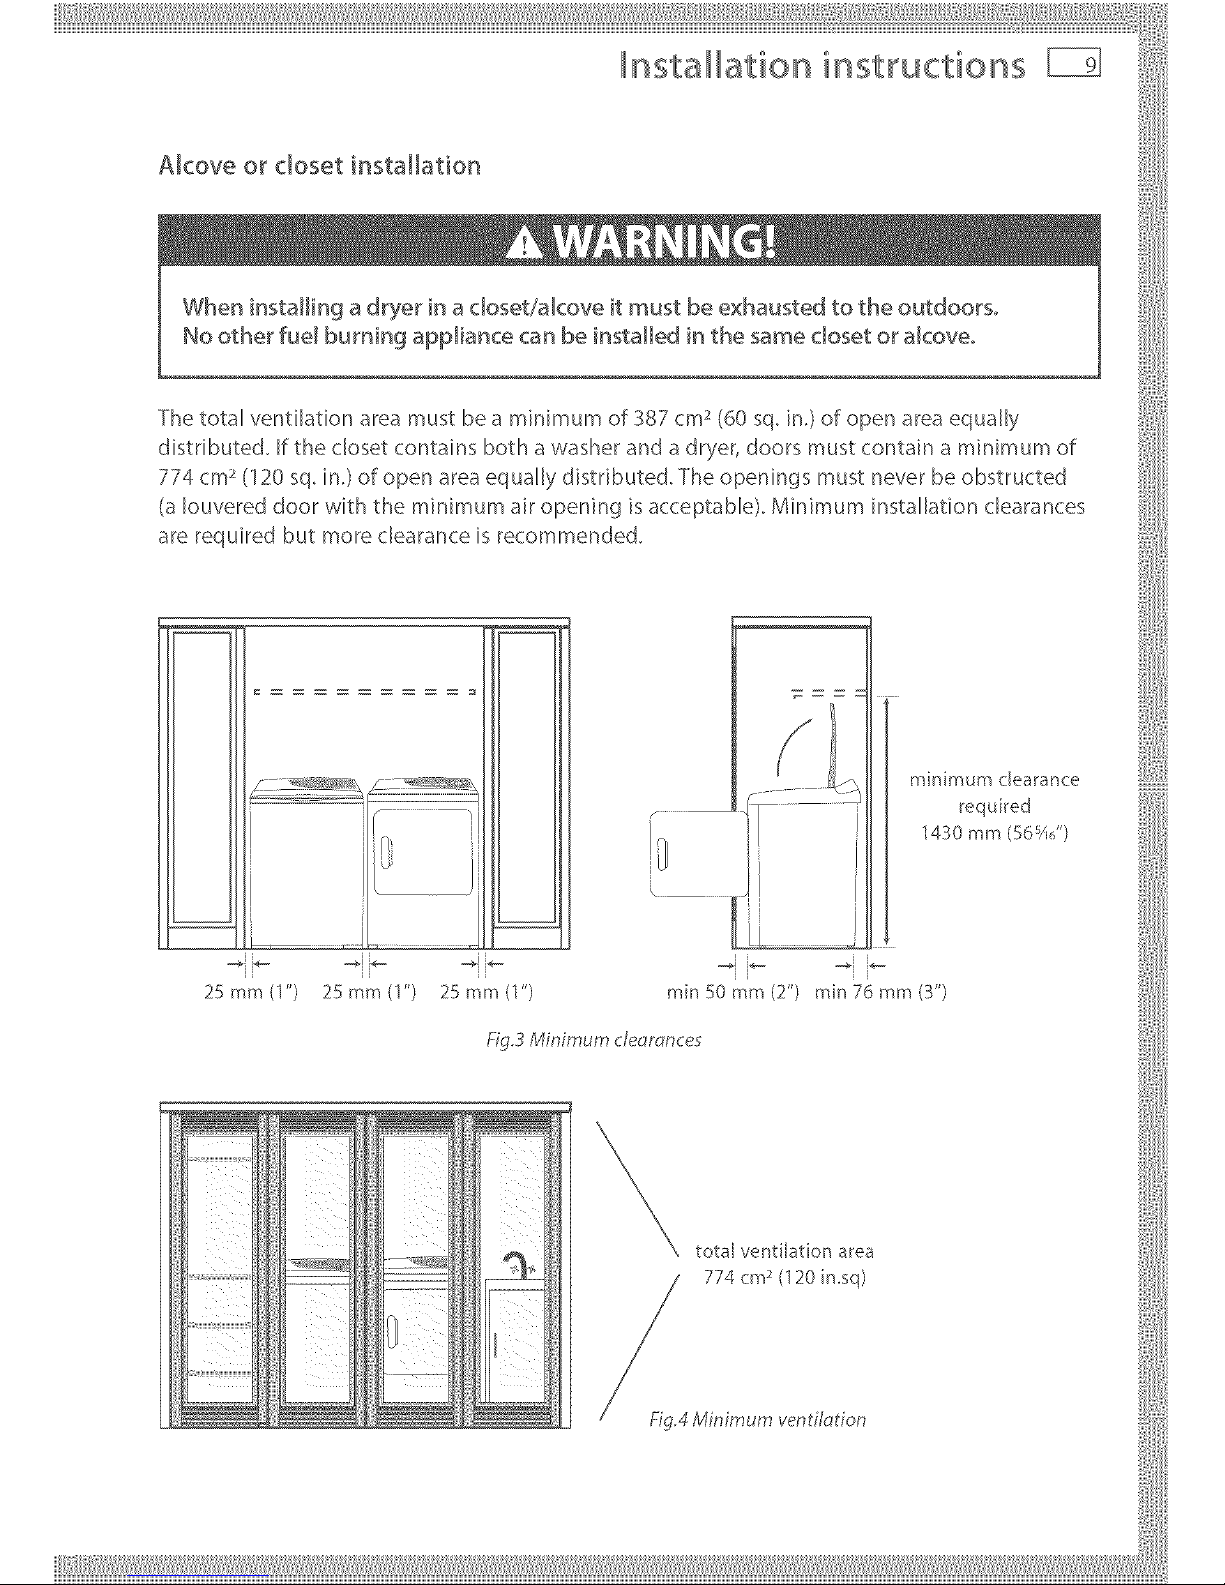
Alcove or closet ir_stallation
-[he total ventilation area must be a minimum of 387 cm (60 sq. in,) of open area equally
distributed. If the closet contains both a washer and a dryer, doors must contain a minimum of
774 cm (120 sq, in.) of open area equally distributed. The openings must never be obstructed
(a Iouvered door with the minimum air opening is acceptable). Minimum installation clearances i
arereq°_redb°tmoreclearance_srecommended.
F __/ [ required
_\_ total ver_tllatlon area
___________
Page 12
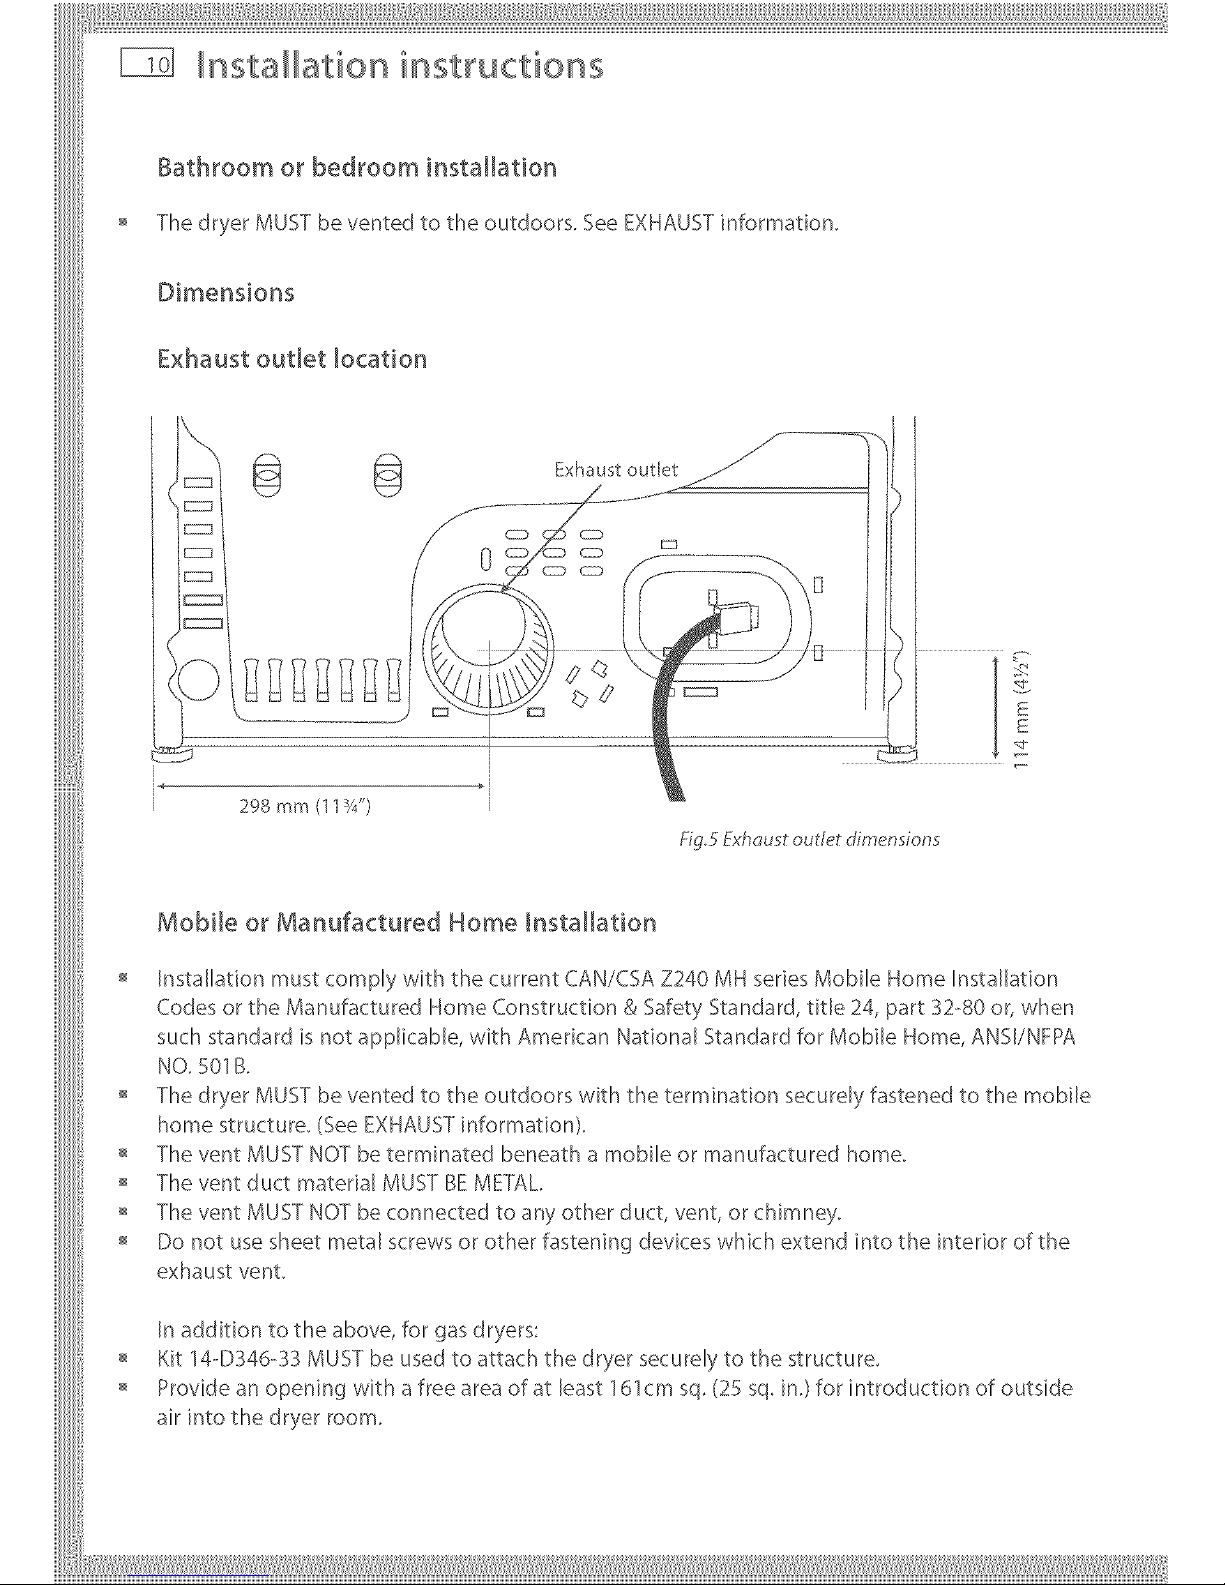
nsta ation instructions
Bathroom or bedroom installation
The dryer MUSTbe vented to the outdoors, See EXHAUSTinformation,
Dimensions
Exhaust outlet location
Exhaust outlet
/
i
298 mm (I 1¼')
Fig.5 Exh{_u t outlet dimensions
Mobile or Manufactured Home installation
Installation must comply with the current CAN/CSA Z240 MH series Mobile Home Installation
Codes or the Manufactured Home Construction & Safety Standard, title 24, part 32-80 or, when
such standard is not applicable, with American National Standard for Mobile Home, ANSI/NFPA
NO. 501 B.
The dryer MUST be vented to the outdoors with the termination securely fastened to the mobile
home structure. (See EXHAUST information).
The vent MUST NOT be terminated beneath a mobile or manufactured home.
The vent duct matedal MUST BE METT\L
o The vent MUST NOT be connected to any other duct, vent, or chimney.
Do not use sheet metal screws or other fastening devices which extend into the interior of the
exhaust vent.
In addition to the above, for gasdryers:
Kit 14-D346-33 MUSTbe used to attach the dryer securely to the structure.
Provide an opening with a free area of at least 161cm sq.(25 sq.in.) for introduction of outside
air into the dryer room.
Page 13
iiilI!i!,!,ii_ilillii,lilili,liiliil,lii,ili ¸iÀÀ¸l,liiii¸ililiililil_,i_,ili_iiiiiiili_li_li_iii_ili!¸I:I!l:ill:ilii!iiil,lii!,i!,iiiiiii,ii_li!ii=!i,i!iiilliii:li/iil!
Installation instructions
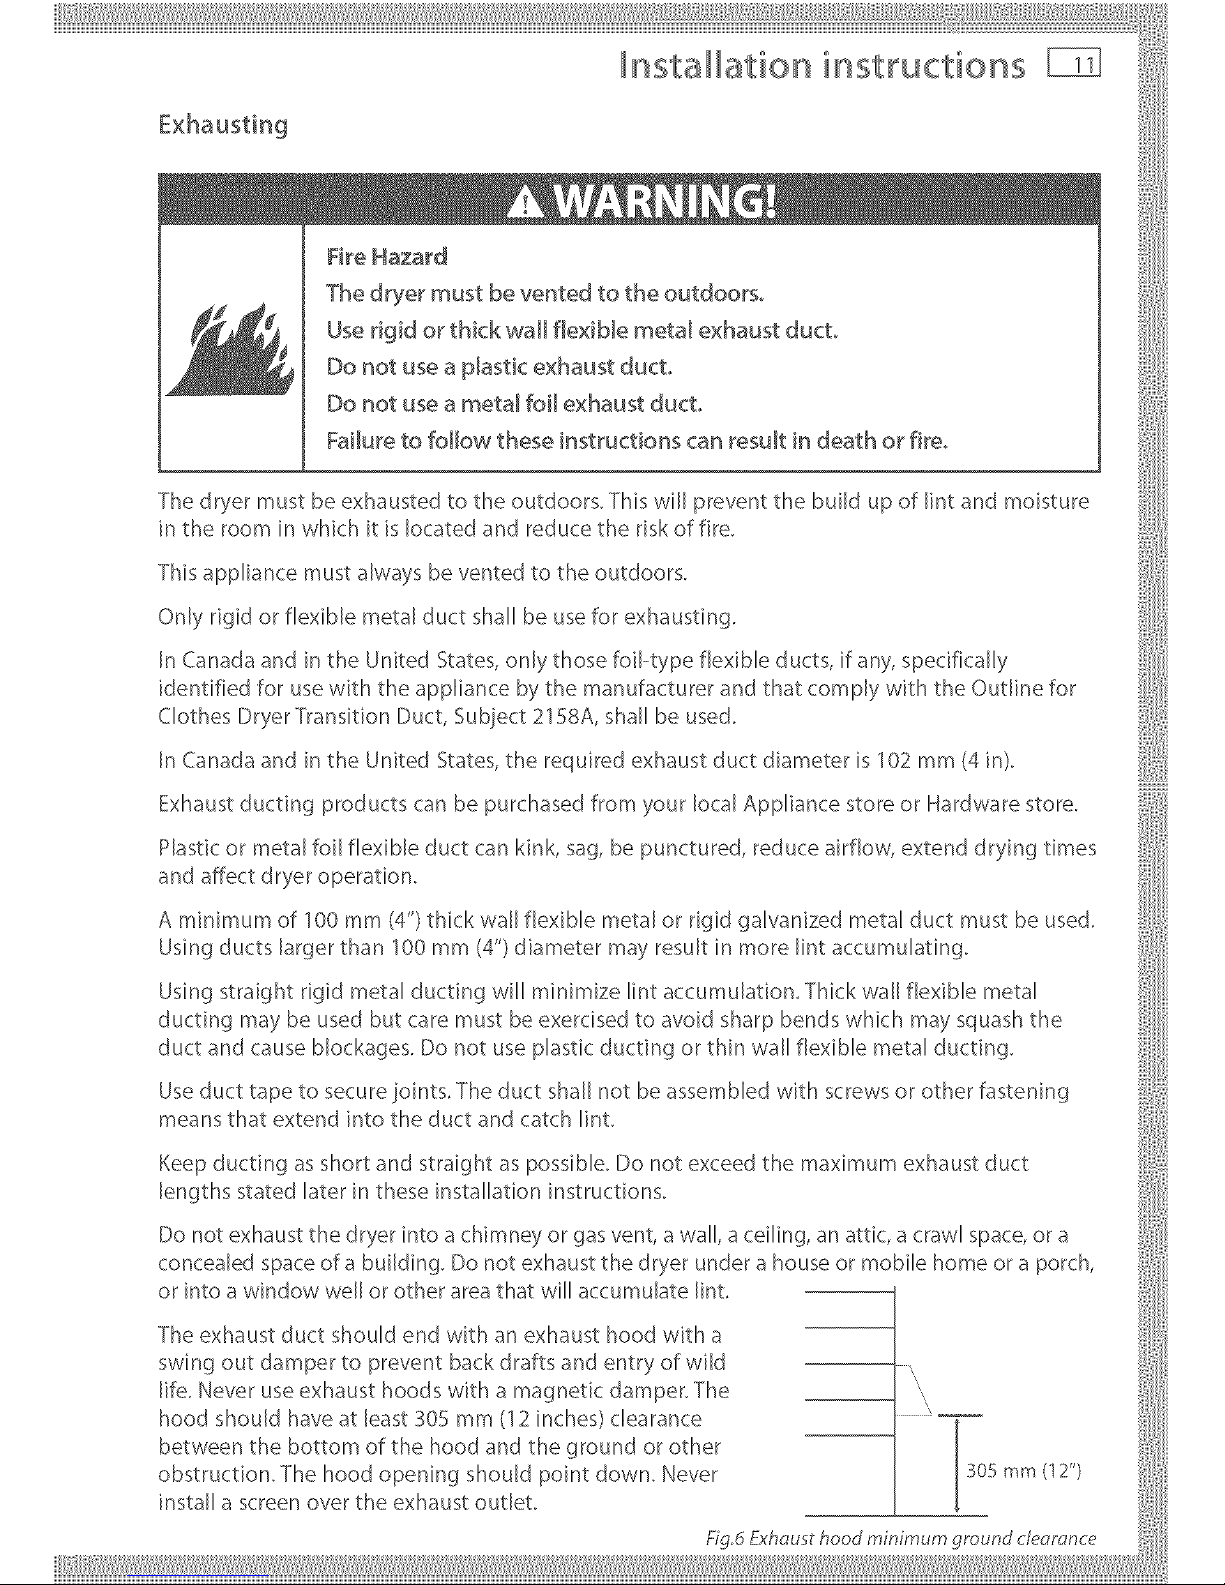
E×hoo =og
Failure to follow these instructions can result in death or tim°
Thedryermustbeexhaustedtotheoutdoors.This,,,'illpreventthebuildupoflintandmoisture
in the room in which it is located and reduce the risk of fire.
This app/ance must always be vented to the outdoors. :::i1
Only,g_dorflexiblemetalductshaUbeuseforexhausting.
In Canada and in the United States, only those foil-type flexible ducts, if any, specifically !:ii
identified For use with the appliance by the manufacturer and that comply with the Outline for
Clothes Dryer Transition Duct, Subject 21S8A, shall be used.
In Ca nada and in the United States, the requi red exhaust duct d ia meter is 102mm (4in).
niiiiiii
Exhaust ducting products can be purchased from your local Appliance store or Hardware store.
andaffectdr;,eroperation.
A minimum of 100 mm (4")thick wall flexible metal or rigid galvanized metal duct must be used.
Using ducts larger than 100 turn (4")diameter may result in more lint accumulating.
Using straight rigid metal ducting will minimize lint accumulation. Thick wail flexible metal
ducting may be used but care must be exercised to avoid sharp bends which may squash the
duct and cause Mockages. Do not use plastic ducting or thin ,,,,'allflexible metal ducting.
Useducttapetosecureioints.TheductshaUnotbeassembledwithscrewsorotherfastening
means that extend into the duct and catch lint. [[
Keep ducting as short and straight as possible. Do not exceed the maximum exhaust duct
lengths stated later in these installation instructions, i }
Do not exhaust the dryer into a chirnnel/or gas vent, a wall, a ceiling, an attic, a crawl space, or a
concealed space of a building. Do not exhaust the dryer under a house or mobile home or a porch,
Thee×haustduc_shouk_endw_thanexhausthoodw_tha _
swingoutdampertopreventbackdraftsandentryofwUd _ ', 'i
life. Never use exhaust hoods with a magnetic damper.The . I ",,
hood should have at least 305 mm (12 inches) clearance . I
between the bottom of the hood and the ground or other J
305 mm (12 )
obstruction.Thehoodopeningshouldpointdown.never [ - "
install a screen over the exhaust outlet.
___________
Page 14
nsta ation instructions
To reduce condensation, insulate any ducting which passes through unheated areas.
Slope the duct gently downwards to the hood, to drain condensation and reduce lint build up.
Avoid sag or loops in the duct as they may collect and store water and accumuhte lint.
Before using an existing exhaust duct system for a dryer ensure that:
No plastic or other potentially combustible duct or flexible metal foil ducting has been used.
The duct is not pierced, kinked or crushed.
The duct does not exceed the maximum recommended length for the new dryer.
The exhaust hood damper opens and closes freely and with sufficient movement.
Static pressure in the exhaust ducting does not exceed 250Pa (1 inch of water column), or is not
less than 0 inches of water column (ie negative pressure), when measured with a manometer in
the first 150 mm (6") of the duct, with the dryer running on FLUFF(NO HEAT)setting.
The exhaust duct system meets all relevant local, state, province and national codes.
All ducting should be inspected and cleaned at least once a year to remove accumulated lint.
Frequently check that the damper on the exhaust hood moves sufficiently and opens and
shuts freely.
Mobile Home Installations
A Mobile Home Installation Kit is available (see'Accessories' page 7 and notes page 10).
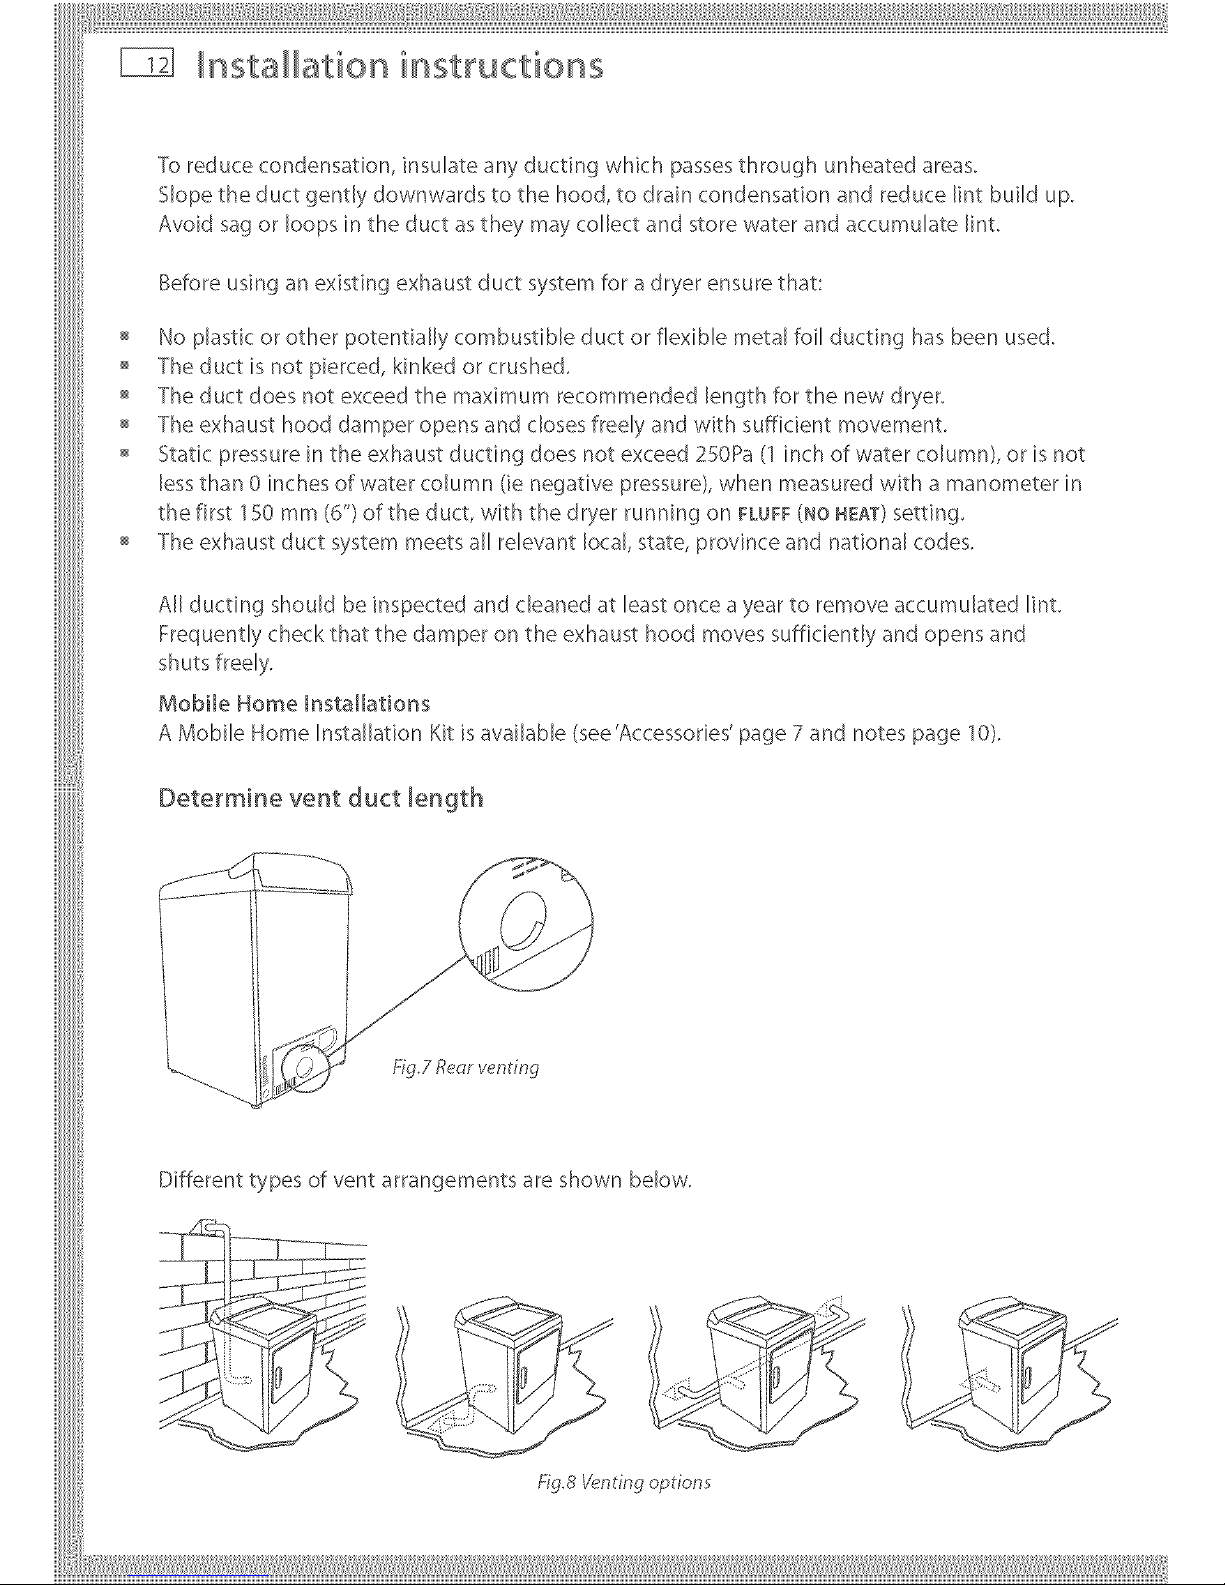
Determine vent duct length
Different types of vent arrangements are shown below.
F-ig8 Yenting options
Page 15
Installation instructions
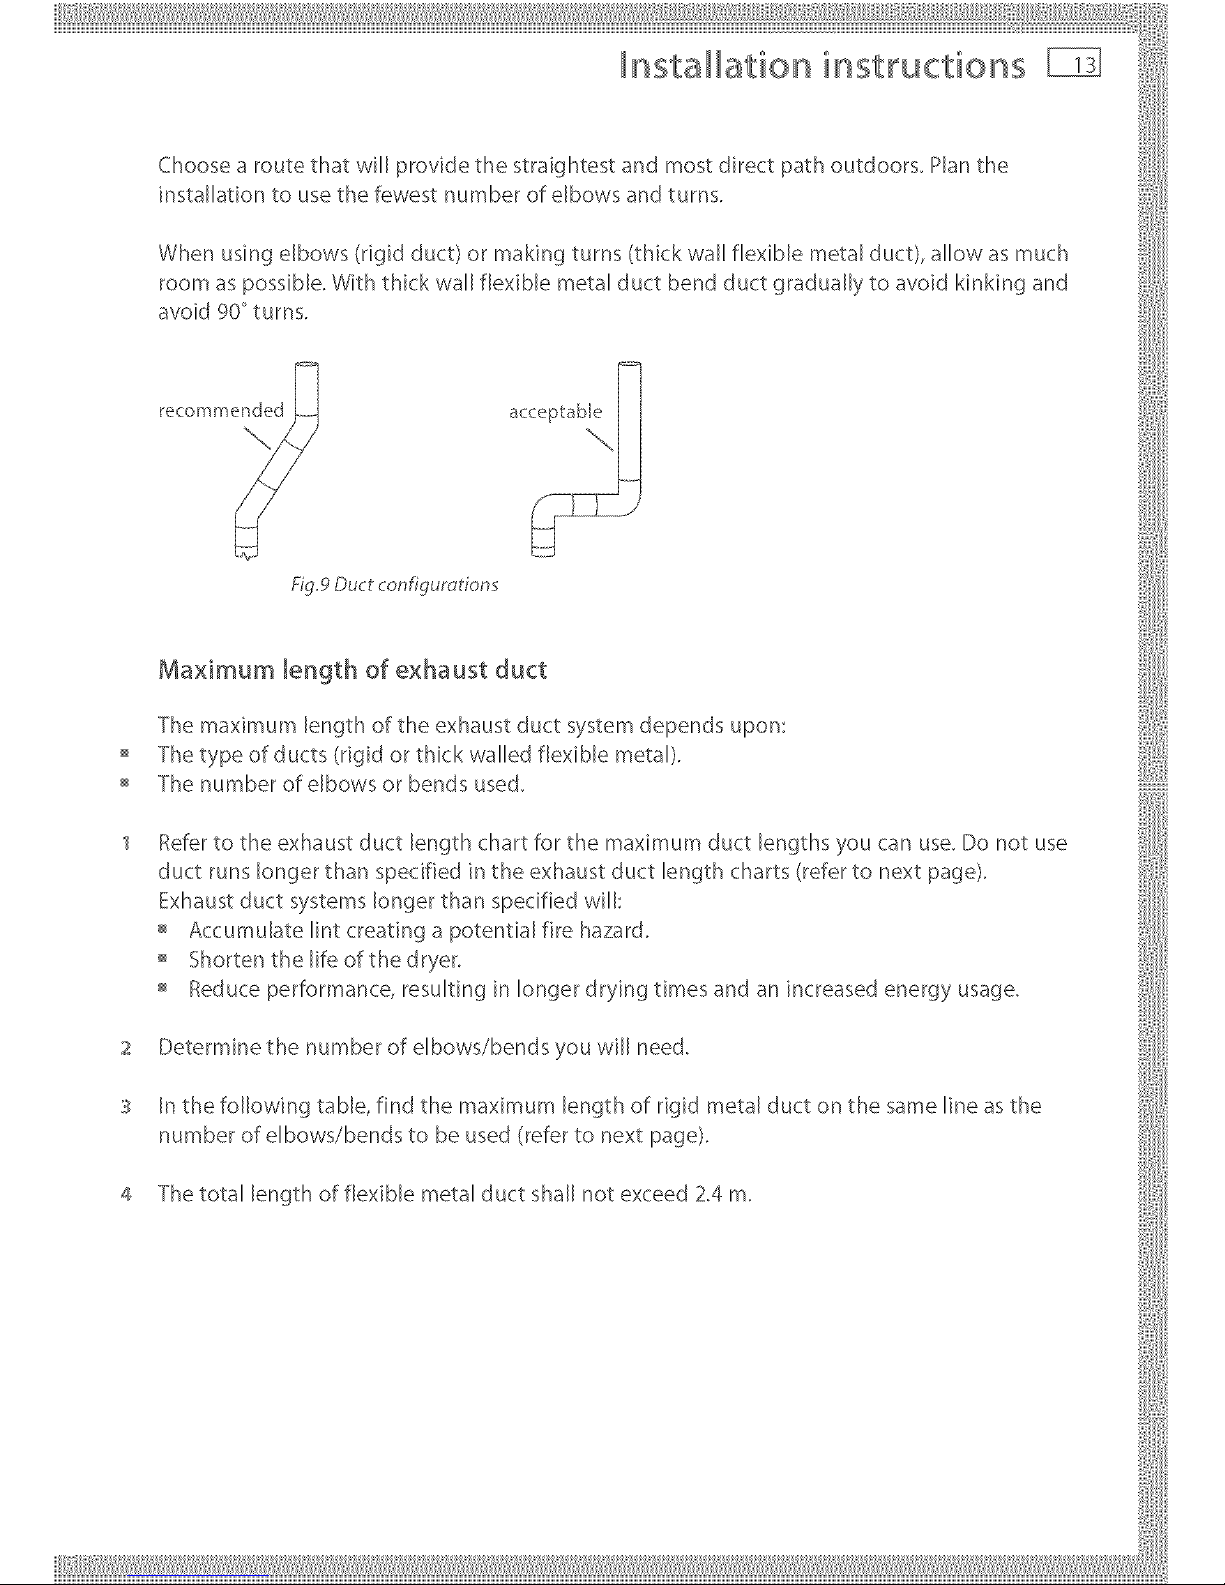
Choose a route that will provide the straightest and most direct path outdoors. Plan the
installation to use the fewest number of elbows and turns.
When using elbows (rigid duct) or making turns (thick wall flexible metal duct), allow as much
room as possible. With thick wall flexible metal duct bend duct gradually to avoid kinking and
avoid 90" turns.
£g.9 Duct configurations
Maximum length of exhaust duct
The maximum length of the exhaust duct system depends upon:
The type of ducts (dgid or thick walled flexible metal).
= The number of elbows or bends used.
1 Refer to the exhaust duc/: lenf_lth chart for the maximum duct lengths you can use. Do not use It
duct runs longer than specified in the exhaust duct length charts (refer to next page). !}
Exhaust duct sy'stems Ionf_ler than specified wilh
Accumulate lint creating a potential fire hazard.
Shorten the life of the dryer, i
= Reduceperformance,resulting_n_ongerdryingt_mesandan_ncreasedene<,,usage. ::i1
Oeterm_nethenumberofelbows/bendsyou,,.,'_IIneed. {[i
S In the following table, find the maximum length of rigid metal duct or, the same line as the
number of elbows/bends to be used (refer tO next page).
4 The total length of flexible metal duct shall not exceed 2.4 m. {1[{
Page 16

Installation instructions
Maximum length of exhaust duct
Maximum length of 100 mm (4"} diameter metal duct.
Number of 90 °
elbows/bends Rigid
0 183 m 60 ft
1 1:5.7 m 45 ft
2 10J m 35 ft
3 7.6 m 25 ft
4 4.6 m 15 ft
For exhaust systems not covered by the exhaust duct length charts (such as multiple unit hook-
ups, plenums, and power-assist fans), ca[[ our Customer Care Center:
TOLL FREE1.88&g.FNRUSA (1.888.936.7872).
Page 17

iiilI!i!,!,!!!!!' I'liiiliii,ill¸IIII IIIiiiiliill_i, iliiii_illiiillIIIlilil_ill,i!,lilii_ii!iI,lii!IIIi:liii!_iiil,iliiilii!_lli,iii
Installation instructions
Alternative exhaust directions
This dryer can be vented from the rear, right, left, and bottom side of the cabinet and must be
exhausted to the outdoors.
Note: the gas dryer can not be exhausted directly through the right side of the cabinet.
Dryer exhaust to right, left or bottom of cabinet
Detach and remove the bottom, right or
left side knockout as desired. Remove the
screw inside the dryer exhaust duct and
save, Pull the duct out of the dryer. Protect
sharp edges around the knockout and
exhaust opening with tape.
Remove
scYew
and save
Remove desired
knockout (one ony)
Fixing __ole
iiiiiiiils
cuttheductasshownandkeepportionA. B A
°° -- i )
-< 9" _i !i
Tab tocation Bend tab " .... .-" " ii_i:_}i}_::, ....
Through the rear opening, locate the tab up 45+ _ /<} %]:: :i ":!':_"
in the middle of the dryer base. Lift the tab _'\, ..... i/,i_ " _:_
to about 45° us ng a f at bade screwdr ver. " _ ..... ' -'}"} ........ ii,
F_×_ng j:
Adding new duct Hole \ Portion 'W ......
Reconnect the cut portion (,&)of the _,, .................. :::::
ducttotheb_owerhousing.Makingsure _<*'L _
that the shortened duct is aligned with ......::;/, '_;:,!,/",,:;::, ;
the tab in the base. Use the screw saved :i....... i ,/. ........ .'
previously to secure the duct in place '
through the tab on the dryer base.
R_g
sdeexhaus_Fig.70E_,h_._di_<_io__e__,_
___________
Page 18

nsta ation instructions
AJtemative exhaust directions
Adding elbow and duct for exhaust to
right or left side of cabinet
Preassemble 100 mm (4") elbow with
100 mm (4") duct. Wrap duct tape around joint.
Insert duct assembly, elbow first, through the
side opening and connect the elbow to the dryer
internal duct.
or rght side
Ducttape
Besure not to pull or damage the dectrical
wires inside the dryer when inserting the duct°
Apply duct tape as shown on the joint between the
dryer internal duct and the elbow.
internal duct joints must be secured with tape,
otherw;se they may separate and cause a safety hazard,.
Fig.11 Left andright exhousting
i
Fig.12Securingjoints
Adding elbow for exhaust through bottom
of cabinet
Insert the elbow through the rear opening and
connect it to the dryer internal duct.
Apply duct tape on the joint between the dryer
internal duct and elbow; as shown above.
internal duct joints must be secured with tape,
otherwise they may separate and cause a safety hazard,. Fig
Adding cover pUate to rear of cabinet
(sides and bottom exhaust)
Connect standard metal elbows and ducts to
complete the exhaust system. Cover back opening
with a plate (kit WE1M454) available from your local
service provider. Place dryer in final location.
Plate (kit WEI M454)
Fig. 14 Cover p/ate
Page 19

,_i_/ _ _ Exhaustoutkot
1 ---
, () , Fig.lSExhautout£_tdim_nsions
S The exhaust vent can be routed up, down, left, right or straight out the back of the dryer. Refer
to d iag rar'n. j
Page 20

nsta ation instructions
Installation
Partsand literature are packaged inside the dryer drum.
Use two or more people to move and install the dryer,
Failure to do so can result in back or other injury°
Only remove the packaging at the customer's premises.
This will ensure the appliance arrives in pristine condition and reduces the risk of damage when
transporting to the customer's home.
Make sure dryer is in a suitable location for installation.
Consider installing the dryer before the washing machine in a side by side installation, this will
allow better access to electrical and exhaust connections.
Foam removal from dryer legs
Tilt the dryer sideways and remove the foam shipping pads by pulling at the sides and breaking
them away from the dryer legs. Be sure to remove all of the foam pieces around the legs.
Page 21

Failuretofollowtheseinstruction,scan_su_tindeath,fire,ore_ectrica_
ho_k_
Grounding for a cord-connected appliance
Th_sappliancemostbeg_oonded._ntheeventofmalfonct_ono_b_eakdown,g_oond_ngw_ll
_edocethe_iskofelectricshockbyp_ovidingapathofleast_esistancefo_electricco_ent.
When this appliance is equipped with a cord having an equipment-grounding conductor and a
grounding plug, the plug must be plugged into an appropriate outlet that is properly installed
and grounded in accordance with all local codes and ordinances, or in their absence, with the
National Electrical Code ANSI/NFPA 70, or the Canadian _}:lectrical Code CSA C22.1.
doubt as to whether the appliance is propedy grounded°
Refer to pages 20 - 22 for wiring detaiB for ebctdc dryers, including the grounding requirements
fo,ad_,ectw_,edappliance.
Page 22

nsta ation instructions
Electrical _equkements for electric modeB only
£1ectrk Shock Hazard
Use a new ULiCSA approved 30-ampere power cord or dkect wke cable°
Use a UL approved strain re[ieL
Disconnect power before making electrical connections°
Connect neutral wire (white or center wire} to center terminal
On aHfour wire installations remove the grounding link and connect the
ground wire to the green ground connecting screw°
Connect remaining 2 supply wires to remaining 2terminaBo
Securely tighten aHelectrical connections°
Failure to do so can result in death, fire, or e[ectrica_ shock°
Note: the wiring diagram is inside
the control console. The dryer must
be plugged into or connected to an
individual branch circuit, do not use an
extension cord.
Ensure proper ground exists before use.
The power supply must be 220/240V or
208V, 60 Hz approved alternating current
electrical service. The electrical service
requirements can be found on the data
label that is located on the console back.
A 30--ampere fuse or circuit breaker is
required on each of the lines.
If a power cord is used, the cord must be
plugged into a 30--ampere receptacle.
If local codes permit, an external
ground wire (not provided), which
meets ocal codes, may be added by
attaching to the green ground screw o_
the rear of the dryer, and to a grounded metal
cold water pipe or other established ground.
Fig. 18 Grounding
The power cord is NOT provided with U.S.electric model dryers.
This dryer is supplied with the cabinet grounded through the neutral on the terminal block. If
the dryer is to be installed in (1) a new branch installation, (2) a mobile home, (3) a recreational
vehicle, (4) an area where local codes do not permit grounding through the neutral conductor,
the appliance grounding link must be removed and a &°wire power cord/cable or a separate
grounding wire must be used.
Do not reuse a power supply cord/cable from an old dryer. The power cord/caNe electric supply
wiring must be retained at the dryer cabinet with a suitable UL listed strain relief.
Page 23

nsta ation instructions
Electric power supply for gas and electric dryers
Power supply for electric dryers: (for Canada onJy}
120 / 240 V or 120 / 208 V of 60 Hz sinusoidal supplied
via an individual branch circuit with a 30 ampere fuse
or breaker in each of the lines.
Connected to a 30 ampere wall receptacle as shown
The installation conforming to local codes. Do not
modify the plug to fit a different outlet
Electric power supply for gas dryers:
120 V 60 Hz sinusoidal supplied via a circuit protected
with a 15 or 20 ampere fuse or breaker.
o Connected to a wall receptacle asshown
The installation conforming to local codes and/or the
current CSA C22.1 Canadian Electrical Code part 1.
Power supply cord requirements for UoSoA
Fig. 1_?Power supply cord
1
E_ectHcShock Hazard
Never _eavethe cover off of the termina_ blocko
Failure to do so will result in death or e_ectric shock°
4-wire connections (must be used for mobile home installation)
Note: since January 1, 1996, the National Electric Code requires that new constructions utilize a
4 wire connection to an electric dryer.
1 Turn off the circuit breaker(s) (30 amp) or remove the dryer's circuit fuse at the electrical box.
2 Be sure the dryer cord is unplugged from the wall receptacle.
3 Remove the power cord cover located at the lower back.
4 Remove and discard ground strap. Keep the green ground screw for step 7.
5 Install %" UL recognized strain relief to power cord entry hole. Bring power cord through
strain relief.
6 Connect power cord as follows:
A.Connect the 2 hot lines to the outer screws of the terminal block (marked L1 and L2).
B.Connect the neutral (white) line to the center of the terminal block (marked N).
Page 24

nsta ation instructions
Power supply cord requirements for UoSoA
7 Attach ground wire of power cord with the green ground screw (hole above strain relief bracket).
Tighten all terminal Mock screws (3) completely,
8 Properly secure power cord to strain relief,
9 Reinsta[[ the cover,
Remove ground strap
and d scard Kee
ground scew
Hot wire Rdocate green
iround screw here
Fig.204-wire connections
_", UL recogn zed
Cover strain relef
3owire connections
Strain relief bracket
4 #I0 AWG minmum copper
conductors or 120/240V 30A power
supply cord kit marked for use with
dryers & provided with closed loop or
spade term na[s wth upturned ends
(not supplied)
If required, by local code, install external ground (not provided) to grounded metal, cold water
pipe, or other established ground determined by a qualified electrician.
1 Turn off the circuit breaker(s) (30 amp) or remove the dryer's circuit fuse at the electrical box.
2 Be sure the dryer cord is unplugged from the wail
s Remove the power cord cover located at the lower back.
4 Install s/4"UL recognized strain relief to power cord entry hole. Bring power cord through
strain relief.
5 Connect power cord as follows:
A. Connect the 2 hot lines to the outer screws of the terminal block (marked L1 and L2).
B. Connect the neutral (white) line to the center of the terminal Mock (marked N).
6 Be sure ground strap is connected to neutral (center) terminal of block and to green ground
screw on cabinet rear. Tighten all terminal Mock screws (3) completely.
7 Properly secure power cord to strain relief.
8 Reinsta[[ the cover.
ends (not supplied)
Page 25

iiilI!i!,!,!!!!!,l,liiiliii,ill ¸IIIIlllliiiliill,i,iliiii_illiiillIIIlilil_ill,i_,lilii_ii!il,lii!lllilll,iiil,i,lliilliiiii!
Ilstlllttiol instructions
Gas i'equh'emelts (gas models only)
The installation must conform with Local Codes, or in the absence of Local Codes, to the
National Fuel Gas Code ANSI Z223.1/NFPA 54 or the Canadian Natural Gas and Propane
Installation Code, CSA B149.1.
E×p_os_o=Ho=ord
Instalations must be performed by a qualified or licensed contractor, i}
p_umber, or gasfitter qualified or licensed by the state, province, or
region where this app/ance is being instaledo
UseanewAGAorCSAapprovodgassopp_yIhe.
_nstaHashut-offva_,,e_nanaccessibleplace.
Only use a gas shut-off valve approved for' use within the state, province, i ::
or re@on where this app/ance is being installed.
Securely tighten al gas connectionso
Failure to follow these instructions can result in death, explosion, or fire°
iiiiiiiils
Gas type .......................
located on the rating plate located on the front of the dryer behind the door. If this information
does r_ot agree with the type of gas available in your home, contact ,,'our local Fisher & Paykel
suppneror servicecentec
Natural gas
Th_sdryer_ssuppl_edreadyforusew_thNaturalGas.
It"is design certified by CSA Intemaqonal for LP (Propane or Butane) Gases with the appropriate
conversion. J
LPga__o,we.io=
_fthedryer_stobeoperatedonLP/Uqu_dPropaneorButane/Gas,thedryermustbe
converted. To do so, use only the approved Fisher & Paykel conversion kit listed in Accessories
on page 7. Do not use with a different gas without consulting the serving gas supplier.
Thedryermustbecon,,e.edforsafeandproperperformancebyqualifiedserviceor
installation personnel.
Conversion kits for Natural and LPGas are available from your local Fisher & Paykel Dealer (see i
'Accessories'pa_e7)._fothercon,,ers_onsarerequired,check,,,,_thyourlocalgasutU_t;,'for
specific information concerning conversion requirements. :i!
___________
Page 26

nsta ation instructions
Connecting gas to your dryer (gas models only)
Usecompound or thread tape appropriate to the gastype that isto be used (Natural or LPGas),
on the male threads of all non--flaredconnections.
Never use an open flame to test for gas leaks.
This dryer will operate satisfactorily up to altitudes of 2000m (6500ft) above sea level at the
BTU rating indicated on the model/serial plate. Burner input adjustments may be required if
operating above this elevation.
The dryer must be isolated from the gas supply piping system by closing the supply shut--off
valve during any pressure testing of the gas supply piping system.
Gas ignition
This dryer has an automatic ignition system to ignite the burner. There is no pilot flame burning
in this dryer.
Connecting to the gas supply
'I The gas supply line should be 12.7 mm (W').
2 An individual manual shut-off valve must be installed on the gas supply line within 1.8m (6fl)
of the dryer, in accordance with the National Fuel Gas Code ANSI Z223.1/NFPA 54 for the United
States or in accordance with the B149.1 Natural Gas and Propane Installation Code for Canada.
s An m_inch NPT plugged tapping must be installed to allow the gas inlet pressure to be
checked. It must be accessible for test gauge connection and immediately upstream of the gas
connection to the dryer.
Ks"NPTplugged tapping
Y/'NPTgas supply ine
Fig.22donnecring to the gassupply
Page 27

I_stallation i_structions
4 A listed connector in compliance with ANSI Z21.24/CSA6.10 must be used to connect the dryer i
tothegassupply.
5 If flexible tubing is used, an elbow should be installed on the pipe at the back of the dryer for
the flexible tube to be connected to. This will minimize damage to the tube when the dryer is
moved back. Use a flexible tubing connection kit that has designed for use on a clothes dryer.
This kit should have the unions necessary to ioin to the ends of the tubing. Be sure to follow all
instructions suppled with the kit. i]
6 Copper tubing should not be used for Natural Gas and if used for LP Gas, it must be LP Gas
compatible. ;:
7 D_sconnectandd_scardold_lex_bletubing.
8 Thegaspipethatcomesoutoftherearofyourdryerhasonita_/_'NPTmalethread. Remove
the protective cap and apply sealing compound or tape to the thread. Thread sealant should be
appropriate for the type of gas to be used.
Completing the cor, nection
1 Use wrenches to tighten all ioints but do not over tighten.
2 Open the gas supply valve and check all joints by brushing or] a non-corrosive leak-detecting !ii1
solution._ubbl_n_w_ll_nd_catealeak._anyleaksare_ound,closethevalve_mmed_atdyand
correct the leaks. Repeat until no leaks are found. ::i:
___________
Page 28

_nsta_Btion instructions
Level machine
Check the dryer is level, and make necessary adjustments.
Adjust all 4 leveling legs to match washer height. Dryer MUST BE LEVEL and rest firmly on all
4 leveling legs.
Level front-to-back
Levd side-to--side
/
/
Fig24 Leveling the mochine
4 eve , g, gs iiiiiiiiiiii
Final installation check [[st
Check that:
o Noplasticorflexiblemetalfoilisusedintheexhaustducting.
° Exhaust is rigid ducting or thick wall flexible metal ducting.
o All joints in the ducting are made with duct tape. It must not be connected with screws or other ,!
fastening devices which extend into the inside of the duct.
o Ductingiscleanandisconnected_othedryer.
o Dryer_slevel.
° Dryer is plugged or directly wired into an approved fitting and is properly grounded. : ]
° Dryer starts, heats, cools and shuts off.
Dryer is pBgged into an approved fitting and is properly grounded.
° A[[ fittings in the gas line are tested for leaks.
o Exhausttemperatureincreases,toconfirmignitionhasoccurred.
- Ifignition does not occur initially, it may be due to air in the gas line or low voB_ge
powersupply.
- -[he gas regulator valve may fail to open if the power supply falls below 105 Volts. i/i
Page 29

Features
Extra care
Use this option to minimize the wrinkles in clothes. This option
provides approximately 15 minutes of no--heat tumbling after the
clothes are dry.
This option can only be used with the Automatic cycles.
Sigr_a[
Use this option and a signal will sound just before the end of the
cycle to remind you to remove the clothes.
If you selected the EXTRACAREoption, a signal will sound a the end
of the drying time and will sound several times during the EXTRA
CAREcycle. This will remind you that the drying cycle is complete
and you should remove your clothes.
Note:
Remove garments promptly at the sound of the signal. Place clothes
on hangers so wrinkles won't set in.
Use the S_CNALoption especially when drying fabrics like polyester
knits and permanent press. These fabrics should be removed
promptly so wrinkles won't set in.
Reset options
Selecting RESETOPTIONScancels all options that have been selected.
Drum lamp
A handy light inside the dryer to help make urfloadk_g easier.
Drying rack (optional on some models)
A handy drying rack may be used for drying articles such as
stuffed toys, pillows, washable sweaters and sports shoes.
Hookthe rack over the lint filter so the rack extends into the
dryer drum.
Note: the drying rack must be used with the Timed cycle. Do not
use this drying rack when there are other clothes in the dryer,
\
ii
,/
Fig25Drum Iomp X\ k
¢_esL-yR'<'_£_,
Fig 2d Drying rock
Page 30

Operati sg instructions contro pane
Automatic dry
When an automatic drying cycle is selected the dryer automatically senses when the clothes are dry.
There are two automatic dryness levels: MOREDRY_ and LESSDRY_.
These two settings dry your clothes to different degrees depending on the level of dryness you
would like.
AUTOMATICPERMANENTPRESS- For synthetic blends. Select _ for heavier fabrics, _ for
light fabrics.
AUTOMATmCDEL_CATES- For lingerie and special care fabrics. Select _ for heavier fabrics, _ for
lighter fabrics.
AUTOI'qATmCCOTTONS- For cottons and most linens. For most loads select the Preferred Regular
Setting (marked with an _). Set towards _ for heavier fabrics, _ for lighter fabrics.
Fabric care settings
FLUFF- For items requiring drying without heat, Perfectfor airing clothes or to freshen up
garments that have been packed in asuitcase or drawer.
COTTONREGULAR- Fordrying general cottons suchas sheets, sweatsand knits.This cycle useshigh
heatto dry clothes quickly. Suitable for garments labeled 'tumble dry"
PERMANENTPRESS- For drying lightweight fabrics. A medium heat is used to reduce wrinkles. Ideal
for lightweight cottons, casuals and items labeled 'tumble dry with a medium heatt This cycle
automatically selects the DEWR_NRLEoption to reduce wrinkles.
KNITSDELICATES- For heat sensitive items, this cycle uses a low heat, Use this setting when
care labels recommend low heat settings or for garments with a synthetic fiber content, where
overheating could cause damage to fibers.
Page 31

Operating instructions contro pane
Timed dry
TmMEDDRYcycles allow you to select how long the cycle runs for.
The dryer has three timed cycles. These cycles have set drying times of either 40, 60 or 80
minutes and include a DAMPDRY and DEWR_NKLEfunction. If selected, your dryer will dry for
the specified period of time.
TmMEDDRY- Set the cycle selector dial at the desired drying time.
DAMPDRY- To leave items partially dry set the cycle selector dial on DAMP DRY setting.
DEWRINRLE- For removing wrinkles from items that are clean and dry or that are slightly damp.
Set the cycle selector dial on to DEWRff_RLEsetting.
Note: drying times will vary according to the type of heat used (Electrical or Natural Gas), size
of load, types of fabrics, wetness of clothes and condition of exhaust ducts.
selector dial
Fig27 Control pone/
Page 32

Reversing the doo
Tools needed:
Standard #2 Phillips screwdriver
Tape--tipped putty knife
Needle--nosed pliers
8
9
Open the door and remove the filler plugs opposite
the hinges.
With the door completely open, remove the bottom
screw from each hinge on the dryer face.
Insert these screws about half way into the top holes,
for each hinge, on the opposite side (where you
removed the filler plugs). Apply firm pressure to get
the screw started in untapped holes.
Loosen the top screw from each hinge on the dryer
face half way.
With one hand holding the top of the door and the
other hand holding the bottom, remove the door from
the dryer by lifting it up and out.
Rotate the door 180°. Insert it on the opposite side of
the opening by moving the door in and down until
the top hinge and the bottom hinge are resting on the
two top screws inserted in step 3.
Remove the remaining screws from the side of the
opening from which the door was removed. With
these screws secure each hinge at the bottom.
Tighten the two top screws of each hinge.
Reinsert the plastic plugs on the side from which the
door was removed.
I
F-ig.28 Revesing the door
Page 33

Using your dryer
To reduce the risk of fire, e_ectric shock, or injury to persons_ read the SAFETYAND
WARNINGS before operatin 9 this app[ianceo
Fire Hazard
Only dry fabrics that have been washed with water:
Do not use heat to dry articles containing foam rubber or similaHy
textured rubber.4ike materiaBo Dry on the FLUFFcycle°
A clothes dryer produces combustible _intand must be exhausted
outdoors° Take care to prevent the accumulation of Hnt around the
exhaustopening and inthesurroundingarea°
Failure to follow these instructions can msu_t in death or persona_ injury°
Explosion Hazard
Keep flammaNe materiaB and vapors, such asgaso[ine_ away from dryer_
No washer' can completely remove oil
Do not dry anything that has ever had gasoline_ oi_or anything
flammaMe on it (including cooking oiB)o
Failure to fo[low these instructions can result in death or personal injury_
Page 34

Usingyourdryer
Check the care labels inside the garments to determine whether the garment manufacturer
recommends tumble drying (see care label section).
1, Sorting
It is best that you sort your garments before placing them into the dryer. Sort into loads of
similar types of items and items that take similar times to dry.
Heavier items (eg towels, t-shirts and flannel sheets) are best dried separately from lightweight
items (eg synthetics, poly-cotton sheets and shirts). This prevents the possibility of some items
becoming over-dried whilst others are still damp. It will also help to extend the life of your
clothing and linen.
Drying your clothes assoon asthe washer hasfinished will decreasethe chance of wrinkles
forming and reducethe chance of dye transfer from colored items to white items.
We recommend that articles of clothing with screen-printing are turned inside out to ensure the
screen-printing does not stick to the drum. Garments with hooks or zippers need to be fastened
and where possible turned inside out. Place undergarments in a mesh bag to provide protection
from other items in the load.
Use a drying rack to dry wool garments (available as an optional accessory).
2, Loading
Garments need to be loaded properly to reduce the likelihood of them wrinkling and to ensure
the load is dried evenly, Make sure there is ample room for the garments to tumble freely while
drying. Load in terms of the space the garments will take up when dry, rather than when they
are wet.
The general rule is: one wash load : one dryer load.
It is a good idea to dry 'permanent press'type garments together in a separate cycle with the
EXTRACAREoption turned on. This will help reduce wrinkles and the need for ironing.
3oClean the lint filter
Clean the lint filter each time you use the dryer, before or after each load.
Operete your dryer w;th the tint filter in piece et ell times.
Page 35

Using you d yer
4oSelecting a cycle
Yourdryerhasa numberof FABmCCAREcyclesthat canbeusedtodr;,,differenttypesofgarments:
Fig29 Dr}'cycle5
Select an automatic or timed cycle. See the below cycle descriptions.
Select a drying cycle that matches the type of bad you are drying. Different fabrics have
different drying requirements, so it is important to choose the cycle that best describes the load.
[f your load contains mainly delicate items it is best you select the KNmTSDEL[CATEScycle.
AMays t\ollow the garment manufacturer's carelabd instructions when &yingo
[f you are unsure of the temperature to select for a load, it's best to select a lower heat
rather than a higher heat, eg the KNITSDELICATESor PERMANENTPRESScycle instead of the
COTTONREGULARcycle.
Choose the FLUFFcycle for items requiring drying without heat. The cycle is perfect for airing
clothes or to freshen up garments that have been packed in a suitcase or drawer.
Select COTTONREGULARfor drying genera[ cottons such assheets,sweats and knits. Thiscycle
usesa high heatto dry clothes quickly. Suitable for garments labeled 'tumble dry"
Use the PERMANENTPRESScycle for drying lightweight fabrics. A medium heat is used to reduce
wrinkles. Ideal for lightweight cottons, casuals and items labeled 'tumble dry with a medium
heat' This cycle automatically selects the DEWR_NKLEoption to reduce wrinkles.
Choose the KNITSDELICATESfor heat sensitive items, this cycle uses a low heat. Use this setting
when care labels recommend low heat settings or for garments with a synthetic fiber content,
where overheating could cause damage to fibers.
Extra care
Minimizes the likelihood of wrinkles forming in clothes if you are not able to
unload the dryer straight away.
Page 36

Using your dryer
5oSelecting the dryness level
The desired dryness level can be altered.There are two dryness levels to choose between:
LESSDRY
Refer to page 28 for dryness level descriptions.
At the end of the cycle, if the clothes are still damp or are too dry, next time just adjust the
dryness level on the timer to meet your personal preferences.
6o Selecting the drying process
There are two ways in which your dryer is able to dry clothes; by using automatic drying or by
using T_MED DRY.
Automatic drying
When automatic drying is selected the dryer automatically senses the dryness level of the
load and turns off when the clothes are dry.The dryer's internal computer measures the
moisture content of the load using metal sensing bars and together with a temperature
sensor determines when the clothes have reached the selected dryness level (Refer to above -
'Selecting the dryness level').
For optimum clothes care, match the cycle to the load. Automatic drying often provides the best
results and leads to lower energy costs than T_MEDDRY.
Note: as automatic drying relys on items of the load contacting sensors, it will not work when
the drying rack accessory is used.
T_MED DRY
There are three timed cycles. You can choose between 40, 60 and 80 minutes. A COOLDOWN
period of 10 minutes is included in the three cycles.
To select a timed cycle, set the cycle selector dial at the desired drying time you want your dryer
to run for. Throughout the cycle, the cycle selector dial will rotate towards the end of the cycle.
During TIMED DRY,the dryer does not sense when the clothes are dry, This may cause over°
drying, We recommend that you dry your clothes for a shghdy shorter time than you think
they need, or check on them regularly (to avoid over,_drying)o
Page 37

Using yeur dryer
7o Beginning the drying cycle
Once you have chosen all your desired settings, close the dryer door and press START(located on
the right--hand side of the control panel).
Opening the door during the operation will stop the dryer.
]b restart the dryer, dose the door and select STARTto complete the cycle.
8o Stopping your dryer
Your dryer can be stopped durk_g any stage of the d@qng process, to allow you to check on your
load or add/remove clothes.
]b do this, open the dryer door. There will be a slight dehy as the drum slows down and stops.
if the cycle is interrupted before it progresses into COOLDOWN,parts of the drum mey be hot.
Caution should be taken if removing items.
Tb start your dryer again, press START.
9oChanging cycles during operation
[f you wish to change the drying cycle you have chosen after the machine has already begun
dD4ng, press your new cycle sdecqon on the control panel.
10oFabric softener sheets
If you want to use fabric softener sheets, you must ensure that they are labeled 'dryer safe'.
Always follow the instructions on the packaging. Do not place them in a dryer with warm clothes
as there is a chance the fabric softener may stain clothes. Only use a softener sheet once, then
discard it.
11o Beeps
At the end of the cycle, the dryer will beep to let you know that the bad is finished. The drum
will automatically come to rest, allowing you to open the door and remove your load.
Page 38

Care labels
Below is a selection of care label symbols that garment manufacturers use to show how their
garments should be dried, We've converted these symboB into the cycles and heat settings that
we recommend you use in the dryer. By following our recommendations, you can ensure that
your clothes will retain their appearance over time.
Tumble
dry symbols
Normal Permanent
Press
Delicate Do not
Tumble Dry
Tumble
dry symbols
Any Heat High
Medium Low No Heat
Additional drying
instructions
Hang to Dry Drip Dry
%
Dryin Shade Dry Flat
Page 39

© ying specia items
There are some articles that need to be dried in a special way. Before you dry any item that is not
described in the dryer's cycles (page 33), refer to the table below. Always remember to follow the
manufacturer's instructions,
Pillows Check the care label - Can the pillow be dried in the dryer?
Do not dry foam rubber pillows.
It is important that before placing a pillow in the dryer you
check for weak seams where feathers or filRings could escape.
ChooseYbuIt's................................................................................................................................................................................bestcar/thetodry'placeKN_TSoneaveragetheDEUCATESp_HOWs_zedonandaP_ll°wdryingset20atm_nutesrackarime.to avoiddryingany't_me,
chance of the filling escaping, bailing or clumping.
Check the pillow at regular intervals.
If you are using a drying rack, you will need to turn the pillow
at regular intervals to ensure even drying.
Note: it is important to completely dry the pillow to prevent
mildew from forming.
Blankets Check the care label - Can the blanket be dried in the dryer?
Include 4 - 5 medium sized towels along with the blanket for
cushitning.[his will hdp stopshdnka!efrom ove!tumbling_
Choose the KNmTSDELICATE5c.vde and set 20 - 25 minutes
dry!n!] time: ................................................................................................................................
on completion, remove the blanket, shake and, if needed,
stretch the blanket backto its original shape. Place it back in
the dryer and repeat until the blanket is dry_
Note: it is important to completely dry the blanket to prevent
mildew from forming.
Plastic Do not dry products containing foam rubber, plastic or rubber
Foam rubber on any cycle other than FLUFF.
Rubber-backed products Drying these types of garments on any cycle other than FLUFF
is a FIRERISK.
Sports shoes Place the shoes on the drying rack.
Use TIMED DRY, set for 20 minutes, select the KNITSDELiCATE5
Check the shoes at regular interval
At the end of the cycle check if the shoes are dry. [f they are still
damp set the dryer for a further 20 minutes.
Page 40

Drying specia items
Extra large items
(including bedspreads
and comforters)
"In Dryer" Dry-cleaning
products
Checkthe care label - Can item be dried in the dryer?
Use a low heat setting. We recommend KNITSDELICATESand
automatic drying.
Select the MOREDRY_ Dryness Level,
It is best to check the item halfway though the cycle to ensure
even drying,
If the item contains feathers add a heavy item (eg a damp towel
tied in a knot) to the load to help fluffthe comforter.
Ensure the dry--cleaning product is recommended for use in a
Follow the manufacturers instructions for how to prepare the load.
Set the dryer to the PERMANENTPRESScycle, this cycle uses a
medium beat. Select TIMED DRYfor 40 minutes.
At the end of the cycle remove the dry<leaning product from
the machine and continue to follow the dry--cleaning product's
instructions.
Other features
Drying rack
A drying rack Kit Part No WE1M396 is available as an optional accessory, This rack helps to dry
items such as sports shoes, sweaters, hats, stuffed toys and pillows - all those delicate items that
are best dried without tumbling. Contact your Fisher & Paykel Dealer.
Always use T_MEDDRYwhen using the drying rack and a cycle with low temperatures, eg KN_TS
DELICATESor PERMANENTPRESS(see 'Selecting a cycle' page 33).
Do not use the drying option, asthe machine is unable to sense articles placed on the drying rack
and cannot determine when articles are dry, When placing items on the drying rack make sure
they do not hang over the edge of the drying rack.
Check art£1es throughout the cycle to avoid over,odryingo
You must not tumble other clothes while you are @:ying items on the drying rack°
Drum [amp (optional on some models)
Before replacing the light bulb, be sure to unplug the dryer power cord or disconnect the dryer at the
household distribution panel by removing the fuse or switching offthe circuit breaker. Reach above
the dryer opening from inside the drum. Remove the bulb and replace with the same size bulb.
Page 41

C eaning your dryer
Clean your dryer with a soft damp cloth and wipe dry. Do not use scouring cleaners as they can
damage the paint and plastic surfaces.
Interior
The drum is rust-resistant However, colored fabrics which lose color or bleed in the washer may
cause discoloration of the dryer drum. We recommend that the dryer drum be cleaned with
a cloth using a detergent and water paste or a mild abrasive, such as Soft Scrub% Complete
cleaning by thoroughly wiping the drum with a moist dotL Then tumble-dry several wet rags or
old towels for 20 to 30 minutes before using the dryer normally.
Exterior
Wipe off any spills or washing compounds. Wipe or dust with a damp cloth. Try not to strike the
surface with sharp obiects. Dryer control panel and finishes may be damaged by some laundry
pretreatment soil and stain remover products if such products are sprayed on or have direct
contact with the dryer.
Preotreatment sprays
Do not use pre--treatment sprays or liquids on or near your dryer as they can damage your
machine% control panel as well as any of its plastk parts. Damage to your dryer caused by
pre--treatment products will not be covered by your warranty.
Stains
If stains appear inside the drum of your machine, mix a detergent and water paste (or use a
non-fiammaNe liquid cleaner) and wipe over the stain with a soft cloth.Then tumble old towels
for 20 - 40 minutes on the FLUFFcycle to remove all traces of the cleaner.
Lint filte_
The lint filter will need to be cleaned before each time you use
the dryer. It is easier to remove the lint when your fingers are
moistened. A lint filter that is clean ensures your clothes will remain
lint-free and your dryer will operate at maximum efficiency.
Regularly inspect the outdoor exhaust opening, Remove any
accum@ated lint from this area and any surrounding areas,
N9.30 C/ec,ning the tint filter
%0store your dryer for a short period of time, disconnect the power supply and clean the
lint filter.
Page 42

C+eaning your dryer
Exhaust duct
Inspect and clean the dryer exhaust ducting at least once
a year to prevent dogging+ A partially dogged exhaust can
lengthen the drying time+
To clean the exhaust duct follow these steps:
1 Turn off electrical supply by disconnecting the plug from
the wall socket+
2 Disconnect exhaust duct from the dryer+
s Vacuum the exhaust duct with hose attachment or attach
a rag to a pole or drain cleaning wire and clean duct+
Exhausthood
+ Make sure the inside flaps of the exhaust hood move freely
(you may want to check with a mirror)+
+ Make sure inside flaps are fully open when dryer is operating+
+ Make sure there is not wild life (birds, insects, etc) nesting
inside the exhaust duct or hood+
Fig_31 Cleaning the exhau r duct
Venting
For best drying performance, the dryer needs to be
properly vented+
-[:akeep your dryer operating at peak performance,
be sure to have a technician vacuum the lint from the
machine every three years+
Carefully follow the details on exhausting
in the'Installation instructionst
+ Use only rigid metal or flexible metal 102 mm (4")
diameter ductwork inside the dryer cabinet or for
exhausting to the outside+
+ Usethe shortest length possible+
+ Do not crush or collapse.
+ Avoid resting the duct on sharp objects+
+ Do not use plastic or other combustible ductwork.
+ Venting must conform to local building codes+
F-ig32 Checking the exhaust hood
Correct venting
Incorrect venting
F-igS3 Correct and incorrect venting
Page 43

T oub eshooting
If there is a problem with your appliance, please check the following points before contacting
your local Fisher & Paykel Appliances Authorized Service Center Dealer or Customer Care Center.
Dryer doesn't start, Dryer is unplugged.
Dryer doesn't heat,
Dryer shakes or
makes excessive
noise,
Greasy spots on
clothes,
Lint on dothes,
Static occurs,
Make sure the dryer plug is pushed
completely into the outRet.
Fuseis blown/circuit breaker is
::tripped.
Fuse is blown/circuit breaker is
tripped, the dryer may tumble
but not heat.
Check the house fuse/circuit breaker
box and replace fuse or reset breaker.
Note: most electric dryers use two
breakers.
Check the house fuse/circuit breaker
box and replace fuse or reset breaker.
Some shaking/noise is normak
Dryer may be sitting unevenly.
Gas service is off. Make sure gas shutoff at dryer and
main shutoff are fully open.
Move the dryer to a flat place on the
floor, or adjust Feet as necessary until
even.
Improper use of fabric softener. Follow directions on fabric softener
package,
Drying dirty items with dean Use your dryer to dry only dean items.
ones. Dirty items can stain dean items and
the dryer.
Clothes were not completely Sometimes stains which cannot be
dean. seen when the clothes are wet 'appear'
after drying. Use proper washing
procedures before drying.
Lint filter is fulk Clean lint screen before each load.
.......................................................................................... 1
Improper sorting. Sort lint producers (like chenille) from
lint collectors (like corduroy).
Static electricity can attract lint. See suggestions in this section under
static.
Overloadin% Separate large loads into smaller ones.
Paper, tissue, etc. left in Empty all pockets before laundering
pockets, clothes.
Overdrying, Try a fabric softener.
Adjust controls for less drying,
No fabric softener was used. Try a fabric softener.
Synthetics, permanent press Try a fabric softener.
and blends can cause static.
Page 44

°'F ou b eshooti ng
@othes take too
Long to dry,
@othes are
wrinkled.
Clothes shrink,
Improper sorting. Separate heavy items from light-weight
items (generally, a well--sorted washer
load is a welB-sorted dryer load),
: Large loads of heavy fabrics Large, heavy fabrics contain more
: (like beach towels), moisture and take longer to dry,
Separate large, heavy fabrks into
Controls improperly set. Match control settings to the load you
', Lint filter is full. Clean lint filter before every load,
Improper or obstructed Check 'Installation instructions'for
ducting, proper ducting/venting (pages 11 - 17).
Make sure ducting is clean, free of kinks
and unobstructed.
Check to see if outside wall damper
operates easily.
See the 'Exhaust venting' section,
Blown fuses or tripped circuit Replace fuses or reset circuit breakers,
breakers. Since most dryers use 2 fuses/breakers,
make sure both are operating,
Overloading/combining loads Do not put more than one washer load
in the dryer at a time,
Undedoading. :_If you are drying only one or two items,
::add a few items to ensure proper
::tumbling.
Overdrying. Select a shorter drying time.
Remove items while they still hold a
slight amount of moisture,
Letting items sit in dryer after
cycle ends.
Some fabrics will naturally
shrink when washed. Others
can be safely washed, but will
shrink in the dryer.
Remove items when cycle ends and fold
or hang immediately.
To avoid shrinkage, follow garment care
labels exactly.
Some items may be pressed back into
shape after drying,
::If you are concerned about shrinkage in
a partkular item, do not machine wash
or tumble dry it.
Page 45

Limited warranty
When you purchase any new Fisher & Paykd whiteware product for personal or consumer use
you automatically receive an 18 month limited warranty covering parts and labor for servicing
within the 48 mainland United States, Hawaii, Washington D£ and Canada, In Alaska the limited
warranty is the same except that you must pay to ship the product to the service shop or the
service technkian's travel to your home, Products for use in Canada must be purchased through
the Canadian distribution channel to ensure regulatory compliance,
If the product is installed in a motor vehicle, boat or similar mobile facility, you receive the same
18 month limited warranty, but you must bring the vehicle, boat or mobile facility containing the
product to the service shop at your expense or pay the service technician's travel to the location
of the product.
Fisher & Paykel undertakes to:
Repair without cost to the owner either for mateda[ or labor any part of the product, the serial
number of whkh appears on the product, whkh is found to be defective, In Alaska, you must
pay to ship the product to the service shop or for the service technician's travel to your home,
If the product is installed in a motor vehicle, boat or similar mobile facility, you must bring it to
the service shop at your expense or pay for the service technician's travel to the location of the
product, If we are unable to repair a defective part of the product after a reasonable number of
attempts, at our option we may replace the part or the product, or we may provide you a full
refund of the purchase price of the product (not including installation or other charges),
This warranty extends to the original purchaser and any succeeding owner of the product for
products purchased for ordinary single-family home use,
All service under this limited warranty shall be provided by Fisher & Paykd or its Authorized
Service Agent during normal business hours,
How long does this limited warranty last?
Our liability under this limited warranty expires 18 MONTHS from the date of purchase of
the product by the first consumer.
Our liaMity under any implied warranties, including the implied warranty of merchantability
(an unwritten warranty that the product is fit for ordinary use) also expires 18 MONTHS (or such
longer period as required by applkaNe law) from the date of purchase of the product by the first
consumer, Some States do not allow limitations on how long an implied warranty lasts, so this
limit on implied warranties may not apply to you,
Page 46

Limited warranty
This warranty does not cover:
A Service calls that are not related to any defect in the product. The cost of a service call will be
charged if the problem is not found to be a defect of the product. For example:
1. Correcting faulty installation of the product.
2. Instructing you how to use the product.
3. Replacing house fuses, resetting circuit breakers, correcting house wiring or plumbing, or
replacing light bulbs.
4. Correcting fault(s) caused by the user.
5. Changing the set-up of the product.
6. Unauthorized modifications of the product.
7. Noise or vibration that is considered normal, for example, drain/fan sounds, refrigeration
noises or user warning beeps.
8. Correcting damage caused by pests, for example, rats, cockroaches etc.
g Defects caused by factors other than:
1. Normal domestic use or
2. Use in accordance with the product's User Guide.
C Defects to the product caused by accident, neglect, misuse, fire, flood or Act of God.
D The cost of repairs carried out by non--authorized repairers or the cost of correcting such
unauthorized repairs.
E Travel fees and associated charges incurred when the product is installed in a location with
limited or restricted access. (eg. airplane flights, ferry charges, isolated geographic areas).
F Normal recommended maintenance as set forth in the product's User Guide.
If you have an installation problem contact your dealer or installer. You are responsible for
providing adequate electrical, exhausting and other connection facilities.
We are not responsible for consequential or incidental damages (the cost of repairing or
replacing other property damaged if the product is defective or any of your expenses caused
if the product is defective). Some States do not allow the exclusion or limitation of incidental
or consequential damages, so the above limitation or exclusion may not apply to you.
Page 47

Limited warranty
How to get service
Please read your User Guide. If you then have any questions about operating the product,
need the name of your local Fisher & Paykel Authorized Service Agent, or believe the product is
defective and wish service under this limited warranty, please contact your dealer or call us at:
USA and Canada
TOLL FREE1o888ogoFNPoUSA(1o888o936o7872) or visit us at wwwoe[baapp[iancesocom
You may be required to provide reasonable proof of the date of purchase of the product before
the product will be serviced under this limited warranty.
Commercial use
If you are using the product in a commercial setting (any use other than a single family dwelling),
we agree to repair or replace, without cost to you for parts only, any defective parts, the serial
number of which appears on the product. Our liability for these repairs expires ONE YEAR from
the date of original purchase.
At our option we may replace the part or the product, or we may provide you a full refund of
the purchase price of the product (not including installation or other charges). All service under
this limited warranty shall be provided by Fisher & Paykel or its Authorized Service Agent during
normal business hours.
No other warranties
This limited warranty is the complete and exclusive agreement between you and Fisher & Paykd
regarding any defect in the product. None of our employees (or our Authorized Service Agents)
are authorized to make any addition or modification to this limited warranty.
Warrantor: Fisher & Paykel Appliances, Inc.
If you need further help concerning this limited warranty, please call us at the above number,
or write to:
Fisher & Paykel Appliances, Inc
5900 Skylab Road
Huntington Beach
CA 92647
This limited warranty gives you specific legal rights, and you may also have other rights which
vary from State to State.
Page 48

Copyright © Fisher & Payke120( 9. AH rights rese[vea
he DIOd]U('L SD@cIrIcF_[IO['IS [/ [[_lS DOOKIe[ 8iJIDI/ [0
u _c SDeCIFIC DFOF][JC/S _l E_ R/o(]elb Q@scnDeq a_ [['}e
te o_ rs_ue_ L,_r._eroL _oncv o :on[Inuous _oauc
improvemen[, mes_ specmcauons r _:y cnange _[ any
dine, You should therefbre check wl_h your Dealer tc
ensure this booklet correctly describes the pro duc
cSr_6ntly available.
wwwo÷_b_app_a_So_Om
US
Clothes d _yel
Installation Instructions andtJ 9erGuide
Published: 02/2009
Part No,.478176
£[b_oUSA Part Noo 500A277P_J63 ....
 Loading...