

ELAN Lighting LED-BLINDER-260-RGBW User Manual
LED-BLINDER-260-RGBW
Thank you for purchasing a product from our LED-BLINDER-260-RGBW. Every suit has
been thoroughly tested and shipped in perfect condition. Carefully check the shipping carton
for damage that may have occurred during shipping. If the carton appears to be damaged,
carefully inspect your unit for any damage and be sure all accessories necessary to operate
the unit has arrived intactly. In the case damage has been found or parts are missing, please
contact Acson Comercial or your local supplier for further instructions. Do not return this unit
without any warning.
USER’S MANUAL

2
Contents
FOR YOUR OWN SAFETY, PLEASE READ
THIS USER MANUAL CAREFULLY BEFORE
POWERING OR INSTALLING. SAVE IT FOR
FUTURE REFERENCE
1. Before Using.............................................................................................................................................3
1.1 What is included....................................................................................................................................... 3
1.2 Open Instructions ..................................................................................................................................... 3
1.3 AC Power Supply ..................................................................................................................................... 3
1.3 AC Safety Instructions .............................................................................................................................. 4
2. Introduction .............................................................................................................................................4
2.1 Dimensions .............................................................................................................................................. 4
2.2 Specifications .......................................................................................................................................... 5
2.3 Features................................................................................................................................................... 5
2.4 Product Introduction ................................................................................................................................ 5
3. Installation................................................................................................................................................6
3.1 Installating requirements ......................................................................................................................... 6
3.2 Mosaic ..................................................................................................................................................... 6
3.3 Power supply connection ........................................................................................................................ 6
3.4 DMX Signal Connection .......................................................................................................................... 7
3.5 DMX Address Setting .............................................................................................................................. 7
4. Operating Instructions .............................................................................................................................7
4.1 Control panel features ............................................................................................................................. 7
4.2 Menu Map ............................................................................................................................................... 8
4.3 Menu Description .................................................................................................................................... 8
5. DMX Channel Table .................................................................................................................................6
5.1 Basic mode (13CH) ................................................................................................................................. 11
5.2 Standard mode (24CH) ........................................................................................................................... 12
5.3 Extanded mode (45CH) .......................................................................................................................... 13
6. Beam Macro Color ...................................................................................................................................14
6.1 AUTO ....................................................................................................................................................... 15
6.2 Linear CTO .............................................................................................................................................. 15
6.3 Aura LED Effect ....................................................................................................................................... 15
6.4 Dimmer Curve Select .............................................................................................................................. 16
3
1. Before Using
• Equipment x 1
• Power cable with Plug x 1
• User manual x 1
1.1 What is included
1.2 Open Instructions
1.3 AC Power Supply
Attention!
Please help preserve the environment. Make sure this product is
recycled at the end of its life. Ask your supplier for information on
local arrangements for the disposal of this kind of products.
Please open the equipment carefully ,and check all the spare parts are included or not.If any part of the
cause of the failure due to improper transportation or carton,please keep the packing materials and immediately inform the shipper to check.If the equipment must be returned to the factory,the equipment should be
use the original carton and packaging.
The equipment power supply is able to adapt to the wide input voltage.Please confirm the input voltage is in
the scale of rated voltage. The equipment can adapt to100V-240V AC voltage. Frequency50-60HZ. It can not
run a rheostat(variable resistor) or dimmer circuits.
Warning!
Please read these instructions carefully. It includes important
information on installation, usage and maintenance of this product.
!
The following symbols are used to identify important safety information on the
product and in this manual:
4
1.4 Safety Instructions
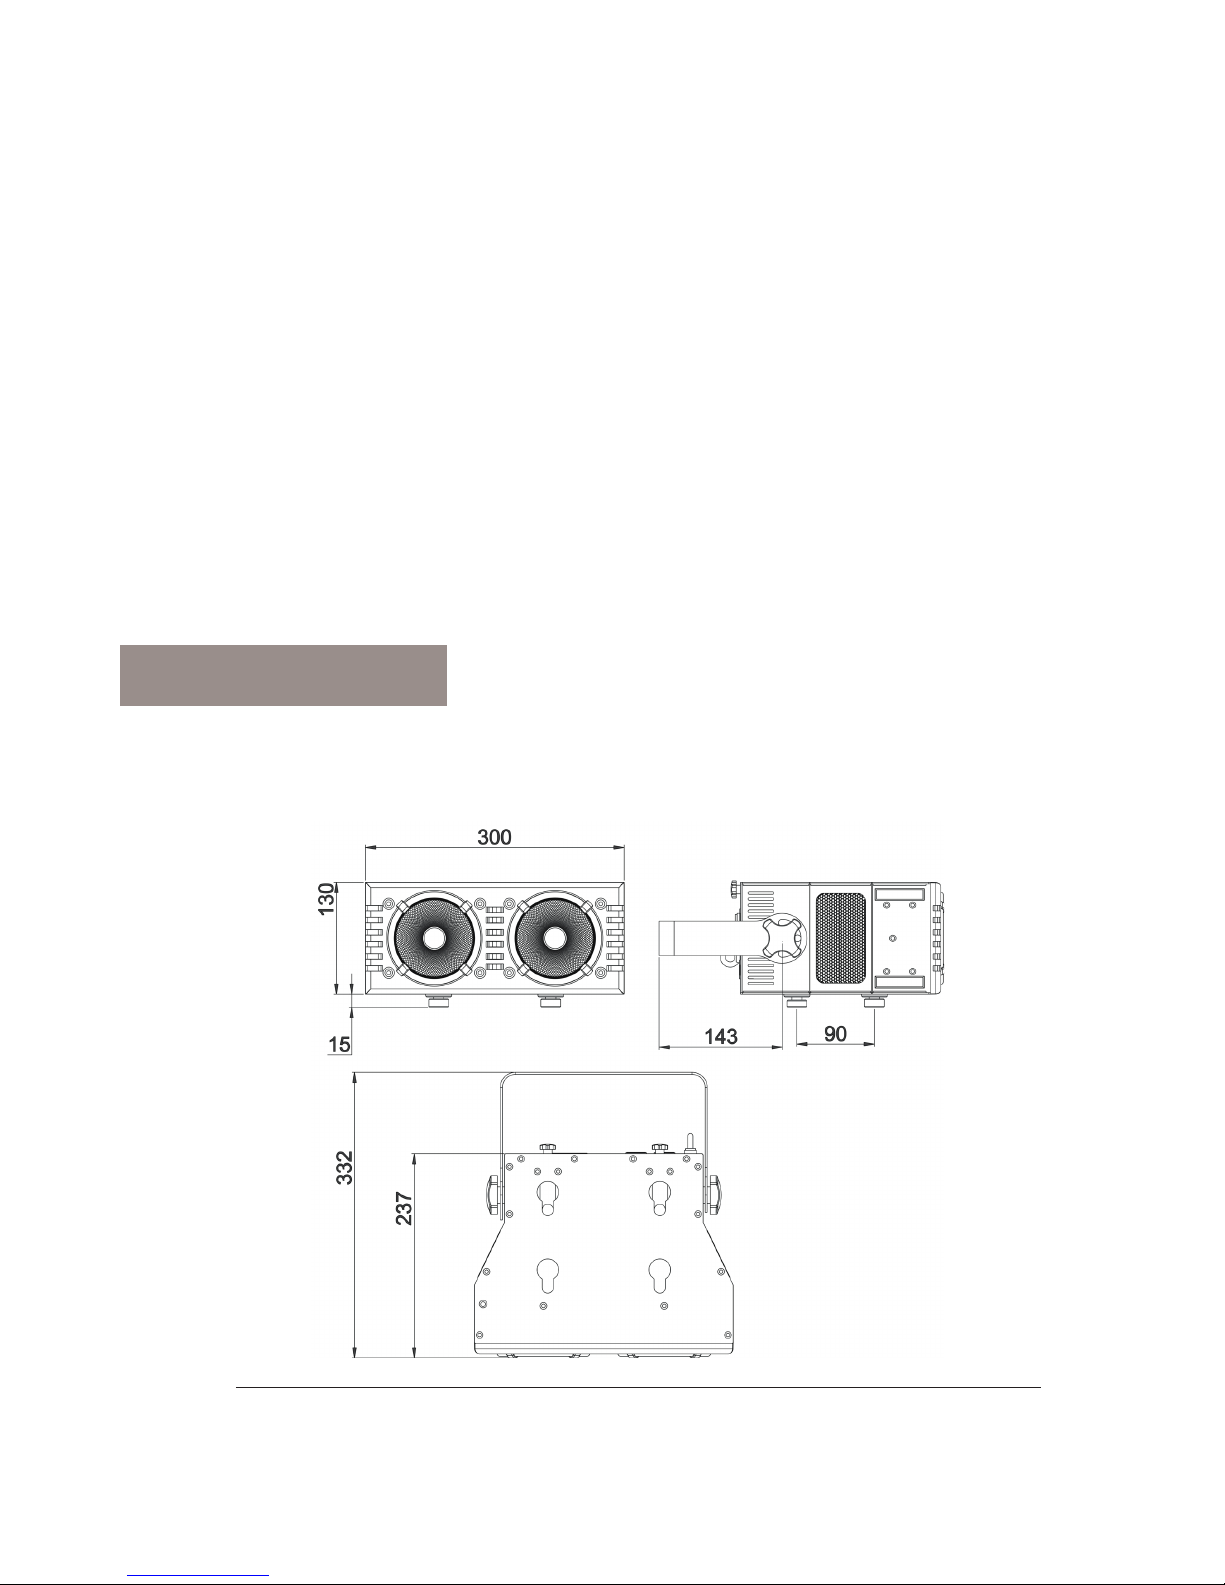
2.1 Dimensions
• This product is I level protection equipment,so it is must be connected well and connected by the professional people.
• Make sure the voltage don’t be above or below which the user manual rated values.
• Confirm the power cord is not a sword cut or damaged.
• Must be cut off the power supply in the condition of no using or cleaning.
• Only allowed with the power cord plug connection.Please do not force when unplug the power cord to
pull the plug.
• Be careful in the process of installation of equipment.Avoid touching the bare wire,otherwise it will suffer
fatal shocks.
• Don’t look the light source directly,otherwise it will hurts the eyes.
• When choosing installation position of equipment and the equipment must be more than 0.5m distance
between objects.
• Please use the equipment wires appropriate.
• Without the manufacturer’s authorization or laypeople don’t remove,repair and modification of equipment.
• The maximum operating temperature is 40ºC don’t operate the equipment when it is over 40ºC
• Do not connect the equipment to the dimmer equipment
• Under 120V voltage,output power don’t series more than 5 pcs equipment,voltage 230V. Output power
don’t series more than 10 pcs
2. Introduction
Measurements in millimeters

5
2.2 Specifications
2.3 Features
2.4 Product Introduction
• Rated Voltage: AC100V-240V, 50-60HZ
• Rated Consumption: 180W
• LED Qty: 2x60W high power 4 in 1 LEDs
16x0.5W 3 in 1 LEDs
• LED Drive Current: Beam= 4500mA
Aure LED= 30mA
• Beam Angle: 4.5°
• IP Class: IP20
• DMX Modes: 13CH (Basic mode) | 24CH (Stan-
dard mode) | 45CH (Extended mode)
• Packing Size: 405x370x200mm
• N. G.: 7 Kg
• G. W.: 8.2Kg
• 3 Pin & 5 Pin calderon input and 3 Pin &5 Pin
calderon output
• Power input ,output
• 4Control Mode: DMX512, Artnet, Sound, Master-slave
• 8 kinds of optional color temperature: 2700K,
3200K, 4200K, 5600K, 6500K, 7200K, 8000K,
10000K.
• Black plastic +Sheet Metal
• 2.4 inch TFT color LCD monitor
• 4 touch button operation
• Display board can be 180°in turn it can be fited
in different setting
• Indoor Temperature: -20°C~+40°C
• Dimmer:0-100%
• 4 species dimming curve selection
• Display panel can set the white balance adjustment
• 0-20HZ Strobe, pulse strobe, Asynchronous
stroboscopic effect.
• Macro function
• Super mixed color and rainbow effect.
• All the color can be for the total dimmer.
• Fan cooling(fan will be change the speed with
the temperature variation.
• Temperature detecting system (If the temperature detection error,the light doesn’t work).
1. Lens
2. Aura LED
3. Carrying handles
4. Power Output
5. Power Input
6. FUSE
7. 5pin DMX input
8. Safety Rope
9. 5pin DMX output
10. 3pin DMX output
11. 3pin DMX input
12. Menu button
13. Enter button
14. Down button
15. Up button
16. LCD Display
6
3.1 Installating requirements
3.3 Power supply connection
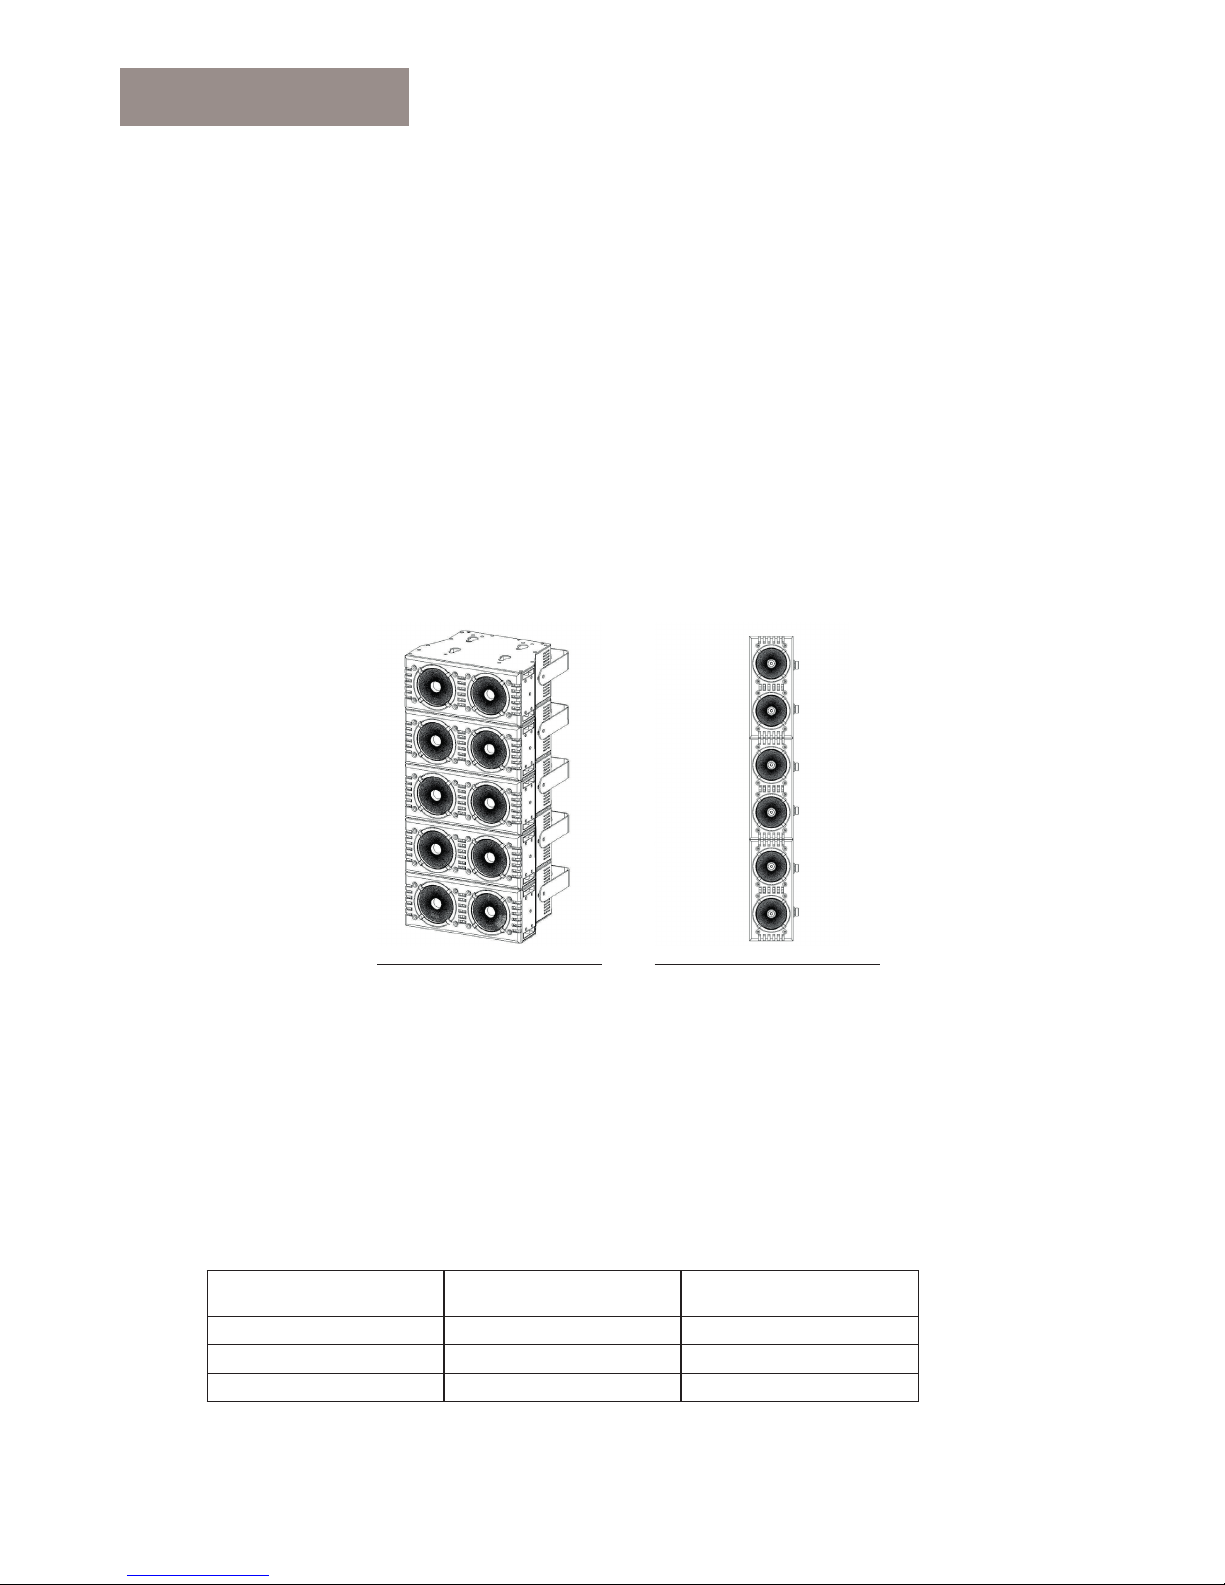
3.2 Mosaic
• This equipment can be used in many places, it can hang and put on the ground.
• Choosing a suitable place to put or hang the equipment when installation. Must be use the special
screws and hook to make sure the lamp’s weight is in the weight range.
• When installing the equipment,ensure no inflammable and explosive goods at 0.5 meter distance.
• Please ask the professionals to install the equipment,any improper installation will cause personal injury
or material damage.
• To prevent others entering the working ares below,the installation or maintenance of equipment with
suitable and stable platform
• The equipment must be placed in ventilated place, at least 50 cm from the ground,please ensure that
the vent without clogging.
• This lamp has stitching, easy installation, splicing and elongated matrix mosaic (below)
The equipment can be used in the wide voltage input. Please make sure the voltage is the scale of rated
voltage when connecting the power.The equipment can adapt to 100V to 240 V AC voltage and 50-60 Hz.
When the lamp power supply is connected via the power jack “POWER IN” and “POWER OUT” were connected end to end, to connect up to 10 similar fixtures
3. Installation
Matrix combination Elongated combination
s Connection Pin
Brown AC Live 1
Blue AC Neutral 2
Green/Yellow AC Ground 3
 Loading...