

Page 1
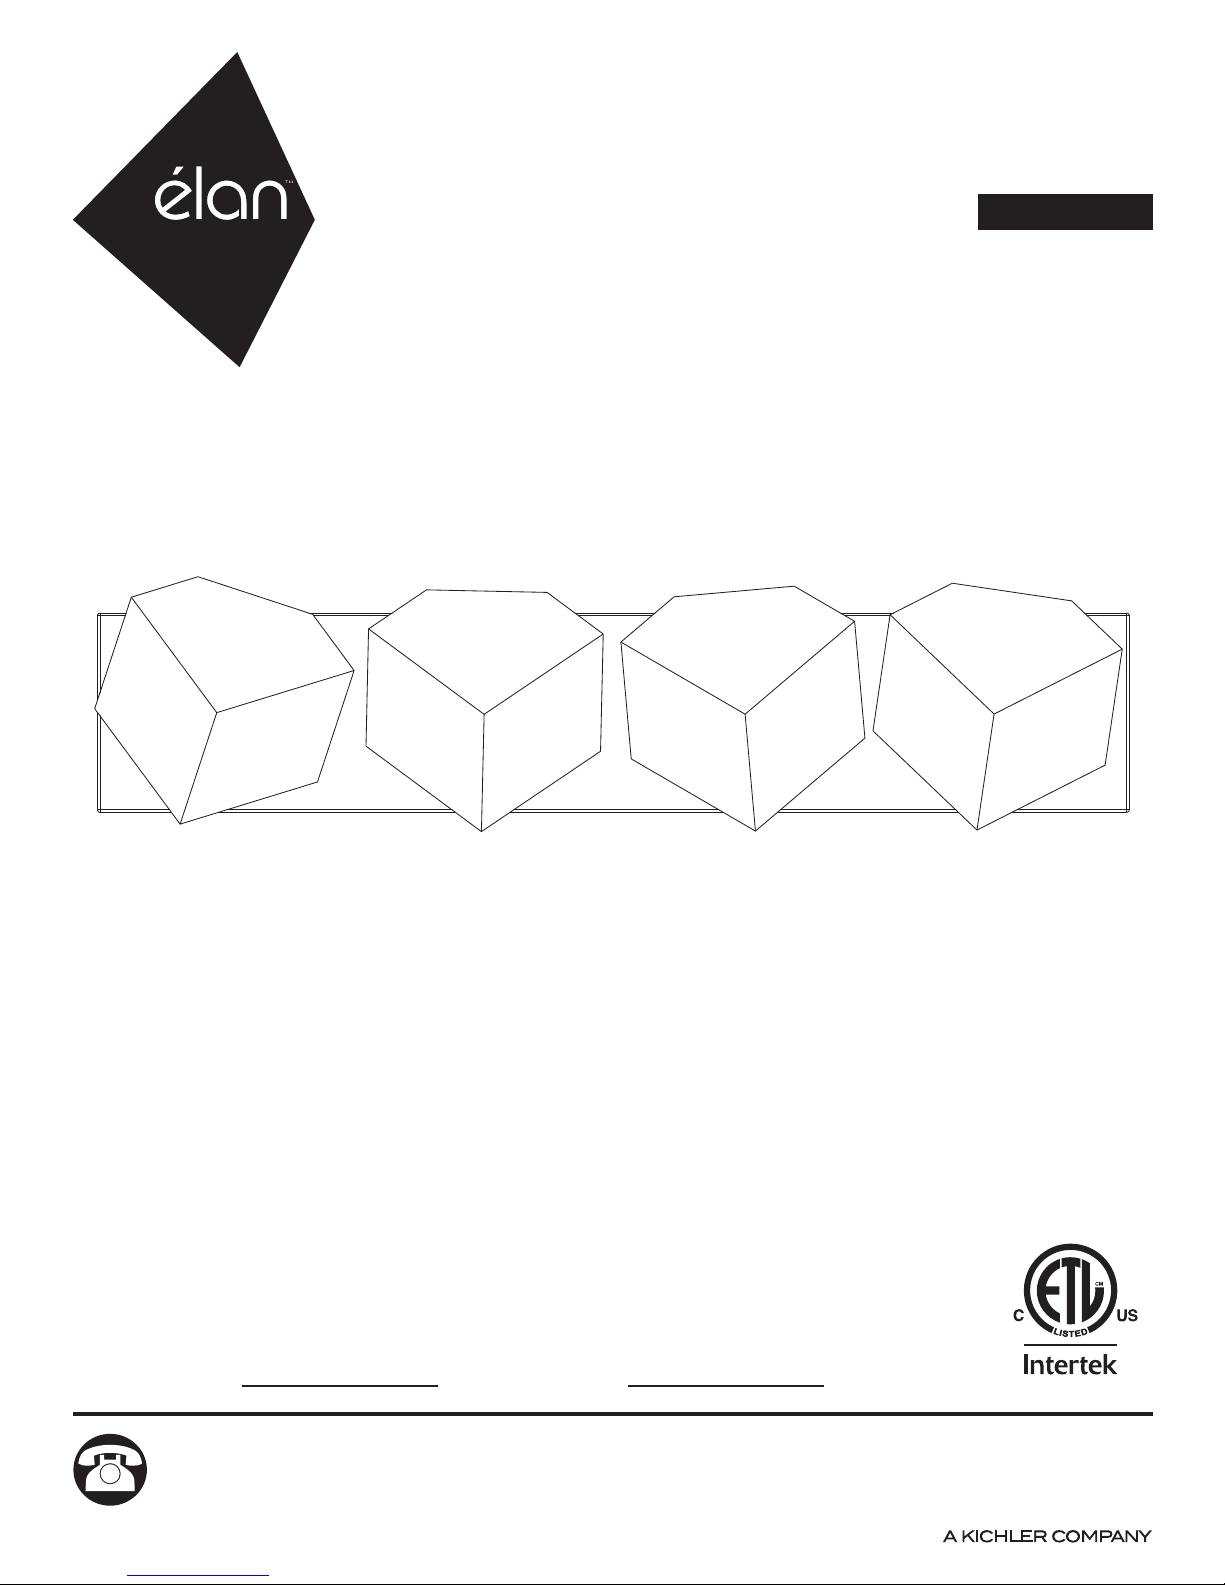
4-LIGHT VANITY
MODEL #83335
Français p. 8
ATTACH YOUR RECEIPT HERE
Serial Number
Questions, problems, missing parts? Before returning to your retailer, call our
customer service department at 1-855-226-7169, 8 a.m. - 4 p.m., EST, Monday - Friday.
Purchase Date
1
Page 2
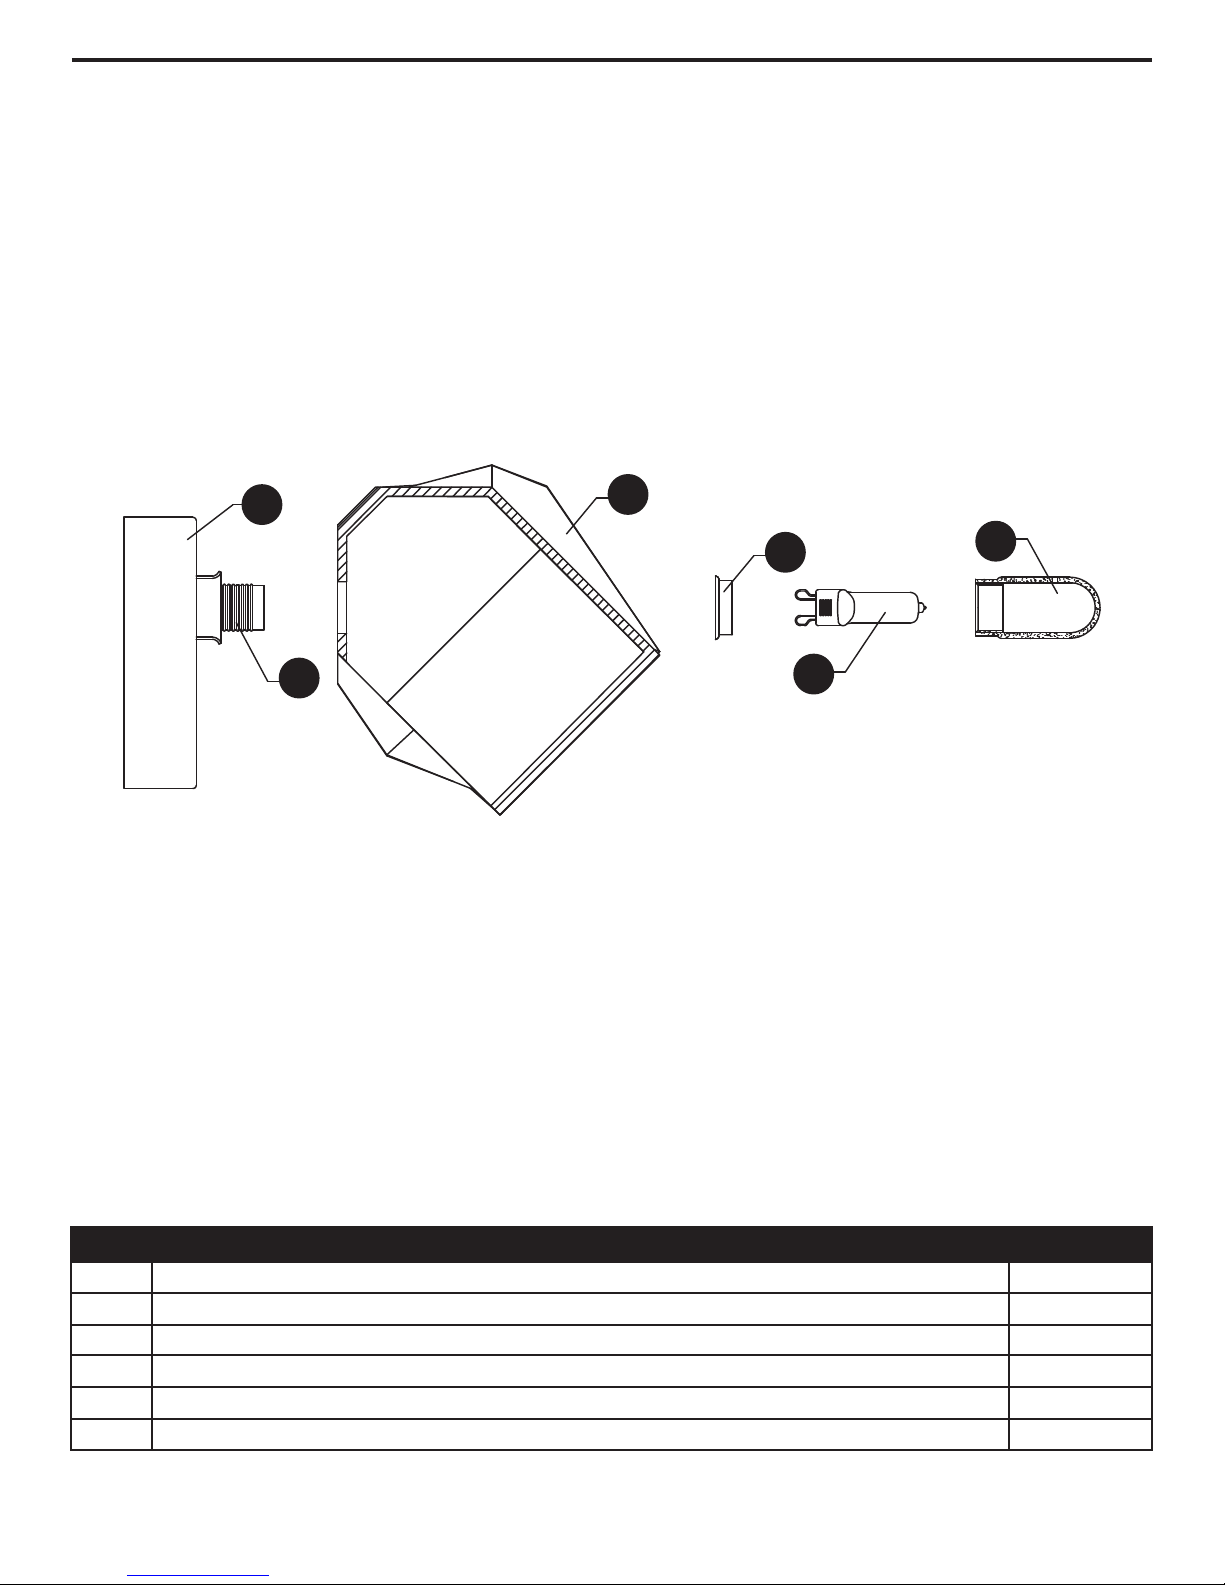
PACKAGE CONTENTS
A
D
E
F
B
C
PART DESCRIPTION QUANTITY
A Canopy 1
Bulb Cover 4
B
C
25-Watt G9 Bulb 4
D
Threaded Socket 4
Shade 4
E
Threaded Socket Ring 4
F
2
Page 3
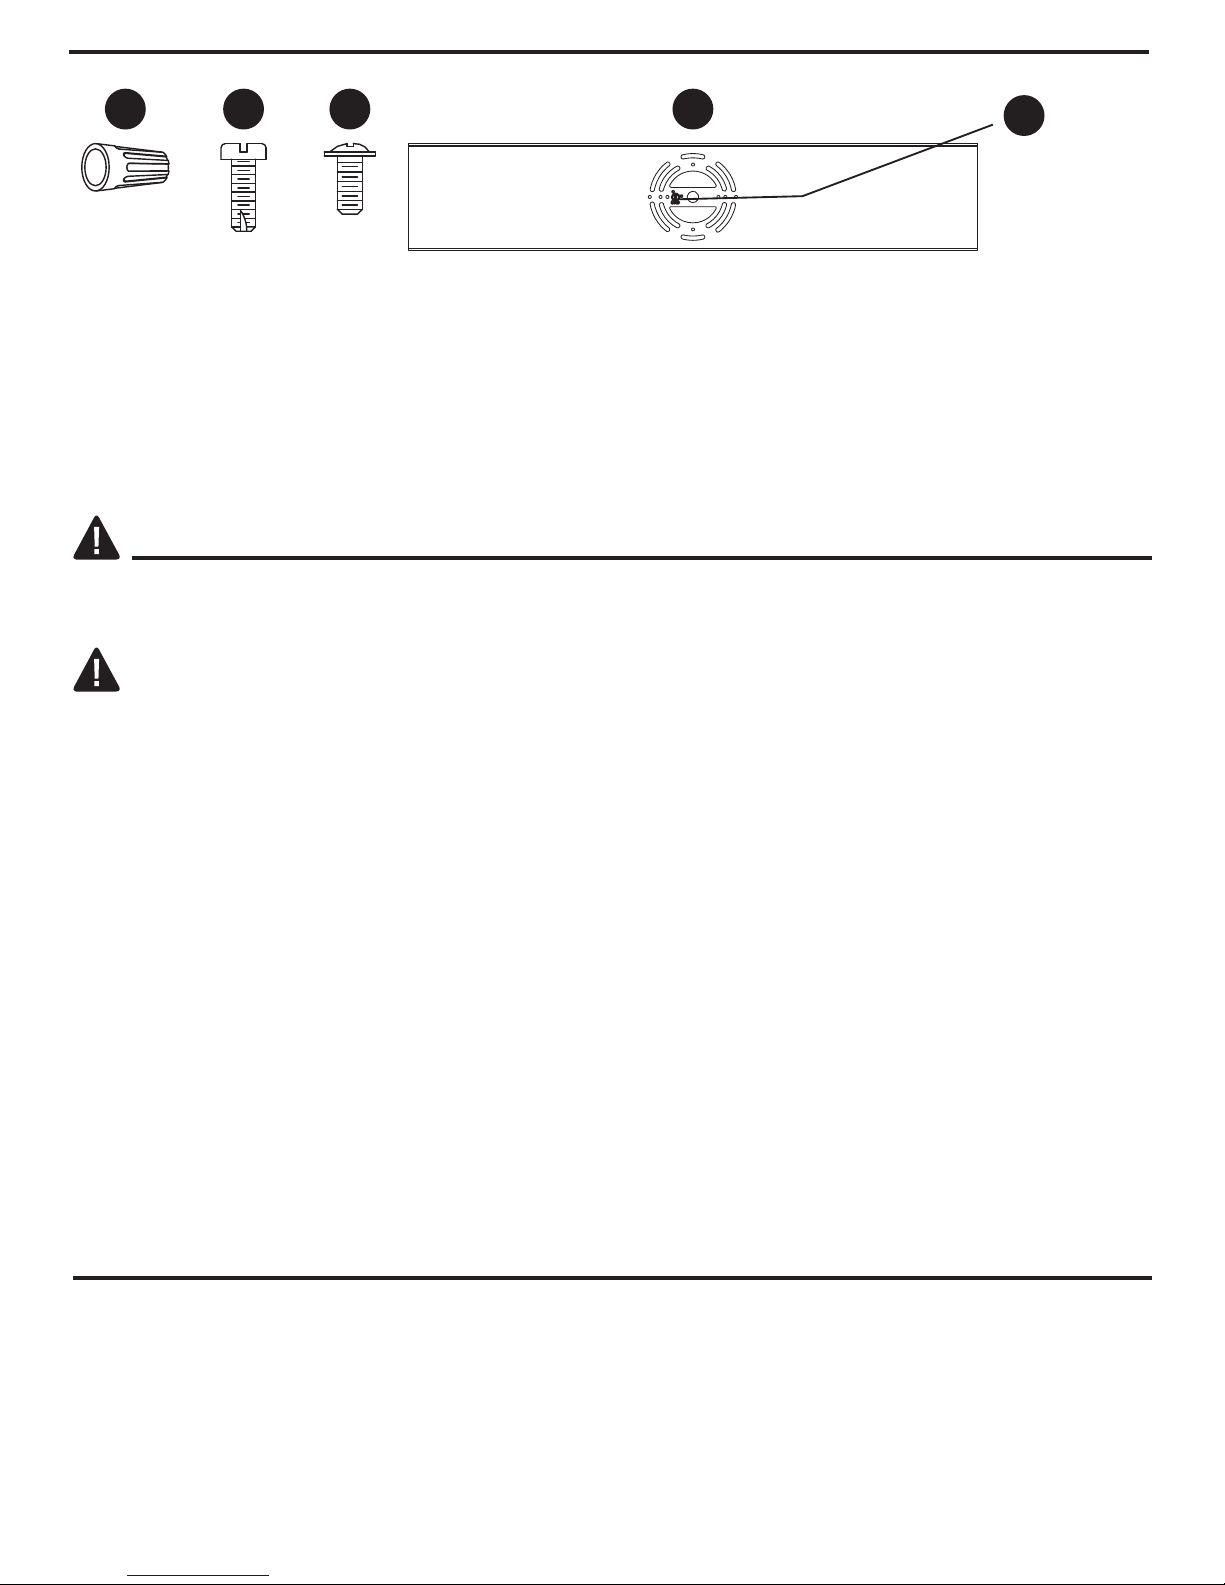
HARDWARE CONTENTS
AA
Wire
Connector
Qty: 3
BB
Short
Machine
Screw
CC
Canopy
Screw
Qty: 2
DD
Mounting
Bracket
Qty: 1
EE
Ground
Screw
Qty: 1
Qty: 2
SAFETY INFORMATION
Please read and understand this entire manual before attempting to assemble, operate or install the
product.
WARNING
• IMPORTANT: NEVER attempt any work without shutting off the electricity.
• Go to the main fuse box, or circuit breaker, in your home. Place the main power switch in the
“OFF” position and unscrew the fuse(s), or switch “OFF” the circuit breaker switch(es), that control
the power to the fixture or room that you are working on.
• Place the wall switch in the "OFF" position. If the fixture to be replaced has a switch or pull chain,
place it in the "OFF" position.
• Do not use bulbs with wattage greater than specified on this fixture.
• WARNING: California Prop. 65: This lighting fixture contains chemicals known to the state of
California to cause cancer, birth defects, and/or other reproductive harm. Wash hands after use.
CAUTION
• Read and understand all instructions and illustrations completely before proceeding with assembly
and installation of this fixture.
• If you have any doubts about how to install this lighting fixture, or if the fixture fails to operate
completely, please contact a licensed electrical contractor.
• All parts must be used as indicated in these instructions. Do not substitute any parts, leave parts
out, or use any parts that are worn out or broken. Failure to obey this instruction could invalidate
the ETL listing and/or C.S.A. certification of this fixture.
PREPARATION
Before beginning assembly of product, make sure all parts are present. Compare parts with package
contents list. If any part is missing or damaged, do not attempt to assemble the product.
Estimated assembly time: 30 minutes to 1 hour
Tools Required for Assembly (not included): Phillips screwdriver, flathead screwdriver, wire strippers,
electrical tape, ladder, safety glasses.
3
Page 4

ASSEMBLY INSTRUCTIONS
1. Connect the mounting bracket (DD) to the outlet
box with short machine screws (BB).
Hardware Used
Short Machine
BB
x 2
Screw
DD
Mounting
Bracket
x 1
2. Wire connection guide:
Ground wire:
• For installation in the United States: Wrap
ground wire from outlet box around ground
screw (DD) on mounting bracket (CC) no
less than 2 in. from wire end. Tighten ground
screw (DD). If fixture is supplied with a
ground wire, connect to outlet ground wire
with a wire connector (AA).
• For installation in Canada: If fixture is
supplied with ground wire, wrap ground wire
around ground screw (DD) on mounting
bracket (CC). Tighten ground screw (DD).
1
Outlet Box
(Not Included)
2
BARE COPPER, OR
GREEN GROUND
SUPPLY WIRE
BLACK SUPPLY
WIRE
WHITE SUPPLY
WIRE
BLACK SUPPLY
WIRE
DD
BB
BARE COPPER, OR
GREEN GROUND
FIXTURE WIRE
BLACK FIXTURE
WIRE
WHITE FIXTURE
WIRE
OR
PARALLEL FIXTURE CORD
(ROUND AND SMOOTH)
Supply wires:
• Connect the Neutral (White) supply wire from
the outlet box to the Neutral fixture wire
(White or Parallel Cord “D” shaped and
ribbed).
• Connect the Hot (Black) supply wire from the
outlet box to the Hot fixture wire (Black or
Parallel Cord round and smooth).
Hardware Used
AA
WHITE SUPPLY
WIRE
PARALLEL FIXTURE CORD
(“D” SHAPED AND RIDGED)
NOTE:
Fixture will have 2 wires either
Black & White or Parallel Cord
SPT-2 lamp wire with one round
smooth wire and one “D” shaped
x 3Wire Connector
ribbed wire.
4
Page 5
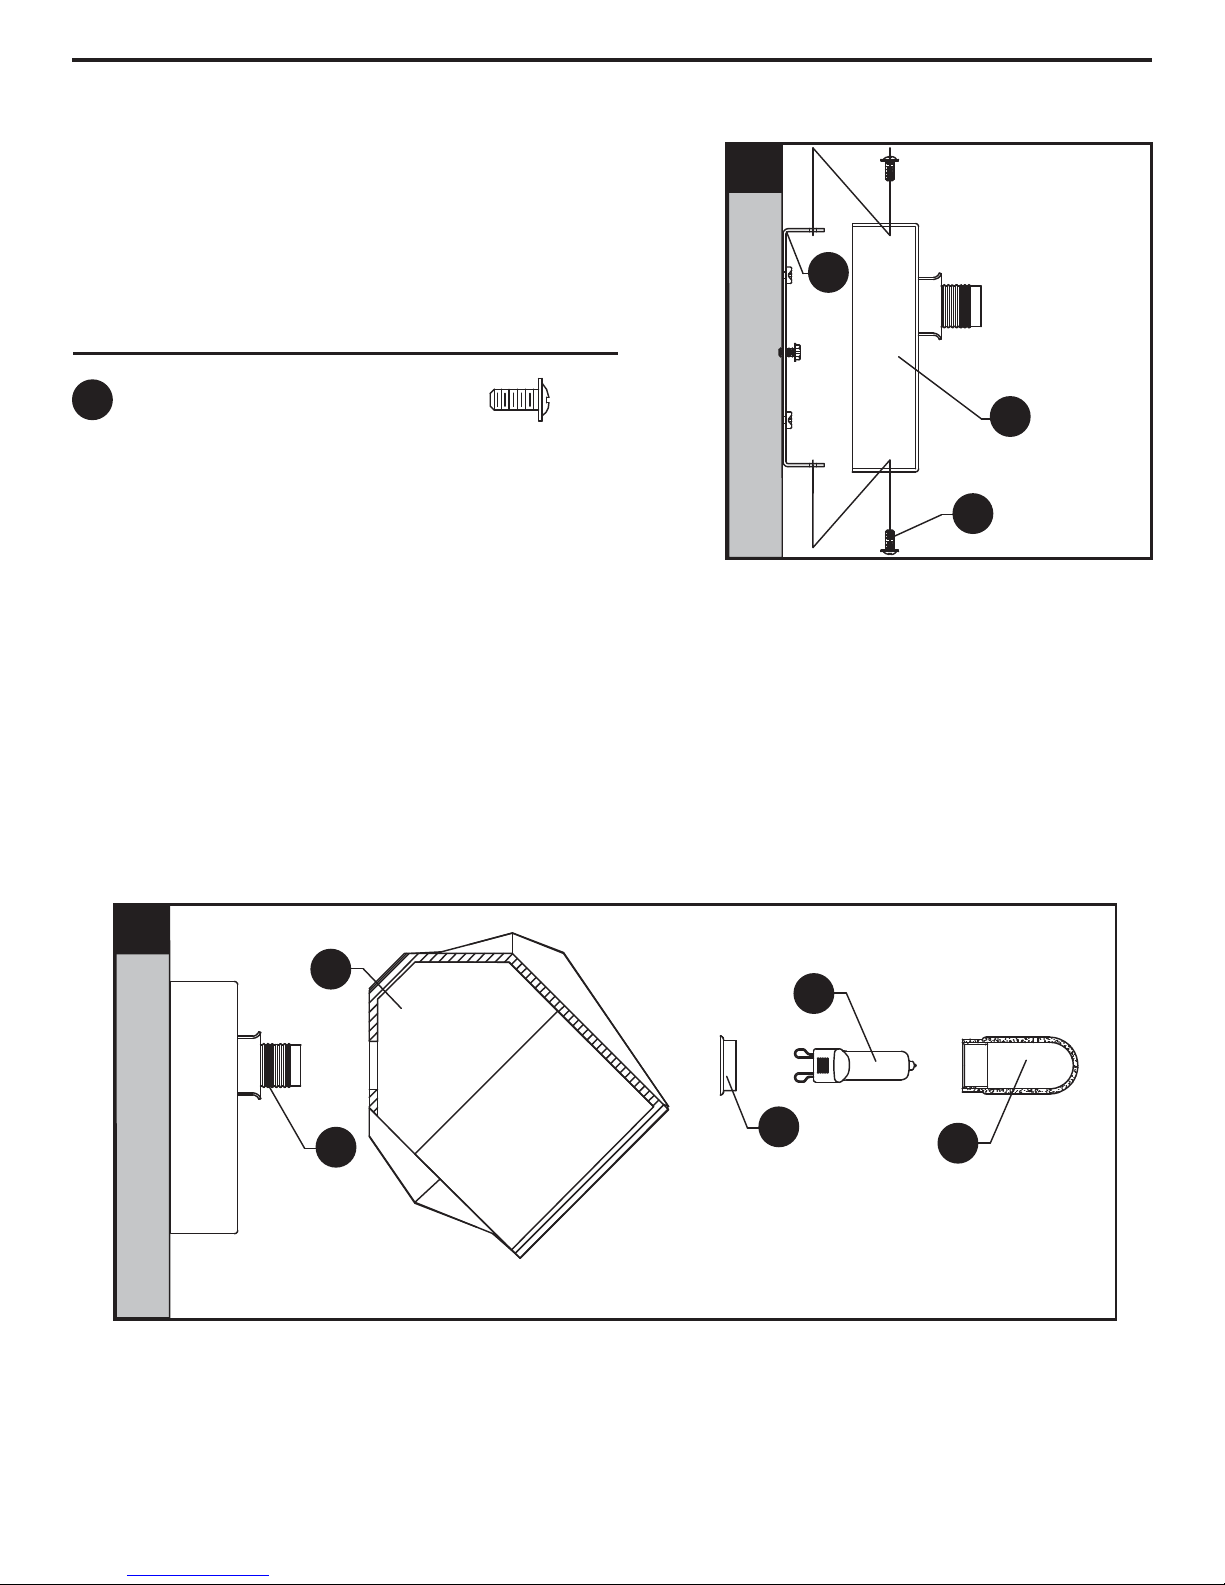
ASSEMBLY INSTRUCTIONS
3. Pass canopy (A) over mounting bracket
(DD) and secure with canopy screws (CC).
Hardware Used
Canopy
CC
Screw
3
DD
x 2
A
CC
4
E
C
F
D
4. Pass shade shade (E) over threaded socket (D) and secure with threaded socket ring (F). Insert
25-watt G9 bulb (C) into threaded socket (D). Screw Bulb cover (B) onto threaded socket (D).
B
5
Page 6
CARE AND MAINTENANCE
• Always be certain that electric current is turned off before cleaning this item.
• Use a soft, moist cloth with mild non-abrasive soap to clean fixture. Never use glass cleaner on
fixture, as it will damage the metal finish.
• All glass shades may be washed in a towel-lined sink with warm water and mild soap. Do not
wash shades in an automatic dishwasher.
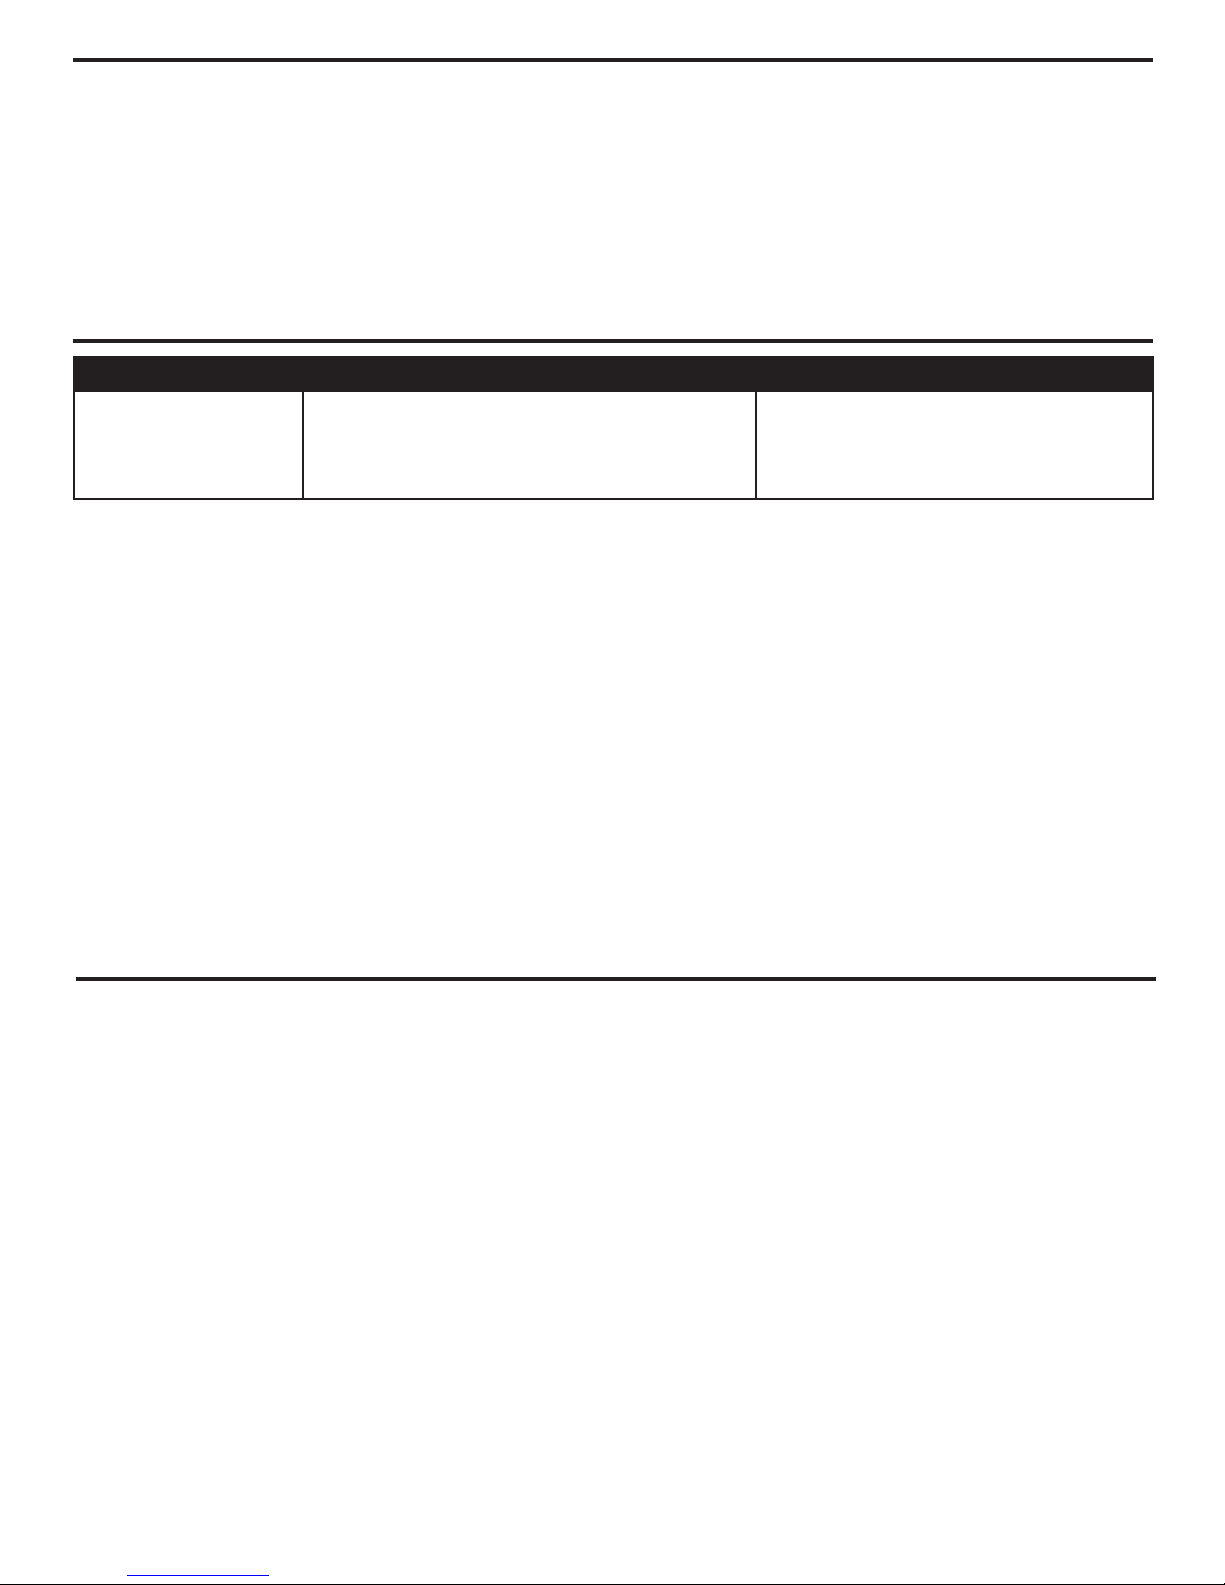
TROUBLESHOOTING
PROBLEM POSSIBLE CAUSE CORRECTIVE ACTION
Fixture does
not light.
WARRANTY
1. Fixture may be wired incorrectly. 1. Check wiring.
2. Worn or broken bulb. 2. Replace bulb.
Distributor warrants products manufactured by it will be free from defects in material and
workmanship for one (1) year following the date of shipment. This warranty does not cover bulbs or
finish on outdoor product. If any of the warranted products are found by Distributor to be defective,
such products will, at Distributor’s option, be replaced or repaired at Distributor’s cost. The parties
hereto expressly agree that Buyer’s sole and exclusive remedy against the Distributor shall be for the
repair or replacement of defective products as provided herein, or, at the Distributor’s sole option,
Distributor may refund the purchase price of the products. THE FOREGOING WARRANTY IS IN
LIEU OF ALL OTHER WARRANTIES, EXPRESSED OR IMPLIED, INCLUDING THOSE OF
MERCHANTABILITY, FITNESS FOR ANY PARTICULAR PURPOSE OR INFRINGEMENT. No
affirmation of Distributor, by words or action, other than set forth in this paragraph shall constitute a
warranty. Goods which may be sold by Distributor but which are not manufactured by Distributor are
not warranted by Distributor, but are sold only with the warranties, if any, of the manufacturer thereof.
This warranty does not cover labor or other costs or expenses to remove or install any defective,
repaired or replaced product. Distributor’s warranty does not apply to any products that have been
subjected to misuse, mishandling, misapplication, neglect (including, but not limited to improper
maintenance), accident, improper installation, modification (including, but not limited to use of
unauthorized parts or attachments), or adjustment or repair.
6
Page 7

REPLACEMENT PARTS LIST
For replacement parts, call our customer service department at 1-855-226-7169, 8 a.m. - 4 p.m., EST,
Monday - Friday.
PART DESCRIPTION PART #
B
E
F
AA
BB
CC
DD
Bulb Cover BC001
Shade S83335
Threaded Socket Ring TSR83335
Wire Connectors WC001
Short Machine Screw SCR832X050
Canopy Screw CS83335
Mounting Bracket XBAR83335
B
AA
BB
E
CC
F
DD
Rev. 04-11-14
7
Printed in China
Page 8

LUMINAIRE À 4 LUMIÈRES
POUR MEUBLE-LAVABO
MODÈLE #83335
JOIGNEZ VOTRE REÇU ICI
Numéro de série Date d’achat
Des questions, des problèmes, des pièces manquantes? Avant de retourner l’article au
détaillant, appelez notre service à la clientèle au 1 855 226-7169, entre 8 h et 16 h (HNE),
du lundi au vendredi.
8
Page 9

CONTENU DE L’EMBALLAGE
A
D
E
F
B
C
PIÈCE
DESCRIPTION
A Pavillon 1
Cache-ampoule 4
B
C
Ampoule G9 de 25 watts 4
D
Douille filetée 4
Abat-jour 4
E
Bague de douille filetée 4
F
QUANTITÉ
9
Page 10

QUINCAILLERIE INCLUSE
AA
BB
CC
DD
EE
Vis de mise
à la terre
Qté : 1
Capuchon
de connexion
Qté : 3
Vis à
métaux
courtes
Qté : 2
Vis du
pavillon
Qté : 2
Support de
fixation
Qté : 1
CONSIGNES DE SÉCURITÉ
Veuillez vous assurer de lire et de comprendre l’intégralité du présent guide avant d’assembler,
d’utiliser ou d’installer ce produit.
AVERTISSEMENT
• IMPORTANT : NE tentez JAMAIS de travailler sans couper l'électricité.
• Accédez au panneau central de disjoncteurs ou de fusibles de votre demeure et placez
l’interrupteur
principal en position d’arrêt (« OFF »). Dévissez les fusibles ou placez en position d’arrêt (« OFF
») l’interrupteur des disjoncteurs qui alimentent le luminaire ou la pièce dans laquelle vous
travaillez.
• Placez l’interrupteur mural en position d’arrêt (« OFF »). Si le luminaire à remplacer est doté d’un
interrupteur à bouton ou à chaîne, placez-le en position d’arrêt (« OFF »).
• N’utilisez pas d’ampoules dont la puissance dépasse la puissance nominale indiquée sur ce
luminaire.
• AVERTISSEMENT en vertu de la Proposition 65 de la Californie : Ce luminaire contient des
produits chimiques reconnus par l’État de la Californie comme étant la cause de cancers,
d’anomalies congénitales et d’autres problèmes liés aux fonctions reproductrices. Lavez-vous les
mains après l’avoir manipulé.
MISE EN GARDE
• Prenez soin de lire et de comprendre toutes les instructions avant de commencer l’assemblage et
l’installation du luminaire.
• Si vous avez des doutes à propos de l’installation, ou si le luminaire ne fonctionne pas
correctement, veuillez communiquer avec un électricien qualifié.
• Toutes les pièces doivent être utilisées tel qu’il est indiqué dans ces instructions. Ne remplacez
pas les pièces, n'en laissez pas de côté et ne les utilisez pas si elles sont usées ou brisées. Le
non-respect de ces instructions peut annuler l’homologation ETL ou CSA du luminaire.
PRÉPARATION
Avant de commencer l’assemblage du produit, assurez-vous d’avoir toutes les pièces. Comparez les
pièces dans l’emballage avec la liste du contenu. S’il y a des pièces manquantes ou endommagées,
ne tentez pas d’assembler le produit.
Temps d’assemblage approximatif : de 30 à 60 minutes
Outils requis pour l’assemblage (non fournis) : tournevis cruciforme, tournevis à tête plate, pinces à
dénuder, ruban isolant, échelle, lunettes de sécurité, perceuse et foret de 9/32 po.
10
Page 11

INSTRUCTIONS POUR L'ASSEMBLAGE
1. Fixez le support de fixation (DD) sur la boîte de
sortie à l’aide des vis à métaux courtes (BB).
Quincaillerie utilisée
Vis à métaux
BB
courtes
Support de
DD
fixation
x 2
x 1
2. Guide de raccordement électrique
Fil de mise à la terre :
• Pour une installation aux États-Unis :
enroulez le fil de mise à la terre provenant de
la boîte de sortie autour de la vis de mise à
la terre (EE) située sur le support de fixation
(DD), à au moins 5 cm (2 po) de l’extrémité
du fil. Serrez la vis de mise à la terre (EE). Si
le luminaire est fourni avec un fil de mise à la
terre, raccordez-le au fil de mise à la terre de
la boîte de sortie à l’aide d’un connecteur de
fils (AA).
• Pour une installation au Canada : si le
luminaire est fourni avec un fil de mise à la
terre, enroulez-le autour de la vis de mise à
la terre (EE) située sur le support de fixation
(DD). Serrez la vis de mise à la terre (EE).
Fils d'alimentation :
• Connectez le fil neutre d’alimentation (blanc)
provenant de la boîte de sortie au fil neutre
du luminaire (fil blanc ou fil parallèle en
forme de « D » et rainuré).
• Connectez le fil d’alimentation chargé (noir)
provenant de la boîte de sortie au fil du
luminaire (fil noir ou fil parallèle, rond et
lisse).
1
DD
Boîte de sortie
(non incluse)
2
CUIVRE NU, OU FIL VERT
DE MISE À LA TERRE
DE LA RÉSIDENCE
FIL NOIR
D'ALIMENTATION
FIL BLANC
D'ALIMENTATION
FIL NOIR
D'ALIMENTATION
FIL BLANC
D'ALIMENTATION
REMARQUE :
Le luminaire aura soit 2 fils (1 noir et
1 blanc), soit un câble parallèle
SPT-2 de luminaire composé d'un fil
rond et lisse et un fil rainuré en forme
de « D ».
BB
CUIVRE NU, OU FIL
VERT DE MISE À
LA TERRE DU
LUMINAIRE
FIL NOIR
DU LUMINAIRE
FIL BLANC
DU LUMINAIRE
OU
FIL DU CÂBLE PARALLÈLE
DU LUMINAIRE
(ROND ET LISSE)
FIL DU CÂBLE PARALLÈLE
DU LUMINAIRE
(EN FORME DE « D » ET RAINURÉ)
Quincaillerie utilisée
Capuchon
AA
de connexion
x 3
11
Page 12

INSTRUCTIONS POUR L'ASSEMBLAGE
3. Placez le pavillon (A) sur le support de fixation
(DD) et fixez à l'aide des vis du pavillon (CC).
Quincaillerie utilisée
CC
Vis du
pavillon
x 2
3
DD
A
CC
4
E
C
F
D
4. Placez l'abat-jour (E) sur la douille filetée (D) et fixez-le à l'aide de la bague de douille filetée (F).
Insérez une ampoule G9 de 25 watts (C) dans la douille filetée (D). Vissez le cache-ampoule (B)
sur la douille filetée (D).
B
12
Page 13

ENTRETIEN
• Vérifiez toujours que le courant est coupé avant de nettoyer le luminaire.
• Utilisez un linge doux et humide ainsi qu’un savon non abrasif. N’utilisez jamais de nettoyants
pour vitres; vous risqueriez d’endommager le fini métallique du luminaire.
• Les abat-jour en verre peuvent être nettoyés dans un évier couvert de serviettes, à l’aide d’eau
tiède et de savon doux. Ne nettoyez pas les abat-jour dans un lave-vaisselle.
DÉPANNAGE
PROBLÈME CAUSE POSSIBLE MESURE CORRECTIVE
Le luminaire
ne s’allume pas.
1. Le luminaire est mal branché. 1. Vérifiez si le luminaire
est bien branché.
2. L’ampoule est usée ou brisée. 2. Remplacez l’ampoule.
GARANTIE
Le distributeur garantit les produits qu’il a fabriqués contre tout défaut de matériaux ou de fabrication
pour une période de un (1) an à compter de la date d’expédition. Cette garantie ne couvre pas les
ampoules ni le fini des produits extérieurs. Si l’un des produits garantis est déclaré défectueux par le
distributeur, celui-ci choisira de remplacer ou de réparer le produit à ses frais. Les parties acceptent
expressément par la présente que le seul recours de l’acheteur contre le distributeur se limite à la
réparation ou au remplacement des produits défectueux, tel qu'il est stipulé aux présentes, ou, à sa
seule discrétion, le distributeur peut choisir de rembourser le prix d’achat des produits. LA
GARANTIE SUSMENTIONNÉE PRÉVAUT SUR TOUTE AUTRE GARANTIE, QU'ELLE SOIT
EXPRESSE OU IMPLICITE, Y COMPRIS TOUTE GARANTIE DE QUALITÉ MARCHANDE,
D'ADÉQUATION À UN USAGE PARTICULIER OU DE NON-CONTREFAÇON. Aucune affirmation de
la part du distributeur, qu’elle se traduise en mots ou en action, ne constitue une garantie si elle n’est
pas stipulée dans ce paragraphe. Les articles qui sont vendus par le distributeur sans toutefois avoir
été fabriqués par le distributeur ne sont pas couverts par cette garantie. Ils sont vendus avec les
garanties fournies par le fabricant seulement, le cas échéant. Cette garantie ne couvre pas la
main-d’œuvre ni les coûts et dépenses associés au retrait ou à l'installation d’un produit défectueux,
réparé ou remplacé. La garantie du distributeur ne couvre pas les produits qui ont été soumis à un
usage inapproprié, à une manipulation inadéquate, à une négligence (y compris, sans toutefois s’y
limiter, à un entretien inadéquat), à un accident, à une installation inadéquate, à une modification (y
compris, sans toutefois s’y limiter, à l’utilisation de pièces et d’accessoires non autorisés), à un
réglage ou à une réparation.
13
Page 14

LISTE DES PIÈCES DE RECHANGE
Pour obtenir des pièces de rechange, appelez notre service à la clientèle au 1 855 226-7169, entre
8 h et 16 h (HNE), du lundi au vendredi.
PIÈCE
DESCRIPTION
B
E
F
AA
BB
CC
DD
Cache-ampoule BC001
Abat-jour S83334
Bague de douille filetée TSR83334
Capuchon de connexion WC001
Vis à métaux courtes SCR832X050
Vis du pavillon CS83335
Support de fixation XBAR83335
Nº DE PIÈCE
B
AA
BB
E
CC
F
DD
Rev. 04-11-14
14
Imprimé en Chine
 Loading...