

Page 1
TECHNISCHE ÄNDERUNGEN VORBEHALTEN · NACHDRUCK UND KOPIEN NUR MIT UNSEREM EINVERSTÄNDNIS · Specifications subject to change without notice · Copyright ELAFLEX
August 2015
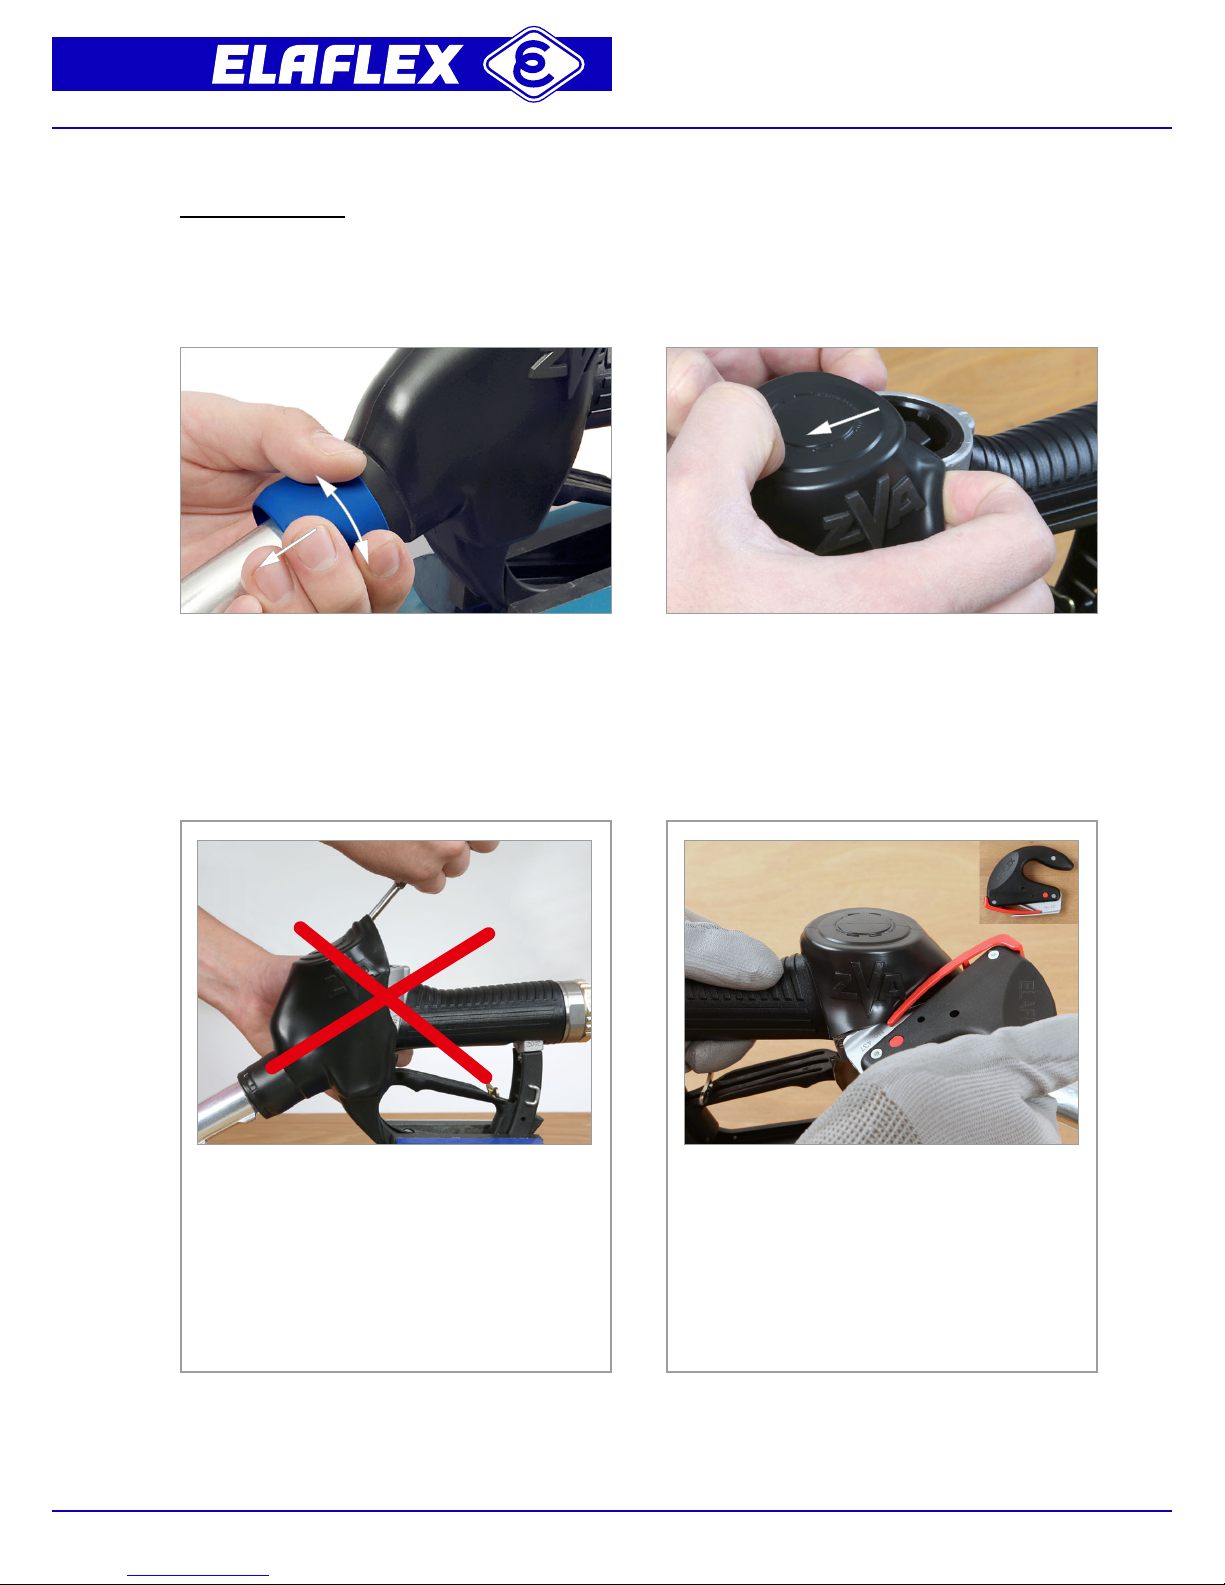
1) With a turning movement, pull off Product
Sleeve EK 043 ( or Splashguard EK 652 )
towards the spout tip.
Do not use tools ( e.g. screwdriver ) to
pull off the Scuffguard.
Tools might overscretch and permanently
deform the Scuffguard. In this case, the
Scuffguard does no longer fit onto the nozzle
body so that the Product Sleeve cannot be
assembled correctly.
To remove hardened scuffguards please use
our Safety-Cut-Off Tool EW-CUT.
For further information about the EW-CUT
please read at our manual 'Safety-Cut-Off
Tool'.
2) Put fingers below the Scuffguard EK 044 and
pull it towards the spout tip to remove.
ZVA Slimline 2 – Disassembling and
Assembling Scuffguard / Product Sleeve
DISASSEMBLING
Scuffguard
EK 044
Product Sleeve
EK 043
EW-CUT
These parts can by disassembled at room temperature, by hand. Using a vise ( smooth jaws, to protect the
plastic guard ) facilitates the procedure.
Page 2

c
c
b
b
a
a
3) Push the Scuffguard further as shown in order
that the Product Sleeve can be fitted correctly.
2) Push the Scuffguard over the spout as shown.
Then put fingers slightly below the Scuffguard
to pull it onto the nozzle body.
4) Push Product Sleeve ( or Splashguard EK 652 )
onto the Scuffguard. While pushing the Product
Sleeve, turn it until it snaps in properly.
Pay attention to the correct position
of the Product Sleeve :
a) Correct position of the Scuffguard -
the nozzle body has to be visible.
b) The Product Sleeve has to snap onto the
Scuffguard: no gap between these two parts
allowed.
c) The parting line on the Product Sleeve has to
be in line with the parting line of the Scuffguard.
ASSEMBLING
The scuffguard can be mounted by hand, at room temperature. To facilitate assembling for large quantities or
at low ambient tempertures, it is admissable to warm up scuffguards, e. g. with warm air or water ( 45° C up to
max. 55° C ). Avoid higher temperatures.
1) Apply soap water to nozzle body in the area of
the Diesel Drip Catcher, e. g. with a sponge.
Diesel Drip Catcher
 Loading...