

Ekselans AP 1200 User Manual
AP 1200
330003
Wireless Access Point
User manual

2
Index
AP 1200 Hardware interface ….....…………...…………………..………..3
Installation diagram ………………………………………………………………3
Connect to AP 1200...........................................................................4
AP 1200 Web interface ....................................................................5
Advanced Settings .........................................................................17
3
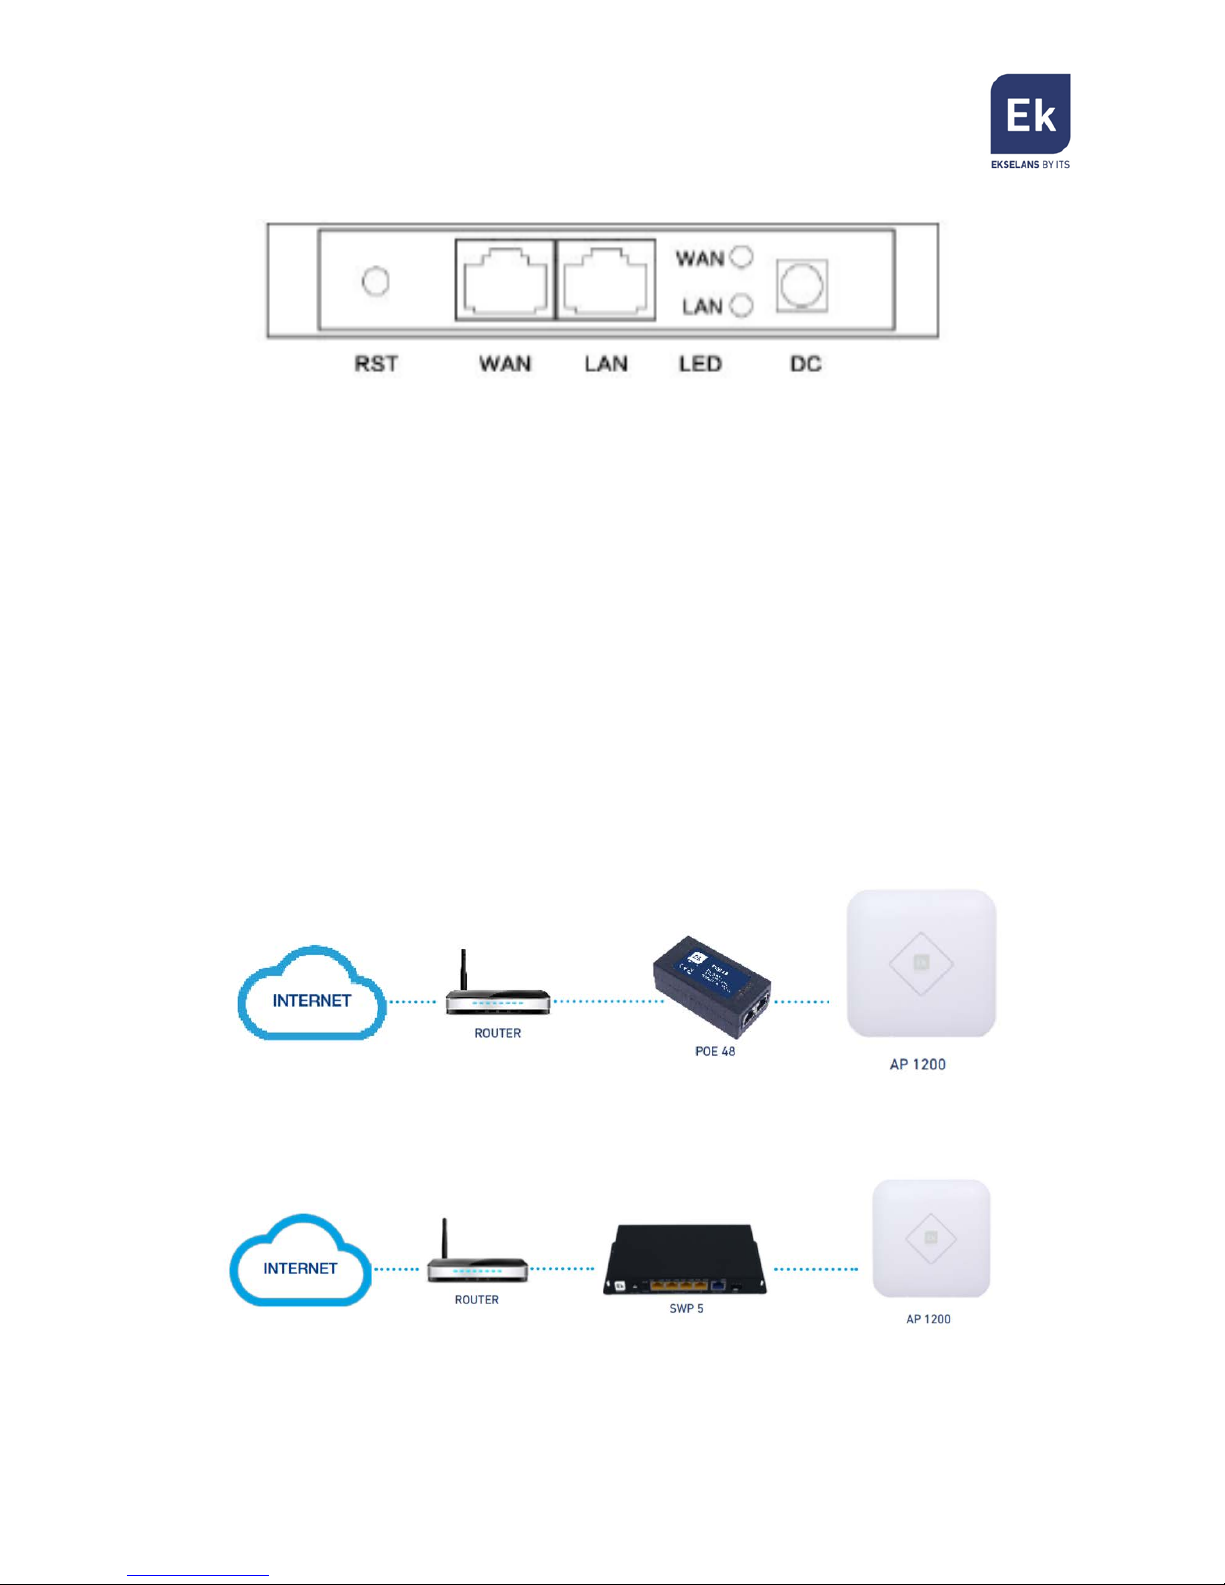
AP 1200 Hardware interface
• RST: Reset Button, it make AP revert to default data after press it 15
seconds.
• WAN: WAN Port, connect with ADSL modem or Internet mainly. It will be LAN
port under Wireless AP and Wireless Repeater operation mode.
• LAN: LAN Port to end users.
• LED: LED indicator of WAN port and LAN port.
• DC: DC power connector.
Installation diagram
1. PoE Injector Power Supply
2. Powered by PoE Switch
4
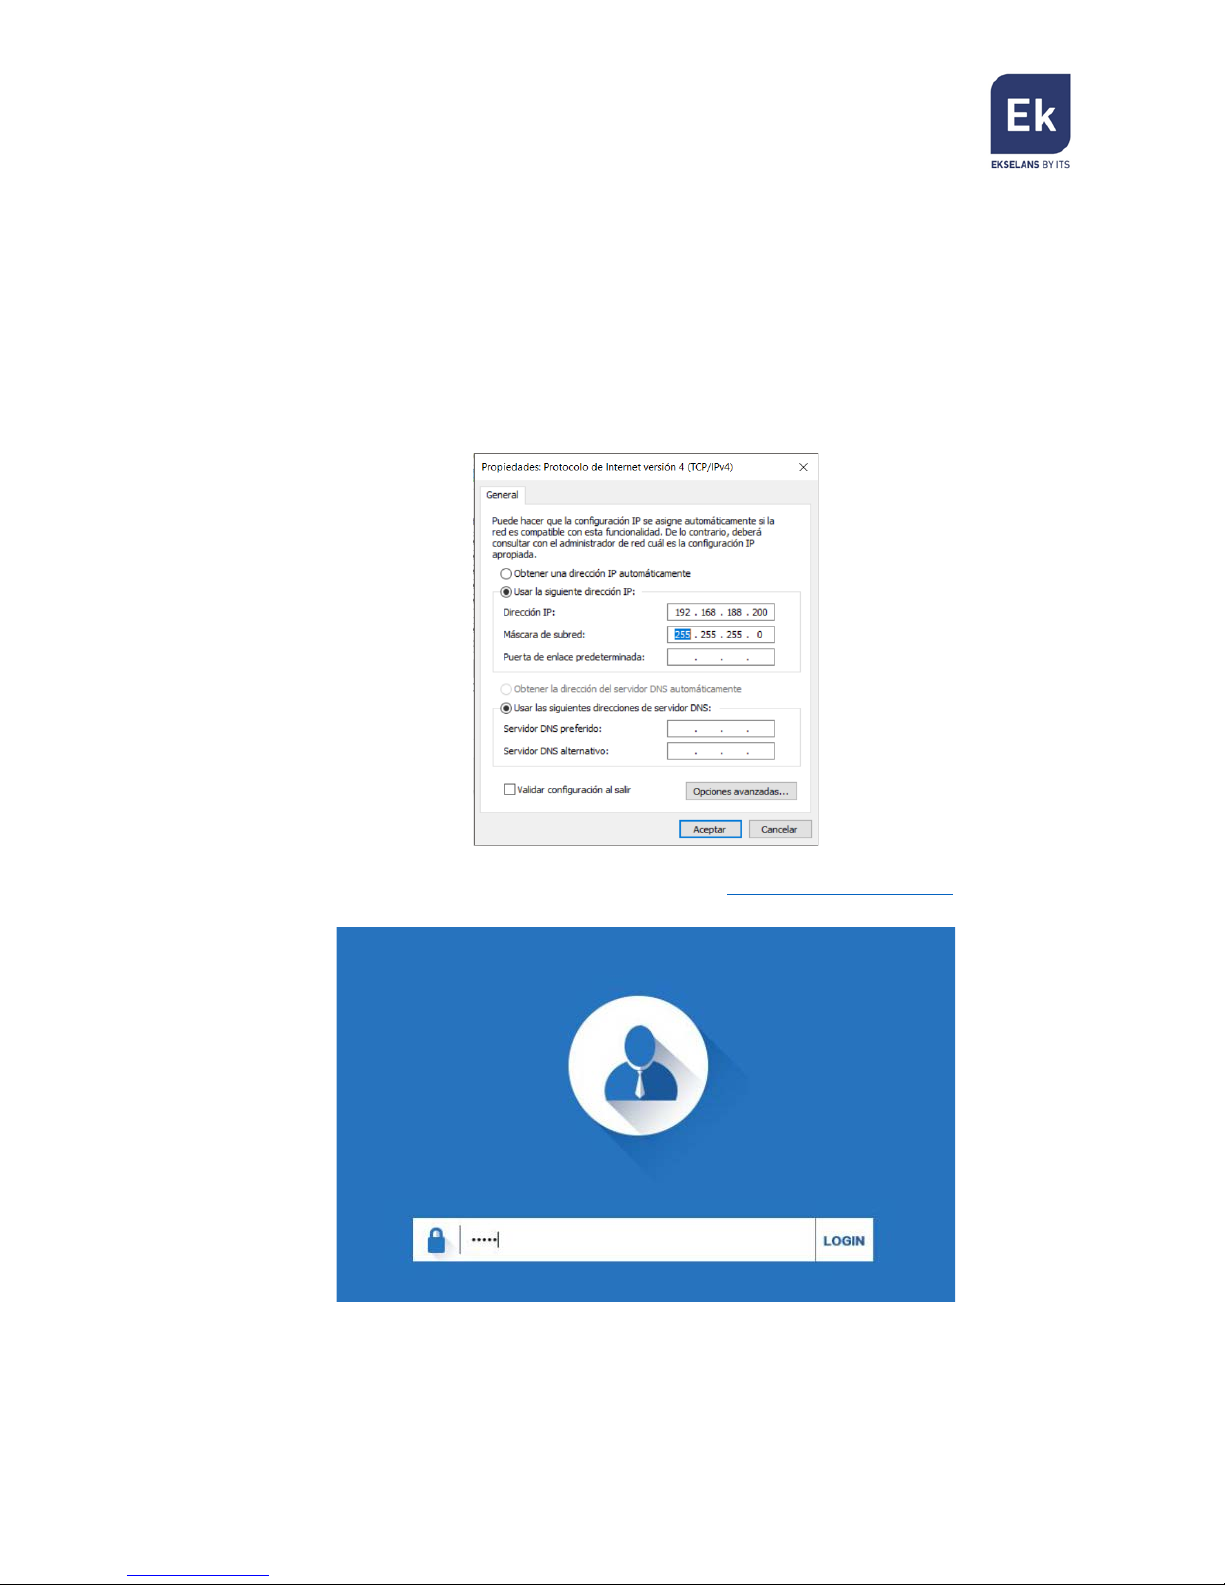
Connect to AP 1200
Note: The default SSID is Ek_2.4G and Ek_5.8G with password
12345678
To connect to AP 1200 please follow these steps:
1. Connect to AP 1200 with Ethernet cable or wireless.
2. Set our Ethernet / Wireless adapter with Static IP:
3. Open a Web browser and navigate to the URL: http://192.168.188.253
4. To enter use the password: admin
5
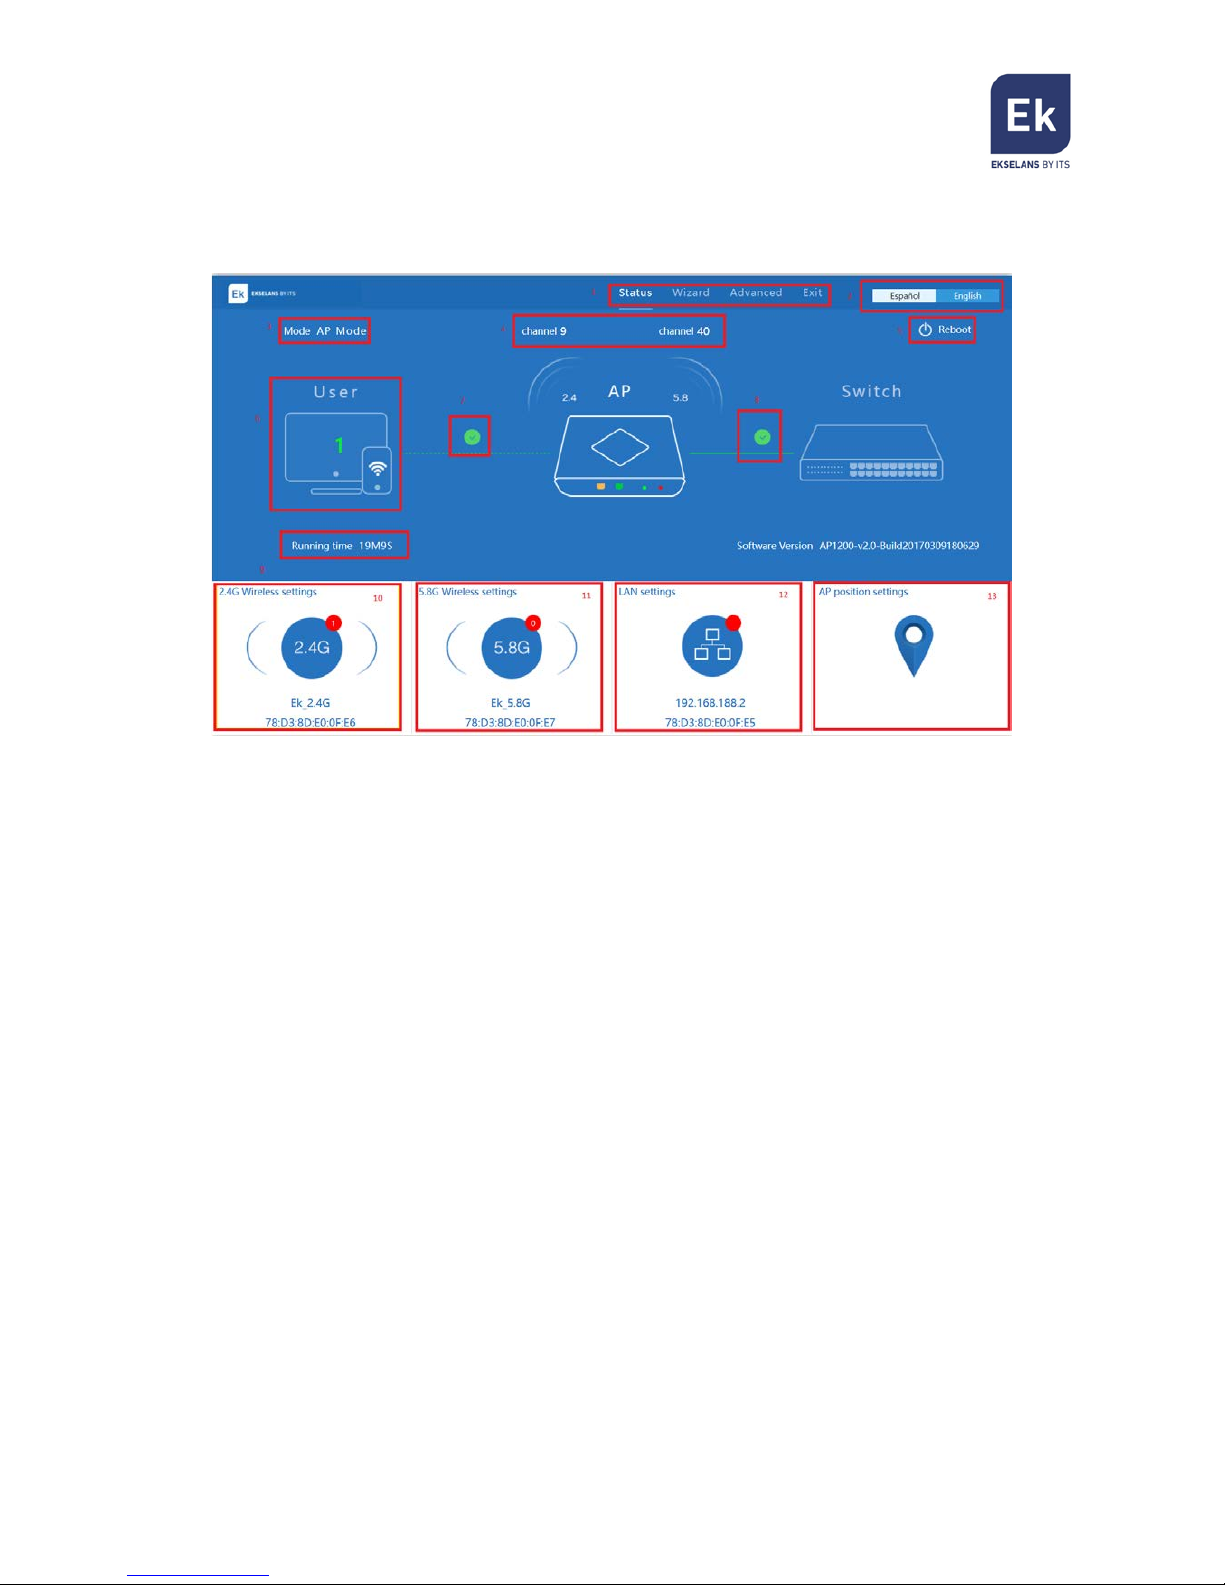
AP 1200 Web interface
After entering, the password will appear the main interface
1. Displays the Menu.
2. Language Selector can be English / Spanish.
3. Displays the Operational mode (AP Mode, Gateway Mode, and Repeater).
4. Displays the channel that the wireless is broadcasting.
5. To reboot the device
6. Shows the number of users connected to the device.
7. Displays if the user connection to the device is good or bad.
8. Displays if the device connection to the external network is good or bad.
9. Shows the running time of the device.
10. Displays Wireless information such as Wireless SSID and Wireless MAC for
5.8G. Also by doing click on it will open the fast configuration menu for
Wireless
11. Displays Wireless information such as Wireless SSID and Wireless MAC for
2.4G. Also by doing click on it will open the fast configuration menu for
Wireless
12. Displays LAN information such as device IP and LAN MAC. Also by doing click
on it will open the fast configuration menu for LAN network.
13. Displays the AP position information, by doing click on it will open the fast
configuration menu for AP position.
6
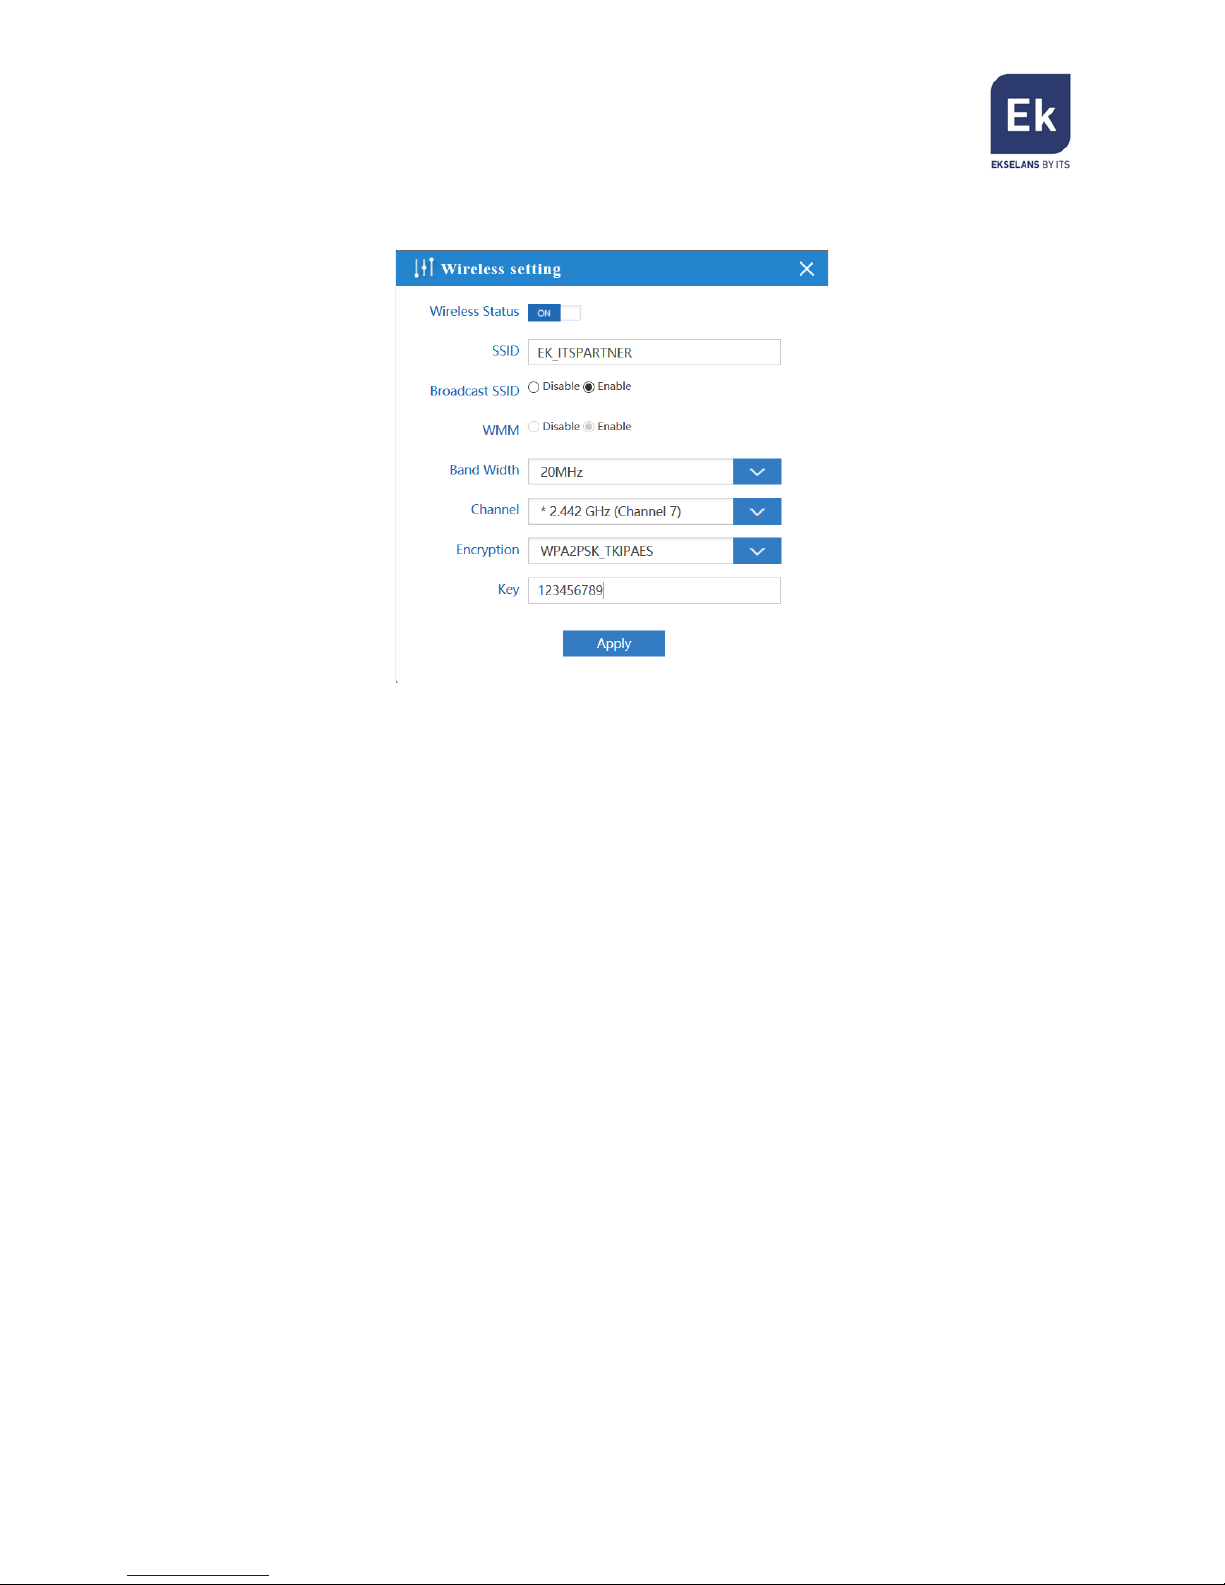
Wireless setting (Main Window 10 and 11)
Clicking in the Wireless section will open the fast configuration menu for Wireless
• Wireless Status: ON / OFF.
• SSID: Name of the wireless.
• Broadcast SSID: Enable - Show SSID, Disable – Hide SSID,
• WMM: Enable or Disable WMM.
• Band Width: The width that Wireless will use 20MHz, 40MHz or 80MHz.
• Channel: The channel that Wireless will use.
• Encryption: Select the encryption wanted for the wireless SSID.
• Key: The password for the SSID
After filling the above value as we want, we can press “Apply” to save the changes
for our Wireless.
7
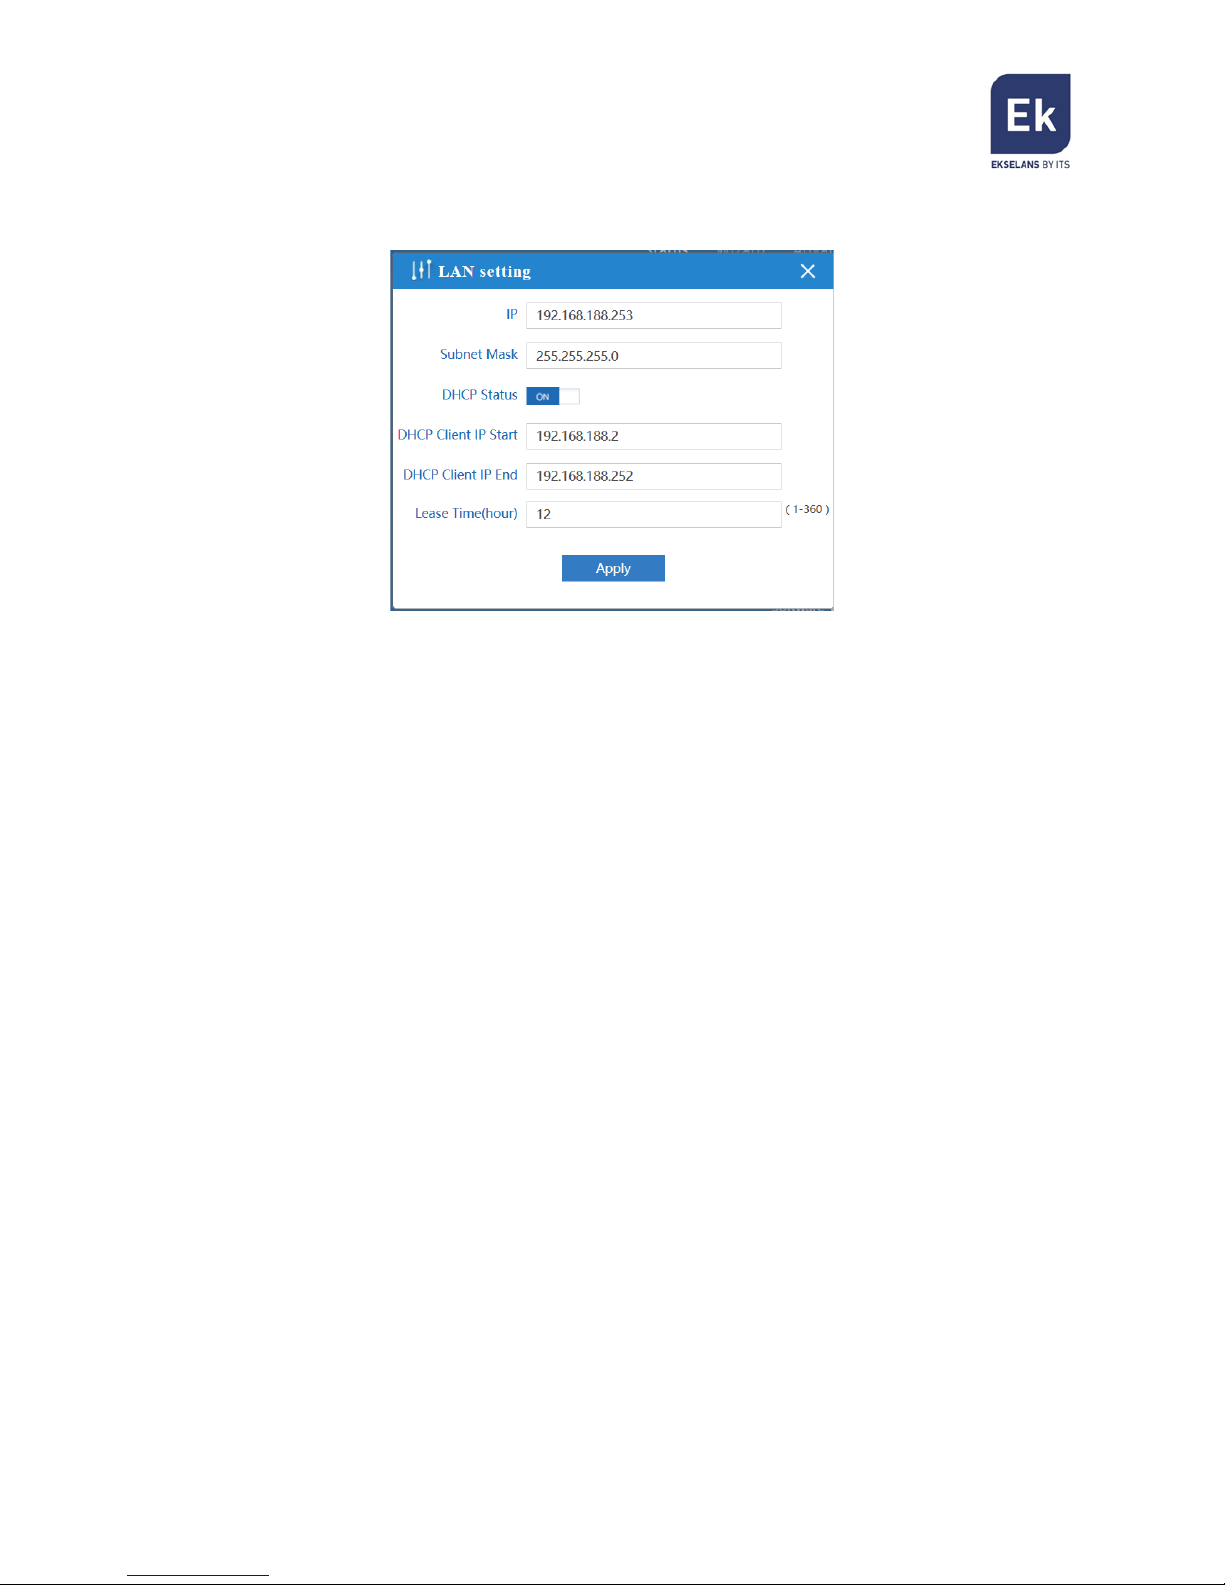
LAN setting (Main Window 12)
Clicking in the Wireless section will open the fast configuration menu for Wireless
• IP: Set the IP for this device.
• Subnet Mask: Set the Subnet Mask for this device.
• DHCP Status: ON – To enable the DHCP, OFF – To disable the DHCP.
• DHCP Client IP Start: The starting IP for the DHCP range.
• DHCP Client IP End: The ending IP for the DHCP range.
• Lease Time (hour): The time to renew the IP for the connected devices.
After filling the above values as we want, we can press “Apply” to save the changes
for our LAN settings.
Note: This window can change based on the Operational Mode our
AP 1200 is using.

8
Location Information (Main Window 13)
Clicking in the Location section will open the fast configuration menu for Location
Information
• AP Location: Set the AP Location, this is just information for the user to know.
• AP Name: Set the identification name for our AP.
After filling the above values as we want, we can press “Apply” to save the changes
for our Location information settings.
 Loading...