

General
© ekey biometric systems GmbH Operating instructions ekey home Page 1 / 41
OPERATING INSTRUCTIONS
ekey home
Fingerscan Access Control System
ID16/39:
Version
2 dated
27.1.2012

General
© ekey biometric systems GmbH Operating instructions ekey home Page 2 / 41
ENGLISH
ENGLISH ............................. ........................................................................................ ............................................ .......... 2
1. FOREWORD ......................................... ............. ............................... ............. ............................... ............................. 4
2. MANUFACTURER´S WARRANTY ...................................... ............................................ ................................................ 4
3. CONTACT...................................................................................... ............. ............................... ................................ 4
4. NOTE ON THE OPERATING INSTRUCTIONS ......................................................... ............................................ .............. 5
4.1 W
ARNING SIGNS AND SYMBOLS
.................................................................................................................................................................... 5
4.2 D
EPICTION CONVENTIONS
............................................................................................................................................................................ 5
4.3 V
ALIDITY
.................................................................................................................................................................................................... 5
5. PRODUCT OVERVIEW - THE EKEY HOME SYSTEM ..... ..................................................... ............................................ .... 6
6. GENERAL SAFETY INFORMATION .................... ............................... ............................................ ................................. 7
6.1 I
NTENDED USE
............................................................................................................................................................................................ 7
6.2 S
ECURITY AGAINST MANIPULATION
............................................................................................................................................................... 8
6.3
RISKS ASSOCIATED WITH INTENDED USE
.......................................................................................................................................................... 9
6.4 REQUIREMENTS FOR THE USER ............................................................................................................................................................ 9
6.5 N
OTE ON PRODUCT LIABILITY
....................................................................................................................................................................... 9
7. EKEY HOME FINGER SCANNERS...... ............................... ............................................ ................................................. 10
7.1 M
ODELS AND VERSIONS
............................................................................................................................................................................. 10
7.2
OPERATING THE FINGER SCANNERS
.............................................................................................................................................................. 10
7.2.1 FUNCTION OF THE FINGER SCANNER ......................................................................................................................................... 10
7.2.2 OPERATING CORRECTLY THE FINGER SCANNER ........................................................................................................................ 11
7.2.3 WHAT YOU SHOULD NOT DO ...................................................................................................................................................... 12
7.3 O
PTI
CAL
SIGNALS ON THE EKEY HOME FINGER SCANNER
................................................................................................................................ 13
7.4 ELECTRIC CONNECTION ....................................................................................................................................................................... 14
7.5 MOUNTING........................................................................................................................................................................................... 14
8. EKEY HOME CONTROL PANELS .................... ..................................................... ............. ............................... ............. . 14
8.1 M
ODELS AND VERSIONS
............................................................................................................................................................................ 14
8.2
OPERATION
.............................................................................................................................................................................................. 15
8.2.1 ekey home CP IN and ekey home CP WM ............................................................................................................................ 15
8.2.1.1 Operating the buttons ................................................................................................................................................................ 15
8.2.1.2 Main menu .................................................................................................................................................................................. 15
8.2.1.3 Optical Signals ............................................................................................................................................................................. 15
8.2.1.4 INITIALIZING THE DEVICES.......................................................................................................................................................... 16
8.2.1.5 Overview of the programming menu of the control panel ...................................................................................................... 17
8.2.1.6 Entering the security code .......................................................................................................................................................... 18
8.2.1.7 Enrolling a fingerprint in the system ......................................................................................................................................... 18
8.2.1.8 Deleting a user ............................................................................................................................................................................ 20
8.2.1.9 Setting a new security code........................................................................................................................................................ 20
8.2.1.10 Accessing serial number and version number......................................................................................................................... 21
8.2.1.11 Changing the relay switching times......................................................................................................................................... 22
8.2.1.12 Resetting to factory settings .................................................................................................................................................... 23
8.2.2 ekey home CP DRM 1 (2) ............................................................................................................................................................. 24
8.2.2.1 CONTROLS ................................................................................................................................................................................... 24
8.2.2.2 Main menu .................................................................................................................................................................................. 25
8.2.2.3 initial operation........................................................................................................................................................................... 25
8.2.2.4 Entering the security code .......................................................................................................................................................... 27
8.2.2.5 Enrolling a fingerprint in the system ......................................................................................................................................... 27
8.2.2.6 Deleting a user ............................................................................................................................................................................ 31
8.2.2.7 Setting a new security code........................................................................................................................................................ 32
8.2.2.8 changing the relay switching times .......................................................................................................................................... 33

General
© ekey biometric systems GmbH Operating instructions ekey home Page 3 / 41
8.2.2.9 RESETting to factory settings ..................................................................................................................................................... 34
8.2.2.10 Test mode .................................................................................................................................................................................. 35
8.2.2.11 LED INTENSITY ........................................................................................................................................................................... 36
8.2.2.12 LOGGING ................................................................................................................................................................................... 37
8.2.3 Electric connection ....................................................................................................................................................................... 38
8.2.4 Mounting ...................................................................................................................................................................................... 38
10. TROUBLE-SHOOTING ................... ...................... ............................................ ........................................................... 38
11. MAINTENANCE ........................ ...................... ............................................ .............................................................. 40
11.1 C
ARE
.................................................................................................................................................................................................... 40
11.2 C
LEANING
............................................................................................................................................................................................. 40
12. DISPOSAL .......................... ............................................ ............................................ ............................................ .. 40
13. TECHNICAL DATA ................................. ...................... ............................................ .................................................. 40
14. ACCESSORIES ............... ........................................................................... ............. ............................... ............. ........ 41
15. DECLARATIONS OF CONFORMITY ...... ...................... ................................................................................................. .. 41
16. EKEY BRANCH OFFICES .................................................... ............................................ .............................................. 41
General
© ekey biometric systems GmbH Operating instructions ekey home Page 4 / 41
1.
Foreword
Congratulations on the purchase of this premium finger scanner system
ekey home.
It has been manufactured with highest accuracy and guarantees a maximum amount of recognition
performance. Enjoy the convenience - no more lost keys and no longer memorizing complicated codes.
From now on your finger is the key!
We hope you will enjoy your product a lot!
2.
Manufacturer´s warranty
ekey biometric systems (‘ekey’) guarantees, under conditions which you can view on our website
www.ekey.net, that the product is free from material or processing defects for
24 months from the date of purchase.
Warranty claims can only be made in the country where the product has been sold to you. ekey records
the production of each product.
3.
Contact
Visit the website of ekey biometric systems GmbH at:
www.ekey.net
There you can always find the most up to date version of this document, as well as other additional
information about this and other products by ekey biometric systems.
Should you still have technical questions, please contact your ekey dealer!
In order to have the most important information at hand in case of complaints, we request that you enter
the serial number below:
The serial number has 14 digits and can either be found on the label below the barcode or can be
accessed via the menu on the control panel.
ekey home finger scanner
ekey home control panel

General
© ekey biometric systems GmbH Operating instructions ekey home Page 5 / 41
4.
Note on the operating instructions
4.1 Warning signs and symbols
CAUTION! This symbol indicates a special notice, which you must pay attention to in the described
feature.
INFORMATION! This symbol indicates that you can find useful information and tips about the
product in the adjoining text.
STOP! This symbol indicates that you may under no circumstances carry out a given action. In the
majority of cases, in order to carry out the given feature, you need first to make some specific
settings.
Warning about dangerous electric voltage: This warning notice indicates that you are exposed
to electric voltage hazard
Warning about battery hazard
4.2 Depiction conventions
Depiction Signification
Listing
1.
2.
Follow the steps in this order
italic
underlined
Product name
4.3 Validity
These operating instructions are not subject to updating. You can find the most up-to-date version of
these instructions at
www.ekey.net
. Subject to optical and technical modifications, any liability for
misprints excluded.
General
© ekey biometric systems GmbH Operating instructions ekey home Page 6 / 41
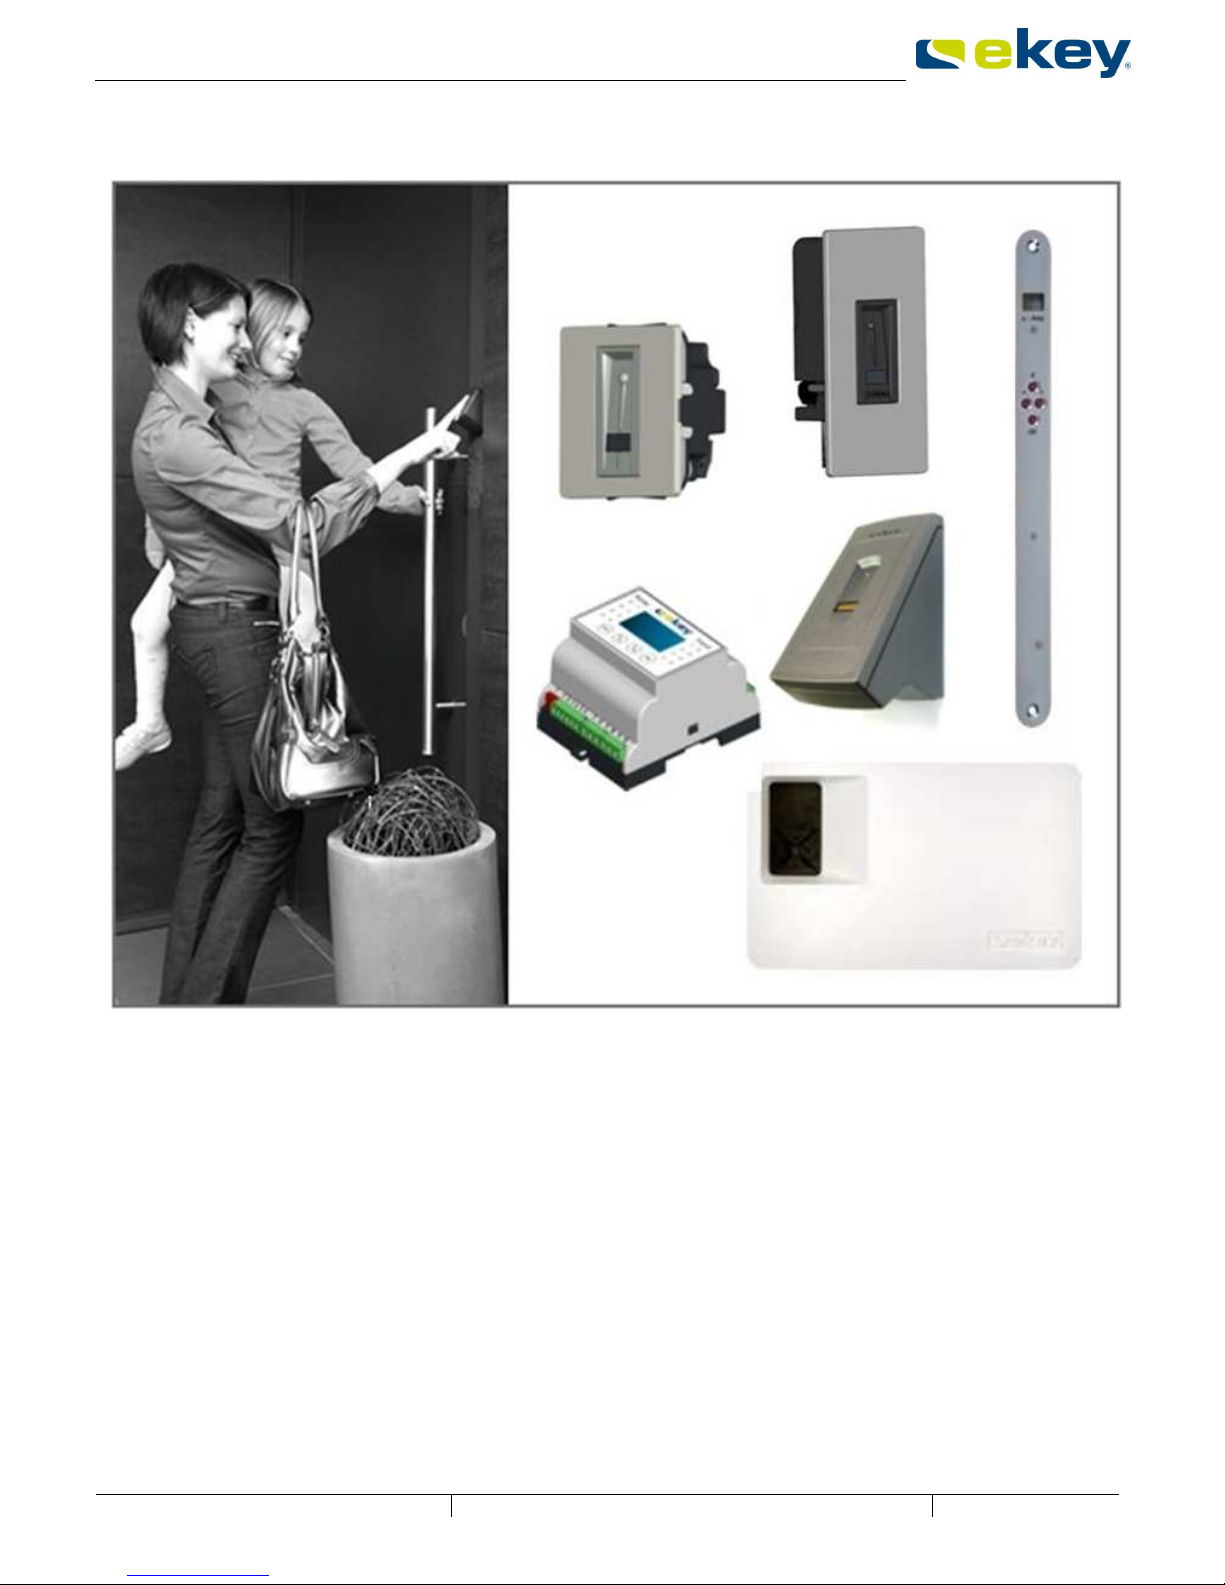
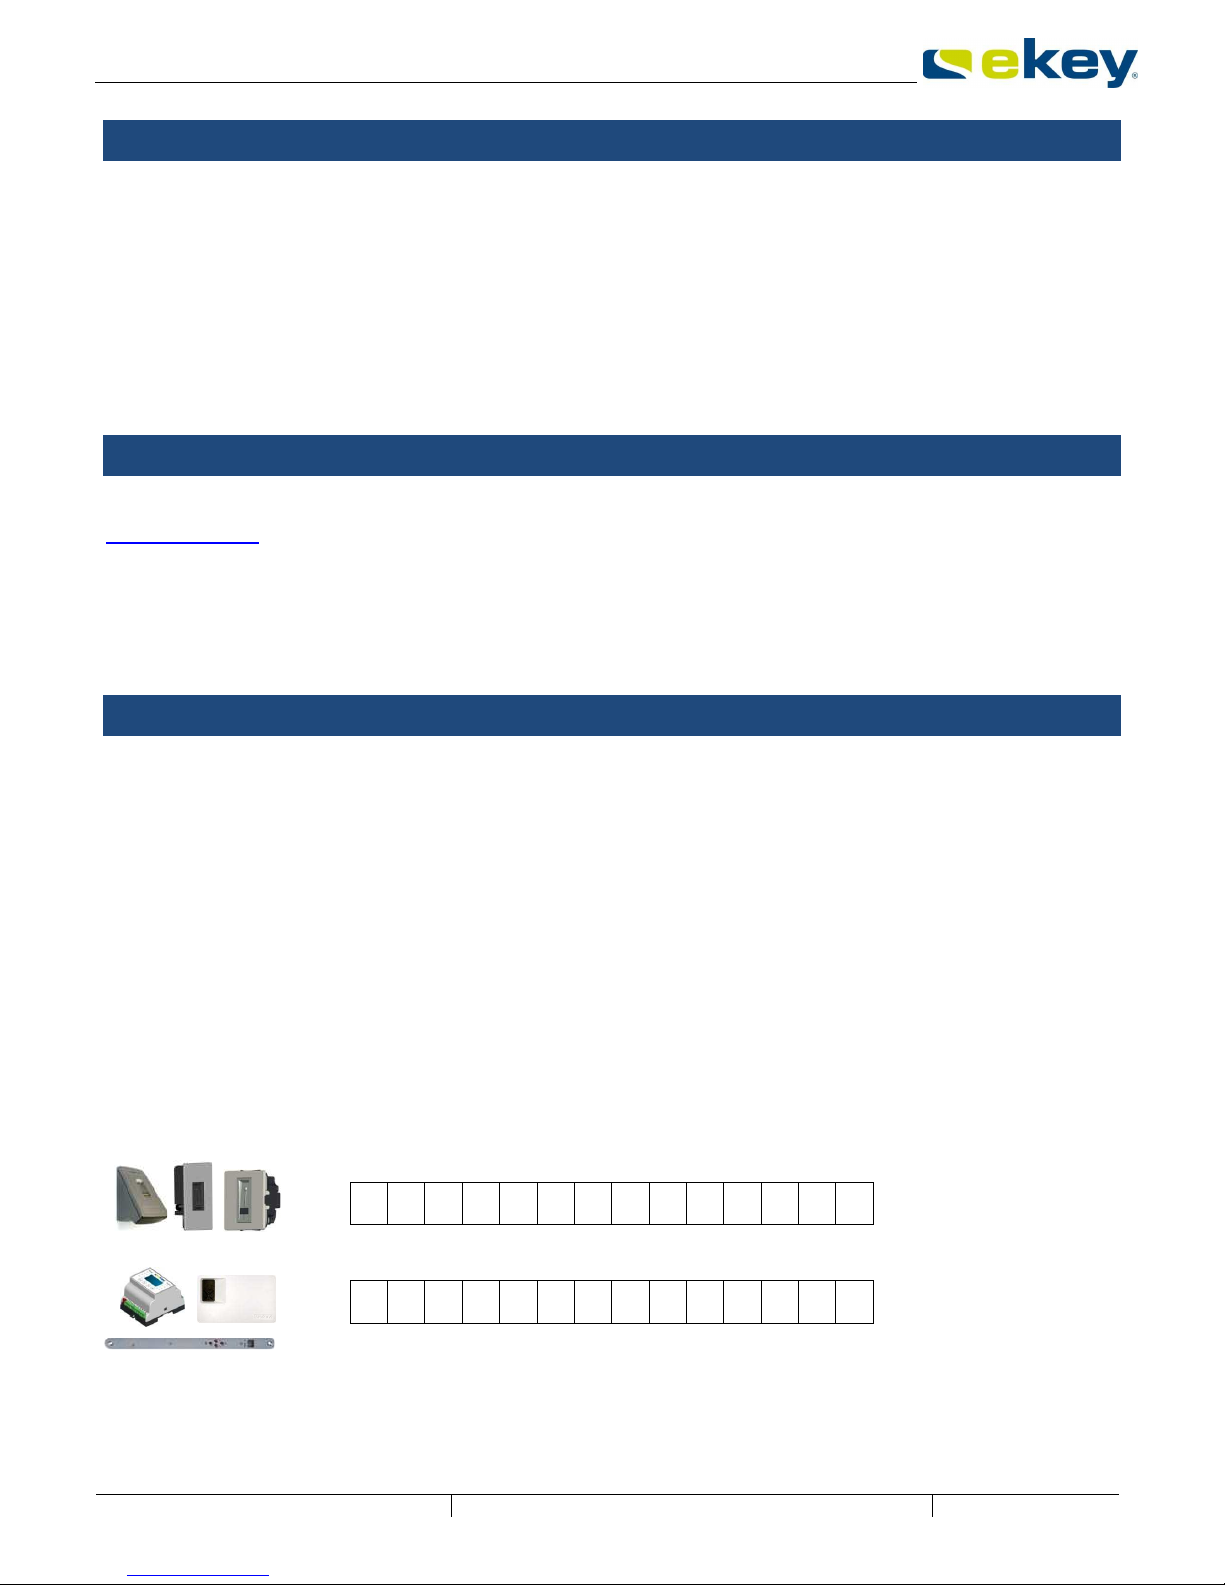
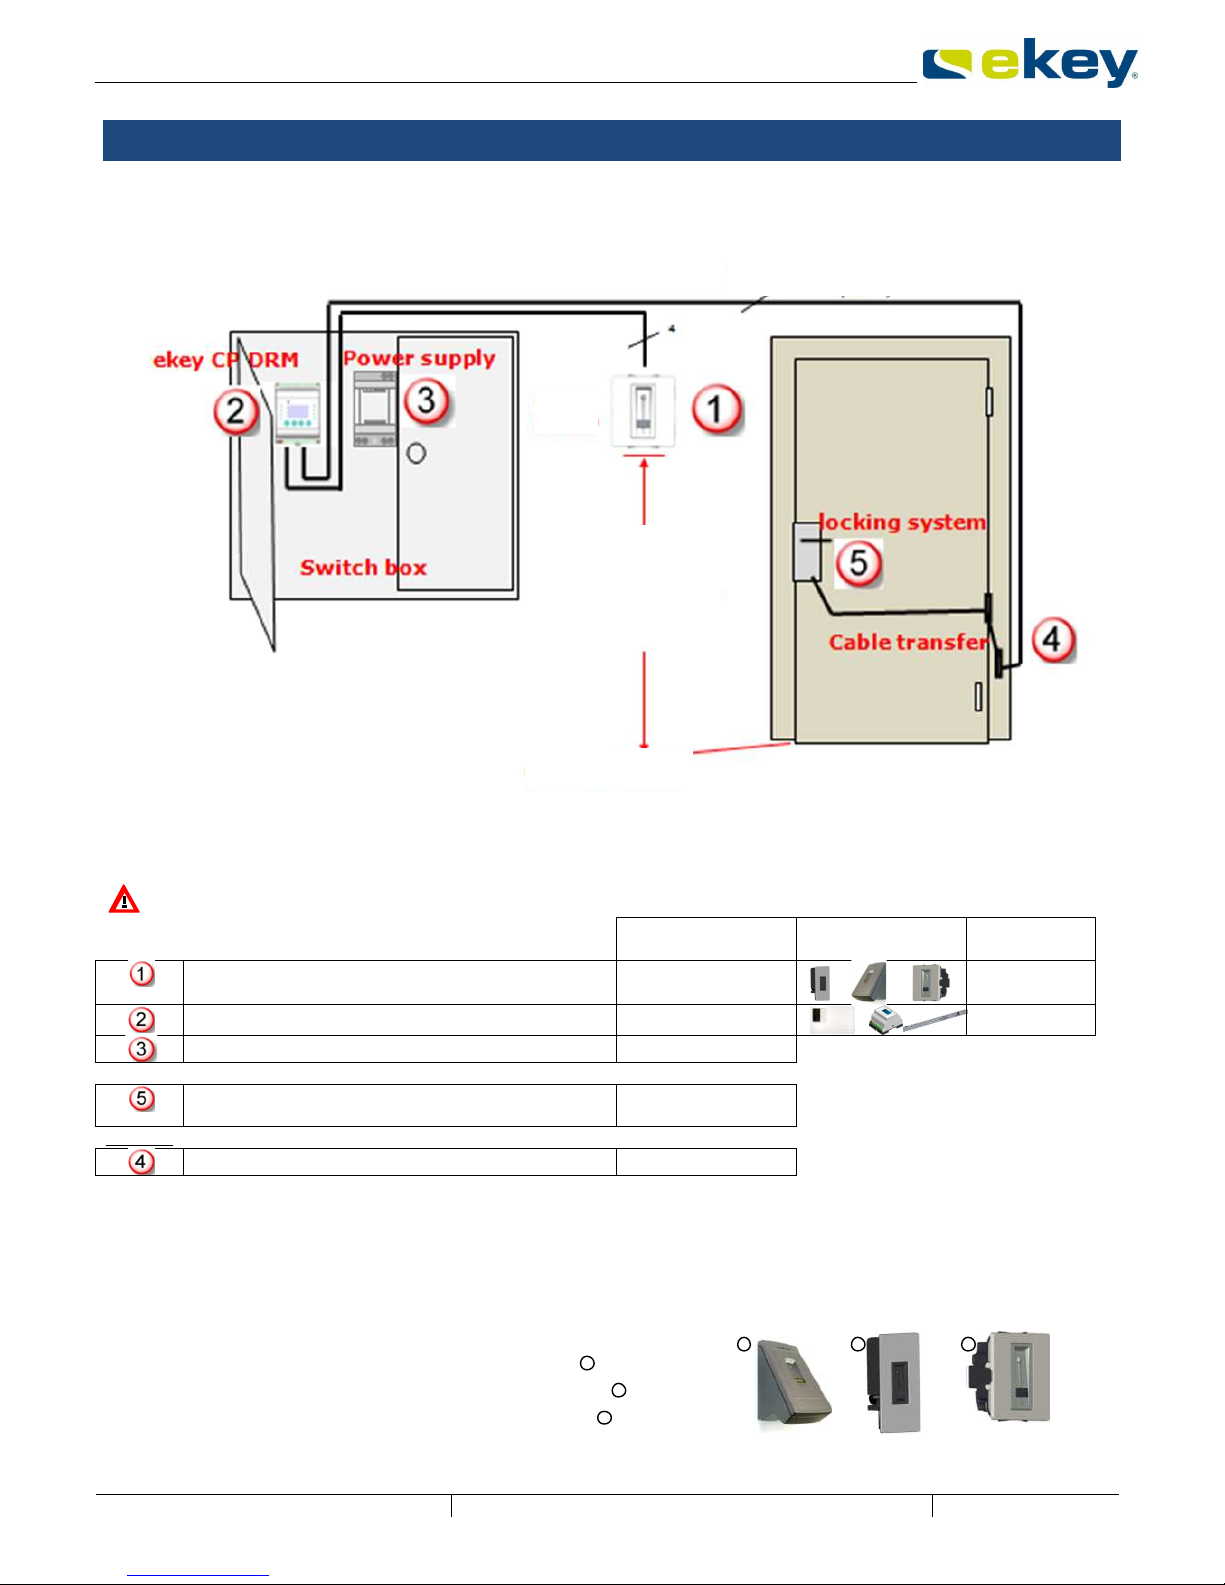
5.
Product overview - the ekey home system
For a complete operational ekey home system you will need the following components:
Not all parts are supplied by ekey!
ekey home is a biometric access system which is equipped with a finger scanner. This scanner reads
special features of your finger lines and uses them to recognise people with access rights. Each one of
your fingers has specific recognition features and also varies from the fingers of other people. ekey home
is available in different functional and mechanical versions and can therefore be optimally adapted to your
needs.
ekey home finger scanner versions
ekey home FS WM 2.0 wall-mounted
ekey
home FS IN 2.0 integrable (door)
ekey home FS OM outlet-mounted
Supplied by
ekey
Models
Description
on page
ekey home
f
inger
scanner
Yes
7
ekey home
control panel
Yes
8
Power supply
Yes
Motor
lock /
Electric strike
/ Locking
system
No
optional
Cable transfer
Yes
3
2
1
1 2 3
ekey
FS OM
mounting
height varies
according to
finger scanner
model
floor
L
min. 3 (depending on motor
locking system)
General
© ekey biometric systems GmbH Operating instructions ekey home Page 7 / 41
ekey control panel versions
The ekey home control panels are intended to directly control an electric motor lock. This is usually relay
1 for a door wiring.
ekey home CP WM 1 wall-mounted 1 relay
ekey home CP WM 3 wall-mounted 3 relays
ekey home CP IN 1 integrable 1 relay
ekey home CP IN 2 integrable 2 relays
ekey home CP DRM 1 Electric control cabinet (switching cabinet on top hat rail) 1 relay
ekey home CP DRM 2 Electric control cabinet (switching cabinet on top hat rail) 1 relay
Essentially any finger scanner may be combined to any control panel. Based on the scope of delivery,
check precisely which units you have when you start up the systems.
6.
General Safety Information
6.1 INTENDED USE
The ekey home system consisting of
ekey home finger scanner
ekey home control panel
ekey power supply
is a biometric access control system available in different hardware shapes and combinations. It captures
the unique features (minutea) of the fingerlines, which are then compared to the master templates saved
in the finger scanner. To authenticate a finger successfully, a certain degree of identicalness (threshold)
has to be reached. Based on this, a defined switching actuator is activated (relay output situated on the
control panel).
The system has been primarily developed for opening front doors, apartment doors, garage doors, etc. in
a residential and corporate environment. It has to be installed in a fixed position, and in accordance to the
accompanying installation manual and wiring diagrams.
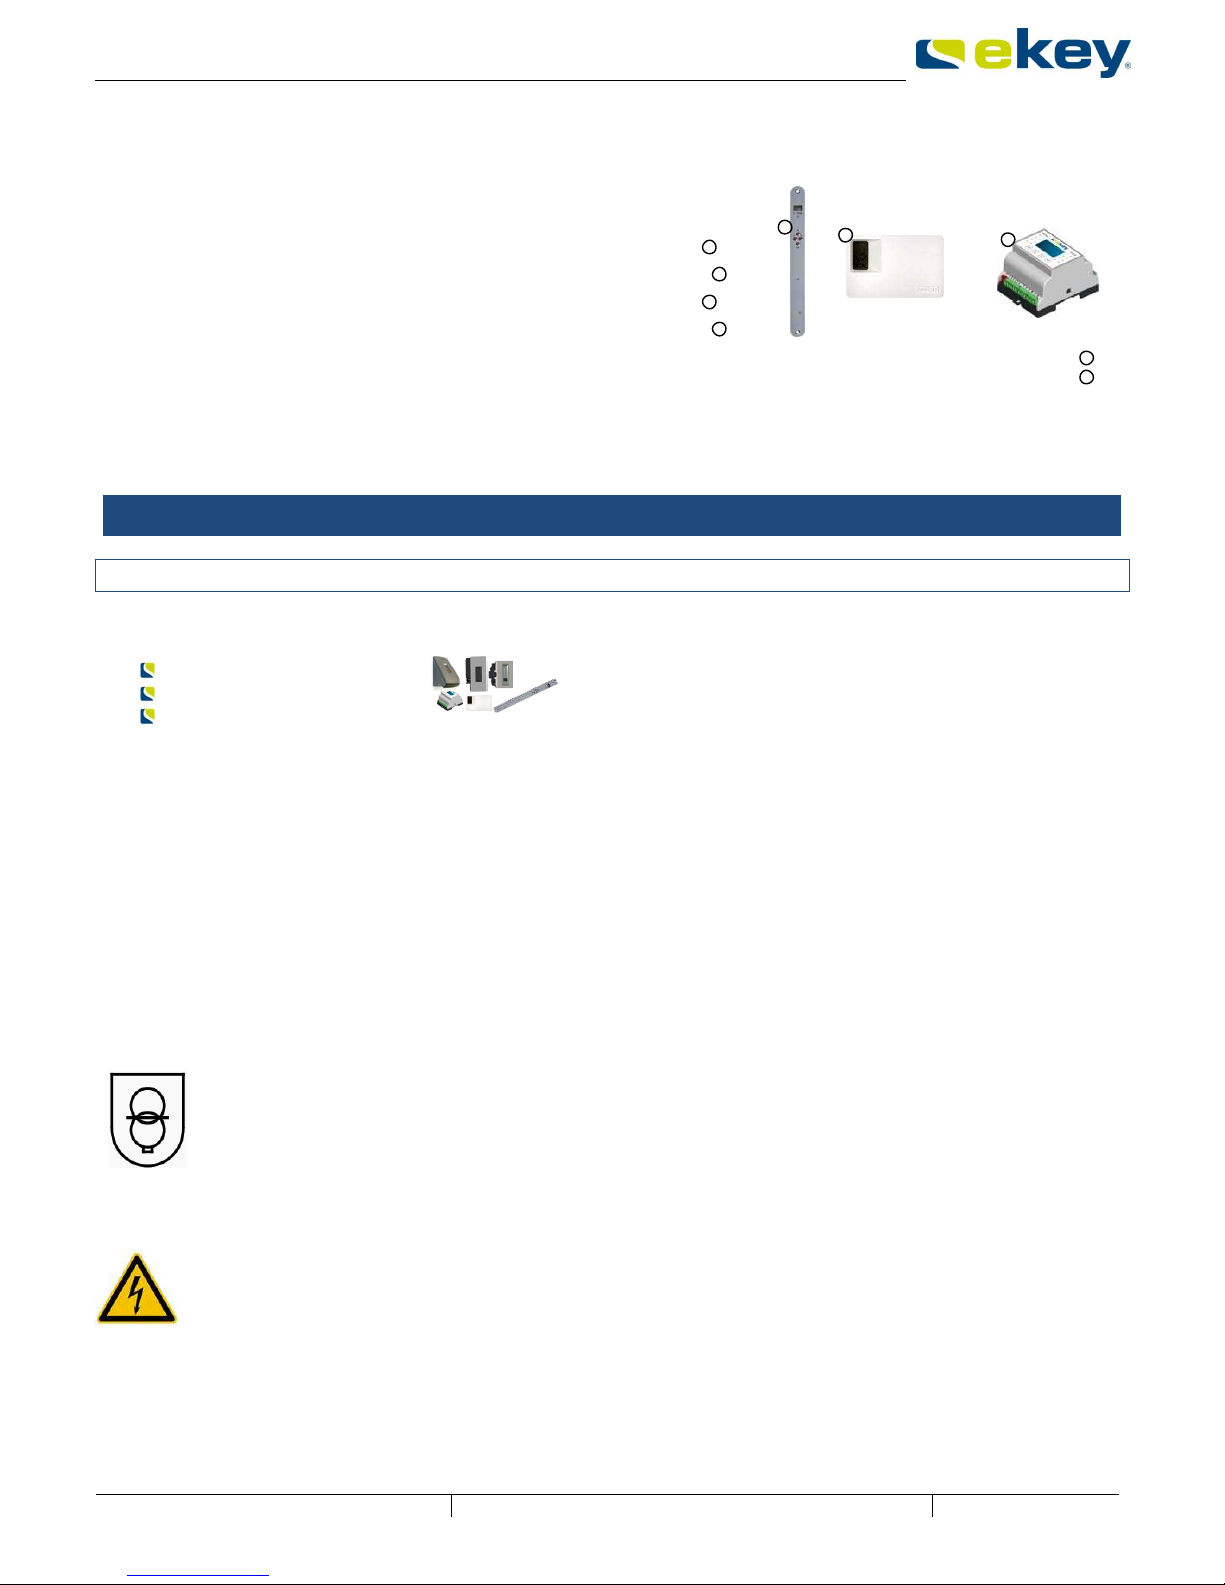
Electrical Safety
All ekey home devices are to be operated by safety extra-low voltage and powered by adapters from
protection class 2 according to VDE 0140-1.
Such power adapters are typically marked with below shown symbol according to IEC 60417:
Your ekey home system is powered by electricity. Despite the exclusive operating clearance of
protection class 2 power adapters, all devices need to be handled with particular caution during
installation and wiring. For this reason, all services have to be carried out by qualified personnel
(e.g. electrician, installer, etc.).
3
3
4
4
3
4
5
5
5

General
© ekey biometric systems GmbH Operating instructions ekey home Page 8 / 41
Please read carefully the provisions below before starting to wire the system:
The connections of the devices are NOT protected against reverse polarity! Incorrect
wiring of the devices can result in them being damaged beyond repair!
Only trained and qualified electricians should carry out electrical wiring of the units
and connection to the mains grid!
Lay the connecting cable between the ekey home CP (control panel) and the ekey
home FS (finger scanner) separately from any 230 V or 380 V mains voltage cables
in the house. The connecting cable carries low voltage signals that can be interfered
with by current-carrying mains voltage cables in the vicinity.
6.2 SECURITY AGAINST MANIPULATION
Your ekey home system consists of 2 electronic devices
the ekey home finger scanner
the ekey home control panel
The ekey home finger scanner is typically mounted in an outdoor environment and therefore accessible to
everyone. In order to avoid external tampering, which could theoretically result in an unauthorized
access, your system is equipped with below listed security features:
The ekey home control panel has to be mounted in a secure area. The switching actuator (relay
output) to operate a motor locking system is positioned on the control panel.
System changes (fingerprint enrollment, etc.) can only be made via the ekey home control panel
situated in a secure area.
The access to the menu in the ekey home control panel is secured with a security code. This is an
additional obstacle within the system for unauthorized users.
The finger scanner is connected to the control panel by a data line. The communication between
both components is encrypted.
The finger scanner and the control panel are “married”, i.e. they have been coupled during the
initial start-up. When replacing a device, a new coupling must be done via a specific key
combination on the control panel mounted in the secure area). Otherwise no access will be
granted.
Operation and data monitoring
Your ekey home finger scanner features software routines which run sanity checks of the system
operation data. If the system identifies inconsistencies, then the finger scanner will be recalibrated
automatically. This calibration procedure takes 3 to 5 seconds and can be followed via the LED signals
sequence (see section 7.3). These inconsistencies can be caused by:
abnormal electrostatic discharges (ESD),
abnormal electromagnetic interference fields.
It is not possible to operate the finger scanner during the calibration process. The device resumes its
normal operation after the calibration process is over.

General
© ekey biometric systems GmbH Operating instructions ekey home Page 9 / 41
6.3 RISKS ASSOCIATED WITH INTENDED USE
The sensor surface of the thermal line sensor, which is primarily used for the
ekey home FS WM
ekey home FS IN
can become very hot (>50°C) when exposed to direct sunlight. In order to avoid burns and scalds of the
fingertips, it is recommended to test the temperature by shortly touching the sensor. If needed, place
your hand over the scanner making a cooling shade.
Apart from that, there are no other known risks in normal use of the system.
6.4 REQUIREMENTS FOR THE USER
It is essential for the installer to study the supplied manuals (Mounting instructions, Wiring, and Operating
instructions) before installing the devices. The installer (system commissioner) is required to possess
professional certificated training in the area of electrotechnical engineering.
The user has to use the system in accordance with these instructions. Otherwise, no special knowledge is
necessary to operate the system.
6.5 NOTE ON PRODUCT LIABILITY
In below listed cases, the security provided respectively the protection of the device may be impaired.
The liability for the operability of the equipment is transferred to the operator / administrator / user:
The device is not operated, maintained and cleaned in accordance with the respective manual.
The device is used outside of the application area specified herein, e.g. in automotive applications,
hazardous areas, safety-critical applications (thereat to life or physical condition)
The operator carries out unauthorized changes on the devices
…
General
© ekey biometric systems GmbH Operating instructions ekey home Page 10 / 41
7.
ekey home finger scanners
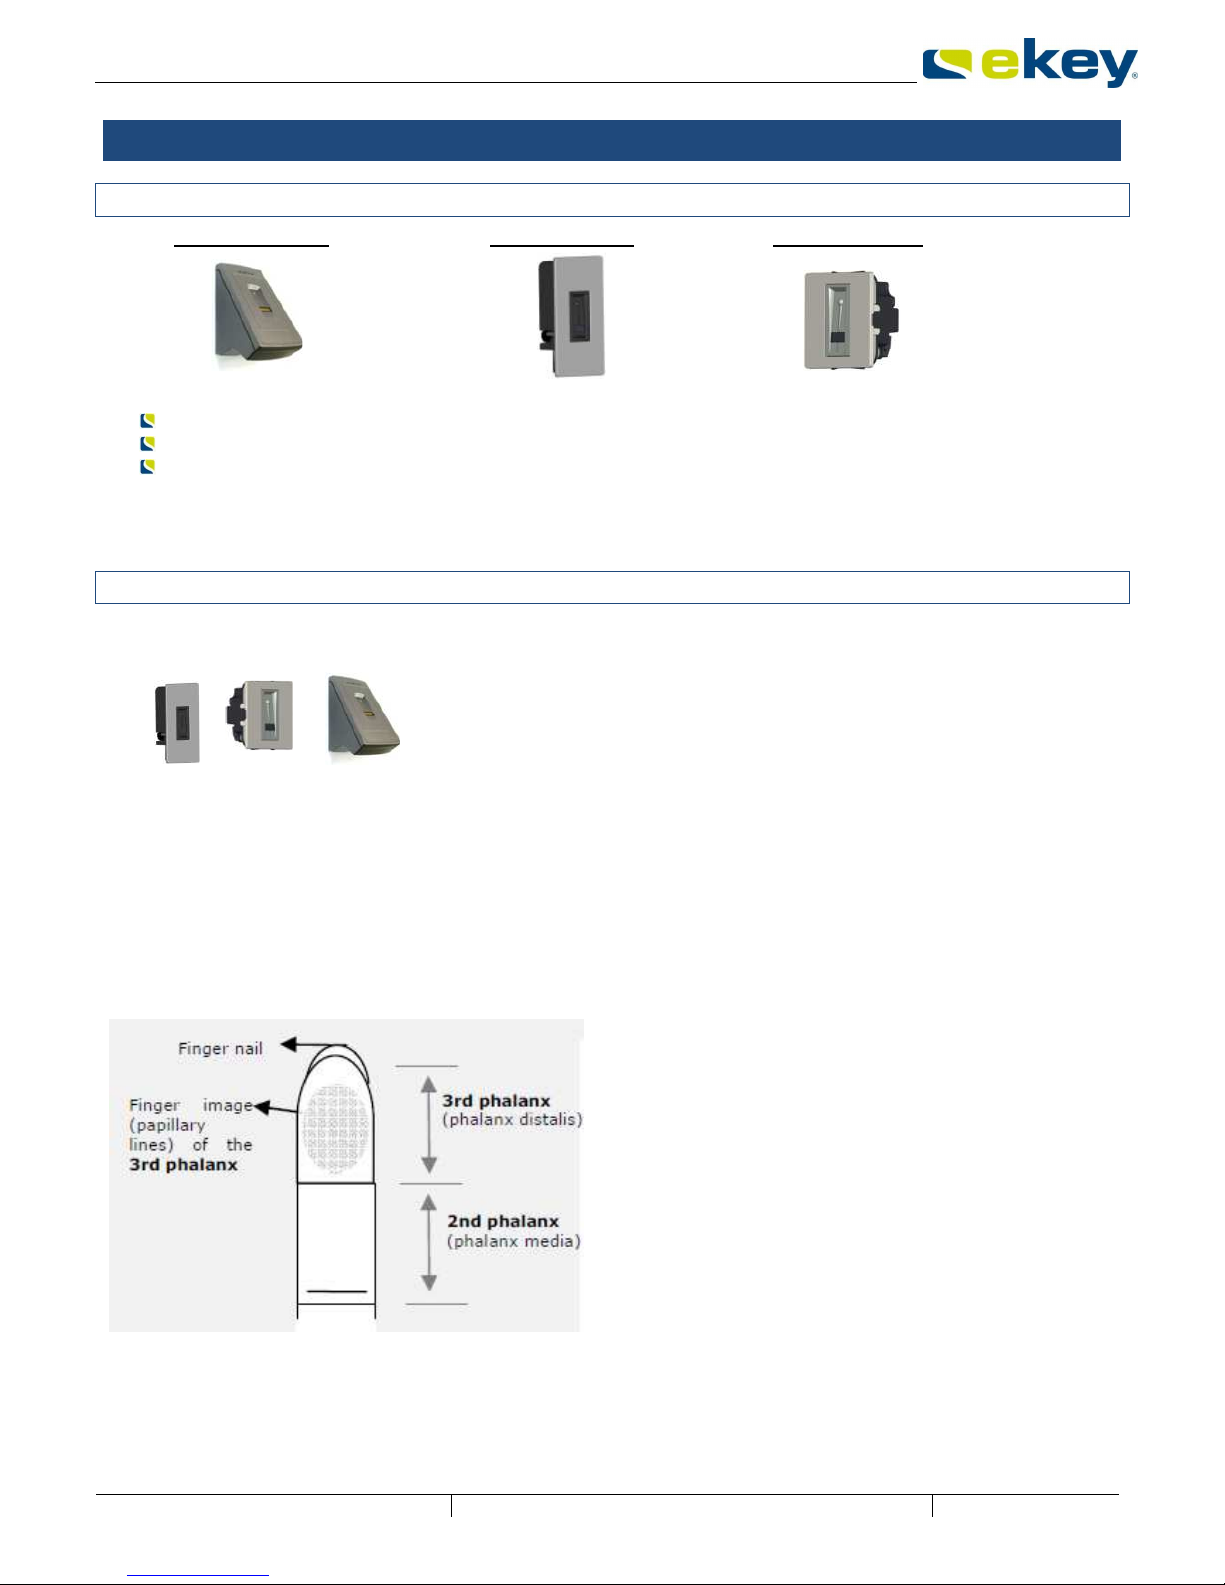
7.1 MODELS AND VERSIONS
There are 3 different ekey home finger scanner models.
ekey home FS WM 2.0 – wall-mounted
ekey home FS IN 2.0 – integrable into doors and intercoms
ekey home FS OM – outlet-mounted
The individual finger scanners essentially differ in their method of installation. The method of operation,
however, is identical for all models.
7.2 OPERATING THE FINGER SCANNERS
7.2.1 FUNCTION OF THE FINGER SCANNER
ekey finger scanners are exclusively equipped with line (swipe) sensors. To capture a fingerprint, please
draw your finger over the sensor. The system records the image of the fingerprint lines (papillary lines)
line by line and compiles an image from the individual rows. The finger scanner then calculates a
recognition template (minutia and their relative positions), which is compared to the previously stored
finger templates (reference finger templates). If a certain degree of congruence is exceeded (threshold), a
positive match (= finger was recognized) will trigger an allocated action (e.g. switch relay output 1). It is
important to note that no fingerprint images are stored.
Which part of the finger should be recorded by the finger scanner?
It is necessary to capture an image of the 3rd
phalanx. On the contrary, your finger scanner will not
function properly.
In order to ensure this, take care to operate the finger
scanner correctly. It is fundamental to place your
finger correctly in the finger recess and move it down
across the sensor at the right speed. Ergonomically
speaking, the best fingers are the index, the middle
finger and the ring finger. The thumb and the little
finger may not be used!
A finger scanner works like a camera. It makes a picture of the bottom side, the papillary lines, of your
finger´s third phalanx. However, this picture must be of good quality, so that physical access can be
granted whenever necessary.
Imagine you wish to make a picture of someone, and this person
ekey home FS WM ekey home FS IN ekey home FS OM
General
© ekey biometric systems GmbH Operating instructions ekey home Page 11 / 41
keeps fidgetting
runs by and you try to make a picture of him at that exact moment
hides half of his face behind a tree
etc.
What do you think these pictures will look like? On some of the pictures you will not even be able to
recognize the person.
The finger scanner works in the same way. The finger scanner can only read all the information contained
in your finger, and consequently open your doors securely and reliably, if you move your finger down
across the sensor evenly and in the right position.
Let us now look at where you should place your fingers and at which speed you should move them across
the sensor, so that the „pictures“ of your fingers are perfect.
The finger recess – the control element
The finger recess allows to place the finger correctly so that a finger picture of good quality can be
captured. It actually is the control element and consists of
- Pin point - Sensor - right and left recess edges
7.2.2 OPERATING CORRECTLY THE FINGER SCANNER
General
© ekey biometric systems GmbH Operating instructions ekey home Page 12 / 41
Best results are achieved by using the middle finger and stretching out the index and
ring finger at the same time.. (see the figure above).
The correct operation of the fingerprint scanner is your guarantee of the successful functioning of this
product. Below written recommendations apply for all hardware types:
Please use the finger which has the best finger lines in your opinion. In particular with weaklypronounced finger lines you should avoid pressing down too hard on the sensor so that you do not
squash the finger lines which are flat anyway.
The small fingers and thumbs should NOT be used!
The finger scanner is equipped with a fully automatic learning system, which recognizes changes in
user habits and growing children´s fingers. To optimize the fingerprint recognition, it is best to
swipe each finger at least 5 times over the sensor, every time you have enrolled a new finger, or if
you have not used the system for a long time. If any of your finger scans is rejected, then please
repeat this process. Sollte Ihr Scan abgewiesen werden, so wiederholen Sie bitte diesen Vorgang.
If none of your fingerprint scans are accepted in spite of this, please try the following:
Vary the pressure (stronger or lighter) when swiping your finger.
Take care to place your finger correctly in the finger recess
Small finger and thumb are not ideal for ergonomic reasons. The thumb is particularly very difficult
to use.
Try scanning the fingerprint at different speeds in order to find out the best speed for you.
Save the same fingerprint in several locations, if the above points do not help. You have 99
memory spaces available. In extreme circumstances you should use up to 10 memory spaces for
one finger.
Wet fingers show different contours. If you often have wet fingers, then save your fingerprint in
wet condition.
Children´s fingerprints are usually recognized, depending on the body height of the child, generally
from the age of 5 – please also observe the above points.
7.2.3 WHAT YOU SHOULD NOT DO
General
© ekey biometric systems GmbH Operating instructions ekey home Page 13 / 41
7.3 OPTICAL SIGNALS ON THE EKEY HOME FINGER SCANNER
Your ekey home finger scanner is equipped with LEDs that deliver information on the operational state
and individual functions of your system. The optical signaling of the individual finger scanners will differ
though. The two tables below will show you the corresponding signals and their meanings.
The LEDs are named based on their purpose as
Status LED – for details on the operational state (finger recognized, finger rejected, etc.)
Function LED– for details on the function of the system (online, offline, etc.)
LED signals on ekey home FS OM, ekey home FS IN 2.0 and ekey home FS WM 2.0
ekey home FS OM
ekey home FS IN 2.0
ekey home FS WM 2.0
Function
LED
Status LED Description
Normal mode
ORANGE
flashing
slow
Left: OFF
Right: OFF
There is no bus connection to the ekey home control panel. Please check
the connection cables or apply „Initializing the devices“ as described in
section 8.2.1.4 or 8.2.2.3.
BLUE
Left: OFF
Right: OFF
The system is online – all components are communicating correctly.
ORANGE
flashing
quick
Left: OFF
Right: OFF
Once you have drawn your finger over the sensor, the system will start
the processing (enrollment ) and matching. The LED flashes orange
during the entire process.
GREEN
Left: OFF
Right: OFF
Fingerprint recognition: posit ive, the relay switches.
RED
Left: OFF
Right: OFF
Fingerprint recognition: negative or poor image, which does not allow
any fingerprint check.
ORANGE
Left: OFF
Right:OFF
Fingerprint enrollment mode. When enrolling a finger via the menu on
the control panel, this LED state indicates t he system to be ready for
swiping a finger over t he sensor. T he system generates a reference
template from this fingerprint image.
Status LED
Function LED

General
© ekey biometric systems GmbH Operating instructions ekey home Page 14 / 41
RED G REEN
flashing
Left: OFF
Right: OFF
The sensor is dirty, smudgy or wet. Clean the sensor!
During the boot procedure (power up)
GREEN
BLUE flash
BLUE
Left: off – BLUE flash
- off
Right: off – RED flash
- off
The module is booting (powering up). It takes about 1-2s counting from
the moment when power supply is available.
7.4 ELECTRIC CONNECTION
You can find further details such as the
pin assignment
wiring examples
either on the accompanying ekey home wiring diagram, or on the DVD as a .pdf file.
7.5 MOUNTING
You can find further information either on the accompanying ekey mounting instructions, or on the DVD
as a .pdf file.
8.
ekey home control panels
8.1 MODELS AND VERSIONS
There are 3 different ekey home control panel models.
ekey home CP IN – integrable into doors
ekey home CP WM – wall-mounted
ekey home CP DRM – 4HP DIN—rail mounted device
The individual control panels essentially differ in their method of installation. The method of operation,
however, is identical for the ekey home CP IN and the ekey home CP WM. The ekey home CP DRM is the
more recent model featuring an LCD display. In addition, the state of the relay outputs is indicated via
LEDs.
The ekey home control panels are the actuator units within the ekey home system. The finger scanner
transmits to the control panel which relay output has to be activated. This action is then executed on the
respective control panel. In addition, the system configuration is another important task of the ekey home
control panel. The respective settings (e.g. fingerprint enrollment, relay switching time, etc.) are defined
via the push buttons and the display.
The ekey home CP should always be mounted in a secured area (indoors). If you mount the control
panel outdoors, where anybody can have access to it, then unauthorized people could easily unlock
the door!

General
© ekey biometric systems GmbH Operating instructions ekey home Page 15 / 41
8.2 OPERATION
8.2.1 EKEY HOME CP IN AND EKEY HOME CP WM
8.2.1.1 OPERATING THE BUTTONS
Four buttons are used for the operation:
= OK button: is used to enter the menu and to confirm entries.
< and > buttons: are used to change the values on the display or for navigating in the programming
menu (see diagram in section 8.2.1.5)
ESC button (X): is used to cancel the current entry.
8.2.1.2 MAIN MENU
Menu item Display____________
Normal mode (flashing dot) .
Enrol user (Enroll user) Eu
Delete user (delete user) du
Set the security code (Security code) Sc
Serial and version number (Information) In
Reset to factory settings rr
Change relay switching times (Relay time) rt
8.2.1.3 OPTICAL SIGNALS
Displays from the menu navigation are not described here.
Display Information Description
Both dots are lit up
The terminal
is new or has been reset to factory
settings. The link with the fingerprint scanner is not
active.
Left dot flashing
Normal mode, everything is functioning properly.
"Nu" - Need Update
This terminal requires a firmware update. This display
also appears during updating.
„E0“- Error code
There is no connection to the finger scanner, or the
energy supply to the system has been interrupted.
The system will be rebooted.
„E1“-Error code
99 fingerprints have already been registered
No more
fingerprints can be registered. Where
necessary delete existing fingerprints in order to
record new ones.

General
© ekey biometric systems GmbH Operating instructions ekey home Page 16 / 41
„E2“-Error code
30min lock after the security code has been entered
incorrectly three times. Wait 30 minutes before
entering the security code again
.
„E3“-Error code
Devices connected incorrectly. Connect the devices
again, as one of the devices has been manipulated.
to
Display
s
a number between
“1” and “99
” and the dot on
the right is lit up.
Shows the user number of the recognized fingerprint.
to
Control panel counts down
from „44“ to „0“
State when connected to live current, with no
connection having been created to the finger scanner.
If the control panel does not switch to normal mode
after a few seconds, but continues to
count down, the
physical connection (cable) with the finger scanner is
not intact and has to be checked / corrected.
8.2.1.4 INITIALIZING THE DEVICES
CAUTION! The electrical connection of the system can only be carried out by a specialist!!!
Before you connect the systems to the mains, make sure that both the mounting and the wiring
have been done correctly.
You may only manipulate the electric connections after having separated the system from the
mains!
You will find mounting and wiring instructions in sections 7.4 and 7.5.
CONNECTION BETWEEN CONTROL PANEL AND FINGER SCANNER
When the devices are connected to the power supply, the control panel display starts to count down until
a connection has been created with the finger scanner. Afterwards two red dots appear. During this time
the status display on the finger scanner lights up red. Once the boot procedure has been completed, the
status display begins to flash orange. Now the initialization can be started.
If the counter does not stop on the control panel and you are not taken to the language settings,
please double check the RS485 bus connection (clamp 1 and 2). Alternatively, please check
whether the finger scanner is properly powered (LED blinking or illuminated).
1.) Press the OK button
2.) Press the ESC button. "EF" appears on the display, which stands for "Enroll Finger".
3.) A) Initialization after having replaced the control panel
If it was necessary to replace the control panel because it was defective, then fingers had
already been recorded in the ekey home finger scanner. In order not to have them deleted, a
pre-recorded finger may now be swiped over the sensor, and the initialization process is
started without deleting any data.
B) New installation
If this is a new system (new installation), press the ESC button once again.
The system now initializes. All the fingers recorded previously on the finger scanner will be
deleted.
4.) The initialization process runs completely automatically, in the course of which the devices are
connected with each other. This connection is meant to prevent unauthorized people gaining
access in case of an improper finger scanner replacement.
DISP LAY K EY STROKE DI SPLAY K EY STROKE DISP LAY KEY STROKE DI SPLAY D ISPLA Y
The devices have no w been
initi alized. Y ou may start en rolling
use rs->
see B:
FINISHED
START

General
© ekey biometric systems GmbH Operating instructions ekey home Page 17 / 41
8.2.1.5 OVERVIEW OF THE PROGRAMMING MENU OF THE CONTROL PANEL
You can access lower menu levels by pressing the OK button. You can move back up by pressing the ESC
button. You can navigate by pressing the left < and right > buttons. You can choose a particular option by
pressing OK.
Keypad on
ekey home CP WM
and
ekey home CP IN
. Flashing dot
Normal mode
. 0..99
Enter safety code
Eu
Enroll user
du
delete user
Sc
Set Security
code
In
Information
rr
Factory
settings
rt
Set relay
impulse
1..99
Select user #
F1..F9,F10
Select finger
#
o1…o3; od
Select relay
o1…o3
Select relay
1..99
Select user #
See section
8.2.1.7
0..99
Enter security
code
See section
8.2.1.8
See section
8.2.1.9
0..99
Enter security
code
See section
8.2.1.12
0..99
Define relay
switching time
See section
8.2.1.11
Sn
Serial #
US
Version
Cu
Control panel
FS
Finger scanner
Cu
Control panel
FS
Finger scanner
See section
8.2.1.10
OK
= : to enter the menu and to confirm entries
><
or : to navigate in the menu or to select values during setup and
finger enrollment
X = ESC: to cancel the current entry

General
© ekey biometric systems GmbH Operating instructions ekey home Page 18 / 41
8.2.1.6 ENTERING THE SECURITY CODE
The security code allows you to avoid system manipulations by unauthorized people. Since the control
panel is to be mounted in a secure area, an unauthorized person will have to get access to this secured
area first. This security code can then be described as an additional hurdle.
After 3 incorrect attempts, the device is blocked for 30 minutes and the control panel display
shows error code . If the control panel is disconnected from the mains, the counter resets itself
once is has been re-connected to the mains.
The factory default setting for this code is „99“. Change this code as soon as you have started up the
system to any 2-digit code of your choice.
1.) Press the OK button on the control panel.
2.) Enter the left digit of the security code using the < and > buttons (factory setting is 9)
3.) Press the OK button.
4.) Enter the right digit of the security code using the < and > buttons (factory setting is 9)
5.) Press the OK button.
The display shows „Eu“ (Enroll user).
8.2.1.7 ENROLLING A FINGERPRINT IN THE SYSTEM
In ekey home a maximum of 99 fingerprints can be enrolled. These 99 fingerprints can be assigned to 99
user IDs. You can for example
administrate 11 users, each one enrolling 9 fingerprints or
administrate 99 users, each one enrolling only 1 fingerprint or
opt for any other mixed setup.
Generally speaking, we recommend to:
save at least 2 fingerprints per user (ideally from different hands)
use index and middle fingers. From an ergonomic point of view, they are best suited for proper
operation resulting in the highest level of recognition.
avoid using thumbs and little fingers.
create a user list assigning the user ID to a user name. You can find a template in the
accompanying DVD.
stick to the suggested numbering of the respective fingerprints (see below).
Before adding a fingerprint into the system, please read through section 7.2
“Operating the finger scanners“, or watch the movie on proper use on the
accompanying DVD. Using the finger scanner properly is essential for a stable
operation, and this in turn starts during the fingerprint enrollment. Properly
recorded fingerprints will simply work better!
DISP LAY KEY
STROKE
DISP LAY +
SETTIN G
KEY S TROKE DISP LAY +
SETTIN G
KEY S TROKE DI SPLA Y
Set security code
DIGIT 1
Set security code
DIGIT 2
STAR
T
FINISHE D

General
© ekey biometric systems GmbH Operating instructions ekey home Page 19 / 41
1.) First, enter the security code as per section 8.2.1.6:
2.) When the display shows "Eu", press the OK button.
3.) Select the user: The display shows the number "1". If this user number is already in use, this is
signalized by a lighted dot next to the number. For example: „1.“. Set the desired user number
using the < and > button.
4.) Press the OK button.
5.) Select the finger: On the display "F1" stands for finger 1 = small finger on the left hand. Please
begin counting with the little finger on the left hand.
The little finger on the right hand is number 10 (= setting "F0" on the display). If a finger number
has already been allocated, then this is also signalized with a dot next to the number. For example
set the index finger on the right hand as “F7". If the finger has already been recorded, then you
will see a flashing dot beside the finger number, e.g. „F1.“. You may still record the finger however
if you wish to do so. The preceding finger will then be automatically overwritten.
6.) Press the OK button.
7.)
Consider step 7 only if you have an ekey home control panel with more than 1 relay:
ekey home CP IN 2
ekey home CP WM 3
You can now determine which relay is meant to be controlled by the previously selected
fingerprint. "o1" on the display signalizes that at the moment the first relay (the motor lock) is
selected (standard setting).
“o1” … Relay 1
“o2”… Relay 2
“o3“... Relay 3
“od”… Double relay function: Relay 1 and relay 2 switch simultaneously with one
finger swipe only. Both relays switch according to the set relay switching times (e.g. relay 1
3 seconds and relay 2 6 seconds).
Use the < and > buttons to select the relay to be controlled.
8.) Press the OK button.
KEY
STROKE
DISPLAY
Swipe
USER
FINGER
DISPLAY
DISPLAY
DISPLAY
Enter security
code
DISPLAY
KEY STROKE
DISPLAY +
SETTING
KEY STROKE
DISPLAY +
SETTING
KEY STROKE
DISPLAY +
SETTING
Enter security
code
Select
USER
NUMBER
0-99
Select FINGER
NUMBER F1-
F10
Select RELAY
o1-o3 or od
1
5 6
0
9
STAR
T
The red dot only flashes if this memory space
has already been allocated (there already is a
user or a finger on this position)!
User finger recorded
!
FINISHE D

General
© ekey biometric systems GmbH Operating instructions ekey home Page 20 / 41
Once „EF“ appears on the display, you have 60 seconds time to swipe your finger, starting at the
top knuckle downwards, over the sensor. The finger scanner status LED lights up orange =
operation mode Enrollment. The device is waiting for a finger to enroll.
The fingerprint should be recorded in the manner described in section 7.2. The finger scanner
possesses a (LED) status display, which signalizes using two different colors, after you have swiped
your finger over the sensor, if the enrollment was successful or not:
Red: The finger could not be scanned successfully,
Please repeat the enrollment process. Read section xxx before doing so.
Watch the movie on the DVD.
Green: The finger has been succesfully recorded (scanned). The enrollment was
successful Enter the user name on the user list, which you maybe have on paper,
at the corresponding place.
8.2.1.8 DELETING A USER
The “DELETE USER” (du) function always relates to all of the user´s data. It is NOT possible to delete
individual fingers. If a user is deleted, all his recorded fingers will be irrecoverably deleted.
1.) Look up in the handwritten user list the user number which you wish to delete.
2.) First enter the security code as per 8.2.1.6
3.) Press the > button several times until “du” (delete user) is displayed.
4.) Press the OK button.
5.) Use the < and > buttons to select the desired user number to be deleted from the system.
6.) Press the OK button.
7.) “OK” is then shown on the display for a short time. The device then returns to normal mode.
8.2.1.9 SETTING A NEW SECURITY CODE
Please be aware that the device cannot be operated further without setting a new security code. If you
enter a new security code, then you will always need this code in the future in order to make changes
(finger enrollment, delete user, etc.) in your ekey home system.
1.) First enter the security code as per 8.2.1.6
D: DELETE USER (du)
ENTER SE CURI TY
CODE
DISP LAY + SETTING KEY STROKE DISPLA Y +
SETTIN G
KEY S TROKE DISP LAY DISP LAY
SEE
B:
Select MENU
ITEM du
Select USER
NUMBER
STAR T
FINISHED
The selected user has
been deleted!
Der NEUE
Siche rheits code ist
dam it aktiv!
F: CHANGING THE SECURITY CODE (Sc)
ENTER SE CURI TY
CODE
DISP LAY +
SETTIN G
KEY S TROKE DISP LAY +
SETTIN G
KEY S TROKE DI SPLA Y +
SETTIN G
KEY S TROKE DISP LAY DISP LAY
SEE B:
Select
MEN
U
ITEM
Sc
NEW CODE
DIGIT 1
NEW CODE
DIGIT 2
FINISHED
STAR T

General
© ekey biometric systems GmbH Operating instructions ekey home Page 21 / 41
2.) Press the > button until “Sc” is displayed
3.) Press the OK button
4.) Enter the left digit of the new security code using the < and > buttons
5.) Press the OK button
6.) Enter the right digit of the new security code using the < and > buttons
7.) Press the OK button
8.) “OK” is displayed for a short time. The device then returns to normal mode
9.) Memorize your security code, or write it down and keep it in a safe place, separately from the ekey
home control panel.
8.2.1.10 ACCESSING SERIAL NUMBER AND VERSION NUMBER
The serial number and the version number of the components of your ekey home system,
ekey home CP and
ekey home FS
can also be accessed via the 7-segment display. Two digits of the number are displayed at a time. This is
especially important for integra models, as their parts are built-in and the labels are usually hardly or no
longer visible.
The serial number corresponds to the serial number of the device and therefore allows you to determine
the date of production and the hardware model. The version number corresponds to the update version of
the software. You will only need both these numbers if you are in contact with our technical support team
in order to solve a problem you are facing.
8.1.1.10.1 ACCESSING THE SERIAL NUMBER
1.) First enter the security code as per section 8.2.1.6
2.) Press the > button, until “In” is displayed
3.) Press the OK button
4.) Use the < and > buttons to select the option „Sn“ for serial number
5.) Press the OK button
6.) Use the < and > buttons, to select which device you wish to view the serial number of:
“FS”…. Finger Scanner
“CU”…. Control Panel
7.) Press the OK button
8.) Now you will be able to see the first two digits of the serial number. By pressing the > button you
can view the remaining digits. The serial number is 14 digits long.
9.) By pressing the OK button you return to the first two digits of the serial number. If you press the
ESC button once you have reached the last two digits the display moves up a level in the
navigation.
8.1.1.10.2 ACCESSING THE VERSION NUMBER
1.) First enter the security code as per section 8.2.1.6
2.) Press the > button, until “In” is displayed
3.) Press the OK button
4.) Use the < and > buttons to select the option „US“ for version number
5.) Press the OK button
6.) Use the < and > buttons, to select which device you wish to view the version number of:
“FS”…. Finger Scanner
“CP”…. Control Panel
7.) Press the OK button
8.) Now you will be able to see the first two digits of the version number. By pressing the > button
you can view the remaining digits. The serial number is 8 digits long.
By pressing the OK button you return to the first two digits of the version number.
If you press the ESC button once you have reached the last two digits the display
moves up a level in the navigation.

General
© ekey biometric systems GmbH Operating instructions ekey home Page 22 / 41
8.2.1.11 CHANGING THE RELAY SWITCHING TIMES
The switching impulse times of the individual relays can be variably adjusted from 1s to 99s. This enables
you to adjust the duration of the opening impulse of the door according to your application.
All the relays on your ekey home control panel are preset at 3s impulse duration.
Special feature relay time 0
If the value 0 is assigned to a relay in this menu, then a special function is active. In this case the relay is
bi-stable. This means that when a finger is recognized, the relay changes to its switched state and
remains there until another finger is recognized. That relay thereby works as a switch and does not emit
an impulse.
If there is a power cut or a RESET on the ekey home FS or the ekey home CP due to a
trouble signal in this operating mode (relay permanently closed), then the relay always
restarts in idle state once the power supply has been reconnected (or after the reset).
Contact NO = open!!
If you operate for instance an alarm system via relay permanent status (relay time =
0), then a power cut could deactivate the alarm system! You can also provoke a reset by
swiping 10 times in a row an unknown finger over the finger scanner! Therefore keep in
mind that this feature has limitations!!
1.) First enter the security code as per section 8.2.1.6
2.) Press the > button until “rt” is displayed
3.) Press the OK button
4.) Only proceed with step 4 if you have an ekey home control panel with more than 1 relay:
ekey home CP IN 2
ekey home CP WM 3
Use the < and > buttons to select “o1”, “o2”, “o3” for the desired relay (NOT on ekey home CP
WM 1 and ekey home CP IN 1, as they only have one relay available!)
5.) Press the OK button
6.) Use the < and > buttons to set the desired duration of the switching impulse
0 = special feature „Switch“
1 = 1 sec
2 = 2 secs
.
.
99 = 99 secs
7.) Press the OK button
8.) “OK” will appear on the display for a short time. The device then returns to normal mode.
The duration of the impulse or the switching feature has therefore been set for the selected relay. Repeat
this procedure for each relay, the impulse duration of which you wish to change.
Relai sschaltze it für das
ge wählte Re lais is t
einge stellt !
ENTER SE CURI TY
CODE
DISP LAY +
SETTIN G
KEY S TROKE DISP LAY +
SETTIN G
KEY S TROKE DI SPLA Y +
SETTIN G
KEY S TROKE DI SPLAY DI SPLAY
SEE B:
Select
MEN
U
ITEM rt
Select RELAY
Switching time in
secs (0; 1-99)
FINISHED
STAR T

General
© ekey biometric systems GmbH Operating instructions ekey home Page 23 / 41
8.2.1.12 RESETTING TO FACTORY SETTINGS
If you carry out this procedure, then all the saved data will be irrecoverably deleted!
If you reset the device to its factory settings, all the user data (user fingers) in the memory are deleted.
The security code is reset to the standard value of 99, the control panel and the finger scanner are
disconnected, and the relay switching times are set for all the relays at 3s.
1.) First enter the security code as per section 8.2.1.6.
2.) Press the > button until “rr” is displayed
3.) Press the OK button
4.) Enter the left digit of the security code using the < and > buttons
5.) Press the OK button
6.) Enter the right digit of the security code using the < and > buttons
7.) Press the OK button
8.) After a couple of seconds, “rr” is displayed and then two red dots appear on the display. The LED
on the finger scanner flashes orange. The device is now reset to its factory settings (= as when it
was delivered).
To start operating the device again, proceed from section 8.2.1.4. You must re-initialize the devices.
ENTER SE CURI TY
CODE
DISP LAY +
SETTIN G
KEY S TROKE DISP LAY +
SETTIN G
KEY S TROKE DISP LAY +
SETTIN G
KEY S TROKE D ISPLA Y DISP LAY
SEE B:
Select
MEN
U
ITEM rr
Security code
DIGIT 1
Security code
DIGIT 2
Your device ha s now
bee n reset to its fa ctory
se ttings!
STAR T
FINISHED

General
© ekey biometric systems GmbH Operating instructions ekey home Page 24 / 41
LCD display on ekey home CP DRM
Displays information related to the
programming procedure on the ekey
home CP DRM.
Button functions and assignment; symbols for
keystrokes
Allows you to enter the menu and to
confirm your entries
Allows you to change the values
displayed and to navigate in the ekey
home CP DRM menu
Allows you to cancel the current entry
8.2.2
EKEY HOME CP DRM 1 (2)
8.2.2.1 CONTROLS
The ekey home CP DRM has 4 buttons and an LCD display for system operation and programming. It also
features a sliding switch to switch on and off the bus termination, as well as 1 respectively 2 LEDs for
relay status and digital input signaling.
The ekey home CP DRM is optimized for its electric consumption. For this reason, the LCD display
is deactivated automatically after approx. 2 minutes. This way, the energy consumption is reduced
significantly. To make any system changes, please press any key to reactivate the display.
Signaling of the relay and input state
The ekey home CP DRM features one respectively two status LEDs monitoring
the relay switching status. This LED is implemented in green color. The LED is illuminated when the
relay output is switched actively, i.e. contact NO = closed
the status of the digital input. This LED is implemented in red color and illuminated when the
electric resistance between the input pins is smaller 1kΩ ist (= external push button is closed). The
LED is for sure not illuminated if the resistance is >50kΩ (push button open).
Red
LED
for INPUT status
Green
LED
for RELAY status
Status LEDs for relays
and digital inputs
Sliding switch for bus
termination

General
© ekey biometric systems GmbH Operating instructions ekey home Page 25 / 41
8.2.2.2 MAIN MENU
The main menu items and thus the most important programming steps are
Enroll user – add new user and enroll the corresponding fingerprints
Delete user – delete all data of a certain user
Logging - displays the last 50 accesses
Security code – change the security code to enter the menu
Change relay
Switching time – change the switching time of the relay output
Reset – reset to factory settings
Test mode – test mode for simplified commissioning
LED intensity - sets the intensity of the status LED on the finger scanner
8.2.2.3 INITIAL OPERATION
Before you connect the system to the mains, make sure that both the mounting and the
wiring have been done correctly.
You may only manipulate the electric connections after having separated the system
from the mains!
CAUTION! The electrical connection of the system can only be carried out by a
specialist!!!
CONNECTION BETWEEN CONTROL PANEL AND FINGER SCANNER
When the devices are connected to the power supply, the language selection is displayed on the ekey
home CP DRM. Once the boot procedure on the ekey home FS has been completed, the status LED of the
finger scanner begins flashing in orange or blue colour.
Now the initialization can be started.
DISP LAY K EY
STROKE
DISP LAY KEY
STROKE
DISP LAY KEY
STROKE
DISP LAY KEY
STROKE
DISP LAY
OR
Select a language
ZIEHEN
NEW = new system =
finger scanner and control
panel have the factory
default settings!
If you have only replaced the ekey home CP DRM, and
you are using an ekey home finger scanner on which fingers
have already been saved (e.g. replacement due to a
defective CP), you can keep all the saved fingers by
swiping a saved finger over the sensor. If you strike the
ESC key, then all the fingers will be deleted!
F
I
N
I
S
E
D
STAR T

General
© ekey biometric systems GmbH Operating instructions ekey home Page 26 / 41
1.) Select a language using the buttons. It is now that you must define the language! After the
initialization has been concluded, you CANNOT change the selected language anymore (except if
you reset the system).
2.) Press the button. A time counter is displayed, which counts from 45 seconds to 0. You will be
asked to press the [OK] button.
3.) Press . Now you will be asked to press the [ESC] button.
4.) Now press .
5.) You now have 2 possibilities:
A) Initialization after having replaced the control panel
If it was necessary to replace the control panel because it was defective, then fingers had
already been recorded in the ekey home finger scanner. In order not to have them deleted, a
pre-recorded finger may now be swiped over the sensor, and the initialization process is
started without deleting any data.
B) New installation
If this is a new system (new installation), press the button once again.
The system now initializes. All the fingers recorded previously on the finger scanner will be
deleted.
6.) “Initializing OK ” is then displayed for 1-5s. The control panel and the finger scanner have now
been coupled.
7.) Now the 14-digit serial number and the 4-digit software version number of the ekey home CP DRM
and of the ekey home FS (finger scanner) are displayed. The initialization procedure has now been
concluded.
System OK
:
means t hat the
communic ation
connection
between the ekey
home FS and the
ekey home CP
DRM is working
properly.
ekey home CP DRM serial number
ekey home CP DRM software version
ekey home FS serial number
ekey home FS software version
Number of fingers whic h can still be
enrolled

General
© ekey biometric systems GmbH Operating instructions ekey home Page 27 / 41
You can now start setting up the system and entering user data.
8.2.2.4
ENTERING THE SECURITY CODE
The security code allows you to avoid system manipulations by unauthorized people. However, the control
panel is normally mounted within the secured area (electric control cabinet), so for an unauthorized
person to try to manipulate the system, must this person already be within this secured area. This
security code is an additional hurdle, which the unauthorized person should override.
After 3 incorrect attempts, the device is blocked for 30 minutes and the control panel display
shows „Locked for 30 min“. If the control panel is disconnected from the mains, the counter resets
itself once is has been re-connected to the mains. In addition, the system has to be in the “System
OK” status (finger scanner and control panel are connected to each other). If this is not the case,
the lock will not expire!
The factory default setting for this code is „99“. Change this code as soon as you have started up the
system to any 2-digit code of your choice.
1.) Press the button on the control panel.
2.) Enter the left digit of the “security code” using the buttons.
3.) Press the button.
4.) Enter the right digit of the “security code” using the buttons.
5.) Press the button.
6.) The LCD display now shows the main menu. You may proceed with changes in the system.
8.2.2.5 ENROLLING A FINGERPRINT IN THE SYSTEM
In ekey home a maximum of 99 fingerprints can be enrolled. These 99 fingerprints can be assigned to 99
user IDs. You can thus for example
administrate 11 users, each one enrolling 9 fingerprints or
administrate 99 users, each one enrolling only 1 fingerprint or
opt for any other mixed setup.
If you have already enrolled 99 fingerprints and you attempt to add the 100
th
, the following error message
will be displayed on the LCD:
DISP LAY KEY
STROKE
DISP LAY KEY
STROKE
DISP LAY KEY
STROKE
DISP LAY
SECURITY CODE D igit 1
SECURITY CODE D igit 2
FINISHED
The wrong security code has been
entered 3 times in a row. The device is
locked for 30 minutes.
Must be „System OK“

General
© ekey biometric systems GmbH Operating instructions ekey home Page 28 / 41
Generally speaking, we recommend to:
save at least 2 fingerprints per user (ideally from different hands)
use index and middle fingers. From an ergonomic point of view, they are best suited for proper
operation resulting in the highest level of recognition.
avoid using thumbs and little fingers.
stick to the suggested numbering of the respective fingerprints (see below).
Before adding a fingerprint into the system, please read through section 7.2
“Operating the finger scanners“, or watch the movie on proper use on the
accompanying DVD. Using the finger scanner properly is essential for a stable
operation, and this in turn starts during the fingerprint enrollment. Properly
recorded fingerprints will simply work better!
DISP LAY E nter sec urity code DISP LAY K EY
STROKE
DISP LAY
Enter use r name
KEY
STROKE
DISP LAY
Enter use r name
KEY
STROKE
Enter
security
code
Select user
number
Use the buttons
to go to the User
names and
Set digits 1 to 9 of the
user name
START
The numbers show
which fingers have already
been used for this user and which relay switches:
1 … Relay 1
2 … Relay 2 (only for ekey home CP DRM 2)
D … Double relay (only for ekey home CP DRM 2)
Repeat this st ep until
the complet e user
name has bee n
entered (9 digits )
DISP LAY
Select fi nger
KEY
STROKE
DISP LAY
Select re lay
KEY
STROKE
DISP LAY
SWIPE FINGER
OVER SENSOR
DISP LAY
green…Finger
enrolled!
DISP LAY
Select finger
Select relay
red… Finger reje cted!
Try it again
F
I
N
I
S
H
E
D
The finger has been
enrolled!
Now you can enro ll additional
fingers or jump back by
striking the
key
to main menu.
only
for ekey home CP DRM 2

General
© ekey biometric systems GmbH Operating instructions ekey home Page 29 / 41
1.) First, enter the security code as per section 8.2.2.4
2.) Select “Enroll user” in the main menu.
3.) Press the button.
4.) Select the user: This is what the user / finger matrix looks like:
Each individual user is indexed through the user number. On the right hand side, beside the user
number, you can check if any finger has been saved for this one user. The numbers 1, 2 or D
indicate
that for this user, this one finger has been allocated
which relay switches for this finger and
via the location of the dash which finger this is.
_ _ _ _ _ _ _ _ _
Begin counting with the little finger on the left hand. In the example above, finger #7 has been
already enrolled. If you use our finger counting method, then finger #7 is the right index finger.
Select the desired user number for which you wish to enroll a finger using the buttons.
5.) Press the button.
6.) Set the user name
Navigate with the button to the user name and press the button.
You can now use set each letter of the user name by using the buttons. Press the
button to save the setting and go to the next menu item. You can thus define a meaningful name
for each user.
Once you have confirmed the setting of the 9 letters of the user name by pressing , then this
is the saved name for this user. In our example, the user is called “MUSTERMAN”.
1
5 6
0
9
1 10 2 7
User num ber
The numbers show that th
ese fingers
for the
corresponding user have already been allocated
and which relay switches for each finger:
1 … Relay 1
2 … Relay 2 (only for ekey home CP DRM 2)
D … Double relay (only for ekey home CP DRM
2)

General
© ekey biometric systems GmbH Operating instructions ekey home Page 30 / 41
7.) Now using the buttons, select the finger to be enrolled:
“R2” beside the finger means that this finger has already been enrolled and that it has been
allocated to relay 2. You can however still select this finger and enroll it anew. The preceding finger
image will then be automatically overwritten.
Usually the index and the middle fingers are the best ones for scanning!
The small finger and the thumb should be avoided, or only used in case of emergency.
Always enroll at least 2 fingers, preferably 1 finger of each hand!
Select the desired finger using the buttons.
8.) Press the button.
9.) Define which relay should switch.
For your ekey home system to open the right door, you must allocate a relay to the selected
finger. Later on, in normal operation mode, each time you will swipe your finger over the sensor,
then the allocated relay will switch.
This feature does not exist in the ekey home CP DRM 1 system, since it only has one
relay, which is allocated automatically.
Relay 1 … if the enrolled finger is recognized in normal operation mode, then relay 1
switches
Relay 2 … if the enrolled finger is recognized in normal operation mode, then relay 2
switches
Double relay … if the enrolled finger is recognized in normal operation mode, then both
relay 1 and 2 switch.
In each one of these 3 options, the effective relay times are those which have been previously set
(see section Fehler! Verweisquelle konnte nicht gefunden werden.)
Select the desired relay with the buttons.
10.) After having selected the relay, press the button.
11.) You will now see a message on the display, asking you to swipe your finger over the sensor
or cancel the finger enrollment by pressing the button.
You now have 60 seconds to swipe your finger, starting at the top knuckle downwards, over the
sensor. The finger scanner status LED lights up orange= „operation mode Enrollment“ = The
device is waiting for a finger to enroll.
This finger has already
been enrolled
R2

General
© ekey biometric systems GmbH Operating instructions ekey home Page 31 / 41
If you press , the finger enrollment will be canceled, without any finger having been enrolled,
and you will be back to the finger overview.
The fingerprint should be recorded in the manner described in section 7.2. The finger scanner
features a (LED) status display, which signalizes using two different colors, after you have swiped
your finger over the sensor, if the enrollment was successful or not:
Red: The finger could not be scanned successfully,
Please repeat the enrollment process. Read section 7.2 before doing so.
Watch the movie on the DVD.
Green: The finger has been succesfully enrolled (scanned). The enrollment was
successful.
„Enrollment OK“ will be displayed for approx. 1 sec on the control panel, if the finger has been
enrolled with success. After that the finger list shows up again. You will then see the relay number
beside the finger description, meaning that it has been enrolled successfully.
12.) You have now concluded the finger enrollment. You may now enroll other fingers, or go back
to the main menu by pressing .
8.2.2.6 DELETING A USER
The „DELETE USER“ (du) function always relates to all of the user´s data. It is NOT possible to delete
individual fingers. If a user is deleted, all his recorded fingers will be irrecoverably deleted.
1.) First enter the security code as per 8.2.2.4.
2.) Select “Delete user” in the main menu using the buttons.
3.) Press the button.
4.) Select the user number which is to be deleted from the system using the buttons.
The finger has been enrolled.
DISP LAY E nter sec urity
code
DISP LAY K EY
STROKE
DISP LAY KEY
STROKE
DISP LAY KEY
STROKE
DISP LAY
See B:
Select the „Delete
user“ menu item
Select the user to
be deleted
This user´s fingers will all be
deleted! The user name is set back
to the factory settings.
START
F
I
N
I
S
H
E
D

General
© ekey biometric systems GmbH Operating instructions ekey home Page 32 / 41
5.) Press the button.
6.) You will then be asked if you really wish to delete this user´s fingers.
Press the button to delete all the fingers as well as the user name. Press the button to
cancel the delete process.
7.) The relay numbers indicating the enrolled fingers for that one user disappear. This user number
can therefore be used for another new user.
It is not possible to delete individual fingers! You can only delete all the user´s enrolled
fingers.
8.) You can now delete other users or go back to the main menu by pressing .
8.2.2.7 SETTING A NEW SECURITY CODE
Please be aware that the device cannot be operated further without entering the security code. If
you enter a new security code, then you will always need this code in the future in order to make
changes (finger enrollment, delete user, etc.) in your ekey home system.
1.) First enter the current security code as per section 8.2.2.4.
2.) Select “Security code” in the main menu using the buttons.
3.) Press the button.
4.) Enter the left digit (decade digit) of the new security code using the buttons.
5.) Press the button.
6.) Enter the right digit (unit digit) of the new security code using the buttons.
7.) Press the button.
8.) The system returns automatically to the main menu.
9.) Memorize your security code, or write it down and keep it in a safe place, separately from the ekey
home CP DRM.
Your security code is now enabled. Each time you wish to make entries in the system (enroll or delete
users, change the relay switching times, …), you need to enter this security code.
The
relay numbers and the user name
beside “02USER” have disappeared. All the
enrolled fingers have been deleted.
DISP LAY Enter sec urity
code
DISP LAY K EY
STROKE
DISP LAY KEY
STROKE
DISP LAY K EY
STROKE
DISP LAY
Enter
security
code
Select the menu
item „Security code”
Enter the first digit
of the new code
Enter the second
digit of the new
code
START
F
I
N
I
S
H
E
D

General
© ekey biometric systems GmbH Operating instructions ekey home Page 33 / 41
8.2.2.8 CHANGING THE RELAY SWITCHING TIMES
The switching impulse times of the individual relays can be variably adjusted from 0.5s to 99.0s with
intervals of 0.5s. This enables you to adjust the duration of the opening impulse of the door according to
your application. The relay on your ekey home CP DRM is preset at 3s impulse duration.
Special feature relay time 00.0
If the value 00.0 is assigned to a relay in this menu, then a special function is enabled. In this case the
relay output will toggle. Once a finger is recognized, the relay changes to its switched status and remains
there until another finger is recognized. That relay thereby works as a switch and does not emit an
impulse.
If there is a power cut or a RESET on the ekey home FS or on the ekey home CP due to a trouble
signal in this operating mode (relay permanently closed), then the relay always restarts in the
status you selected once the power supply has been reconnected (or after the reset). With the
ZnR … status after reset
flag, you define:
-… the relay always stays open after a reset or power cut
I … the relay takes after the reset of power cut the same state again as the one it had
before.
The ZnR flag can only be modified if relay time 00.0 has been previously selected!
1.) First enter the security code as per section 8.2.2.4.
2.) Select “Set relay time” in the main menu using the buttons.
3.) Press the button.
4.) Set the relay time for relay 1.
Set the relay time using the buttons. The switching impulse times of the individual relays
can be variably adjusted from 00.5s to 99.0s with intervals of 0.5s. Relay time 00.0 enables a
special feature, where the relay toggles (switch mode).
5.) Press the button.
6.) Set the relay time for relay 2.
DISP LAY Enter sec urity
code
DISP LAY K EY
STROKE
DISP LAY K EY
STROKE
DISP LAY KEY
STROKE
DISP LAY
Enter
security
code
Select the menu
item „Set relay
time“
Set relay time 1
Set relay time 2
START
F
I
N
I
S
H
E
D
ZnR ... status after reset;
Can only be modified if
relay time 00.00 (toggle
mode) has been selected.

General
© ekey biometric systems GmbH Operating instructions ekey home Page 34 / 41
This relay time can only be set for the ekey home CP DRM 2.
7.) Press the button.
8.) You now are back to the main menu.
The duration of the impulse or the switching feature has thus been defined for the selected relay.
8.2.2.9 RESETTING TO FACTORY SETTINGS
If you carry out this procedure, then all the saved data will be irrecoverably deleted!
If you reset the device to its factory settings, all the user data (user fingers) in the memory are deleted.
The security code is reset to the standard value of 99, the control panel and the finger scanner are
disconnected from each other, and the relay switching times are set for all the relays at 3s.
1.) First enter the security code as per section 8.2.2.4.
2.) Select “Reset” in the main menu using the buttons.
3.) Press the button.
4.) A message appears on the display, asking you if you are sure you want to execute a RESET.
If you press the button, the reset will be done.
If you press the button, you will cancel this action and go back to the main menu.
5.) After pressing , the procedure will take a couple of seconds. The system will reset all the
settings and delete all the enrolled fingers. At the end of the RESET procedure, you will be asked
on the ekey home CP DRM display to select a language, and the ekey home finger scanner lights
up orange.
Proceed from section 8.2.2.3 in order to set up your system anew from the factory settings.
DISP LAY Ente r security
code
DISP LAY K EY
STROKE
DISP LAY K EY
STROKE
DISP LAY
Enter
security
code
Select the menu item
„Reset“
Press OK or ESC
ZnR ... status after reset;
Can only be modified if
relay time 00.00 (toggle
mode) has been selected.
START
FINISHED

General
© ekey biometric systems GmbH Operating instructions ekey home Page 35 / 41
8.2.2.10 TEST MODE
The test mode has been particularly designed to run functional tests after the initial installation and for
trouble shooting the system in combination with a suitable locking system. In this mode, you can
manually activate the relay output via the menu of the ekey home CP DRM. This way, you can verify in a
simple manner if the locking system has been wired properly.
1.) First enter the current security code as per section 8.2.2.4.
2.) Select “Test Mode” in the main menu using the buttons.
3.) Press the button.
4.) Depending on the current operating mode of the ekey home CP DRM relay, you can either activate
or deactivate the relay output. Please use the button for this purpose. Pressing the button
will switch the relay output.
5.) Press the button to exit the test mode and return to the main menu. While returning from the
test mode, the relay output is deactivated.
DISP LAY Enter sec urity
code
DISP LAY KEY S TROKE D ISPLA Y KEY
STROKE
DISP LAY
Enter
security
code
The relay is not
active
THE RELAY IS
ACTIVE
Select the menu item
„Test mode“
The relay is
active
THE RELAY IS NOT
ACTIVE
START
Press to go back to
the main menu.

General
© ekey biometric systems GmbH Operating instructions ekey home Page 36 / 41
8.2.2.11 LED INTENSITY
The ekey home CP DRM allows you to define the LED intensity of the status LED on the finger scanners in
idle mode. The status LED is always preset on „On“ (factory setting) and lights up blue with maximum
intensity. Some customers however wish to have it dimmed or even switched off, so that the finger
scanner beside the front door does not attract too much attention.
1.) First enter the current security code as per section 8.2.2.4.
2.) Select „LED intensity“ in the main menu using the buttons.
3.) Press the button.
4.) Now select the LED status of the status LED on the finger scanner in idle mode using the
buttons.
5.) Press the button.
The status of the status LED on the finger scanner will be changed immediately to the one you
selected and you will go back to the main menu.
You can define
here the status of
this LED when the
finger scanner is in
idle mode.
3 different statuses can be set:
LED on … The LED lights up with full
intensity (factory setting).
LED dimmed … The LED is dimmed.
LED off … The LED is off.
DISP LAY Ente r security
code
DISP LAY KEY
STROKE
DISP LAY K EY
STROKE
DISP LAY
Enter
security
code
Select the menu item
„LED intensity“
Select the LED
status
START
FINISHED

General
© ekey biometric systems GmbH Operating instructions ekey home Page 37 / 41
8.2.2.12 LOGGING
The ekey home CP DRM logs the last 50 accesses. Both the user name and the switched relay will be
displayed on a list.
1.) First enter the current security code as per section 8.2.2.4.
2.) Select „Logging“ in the main menu using the buttons.
3.) Press the button.
The list with the last 50 accesses will now be displayed. They are ranked chronologically, beginning
with the latest one. Here is all the information you can have access to:
You can scroll through the list using the buttons.
4.) Press the button and you will go back automatically to the main menu.
DISP LAY Ente r security
code
DISP LAY KEY
STROKE
DISP LAY K EY
STROKE
DISP LAY
Enter
security
code
Scroll in the list
START
FINISHED
MUSTE RMAN´s
acc esses
latest
oldest
Finger number acc. to ekey
counting method
1… left small finger
.
5… left thumb
6… right thumb
.
10.. right small finger
Action code
0 … access
Switched relay. Here for instance, relays
1 and 2 were switched simultaneously.

General
© ekey biometric systems GmbH Operating instructions ekey home Page 38 / 41
8.2.3 ELECTRIC CONNECTION
You can find further details such as the
pin configuration
wiring sketches
either on the wiring diagram supplied with the product, or on the DVD (.pdf file).
8.2.4 MOUNTING
You can find further information to be supplied either on the ekey mounting instructions supplied with the
product, or on the DVD (.pdf file).
9.
Other features
Software update
The flawless operation of your ekey home products is essentially guaranteed thanks to the high quality of
the software implemented on the devices. Since ekey is permanently improving its products and providing
them with new features, ekey offers you the possibility of updating your “ekey home” products. That is to
say, you can, as long as ekey makes it available on the homepage, update the software of your ekey
devices (ekey home finger scanner and ekey home control panel) with a software update kit to the latest
available firmware version.
Contact your ekey partner for more details!
10.
Trouble-shooting
Error
CP
display
FS
display
Cause
Solution
Finger
enrollment
Finger
enrollment is not
working
1. The finger was not swiped evenly over the sensor
starting at the top knuckle.
2. The finger was swiped
with too litt le o r too much
pressure o ver the sensor.
3. The finger was swiped too fast or too slowly over
the sensor.
4. The finger is being swiped at an incorrect angle.
5. The finger does not have enough features to be
detected (due to wear).
1. Swipe
your finger naturally/evenly over
the sensor without any stops, starting at the
top knuckle.
2. Swipe the finger gently, but not too
carefully over the sensor.
3. Swipe the finger at a medium speed and
at the correct angle over the sensor (see
section 7.2
Fehler! Textmarke nicht
definiert.).
4. Use a different finger.
A
finger that has
already been
enrolled is no
longer
recognized.
1. During the enrollment, another part of the finger
surface was captured.
2. The reco rding of the finger was not carried out
properly.
3. The finger was incorrectly swiped over the sensor.
1
. Re-enroll the fingerprint in the system and
pay attention to swiping your finger evenly.
2. See “Finger enrollment is not working“ –
perfect recording guarantees good
recognition.
3. See section 7.2.
ekey home
CP IN and ekey home
CP WM
The status dot on
the control panel
is not blinking
No power supply
1. Check the power supply, where necessary
check the fuses
Two dots are lit
up on the display
of the control
panel
No or defective device coupling
Re-
connect (coupl
e) the devices
(See section 8.2.1.4 Initializing the devices)
Error code
„E0“
on the display,
then the
countdown starts
from 45
1. No b
us connection to the finger
scanner
.
2. The power supply to the system has been
interrupted. The system will be restarted.
1. Check the 4
-
core connection cable
between finger scanner and control panel.
Pay special attention to clamp 1 and 2.
2. Check the power supply on clamp 3 and 4,
it must be at least 8V.
3. Wait until the start process has finished.
Error code
„E1“
on the display
99 fingerprints have already been registered
.
No more fingerprints can be registered.
Where necessary delete existing fingerprints
in order to record new ones.

General
© ekey biometric systems GmbH Operating instructions ekey home Page 39 / 41
Error code
„E2“
on the display
The wrong security code
has been
entered three
times. Device is locked for 30 minutes.
Wait 30 minutes before entering the security
code again. The system has to be
permanently powered within those 30 min!
Error code
„E3“
on the display
Device
connected/coupled incorrectly
Re-
couple the devices
=
initialize devices.
One of the devices has been manipulated.
ekey home
CP DRM
The initialization
process (=
commissioning)
cannot be carried
out.
The control panel cannot reach the finger scanner,
no data exchange possible.
Check, whether the finger scanner is
connected to the mains
(status LED has to
blink in orange).
Check the bus connection (clamp 1 and 2)
between the finger scanner and the control
panel.
Check the device termination (resistor
) acc.
to the wiring diagram.
The message
„Locked for 30
min” is displayed
on the LCD of the
CP DRM.
The wrong security code
has been
entered three
times in a row.
Wait 30 minutes before entering the security
code again. The system has to be
permanently powered within those 30 min!
The d
isplay
of
the CP DRM
reports offline
and the counter
decrements from
44 to 0.
1. No bus connection to the fingerprint scanner
2. The power supply to the system has been
interrupted. The system will be restarted.
1. Check the 4
-
core connection cable
between finger scanner and control panel.
Pay special attention to clamp 1 and 2.
2. Check the power supply on clamp 3 and 4,
it must be at least 8V.
3. Wait until the start process has
been
concluded.
The display
reports during
enrollment
„Already 99
fingers
registered“
99 fingerprints have already been registered.
You
cannot enroll more than 99 fingerprints.
Try to delete inactive users.
ekey home
f
inger
scanner
The green LE
D on
the finger scanner
signaliz
es that the
finger has been
positively
recognized, but the
relay does not
switch.
Wrong device allo cation (coupling).
Access will not be granted since one of the two
devices has been exchanged.
Re-couple the devices.
One of the devices
has been manipulated.
Reset the system to factory settings before
re-initializing them (see section 8.2.1.12)
The status LED of
the finger scanner i
s
blinking red/green.
The sensor might have been damaged
or may not be
working correctly.
Contact the technical support department.
Please have the serial number of the product
ready (to be found below
the barcode label).
See page 4 fo r contact details.

General
© ekey biometric systems GmbH Operating instructions ekey home Page 40 / 41
11.
Maintenance
11.1 CARE
Generally speaking, your system does not require any maintenance. Apart from cleaning the sensor
surface occasionally when it is dirty, you are not required to do anything.
11.2 CLEANING
Care of the sensor area
The sensor area of the finger scanner is the most important element of your ekey home system and needs
to be taken care of accordingly in order to function reliably and durably.
The sensor area is self-cleaning, since fingers are being swept regularly over it, and therefore needs no
special maintenance. If the finger scanner still becomes dirty, wipe the sensor with a damp (not wet),
non-scratch or non-abrasive cloth. Use normal water without any cleaning agents. Be particularly careful
when cleaning the surface of the sensor. Do not rub on the sensor area or exert pressure on it.
12.
Disposal
In the event of a disposal of the product, please note the relevant legal provisions. Information on the
disposal of electrical and electronic equipment in the European Community:
Within the European Union the disposal of electrical devices is governed by national regulations based on
EU Directive 2002/96/EC on Waste Electrical and Electronic Equipment (WEEE). All equipment delivered
after August 13th, 2005 must not be disposed of with municipal or household waste anymore. To
document this, they are marked with the following symbol
Since the disposal requirements vary from one EU country to country, please contact your supplier for
further details in case of need.
13.
Technical Data
The technical specification for each product (ekey home finger scanner and ekey home control panel) can
be found in the respective data sheets on the CD-ROM.
Sensor areas

General
© ekey biometric systems GmbH Operating instructions ekey home Page 41 / 41
14.
Accessories
ekey supplies a wide range of accessories for its biometric systems. Please contact either your ekey
partner, your ekey installer or ekey itself for accessories such as:
power supplies
pre-configured cables
in-wall sets and mounting aids
design elements
milling samples
etc.
15.
Declarations of conformity
The declaration of conformity for each product (ekey home finger scanner and ekey home control panel)
can be found in the “Declarations of conformity” folder on the DVD.
16.
ekey branch offices
Austria
ekey biometric systems GmbH
Lunzerstraße 89, A-4030 Linz
Phone: +43 732 890 500 2000
Fax: +43 732 890 500 2002
Technical support: +43 732 890 500 1000
E-mail: office@ekey.net
Germany
ekey biometric systems Deutschland GmbH
Liebigstraße 18, D-61130 Nidderau
Phone: +49 (6187) 90696-0
Fax: +49 (6187) 90696-20
Technical support: +49 6187 90696 28
E-mail: deutschland@ekey.net
Switzerland | Liechtenstein
ekey biometric systems Est.
Landstrasse 79, FL-9490 Vaduz
Phone: +423 235 08 80
Fax: +423 235 08 81
Technical support: +42 3 235 0880
E-mail: schweiz@ekey.net
Slovenia
ekey biometric systems d.o.o.
Vodovodna cesta 99, SI-1000 Ljubljana
Phone: +386 1 5309 489
Fax: +386 1 5309 493
Technical support: + 386 1 5309 495
E-mail: podpora@ekey.si
 Loading...