

eka KF 912, KF 912 IX, KF 965 M, KF 937, KF 937 UD Use And Instruction Manual
...
USE AND INSTRUCTION MANUAL
USE AND INSTRUCTION MANUALUSE AND INSTRUCTION MANUAL
USE AND INSTRUCTION MANUAL
MODD.
MODD. MODD.
MODD. KF 937
KF 937KF 937
KF 937 –––– KF 937 UD
KF 937 UDKF 937 UD
KF 937 UD
KF 933
KF 933 KF 933
KF 933 –––– KF
KFKF
KF 933 U
933 U 933 U
933 U –––– KF
KFKF
KF 933 AL
933 AL 933 AL
933 AL –––– KF
KFKF
KF 933 AL
933 AL933 AL
933 AL U
U U
U
KF 912
KF 912 KF 912
KF 912 –––– KF 912 IX
KF 912 IXKF 912 IX
KF 912 IX
KF 965
KF 965 KF 965
KF 965 –––– KF
KFKF
KF 965 M
965 M 965 M
965 M –––– KF
KFKF
KF 965 AL
965 AL965 AL
965 AL UD
UDUD
UD –––– KF 966 UD
KF 966 UDKF 966 UD
KF 966 UD
rev.
rev. rev.
rev. 4444
TECNOEKA
TECNOEKATECNOEKA
TECNOEKA S.r.l.
S.r.l.S.r.l.
S.r.l.
Via I. Nievo,
Via I. Nievo,Via I. Nievo,
Via I. Nievo, n.12/B
n.12/B n.12/B
n.12/B ---- 35012 Camposampiero (Padova) Italy
35012 Camposampiero (Padova) Italy35012 Camposampiero (Padova) Italy
35012 Camposampiero (Padova) Italy
Tel. +39.049.9300344
Tel. +39.049.9300344 Tel. +39.049.9300344
Tel. +39.049.9300344 –––– +39.049.5791
+39.049.5791+39.049.5791
+39.049.5791479 Fax +39.049.5794387
479 Fax +39.049.5794387479 Fax +39.049.5794387
479 Fax +39.049.5794387
www.tecnoeka.com
www.tecnoeka.comwww.tecnoeka.com
www.tecnoeka.com
EEEE----mail:
mail: mail:
mail: info@tecnoeka.com
info@tecnoeka.cominfo@tecnoeka.com
info@tecnoeka.com
_ TECNOEKA Srl _________________________________________________________ use and instruction manual _
_ page 2 _________________________________________________________________________________________
Prodotti mirati
Prodotti miratiProdotti mirati
Prodotti mirati
per Ristorazioni, Pasticcerie,
per Ristorazioni, Pasticcerie,per Ristorazioni, Pasticcerie,
per Ristorazioni, Pasticcerie,
Panetterie e Gastronomie
Panetterie e GastronomiePanetterie e Gastronomie
Panetterie e Gastronomie
TECNOEKA Srl
TECNOEKA SrlTECNOEKA Srl
TECNOEKA Srl
Via I. Nievo, 12/B
35012 Camposampiero (PD)
Tel. +39 049 5791479 - +39 049 9300344
Fax + 39 049 5794387
www.tecnoeka.com – info@tecnoeka.com
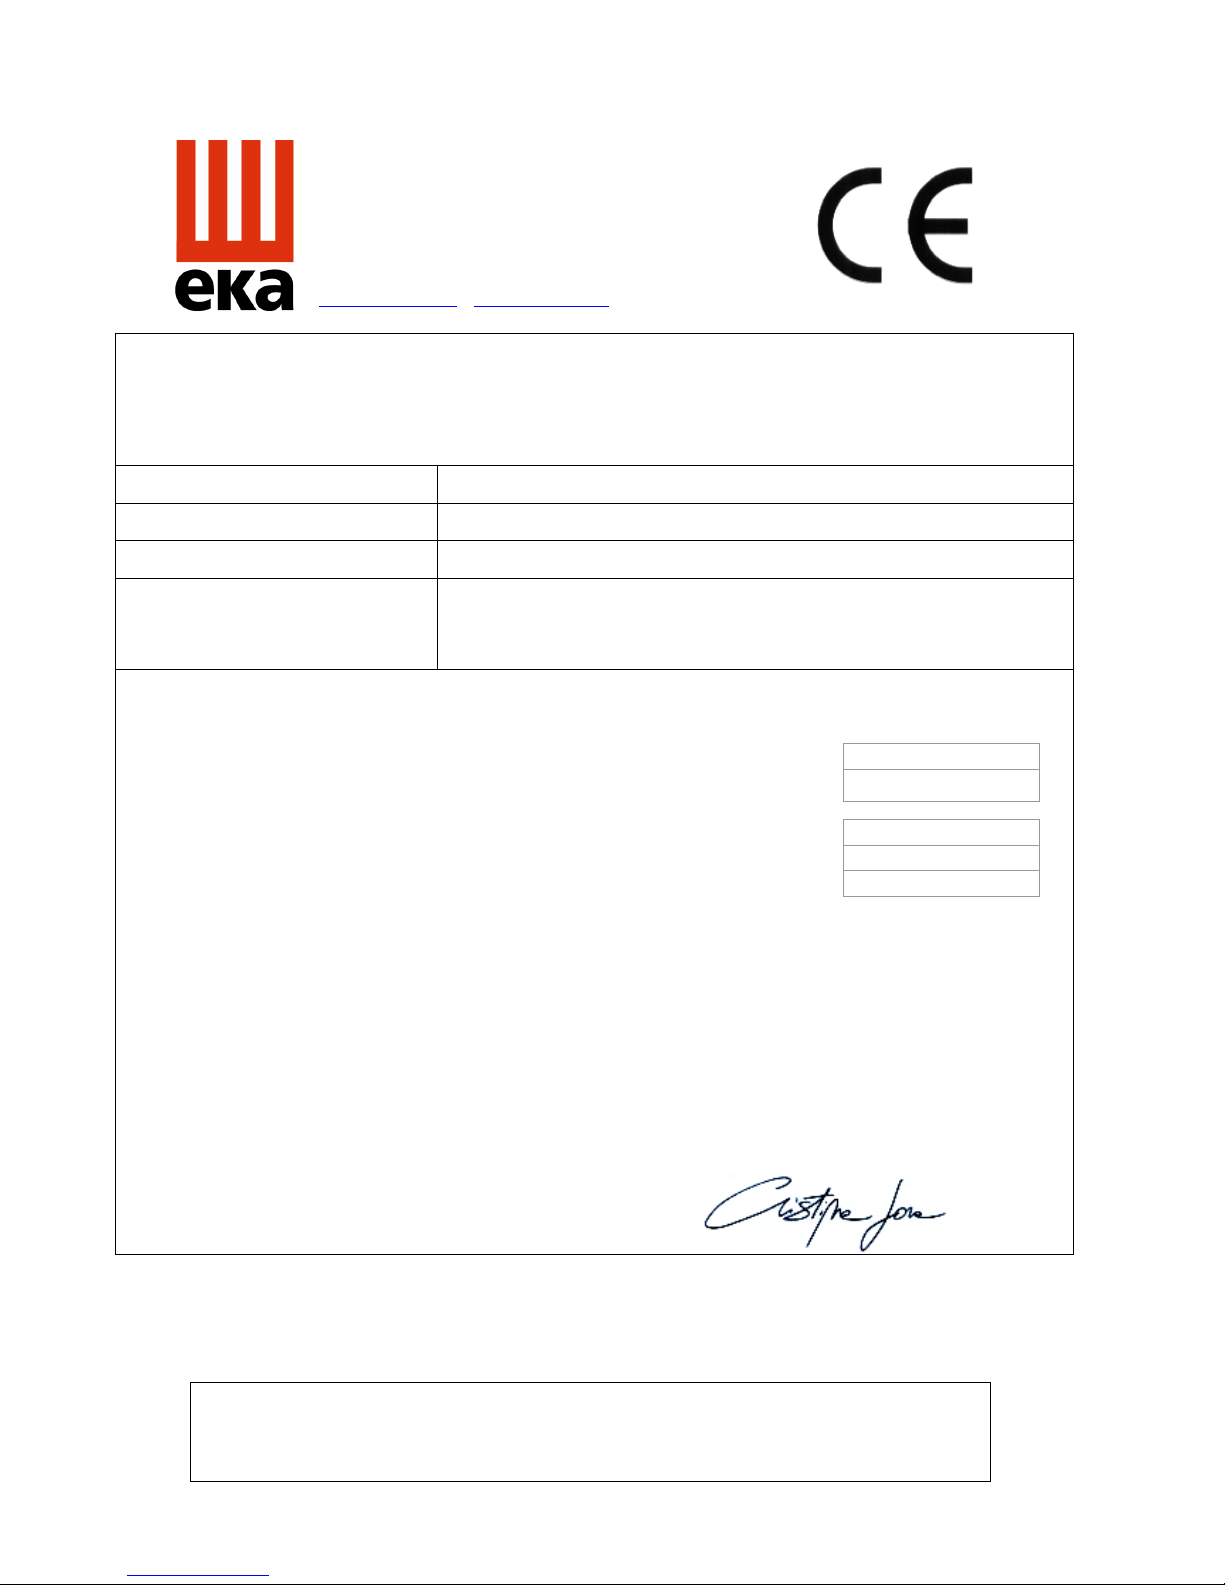
CE
DECLARATION OF CONFORMITY
Annexed document II A, of directive
Annexed document II A, of directive Annexed document II A, of directive
Annexed document II A, of directive 2006
20062006
2006////42
4242
42////EC
ECEC
EC
Manufacturer TECNOEKA Srl
TECNOEKA SrlTECNOEKA Srl
TECNOEKA Srl
Address Via I. Nievo, 12/B
Via I. Nievo, 12/B Via I. Nievo, 12/B
Via I. Nievo, 12/B ---- 35012 Camposampiero (Pd)
35012 Camposampiero (Pd)35012 Camposampiero (Pd)
35012 Camposampiero (Pd)
Type of product
Electric ovens
Electric ovensElectric ovens
Electric ovens
Models
KF 937
KF 937KF 937
KF 937 –––– KF 937 UD
KF 937 UDKF 937 UD
KF 937 UD –––– KF
KFKF
KF 933
933 933
933 ––––
KF 933 U
KF 933 U KF 933 U
KF 933 U –––– KF 933 AL
KF 933 AL KF 933 AL
KF 933 AL –––– KF
KFKF
KF 933 AL
933 AL933 AL
933 AL U
U U
U
KF 912
KF 912 KF 912
KF 912 –––– KF 912 IX
KF 912 IX KF 912 IX
KF 912 IX –––– KF 965
KF 965 KF 965
KF 965 –––– KF
KFKF
KF 965 M
965 M 965 M
965 M –––– KF 965 AL
KF 965 ALKF 965 AL
KF 965 AL UD
UDUD
UD –––– KF 966 UD
KF 966 UDKF 966 UD
KF 966 UD
TECNOEKA Srl declares that the above mentioned products conform to the safety
regulations under:
- Low voltage directive 2006/95/EC
CEI EN 60335-1
CEI EN 60335-2-42
- Electromagnetic compatibility Directive 2004/108/EC
CEI EN 55014-1
CEI EN 61000-3-2
CEI EN 61000-3-3
- Machine Directive 2006/42/ EC;
- Directive on the general safety of products 2001/95/ EC;
- Directive on the restriction in the use of dangerous substances in electrical and
electronic appliances 2002/95/ EC;
- Directive on waste from electrical and electronic appliances 2002/96/ EC.
Camposampiero, 17/02/2012.
__
____
_________________________________
______________________________________________________________
_______________________________
Signature of a Representative of the Board of directors
X:\Sgq\PRODOTTI\Fam. 1 - FORNI\FORNO ELETTRICO\LEka\MANUALI D'USO - Forno Elettrico
40 60 90 - LEka\Lingua Inglese\Instruction manual KF 937-KF937UD-KF933-KF933UKF933AL-KF933AL_U-KF912-KF912IX-KF965-KF965M-KF965AL_UD-KF966UD - GB - rev.
4.doc

_ Electric Ovens _ rev. 4_______ ___________ KF 937 – KF 937 UD – KF 933 – KF 933 U – KF 933 AL – KF 933 AL U
KF 912 - KF 912 IX – KF 965 – KF 965 M – KF 965 AL UD – KF 966 UD _
_________________________________________________________________________________________ page 3 _
Index
IndexIndex
Index
1.
1.1.
1. Technical service
Technical serviceTechnical service
Technical service
2.
2.2.
2. General warnings
General warningsGeneral warnings
General warnings
3.
3.3.
3. Technical specifications
Technical specificationsTechnical specifications
Technical specifications
4.
4.4.
4. Instructions for the installer
Instructions for the installerInstructions for the installer
Instructions for the installer
5.
5.5.
5. Use instructions (for the user)
Use instructions (for the user)Use instructions (for the user)
Use instructions (for the user)
6.
6.6.
6. Residual risks (
Residual risks (Residual risks (
Residual risks (for the user)
for the user)for the user)
for the user)
7.
7.7.
7. How to use the control panel
How to use the control panelHow to use the control panel
How to use the control panel
8.
8.8.
8. Oven cooking
Oven cookingOven cooking
Oven cooking
9.
9.9.
9. Cooking advice
Cooking adviceCooking advice
Cooking advice
10.
10.10.
10. Routine cleaning and maintenance
Routine cleaning and maintenanceRoutine cleaning and maintenance
Routine cleaning and maintenance
11.
11.11.
11. Technical
Technical Technical
Technical assistance
assistanceassistance
assistance
12.
12.12.
12. Informations to the consumers
Informations to the consumersInformations to the consumers
Informations to the consumers
13.
13.13.
13. Wiring layout
Wiring layoutWiring layout
Wiring layoutssss
14.
14.14.
14. The Warranty
The WarrantyThe Warranty
The Warranty
_ TECNOEKA Srl _________________________________________________________ use and instruction manual _
_ page 4 _________________________________________________________________________________________
1.
1. 1.
1. Technical service
Technical serviceTechnical service
Technical service
A technical check-up once or twice a year helps prolong the life of the appliance and
guarantees better operation.
Make sure that assistance is carried out solely and exclusively by qualified personnel.
For any spare parts orders or for any information about the appliance, always mention the
serial number and model (data indicated on the "technical data" plate at the rear of the oven).
2222.
. .
. General warnings
General warningsGeneral warnings
General warnings
Very important!: keep this instruction book together with the appliance for future
consultation.
These warnings were drafted for your safety and for that of others. Please read them carefully
before installing or using the appliance:
- If, on receipt of the goods, the packaging
packagingpackaging
packaging is damaged, write the following on the delivery
note: “I REVERSE THE RIGHT TO CONTROL THE GOODS”
“I REVERSE THE RIGHT TO CONTROL THE GOODS”“I REVERSE THE RIGHT TO CONTROL THE GOODS”
“I REVERSE THE RIGHT TO CONTROL THE GOODS”, specify the damage and get the
driver to sign in acceptance; send a claim in writing to the seller within 4 calendar days
from the date of receipt. No claim shall be accepted after such period.
- The warehouse inside temperature must not be lower than -9°C; otherwise, the
thermostat (regulation and safety thermostat) control devices of the machine will be
damaged. Failure to observe this prohibition invalidates any responsibility of the
manufacturer of the machine.
- The appliance is intended for professional use and must be utilised by qualified personnel
trained to use it.
- Any modification which may be necessary on the electrical system to enable installation of
the appliance, must be carried out solely by competent personnel.
- It is dangerous to modify or attempt to modify the characteristics of this appliance.
- Never clean the appliance with direct water jets, because, if any water enters, it could limit
the machine's safety .
- Before doing any maintenance or cleaning jobs, disconnect the appliance from the
electrical mains and allow it to cool.
- When the tilting door is wide open, do not put anything on the surface, because the door
hinges could be irreparably damaged.
- Do not attempt to carry out the periodic controls or any repairs by yourself. Contact the
nearest Service Centre and use only original spare parts.
N.B.:
N.B.: N.B.:
N.B.: Improper or incorrect use and failure to observe the installation instructions shall release the
Improper or incorrect use and failure to observe the installation instructions shall release the Improper or incorrect use and failure to observe the installation instructions shall release the
Improper or incorrect use and failure to observe the installation instructions shall release the
manufacture from all responsibility.
manufacture from all responsibility.manufacture from all responsibility.
manufacture from all responsibility. In this connection, the directives in the "POSITIONING"
In this connection, the directives in the "POSITIONING" In this connection, the directives in the "POSITIONING"
In this connection, the directives in the "POSITIONING"
paragraph must be strict
paragraph must be strictparagraph must be strict
paragraph must be strictly observed.
ly observed.ly observed.
ly observed.
3.
3. 3.
3. Technical specifications
Technical specificationsTechnical specifications
Technical specifications
Appliance
Appliance Appliance
Appliance
model
modelmodel
model
Cooking chamber
Cooking chamber Cooking chamber
Cooking chamber
Vol.
Vol.Vol.
Vol.
(dm³=It)
Convection heating
Convection heatingConvection heating
Convection heating
element
elementelement
element
(kW)
Grill heating
Grill heating Grill heating
Grill heating
element
elementelement
element
(kW)
Top and bottom
Top and bottom Top and bottom
Top and bottom
heatel
heatelheatel
heatel
(kW)
Motorised co
Motorised coMotorised co
Motorised co
nvection
nvectionnvection
nvection
ventilator
ventilatorventilator
ventilator
(W)
KF 937
KF 937KF 937
KF 937
KF 937 UD
KF 937 UDKF 937 UD
KF 937 UD
60
6060
60 3,5
3,53,5
3,5 //// //// 120
120120
120
KF 933
KF 933KF 933
KF 933
KF 9
KF 9KF 9
KF 933 U
33 U33 U
33 U
KF 933 AL
KF 933 ALKF 933 AL
KF 933 AL
KF 933
KF 933KF 933
KF 933 AL
ALAL
AL UUUU
87
8787
87 3,0
3,03,0
3,0 //// //// 120
120120
120
KF 912
KF 912 KF 912
KF 912
KF 912 IX
KF 912 IXKF 912 IX
KF 912 IX
93
9393
93 1111,,,,6666 //// //// 50
5050
50
KF 965
KF 965KF 965
KF 965
KF 965 AL
KF 965 ALKF 965 AL
KF 965 AL UUUUDDDD
KF 966 UD
KF 966 UDKF 966 UD
KF 966 UD
91
9191
91 3,0
3,03,0
3,0 //// //// 120
120120
120
KF 96
KF 96KF 96
KF 965 M
5 M5 M
5 M
78
7878
78
3,0
3,03,0
3,0
2222
,,,,
5555
3333
,,,,
2222
120
120120
120
_ Electric Ovens _ rev. 4_______ ___________ KF 937 – KF 937 UD – KF 933 – KF 933 U – KF 933 AL – KF 933 AL U
KF 912 - KF 912 IX – KF 965 – KF 965 M – KF 965 AL UD – KF 966 UD _
_________________________________________________________________________________________ page 5 _
Appliance model
Appliance modelAppliance model
Appliance model
KF 937
KF 937KF 937
KF 937
KF 937 UD
KF 937 UDKF 937 UD
KF 937 UD
KF 933
KF 933 KF 933
KF 933
KF 933 U
KF 933 U KF 933 U
KF 933 U –––– KF 933 AL
KF 933 ALKF 933 AL
KF 933 AL
KF 933 AL
KF 933 AL KF 933 AL
KF 933 AL UUUU
KF 912
KF 912 KF 912
KF 912
KF 912 IX
KF 912 IXKF 912 IX
KF 912 IX
KF 965
KF 965KF 965
KF 965
KF 96
KF 96KF 96
KF 965 AL
5 AL5 AL
5 AL UD
UDUD
UD
KF 965
KF 965KF 965
KF 965 MMMM –––– KF 966 UD
KF 966 UDKF 966 UD
KF 966 UD
Max. absorbed power
Max. absorbed powerMax. absorbed power
Max. absorbed power
(kW)
3,7
3,73,7
3,7 6,4
6,46,4
6,4 3,4
3,43,4
3,4 6666,4
,4,4
,4
Power supply voltage
Power supply voltagePower supply voltage
Power supply voltage
(V~)
220/230
220/230220/230
220/230
(50 Hz)
(50 Hz)(50 Hz)
(50 Hz)
380/400 2N
380/400 2N380/400 2N
380/400 2N
(50Hz)
(50Hz)(50Hz)
(50Hz)
220/230
220/230220/230
220/230 (50 Hz)
(50 Hz)(50 Hz)
(50 Hz)
380/400 2N
380/400 2N380/400 2N
380/400 2N
(50Hz)
(50Hz)(50Hz)
(50Hz)
Class
ClassClass
Class
I (contro la scossa elettrica)
I (contro la scossa elettrica)I (contro la scossa elettrica)
I (contro la scossa elettrica)
Power cable
Power cablePower cable
Power cable diameter
diameterdiameter
diameter
3 x 1,5 mm
3 x 1,5 mm3 x 1,5 mm
3 x 1,5 mm²
4 x 2,5 m
4 x 2,5 m4 x 2,5 m
4 x 2,5 mmmmm²
3 x 1,5 mm
3 x 1,5 mm3 x 1,5 mm
3 x 1,5 mm²
4 x 2,5 mm
4 x 2,5 mm4 x 2,5 mm
4 x 2,5 mm²
Type of
Type ofType of
Type of ccccable
ableable
able
H07RN
H07RNH07RN
H07RN----FFFF
Connecting electric cable
Connecting electric cableConnecting electric cable
Connecting electric cable Type Y
Type YType Y
Type Y
Dimensions of appliance
Dimensions of applianceDimensions of appliance
Dimensions of appliance
(mm) LxDxH
790x665x505
790x665x505790x665x505
790x665x505 790x665x635
790x665x635790x665x635
790x665x635 999900000x680x5
0x680x50x680x5
0x680x577770000
90
9090
900x680x5
0x680x50x680x5
0x680x577770000 (KF 965 ..)
(KF 965 ..)(KF 965 ..)
(KF 965 ..)
790x665x635 (KF 966 UD)
790x665x635 (KF 966 UD)790x665x635 (KF 966 UD)
790x665x635 (KF 966 UD)
Weight of appliance
Weight of applianceWeight of appliance
Weight of appliance
(Kg)
45
4545
45 61
6161
61/62/58/59
/62/58/59/62/58/59
/62/58/59 55553333
58/56
58/5658/56
58/56/6
/6/6
/60000/56
/56/56
/56
The noise level of the appliance in operation is below 70 dB (A).
The noise level of the appliance in operation is below 70 dB (A).The noise level of the appliance in operation is below 70 dB (A).
The noise level of the appliance in operation is below 70 dB (A).
The "technical data" plate is positioned on the rear panel of the appliance.
The "technical data" plate is positioned on the rear panel of the appliance.The "technical data" plate is positioned on the rear panel of the appliance.
The "technical data" plate is positioned on the rear panel of the appliance.
4.
4. 4.
4. Instructions for the installer
Instructions for the installerInstructions for the installer
Instructions for the installer
The following instructions are aimed at the qualified installer, to ensure that he carries out the
installation, adjustment and maintenance operations as correctly as possible and according to
current legal regulations. Any operation must be performed with electrical power cut to the
appliance.
Before using the appliance, carefully remove the special adhesive film protecting the parts in
stainless steel. Do not leave any glue residues on the surfaces. If necessary, remove them at once,
with an appropriate solvent.
Fitting the feet
Fitting the feetFitting the feet
Fitting the feet - The feet are inside the appliance and must be secured on the four threaded
holes on the base. If necessary, the height of the feet can be adjusted by screwing or unscrewing.
Positioning
PositioningPositioning
Positioning - Position the appliance perfectly horizontally on a table or similar support (the
table or support must be at least 85 cm above the floor). Position it at a distance of not less than
10 cm from the side and rear walls, to enable natural ventilating air to circulate freely around it.
The appliance is ventilated through specific openings on the metal walls of the outer housing ,
and ensures efficiency and long-life. For this reason it is strictly forbidden to obstruct these
ventilation openings, even partially or for short periods. Failure to observe this specific prohibition
Failure to observe this specific prohibition Failure to observe this specific prohibition
Failure to observe this specific prohibition
releases the manufacturer of the appliance fro
releases the manufacturer of the appliance froreleases the manufacturer of the appliance fro
releases the manufacturer of the appliance from all responsibility and immediately voids any
m all responsibility and immediately voids any m all responsibility and immediately voids any
m all responsibility and immediately voids any
guarantee rights for the said appliance,
guarantee rights for the said appliance, guarantee rights for the said appliance,
guarantee rights for the said appliance, because its constructive conformity has been voluntarily
compromised. Furthermore, the appliance is not suitable for embedding and for grouped
positioning with other identical appliances.
Electrical connection
Electrical connectionElectrical connection
Electrical connection - The appliance must be connected to the electrical mains according to
current legal regulations. Before making the connection, make sure of the following:
- the voltage and frequency values of the power supply system match the values on the
"technical data" plate affixed on the appliance;
- the limiting valve and the system are able to support the appliance's load (see the
"technical data" plate);
- the power supply system has an adequate earth connection according to cu
the power supply system has an adequate earth connection according to cuthe power supply system has an adequate earth connection according to cu
the power supply system has an adequate earth connection according to current legal
rrent legal rrent legal
rrent legal
regulations;
regulations;regulations;
regulations;
- a omnipolar switch with minimum between-contacts aperture of the overvoltage category
III (4000 V), sized to the load and conforming to current legal regulations, is fitted
between the appliance and the mains in the direct connection to the mains;
- the omnipolar switch used for connection is easy to reach when the appliance is installed;
-
the yellow/green earth wire is not interrupted by the switch;
the yellow/green earth wire is not interrupted by the switch;the yellow/green earth wire is not interrupted by the switch;
the yellow/green earth wire is not interrupted by the switch;
- the power supply, when the appliance is operating, must not deviate from the rated
voltage value by ±10%;
_ TECNOEKA Srl _________________________________________________________ use and instruction manual _
_ page 6 _________________________________________________________________________________________
- make sure that after inserting the power supply cord into the terminal block it does not
come into contact with any of the cooking range's hot parts.
- if the supply cable is damaged then it must be replaced by the manufacturer or by your
if the supply cable is damaged then it must be replaced by the manufacturer or by yourif the supply cable is damaged then it must be replaced by the manufacturer or by your
if the supply cable is damaged then it must be replaced by the manufacturer or by your
technical support or by a qualified person to avoid any risk.
technical support or by a qualified person to avoid any risk.technical support or by a qualified person to avoid any risk.
technical support or by a qualified person to avoid any risk.
Connection to the water mains
Connection to the water mainsConnection to the water mains
Connection to the water mains - The appliance must be fed with softened drinking water,
with hardness from 0.5°F to 5°F (it is obligatory to use a softener to reduce the formation of lime
inside the cooking chamber) and pressure in the range from 150 to 250 kPa (1.5 - 2.5 bar).
Connection to the water mains should be made through the threaded 3/4" solenoid-valve on
the rear (on the bottom) of the appliance, fitting in between a mechanical filter and an on/off tap
(before you connect the filter, allow a certain quantity of water to flow out in order to drain any
waste from the pipe).
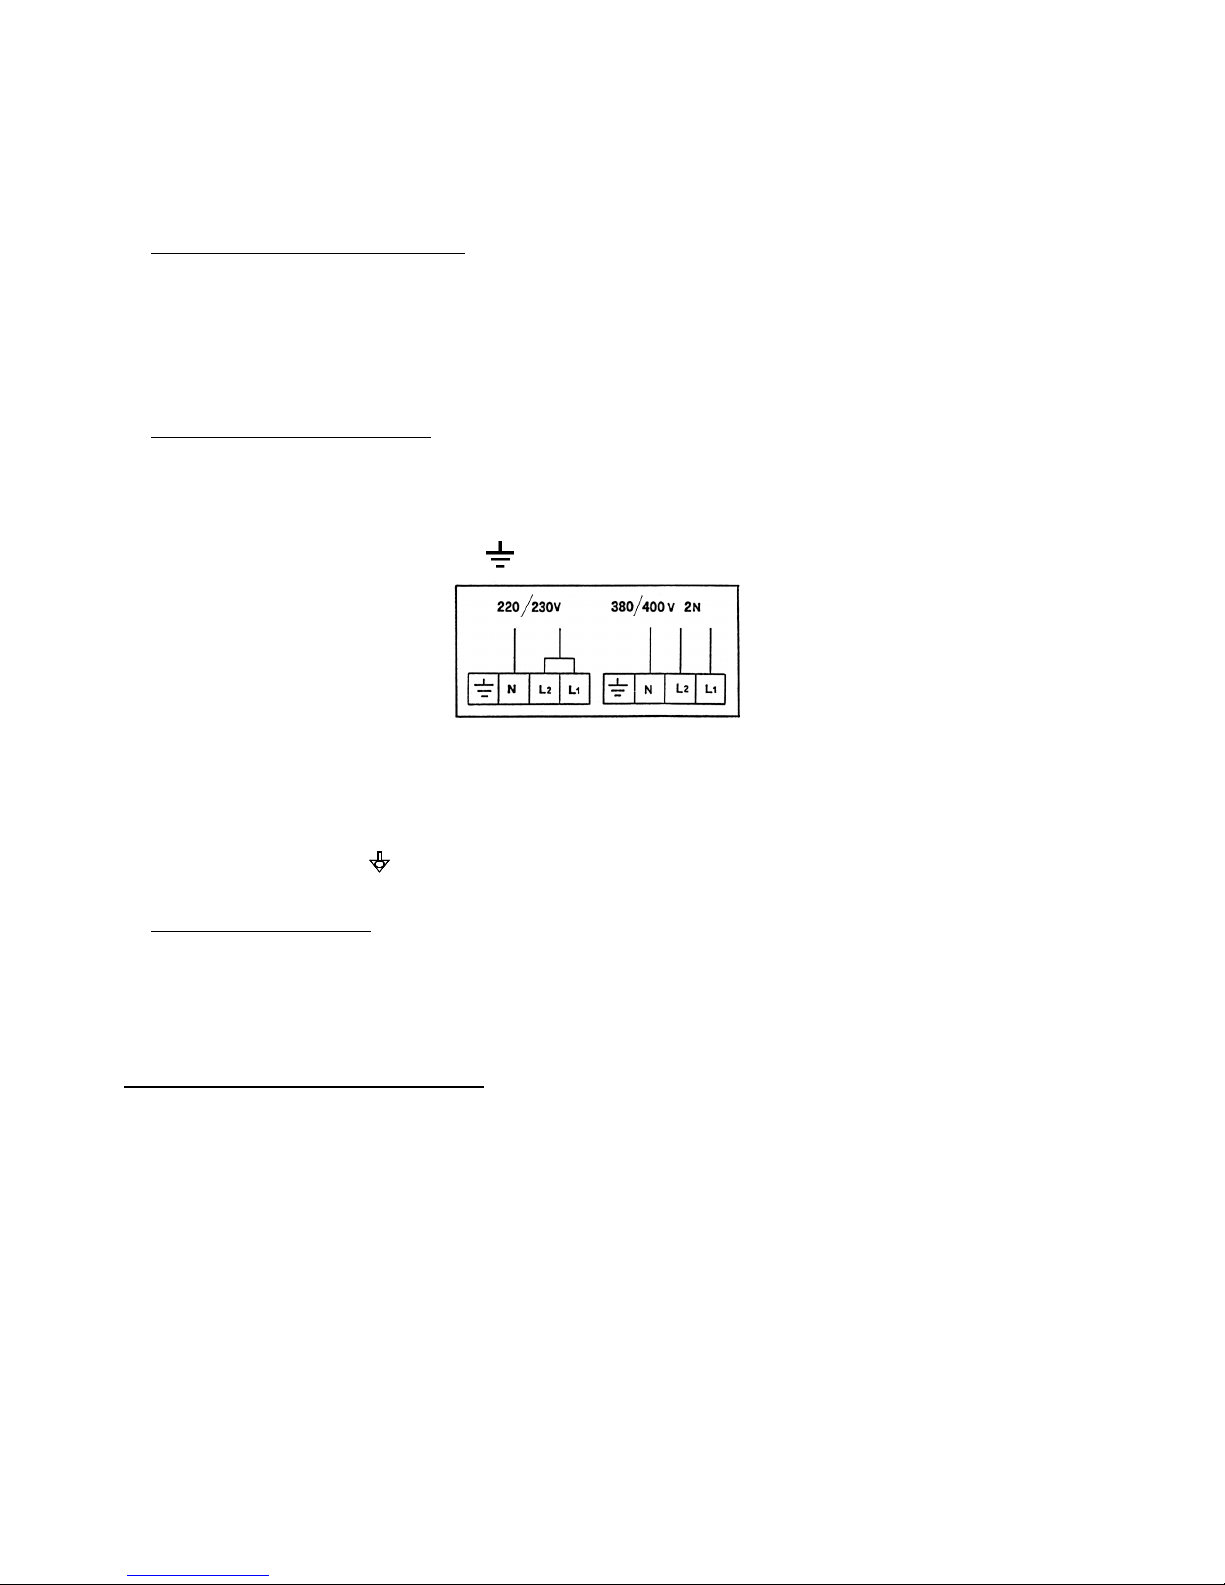
Connecting the power cable
Connecting the power cableConnecting the power cable
Connecting the power cable - To access the terminal board, just remove the appliance's rear
side-panel. Loosen the cable gripper and allow the cable to pass through it. Arrange the
conductors so that the earth conductor is the last to detach from its terminal if the cable goes
into a state of faulty traction. Connect the phase
phasephase
phase conductors to the terminals marked “L1”
“L1”“L1”
“L1” and
“L2”
“L2”“L2”
“L2”, connecting the neutral
neutral neutral
neutral conductor to the terminal marked "N"
"N""N"
"N" and the earth
earthearth
earth conductor to
the terminal marked with the symbol according to the following lay-out:
(this electrical connection lay-out is located near the power supply terminal board ). Tighten the
cable gripper and re-fit the rear side-panel of the appliance.
The appliance must be connected to an equipotential system
equipotential systemequipotential system
equipotential system whose efficiency must first be
checked according to current legal regulations.
This connection must be made between different appliances by using the appropriate terminal
marked with the symbol . The equipotential conductor must have a minimum diameter of 2,5
mm2 The equipotential terminal is at the rear of the appliance.
Safety thermal brea
Safety thermal breaSafety thermal brea
Safety thermal breaker
kerker
ker - The appliance has a manually reset safety thermal breaker. It protects
against excessive dangerous over-temperatures which could be accidentally generated inside the
appliance. This device is located on the back of the oven.
5.
5. 5.
5. Use instructions (for
Use instructions (forUse instructions (for
Use instructions (for the user)
the user)the user)
the user)
This appliance is not intended for use by persons (including children) with reduced phycal,
sensory or mental capabilities, or lack of experience and knowledge. Unless they have beengiven
supervision or instruction concerning use of appliance by a person responsible for their safety.
Children should be supervised to ensure that they do not play with the appliance.
For first use, we advise you to let the appliance to run load-free at maximum temperature for
about one hour. In this way, any unpleasant smells due to thermal insulation and residual work
grease are eliminated.
This appliance must be used solely for the purpose for which it was expressly designed, i.e.
cooking foods in the oven. Any other use is considered unsuitable.
The appliance can be used: for all oven cooking of deserts, pizzas, meat, fish, vegetables, as
well as for gratinating, and for re-conditioning cooled and frozen foods.
When placing food in the cooking compartment, leave a space of at least 40 mm between
pans in order not to over-obstruct air circulation.
 Loading...