

Eiko SCSS-1C-U, SCSS-2C-U Installation Instructions Manual

INSTALLATION INSTRUCTIONS
SCSS-1C-U & SCSS-2C-U
LED SURFACE MOUNT LUMINAIRE
PRECAUTION:
Before beginning installation or service, disconnect the power by turning off the circuit breaker. Turning the
power off by using the light switch is not sufficient to prevent electrical shock. This light is for outdoor use and
should not be used in areas of limited ventilation or high ambient temperature. All work should be performed
by a qualified electrician. This product must be installed in accordance with the applicable installation code by
a person familiar with the construction and operation of the product and the hazards involved.
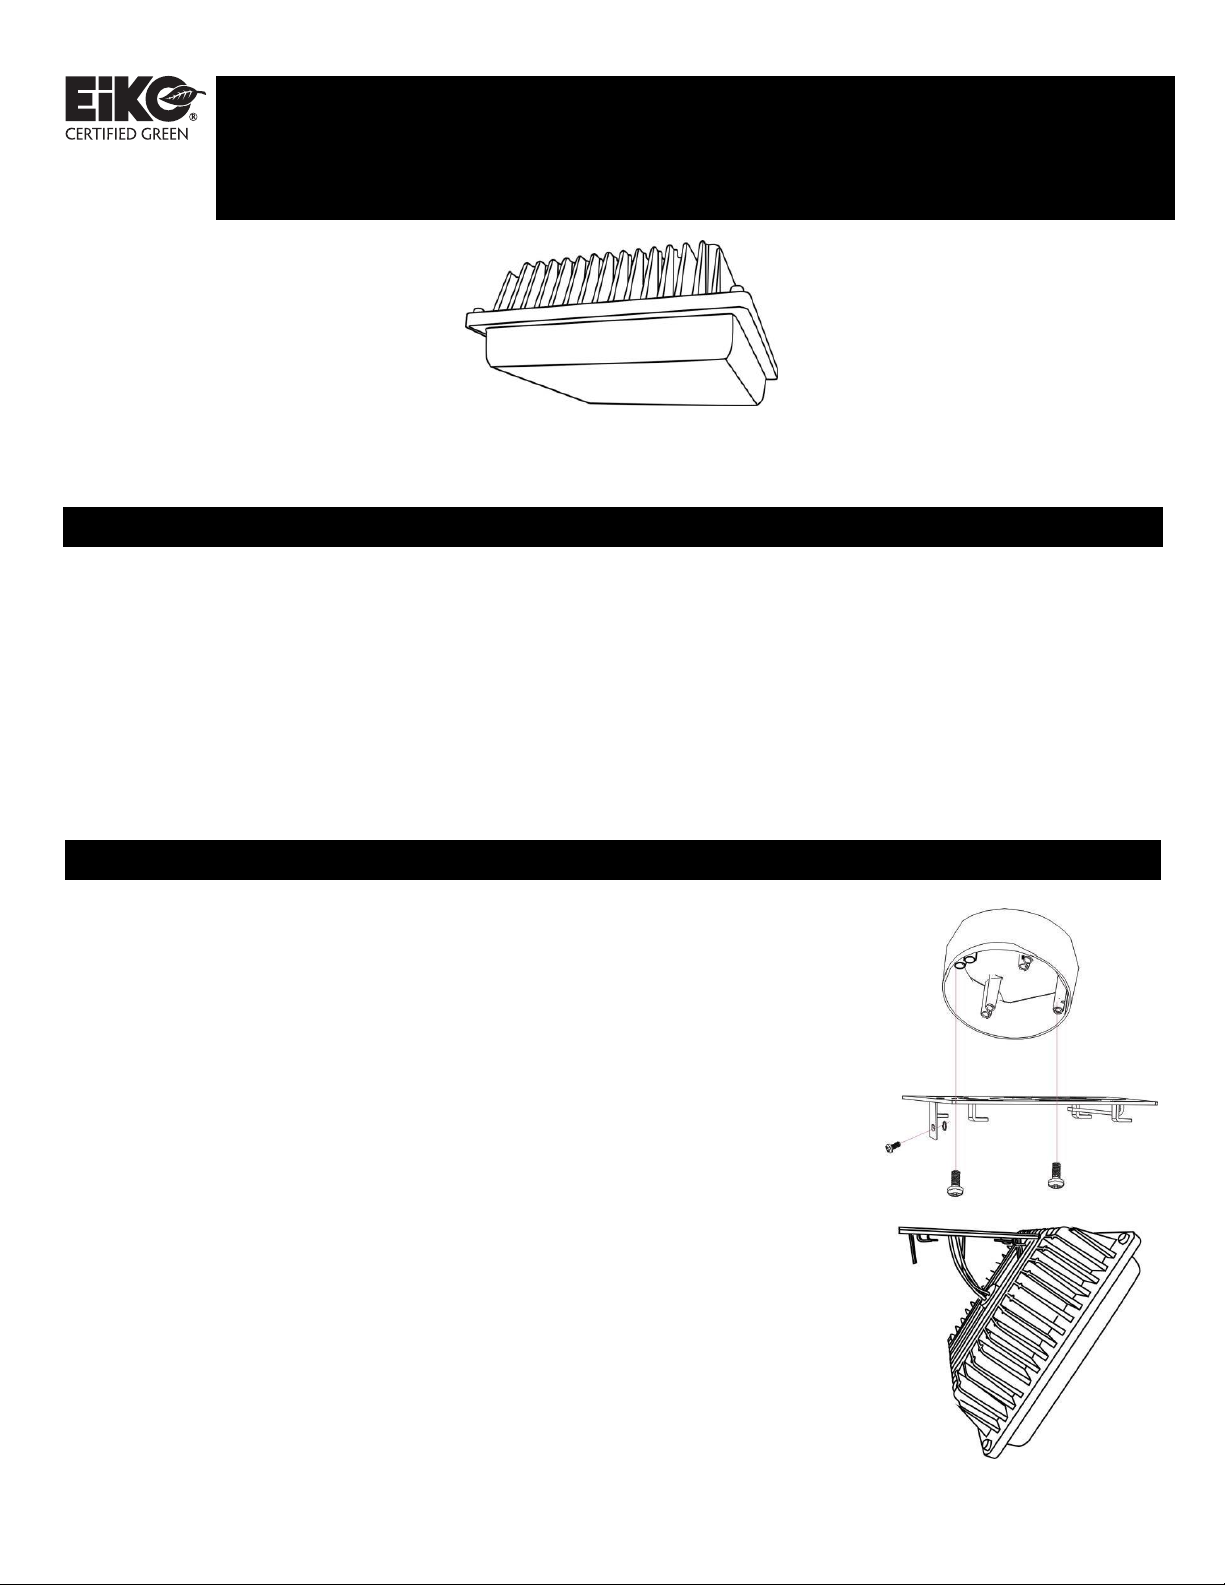
INSTALLATION:
1. Remove the junction box mounting plate from the top of
the fixture by loosening one side screw and sliding the
fixture plate out from the holding brackets on the top of
the casting.
2. Install the mounting plate to the junction box with two
screws (not provided). The bracket should be positioned
to allow the fixture to be “square” with the sides of the
canopy the fixture is mounted to.
3. Hang the fixture from support spring while wiring the
unit. Bring the fixture input wires from the top of the
fixture and connect to the power leads in the junction
box – black to black (hot), white to white (neutral), and
green to green (ground).
4. Connect the main housing to the junction box bracket.
Hold in place while reinstalling one side locking screw.
5. Turn on the power. The fixture will come to full output
in several seconds.
NOTE: Do not remove the bottom lens or touch the LED optics.
All LEDs are preinstalled and ready to operate.
052015
INSTRUCCIONES DE INSTALACIÓN
INSTALACIÓN:
1. Remueva la placa de montaje de la caja de conexión de la parte superior de la
luminaria aflojando un tornillo lateral y corriendo la
placa de la luminaria de los ganchos de sujeción en la parte superior de la
pieza.
2 Instale la placa de montaje en la caja de conexiones con dos
tornillos (no provistos). El soporte debe estar posicionado
para permitir que la luminaria sea un «cuadrado» con los lados del
toldo donde la luminaria está instalada.
NOTA: No quite los lentes inferiores o toque los ópticos LED.
Todos los LED son preinstalado y listos para funcionar.
052015
SCSS-1C-U & SCSS-2C-U
LUMINARIA DE MONTAJE DE SUPERFICIE TIPO LED
PRECAUCIONES
Antes de comenzar la instalación o servicio, desconecte la energía apagando el interruptor eléctrico general.
Apagar el interruptor de luz no es suficiente para prevenir un choque eléctrico. Este reflector es para uso
exterior y no debe ser usado en áreas con ventilación limitada o una temperatura ambiente muy alta Todo el
trabajo debe ser realizado por un electricista cualificado. Este producto debe ser instalado de acuerdo con el
código de instalación aplicable por una persona familiarizada con la construcción y operación del producto y
los riesgos involucrados.
ADVERTENCIA
Asegúrese de que la energía eléctrica esté apagada antes de comenzar la instalación o el mantenimiento.
Todo el cableado debe ser hecho por un electricista cualificado.
3. Cuelgue la luminaria de un soporte mientras conecta la
unidad. Traiga los cables de entrada de la luminaria desde la parte
superior de la misma y conecte los cables de energía en la caja
de conexión - negro con negro (fase), blanco con blanco (neutro) y
verde con verde (tierra).
4. Conecte la armazón principal al soporte de la caja de conexiones.
Manténgalo en su lugar mientras reinstala el tornillo de seguridad.
5. Encienda la energí
pocos segundos.
a. La luminaria encenderá completo en
 Loading...