

Page 1
Operating Guide for
Eiki 16mm Projector
SETTING UP
Open the latch on the front of the projector to remove the
side cover. Raise both REEL ARMS (2 & 13) until they
click. Make sure the FUNCTION LEVER (16) is in the
STOP position, then connect the AC power cord into a
standard wall outlet. (DO NOT REMOVE THE GROUND
PLUG!) A green lamp located beneath the lens will light up.
Before you thread the film, you can pre-focus and adjust the
size of your picture by turning the function lever to the first
forward lamp position. Move the projector back from the
screen to enlarge the picture and closer to the screen to
make the picture smaller. Raise and lower the picture by
using the black ELEVATING KNOB (12) on the front of the
projector. When the picture is correctly sized and
positioned, adjust the FOCUS (5) knob until the edge of the
light is sharp. Turn the FUNCTION LEVER (16) to stop.
Place the film to be shown on the SUPPLY REEL ARM (2).
It should feed off in a clockwise direction; the leader of the
film will usually be green. Place a take up reel on the other
reel arm making sure its the same size or larger than the
supply wheel.
Lock down both reels by pushing down the small ARM
LOCK BUTTONS (1 & 14) on the reel arms.
THREADING
Insert the leader of the film into the FILM TRIMMER (11).
Press down firmly on the raised end to cut the film leader to
the proper shape. Push the SELF-THREADING
CONTROL (10) into the self-thread position, then turn the
FUNCTION LEVER (16) clockwise to the first forward
position. Insert the lead end of the film into the film insert
guide where the projector should pull the film in and thread
it automatically. When enough film has come off the last
roller to attach it to the take up reel, turn the FUNCTION
LEVER (16) off.
Gently tug the end of the film against the last roller to
restore the self-threading mechanism to its normal
operating position.
You can also thread the film manually using the diagram on
the reverse side of this operating guide.
16
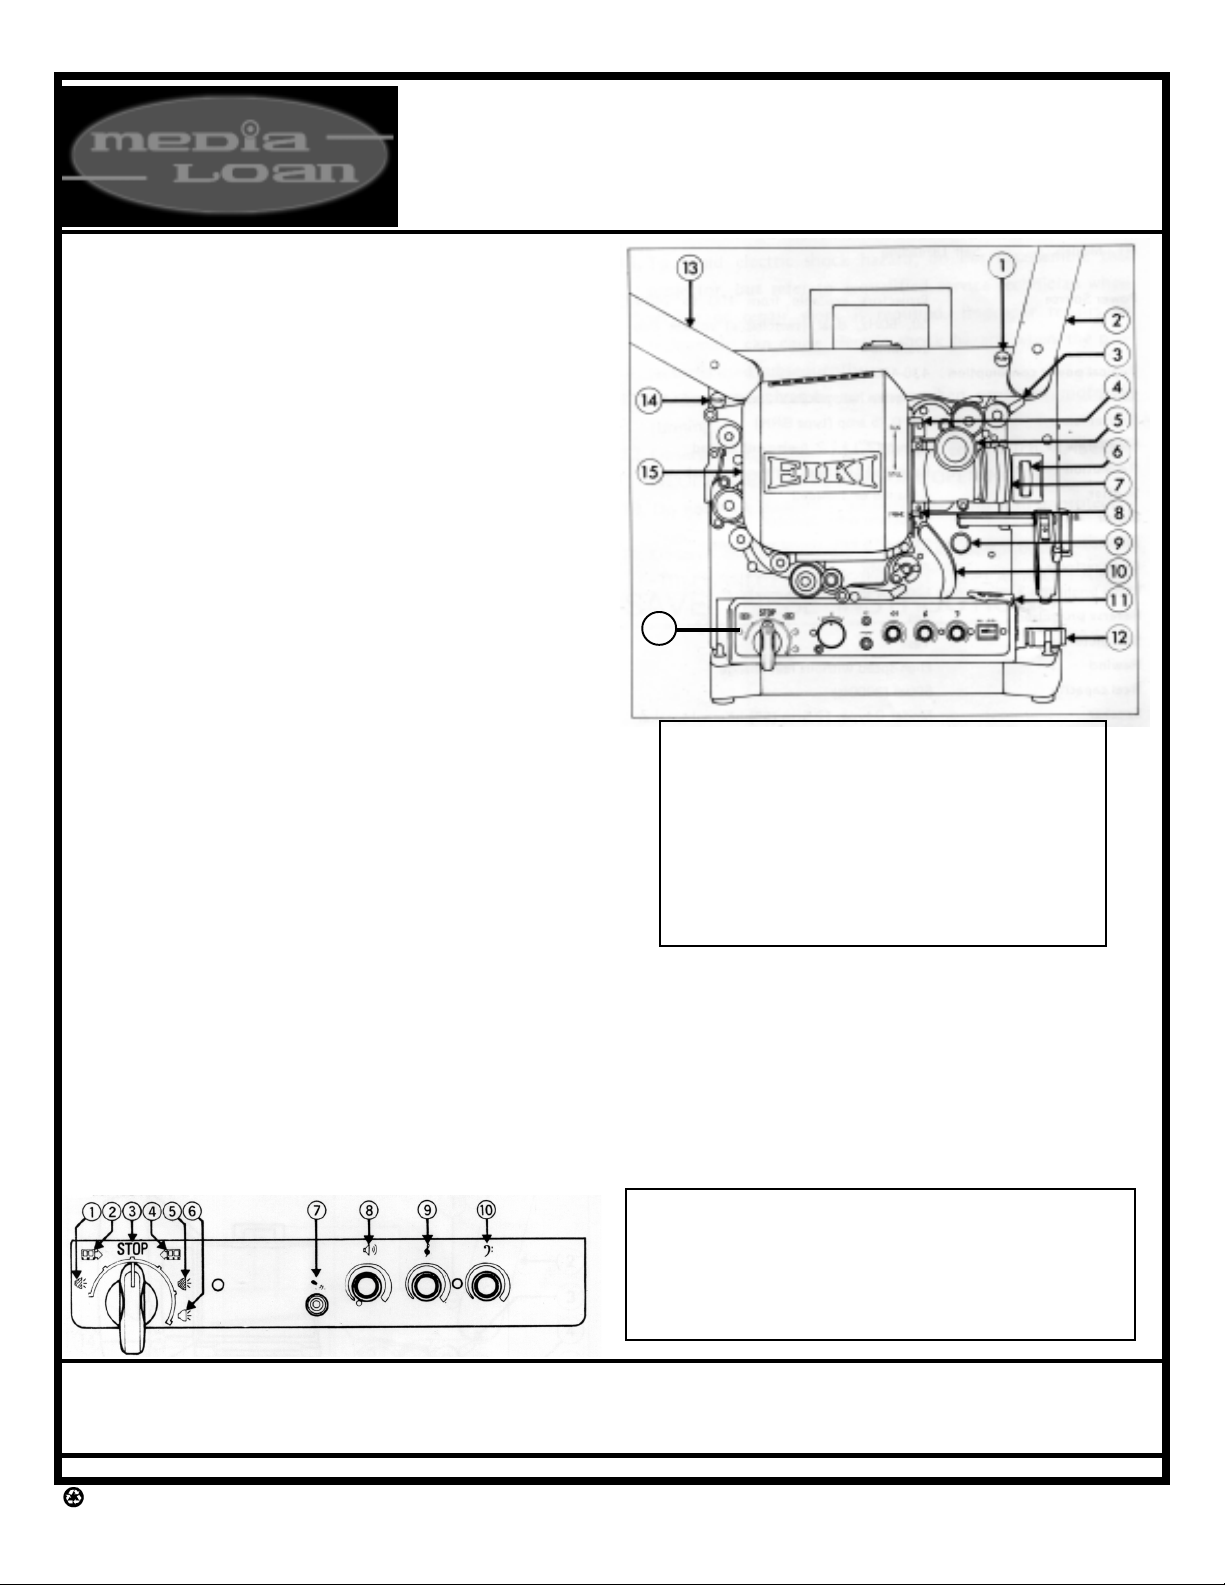
PARTS OF THE PROJECTOR
1. Arm lock button 9. Light
2. Supply reel arm 10. Self-threading control
3. Rewind/operate lever 11. Film trimmer
4. Still picture clutch 12. Elevating knob
5. Focus knob 13. Take-up reel arm
6. Inching knob 14. Arm lock button
7. Lens 15. Lamp housing
8. Framing lever 16. Function lever
SHOWING THE FILM
When you've finished loading the film, turn the FUNCTION
LEVER (see diagram below) clockwise to the first lamp
position (the second lamp position is used only if you need
a brighter image). Focus and frame using the controls
near the lens as detailed under 'Setting Up.' Turn on the
volume and adjust the treble and bass (9 & 10 on Function
Lever Panel diagram) for tone. An external speaker may
also be plugged into the front of the projector.
FUNCTION LEVER PANEL
1. Lamp low (reverse) 6. Lamp high (forward)
2. Reverse 7. MIC input
3. Stop 8. Volume control
4. Forward 9. Treble control
5. Lamp low (forward) 10. Bass control
Media Loan The Library Group (360) 867-6253
The Evergreen State College Olympia, WA 98505
http://www.evergreen.edu/media
Recycled & Recyclable
Eiki16mmProjector/11/11/02lc
Page 2
STILL FRAME AND REVERSE PROJECTION
To still frame the picture, depress the STILL PICTURE
CLUTCH (4) lever. The image will be very dark in still
frame. The lever must be fully depressed or film frames
may get burned. If the shutter is blocking the picture,
turn the INCHING KNOB (6) in either direction until the
image is no longer blocked.
For reverse projection, simply turn the FUNCTION
LEVER (16) counterclockwise to the lamp position.
REWINDING
To rewind, wait until the film has run all the way through
the projector and attach the loose end to the supply reel.
Leaving the FUNCTION LEVER (16) in STOP, move the
REWIND/OPERATE LEVER (3) down to the REWIND
position. If this lever is pressed down when film is
threaded through the projector, the film will tear. (To
rewind when the film is threaded, turn the FUNCTION
KNOB (16) to REVERSE as explained under
'Reverse Projection.')
After the film is rewound, put the REWIND LEVER (3)
back up to its normal position to stop the motor.
After removing both reels from the arms, push the ARM
LOCKING BUTTONS (1 & 14) and lower the arms.
Turn off the volume control switch. Replace the front
cover and the plastic cover. The plastic cover should be
used to carry the take-up reel and the spare lamps.
CHANGING LAMPS
The Eiki projector has two lamps: a PROJECTION
LAMP and an EXCITER LAMP, which picks up the
optical audio track on the film.
To change either lamp, first disconnect the projector
from the power source and pull out on the top edge of
the LAMP HOUSING to remove it.
To change the PROJECTION LAMP, first pull the black
HEAT SHIELD away from the projector. Then pull the
wire release lever located above the lamp toward you.
The lamp may pop out, so be prepared to catch it.
Make sure the replacement lamp snaps into place;
proper seating is essential.
To change the EXCITER LAMP, pull out on the black
EXCITER LAMP
COVER. Push in on
the lamp and turn it
counterclockwise to
remove it. Insert the
new lamp with the
notch on the base
flange in the upper
right position. Turn it
clockwise, clean
fingerprints from the
lamp, then replace
the covers.
release lever
projection lamp
exciter lamp
exciter lamp cover
TROUBLESHOOTING
No Power
- Check power cord connection in wall outlet.
- Check outlet for power.
Motor Runs but No Projection Light
- Replace projection lamp.
Motor and Lamp Operate, but Film Does Not Run
- Raise Still Picture Clutch.
No Sound
- Turn volume switch on and increase volume.
- Check speaker connection if external speaker
is being used.
- Replace exciter lamp if it does not light.
Poor Sound
- Check the lower film loop - rethread
if necessary.
- Film may be defective, use new film
if possible.
Poor Picture
- Check loops, rethread if necessary.
- Clean projector lens with lens tissue.
- Refocus lens.
- Film may be defective.
If these simple adjustments do not correct the problem,
return the projector to Media Loan.
Please note: Media Loan is not responsible for film
damage. If your projector is not running properly and
the above adjustments do not help, remove your film
manually and ask someone in Media Loan for help.
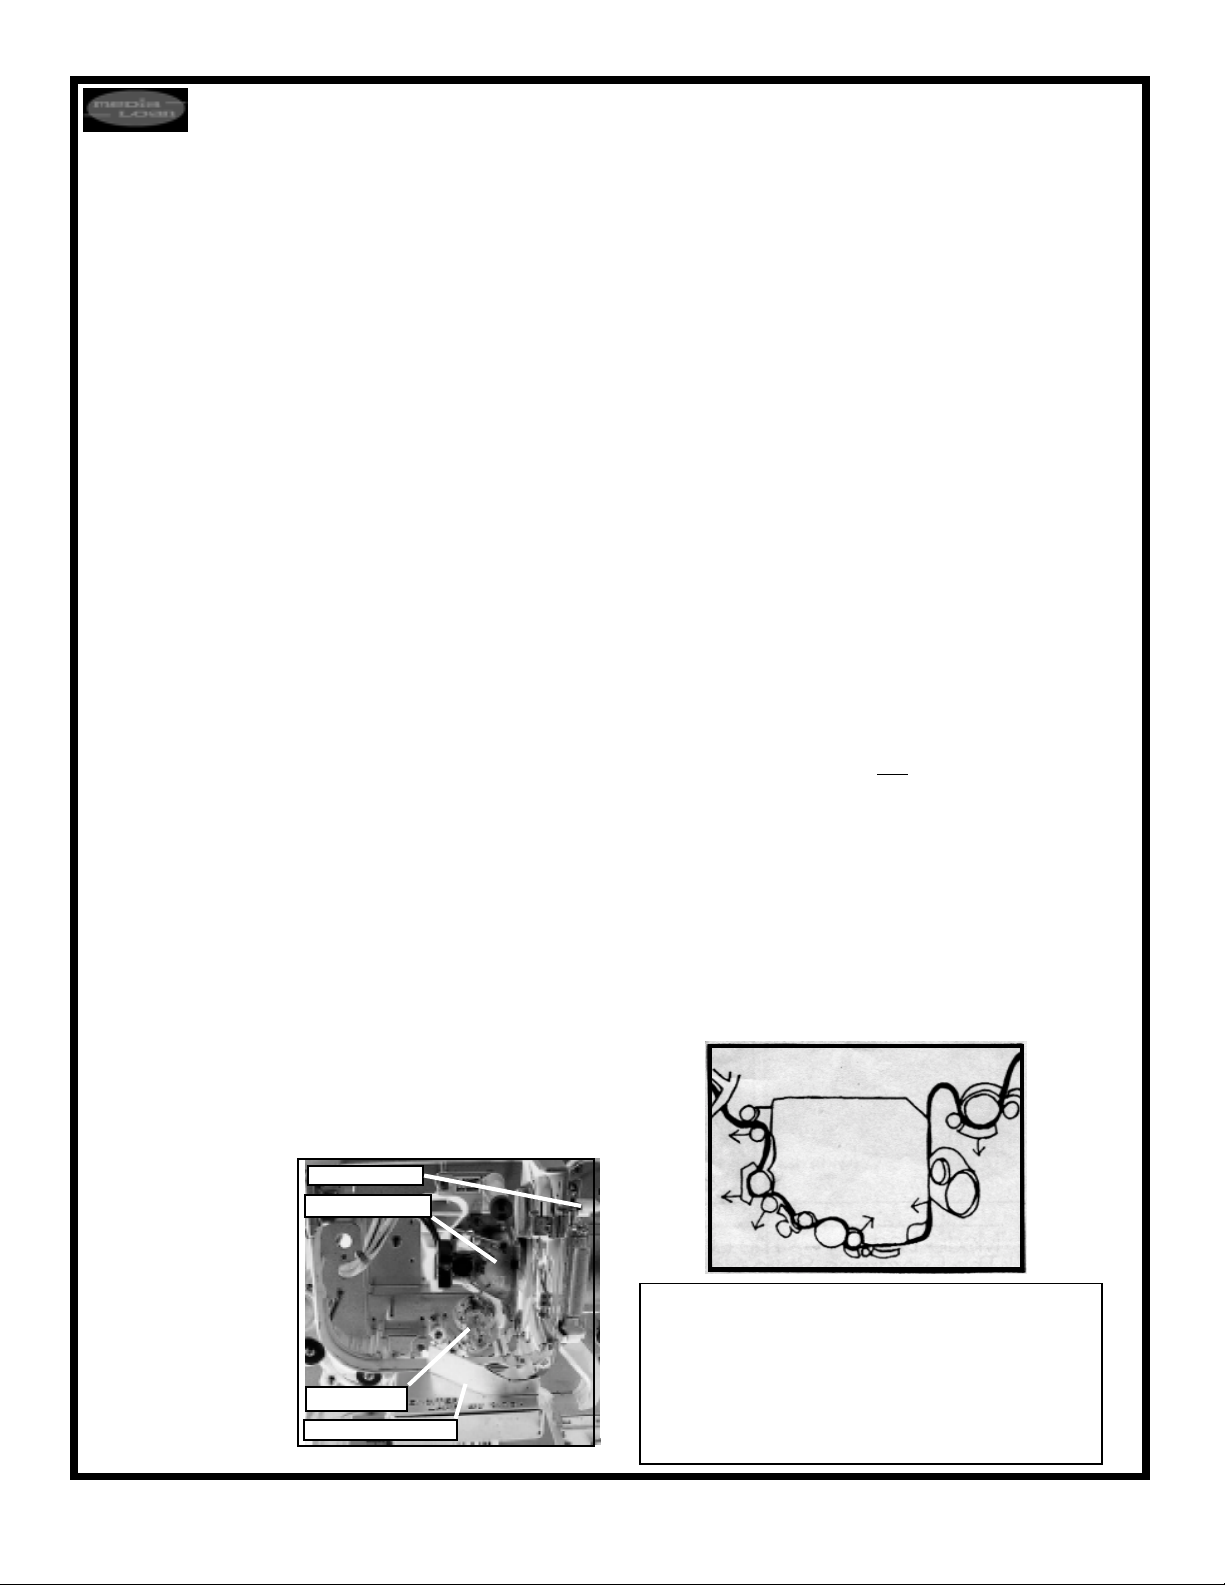
MANUAL UNTHREADING OF FILM
1. Unplug projector
2. Pull lens out
3. Don't push operate/rewind switch
4. Push controls in direction of arrows
5. Manually thread the film from the supply reel side to
the take up reel as pictured below
All TESC films and Washington State Film Library
films are housed in Sound and Image Library, on
the second floor of the Library building, and are
available to Evergreeners and state agencies.
A projection room with equipment already set up
and ready for viewing is located in the Media
Services area, Library 1314. Call ext. 6270 for info.
 Loading...