

Eibach MULTI-PRO-R2 Installation Instructions Manual

MULTI-PRO-R2 | INSTALLATION INSTRUCTIONS
Eibach Springs, Inc. | 256 Mariah Circle | Corona | California 92879-1751 | USA
T +1 951-256-8300
www.eibach.com
1997-01 Acura Integra, Type-R, DC2
PART NUMBER 4020.713
PARTS & HARDWARE LIST
Part Number Description Qty Part Number Description Qty
A 4017.8300 DAMPER ASSY FRONT 2 D PDK4.TOOL 4mm ADJUSTMENT TOOL 1
B 4020.8400 DAMPER ASSY REAR 2 E PDK6.TOOL 6mm ADJUSTMENT TOOL 1
C UB0120 RESERVOIR CLAMP 2 F PDR.TOOL REBOUND TOOL 1
PARTS IDENTIFIER
F
D
NOTES: Read All Instructions Before Beginning Installation
Installation of a Eibach Multi-Pro Coil-Over set should only be performed by a qualified mechanic experienced in the
installation and removal of suspension components.
Use of a hoist is highly recommended and will substantially reduce installation time.
Never work on or under a vehicle unless it is properly supported by safety stands and wheels a re blocked.
Never use impact wrenches or guns to install or remove shoc k absorber piston components, shafts and piston rod
nuts.
After installation, it is always important to inspect and adjust the following if necessary:
- Wheel alignment such as camber, caster & toe.
- Tire and/or wheel fender clearance.
- Brake line clearance and attachments.
- Brake anti-locking and anti-skid system sensors.
Alignment: After installation, you will need a full vehicle alignment to ensure proper tire wear and performance.
Height Adjustment – Should be performed with the wheels completely off the ground and with the springs fully
unloaded.
D3157 - Page 1
PERFORMANCE SUSPENSION AUTOMOTIVE OEM/OES HI-TECH INDUSTRIAL
MULTI-PRO-R2 | INSTALLATION INSTRUCTIONS
Eibach Springs, Inc. | 256 Mariah Circle | Corona | California 92879-1751 | USA
T +1 951-256-8300
www.eibach.com
1997-01 Acura Integra, Type-R, DC2
PART NUMBER 4020.713
FRONT SUSPENSION REMOVAL
1. Raise the car off the ground and make sure it’s
properly supported with jack stands. Note: Never
work on or underneath a car that is not properly
supported with safety stands.
2. Remove the wheels from the vehicle.
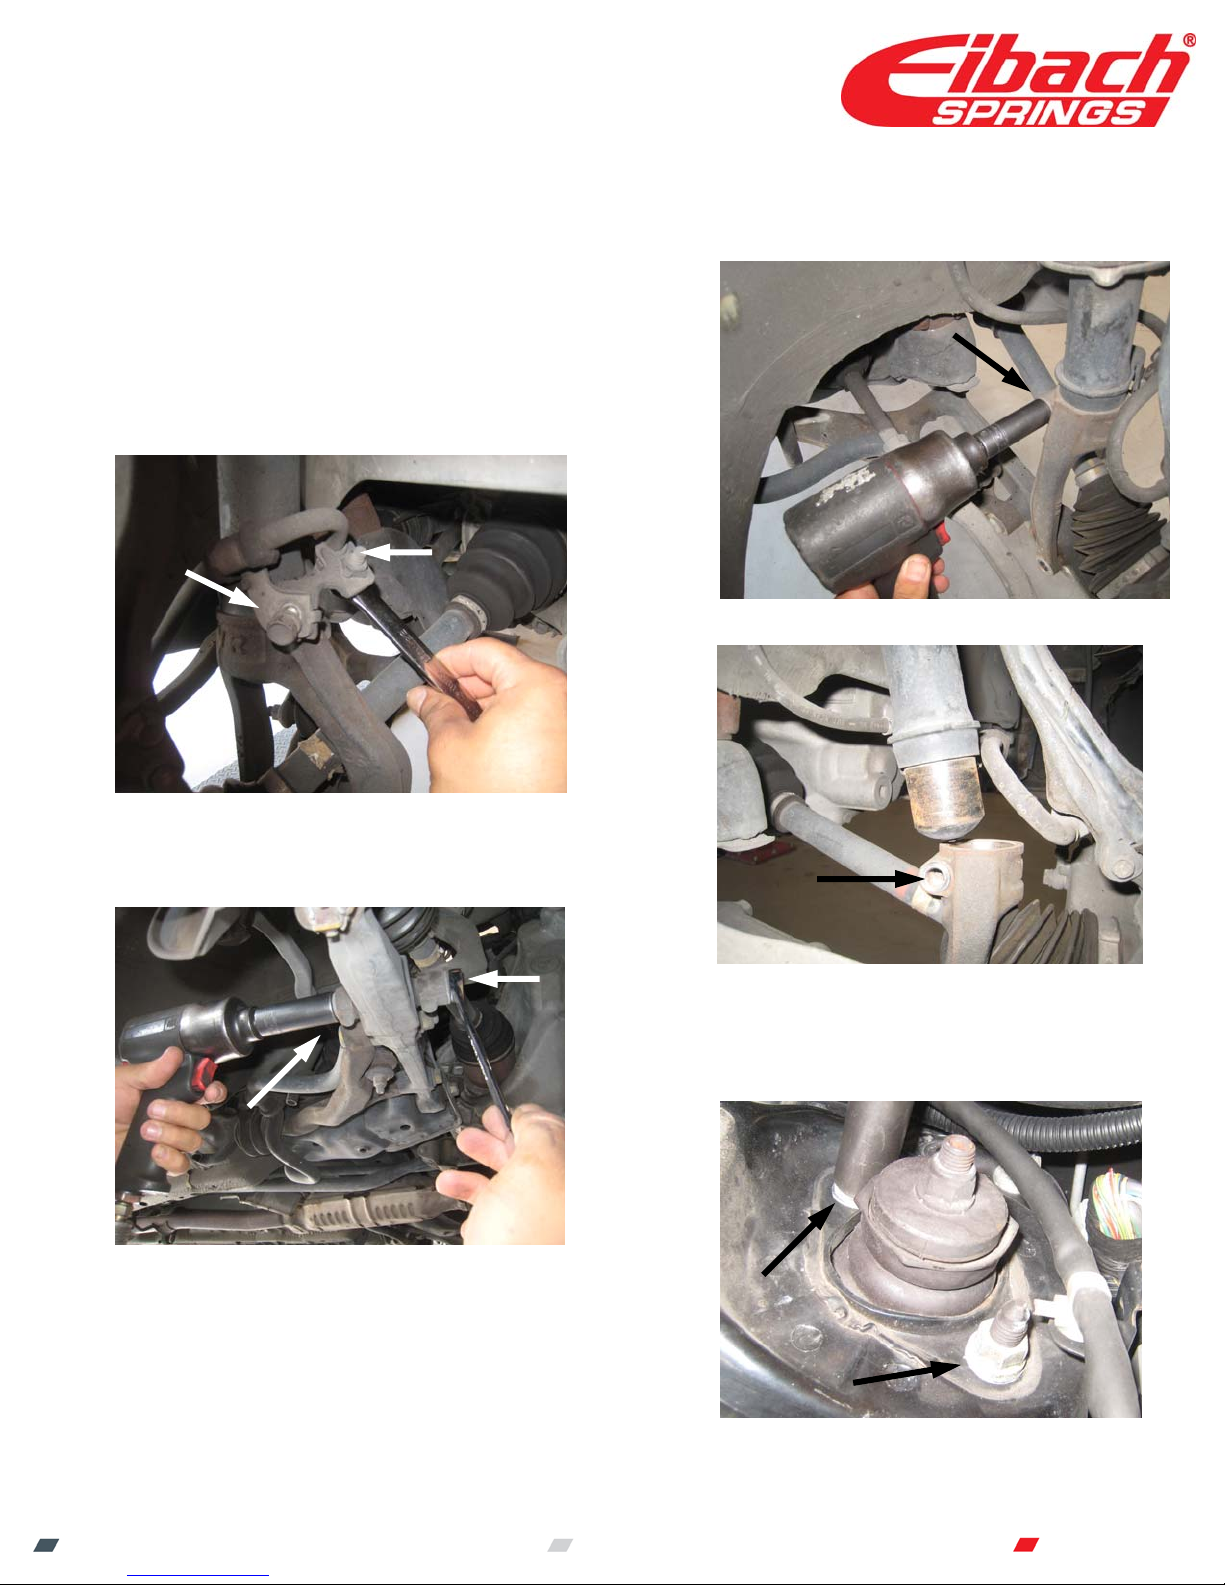
3. Loosen and remove the two screws that secure the
brake line to the side of the strut. (See Photo 1)
Photo 1
5. Loosen and remove the bolt that secures the fork to
the OE strut, then, lower the fork down as shown.
(See Photos 3 & 4)
Photo 3
Photo 4
4. Loosen and remove the bolt and nut that secures
the fork to the lower control arm. (See Photo 2)
PERFORMANCE SUSPENSION AUTOMOTIVE OEM/OES HI-TECH INDUSTRIAL
Photo 2
D3157 - Page 2
Photo 5
MULTI-PRO-R2 | INSTALLATION INSTRUCTIONS
Eibach Springs, Inc. | 256 Mariah Circle | Corona | California 92879-1751 | USA
T +1 951-256-8300
www.eibach.com
1997-01 Acura Integra, Type-R, DC2
PART NUMBER 4020.713
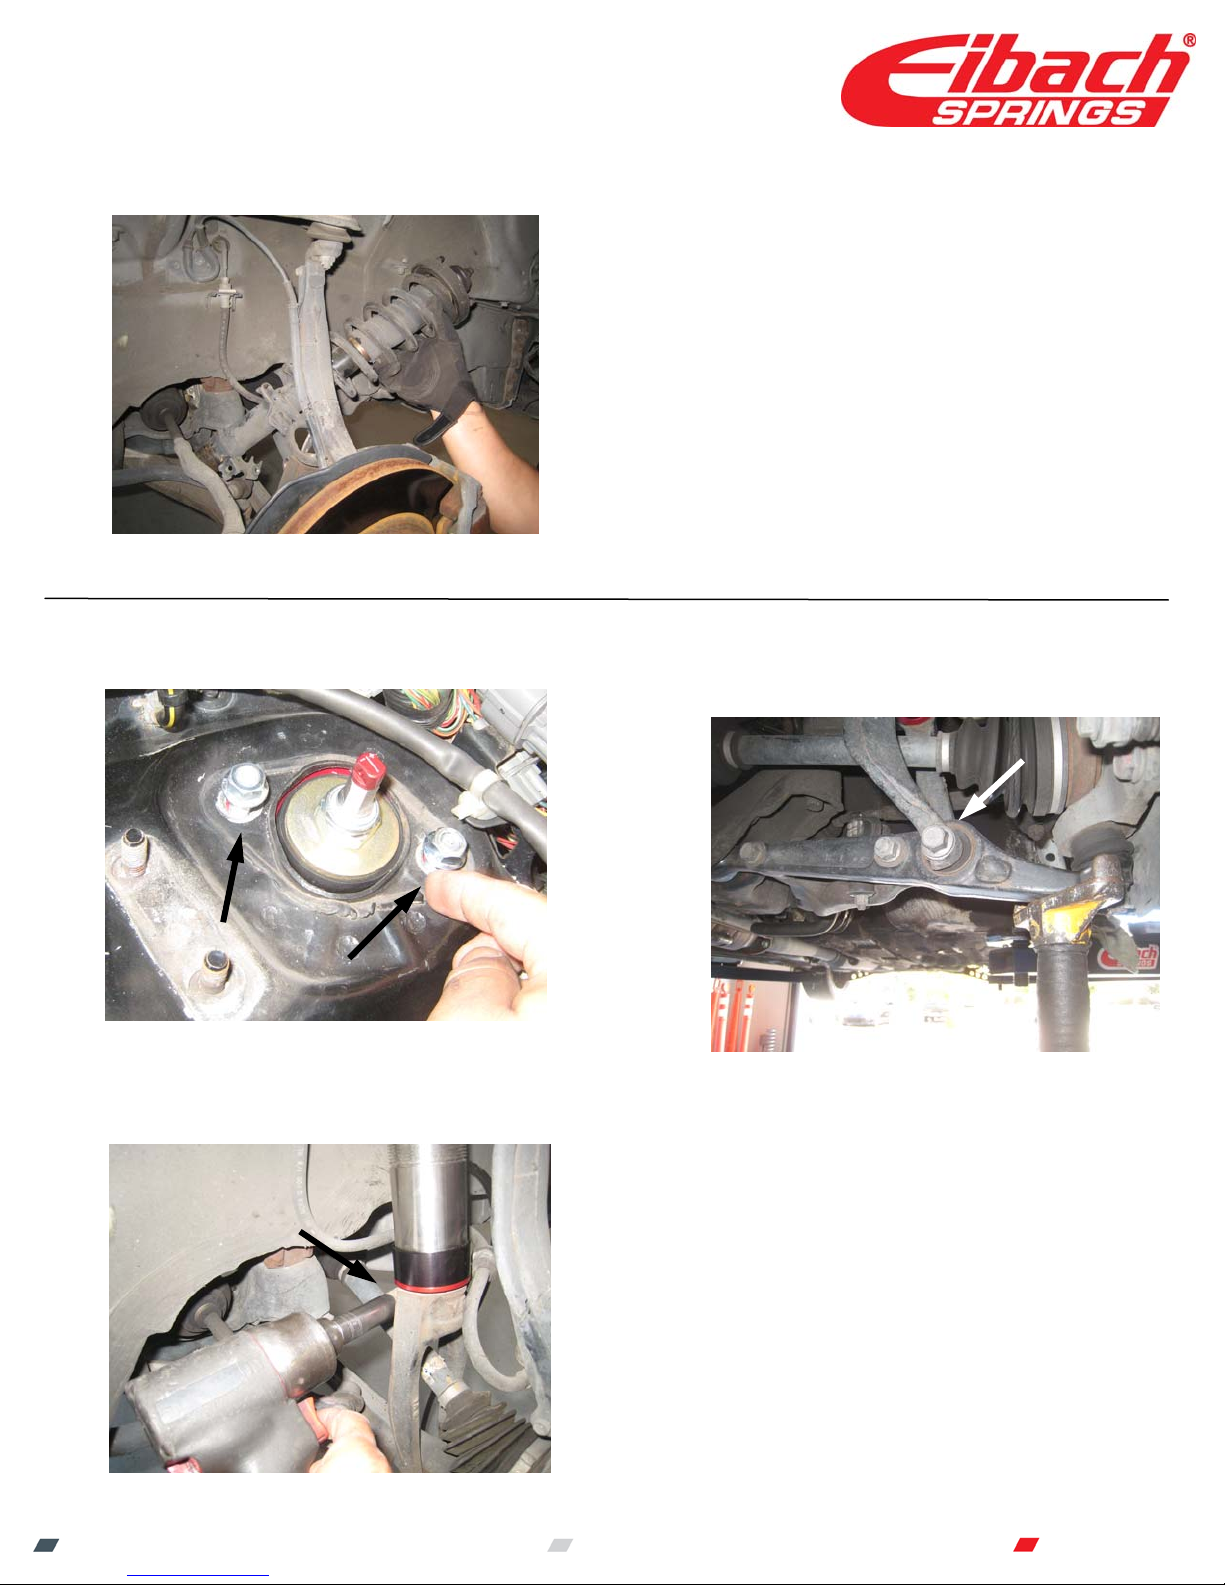
6. Loosen and remove the upper strut mount nuts,
Photo 6
then, remove the strut as shown.
(See Photos 5 & 6)
FRONT SUSPENSION INSTALLATION
1. Install the Eibach Multi Pro coilover into the vehicle
and secure it to the strut tower using the provided
hardware. (See Photo 7)
Photo 7
2. Slide the OE fork onto the bottom of the Eibach
Multi Pro coilover, and secure it with the OE screw.
(See Photo 8)
3. Secure the fork to the lower control arm using the
OE hardware removed in step 4 of the removal
process. Note: Be sure to preload the
suspension prior to tightening this bolt.
Uneven lowering and premature wear to the
control arm bushing will result if not done
properly. (See Photo 9)
Photo 9
PERFORMANCE SUSPENSION AUTOMOTIVE OEM/OES HI-TECH INDUSTRIAL
Photo 8
D3157 - Page 3
 Loading...