

Ehrgeiz Babyzoom 4 User Manual

USER MANUAL

USER MANUAL
CONTENTS
Manual released for Software Version 1.0.0.5 from 11/24/2017
This Manual is released on 12/8/2017
Introduction ......................................................... 1
Safety Instructions ............................................. 1
Delivery Contents .............................................. 3
Fixture Dimensions ............................................ 3
Installations .......................................................... 4
Installation on the floor ..................................... 4
Installation hanging ........................................... 4
Safety attachment .............................................. 4
Omega Bracket .................................................. 5
Connections ......................................................... 6
Mains & DMX .................................................... 6
DMX .................................................................. 7
Wireless DMX .................................................... 7
Operations ........................................................... 8
Menu control .................................................... 8
Menu map ........................................................ 9
Software updates ............................................ 13
DMX Modes .................................................... 13
Standard Mode ........................................... 14
Advanced Mode ........................................... 14
Easy Mode ................................................... 15
RGBW Mode ................................................ 15
Services .............................................................. 16
Trouble Shooting ............................................. 16
Maintenance ................................................... 16
Appendix............................................................... I
Specifications ..................................................... I
Exploded drawing ............................................. II
Spareparts ....................................................... III
eventCON® .................................................... IV
Colourwheel table ............................................ VI
Shutter Channel Table ..................................... VII
Special control channel .................................. VIII
Dimmer Curves ................................................ IX

Introduction Safety Instructions
1
Introduction
Thank you for your purchase and usage of the Ehrgeiz BabyZoom 4.
You have chosen a reliable product with outstanding features like the unique eventCON® connector system. The device is easy to
use and is made of high quality components.
Every Ehrgeiz Product is checked before shipping to secure you are able to receive a great product without compromise. This is not a
toy. Our ambitious aim is to get you a reliable working tool.
Safety Instructions
In General
In order to maintain the condition and to ensure a safe operation, it is important for all users to follow the safety instructions and
warning notes written in this manual.
Do not operate the fixture with missing or damaged covers, shields or any optical component.
Please consider that unauthorized modifications to the device are forbidden due to safety reasons.
If the device is operated in any way that’s not described in this manual, the product may suffer damage and the guarantee will
become void. Furthermore, misuse may lead to dangers like short-circuit, burns, electric shock, burns due to ultraviolet radiation,
lamp explosion, crash, etc.
IP67 protection rating
The fixture is protected against dust (first digit 6) and against Immersion, up to 1m depth tested for 30 minutes (second digit 7).
Prevention from electrical shock
Make sure to ground (earth) the fixture electrically. (It’s essential to connect the yellow/green conductor to earth)
Main Connection
Do not apply any AC mains power to the fixture at any other voltage than that specified.
Never let the eventCON® cable come into contact with other cables. Treat the eventCON® cable and all connections with the mains
with particular caution.
Make sure the eventCON® cable is never crimped or damaged by sharp edges.
Rigging
Check that all external covers and rigging hardware are securely fastened.
When choosing the installation-location, please make sure that the fixture is not exposed to extreme heat. There should not be any
cables lying around. You endanger your own and the safety of others.
Make sure that the area below the installation place is cordoned off when rigging, de-rigging or servicing the fixture.
If suspending from a rigging structure, fasten the fixture to a rigging clamp with an M10 bolt screwed into the threaded hole in the
center of the bracket of the fixture.
Make sure all fixtures are operated and installed by qualified personnel with the relevant national certifications.
Install as described in this manual a secondary attachment such as a safety wire that is approved by an official body.

Introduction Safety Instructions
2
Positioning:
The fixture must be positioned at least 0.2m minimum distance to illuminate objects.
Keep all inflammable materials at least 0.2m from this fixture.
Allow to place the fixture on an inflammable surface.
The maximum ambient temperature of 45°C may not be exceeded.
The exterior of this fixture can reach a very high temperature during operation. Avoid contact by persons and materials.
Maintenance:
This fixture is for professional use only. It is not for household use.
Always unplug the mains for any maintenance.
Risk of eye injury:
Do not stare directly into the light when it is switched on. Do not look at LEDs with magnifying glasses, telescopes, binoculars, or
similar optical instruments that may concentrate the light output.
Introduction Delivery Contents
3
Delivery Contents
You received your BabyZoom 4 with the following content
- BabyZoom 4 4x60W Osram LED Beamlight with 6 – 40° beam angle
- eventCON® Input cable Input cable with Neutrik XLR and Schuko merging to Eventcon
- Diffusor Screws Set of 4 Screws
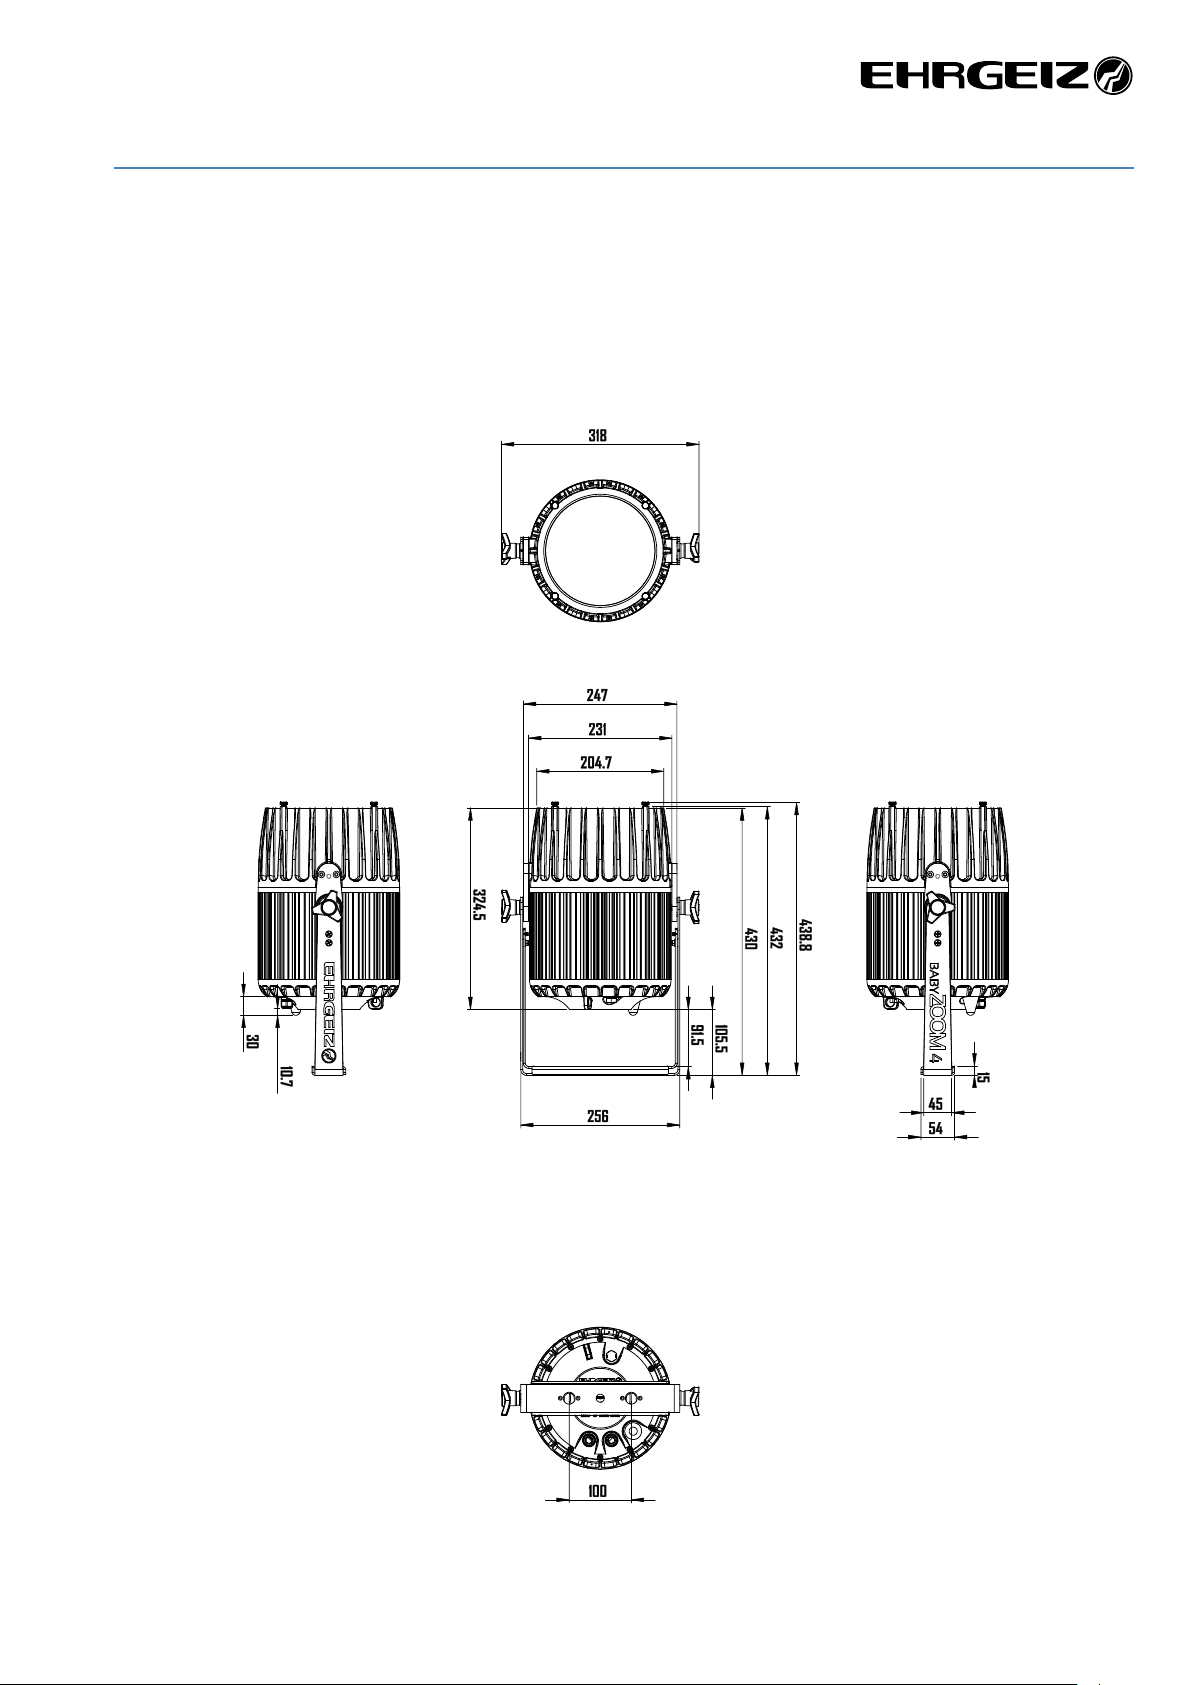
Fixture Dimensions
Dimensions in mm
Installations Installation on the floor
4
Installations
Your BabyZoom 4 can be installed in every kind of following positions. Please see the explanations and rely to the instructions for a
safe operation and secure handling.
Installation on the floor
You could place the BabyZoom 4 on the floor. Please make sure the surface is
plane and the reliability of the floor is sufficient.
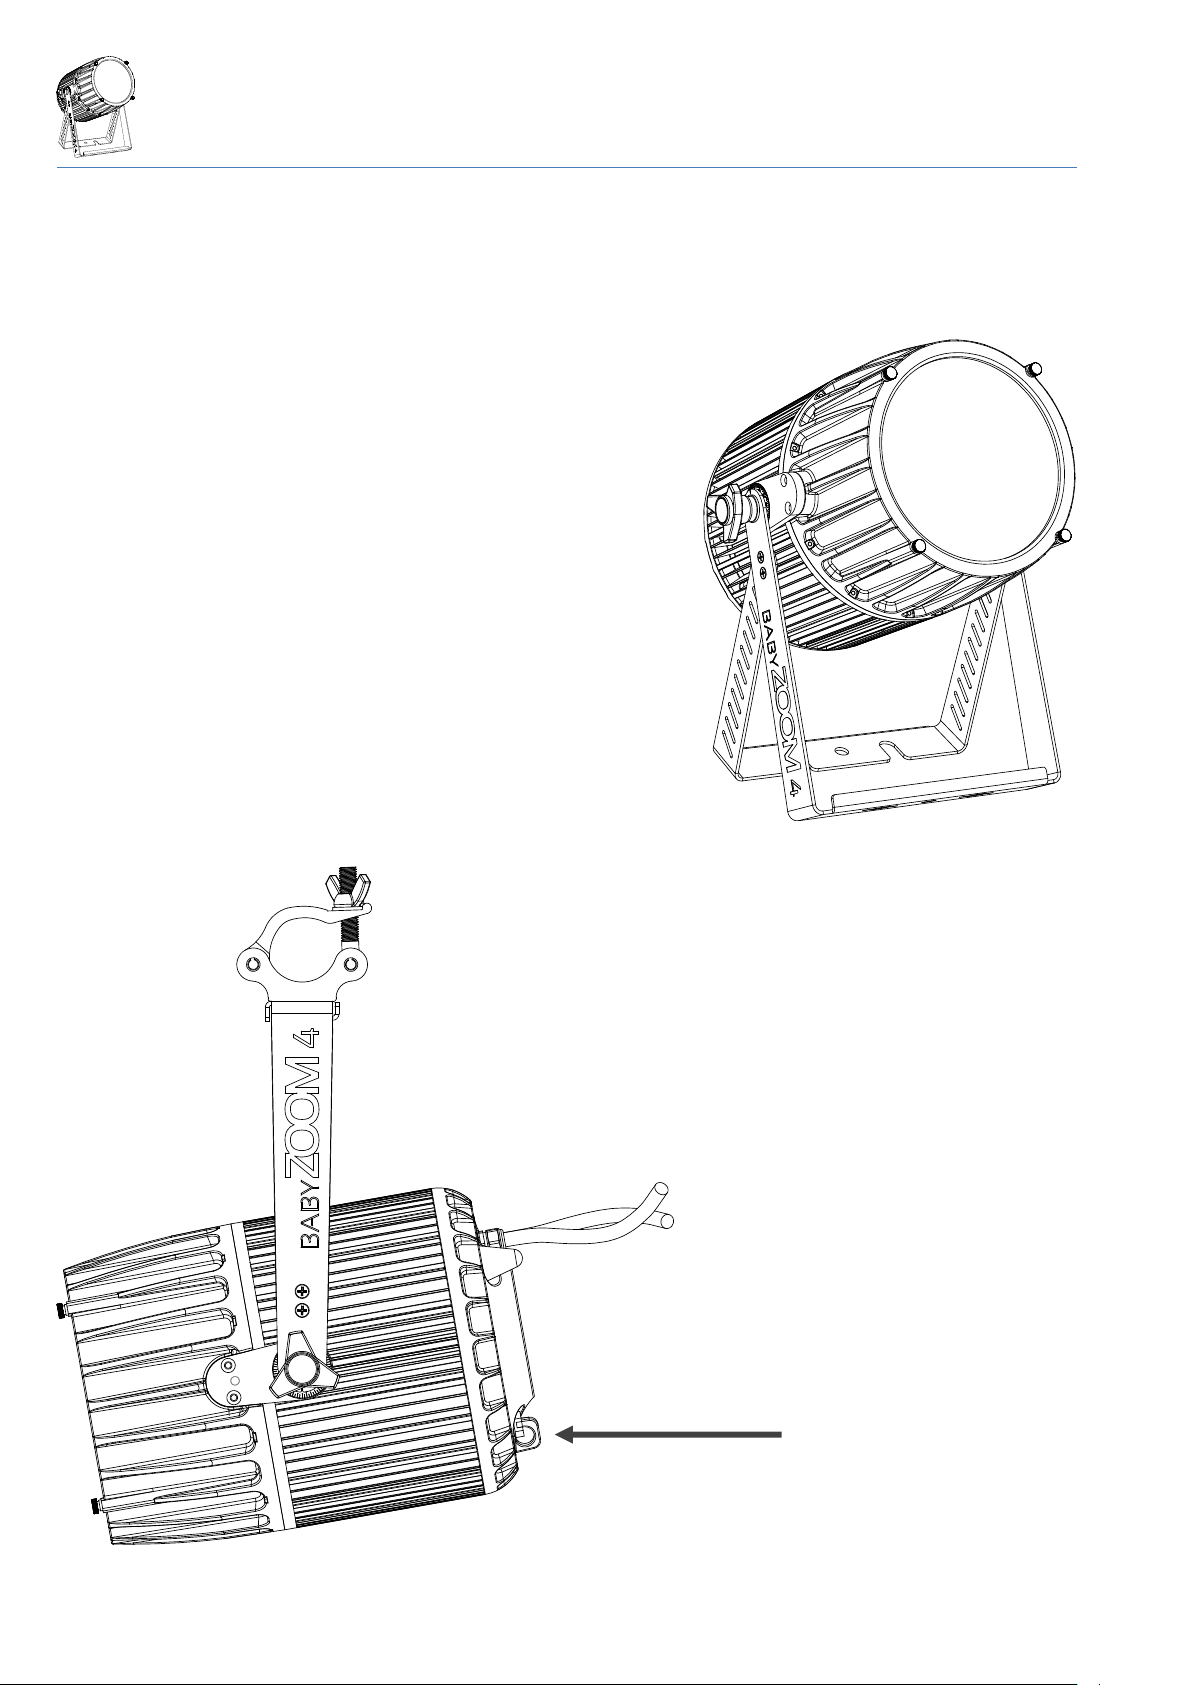
Installation hanging
You can attach the BabyZoom 4 to a Truss or Pipe facing down or to the side.
Safety attachment
Please attach the Safety rope to the dedicated
eyelet integrated into the housing.
Safety

Installations Omega Bracket
5
Omega Bracket
There are optional Omega Bracket fittings available for your BabyZoom 4. Attach them with the screws onto the suspension:
Connections Mains & DMX
6
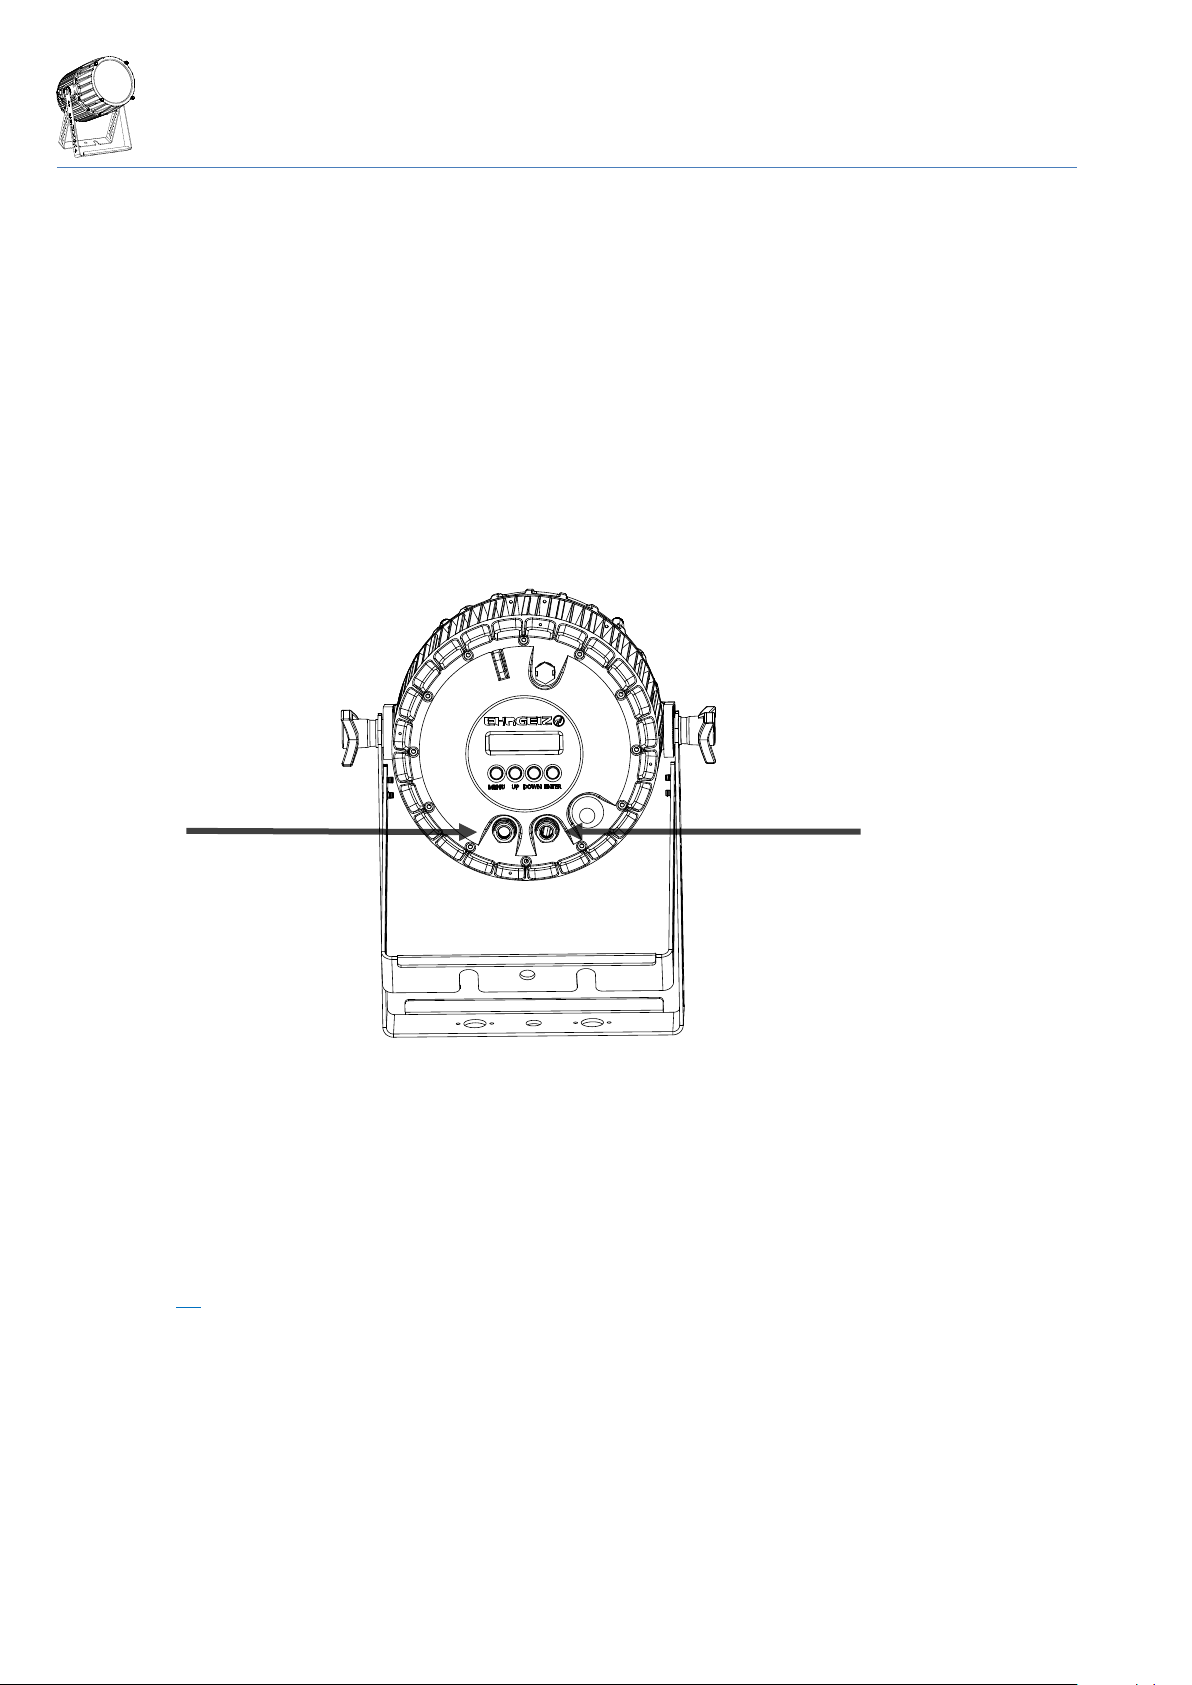
Connections
Mains & DMX
The eventCON® system is an innovative VDE certified connection system for professional use. It offers one connection for Power
supply as well as the DMX signal. You will only be in need for one cable. You are able to loop through to the next device, while the
BabyZoom 4 offers you an input and output.
The connection of the Power supply has to be done by qualified staff only. Do not connect the BabyZoom 4 if you are not able to
survey the consequences.
Do not try to connect another type of plug than an original eventCON®. Do not use any force to connect the eventCON® plug. You
could use the outlet for connecting additional devices. The internal power wiring is done with a cable cross section of 1.5mm².
The eventCON® System offers a big range of optional cables and mergers. For further information see Chapter eventCON® on
Appendix page IV
output
input
Connections DMX
7
DMX
We recommend the use of High quality XLR connectors like original NEUTRIK. Please use real DMX cable with a surge impedance of
110 Ω.
Please notice that the USITT DMX Standard does allow to use a max of 32 DMX fixtures in one line. You should terminate the signal
by a 120 Ω resistor.
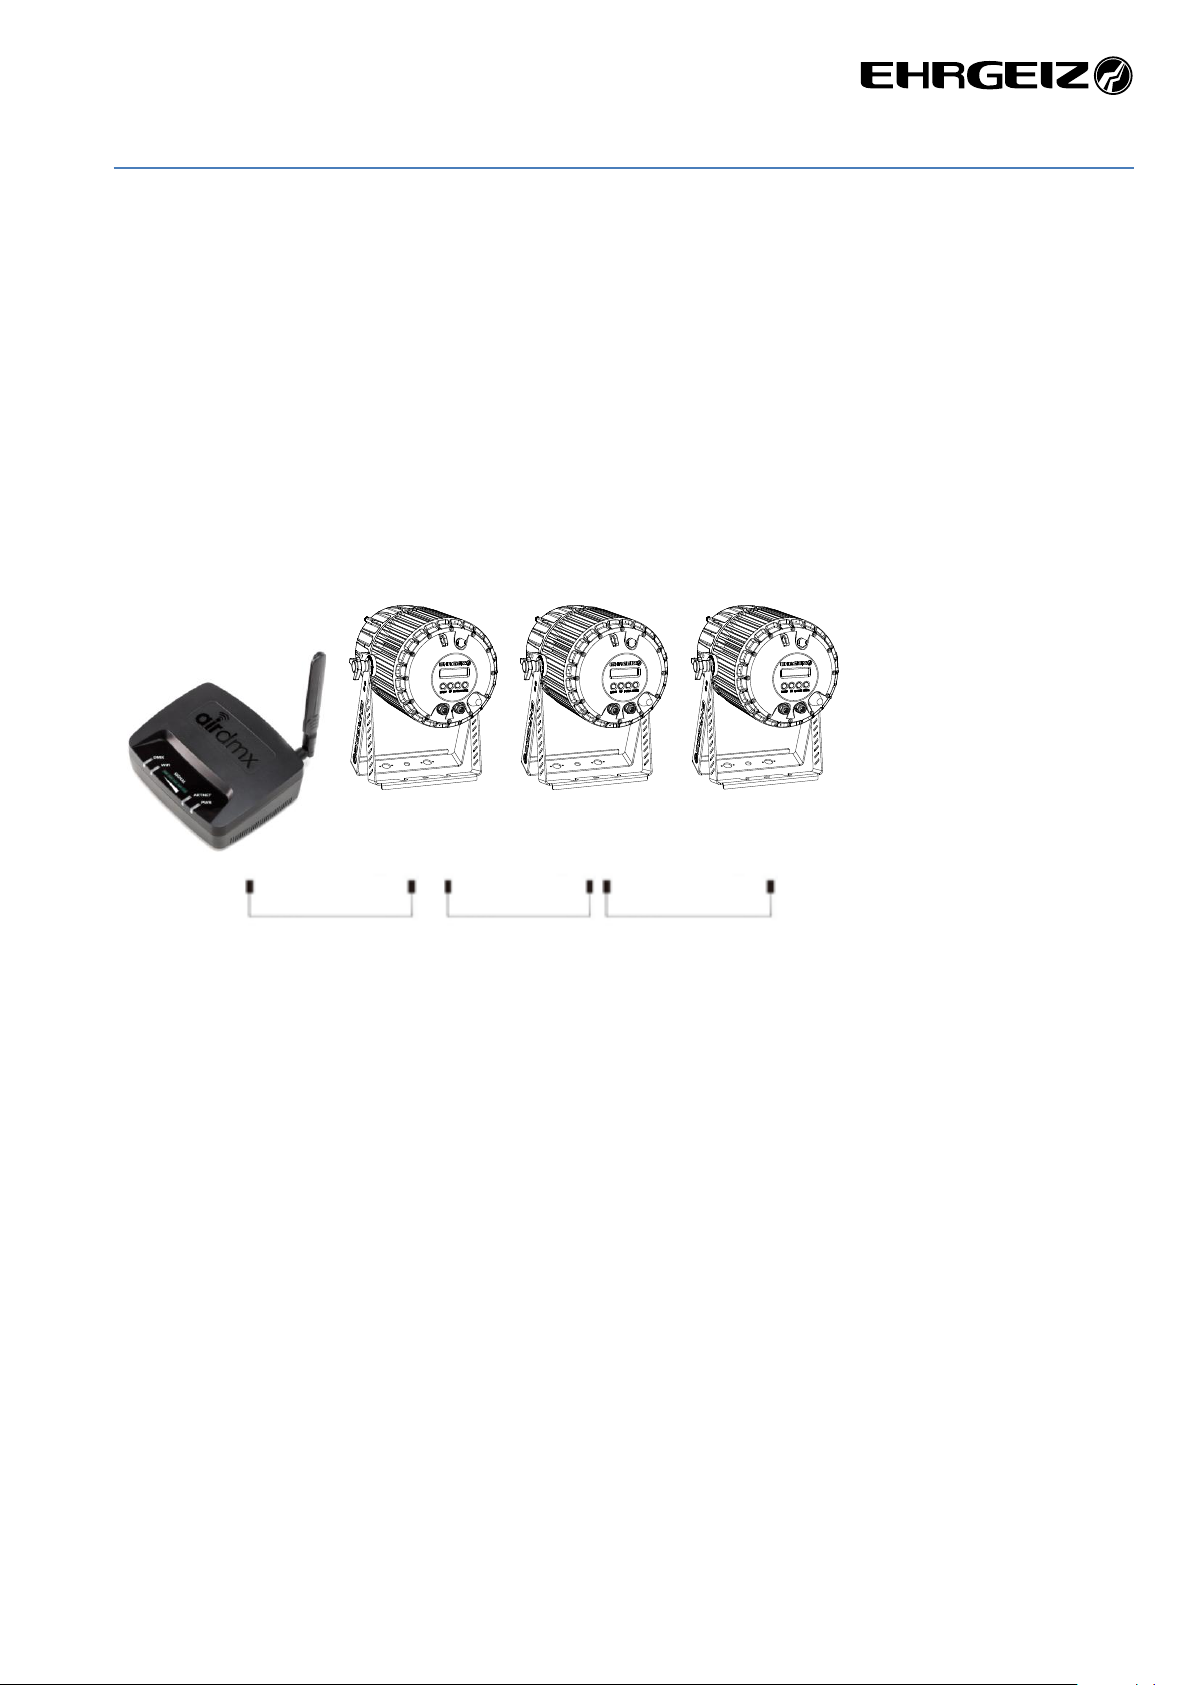
In the Standard mode the BabyZoom 4 uses 11 DMX channels.
Connect the devices and increase the value of the DMX channel by 11 from one device to another
Wireless DMX
The device is equipped with a Wireless DMX Input from Wireless Solution Made in Sweden (W-DMX ™).
To establish a connection simply use the “Link” Option in the BabyZoom 4 Menu and set your transmitter to the Link Mode.
After both devices are linked you will be able to control the device via Wireless DMX, as long as the W-DMX Mode is turned on in the
Menu.
Controller
DMX Address 1
DMX Address 12
DMX Address 23
 Loading...