

Page 1
Page 2
2eHome EH103 Quick Install Guide
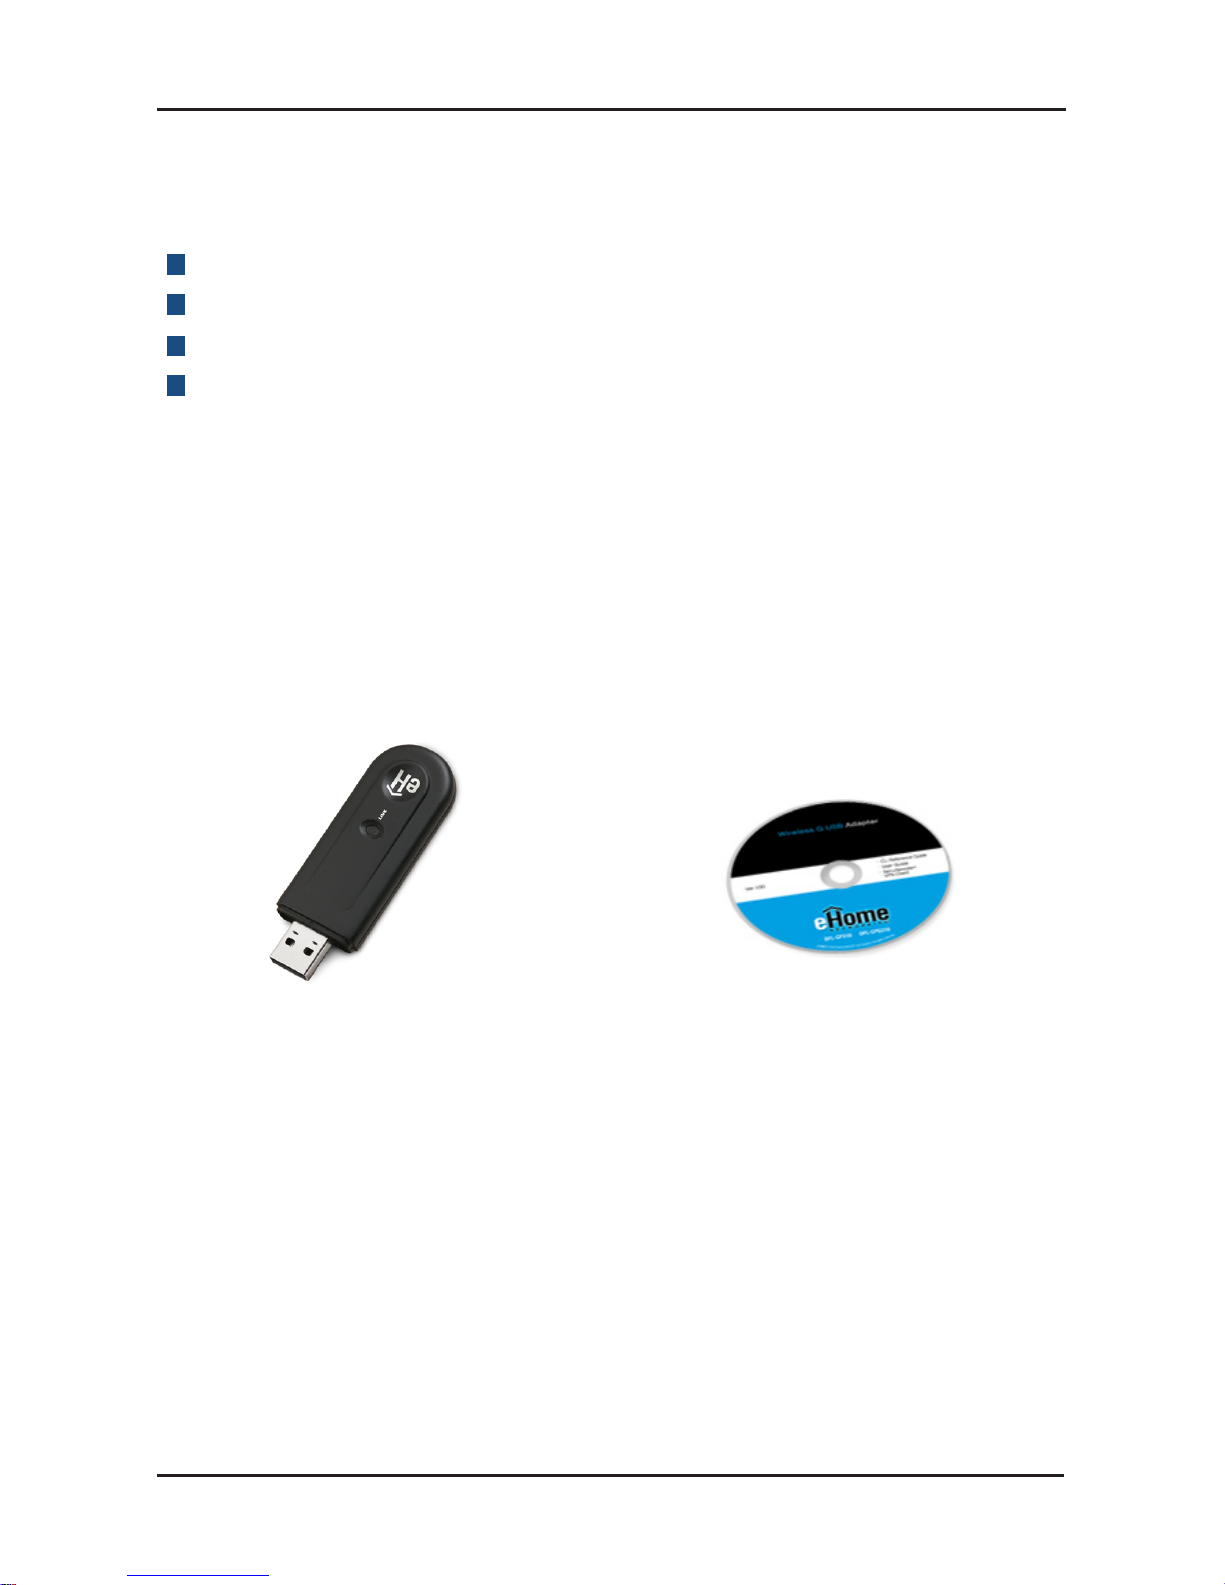
A computer or laptop with an available USB 2.0 port
Windows® 2000 or XP
At least 64MB of memory
Properly installed and working USB Controller
Package Contents
System Requirements
If any of the above items are missing, please contact your reseller.
eHome EH103
Wireless G USB 2.0 Adapter
Manual, software, and
warranty on CD
Page 3
3 eHome EH103 Quick Install Guide
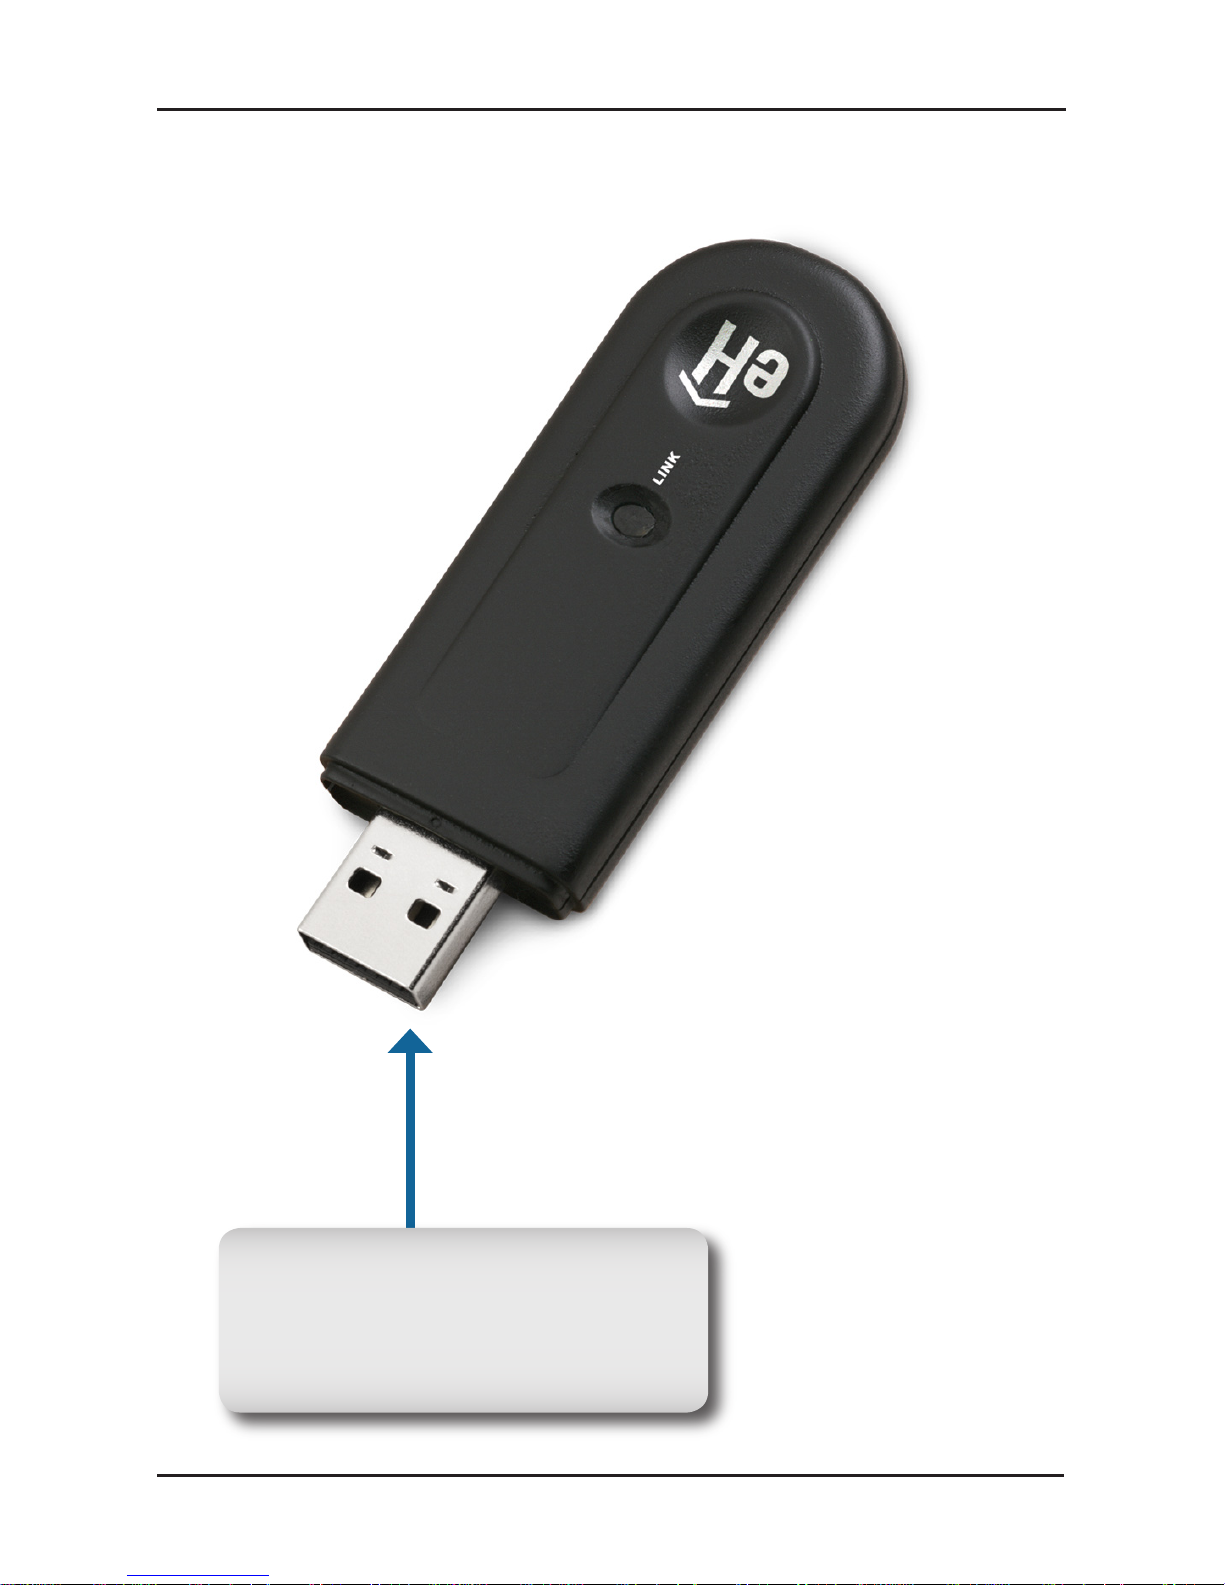
Hardware Overview
USB Port
Used to connect the EH103
to your computer.
Page 4

4eHome EH103 Quick Install Guide
The EH103 lets you access your stored data and media files using a wireless
connection from virtually anywhere within the operating range of your wireless
network. Keep in mind, however, that the number, thickness and location of
walls, ceilings, or other objects that the wireless signals must pass through,
may limit the range. Typical ranges vary depending on the types of materials
and background RF (radio frequency) noise in your home or business. The
key to maximizing wireless range is to follow these basic guidelines:
4
Keep the number of walls and ceilings between the EH103 and other
network devices to a minimum - each wall or ceiling can reduce your
EH103’s range from 3-90 feet (1-30 meters.) Position your devices so
that the number of walls or ceilings is minimized.
1
Be aware of the direct line between network devices. A wall that is 1.5
feet thick (.5 meters), at a 45-degree angle appears to be almost 3 feet (1
meter) thick. At a 2-degree angle it looks over 42 feet (14 meters) thick!
Position devices so that the signal will travel straight through a wall or
ceiling (instead of at an angle) for better reception.
2
3
Keep your product away (at least 3-6 feet or 1-2 meters) from electrical
devices or appliances that generate RF noise.
Building Materials make a difference. A solid metal door or aluminum
studs may have a negative effect on range. Try to position access points,
wireless routers, and computers so that the signal passes through drywall
or open doorways. Materials and objects such as glass, steel, metal,
walls with insulation, water (fish tanks), mirrors, file cabinets, brick, and
concrete will degrade your wireless signal.
If you are using 2.4GHz cordless phones or X-10 (wireless products
such as ceiling fans, lights, and home security systems), your wireless
connection may degrade dramatically or drop completely. Make sure
your 2.4GHz phone base is as far away from your wireless devices as
possible. The base transmits a signal even if the phone in not in use.
5
Wireless Installation Considerations
Page 5
5 eHome EH103 Quick Install Guide
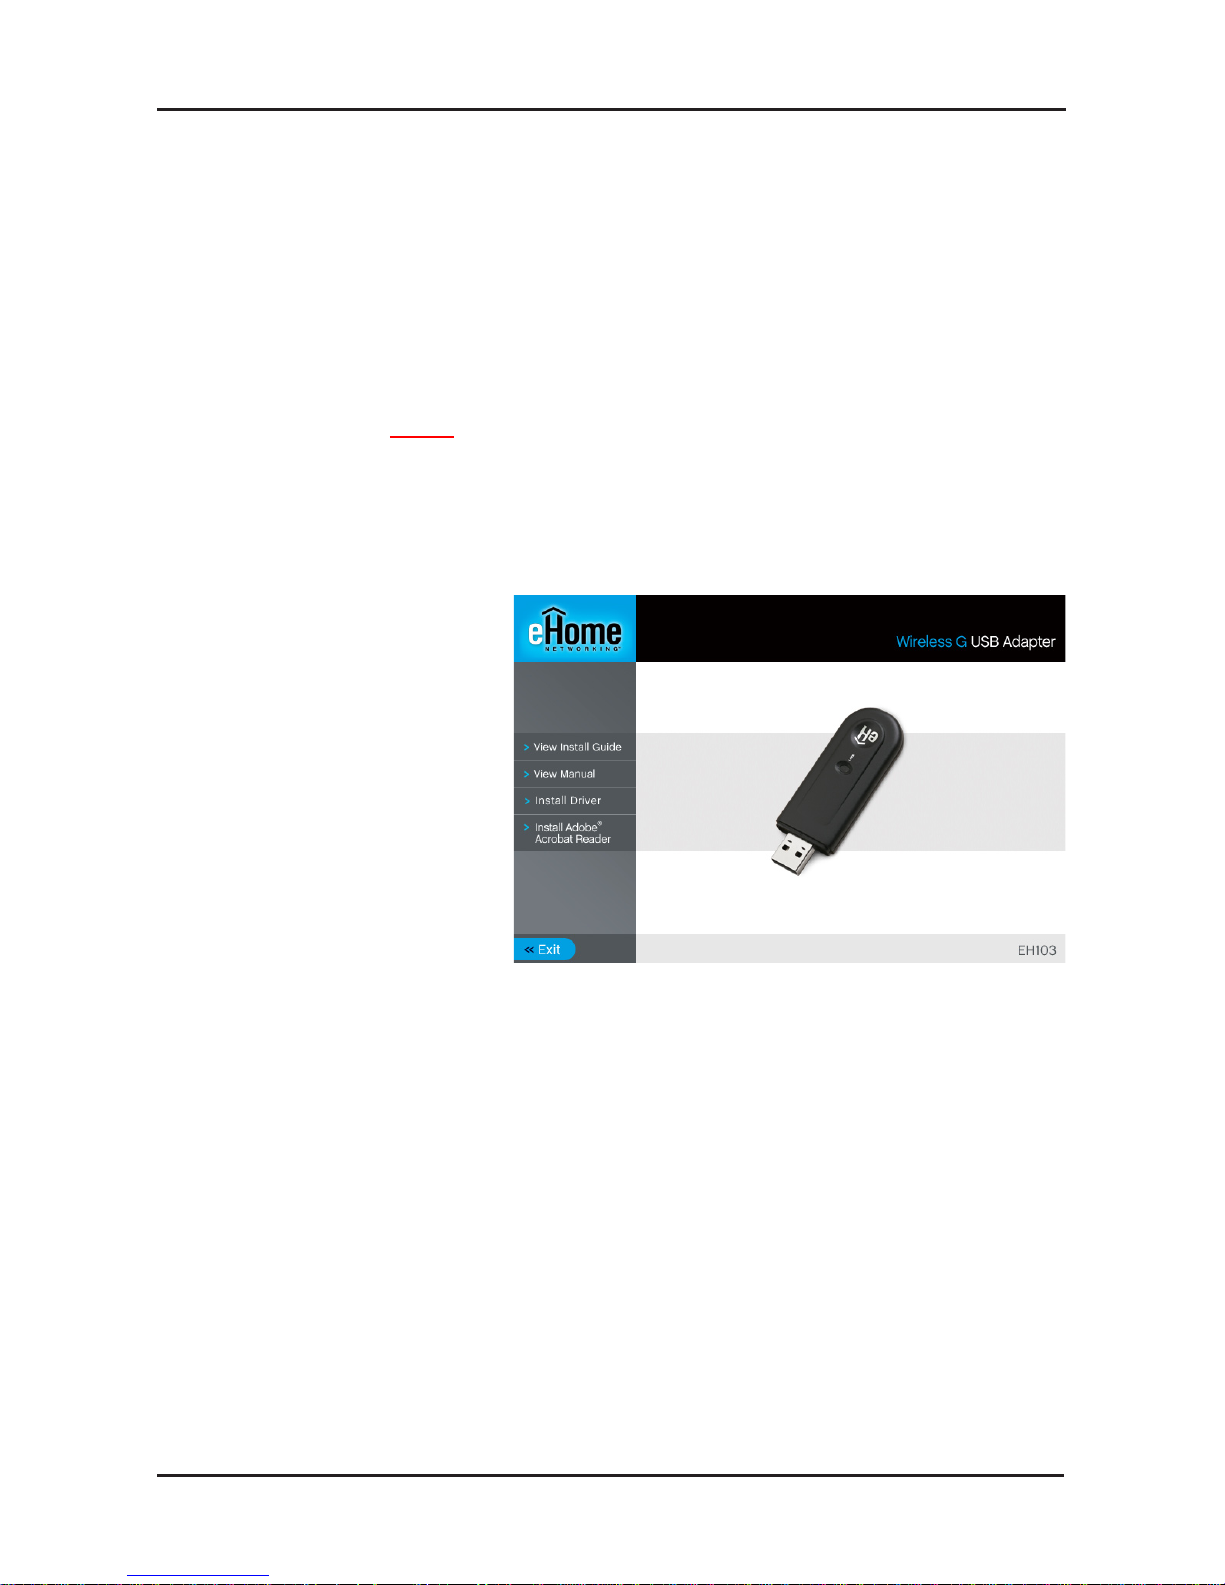
Turn on the computer and Insert the eHome EH103 Driver CD in the
CD-ROM drive. The step-by-step instructions that follow are shown
in Windows® XP. The steps and screens are similar for the other
Windows® operating systems.
Note: Do NOT install the EH103 Wireless G USB
Adapter into your computer before installing the
driver software from the eHome CD!
Click Install Drivers.
If the CD Autorun function does not automatically start on your
computer, type “D:\Drivers\setup.exe”. If it does start, proceed to
the next screen.
Software Installation
Page 6
6eHome EH103 Quick Install Guide
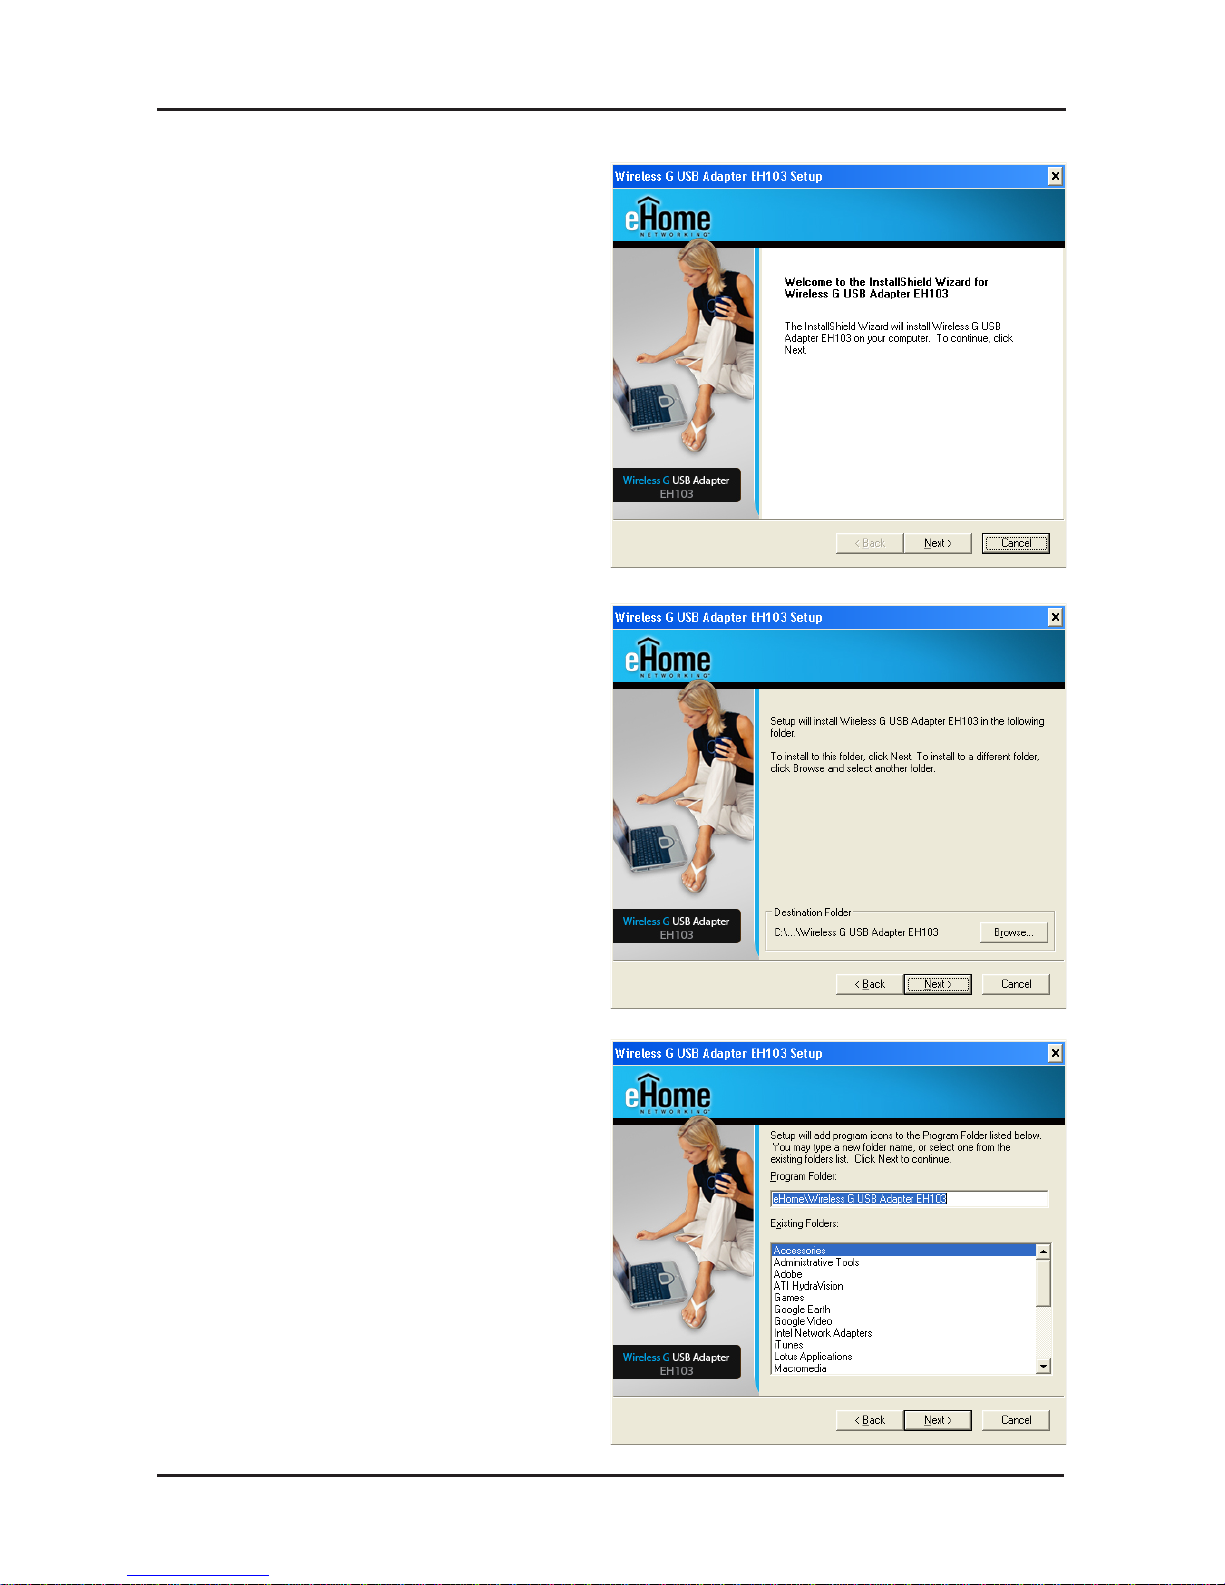
The InstallShield Wizard
window will appear.
Click Next to continue.
By default setup will install to
the default location: C:\Wireless
G USB Adapter EH103, where
C: represents the drive letter of
your hard drive. To install to a
different location click Browse
and specify the location. Click
Next.
Select the Program Files folder
location. Click Next to continue.
Page 7

7 eHome EH103 Quick Install Guide
Click Next to continue.
Remove the protective covering
from the EH103.
Insert the EH103 into an available
USB port on your computer.
Optional: If desired or necessary,
attach the cradle between the
EH103 and your computer.
For Windows® XP: This Hardware
Installation aler t screen will
appear.
Click Continue Anyway.
Click the Scan button to display
a list of wireless networks (site
survey).
You may manually enter the
SSID or network name.
Click Next to continue.
Page 8

8eHome EH103 Quick Install Guide
Click on the network name
(SSID) and click Connect.
If there is a lock icon under
Security, this means the network
is secure (WEP or WPA).
If the wireless network you are
trying to connect to is encrypted,
enter the WEP key or WPA
pa ss phrase. C li ck Nex t to
continue.
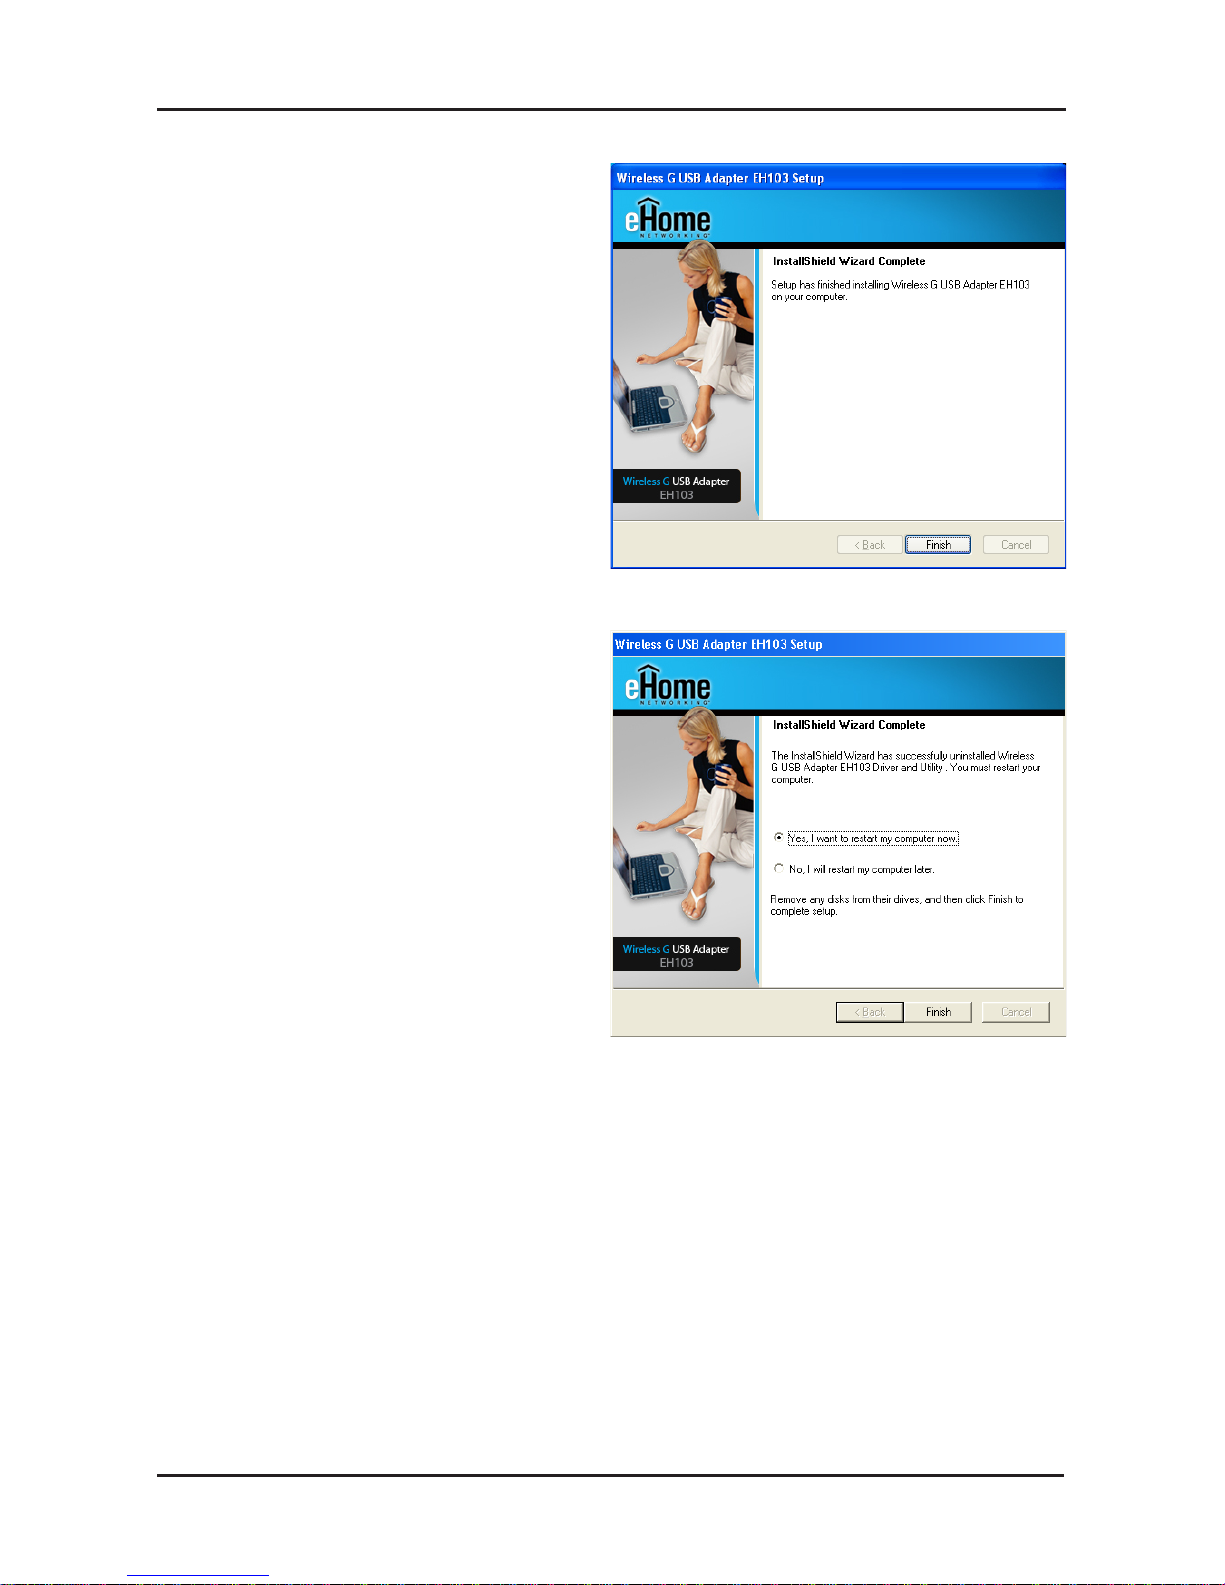
Click Finish to continue.
Page 9
9 eHome EH103 Quick Install Guide
After you have completed the installation, the eHome EH103 Wireless
Connection Manager will automatically start and the utility icon will
appear in the bottom right hand corner of the desktop screen (systray).
If this icon appears GREEN, then you have successfully installed
the EH103, are connected to a wireless network and are ready to
communicate!
Click Finish to complete the
installation.
Select Yes, I want to restart
my computer now and click
Finish.
Page 10
10eHome EH103 Quick Install Guide
Connect to a Wireless Network
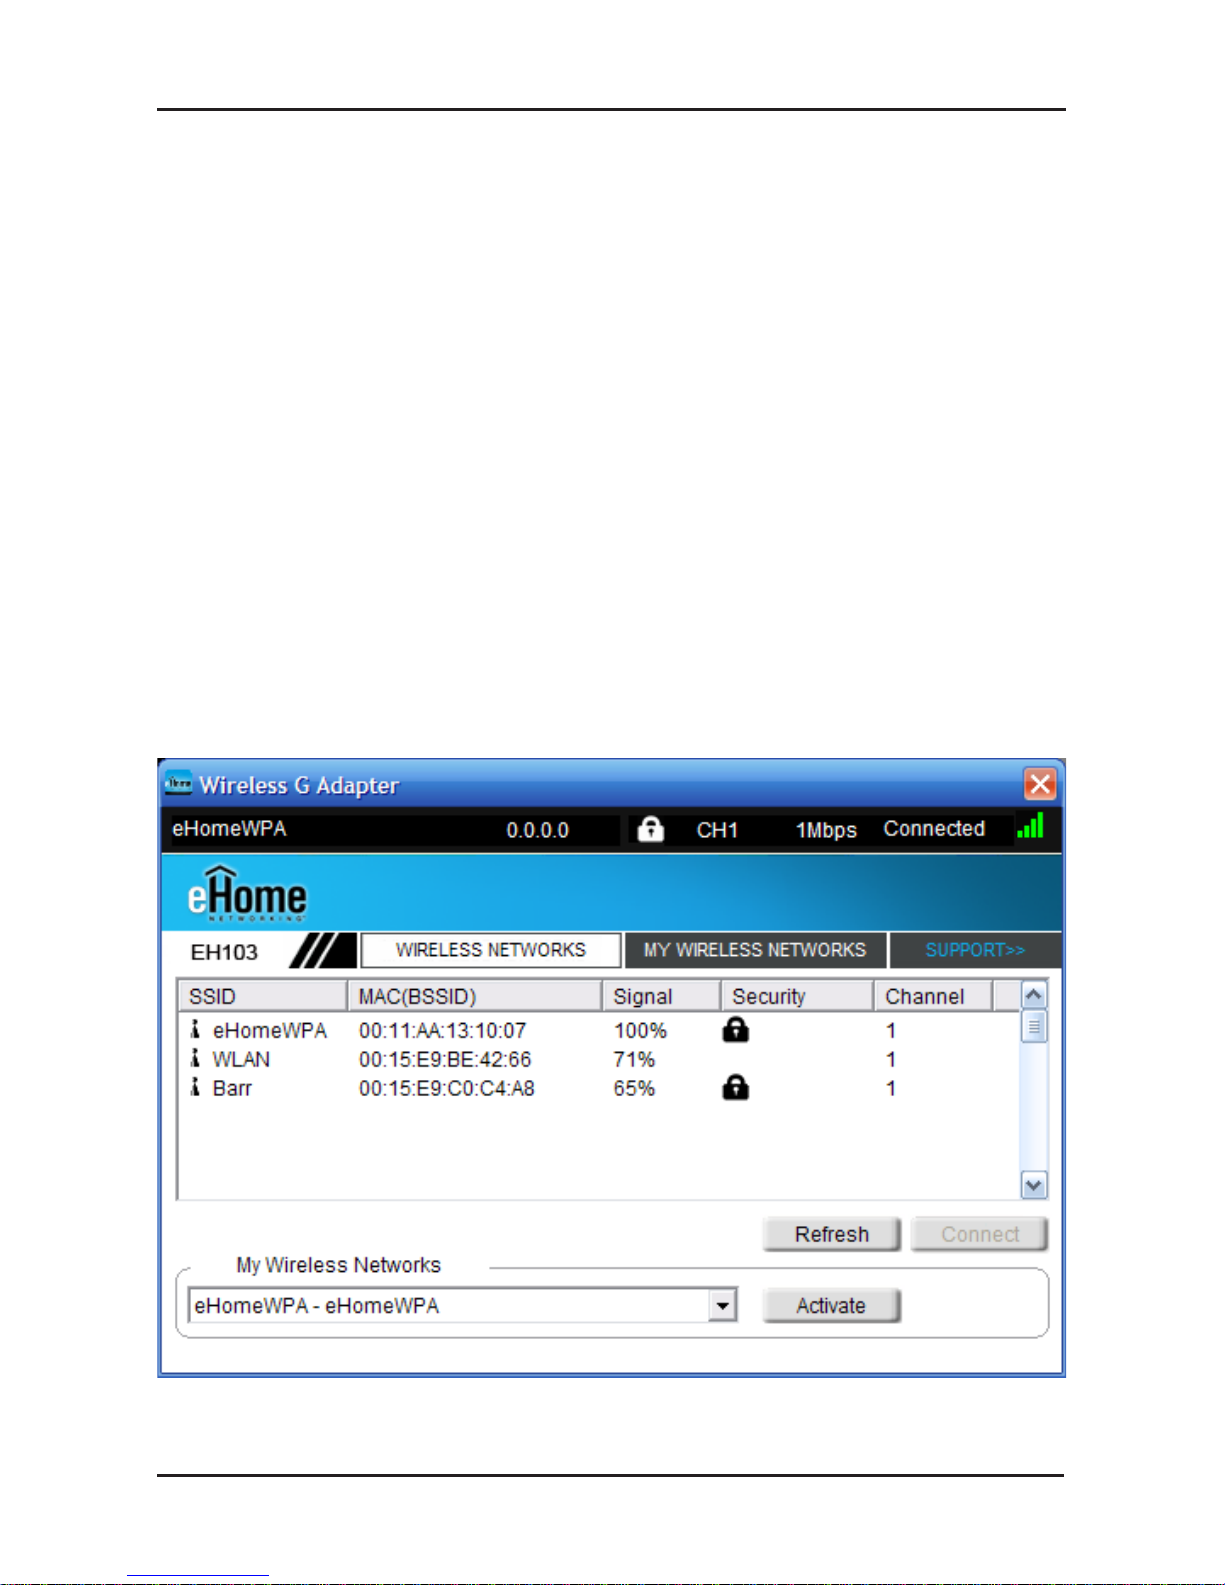
The EH103 uses the Configuration Utility as the management
software. The utility provides the user an easy interface to change
any settings related to the wireless adapter. After you have completed
the installation of the EH103 and whenever you start the computer,
the Configuration Utility starts automatically and the system tray
icon is loaded in the toolbar. Clicking on the utility icon will start the
Configuration Utility.
This window will allow you to see available wireless networks in your
area. Simply click the network (SSID) you want to connect to and
click the Connect button. If you are connecting to a secure network,
you will be prompted to enter the encryption key. Please refer to the
Wireless Security section in the manual located on the eHome CD.
Page 11

11 eHome EH103 Quick Install Guide
If you are attempting to connect to a secure network, You must supply
the encryption key that is on the router or access point you are trying
to connect to.
Please refer to the manual on the CD for more information on Wireless
Security.
If the network you are connecting to is using WEP or WPA/WPA2,
enter the key or passphrase for the network and click OK.
Page 12

12eHome EH103 Quick Install Guide
Technical Support
eHome provides free technical support for customers
within the United States and within Canada for the duration
of the warranty period on this product.
U.S. and Canadian customers can contact eHome
technical support at http://www.ehomeproducts.net.
Version 1.0
August 7, 2006
Copyright ©2006 D-Link Corporation/D-Link Systems, Inc. All rights reserved. eHome Networking and the eHome Networking
logo are registered trademarks of D-Link Corporation or its subsidiaries in the United States and other countries. Other trademarks
are the property of their respective owners. Maximum wireless signal rate based on IEEE Standard 802.11g specifications. Actual
data throughput will vary. Network conditions and environmental factors, including volume of network traffic, building materials
and construction, and network overhead lower actual data throughput rate. Product specifications, size and shape are subject to
change without notice, and actual product appearance may differ from that depicted on the packaging.
 Loading...