

Ehelp ROBOINFO User Manual

COPYRIGHTS
Copyright © 2001-2002 eHelp Corporation. All rights reserved.
Germany. All rights reserved.
Powered by Sail Labs. Copyright © 2000 Sail Labs GmbH, Munich/
This product includes PHP, freely available from http://www.php.net/
Information in this document is subject to change without notice. The software
described in this document is furnished under a license agreement or
nondisclosure agreement. The software may be used or copied only in
accordance with the terms of those agreements. No part of this publication may
be reproduced, stored in a retrieval system, or transmitted in any form or any
means electronic or mechanical, including photocopying and recording for any
purpose other than the purchaser’s personal use without the written permission
of eHelp Corporation.
eHelp Corporation
10590 W. Ocean Air Drive
San Diego, CA 92130
U.S.A.
www.ehelp.com
TRADEMARKS
eHelp™, RoboInfo™, RoboEngine™, RoboInsight™, RoboHELP®, Blue Sky
Software® and Blue Sky® are trademarks or registered trademarks of eHelp
Corporation in the U.S.A. and other countries. Microsoft and Windows are
registered trademarks of Microsoft Corporation. Other brands and their
products are trademarks or registered trademarks of their respective holders
and should be noted as such.
Rev-02/02

Contents
Chapter 1 Introduction to RoboInfo___________________________________ 1
About RoboInfo Publisher __________________________________________ 1
About RoboEngine________________________________________________ 2
Contacting eHelp Corporation_______________________________________ 4
Chapter 2 Setting up RoboInfo_______________________________________ 9
Installing RoboEngine ____________________________________________ 10
Organizing engine licenses ________________________________________ 10
Creating the engine _____________________________________________ 12
Testing the engine ______________________________________________ 15
Obtaining the name of the engine __________________________________ 16
Installing RoboInfo Publisher ______________________________________ 18
Opening a project _______________________________________________ 19
Assigning the name or address of the engine _________________________ 19
Publishing content ______________________________________________ 20
Viewing projects ________________________________________________ 21
Viewing reports_________________________________________________ 22
Chapter 3 Leveraging Existing Content _______________________________23
Scanning process _______________________________________________ 24
Including documents in your project ________________________________ 24
Viewing external documents from the engine _________________________ 28
Scheduling the scanning process ___________________________________ 28
Chapter 4 Managing Engines _______________________________________ 31
Using the Configuration Manager ___________________________________ 31
Working with engines ____________________________________________ 37
Working with projects ____________________________________________ 43
Obtaining more search results _____________________________________ 46

RoboInfo Deployment Manual
Chapter 5 Using RoboInsight Reports ________________________________ 47
Question grouping ______________________________________________ 49
Viewing reports_________________________________________________ 50
Chapter 6 Connecting to Content ____________________________________51
Connecting to content using an Active Server Page (ASP) file_____________ 51
Connecting to content using the RoboAPI.js API _______________________ 52
Chapter 7 Security Options for RoboEngine____________________________ 57
Setting permissions _____________________________________________ 57
Security options for publishing _____________________________________ 60
Securing reports ________________________________________________ 61
Index _______________________________________________________________ 63
ii

Chapter 1
Introduction to RoboInfo
RoboInfo™ is software to create and manage policy and procedure information
on an intranet. It includes a publishing tool, RoboInfo Publisher, to leverage
and create content, and an optional server component, RoboEngine™, with
advanced features including natural language search functionality, feedback
reports, and support for team development.
RoboInfo Publisher: This component enables you to import, create, publish,
and manage content.
RoboEngine (optional): This component delivers content, provides natural
language search capabilities, merges multiple projects, and produces reports.
About RoboInfo Publisher
RoboInfo Publisher is the authoring tool component that enables technical
writers, instructional designers, Web content specialists, and anyone who writes
policies and procedures for a corporate intranet to manage their content.
RoboInfo Publisher offers organization, navigation, and indexing capabilities,
along with project management features and reliable ways to generate, test,
and troubleshoot projects. It does all the HTML work behind the scenes while
you write content, create navigational elements, add images, and design page
layout. You also have the option to develop policies and procedures with any
popular HTML editor, such as Dreamweaver, FrontPage, and HomeSite, or use
RoboInfo Publisher’s powerful built-in editor.
What you can do in RoboInfo Publisher
From project inception to the final deliverable, you can build projects that best
meet your end users' needs. Here are some of the ways you can work with
RoboInfo Publisher:
n Design projects, including styles, navigation, and layout
n Develop projects, topics, indexes, tables of contents, and links
n Write content in the WYSIWYG Editor and other HTML editors
n Import HTML pages, FrameMaker documents, Word documents, HTML
projects, and WinHelp projects
n Manage topics, images, files, and folders
n Publish projects and generate printed documentation
RoboInfo Deployment Manual
RoboInfo Publisher includes ways to manage files using folders (left side) and create
content using the WYSIWYG Editor (right side)
About RoboEngine
RoboEngine is the optional server-side component of RoboInfo. RoboEngine
integrates seamlessly with your projects to give your information the extra
power only a server can provide. Acting as the "brain" of RoboInfo, the engine
gathers and logs data about what questions your users ask while searching so
that you can continuously improve your policies and procedures.
In addition to enabling you to work faster and more efficiently, RoboEngine fills
the following roles:
n Gathers and stores usage data: RoboEngine stores information about
how your users navigate and interact with your online system. Then, using
the RoboInsight™ technology, the data is processed into useful reports for
you to analyze.
n Hosts and serves the structured content: Any content you create with
RoboInfo is hosted and displayed to your end users with RoboEngine.
n Hosts natural language search: Natural language search technology lets
users find information by entering questions in plain English.
2
Chapter 1 Introduction To RoboInfo
Key features of RoboEngine:
n Tracking and reporting of user problems using the RoboInsight technology
n Scanning of a wide variety of content, including Web pages, Microsoft
Office documents, and PDF files to create an extensive database that can
be queried by your users (through natural language search).
n Automatic project merging so authors can work on different projects at the
same time and have them merge at run time into one project
n Question grouping that organizes end-user questions together for more
accurate and streamlined reporting
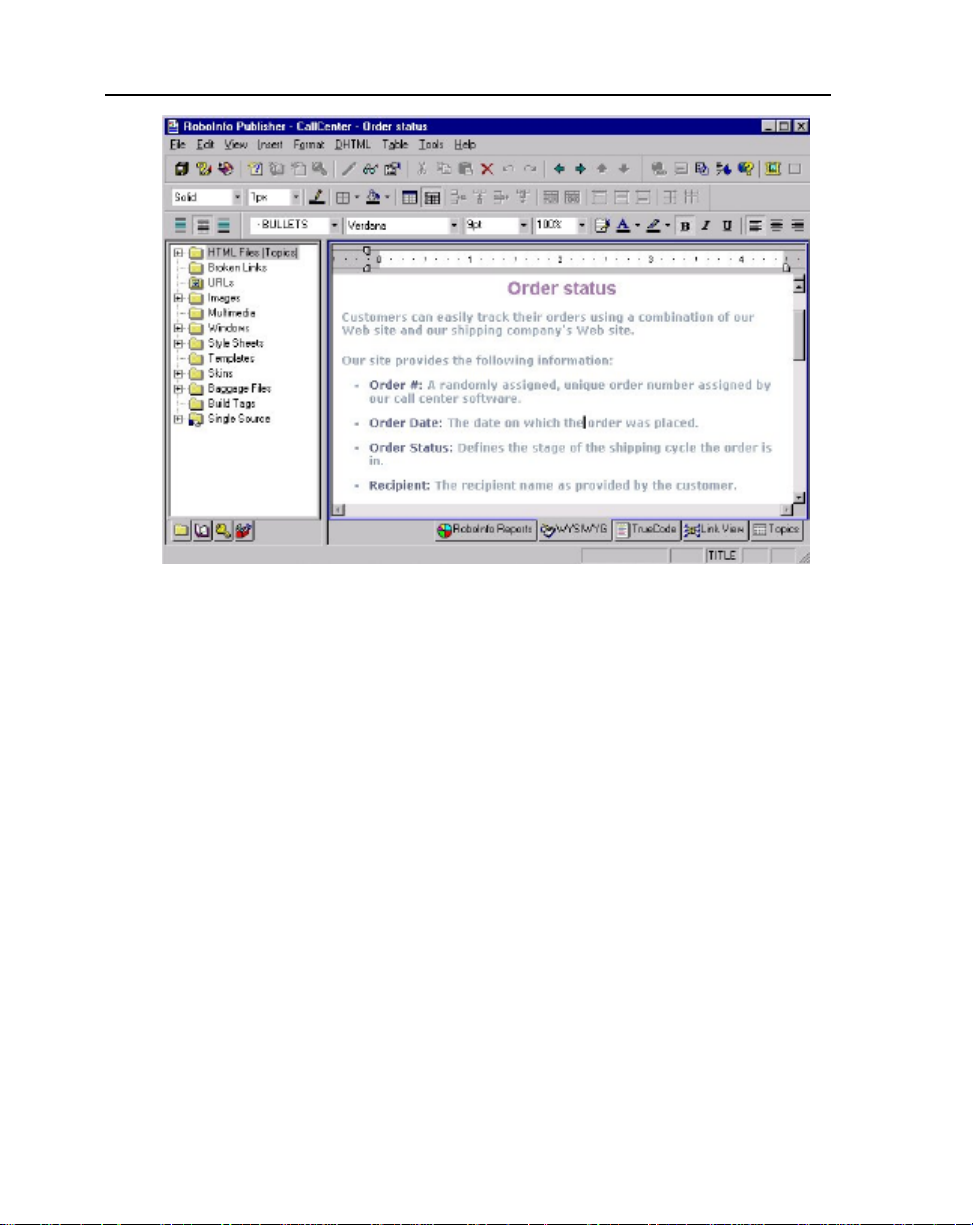
This diagram shows how the RoboInfo components work together
3

RoboInfo Deployment Manual
Contacting eHelp Corporation
eHelp is the worldwide leader in automated user assistance software. Our
innovative tools are easy to use and greatly improve the usability of
information.
Sales
Address: eHelp Corporation
Telephone: 1-858-847-7400
Fax: 1-858-847-1415
World Wide Web:
Email: information@ehelp.com
Office hours: Monday to Friday
Contact your account representative for information about the latest eHelp
products, the eHelp Subscription Plan, upgrade options and prices, and more. If
you have a technical question or problem, please contact Technical Support.
Sales phone: 1-800-677-4946
International (including
Canada):
Sales fax: 1-858-847-1416
10590 W. Ocean Air Drive
San Diego, CA 92130
U.S.A.
www.ehelp.com
6:00 A.M. to 5:00 P.M. Pacific Standard Time
1-858-847-7900
World Wide Web: www.ehelp.com
Sales email*: sales@ehelp.com
Office hours: Monday to Friday
*When sending an email, please include your company name, city, and state to
ensure prompt handling of your request.
4
6:00 A.M. to 5:00 P.M. Pacific Time

Chapter 1 Introduction To RoboInfo
Technical Support
eHelp Corporation is committed to providing you with the best overall product
experience. This includes intuitive technical products and flexible options to fit
your support needs. Our products are designed with superior quality and ease
of use in mind, but we understand that issues do arise from time to time that
need the backing of our support resources.
Note: eHelp Corporation support services are subject to the prices, terms, and
conditions in place at the time the service is used.
n For current hours of operation and details about all support offerings,
please visit eHelp’s Web site at:
http://www.ehelp.com/support
n For 24-hour support resources that include a knowledge base and forums,
please visit eHelp’s Help Community site at:
http://www.helpcommunity.ehelp.com
n To contact Technical Support via email, please use the Contact Us link on
the Help Community Web site:
http://www.helpcommunity.ehelp.com/roboinfo/contact/
contactus.asp
n For installation issues and paid telephone support (single inquiry, Silver,
and Gold maintenance support), please call 1-858-847-7960.
Customer Service
eHelp Corporation strives to continuously provide our customers with the best
possible service. Our new Customer Service Web site offers a list of the most
frequently asked questions and the ability to search our site. Results are
provided in an easy-to-view format.
Contacting Customer Service
Telephone: 1-858-677-4946
World Wide Web: www.ehelp.com/support/customerservice.asp
Email: customer.service@ehelp.com
5

RoboInfo Deployment Manual
Documentation feedback
At eHelp Corporation, we strive to produce the highest quality documentation
products and welcome your feedback. If you have comments or suggestions
about our online Help or printed guides, you can email us.
Please include the following information with your feedback:
n Product name and version number
n Name of printed manual or online Help
n Topic title (for online Help)
n Page number (for printed manual)
n Brief description of content (for example, are you reviewing step-by-step
instructions that are inaccurate, grammatical errors in a specific paragraph,
information that requires clarification or more details, etc.)
n Your suggestion for how to correct/improve documentation
Please send email messages to:
documentation@ehelp.com
Please keep in mind that this email address is only for documentation feedback.
If you have a technical question, please contact Technical Support.
6

Other helpful resources
A good list of resources can make all the difference in terms of support,
guidance, and inspiration. As the recognized leader in user assistance
development solutions, eHelp Corporation leads the way by offering a list of
helpful resources on our Web site at www.ehelp.com.
You’ll find the latest user assistance resource information, including books,
periodicals, helpful Internet links, training, and more. Also, take advantage of
the Help Community, an innovative and comprehensive online support resource
that is constantly updated and open to everyone. This Internet-based support
community combines the knowledge of eHelp customers, with the technical
skills of our support team. Just go to www.helpcommunity.ehelp.com. The
online support resources of the Help Community include the following:
Knowledge Base
Finding solutions to issues is easy in this online source of technical support
issues and answers. The Knowledge Base is a repository of constantly updated
product troubleshooting tips, procedures, and frequently asked questions.
Forums
Forums are the place to go when you are looking for interactive, peer-to-peer
support and networking, as well as technical expertise. Each forum is monitored
by our technical support staff who can answer your question if your peers
cannot. No question goes unanswered in the forums.
Chapter 1 Introduction To RoboInfo
Tips and Tricks
We constantly update our list of time saving tips and tricks to help you get the
most out of RoboInfo.
Publications
Understand complex issues and new trends in the user assistance industry by
downloading helpful information written by industry experts.
Community Events
On a regular basis, the Help Community hosts events led by industry experts
who answer questions you have about their area of expertise.
7

RoboInfo Deployment Manual
8

Chapter 2
Setting up RoboInfo
This chapter provides you with instructions for setting up RoboInfo and gives
you steps for testing the system to make sure it’s working correctly. Some of
the steps for deploying RoboInfo are completed in RoboEngine and some are
completed in the RoboInfo Publisher authoring tool. The following steps are
discussed in this chapter.
Follow these steps in RoboEngine:
n Install RoboEngine
n Organize engine licenses
n Create an engine using the Configuration Wizard
n Test the engine
n Obtain the name of the engine
Follow these steps in RoboInfo Publisher:
n Install RoboInfo Publisher
n Open a project
n Assign the name or address of the engine
n Publish the content
n View the project
n View reports

RoboInfo Deployment Manual
Installing RoboEngine
Installing RoboEngine is a straightforward process. Simply insert the
RoboEngine CD into the CD-ROM drive on the server where you are going to
host your content, type in the serial number provided by eHelp Corporation,
and follow the on-screen instructions. For more details, including system
requirements, see the RoboEngine Installation Guide packaged with the
program CD.
Organizing engine licenses
Each RoboInfo license you purchased can be used to create one engine. If you
have several licenses and engines, you can use the License Manager in
RoboEngine to organize them. Use the License Manager to:
n Determine how many licenses you have installed
n Determine the serial number of the licenses you have installed
n Determine how many engines you have configured
n Determine how many licenses you need for the number of engines you
have configured
n Add new licenses
n Delete engines that you no longer need
Note: A single engine can contain several projects. The projects can then be
merged together so your users view one seamless project.
10

Chapter 2 Setting up RoboInfo
To open the License Manager:
1 Open the Configuration Manager. (On the computer where you installed
RoboEngine, double-click the Configuration Manager icon on the
desktop.)
2 From the Help menu, select License Manager. The License Manager
displays.
Use the License Manager to add licenses and delete sites – in this example, a single,
five-user license has been installed and there are two configured engines
3 Determine how many licenses are installed and how many engines are
configured. Use the Add License and Delete Engine buttons as required.
11
RoboInfo Deployment Manual
Creating the engine
After installing RoboEngine, it is important to create and configure an engine
properly. Once an engine has been configured, authors can publish their
content to the engine. You use the RoboEngine Configuration Wizard to create
the engine.
To create an engine:
1 Open the Configuration Manager. (On the computer where you installed
RoboEngine, double-click the Configuration Manager icon on the
desktop.)
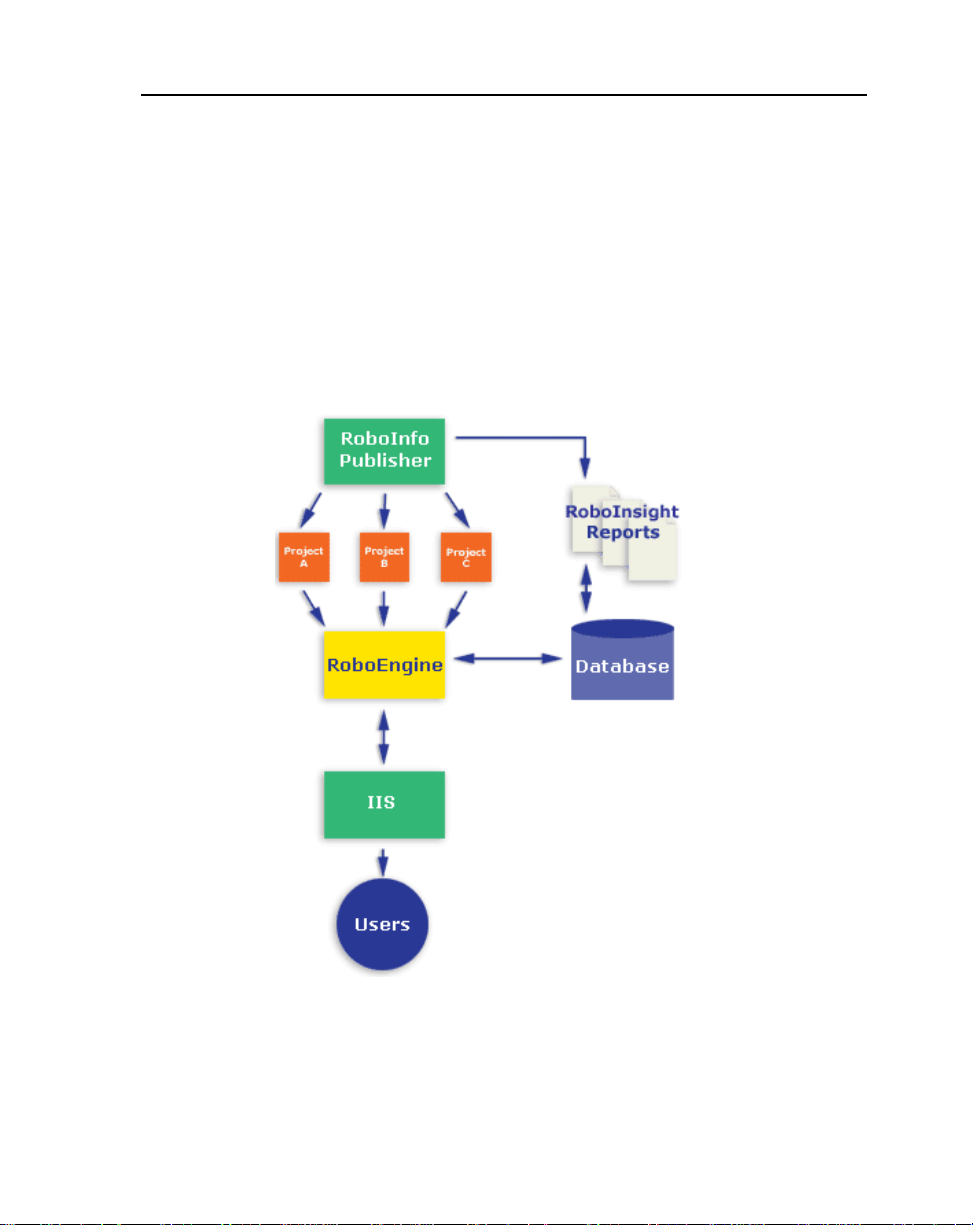
2 From the File menu, select New Engine. The RoboEngine Configuration
Wizard dialog displays.
Create an engine
3 Click Next.
12
Chapter 2 Setting up RoboInfo
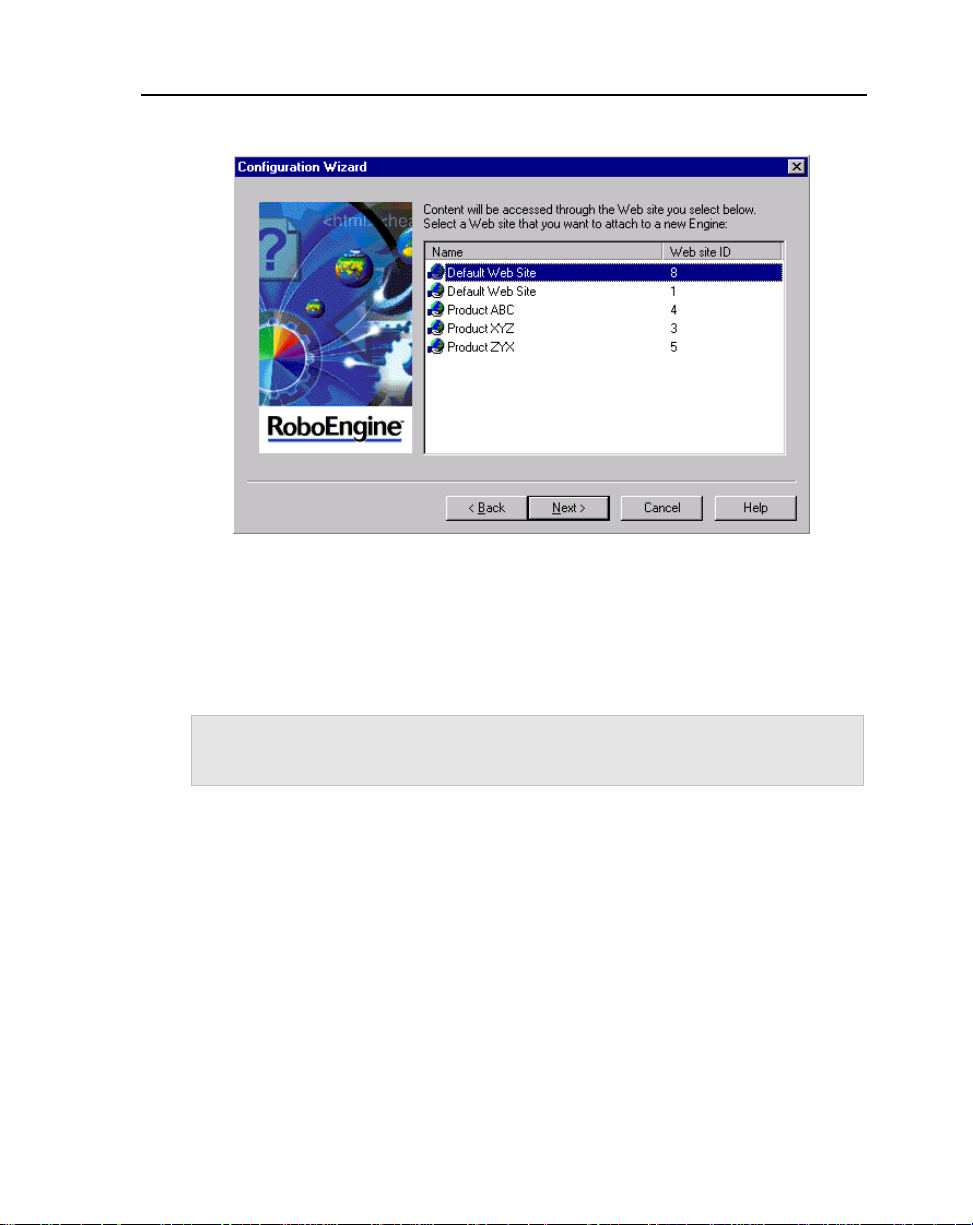
4 Select the Web site where you want to publish content.
Identify a Web site for your engine
The default Web site that is listed in the dialog is created by the Microsoft
Internet Information Server (IIS) when it is installed. If you want to use a Web
site that is different from the default, you must properly configure a new Web
site using IIS. The Configuration Wizard only recognizes properly configured
Web sites. (For more information, see the IIS online Help system included with
your IIS software.)
Note: The Configuration Manager places files into the root folder on the Web
site. You may be prompted if a file already exists. Click OK and a backup
of the existing file(s) is created.
5 Click Next.
13
RoboInfo Deployment Manual
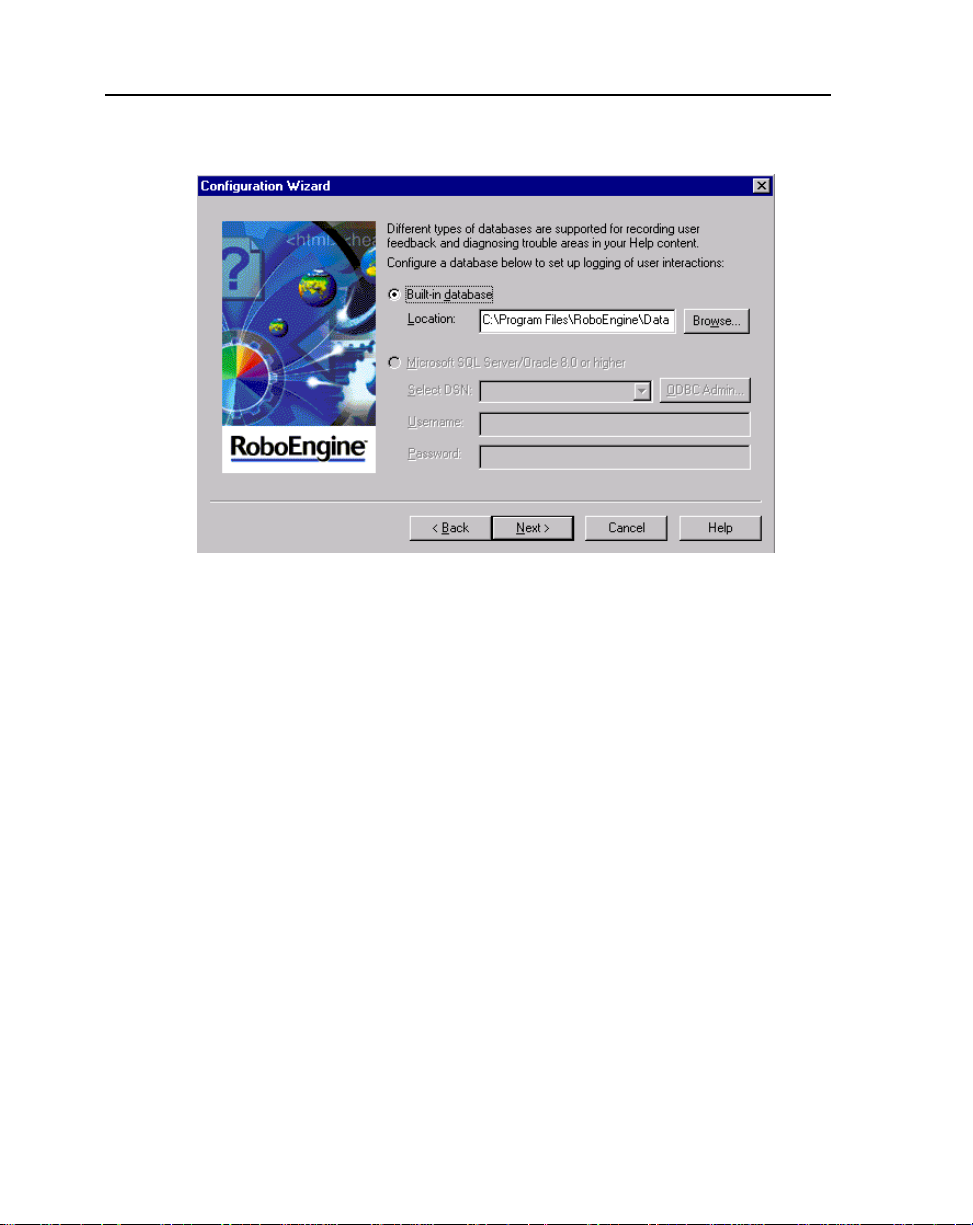
6 Select the database where you want to store user feedback and usage
patterns.
The built-in database option uses a Microsoft Access database. If you want to
use either a Microsoft SQL Server or Oracle 8.0 or higher database, first
purchase a RoboEngine Connectivity Pack license. After you install the
RoboEngine Connectivity Pack, select the Microsoft SQL Server/Oracle 8.0
or higher radio button and fill in the appropriate information.
Configure a database for your engine
14
Chapter 2 Setting up RoboInfo
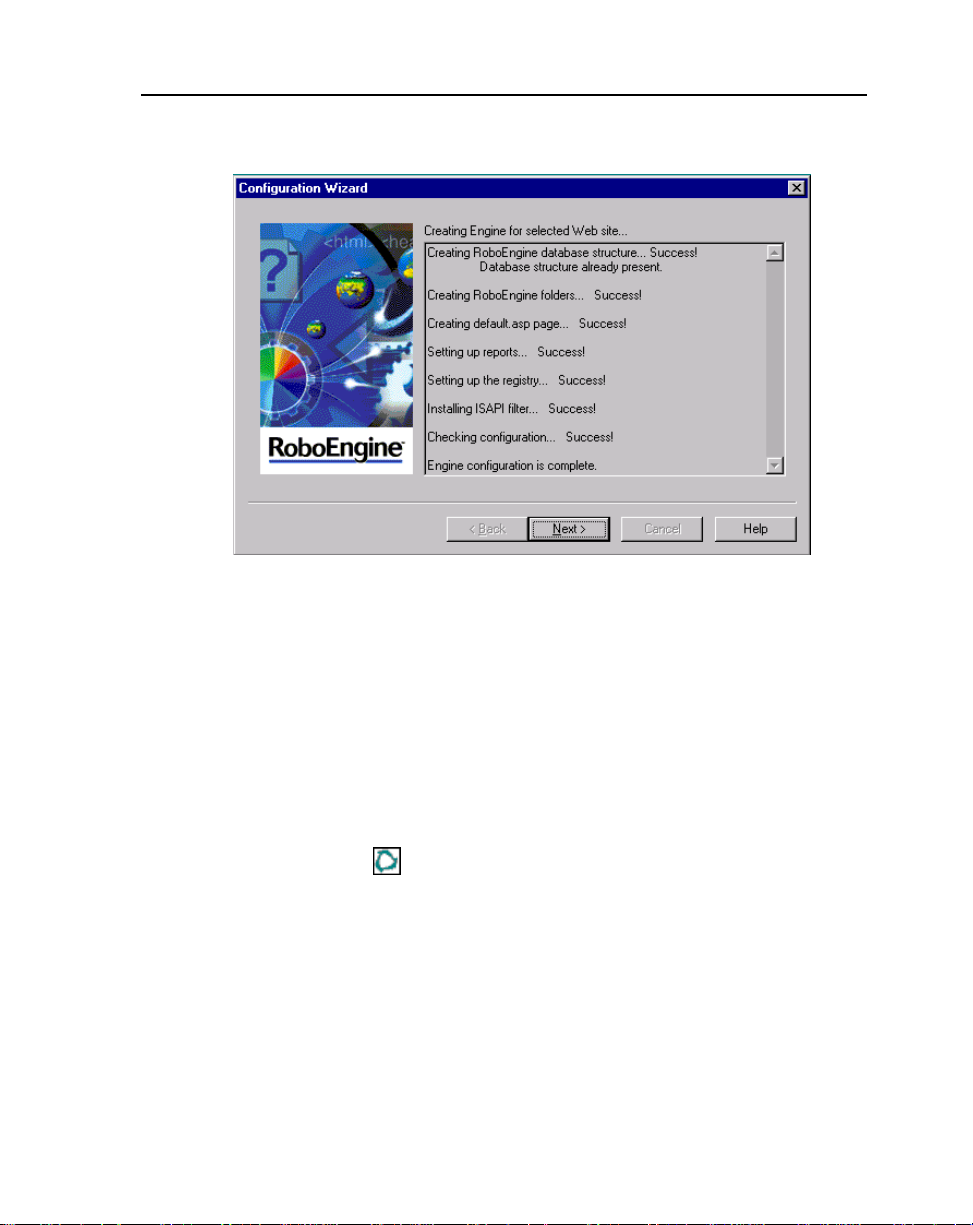
7 Click Next. The RoboEngine Configuration Wizard completes the steps
necessary to create the engine.
View your engine being created
8 Click Next.
9 Click Finish.
Testing the engine
After you create the engine, you should test it.
To test that the engine is working:
1 With the Configuration Manager open, select the Projects panel. (If the
Configuration Manager is not open, double-click the Configuration
Manager icon on the desktop.)
2 Click the View Project button. You have not published any projects yet,
so there is no content to view, but the RoboEngine screen displays to show
you that the engine is working properly. (If you follow the rest of the
deployment steps, you'll publish content and view your project.)
15
RoboInfo Deployment Manual
Obtaining the name of the engine
It is important to obtain the correct name or address of the engine. You need to
assign the name to your projects, using RoboInfo Publisher Project Settings, in
order to publish content to the engine. If the engine, the authoring computer,
and your users are all on a local area network (LAN), you can simply use the
name of the computer where the engine is installed. If not, you need the engine
Internet Protocol (IP) address or Universal Resource Locator (URL).
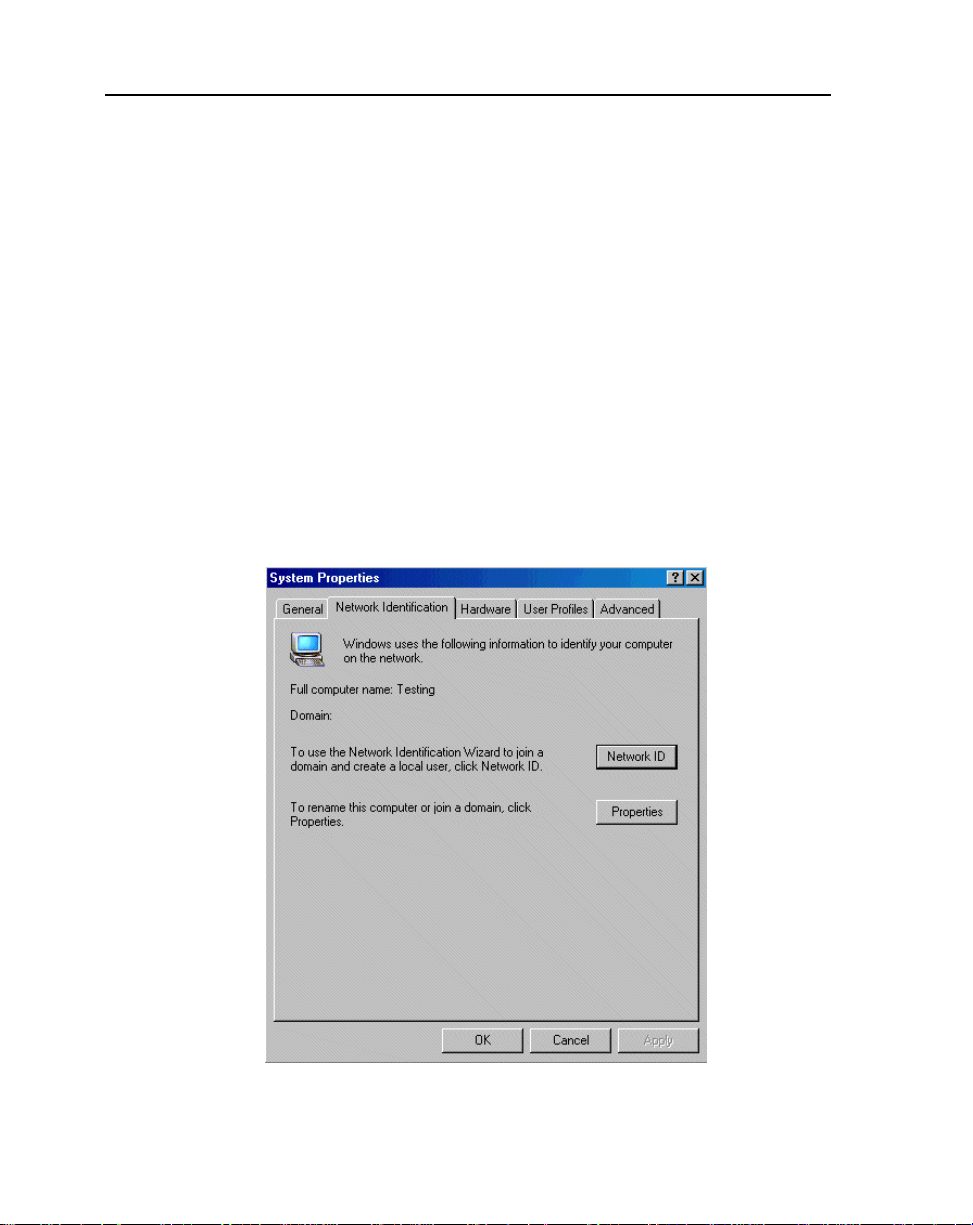
Obtaining the name of a Windows 2000 Server on a LAN
View system properties to determine the name of a Windows 2000 Server.
To obtain the name of a Windows 2000 Server computer on a LAN:
1 Right-click the My Computer icon on the desktop.
2 Select Properties to display the System Properties dialog.
3 Click on the Network Identification tab and write down the Full
computer name (excluding the period at the end).
Determine the name of your Windows 2000 Server computer
16
Chapter 2 Setting up RoboInfo
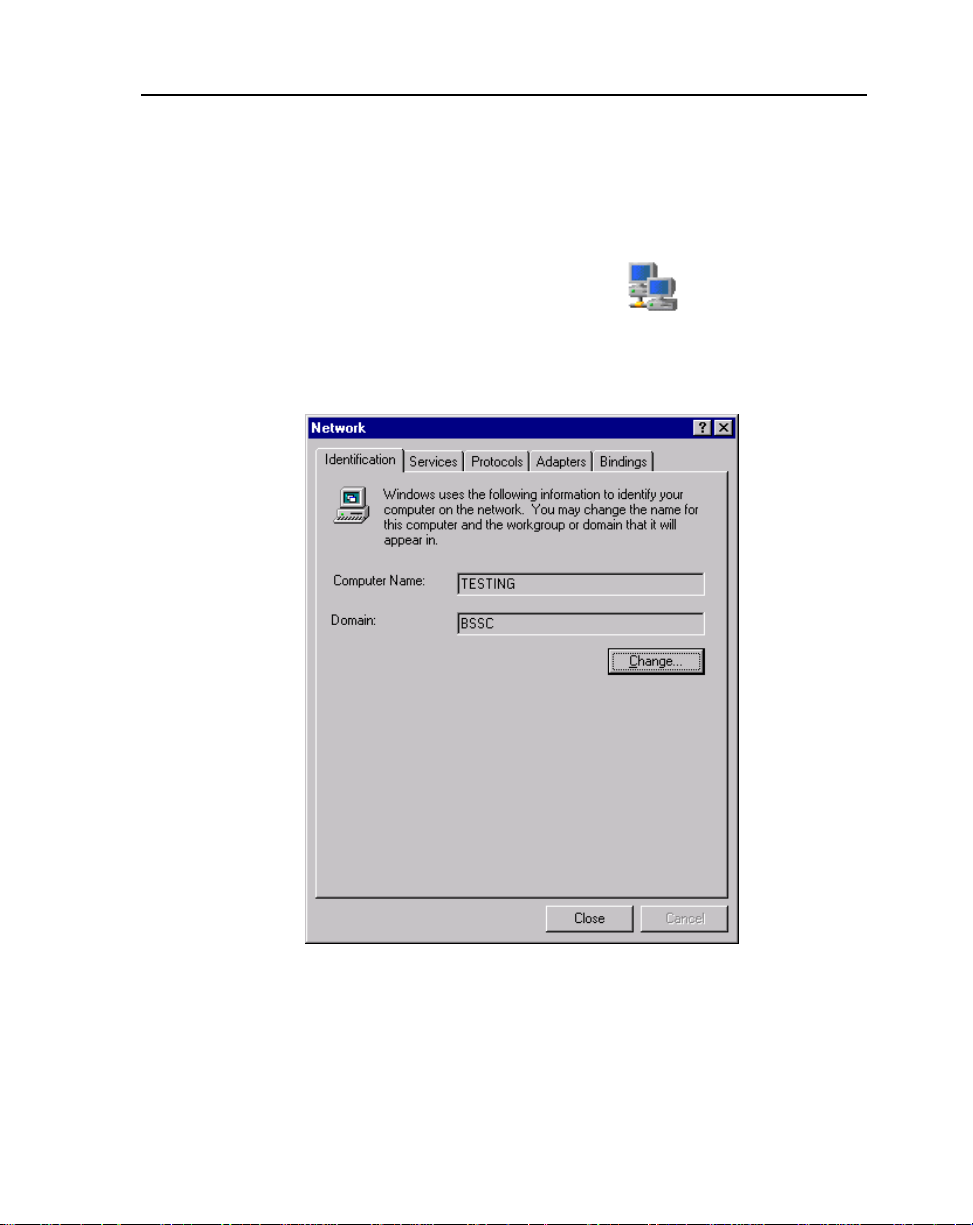
Obtaining the name of a Windows NT Server on a LAN
You can identify the name of a Windows NT Server through the Network
Neighborhood Identification tab.
To obtain the name of a Windows NT Server on a LAN:
1 Right-click the Network Neighborhood icon on the desktop.
2 Select Properties.
3 Select the Identification tab and write down the Computer Name.
Obtain the name of your Windows NT Server computer
If the engine is not on a LAN, you need to obtain the IP address or URL of the
computer where the engine is installed.
17
 Loading...