

Egerium LUVGECAM, LUVGEMON Users Manual
INSTRUCTION MANUAL

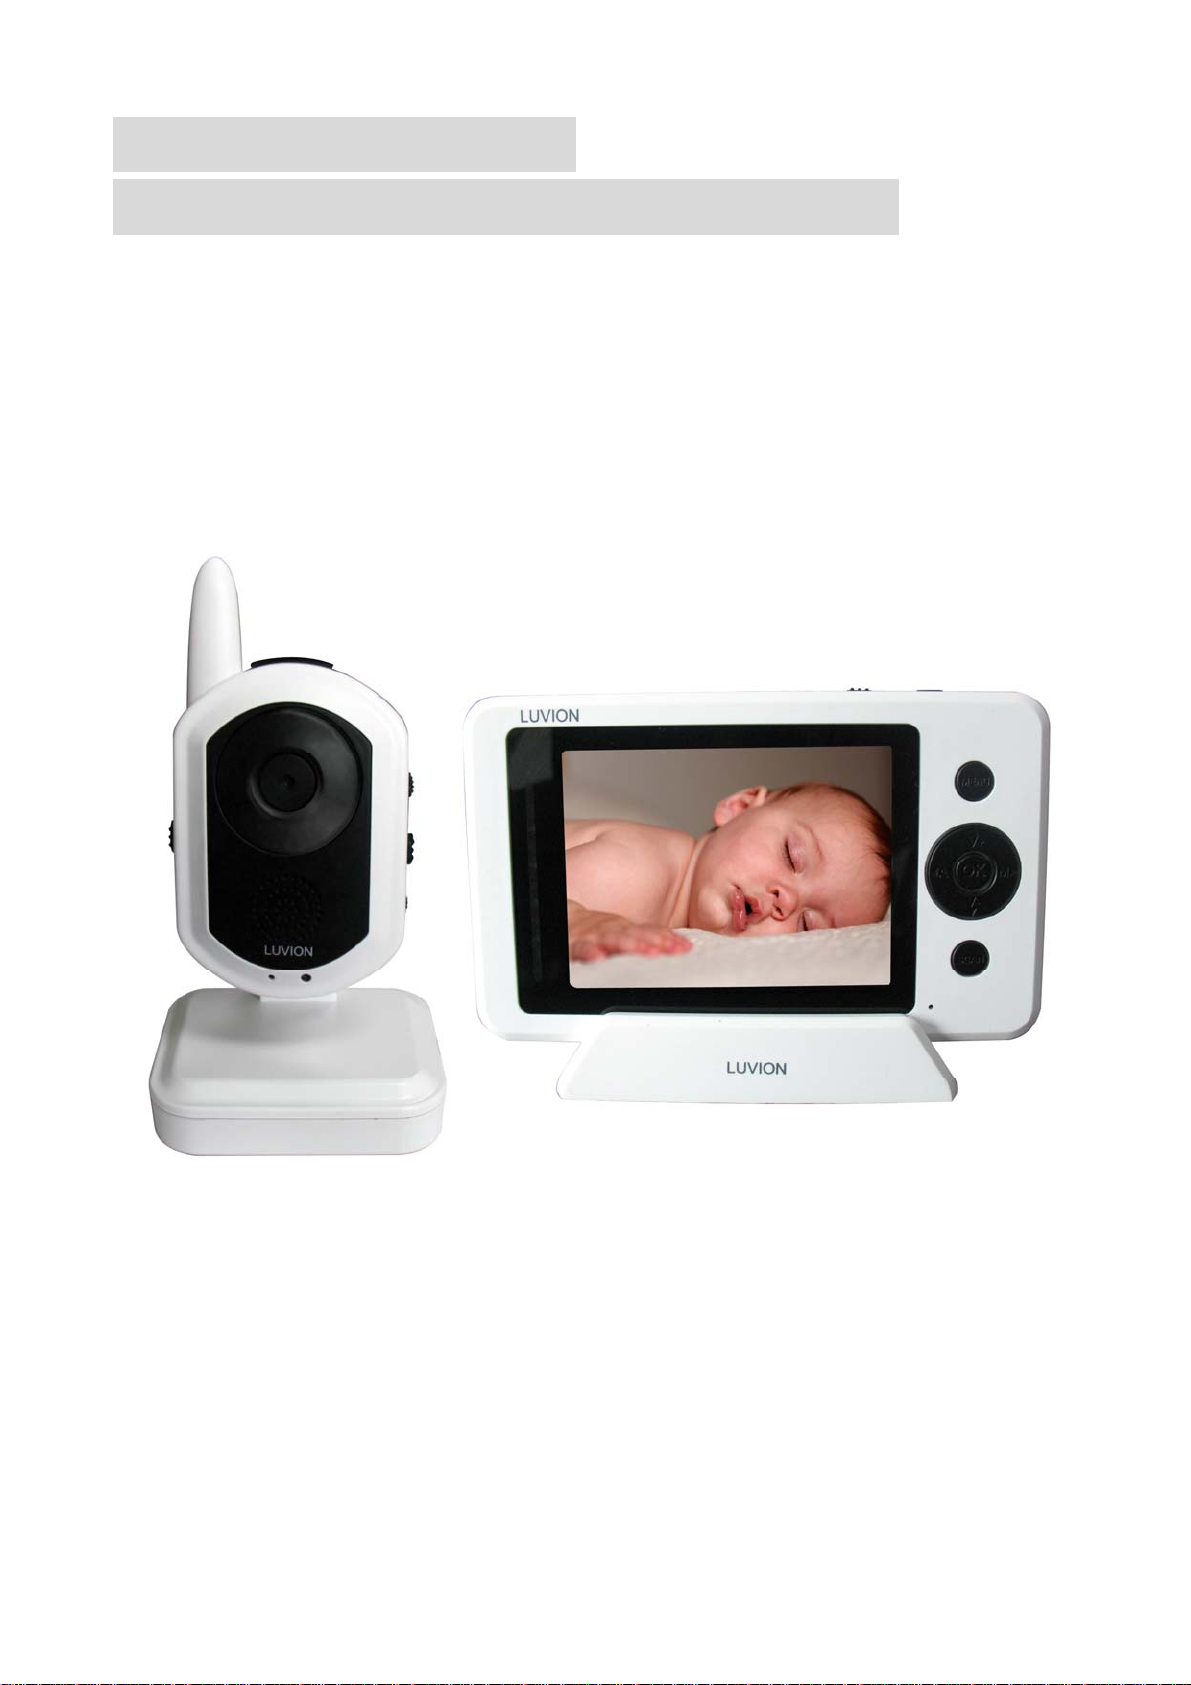
Features
• Digital wireless technology provides excellent image quality and clarity
• Interference free, secure and private signal
①
• Up to 450ft wireless transmission range
• Listen in with exceptional sound clarity
• Safety warning feature notifies you when out of range
• Micro SD card recording
• Music in 4 selections
• System expandable up to 4 cameras
①
Maximum open space transmission range. The actual range is dependent upon building
materials and other obstructions in path of wireless signal.
②
Additional cameras sold separately.
• Two-way audio communication
• Camera room temperature display on monitor
Camera Features
• VGA resolution camera
• Night vision allows for low light viewing up to 15 feet / 4.5 meters
• Built-in microphone
• Camera can be battery operated for true portable wireless operation
②
③
③
IR illumination range of 15ft./4.5m under ideal conditions. Objects at or beyond this range
may be partially or completely obscured, depending on the camera application.
Receiver Features
•3.5” color LCD monitor/receiver with superior image quality
• Auto recording, manual recording and schedule recording
• Video/Audio output for viewing on TV/Monitor or recording on VCR/DVD recorder
• Rechargeable lithium polymer battery for true portability
• Convenient receiver cradle included
• Audio level indicator and alarm
• Displaying stored pictures in scan mode (screen saver)
• Baby room temperature display
1
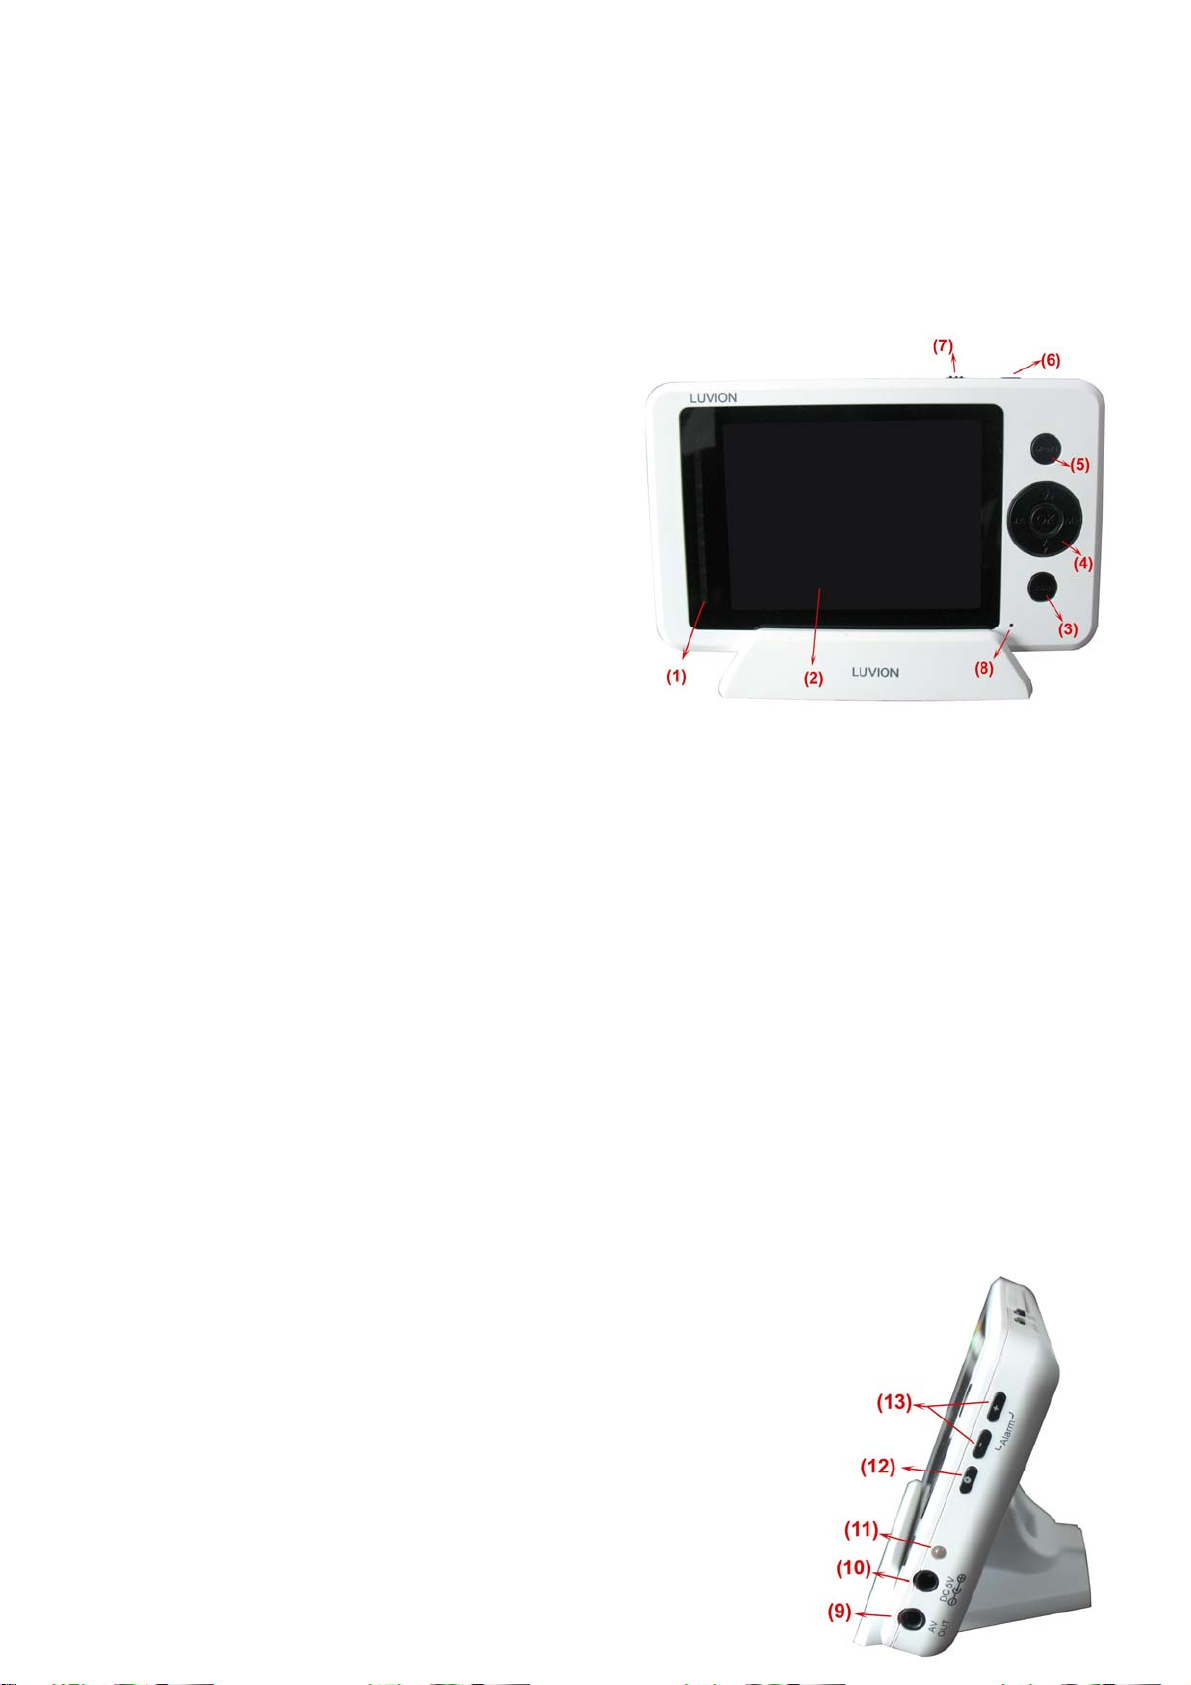
Wireless Receiver
Front/Back Controls
1. Power/Audio Level LEDs – The green LED indicates the receiver power is ON or OFF. The red LEDs
indicate the audio levels (low to high).
2. LCD Screen – Displays video from the camera.
3. SCAN Button – When the SCAN button is
pressed, the LCD screen is turned off and the
system continuously scans all available cameras
while the monitor is dark. The scan feature can be
used for the following two reasons: (1) to prevent
you from being disturbed (i.e. when sleeping) by the
bright LCD screen, or (2) to conserve battery power.
If audio is detected above the preset audio trigger
level on the camera(s)*, the receiver will beep and
display the image from the triggered camera. The
receiver will return to scan mode about 5 seconds
after the alarm has completed. Press “A”, “M” or
“SCAN” button on the front panel of monitor will exit
scan mode.
4. Navigation Controls/OK Button – Use to controls in Viewing Mode and Menu Mode.
Viewing Mode: The following controls are used while watching live video from the camera:
• Press the UP/DOWN ▲▼ arrows to increase or decrease the volume.
• Press the LEFT ◄ arrow to view cameras* in automatic switching mode.
• Press the RIGHT ► arrow to manually switch between cameras*.
Menu Mode: Use the UP/DOWN/LEFT/RIGHT ▲▼◄► arrows to navigate in Menu Mode. Press the
OK button to confirm the menu selection.
5. MENU Button – Press to go into main the receiver menu, press to back to view mode in main menu,
press to back to previous menu in submenus.
6. Record—Press the button to start recording, press it again to stop recording. In this manual recording
mode, the OSD LCD will mark “Recording”. .
7. Antenna Locking Switch – Slide the switch to unlocking position, the
receiver antenna will pop up. Then you can adjust the antenna to vertical
position for better signal reception.
8. Microphone – Receives sounds from the area near the receiver and
transmits sound from the receiver to the camera (only when TALK Button
is pressed down and held).
9. A/V Out Port (Optional Use) – Connect the included A/V cable to view
video from the receiver on a TV or monitor, or record on a DVD
recorder/VCR.
2
NOTE: Using this feature will turn off the LCD screen. The LCD screen will turn back on when the A/V
cable is disconnected.
10. DC 5V Power Input – Connect the included DC 5V power adaptor to power the receiver and/or
charge the receiver battery (when the receiver is not in the cradle).
11. Charging Indication LED – Indicates the built-in battery is in charge when the LED is in yellow, and
in green when it is full charged.
12. Night Light Button – Press to remotely turn on/off the night light on the camera (for the camera
currently being displayed on the LCD screen). When the night light is on, an indication icon will be
displayed on the LCD screen.
13. Alarm +/-Button – Press to increase or decrease the volume of the
audio alarm.
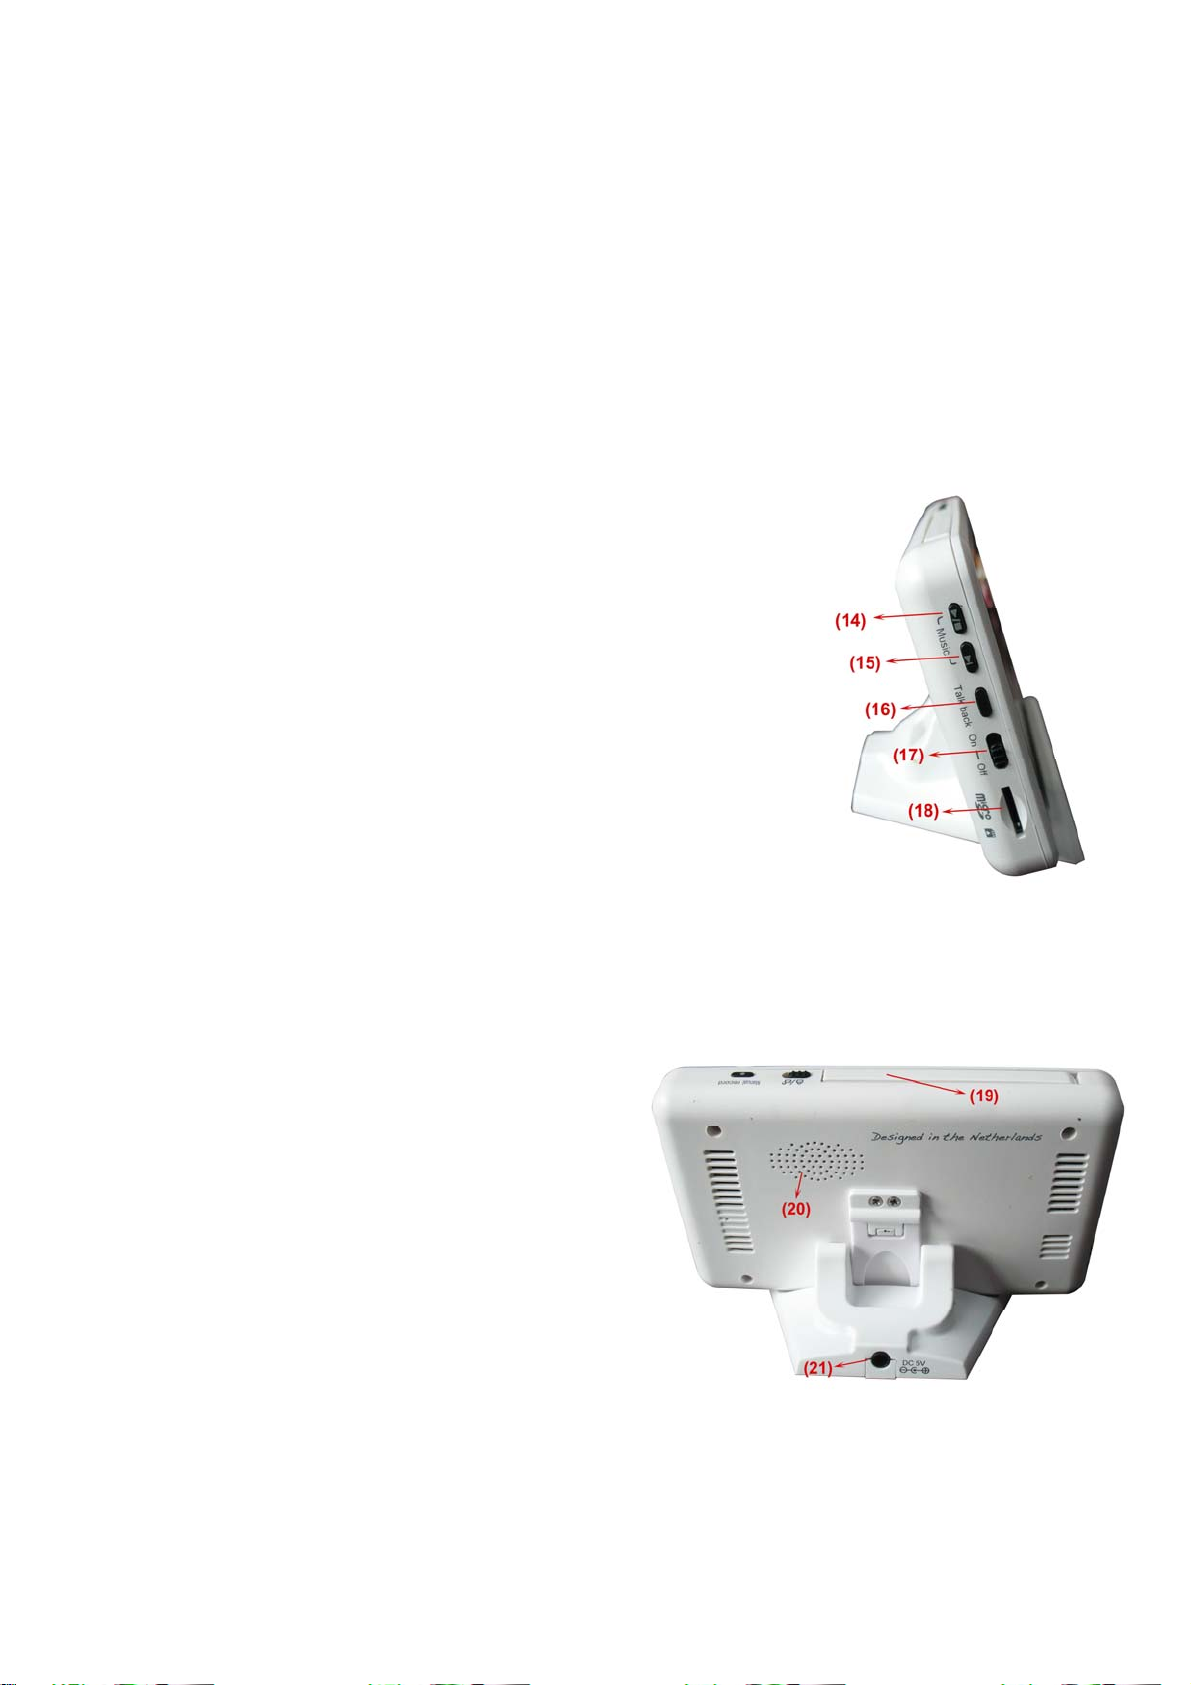
14. / Button – Press the button to start or stop the lullaby.
15. Button – Press the button to play next lullaby.
16. TALK Button – Press and hold the button to talk to the camera
currently being displayed on the LCD screen.
17. Power Slide Switch – Slide the switch to ON or OFF position to
switch on/off the receiver.
18. SD Card Slot – Insert Micro SD card to this SD card slot for both
video and audio recording.
* You must have more than one camera configured on the system when
using the functions that requires more than one camera.
19. Receiver Antenna – receives & sends signals from or to the cameras*.
20. Speaker – Produces the sound transmitted from the camera(s) *.
Receiver Cradle Inputs
21. DC 5V Power Input – Connect the DC 5V power
adaptor (included) to the receiver cradle to power the
receiver and/or charge the receiver (when docked).
NOTE: When the receiver is docked, and the A/V
cable is connected (power cable as needs to be
connected), the LCD screen on the receiver will be
blacked out. The LCD screen will turn back on when
the A/V cable is disconnected.
3
Wireless Receiver Installation
Determine if you will be using the receiver cradle, or connecting the cables directly to the receiver before
installation:
1. Place the receiver cradle or receiver in a place that will have clear reception with your camera(s).
2. Plug the AC adaptor power output cable into the 5V POWER input of the cradle or receiver. Plug the
power plug into a wall outlet or surge protector.
3. Leave the receiver to charge for several hours prior to first time use so the built-in rechargeable
receiver battery is fully charged. DO NOT remove the power cable from the receiver / from the cradle
during initial charge process. After initial charge, charge the receiver as required.
4. If you wish to view the receiver images on a larger screen, connect the included AV cable to the cradle
or receiver, and connect the other end of the cable to the Video IN (Yellow) and Audio IN (White) ports on
the TV, VCR or other viewing/recording device.
NOTE: the purpose of the AV output is for convenience only. When using with large screen TV/Monitor,
the picture might be grainy as the camera limits video resolution to VGA (640x480 pixels). This is not a
product defect. For best performance use with TV/Monitor PIP (Picture in Picture) function.
Check your TV/Monitor product manual to see if this feature is available on your TV/Monitor. This allows
you to view TV or other video source and see video from the camera in a small window on the same
screen.
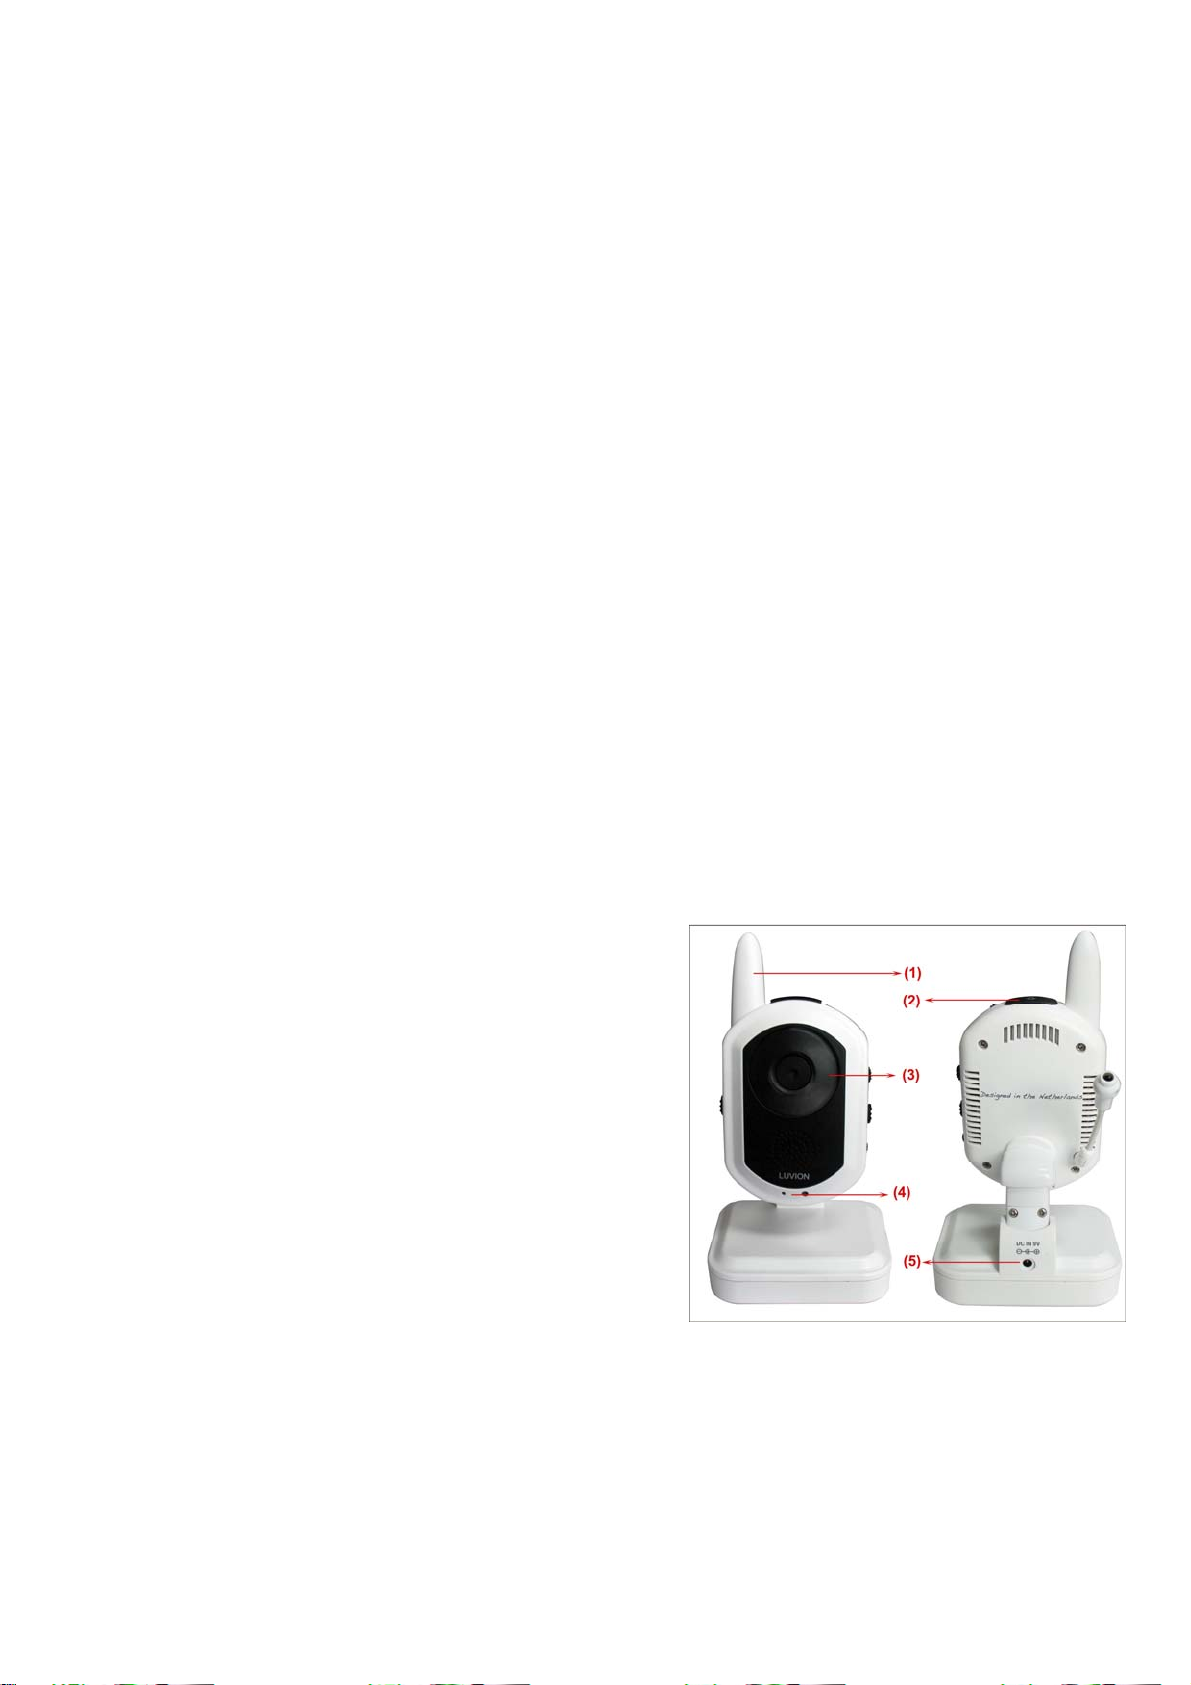
Wireless Camera
Front & Back Controls
1. Camera Antenna – Sends & receives signals to or from
the receiver.
2. Night Light Switch – Press to turn the night light ON or
OFF. Alternatively, press the light button on the receiver to
remotely turn the camera light ON or OFF.
Note: Night Light is available only when the camera is paired
to the receiver.
3. Lens/IR LED Cover – Infrared LEDs provide viewing in
no/low light conditions
4. Microphone – Receives sounds for the area near the
camera, and transmits sound from the camera to the
receiver.
5. DC 9V Power – Connect the DC 9V power adaptor to the camera
NOTE: The camera can also be powered using 4 AA batteries (not included) installed in the base. If the
camera is plugged in with the AC adaptor, the batteries will not be used. The batteries are intended for
short term, portable camera use.
6. Pair Button – The pair button is located on the back of the camera behind the stand mount.
4
 Loading...