

Page 1

Copyright 2015-2016 Egasky Networks, Inc.
- 1 -
2.4GStationUserGuide
Version L1.01
EgaskyNetworks,Inc.
Page 2
Copyright 2015-2016 Egasky Networks, Inc.
- 2 -
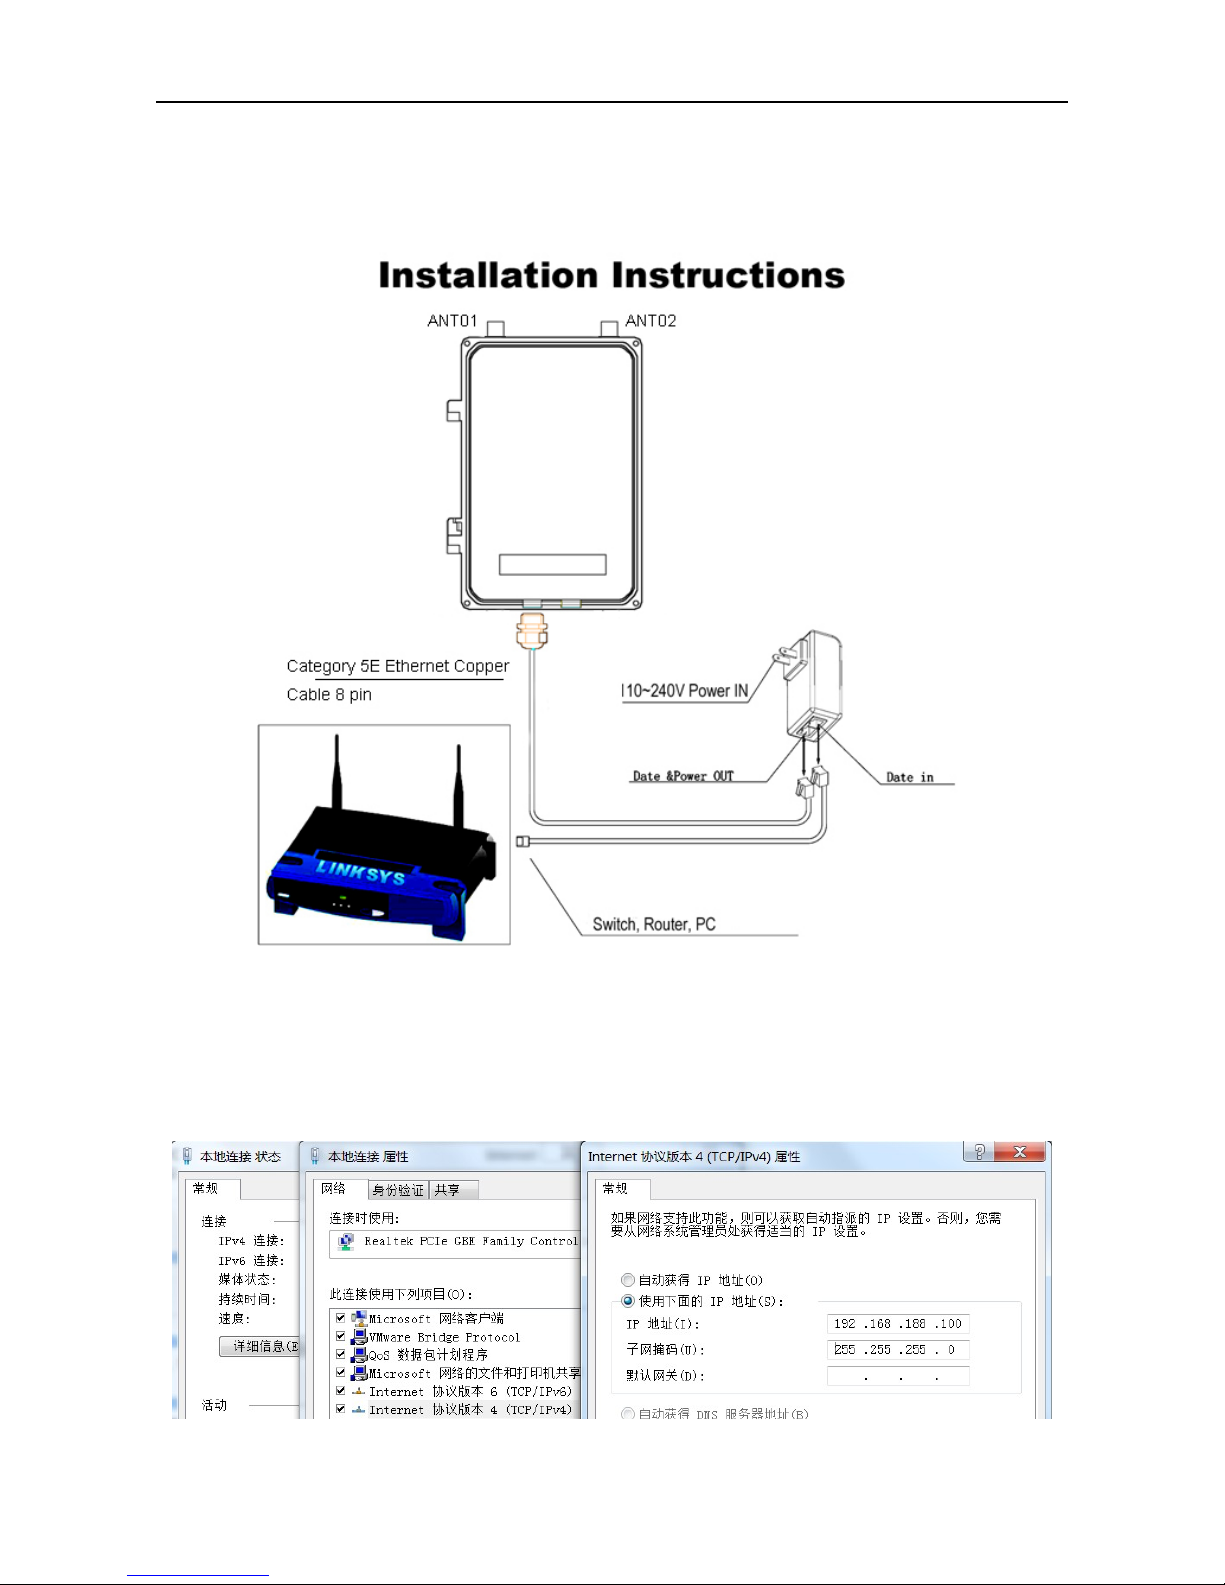
1, Preparations
a. Physical installation
b. Assign static IP
Set up CPE, you need use Network card, since this CPE will not assign IP address. So you need Assign a
static IP address to your PC which should be in the same network segment with this CPE. This CPE default IP
address is 192.168.188.253, you may choose from 192.168.188.*. Then click OK .
Page 3
Copyright 2015-2016 Egasky Networks, Inc.
- 3 -
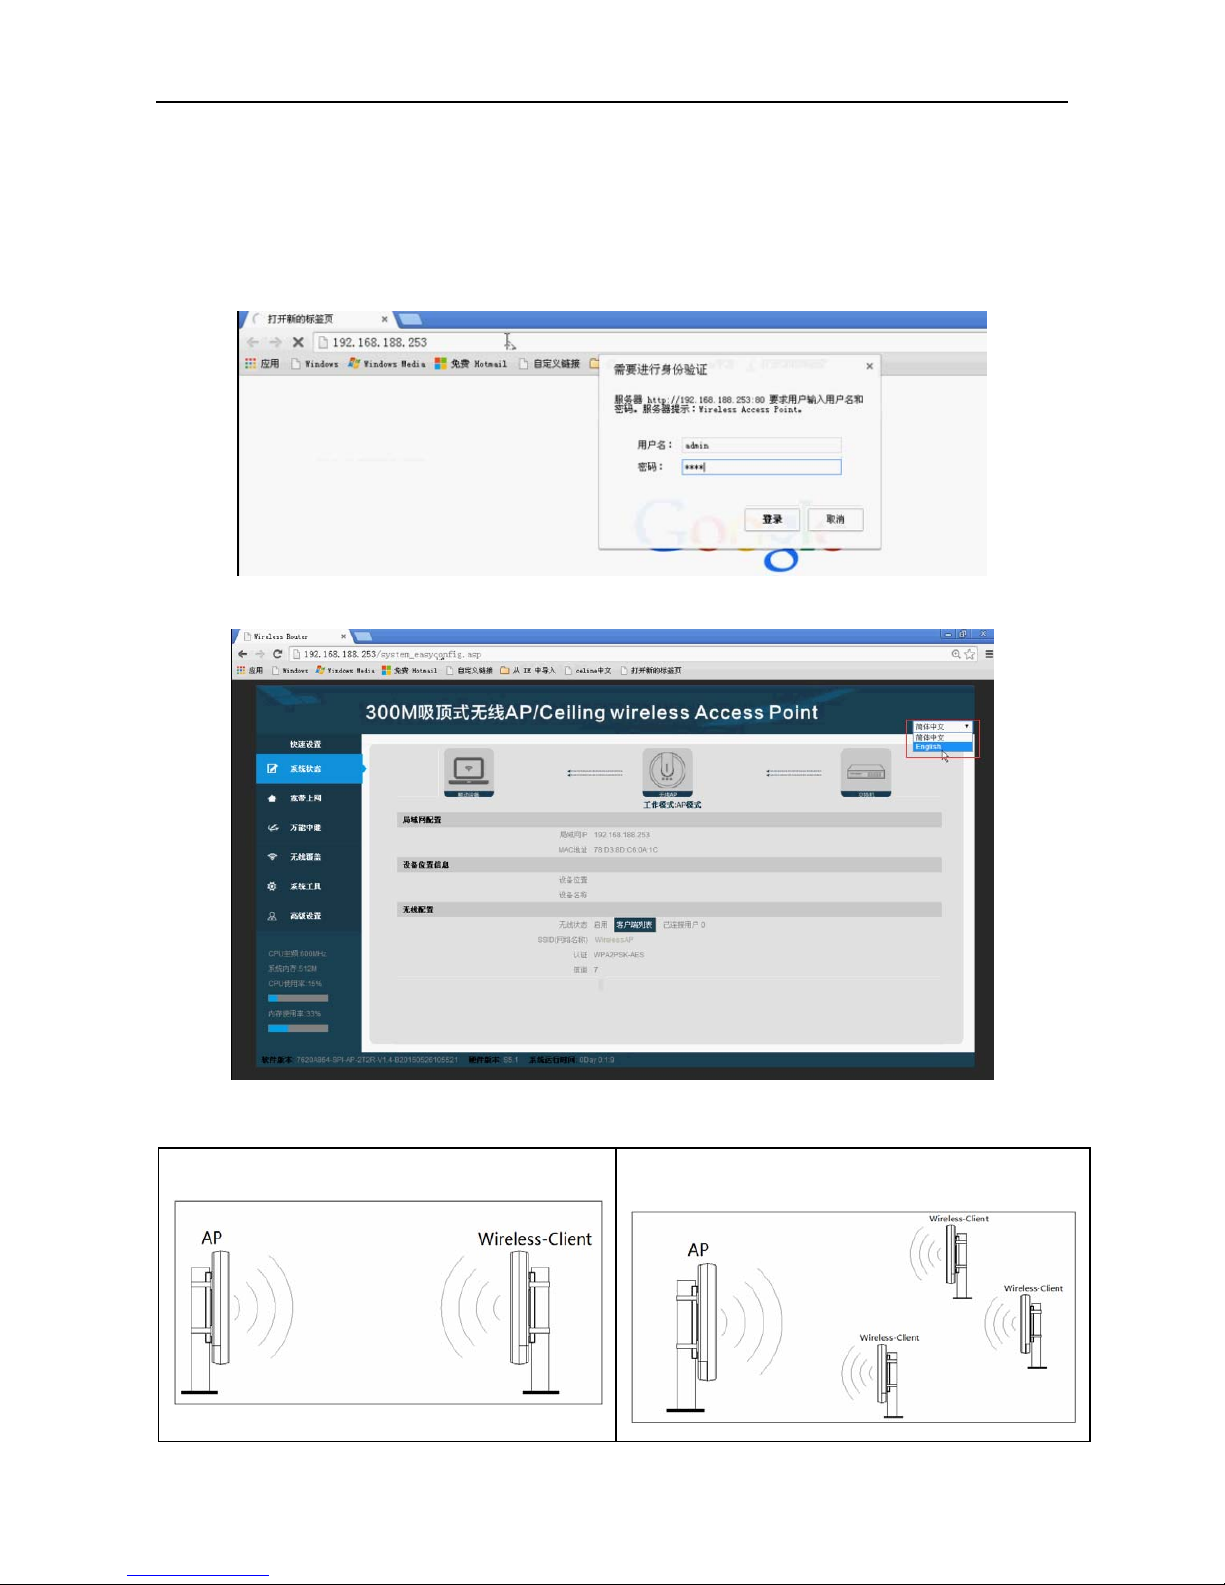
2, Login CPE
Open the browser, Input the CPE IP address (192.168.188.253), press “Enter”.
Default id: “admin” ; Password: “admin”; Enter click Login.
If engineer debugging the device for you, please refer to the nameplate.
log-in CPE. Select English;
a. CPE operating mode
Point to point transmission mode: Point to multipoint transmission mode:
Page 4

Copyright 2015-2016 Egasky Networks, Inc.
- 4 -
AP mode is connected to a monitoring center or broadband terminal end, namely the transmitting end,
Client mode is connected to the IP camera or other network devices, namely the receiving end.
Because the bridge is two-way transmission, in Point to Point program do not distinguish between the
transmitter and the receiver.
However, Point to multipoint program, still in strict accordance with the illustrated erecting equipment.
Since the CPE covers “AP mode” and “Client mode”, the following steps are categorized for convenience
reading to describe how to set each mode after successful log-in.
b. AP mode
b-1、Choose “Wireless Coverage”,Set SSID, Channel, Authentication , Key ;Click “Apply”;
b-2、Change CPE ip address, Select Advanced Settings, Network> Lan Settings> IP Setting; Select "Static IP",
Set new ip Click "Apply";
Page 5

Copyright 2015-2016 Egasky Networks, Inc.
- 5 -
b-3、Wait CPE reboot, Click “Device Status”, View Status
AP mode setting is completed, remains active.
C. Client mode
c-1、Login Second CPE,Choose “Wireless Repeater”,Click “Scan AP”;
Page 6

Copyright 2015-2016 Egasky Networks, Inc.
- 6 -
c-2、Select your SSID;
c-3、Set Key, Click "Apply";
c-4、Wait CPE reboot, Click “Device Status”, View Status
Page 7

Copyright 2015-2016 Egasky Networks, Inc.
- 7 -
c-5、Disable repeater mode, Select “Advanced Settings”, Wireless> Basic Settings, Set Disabl e; Click "Apply";
Ping AP ip address to verify communication.
Page 8

Copyright 2015-2016 Egasky Networks, Inc.
- 8 -
Tips
▅ If can’t log-in page, Make sure that the CPE is correctly connected with you PC, and powered on already.
Then make sure that the IP address of your PC is set in the same network segment with the CPE, which
means that the IP address of your PC should be between 192.168.188.*.
▅ CPE default segment 192.168.188.x, for ease of maintenance, not recommended modifying the default
network segment. Bridge wireless connection, at Data Link layer (Layer 2), commonly used protocol ICMP
IGMP IP (IPV4 IPV6) ARP RARP at Network layer (Layer 3). So even different network segments, it will not
affect the transmission of Layer 3 protocol. More details can search the OSI (Open System
Interconnection) ;
▅ When formation of bridging need specify a fixed frequency, could not choose Auto; if only using AP mode
can choose Auto
▅ After the CPE boot (startup need one minute), press the RESET button 15 seconds and released after,
restart CPE, the completion of initialization.
▅ Wireless parameter setting, install multiple sets of bridge at the same location, long-distance
transmission, enhance the transmission rate is very important.
For more details, please contact optimization engineer.
 Loading...