

Page 1
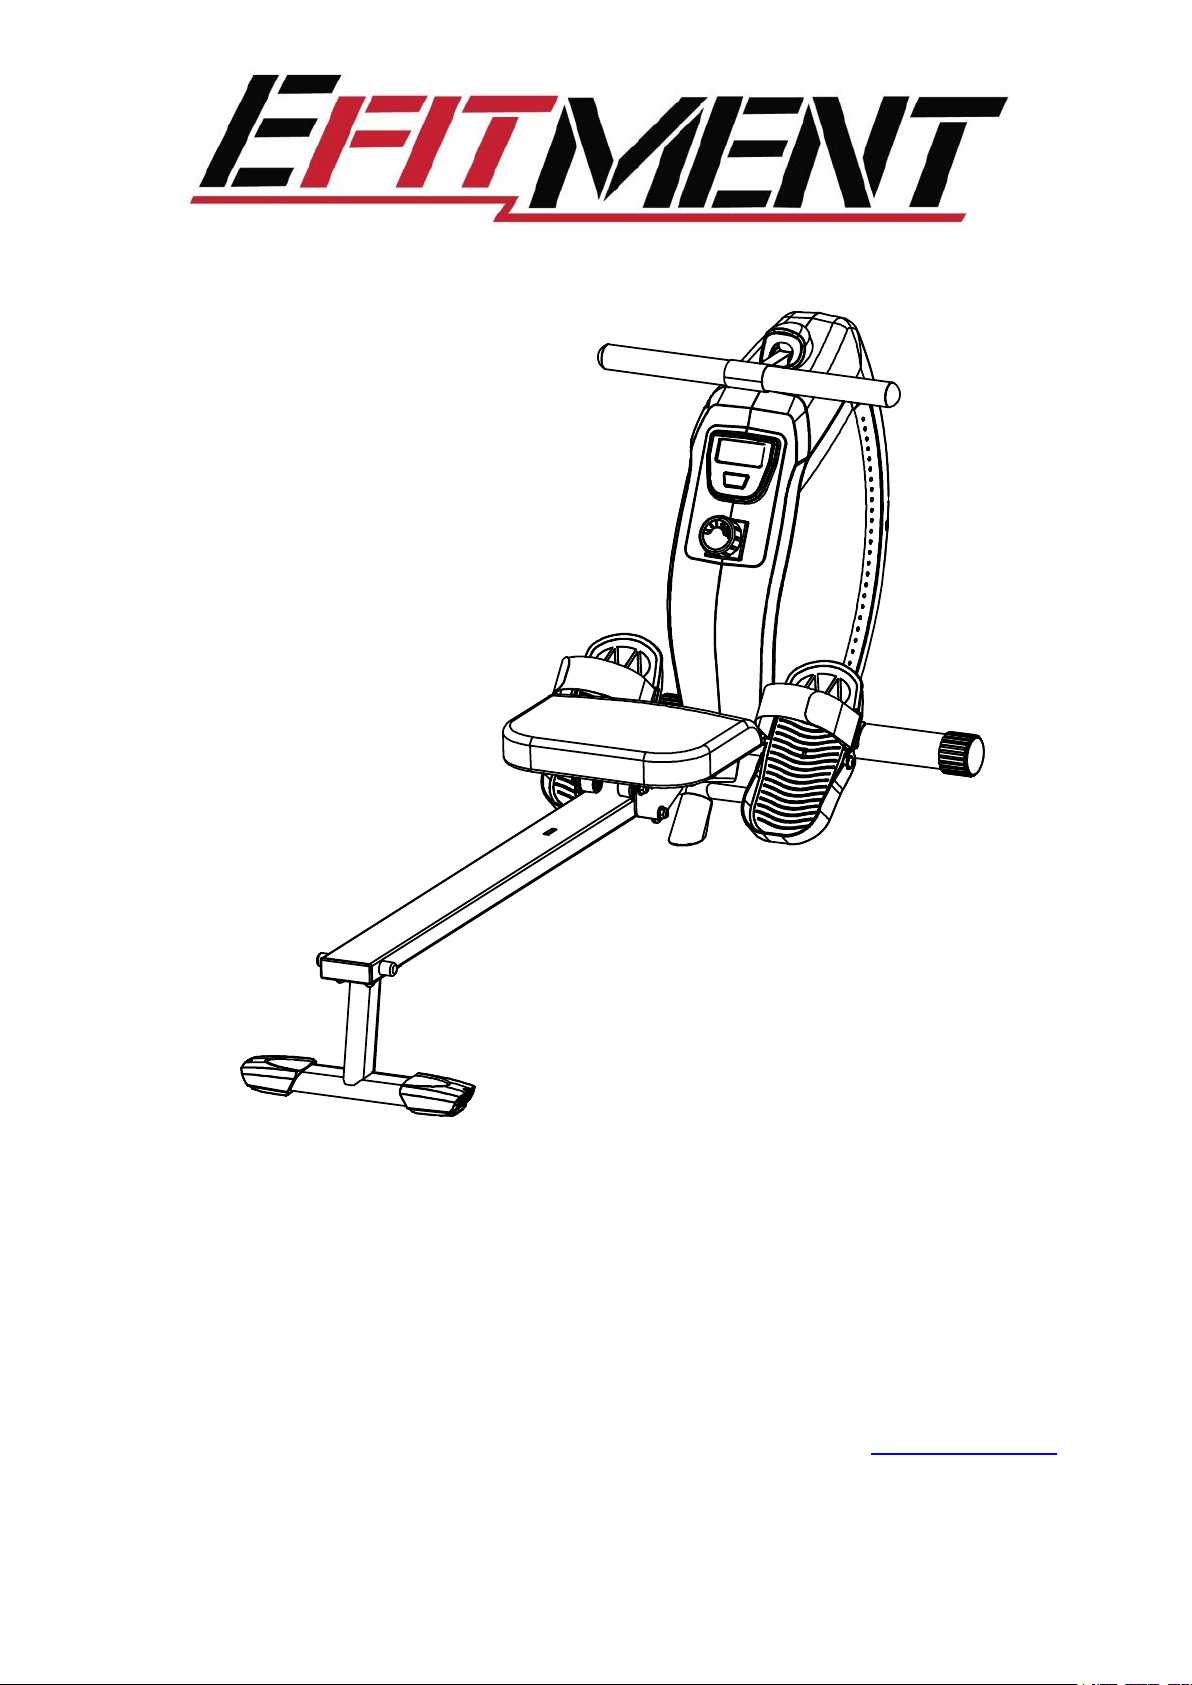
RW025Magnetic Rowing Machine with Steel Slide Rail User Manual
IMPORTANT: Read all instructions carefully before using this product. Retain owner’s
manual for future reference. For customer service, please contact: [email protected]
Page 2

IMPORTANT SAFETY INFORMATION
1. Before starting any exercise program you should consult your physician to determine if
2. Be aware of your body’s signals. Incorrect or excessive exercise can damage your health.
3. Keep children and pets away from the equipment. The equipment is designed for adult
4. Use the equipment on a solid, flat level surface with a protective cover for your floor or
5. Ensure that all nuts and bolts are securely tightened before using the equipment. The
6. Always use the equipment as indicated. If you find any defective components while
7. Wear suitable clothing while using the equipment. Avoid wearing loose clothing that may
8. Do not place fingers or objects into the moving parts of the equipment.
9. The maximum weight capacity of this unit is 250 pounds.
10. This equipment is not suitable for therapeutic use.
11. Move with caution when lifting and moving the equipment. Always use proper lifting
12. Your product is intended for use in cool, dry conditions. You should avoid storage in
13. This equipment is designed for indoor use only! It is not intended for commercial use!
WARNING: This product can expose you to one or more chemicals known to the
State of California to cause cancer and birth defects or reproductive harm. For
more information go to www.P65Warnings.ca.gov.
We thank you for choosing our product. To ensure your safety and health, please use this
equipment correctly. It is important to read this entire manual before assembling and using the
equipment. Safe and effective use can only be assured if the equipment is assembled,
maintained, and used properly. It is your responsibility to ensure that all users of the equipment
are informed of all warnings and precautions.
you have any medical or physical conditions that could put your health and safety at risk or
prevent you from using the equipment properly. Your physician’s advice is essential if you
are taking any medication that may affect your heart rate, blood pressure, or cholesterol
level.
Stop exercising if you experience any of the following symptoms: pain, tightness in your
chest, irregular heartbeat, shortness of breath, lightheadedness, dizziness, or feelings of
nausea. If you do experience any of these conditions, you should consult your physician
before continuing with your exercise program.
use only.
carpet. To ensure safety, the equipment should have at least 2 feet of free space all
around it.
safety of the equipment can only be maintained if it is regularly examined for damage
and/or wear and tear.
assembling or checking the equipment, or if you hear any unusual noises coming from the
equipment during exercise, stop using the equipment immediately and don’t use the
equipment until the problem has been rectified.
become entangled in the equipment.
technique and seek assistance if necessary.
extreme cold, hot, or damp areas as this may lead to corrosion and other related
problems.
- 1 -
Page 3
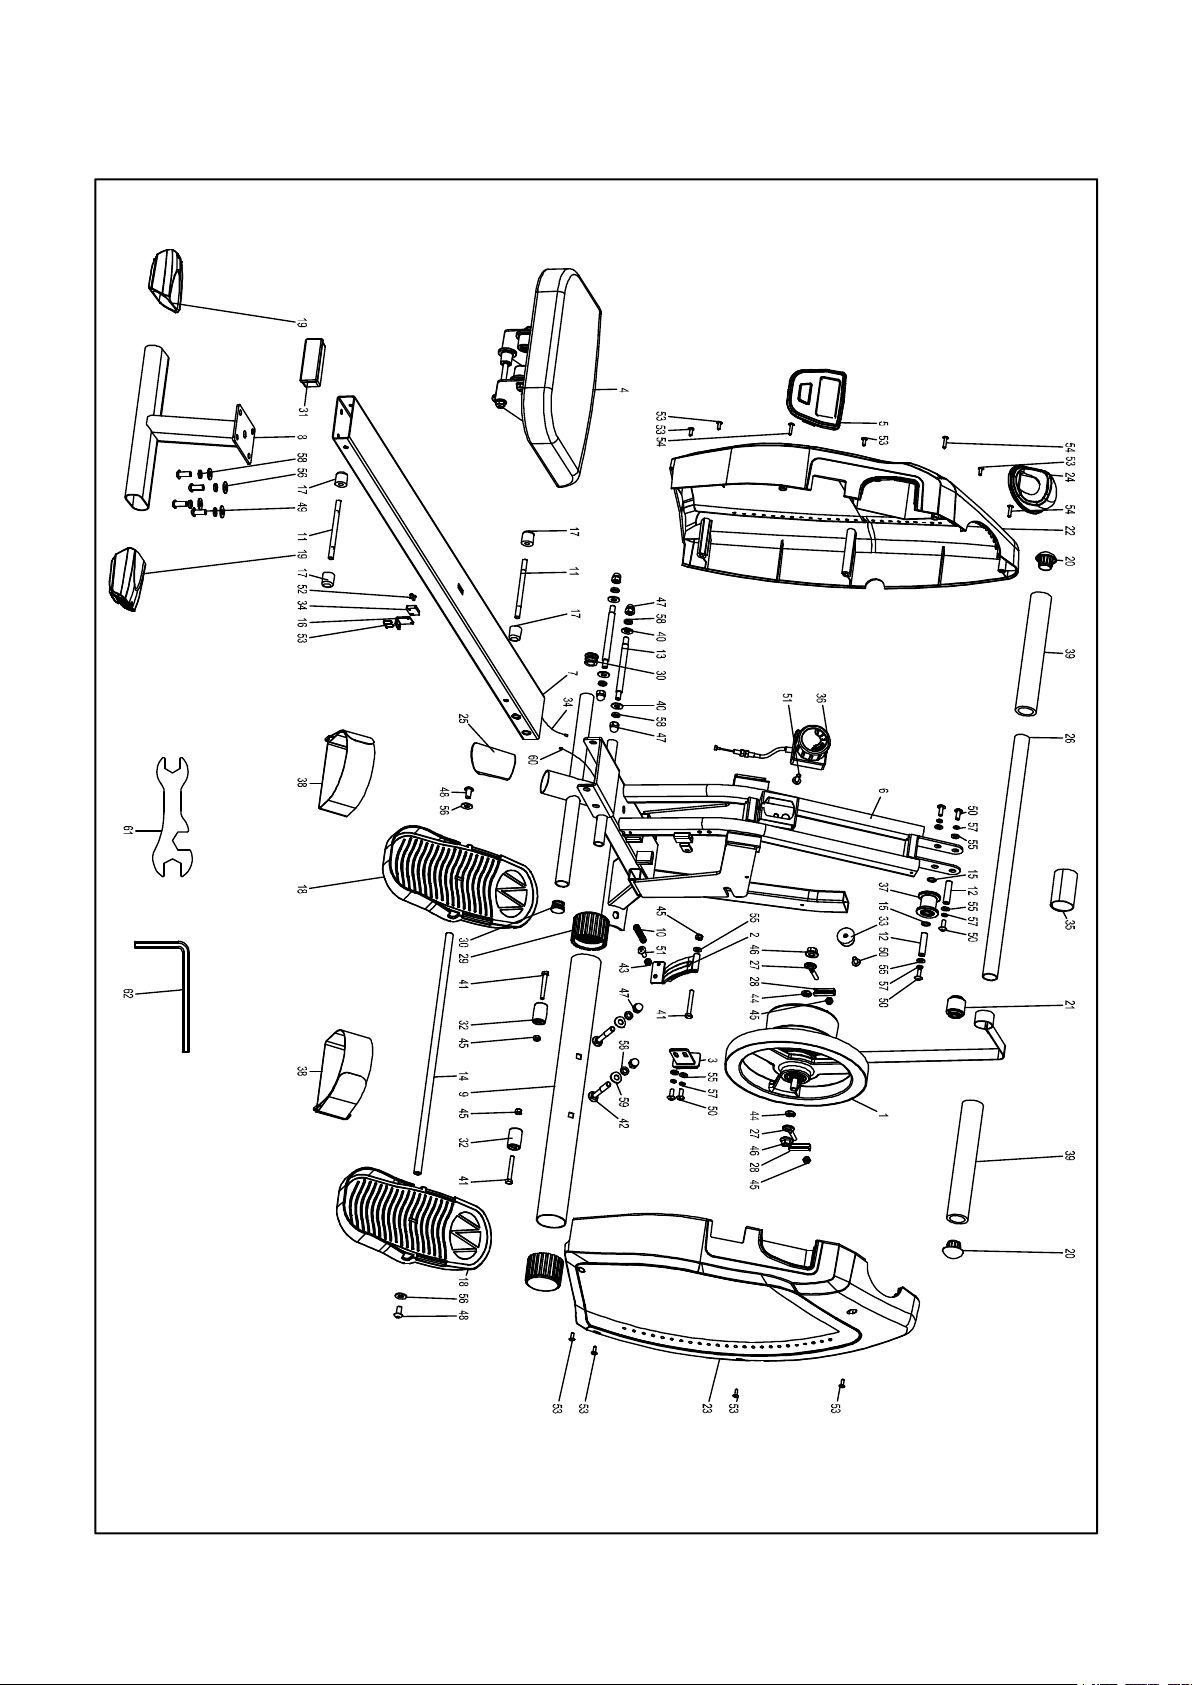
EXPLODED DRAWING
- 2 -
Page 4
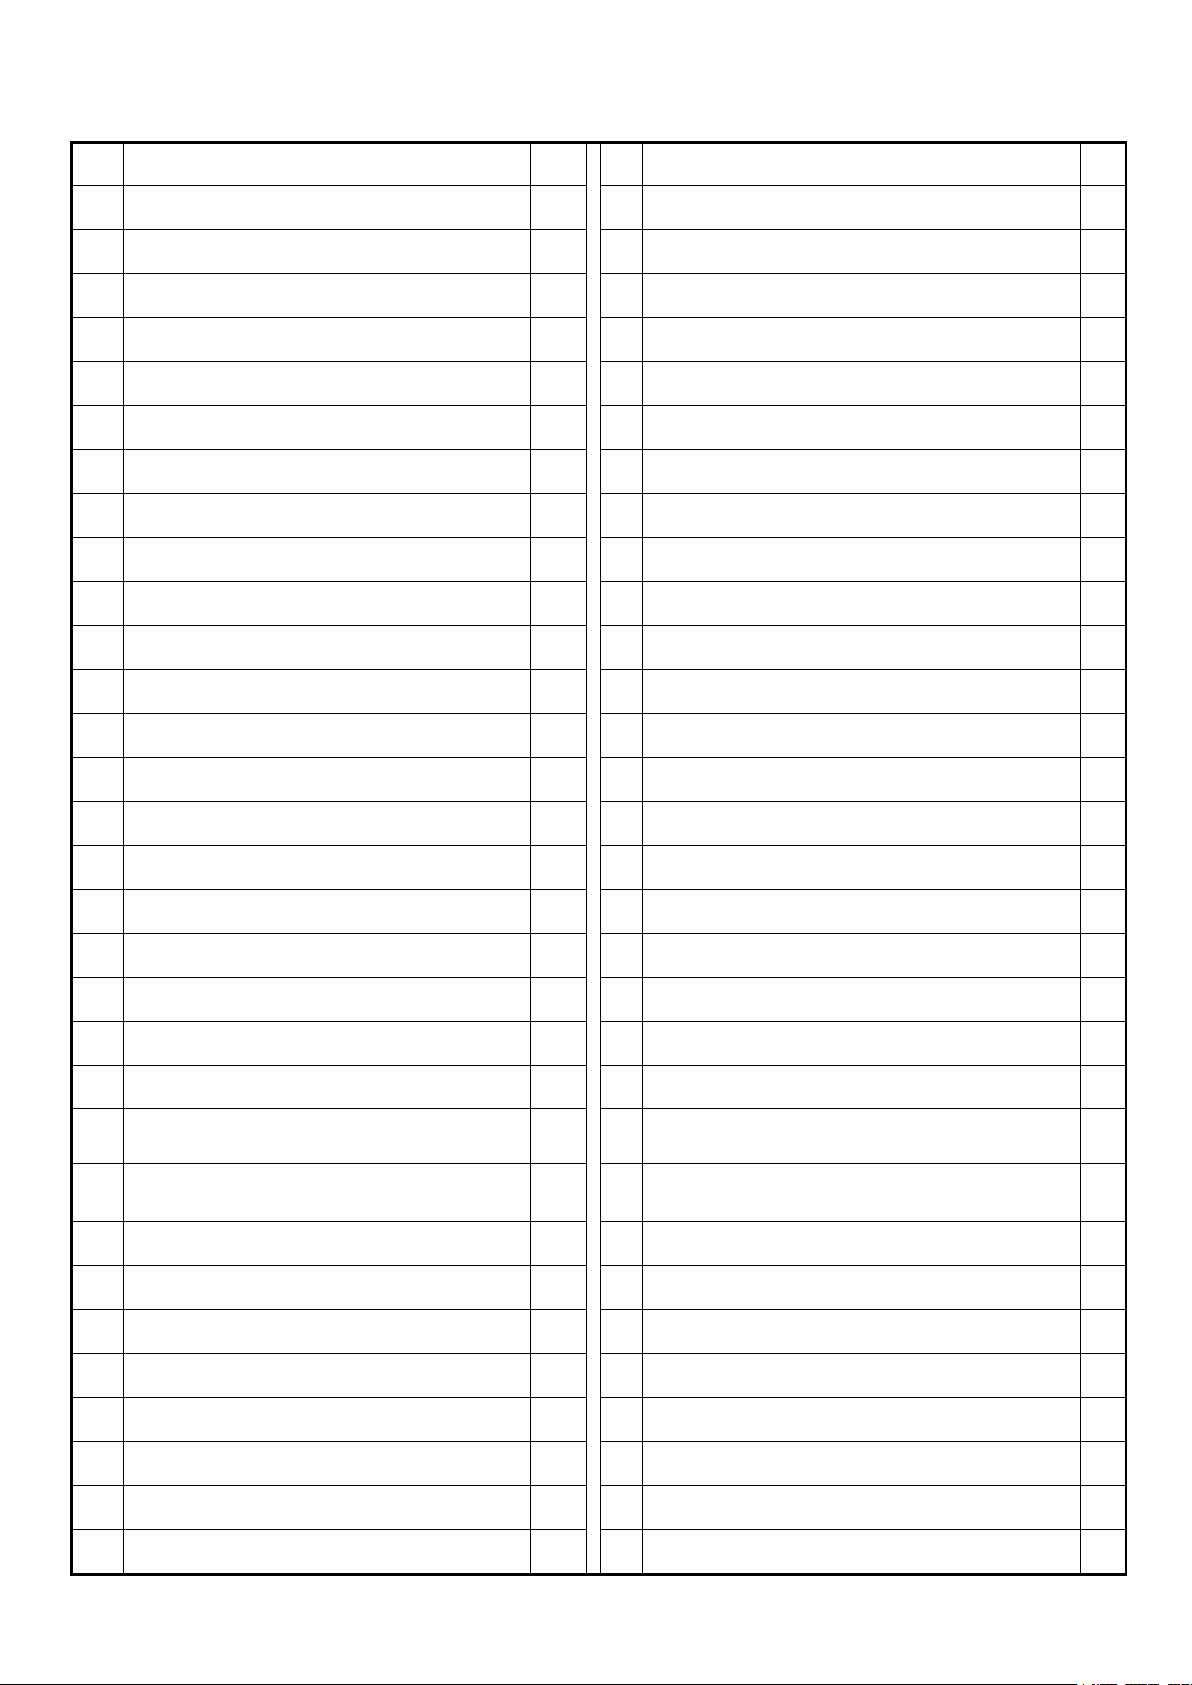
PARTS LIST
NO.
DESCRIPTIONS
QTY
NO.
DESCRIPTIONS
1
Coil spring flywheel
132Bushing
2
2
Adjustable magnetic control
133Rubber foot pad
1
3
Fixable magnetic control
134Sensor wire
1
4
Seat
135Velcro
1
5
Meter
136Tension control knob
1
6
Main frame
137Pulley
1
7
Sliding rail
138Pedal strap
2
8
Rear stabilizer
139Foam grip
2
9
Front stabilizer
140Flat washer Φ10.3*Φ20.0*T2.0
4
10
Compression spring
141Hexagon bolt M6x45
3
11
Screw
242Bolt M8x60
2
12
Axle for sliding wheel
243Hexagon nut M6
1
13
Connecting axle
244Hexagon nut M10
2
14
Pedal shaft core
145Nylon nut M6
5
15
Washer
246Hexagon nut M10
2
16
Fixed piece for sensor wire
147Cap nut M8
6
17
Limit pad
448Allen screw M8x15
2
18
Pedal
249Allen screw M8x20
4
19
End cap for rear stabilizer
250Screw M6x15
7
20
End cap for handlebar
251Screw M6x20
2
21
Block wheel for mesh belt
152Self tapping screw ST2.9x6.5
2
22
Left chain cover
153Self tapping screw ST4.2x13.0
10
23
Right chain cover
154Self tapping screw ST4.2x20.0
3
24
Decoration cover
155Flat washer Φ6.4*Φ13.0*T1.5
7
25
Foot pad
156Flat washer Φ8.4*Φ19.0*T1.6
6
26
Handlebar
157Spring washer Φ6.1*Φ9.3*T1.6
6
27
Screw
258Spring washer Φ8.4*Φ13.5*T2.5
10
28
U shape seat
259Arc washer Φ8.4*Φ19.0*T1.5
2
29
End cap for front stabilizer
260Meter trunk wire
1
30
Round plug
261Spanner #13,#14,#15
2
31
Square plug
162Allen wrench S5
2
- 3 -
Page 5
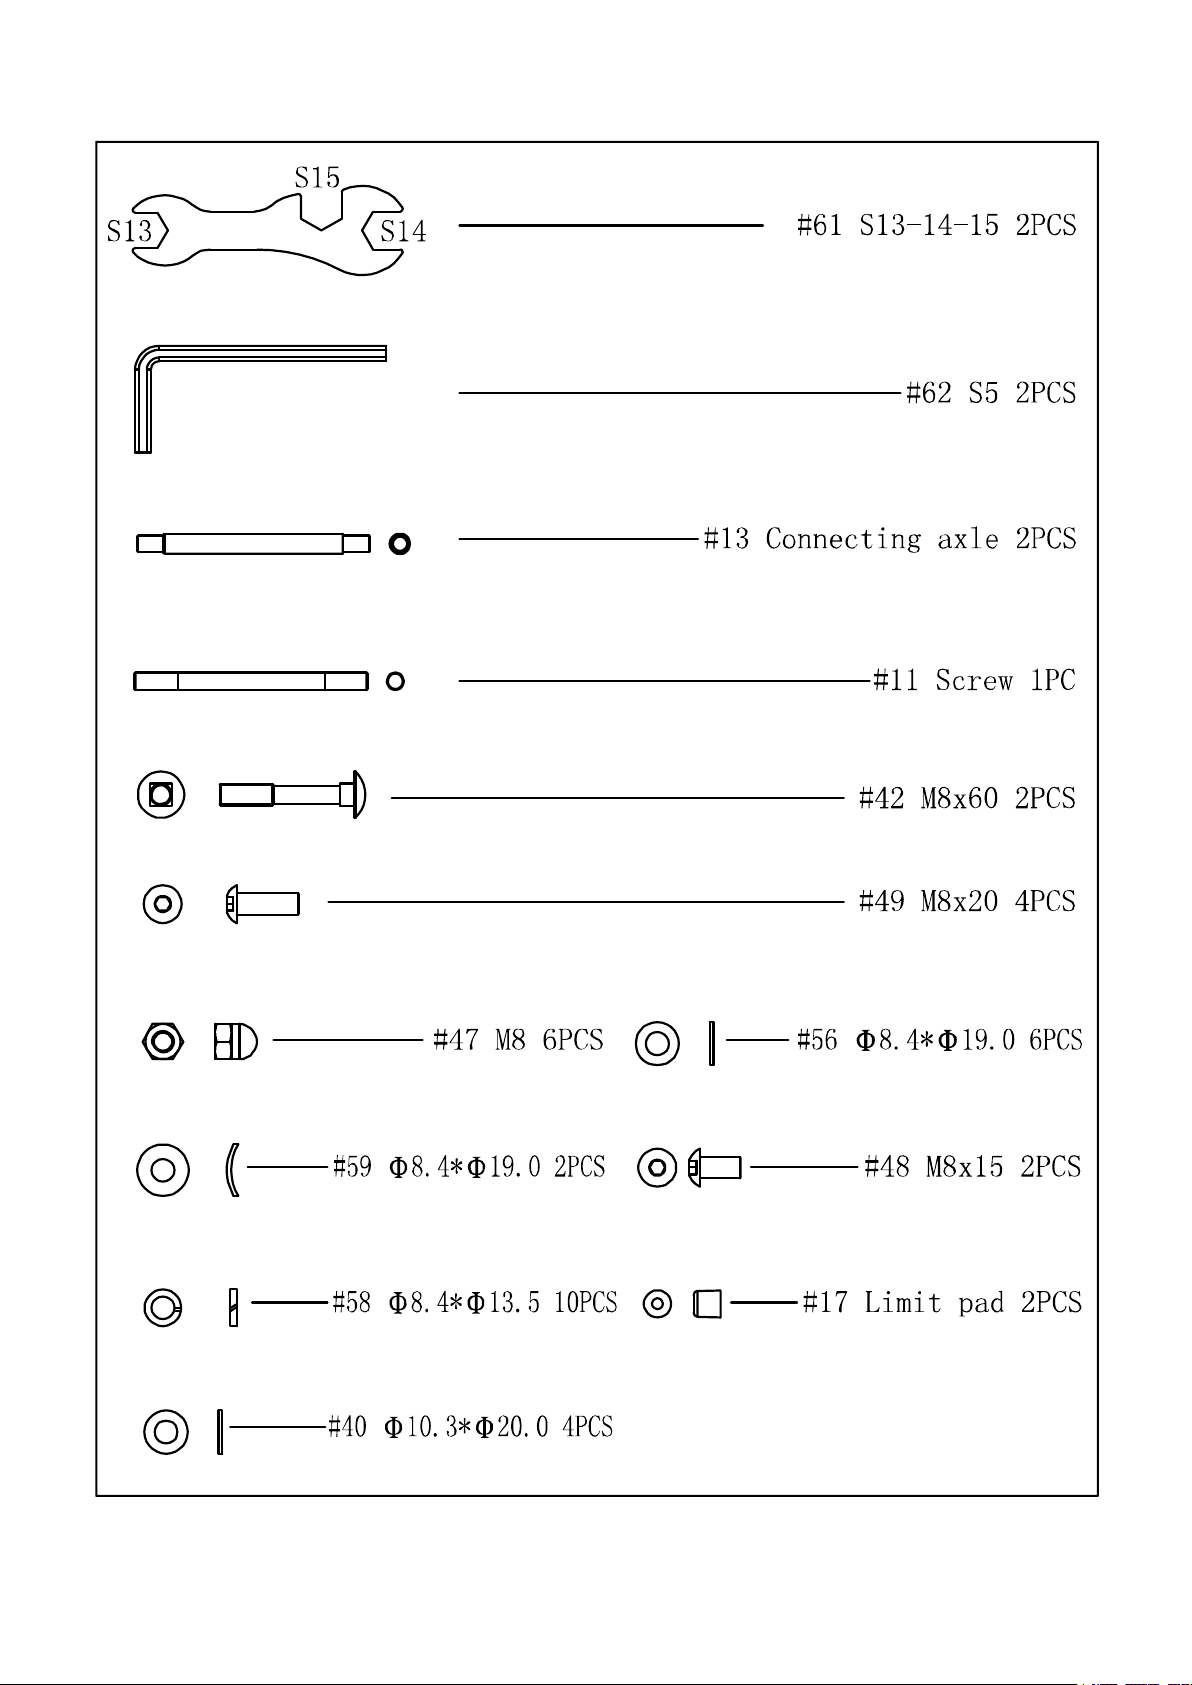
HARDWARE PACKAGE
- 4 -
Page 6
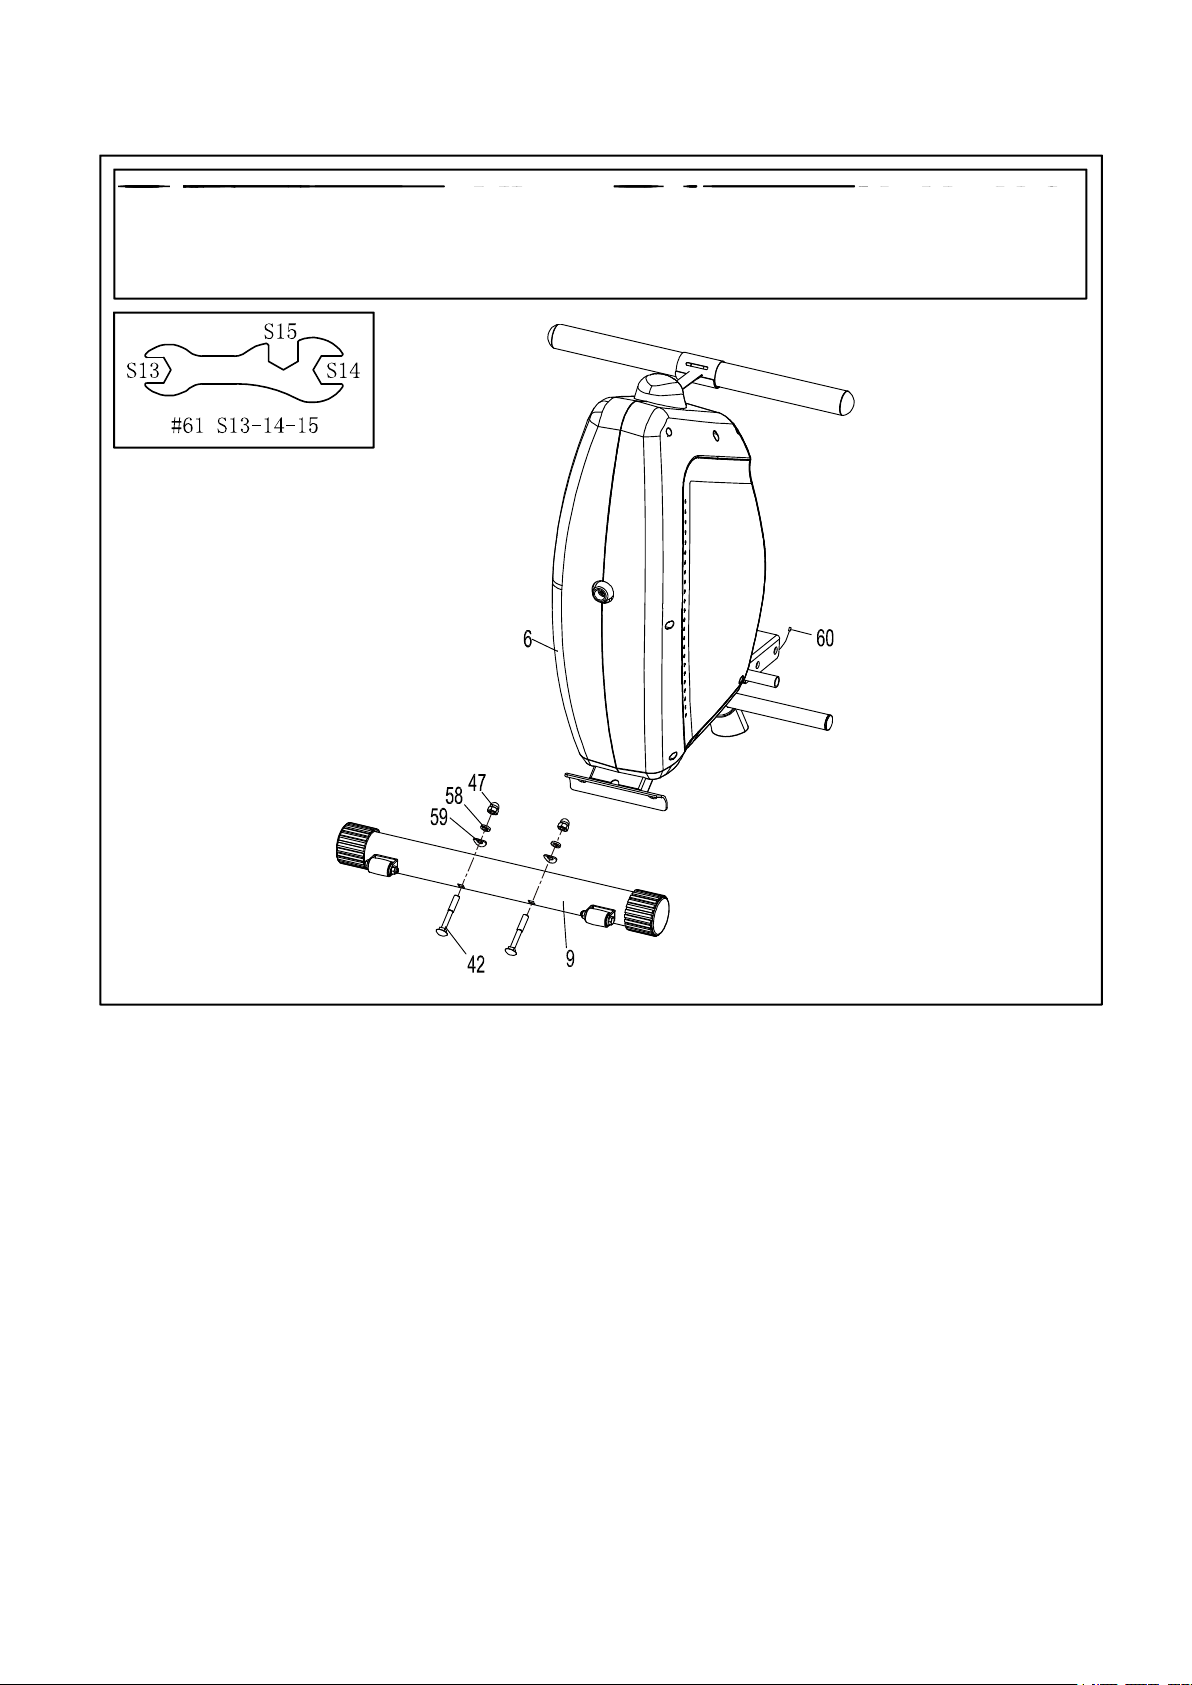
ASSEMBLY INSTRUCTIONS
STEP 1.
Attach the Front Stabilizer (No.9) into the Main Frame (No.6) using 2 Screws (No.42), 2
Arc Washers (No.59), 2 Spring Washers (No.58) and 2 Cap Nuts (No.47). Tighten with
Spanner (No.61).
- 5 -
Page 7
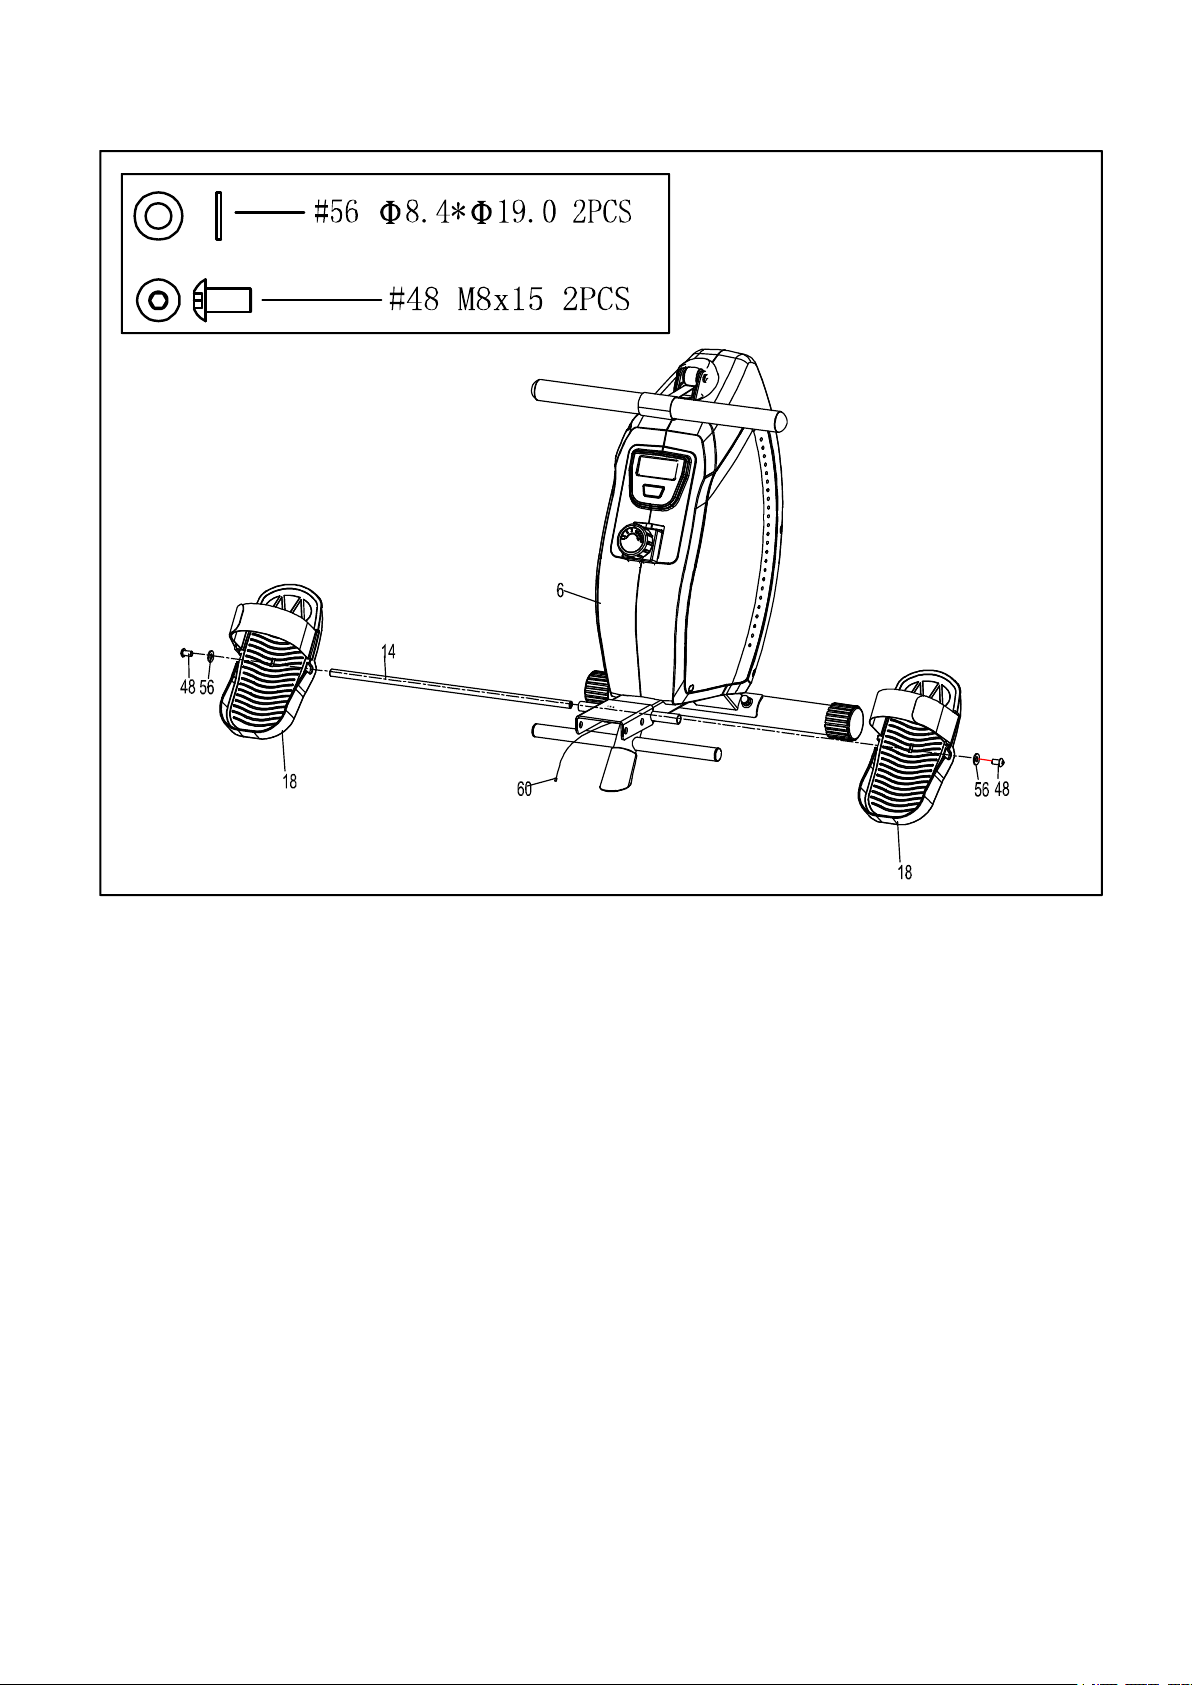
ASSEMBLY INSTRUCTIONS
STEP 2.
Insert the Pedal Shaft Core (No.14) into pedal support post the Main Frame (No.6). Slide the
Pedals (No.18) onto each end of the Pedal Shaft Core (No.14). Secure using 2 Flat
Washers (No.56) and 2 Allen Screws (No.48). Tighten with Allen Wrench (No.62).
- 6 -
Page 8
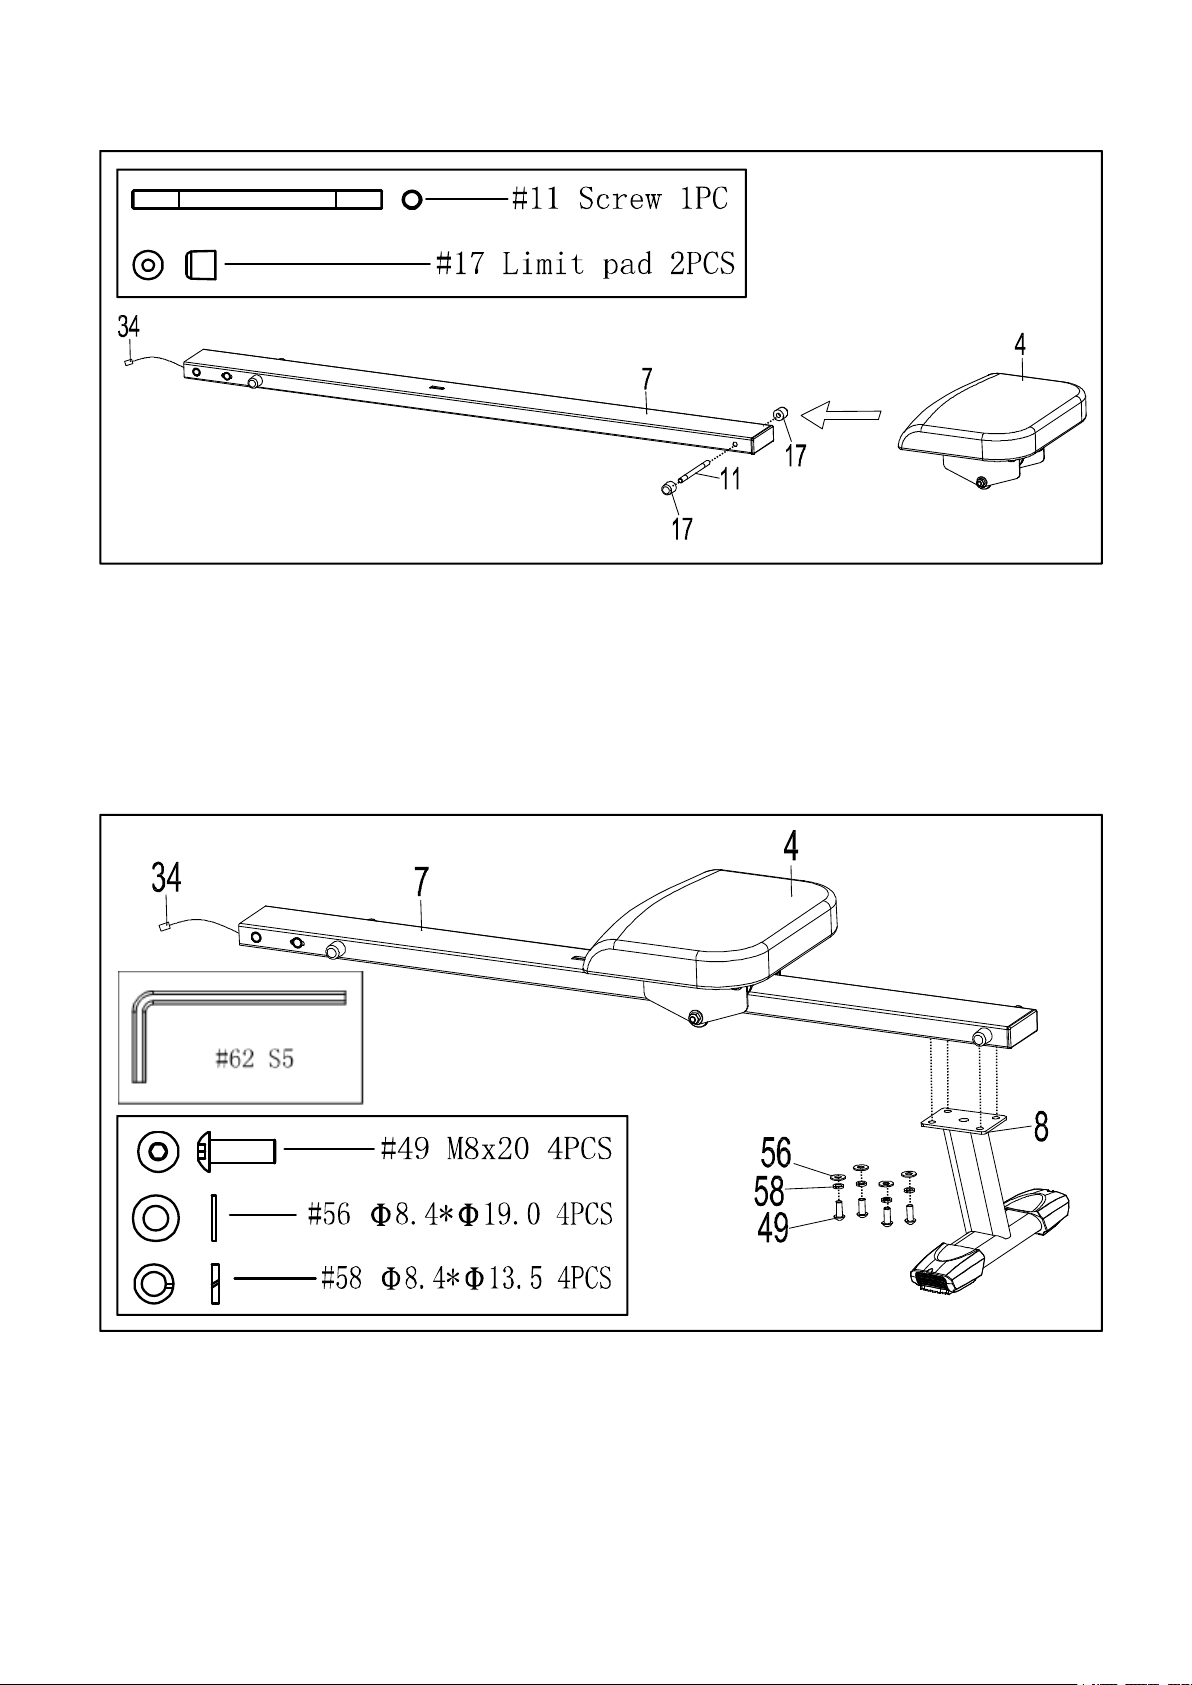
ASSEMBLY INSTRUCTIONS
STEP 3.
Insert the Saddle (No.4) onto the Sliding Rail (No.7) following the direction of arrow. Fix
Limit Pad (No.17) and Screw (No.11) into the Sliding Rail (No.7).
STEP 4:
Attach the Rear Stabilizer (No.8) to the Sliding Rail (No.7) using 4 Flat Washers (No.56), 4
Spring Washers (No.58) and 4 Allen Screws (No.49). Tighten with Allen Wrench (No.62).
- 7 -
Page 9
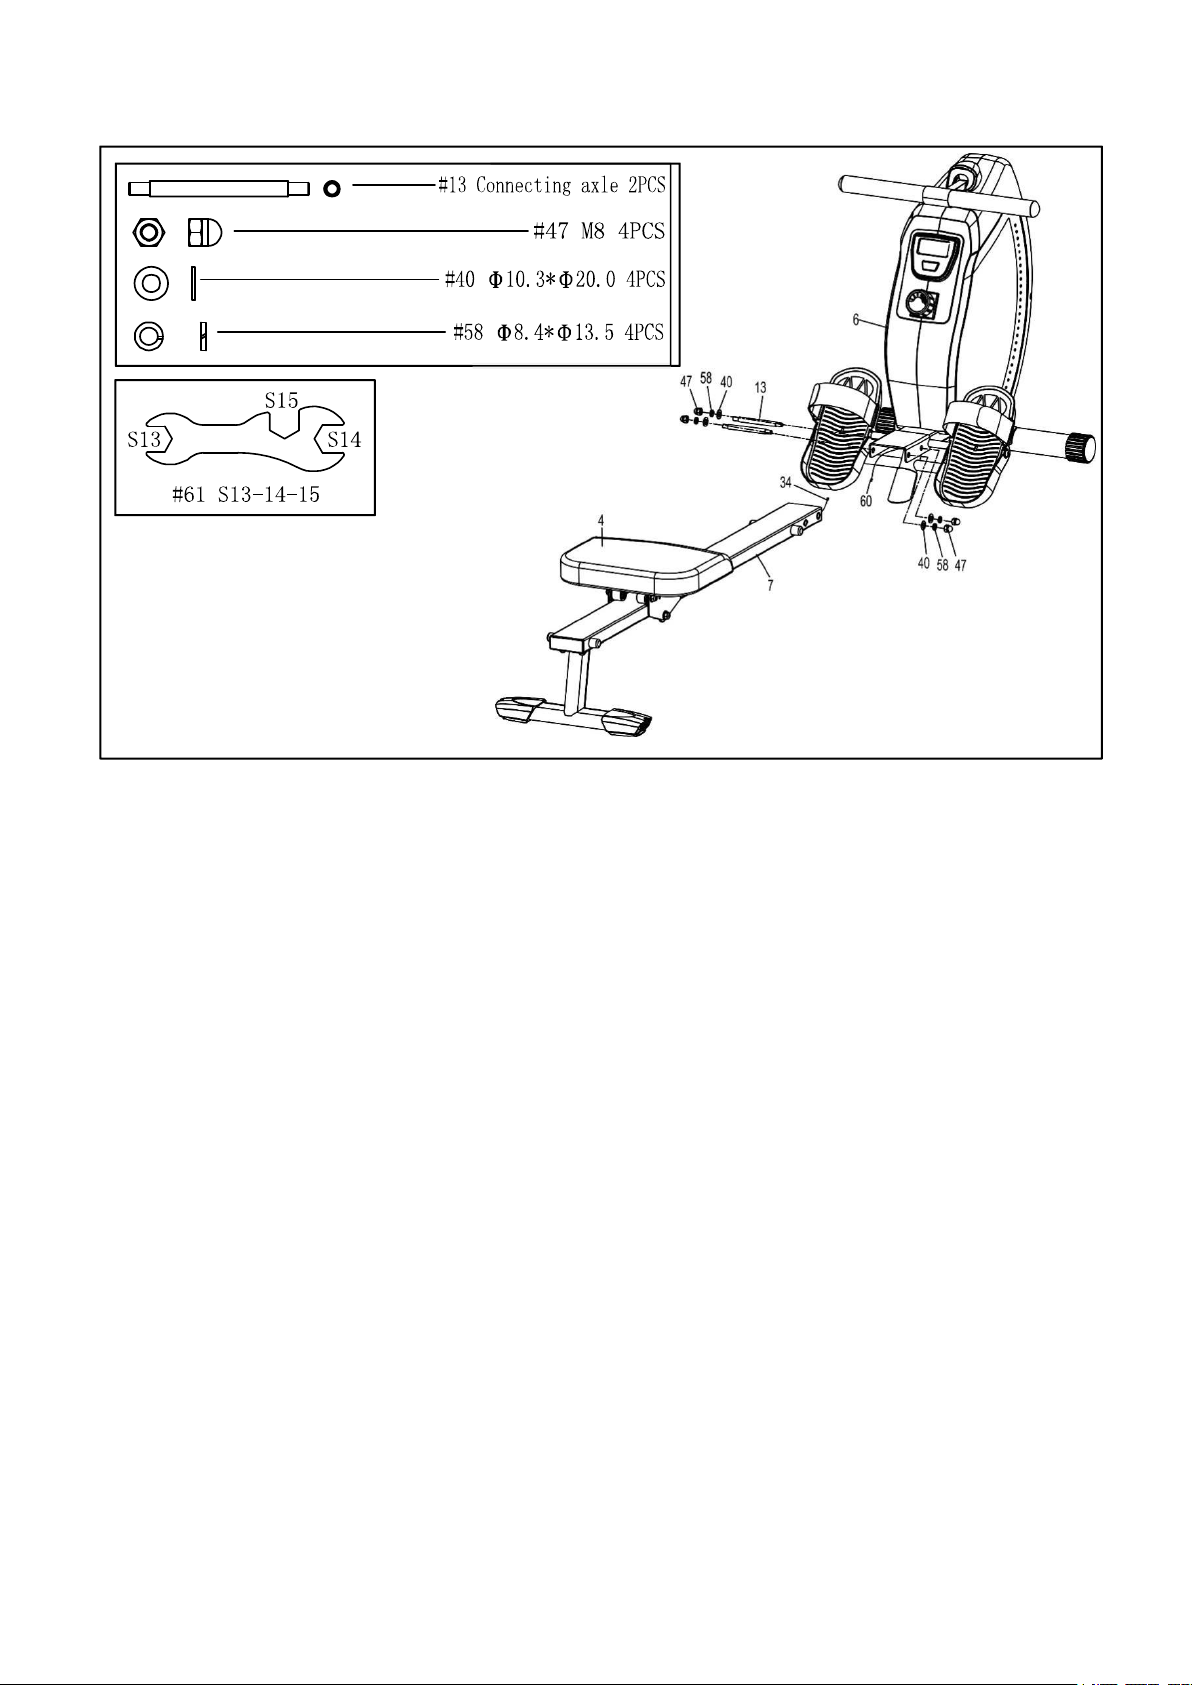
ASSEMBLY INSTRUCTIONS
STEP 5.
Connect the Computer Trunk Wire (No.60) with the Sensor Wire (No. 34).
Attach the Sliding Rail (No.7) to Main frame (No.6) using 2 Connecting Axles (No.13), 4
Flat Washers (No.40), Spring Washers (No. 58) and 4 Cap Nuts (No.47).
- 8 -
Page 10
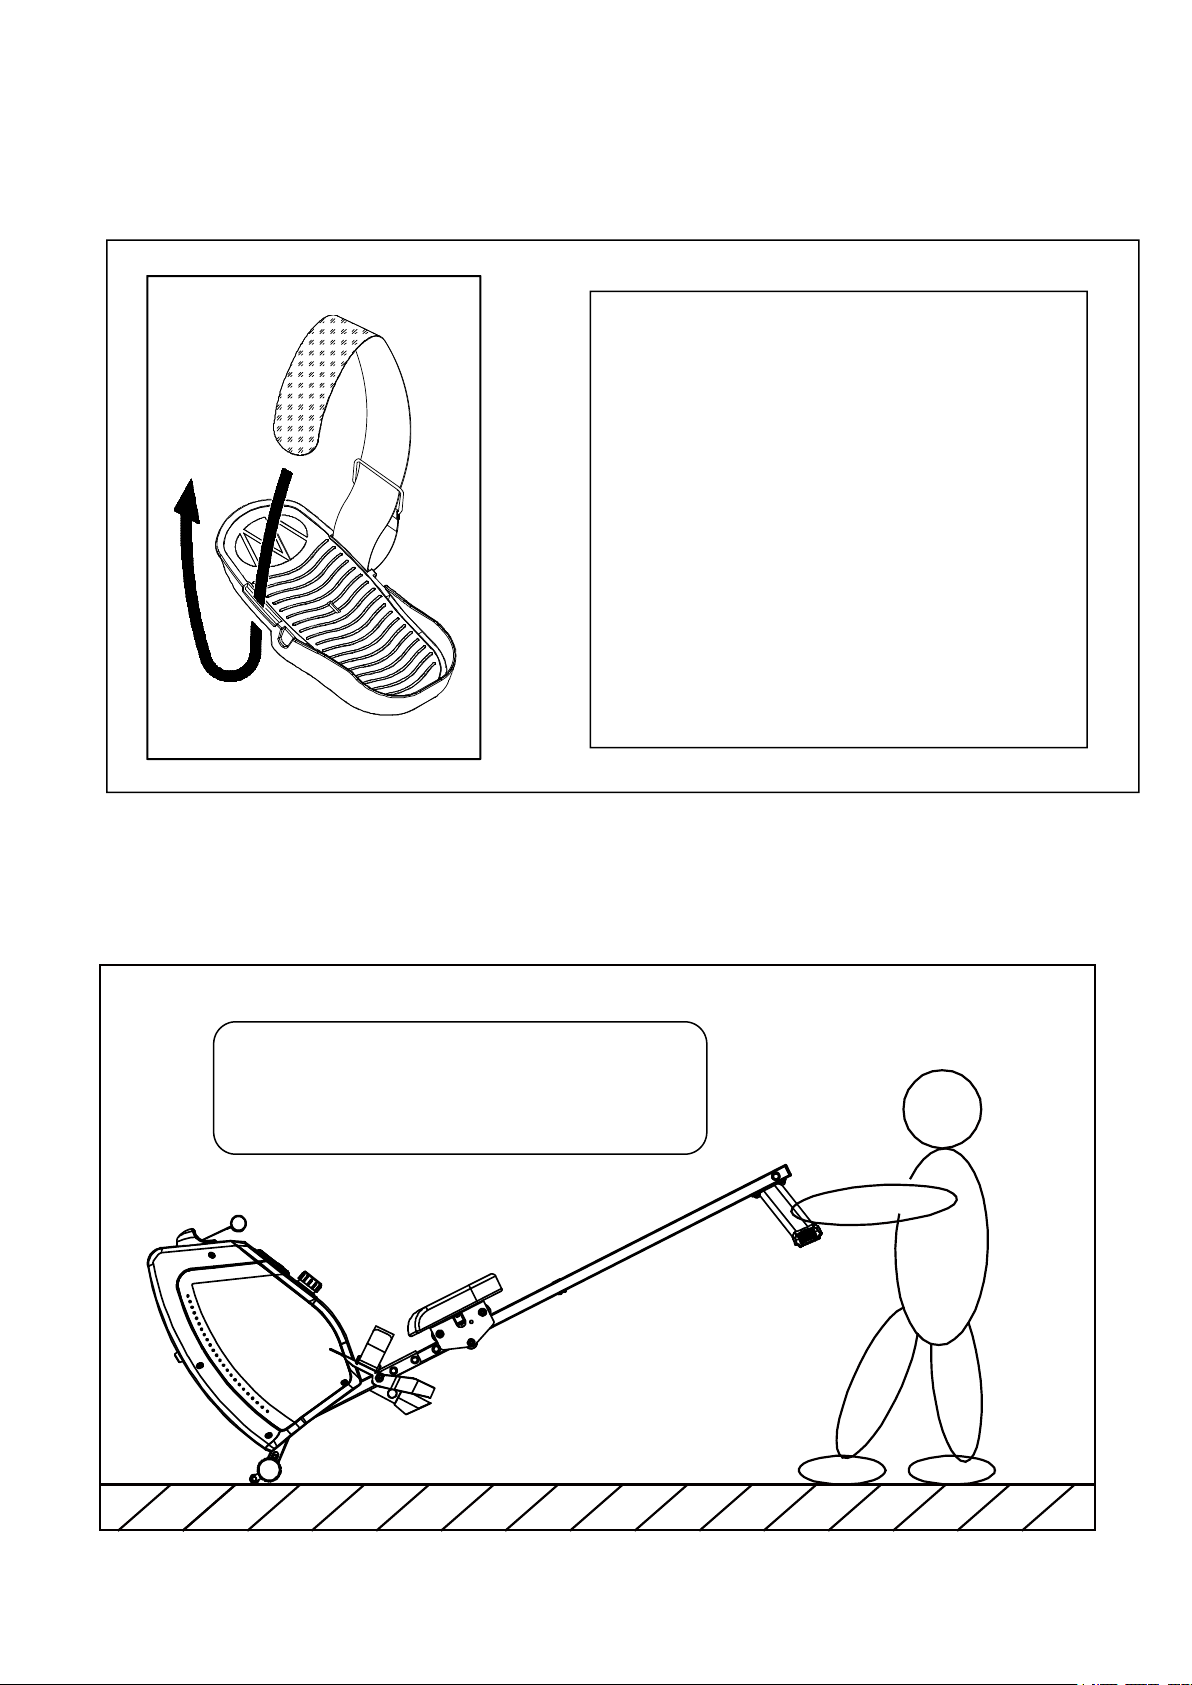
ADJUSTMENT GUIDE
To move the machine, lift up the rear stabilizer
until the transportation wheels on the front
stabilizer touch the ground. With the wheels on
the ground, you can transport the bike to the
The pedal strap is adjustable and can be
personalized to fit the user’s foot size.
To adjust the pedal strap, remove the Velcro
end of the strap from the mesh side by
pulling it upward then to the left.
Once removed, you may increase the
opening of the pedal strap by pulling the
mesh end up and to the right.
To tighten, pull the Velcro end of the pedal
strap upward then to the right and down to
secure it to the mesh side of the strap.
PEDAL ADJUSTMENT
MOVING THE MACHINE
- 9 -
Page 11
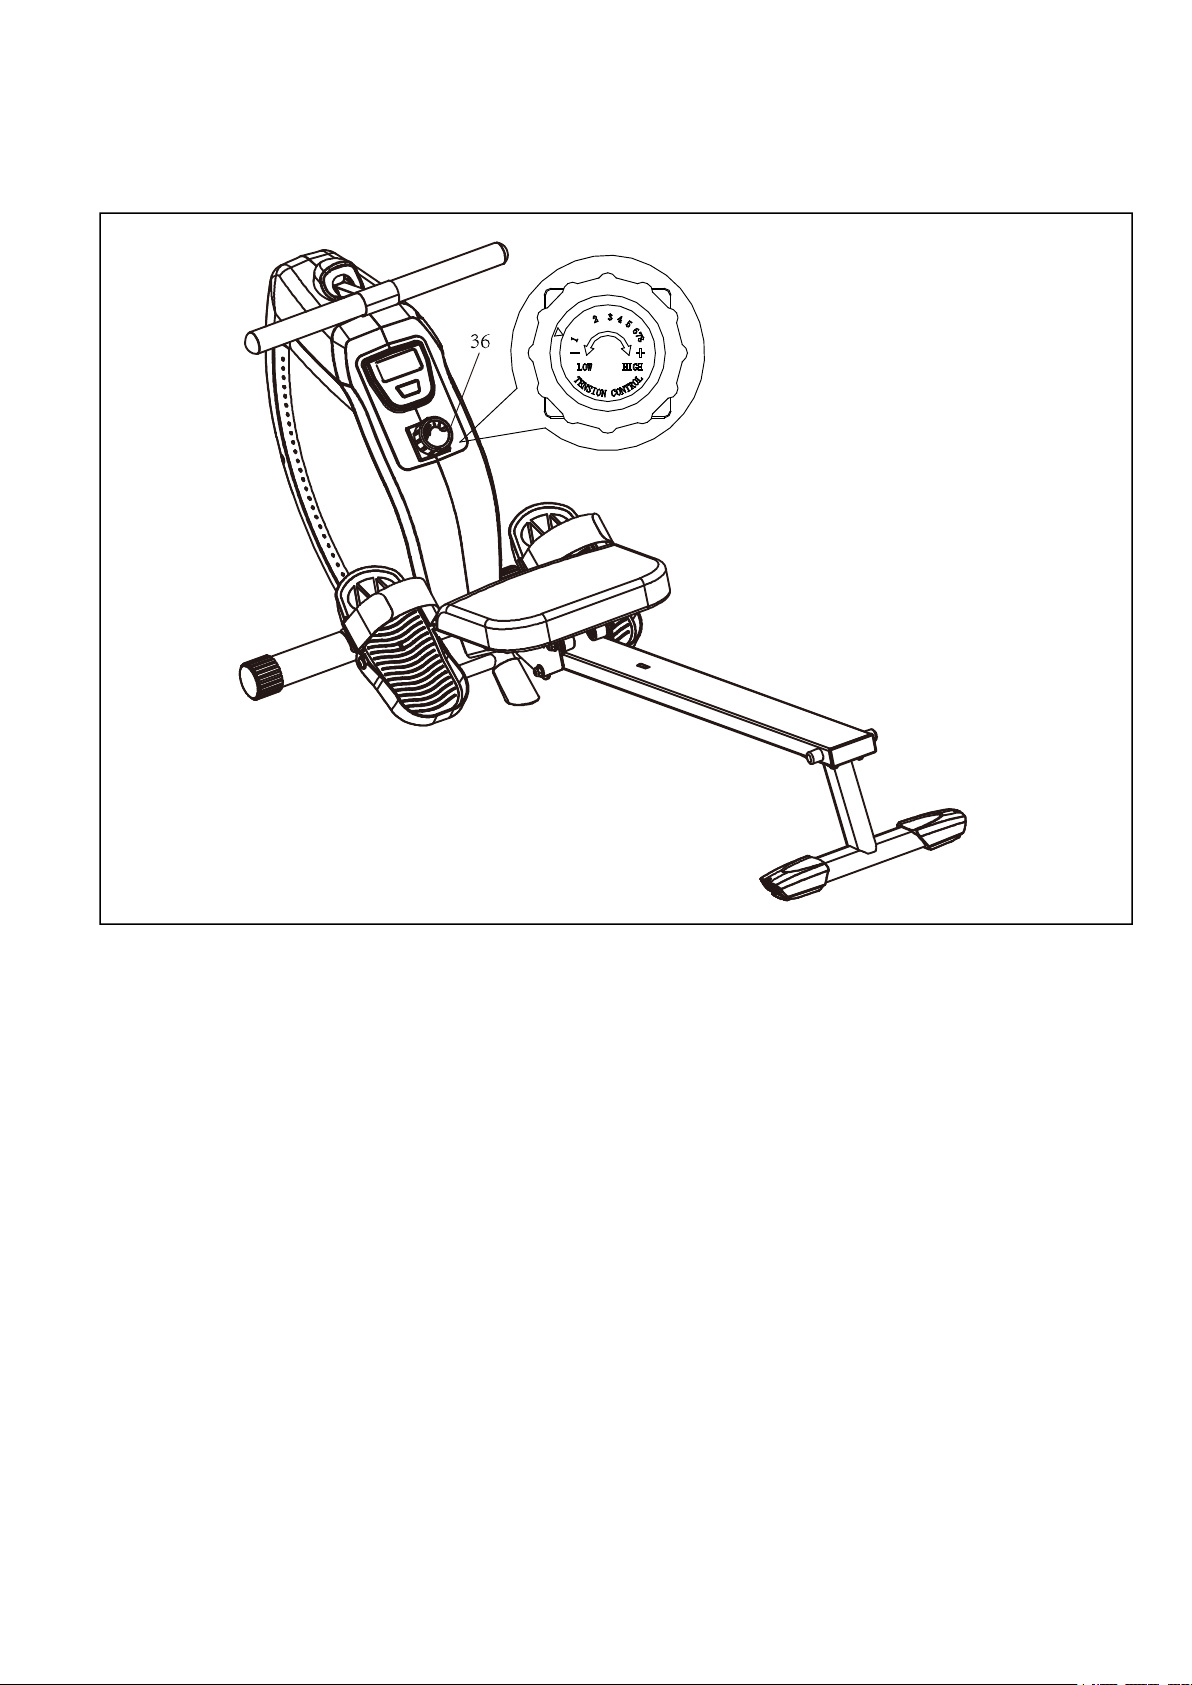
ADJUSTMENT GUIDE
Rotate the Tension Control Knob (No.36) clockwise to increase the level of resistance.
Rotate the Tension Control Knob (No.36) counter-clockwise to decrease the level of
resistance.
Tension levels are set at Level 1 being the lowest and Level 8 being the highest.
ADJUSTING THE RESISTANCE
CAUTION!
Moving parts, such as the seat, can crush and cut. Keep hands clear of the sliding rail during
use!
- 10 -
Page 12

METER INSTRUCTIONS
Version 1.1
CNT (COUNT) --------------------------------------------------------------------------------0~9999
TIME (TIME)-------------------------------------------------------------------------0:00~99:59MIN
RPM ( STROKES/MINUTE) ---------------------------------------------------------------0~9999
CAL (CALORIES)--------------------------------------------------- 0~9999 (0.0~999.9) KCAL
DIST (DISTANCE) --------------------------------------------------------------------0.1-999.9 ML
KEY FUNCTIONS
MODE: Press to select functions: time, calories, rpm, scan, count. Hold the button for 3
seconds to reset all values.
OPERATION PROCEDURES
AUTO ON/OFF
When you start rowing or press the MODE key, the meter will turn on. After approximately 4
minutes of inactivity, the meter will shut off.
MODE
To select the LOCK MODE setting, press the MODE key when the pointer on the function you
wish to select begins to blink. Once locked, only the selected function will be displayed.
RESET
The computer can be reset by pressing and holding the MODE button for three seconds.
Removing the batteries will also reset the computer and reset all values back to zero.
FUNCTIONS
SCAN: Repeatedly displays functions in the following order shown: count, time, speed, calories,
distance.
CNT(COUNT): Counts number of strokes.
TIME : The total exercise time will be shown.
RPM (STROKES/MINUTE): Display current speed during working time.
CAL(CALORIES): The calorie burned will be displayed.
DIST (DISTANCE ML): The distance of each workout will be displayed.
BATTERY
1. Meter stops counting if no signal for 4 seconds.
2. Meter shuts off if no signal for 4 minutes.
3. 1 AAA-1.5V Battery as Power supply.
4. If display is dim, replace the battery. Dispose of old battery according to your regional
guidelines.
- 11 -
 Loading...