

Effective Solutions ERS User Manual

ERS BARCODE DUPLICATOR
User Guide
CONTENTS
1.0 INTRODUCTION
1.1 What’s in the box ?
2.0 INSTALLING THE DUPLICATOR
2.1 Installing the Standard Duplicator
2.2 Installing the Telepen Duplicator
3.0 USING THE DUPLICATOR
3.1 Reproducing an Existing Barcode
3.2 Reprinting an Unreadable Barcode
3.3 Printing Sequentially Numbered Barcode Labels
Appendix A A TYPICAL DUPLICATOR ‘KEYPAD’

1.0 INTRODUCTION
This User Guide describes the installation and operation of the ‘generic’ Barcode
Duplicator system from ERS.
Duplicator functionality may include:
- Reproduction of existing (readable) barcodes
- Reprinting of existing (un-readable) barcodes
- Printing of sequentially numbered barcode labels
The actual functionality provided by specific or bespoke versions of the Duplicator
may differ. In these cases please refer to additional documentation provided with the
product.
1.1 What’s in the box ?
The Standard and Telepen Duplicators comprise the following items:
STANDARD TELEPEN
DUPLICATOR HARDWARE:
PRINTER YES YES
PRINTER PSU YES NO
SCANNER YES YES
SCANNER PSU NO YES
PAPER KEYPAD YES YES
CONSUMABLES:
RIBBONS YES YES
LABELS YES YES
2.0 INSTALLING THE DUPLICATOR
The Duplicator is essentially ready to use ‘out-of-the-box’ simply requiring the
labels and ribbon to be installed into the printer, the connection of the scanner and
the provision of mains power.
Refer to Sections 2.1 and 2.2 below for installation instructions.
2.1 Installing the Standard Duplicator
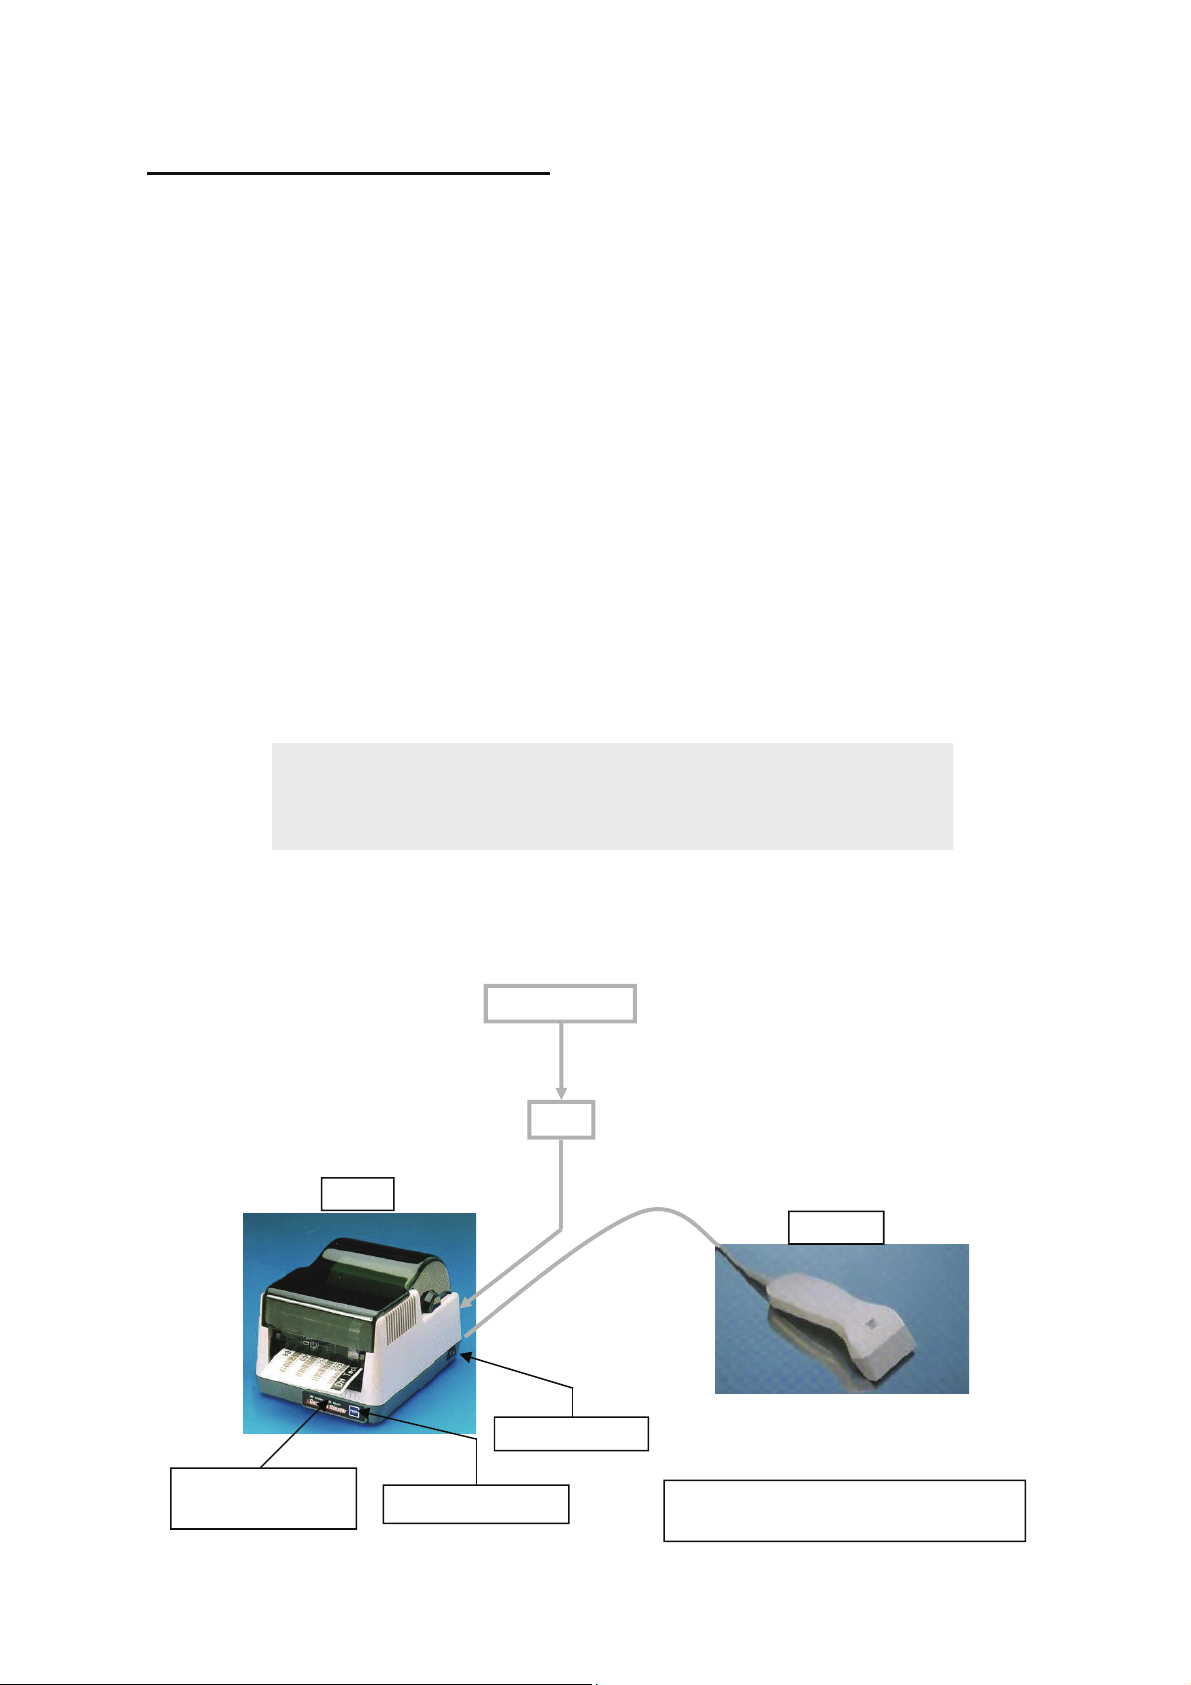
To install the Duplicator (See Schematic diagram 2.1 below):
• Connect the power cord from the printer PSU to the power socket on the rear
of the printer, and connect the PSU mains lead to a suitable grounded power
outlet.
• Connect the scanner to the 9-pin D-type connector located on the rear panel of
the printer
• Install the labels and ribbon into the printer. (Refer to the printer documentation
or ‘Quick Start’ Guide as necessary)
• Power the printer ON using the power switch located on the side of the printer.
The printer Ready LED should illuminate green. The scanner receives power
from the printer and will bleep on power up.
• Press the Feed button on the top of the printer to feed the labels to the correct
‘top of form’ position for printing
• The Duplicator is now ready to use.
NOTE: If the Ready LED illuminates red it is most likely that the print head
has n
ot been fully closed. In this case power the printer down, close the
head firmly e
s of the head are securely closed,
side
nsuring that the retaini
ng clips on b
d power the printer back on again.
an
oth the right and left hand
Printer
Power and Ready
LEDs
Mains Power
Power ON/OFF
Label Feed button
PSU
Scanner
SCHEMATIC DIAGRAM 2.1
The Standa
rd Duplicator
 Loading...