

Eelectron HORIZONE, IN00B02WEB Commissioning Instructions
Eelectron Spa
IN00B02WEBFI00070102_ADMIN_MANUAL_EN.DOCX
1/113
Horizone Server
IN00B02WEB
Commissioning Instruction
Prodotto: IN00B02WEB
Descrizione: Horizone Server – Commissioning Instruction
Data: 24/01/2017

Eelectron Spa
IN00B02WEBFI00070102_ADMIN_MANUAL_EN.DOCX
2/113
This manual was developed and implemented by Eelectron SpA, no part may be reproduced,
published or transmitted in any way or by any means electronic, mechanical, photocopying or
recording without the written permission of Eelectron SpA
Information in this document is subject to change without notice.
© 2017 Eelectron SpA. All rights reserved.
Microsoft, Windows, Windows 2000, Windows XP, Windows 2003, Windows Vista and Internet
Explorer are either trademarks or registered trademarks of Microsoft Corporation in the United
States and other countries. Java is a trademark of Sun Microsystems, Inc. in the United States and
other countries.
All other product names referenced herein are trademarks or registered trademarks of their
respective manufacturers.

Eelectron Spa
IN00B02WEBFI00070102_ADMIN_MANUAL_EN.DOCX
3/113
Index
FIRST COMMISSIONING ............................................................................................................... 6
INTRODUCTION ................................................................................................................... 6
CONTENT OF THE PACKAGING ......................................................................................... 6
HARDWARE INSTALLATION ................................................................................................ 7
INSTALLATION ..................................................................................................................... 7
ENVIRONMENTAL CONDITIONS ......................................................................................... 8
MAINTENANCE / WARRANTY ...................................................................................................... 8
NETWORK CONNECTION ............................................................................................................. 9
LOG IN ......................................................................................................................................... 11
FRONT END AND BACK END ENVIRONMENTS ........................................................................ 12
RESET OF IP ADDRESS TO FACTORY DEFAULTS .................................................................. 15
GENERAL OVERVIEW ................................................................................................................ 16
INTRODUCTION ................................................................................................................. 16
BACKEND – GRAPHICAL INTERFACE .............................................................................. 16
TOOLBAR ........................................................................................................................... 17
NAVIGATION MENU .................................................................................................................... 18
USE OF NAVIGATION MENU ............................................................................................. 18
MENU STRUCTURE ........................................................................................................... 21
SETUP................................................................................................................................. 21
TECHNOLOGIES – KNX ..................................................................................................... 22
TECHNOLOGIES – VIDEO SURVELLAINCE ...................................................................... 22
TECHNOLOGIES – INTERCOM .......................................................................................... 22
CUSTOMIZATION ............................................................................................................... 23
CUSTOMIZATION – NAVIGATION MENU .......................................................................... 23
VISUALISATION – ROOMS ................................................................................................ 24
VISUALISATION – FUNCTIONS ......................................................................................... 25
VISUALISATION – LINKS.................................................................................................... 26
VISUALISATION – SCENARIOS ......................................................................................... 26
VISUALISATION – WIDGETS ............................................................................................. 26
ADVANCED FUNCTIONS ................................................................................................... 26
SEARCH BAR .............................................................................................................................. 27
WORKSPACE .............................................................................................................................. 29
OVERVIEW ......................................................................................................................... 29
USE OF TABS ..................................................................................................................... 29
SETUP.......................................................................................................................................... 30
INTRODUCTION ................................................................................................................. 30
LANGUAGE ......................................................................................................................... 30
NETWORK .......................................................................................................................... 31
UPDATE .............................................................................................................................. 32
BACKUP / RESTORE .......................................................................................................... 34
DATE / TIME........................................................................................................................ 35
DATE / TIME CONFIGURATION ......................................................................................... 35
TIMEZONE SETTINGS ....................................................................................................... 35
ONLINE UPDATE ................................................................................................................ 35
SCHEDULED SERVICES REBOOT .................................................................................... 36
LICENSES AND MODULES ......................................................................................................... 37
CUSTOMIZATION ........................................................................................................................ 38

Eelectron Spa
IN00B02WEBFI00070102_ADMIN_MANUAL_EN.DOCX
4/113
THEMES .............................................................................................................................. 38
NAVIGATION MENU ........................................................................................................... 39
FAVOURITES ...................................................................................................................... 40
OPTIONS ..................................................................................................................................... 41
HOME .................................................................................................................................. 41
MAIL .................................................................................................................................... 42
NOTIFICATIONS ................................................................................................................. 42
MOBILE DEVICES............................................................................................................... 42
BACKGROUND VIEW ......................................................................................................... 43
WEATHER ........................................................................................................................... 43
RSS FEEDS ........................................................................................................................ 44
WEB BROWSER ................................................................................................................. 45
DISPLAY INTERACTION..................................................................................................... 45
CUSTOMIZATION OF FUNCTIONS AND SYMBOLS ......................................................... 46
HIDE NAVIGATION AREA ................................................................................................... 46
KNX .............................................................................................................................................. 48
INTRODUCTION ................................................................................................................. 48
EXPORT OF THE ETS PROJECT ....................................................................................... 48
ETS IMPORT RULES .......................................................................................................... 49
ETS IMPORT ....................................................................................................................... 51
SELECTIVE IMPORT OF AN ETS PROJECT ................................................................ ..... 57
IMPORT OF A CSV FILE ..................................................................................................... 58
KNX OBJECT PROPERTIES .............................................................................................. 60
KNX OBJECT DETAILS ...................................................................................................... 60
KNX GROUP ADDRESSES ................................................................................................ 63
ROOMS AND CONNECTED SCENARIOS ......................................................................... 63
ACTIVE AND PASSIVE EVENTS ........................................................................................ 64
KNX SCENARIOS ............................................................................................................... 65
KNX Devices........................................................................................................................ 66
PHYSICAL ADDRESS OF HORIZONE SERVER ................................................................ 68
ETS GATEWAY ................................................................................................................... 69
LOCAL USE ........................................................................................................................ 69
USE THROUGH INTERNET ................................................................................................ 71
ROOMS ........................................................................................................................................ 75
INTRODUCTION ................................................................................................................. 75
CREATE A NEW ROOM...................................................................................................... 75
INSERT OBJECTS INTO ROOMS ...................................................................................... 79
DELETING ROOMS ............................................................................................................ 80
CUSTOMIZING THE BACKGROUND VIEW ....................................................................... 80
“BUTTONS” TEMPLATE VIEW............................................................................................ 81
FUNCTIONS ................................................................................................................................. 82
INTRODUCTION ................................................................................................................. 82
FUNCTIONS SETTINGS ..................................................................................................... 82
FUNCTIONS IN THE FRONT END ...................................................................................... 83
WIDGETS ..................................................................................................................................... 85
INTRODUCTION ................................................................................................................. 85
CREATE WIDGETS ............................................................................................................. 85
OBJECT FUNCTIONALITY DEFINITION ..................................................................................... 92
GENERIC WIDGETS .................................................................................................................... 94
RGB Control ........................................................................................................................ 96
SCENARIOS................................................................................................................................. 97

Eelectron Spa
IN00B02WEBFI00070102_ADMIN_MANUAL_EN.DOCX
5/113
INTRODUCTION ................................................................................................................. 97
CREATE A NEW SCENARIO .............................................................................................. 97
ADD ACTIONS TO A SCENARIO ...................................................................................... 100
SCENARIOS WITH WAIT COMMANDS ................................................................ ............ 101
CUSTOMIZATION OF WAIT COMMANDS ....................................................................... 102
LINKS ......................................................................................................................................... 103
INTRODUCTION ............................................................................................................... 103
CREATION OF LINKS ....................................................................................................... 103
INTEGRATION IN THE FRONT END ................................................................................ 105
HANDLING INSIDE THE FRONTEND ............................................................................... 106
USERS ....................................................................................................................................... 107
INTRODUCTION ............................................................................................................... 107
USERS AND USERS GROUPS ........................................................................................ 107
CREATE NEW USERS ...................................................................................................... 107
USER GROUPS AND PERMISSIONS .............................................................................. 109
REMOTE ACCESS ..................................................................................................................... 110
INTRODUCTION ............................................................................................................... 110
REMOTE ACCESS THROUGH INTERNET ...................................................................... 110
SYMBOLS .................................................................................................................................. 111
INDEX REVISIONS .................................................................................................................... 112

Eelectron Spa
IN00B02WEBFI00070102_ADMIN_MANUAL_EN.DOCX
6/113
FIRST COMMISSIONING
INTRODUCTION
HORIZONE SERVER is a web server specifically engineered for monitoring and visualization of
Home & Building Automation systems.
HORIZONE SERVER is fully compliant with worldwide standards like KNX and MODBUS, and with
many other technologies used in intelligent buildings, alarm systems, fire and smoke detections
systems, audio / video distribution systems.
The configuration and use of HORIZONE SERVER takes place directly through its web interface,
which can be accessed through a conventional browser (from any device / operating system).
This chapter describes how to connect and configure HORIZONE SERVER.
CONTENT OF THE PACKAGING
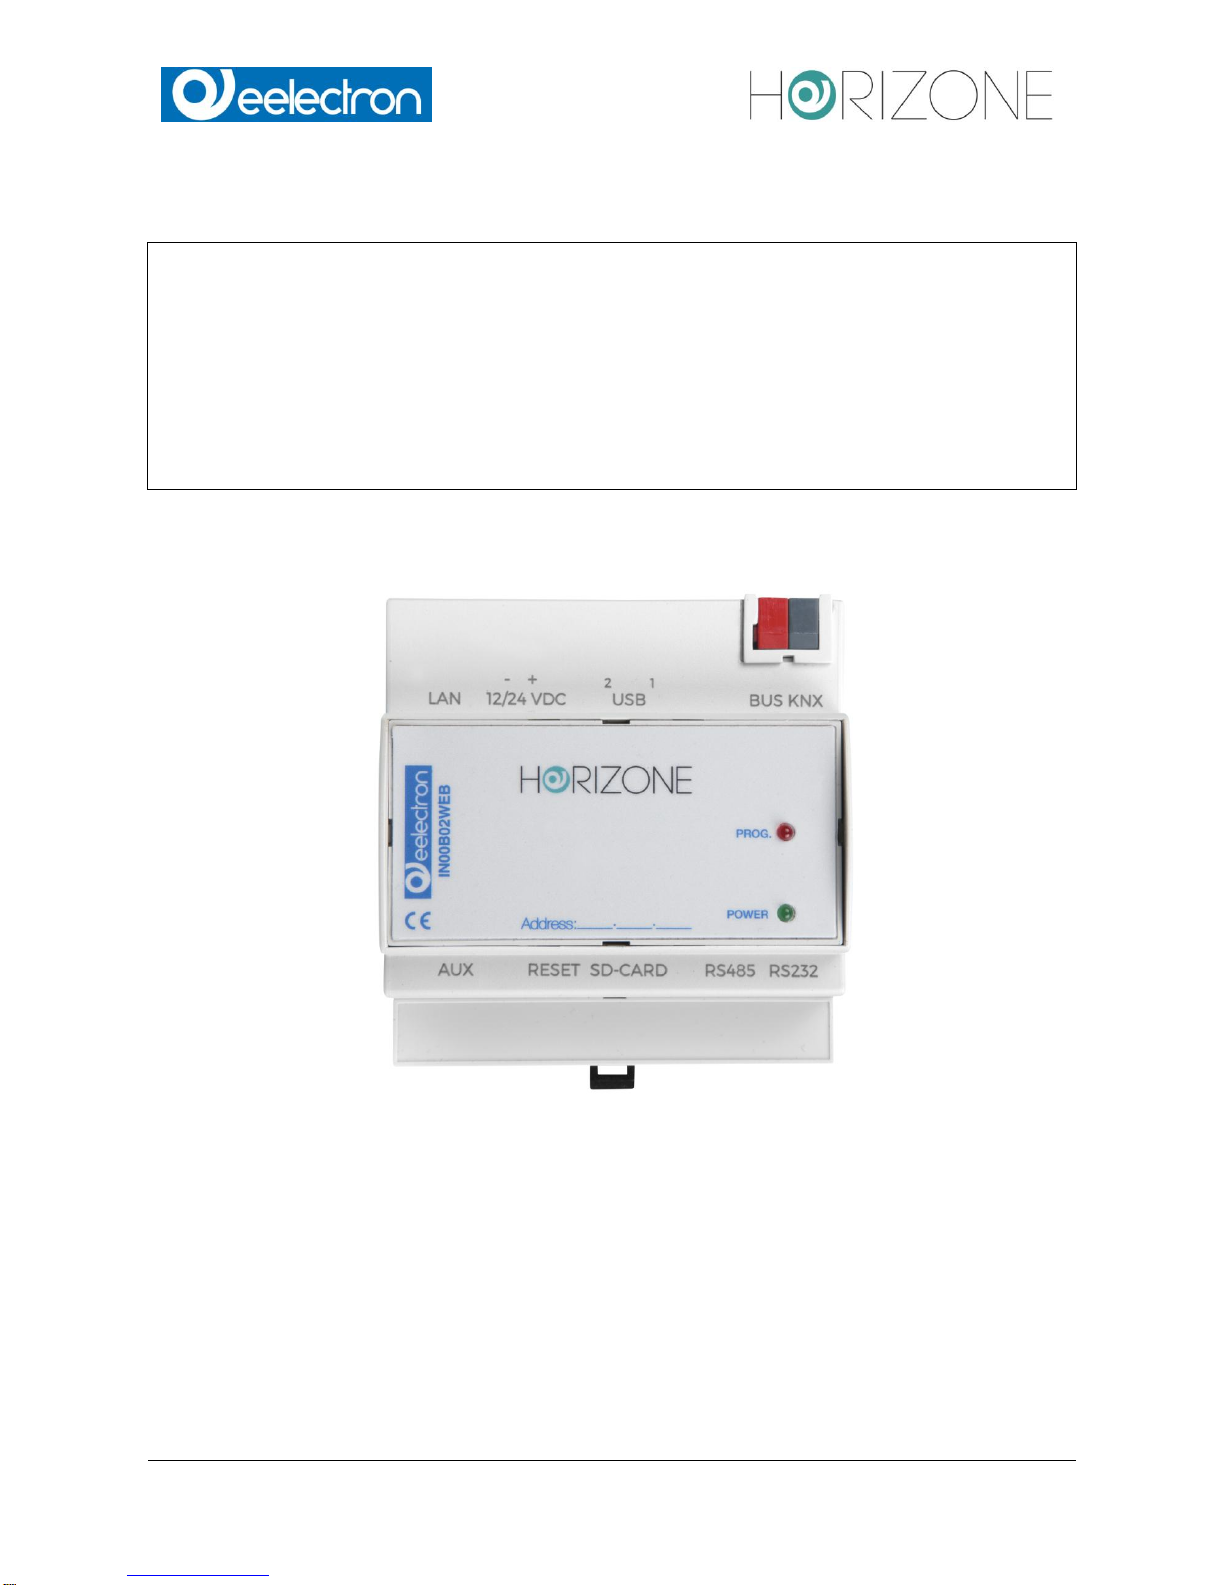
The HORIZONE SERVER packaging contains the following material:
HORIZONE SERVER
connector for power supply and KNX bus
Printed Quick Start Guide
HINT: HORIZONE SERVER is a pure WEB SERVER, therefore it is not usable for standalone
visualisation, because it has no display.
Neither the server has any graphical interface (VGA, DVI, HDMI, ...), therefore it can’t be directly
display any graphical content.
Visualisation is accessed through client PCs, notebooks, netbooks, tablets and smartphones,
connected to the server via Network.
Eelectron Spa
IN00B02WEBFI00070102_ADMIN_MANUAL_EN.DOCX
7/113
HARDWARE INSTALLATION
INSTALLATION
HORIZONE SERVER is designed for installation on a 35 mm DIN rail. It requires a 12/24 VDC
power supply, not included.
For a correct functionality, the following connections must be guaranteed:
Power supply 12V/24V DC (current consumption 240 mA at 12VDC) using the supplied connector.
KNX bus connection via supplied connector.
Network connection via CAT.5 network cable (not supplied).
The LED marked with the label "POWER" on the front of the server signals that the device is ON
The LED labeled “SERVICE” remains off under normal circumstances.
Furthermore, HORIZONE SERVER has the following interfaces:
SD-slot: in the future will be used to expand the memory of HORIZONE SERVER through any
compatible SD Card. Please note that this peripheral at the moment is not actually used.
RS232-interface and 2 USB-ports: for integration of third party systems.
the connection to the KNX bus is not really needed for the configuration of HORIZONE
SERVER, but it allows a more efficient programming, since direct tests of the system
can be performed.
When commissioning HORIZONE SERVER, the following steps must be followed:
Power off the system.
Install HORIZONE SERVER on the DIN-Rail.
Connect power supply and KNX bus to HORIZONE SERVER
Power on the system.
Wait until complete boot up of HORIZONE SERVER.
To ensure appropriate protection to the HORIZONE SERVER hardware and prevent
damages, please consider installing appropriate lightning and surge protection devices
on power supply. To grant full operation under any situation, please consider also
installing an Uninterruptible Power Supply (UPS).
If the HORIZONE SERVER hardware is altered in any way, irreversible damage can
occur. Any intervention on the equipment should be performed only by skilled personnel
authorized by EELECTRON SPA.

Eelectron Spa
IN00B02WEBFI00070102_ADMIN_MANUAL_EN.DOCX
8/113
ENVIRONMENTAL CONDITIONS
For proper operation and storage of HORIZONE SERVER please respect indications below:
OPERATION
Ambient temperature 0°C - 70°C
STORAGE
Ambient temperature -10°C - 70°C
MAINTENANCE / WARRANTY
HORIZONE SERVER is fanless and without moving parts. The industry-tested hardware, the
reduced size and minimal power consumption, make it ideal for long term, high availability
applications and operational conditions.
The device has 24 months warranty from date of delivery (date of the invoice).
IMPORTANT INFORMATION
In case service is needed, before shipping the device, please contact our technical support team
through the email address support@eelectron.com. Our team will authorize the shipment and will
help you to fill in the “Service request” form.
Devices arriving to EELECTRON SPA facility without the “Service request” form complete with all
necessary information will not be accepted and will be shipped back to origin.
In case of shipment, please use appropriate packaging and sufficient protection through shock
absorbing elements.
EELECTRON SPA will not respond for damages caused by inappropriate handling.
Processing time of service requests is 2 weeks.
For technical reasons, only complete systems can be accepted for service.
Eelectron Spa
IN00B02WEBFI00070102_ADMIN_MANUAL_EN.DOCX
9/113
NETWORK CONNECTION
For the usage/configuration of HORIZONE SERVER a fully functional network connection is
required. Factory IP address of HORIZONE SERVER is:
IP address:
192.168.0.110
Subnet mask:
255.255.255.0
Gateway:
192.168.0.110
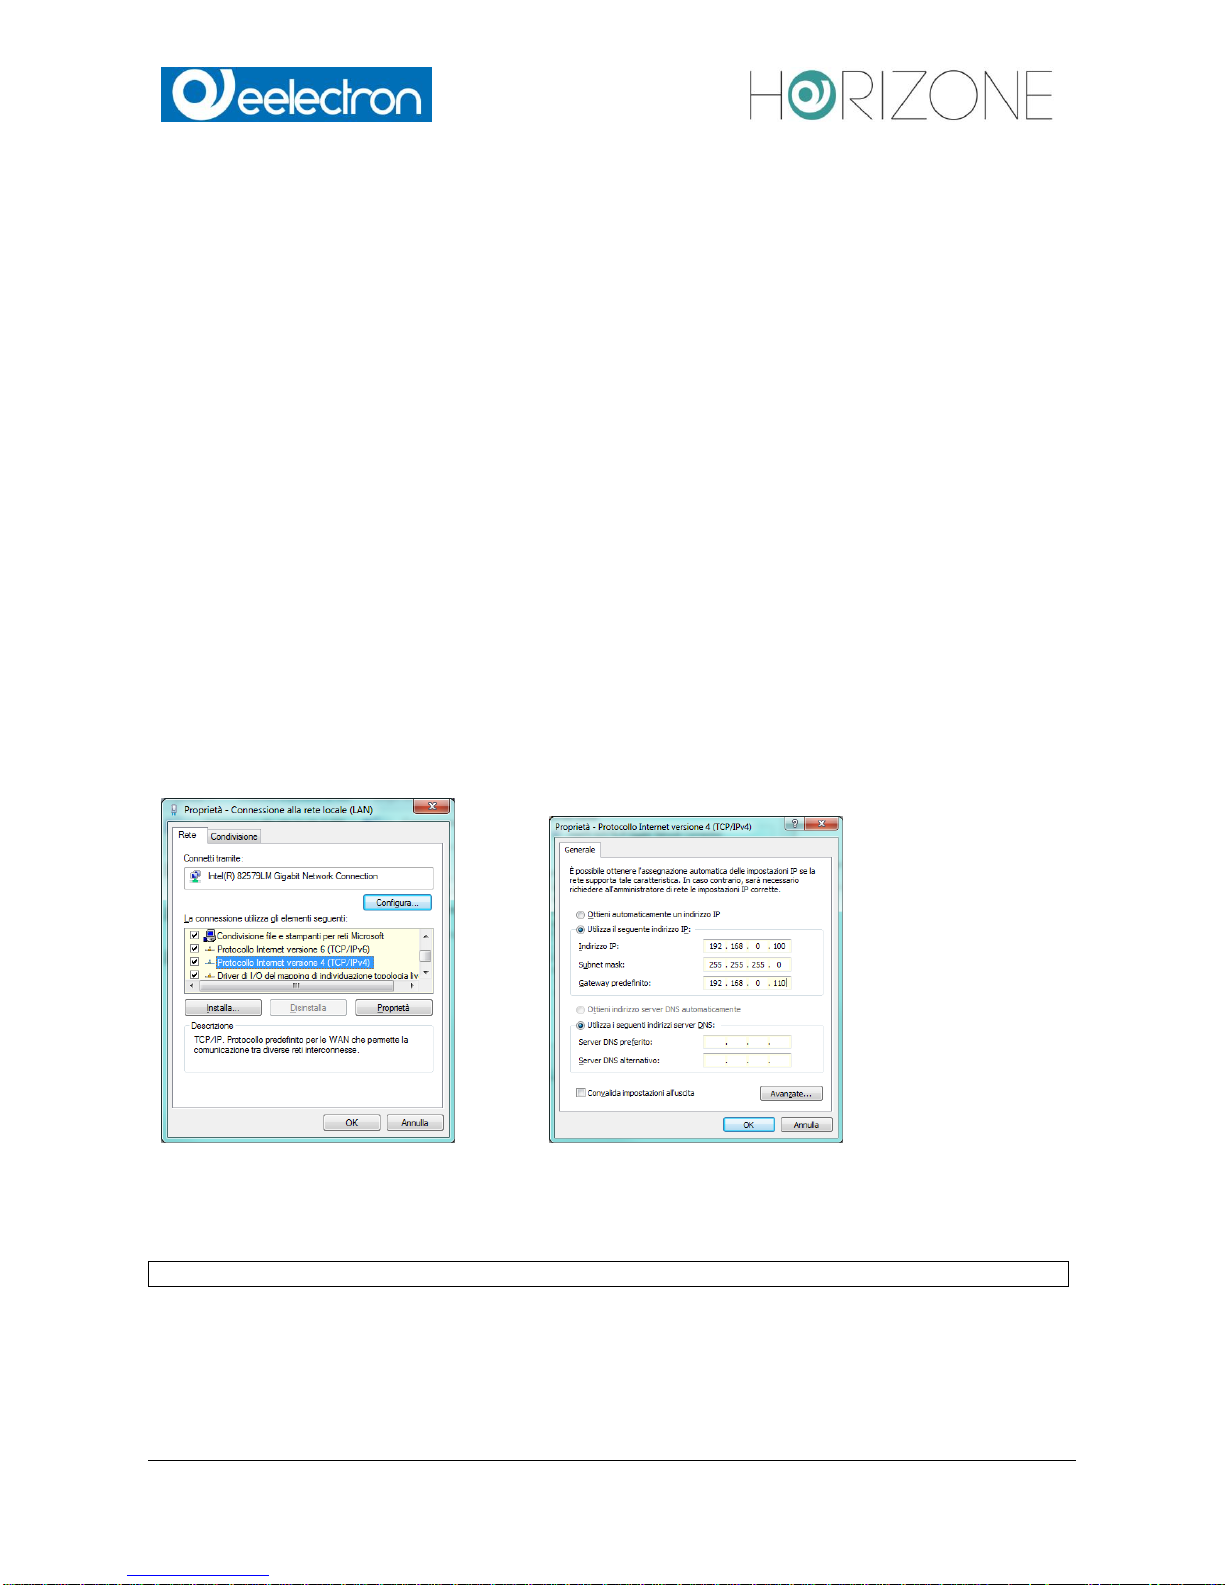
To set the IP address of HORIZONE SERVER, according to the needs of your network, follow
these steps:
Connect a PC directly to HORIZONE SERVER through a standard Ethernet cable.
Open the network configuration settings of your PC.
Change the settings of the TCP/IP – Protocol (Version 4) of PC network interface according
to the following values:
IP address:
192.168.0.100
Subnet mask:
255.255.255.0
Gateway:
192.168.0.110
Save the new settings. Depending on the installed OS, a restart can be necessary.
The following screenshots show how to change the network settings on Windows OS:
Once the network settings have been changed, open a browser on your PC (Google Chrome
preferred) and enter the following URL into the address bar of the browser:
http://192.168.0.110/Horizone/modules/system/externalframe.php?context=configuration
This link will open directly the configuration environment of HORIZONE SERVER.

Eelectron Spa
IN00B02WEBFI00070102_ADMIN_MANUAL_EN.DOCX
10/113
If the network connection is working properly, you will be requested to login.
The best performance for using/programming HORIZONE SERVER can be achieved
with the following browsers:
Google Chrome
Apple Safari
HORIZONE SERVER is compatible with following additional browsers:
Mozilla Firefox
Opera
Microsoft Edge
HORIZONE SERVER is NOT compatible with the following browsers:
Microsoft Internet Explorer
Browser compatibility is continuously under evolution, it is recommended to check out the list of the
compatible browsers in the documentation of newly released product versions.
Eelectron Spa
IN00B02WEBFI00070102_ADMIN_MANUAL_EN.DOCX
11/113
LOG IN
On delivery, HORIZONE SERVER has preconfigured the following users:
Username
Password
Description
Admin
admin
System Administrator. Can edit the visualisation, create users and
change their access rights / permissions
manager
manager
User for the installation / configuration of the system. It can
change all settings regarding the visualisation, but has no access to
system settings.
user
user
Basic user for client-access. It can navigate through the whole
visualisation, but has no or very limited access to the administration of
.
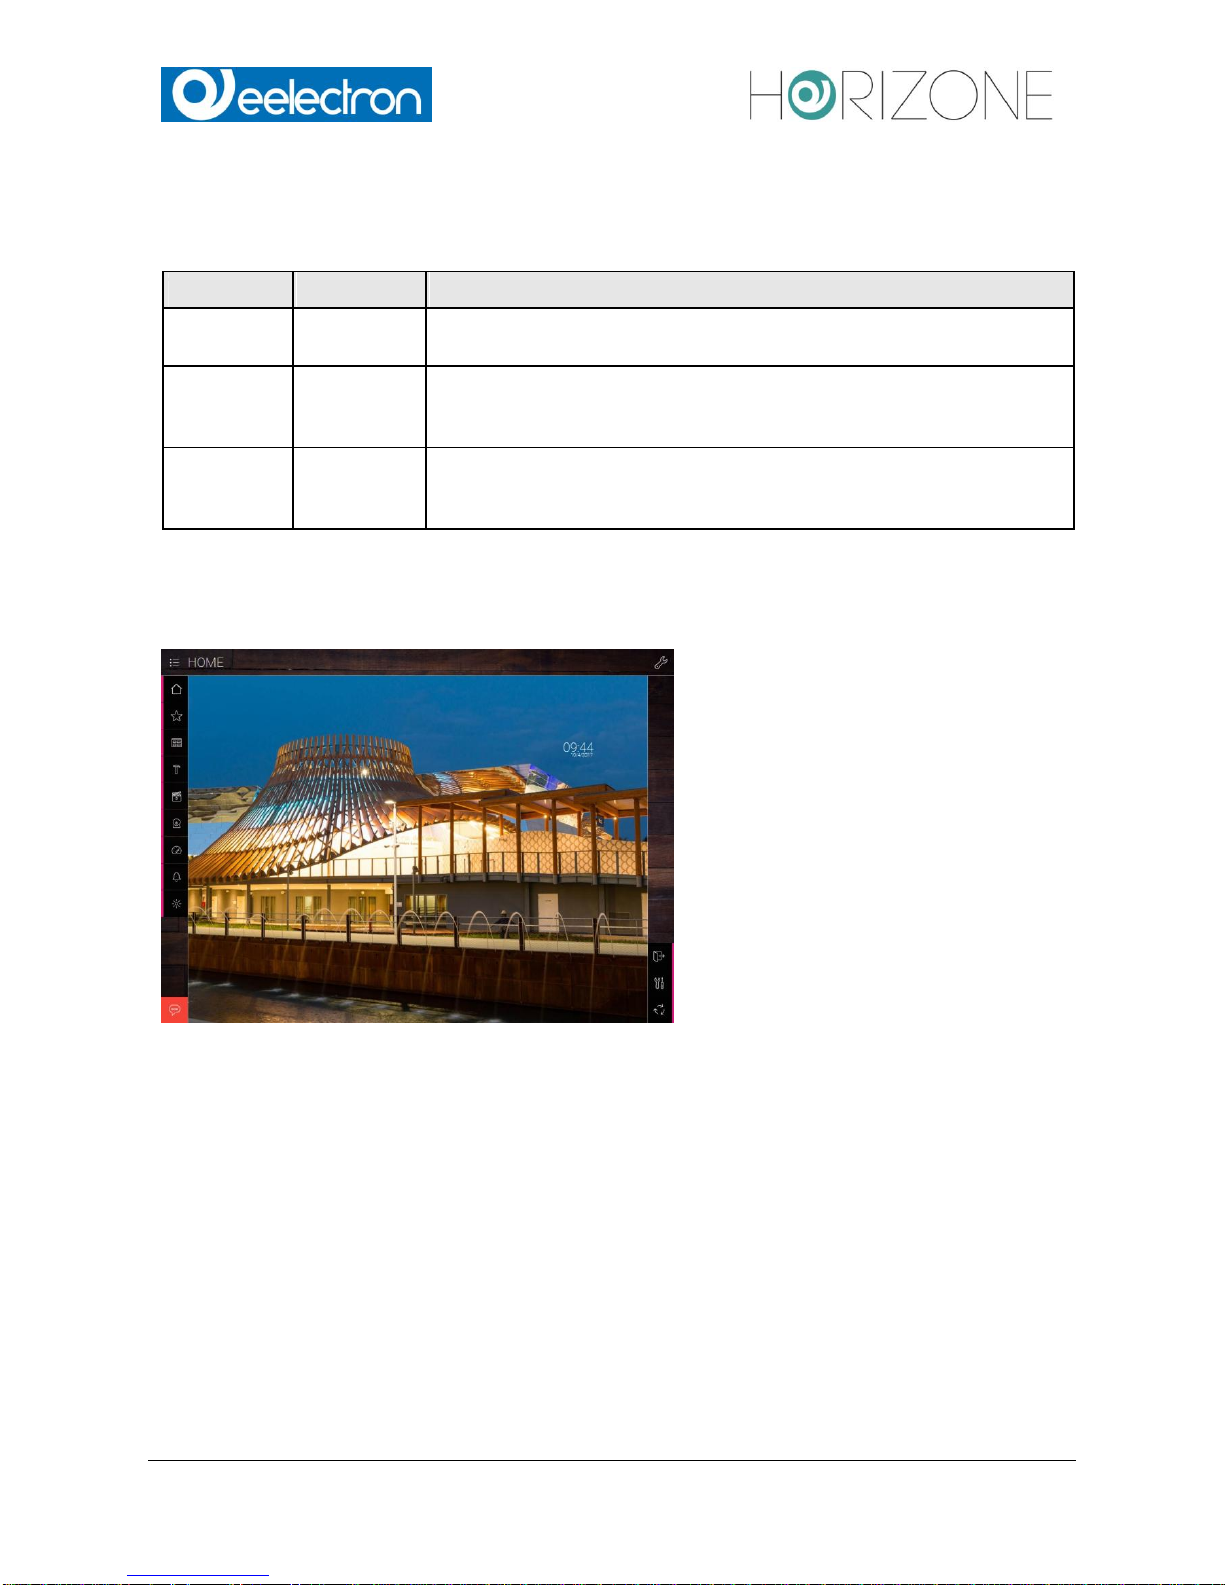
On the first configuration of HORIZONE SERVER you must login with the “admin” user.
Do this by entering the appropriate data into the login screen; once logged in you will see the
following screen:
Eelectron Spa
IN00B02WEBFI00070102_ADMIN_MANUAL_EN.DOCX
12/113
FRONT END AND BACK END ENVIRONMENTS
The graphical interface of HORIZONE SERVER is made of two main environments:
“ADMINISTRATION” or “BACK END”. This is the configuration area, in which (depending on the
users permissions) all settings can be managed.
“VISUALISATION” or “FRONT END”. This is the user visualisation environment. It allows the user
to navigate through rooms/pages, created by the professional installer through the back end, and
to actuate all objects in real time.
Both areas are based on web technology and can therefore be controlled from within a browser
window. The main difference between the two levels is the graphical design:
BACK END was designed with a simple graphic style, optimized to display the maximum amount of
information and options in a clear form.

Eelectron Spa
IN00B02WEBFI00070102_ADMIN_MANUAL_EN.DOCX
13/113
FRONT END was designed to allow the inexperienced users the most intuitive and easy
navigation. The modern and stylish design-makes it very comfortable for the end user to take full
control of its system.
A simple button allows the professional to switch from one environment to the other:
From the BACK END, the button to switch to the FRONT END is positioned in the upper right
corner of the screen.
From the FRONT END, the button to switch to the BACK END is positioned in the lower right
corner. The user must have the permissions to access the BACK END.

Eelectron Spa
IN00B02WEBFI00070102_ADMIN_MANUAL_EN.DOCX
14/113
Alternatively, the two environments can be accessed directly by entering the following links inside
the browsers address bar:
LEVEL
EXAMPLE
BACK END
http://192.168.0.110/Horizone/modules/system/externalframe.php?context=configuration
FRONT END
http://192.168.0.110/Horizone/modules/system/externalframe.php?context=runtime
To save time during configuration, both environments can be displayed simultaneously
in different tabs of the browser, which makes it faster to switch between the areas. Note:
To see the changes in the FRONT END in real time, it is recommended to refresh the
browser window after any change done in the BACK END.
Eelectron Spa
IN00B02WEBFI00070102_ADMIN_MANUAL_EN.DOCX
15/113
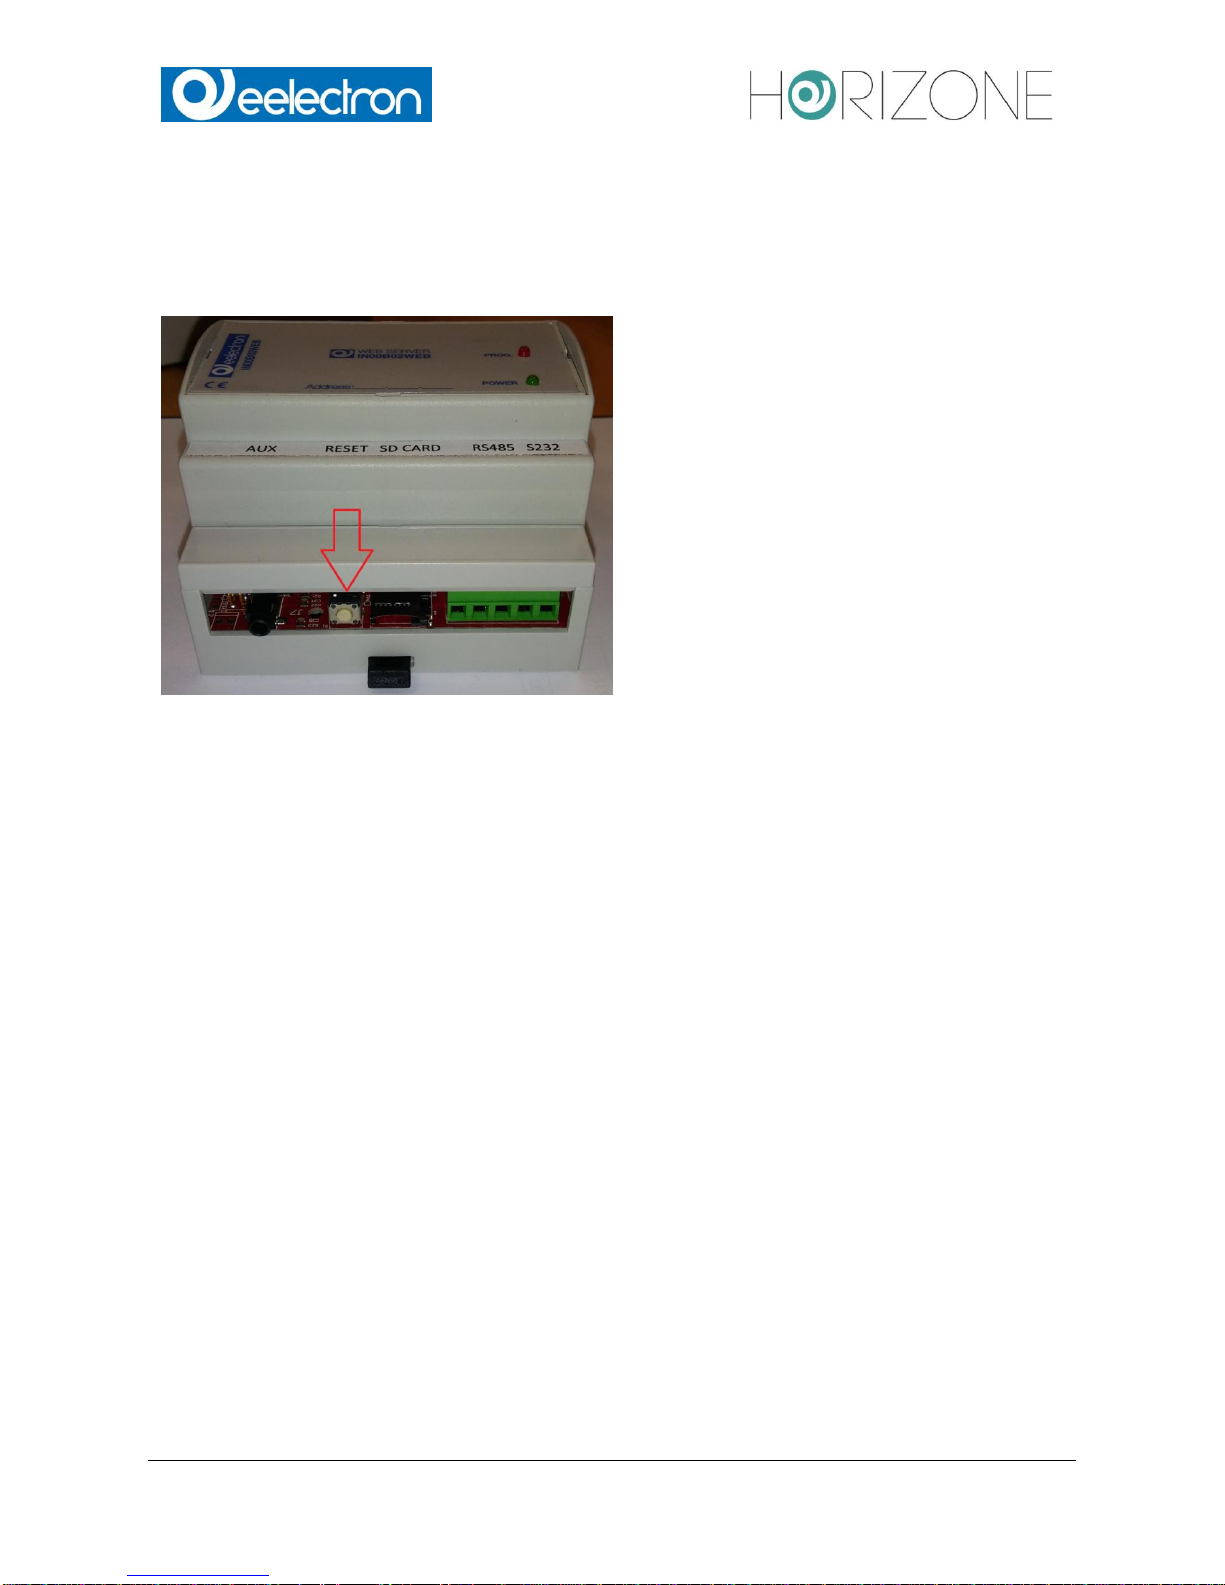
RESET OF IP ADDRESS TO FACTORY DEFAULTS
The IP address of HORIZONE SERVER can be reset to factory default settings through the
RESET-button on the bottom side of the device:
Localize the RESET-button on the device.
Press the RESET-button until the SERVICE-LED starts blinking (minimum 10 seconds). Then
release the RESET button.
Press the RESET-button again within the next 5 seconds. After a short pause the SERVICE-LED
stays on for some seconds.
As soon as the SERVICE-LED turns off, HORIZONE SERVER is reachable at the factory IP
address 192.168.0.110
If the SERVICE-LED stops blinking after the RESET-button was pressed for the first time (10
seconds) and before you were able to press the RESET-button again, please repeat the whole
procedure.
Eelectron Spa
IN00B02WEBFI00070102_ADMIN_MANUAL_EN.DOCX
16/113
GENERAL OVERVIEW
INTRODUCTION
This chapter gives an overview of the ADMINISTRATION area of HORIZONE SERVER and
explains different tools and menus, which can be used to configure the web server.
BACKEND – GRAPHICAL INTERFACE
The BACK END is divided into the following sections:
SEARCH-BAR
The search bar is located in the upper left corner in form of an input filed,
which allows to find objects quickly by entering keywords related to the
searched objects.
MENU
Main menu of the software, shown as a tree-view. Through this menu all
sections of the software are accessible and objects can be created / mod-
ified / deleted.
TOOLBAR
The toolbar in the upper side of the BACK END is always shown and
allows switching quickly to the mostly used functions through the related
buttons.
WORKSPACE
Main area for showing the chosen configuration options; the single menus
and configuration windows of the objects are shown in here. It is possible
to open more menus / windows in the main area at the same time; the
different menus / windows will be accessible through different tabs in this
case.
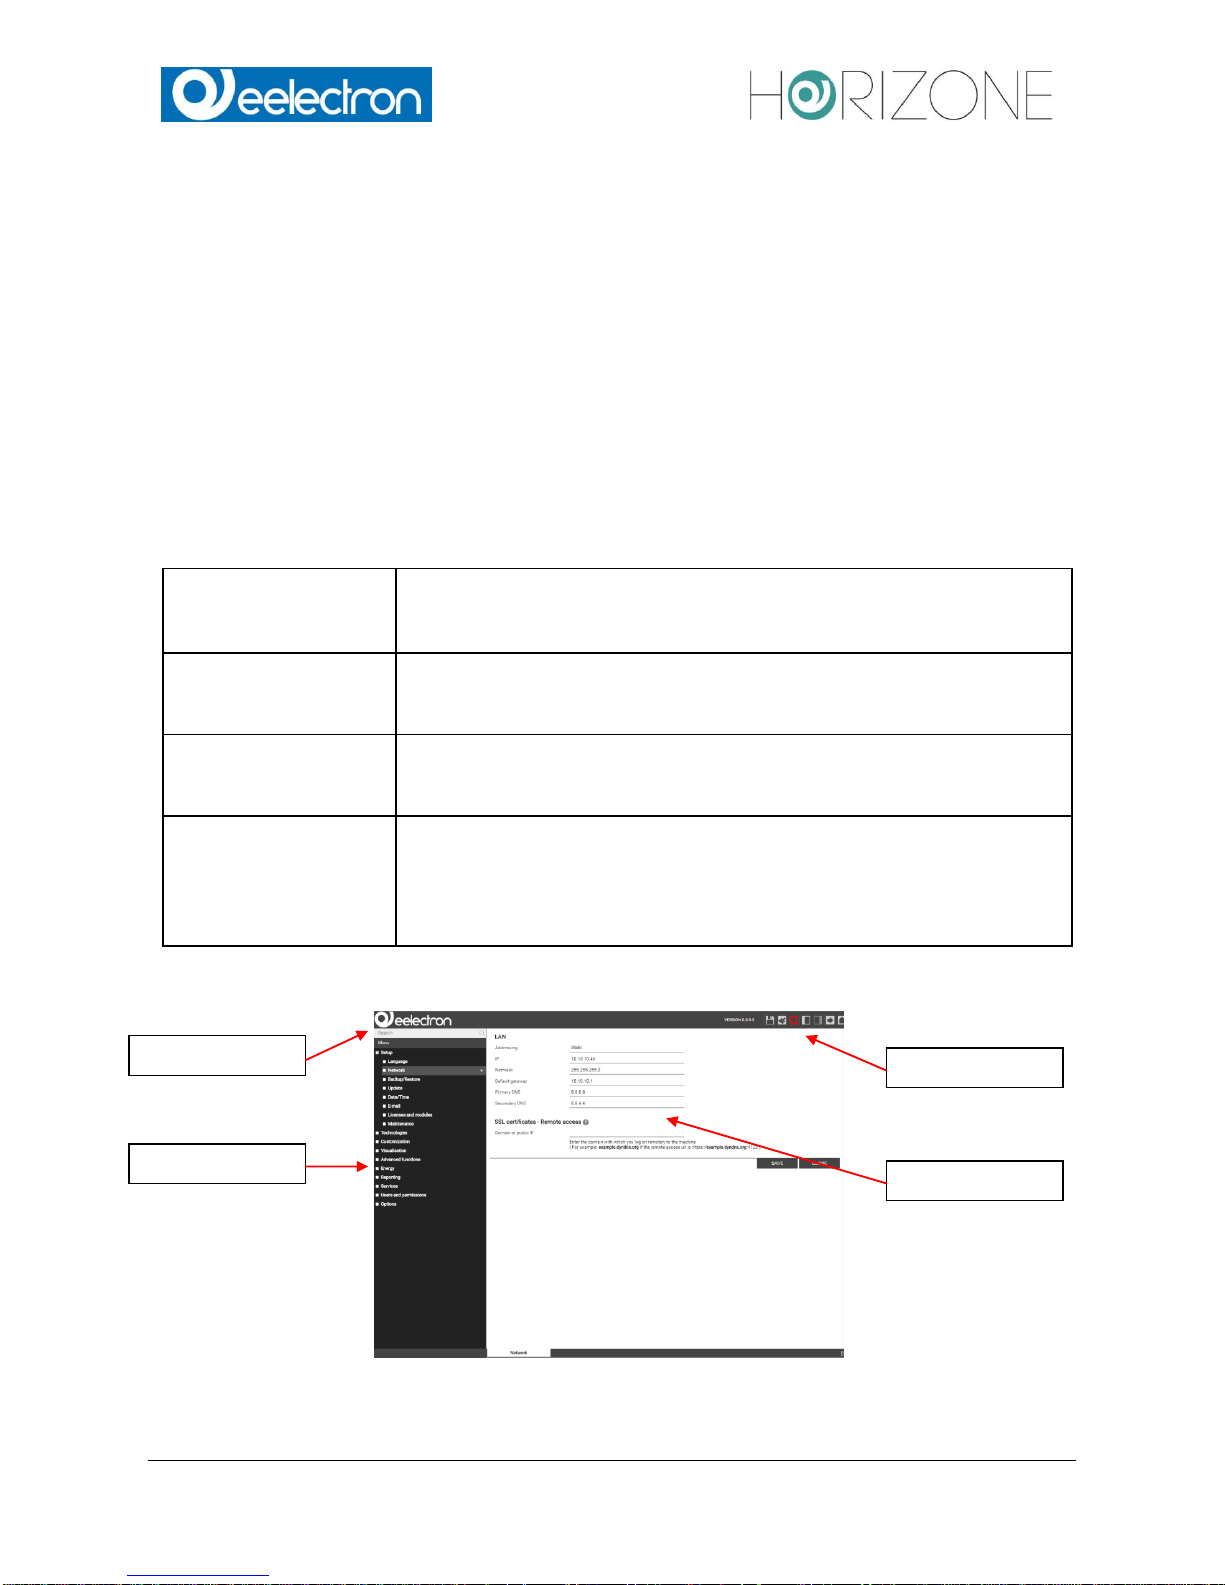
The following screenshot shows the single sections of the ADMINISTRATION area:
SEARCH BAR
MENU
TOOL BAR
WORKSPACE
Eelectron Spa
IN00B02WEBFI00070102_ADMIN_MANUAL_EN.DOCX
17/113
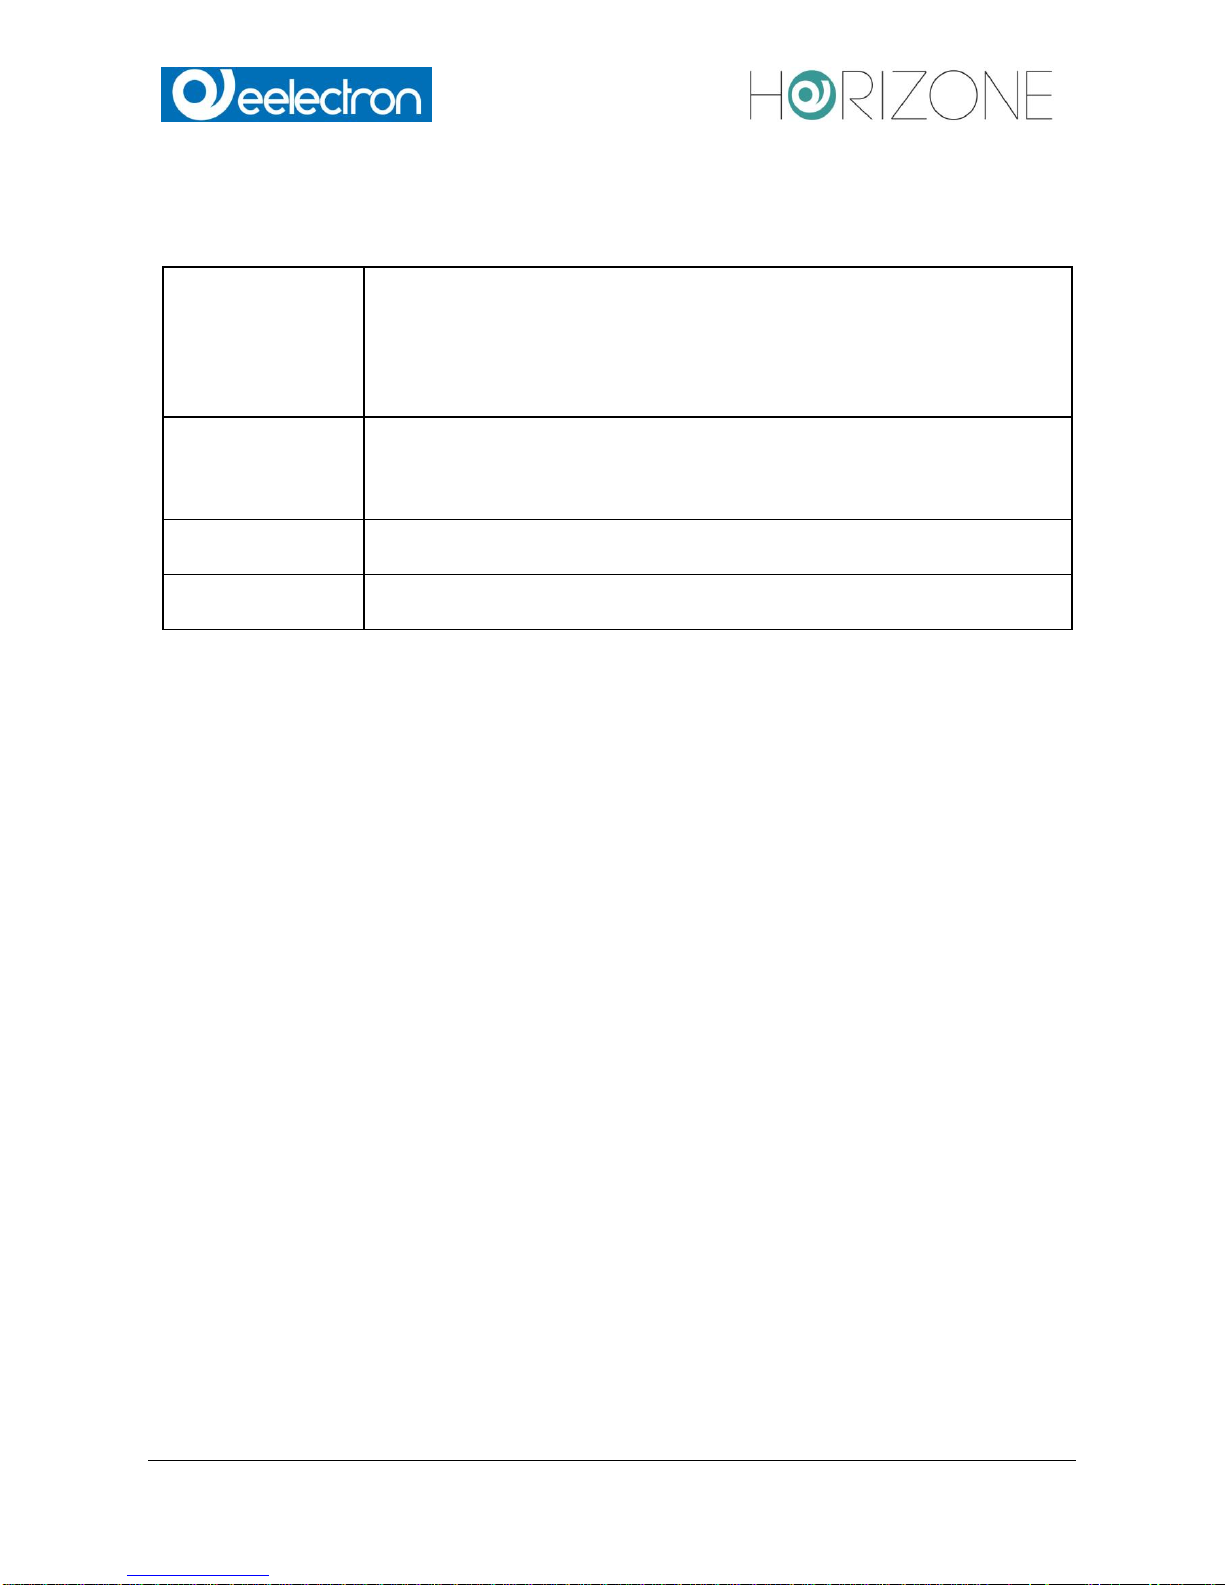
TOOLBAR
Following functions are always present in the toolbar:
SAVE
Allows saving all changes into the flash memory of HORIZONE SERVER,
what will preserve the data even if the web server is powered off. The button
turns red whenever changes are made, but not saved yet. In addition, every
5 minutes an automatic saving of all changes takes place, so pressing the
“SAVE” button is only necessary if the system should be shut down/restarted
immediately after making the changes.
BASE / EXPERT
Changes the visibility of various options / parameters within the configuration
pages. The BASE mode displays only the necessary settings and visible
objects; the EXPERT mode, however, shows even more advanced options
as well as hidden objects.
LOGOUT
Ends the current session and allows you to log onto the web server as a
different user.
VISUALISATION
Allows switching to the FRONT END area and therefore accessing the
visualisation, now showing all modifications made in the configuration.
Eelectron Spa
IN00B02WEBFI00070102_ADMIN_MANUAL_EN.DOCX
18/113
NAVIGATION MENU
USE OF NAVIGATION MENU
The navigation menu is a typical tree-view-menu. After accessing the BACK END area all the main
entries are shown; the sub-menus are accessed by extending the corresponding main menu. The
navigation in this menu is done simply with a mouse. Clicking on an entry in the navigation menu
turns the clicked entry into blue. If the entry has additional submenus, the entry will be extended
and the sub-menus are displayed. Another click on the selected entry will close the section and
hide the submenus again.
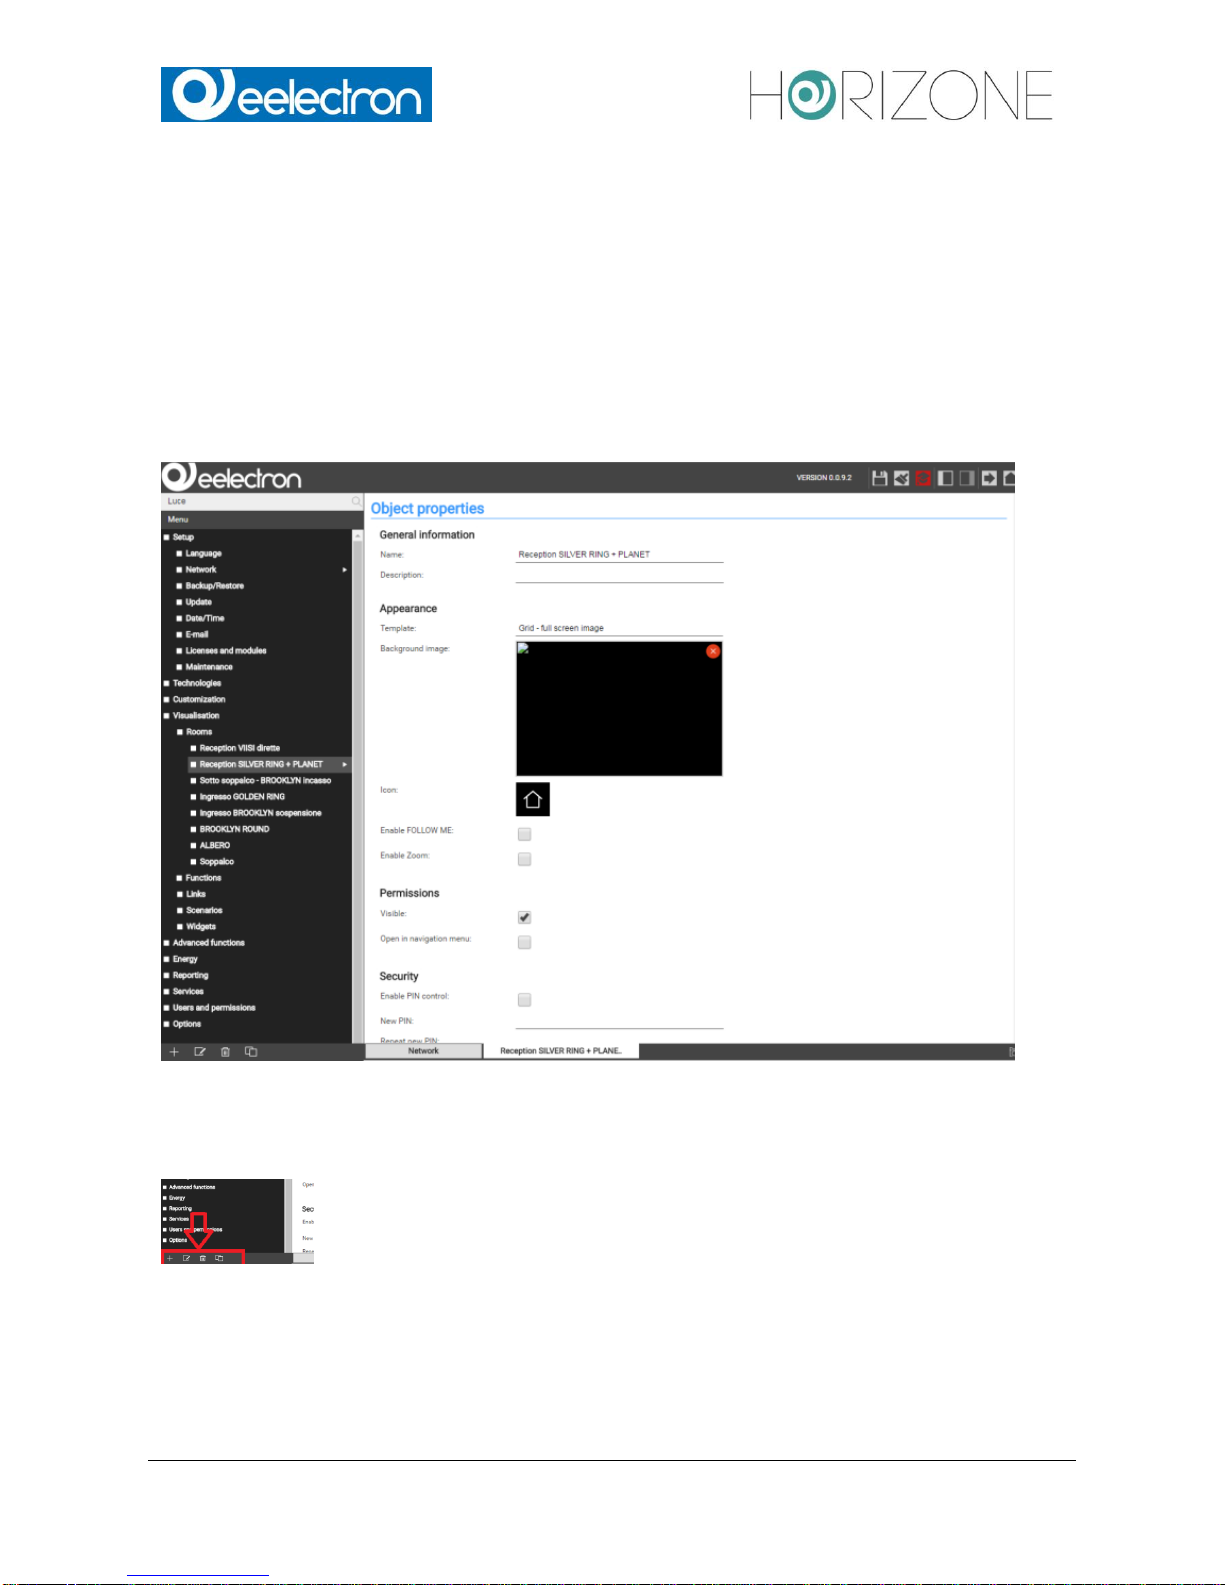
If actions can be performed for the selected entry, they will be displayed in the TOOLBAR at the
bottom left corner of the navigation menu in form of different buttons. The following actions may be
displayed:
Eelectron Spa
IN00B02WEBFI00070102_ADMIN_MANUAL_EN.DOCX
19/113
NEW / ADD
Allows the creation of a new object within the selected entry. Depending
on the selected item different types of objects are created; if a menu allows
the creation of multiple types of objects, then a context menu will be dis
played in order to select the object type to create.
DELETE
Deletes the selected entry from the project
EDIT
Allows editing of the selected entry. The configuration page of the selected
object is open in the workspace on the left.
CLONE
Creates a copy of the selected entry.
If the selected entry supports the EDIT-action, TRIANGLE will be displayed on the right side of the
entry. Clicking on these points has the same effect as clicking on the EDIT button in the
TOOLBAR.
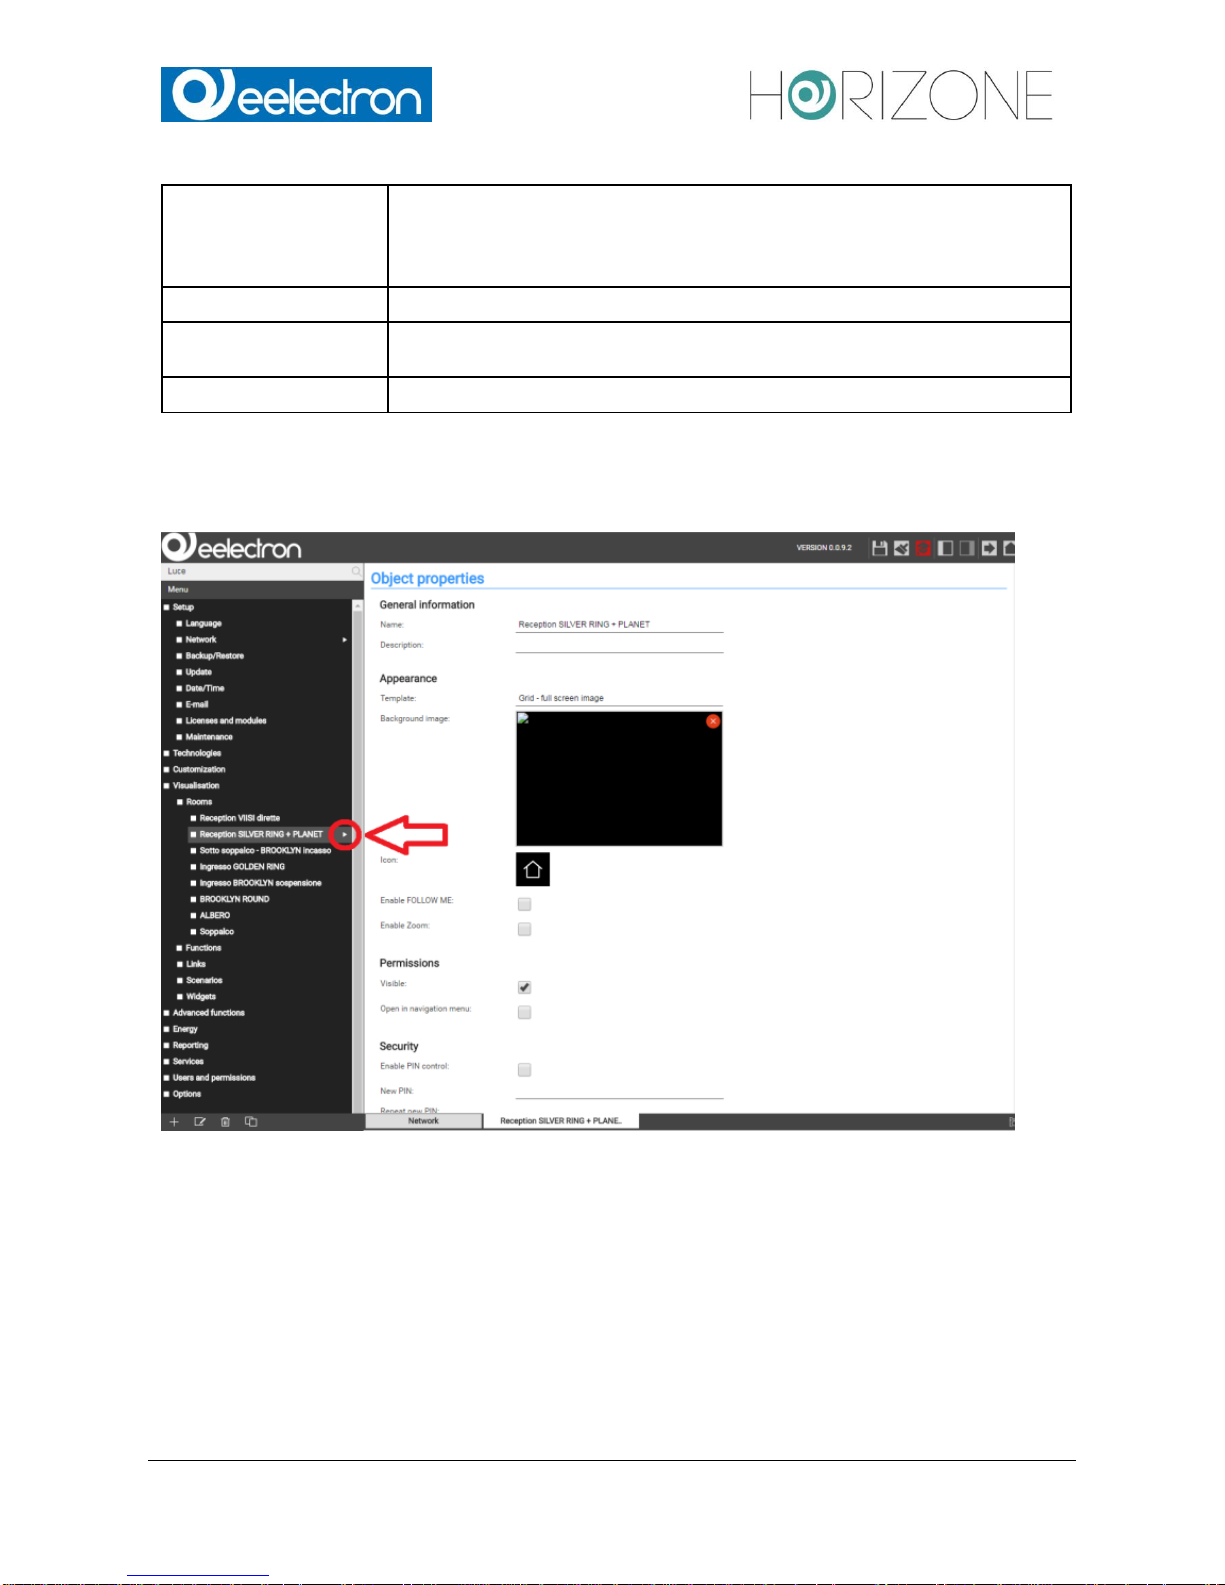
If the configuration window of an entry is opened through the EDIT-action, the entry will show an
arrow-icon on the right side. This icon will be displayed until the configuration window of the entry
is closed and shall facilitate the navigation if multiple tabs are opened in the workspace.
As mentioned before, some of the entries of the navigation menu permit to create submenus or to
insert new objects. This is done using the NEW button in the TOOLBAR: by pressing this button a
new object (the object type depends on the selected entry) will be created and selected
automatically. If the EDIT button is clicked, the configuration window of the newly created object
will be opened.
Eelectron Spa
IN00B02WEBFI00070102_ADMIN_MANUAL_EN.DOCX
20/113
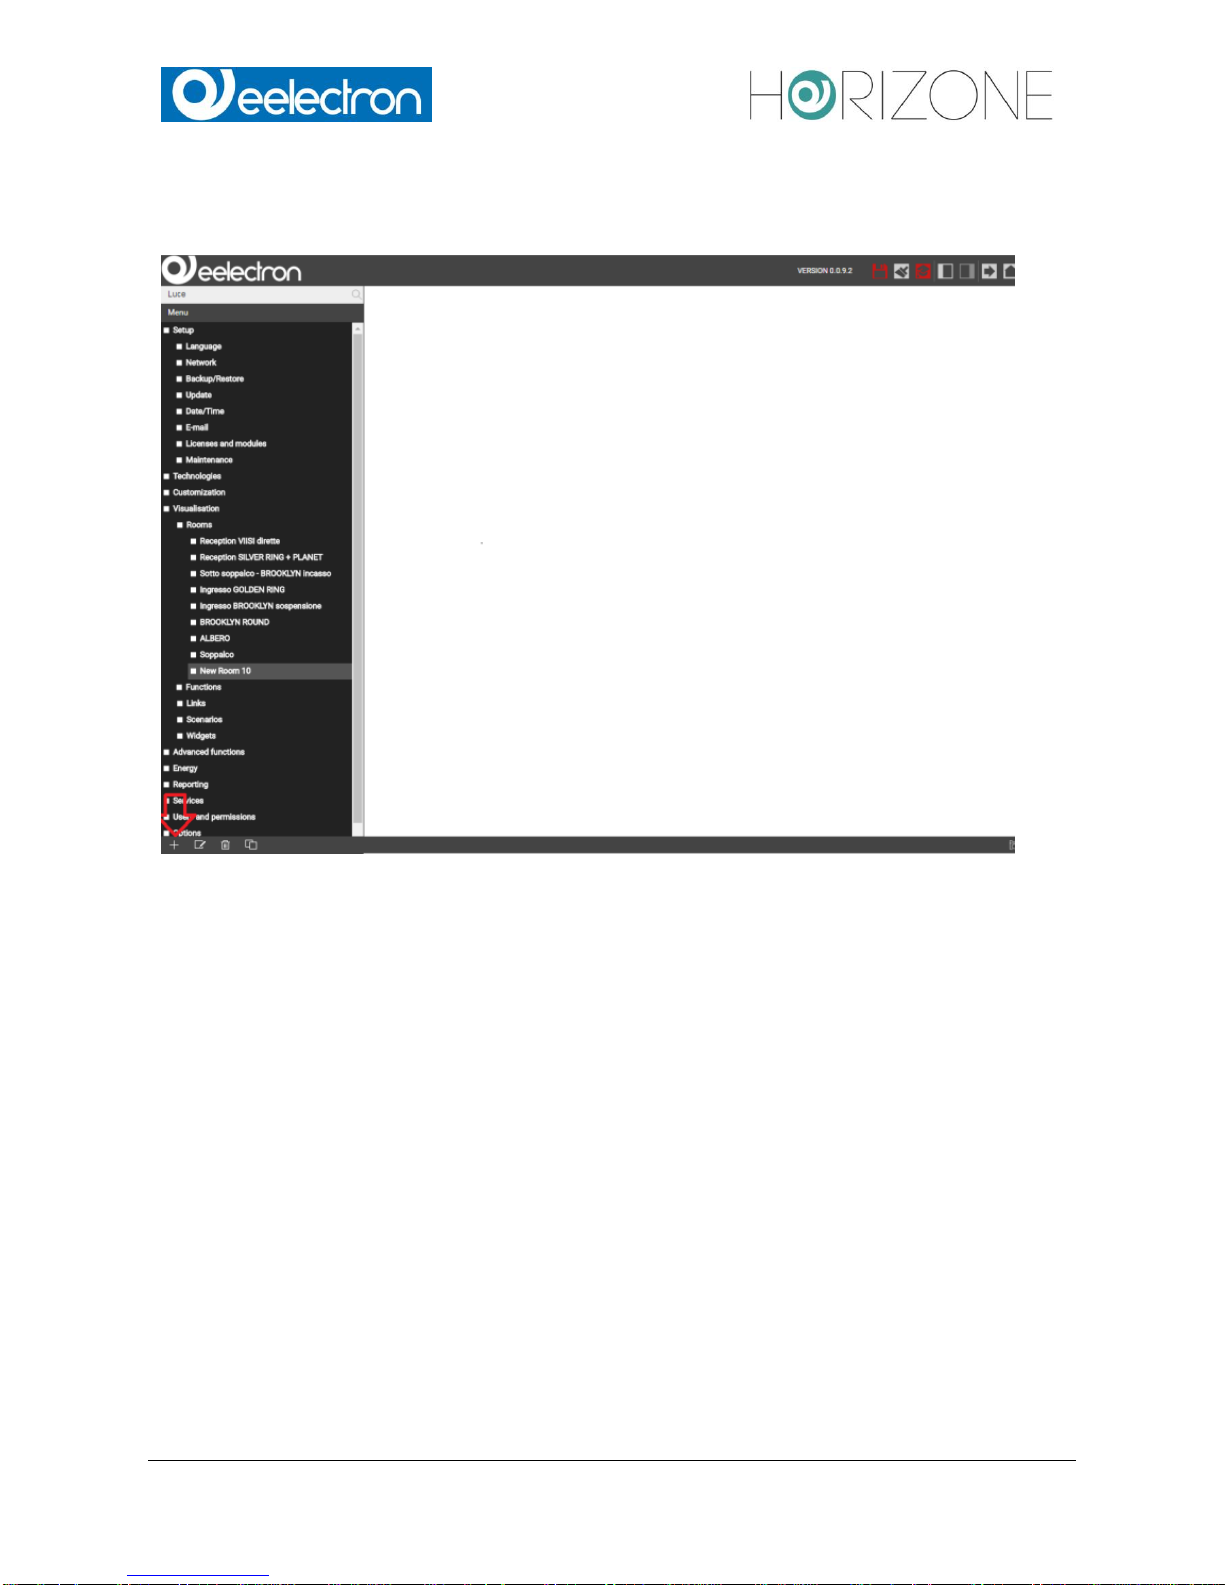
Example: To create a new room, just select the entry "ROOMS" (in the main menu "VISUALISATION") and click on the NEW button. The new room will be created and - if other rooms have
already been created before - shown at the end of the sub-menu:
For rooms it is also possible to create further sub-menus following the same procedure (as in the
further course of this manual will be explained); the resulting tree-structure can so also be used in
the visualisation.
The DELETE button removes the selected entries from the project. This action is blocked for the
system menus and indispensable objects, to prevent the user to remove them by accident.
Eelectron Spa
IN00B02WEBFI00070102_ADMIN_MANUAL_EN.DOCX
21/113
MENU STRUCTURE
The navigation menu permits to access every setting of the web server and has the following
structure:
SETUP
Contains generic settings and parameters of the web server
TECHNOLOGIES
Contains the configuration pages of all technologies supported by the
web server (KNX. Video surveillance, intercom etc.)
CUSTOMIZATION
Contains the configuration pages for customizing the graphical design
of the visualisation and the web server plugins
VISUALISATION
Allows the configuration of the visualisation itself (rooms, functions,
scenar ios etc.)
ADVANCED FUNCTIONS
Allows the configuration of additional functions (e.g. logics,
notifications etc.)
USERS AND
PERMISSIONS
Allows the configuration of new users and their access permissions
SETUP
The menu SETUP contains the following entries:
LANGUAGE
Permits to change the language of the GUI
NETWORK
Permits to configure the network parameters of the web server
UPDATE
Permits to update the web server through specific update-packages
BACKUP/RESTORE
Permits to create a backup of the current database, to import an
already created backup or to reset the database to factory settings
DATE/TIME
Permits to configure date/time of the web server and all date/time
related set
tings
LICENSE AND MODULES
Permits to edit the single license codes and modules for enabling
additional functions
Further information can be found in the appropriate section of this manual.

Eelectron Spa
IN00B02WEBFI00070102_ADMIN_MANUAL_EN.DOCX
22/113
TECHNOLOGIES – KNX
This section contains all settings for establishing a communication with the KNX bus:
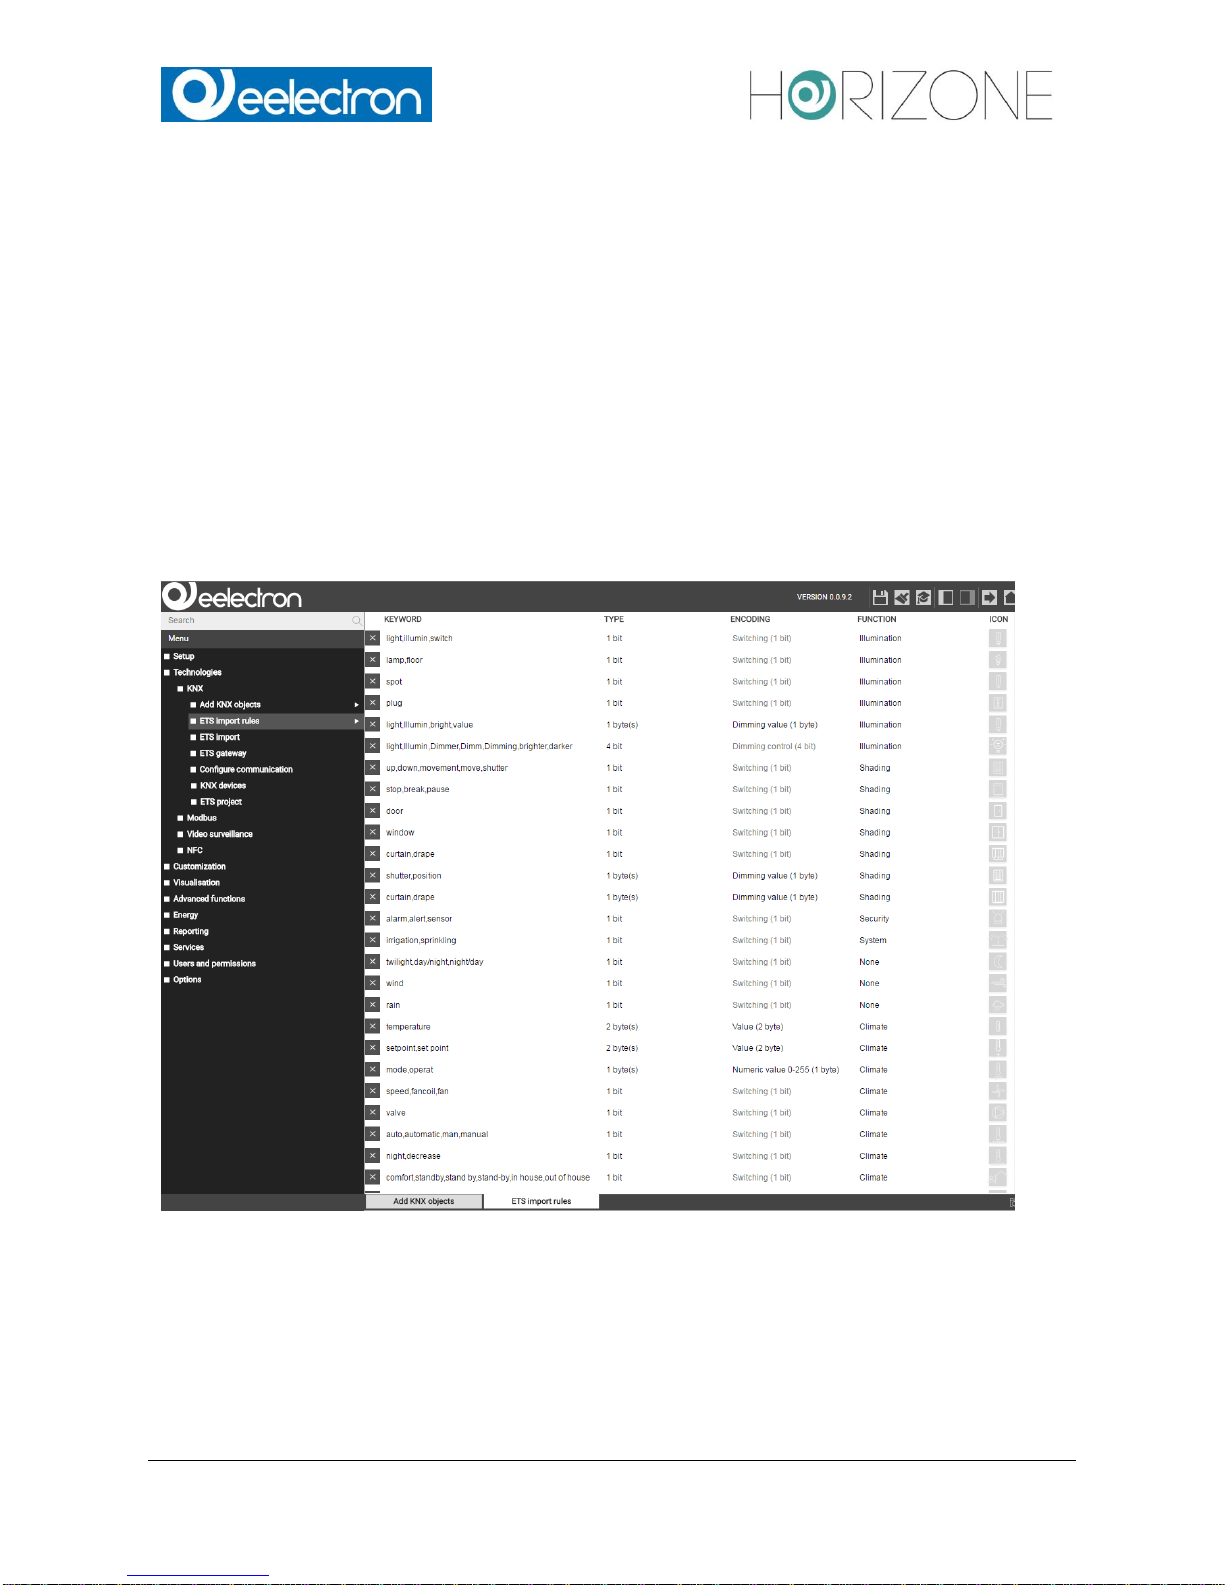
ETS-IMPORT-RULES
Permits to configure import-rules, through which the imported
group addresses will automatically be configured and connected
to the desired icon/function, in dependence of the defined
keywords
ETS IMPORT
Allows the import of a ETS-project into HORIZONE SERVER
ETS GATEWAY
Permits to use HORIZONE SERVER as ETS programming
interface, even via internet
KNX DEVICES
Allows the control / management of the physical KNX devices of
the sys
tem
CONFIGURE
COMMUNICATION
Permits to change the parameters of the used KNX
communication interface
ETS PROJECT
Permits to navigate through the single group addresses and to edit
them;
the navigation structure will be the same as the one in ETS.
TECHNOLOGIES – VIDEO SURVELLAINCE
In this section IP cameras can be integrated into the visualisation; they can be reached inside the
visualisation by clicking on the related icon in the navigation menu.
TECHNOLOGIES – INTERCOM
This section contains several configuration menus for using HORIZONE SERVER as VoIP server
(for the integration of door communication systems):
INTERNAL UNITS
Client-PCs, IP phones or soft phones (SIP protocol support is required)
EXTERNAL UNITS
Compatible video or audio door stations (SIP-Protocol support is
necessary, supported video format: MJPG or H263/H263+/H264)
CALL GROUPS
External and internal units can be grouped into a call group; by calling a call
group,
all the internal and external units belonging to the call group will
start ringing.
TELEPHONE LINES
IP telephony lines to which calls can be forwarded; this object type can be
used to integrate analogue devices (PSTN, ISDN or GSM).
SETTINGS
Generic parameters of the SIP server configuration
NOTE: depending on the server configuration, this section could need additional licenses.
Eelectron Spa
IN00B02WEBFI00070102_ADMIN_MANUAL_EN.DOCX
23/113
CUSTOMIZATION
This section contains the following entries:
THEMES
Permits to change the design (theme) of the FRONT END
NAVIGATION MENU
Permits to personalize the navigation menu of the FRONT
END
FAVOURITES
Permits to change the favourites page of the FRONT END
OPTIONS
Allows the configuration of several aspects / plugins of the
FRONT END
CUSTOM SYMBOLS /
FUNCTIONS
Allows the customization of the existing functions / symbols as
wells as the creation of completely new renderings.
CUSTOMIZATION – NAVIGATION MENU
This entry permits to customize the navigation menu of the FRONT END environment. Existing entries can be hidden (only possible in EXPERT mode) and also rooms (see next section) can be
added to the navigation menu. Therefore, proceed as described below:
Open the settings window of the entry NAVIGATION MENU by clicking the 3 points or the EDIT
button.
Search the desired room by using the search function (see page 27) for further information about
the search function).
Drag the selected room inside the configuration window of the navigation menu and drop it there.
In this way rooms can directly be added into the navigation menu and so they are visible in the
home screen inside the navigation menu (and also directly in the main page of the FRONT END, if
this option is active).
Furthermore, any system entry access, which is not desired, can be easily hidden from the
navigation menu; in this way the FRONT END can be directly adapted to the customer’s needs.
Eelectron Spa
IN00B02WEBFI00070102_ADMIN_MANUAL_EN.DOCX
24/113
VISUALISATION – ROOMS
This section allows the configuration of the rooms inside the visualisation. This section is initially
empty and allows the creation of new rooms (from a technical point of view objects of type
"GROUP"), which can contain other rooms or other objects supported by HORIZONE SERVER.
For each room a so called “Template” can be selected. Depending on the selected THEME,
different Templates are available. Currently the following Templates are available:
BACKGROUND
Background image (photo, graphic rendering, plan), on which the single
control
objects are positioned. Clicking on such a control object, it either
sends the related
command on the KNX bus or opens a box containing
further control options.
GRID
Shows the contained objects in table-form. Depending on the type of
object, it can
be controlled directly by clicking on the related buttons of the
object or a pop-up
Image:
window is opened with additional controls, when the object is clicked.
-> NO IMAGE
-> FULL IMAGE
The grid may also include an image file that is positioned depending on
the selected template.
-> ON TOP
-> ON RIGHT
-> ON LEFT
If the entry ROOMS is selected directly and its configuration window is opened by
clicking on the EDIT button, the order of the contained rooms can be changed. Since
this group belongs to the system, no other settings are available.
Eelectron Spa
IN00B02WEBFI00070102_ADMIN_MANUAL_EN.DOCX
25/113
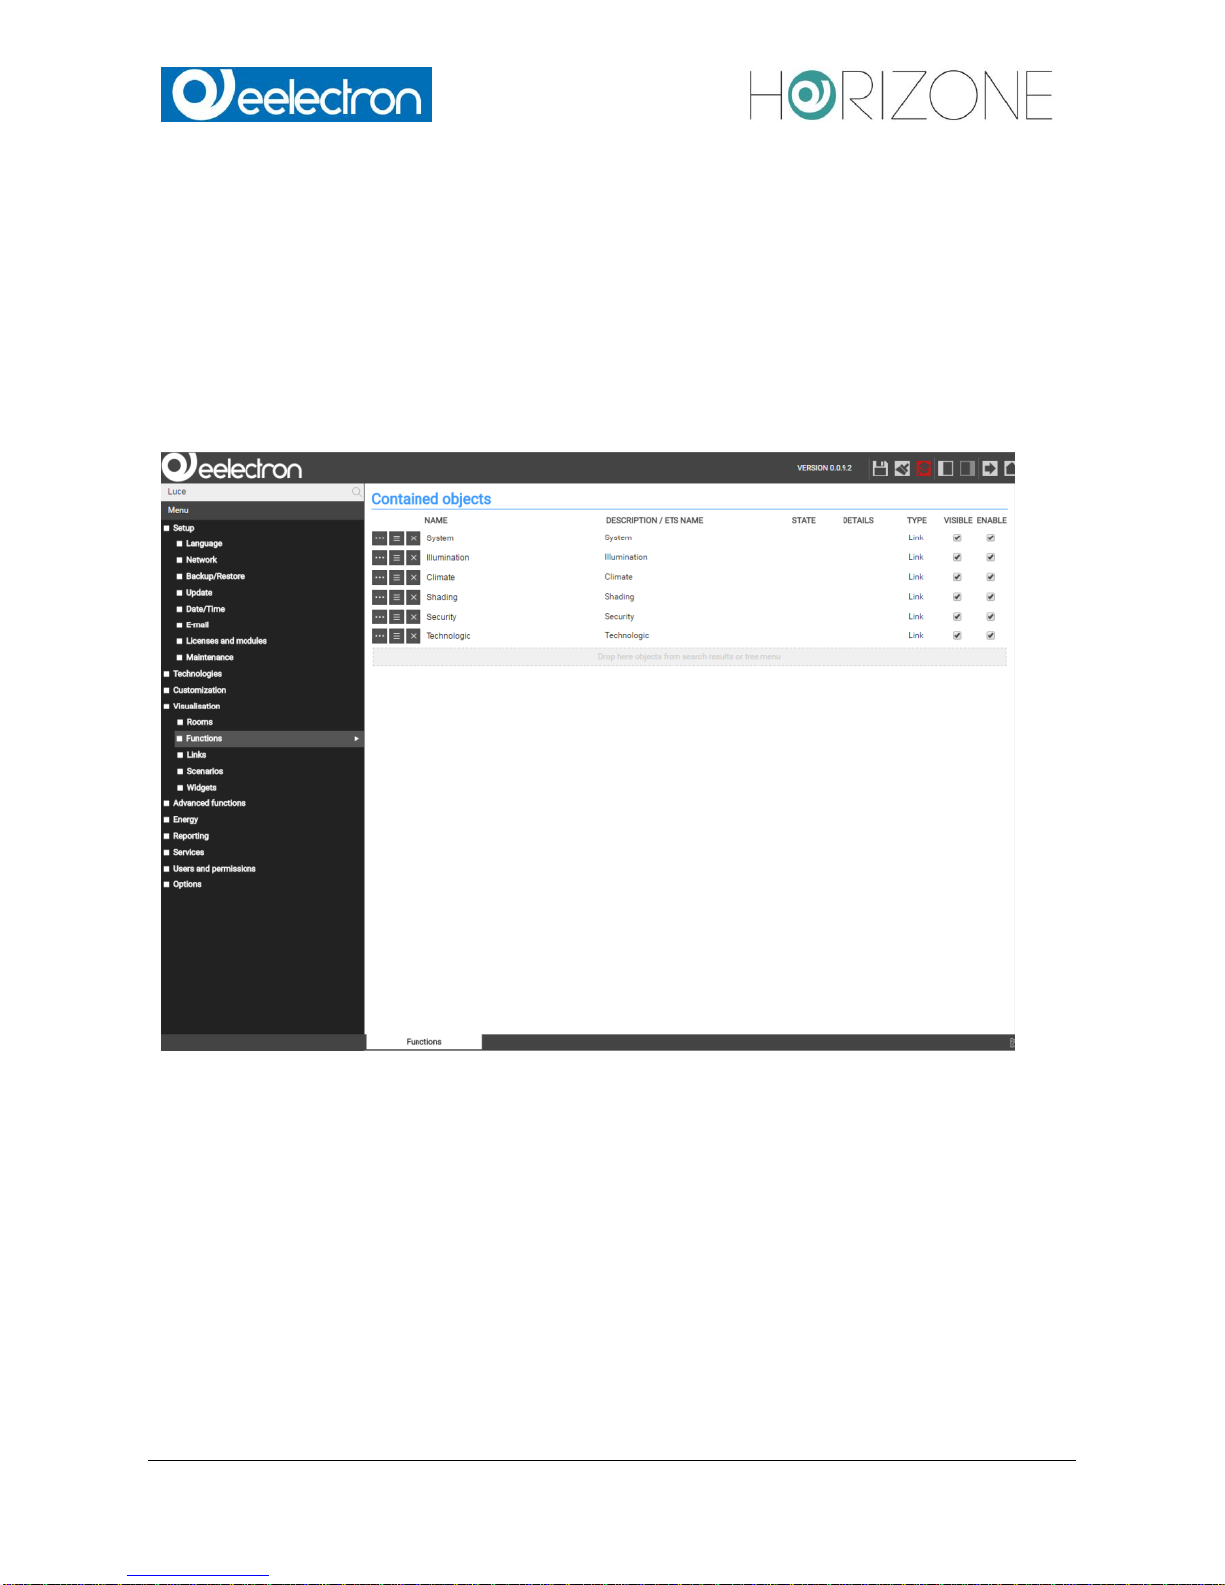
VISUALISATION – FUNCTIONS
This section allows the organization of the FUNCTIONS, which are to be considered as categories
through which all objects can be grouped based on their typology. If an object, for example, is
linked with the FUNCTION "Illumination", it is automatically copied into the group "Illumination" of
the FUNCTIONS. This group can be called directly in the FRONT END, providing quick access to
the objects of the same typology.
After activating the EXPERT-mode through the appropriate button in the toolbar, for each
FUNCTION it can be defined whether it should be visible in the FRONT END or not:
Furthermore, the order of the single entries can be changed. Click on the blue ORDER-button of an
entry, drag it up or down to the desired position and drop it there to fix the entry in the new position. The
new sequence is shown in the FRONT END after accessing the FUNCTIONS menu again.
Further information can be found in chapter 6 of this manual.

Eelectron Spa
IN00B02WEBFI00070102_ADMIN_MANUAL_EN.DOCX
26/113
VISUALISATION – LINKS
This section allows the configuration of links. Using these objects you can create page jumps to
other rooms of the visualisation or even to external web contents (like the contents of a web server
or a homepage).
Further information can be found at page 103 of this manual.
VISUALISATION – SCENARIOS
This section allows the configuration of scenarios. With scenarios, multiple actions can be
executed sequentially- if necessary also time delayed – with only one click. Scenarios can also be
started as a passive event by other objects or via scheduling.
The order of the single scenarios can be changed by opening the configuration menu of the
SCENARIOS entry and by moving the single scenarios to the desired position through drag and
drop.
In EXPERT mode it is also possible to define for each scenario if it should be visible in the FRONT
END or not.
Further information can be found at page 97 of this manual.
VISUALISATION – WIDGETS
This section allows the configuration of so-called widgets, in which KNX objects of the same device
can be grouped and therefore will be accessible and operable in one of the available templates (for
example: thermostats, blinds, dimming, RGB control, etc.).
For more information, refer to page 85 of this manual.
ADVANCED FUNCTIONS
This section permits to extend the system with functionalities that are not programmed on KNX
level. The following advanced functions are available:
LOGICS
Allows AND/OR operations on 1 bit KNX-objects
CONDITIONS
Permits to compare a value of one or more objects with a fixed value and
to define events, which are launched in dependency of the comparison
result
VIRTUAL OBJECTS
Permits to create virtual objects for example for saving values, for
connecting passive and active events etc.
INTEGRATORS
Permits to observe / evaluate values over a given time period; specially
convenient for evaluating energy-values
NOTIFICATIONS
Permits to send notifications (either “on screen” or via mail) in dependency
of events within the installation
CLIENTS
Permits to create relations between the devices connected to HORIZONE
SERVER (each connected device will be shown as CLIENT) and different
actions of the software, like e.g. scenarios, VoIP actions, …
SCRIPTING
Permits to create own, PHP-based scripts in order to extend the
functionalities of HORIZONE SERVER
Eelectron Spa
IN00B02WEBFI00070102_ADMIN_MANUAL_EN.DOCX
27/113
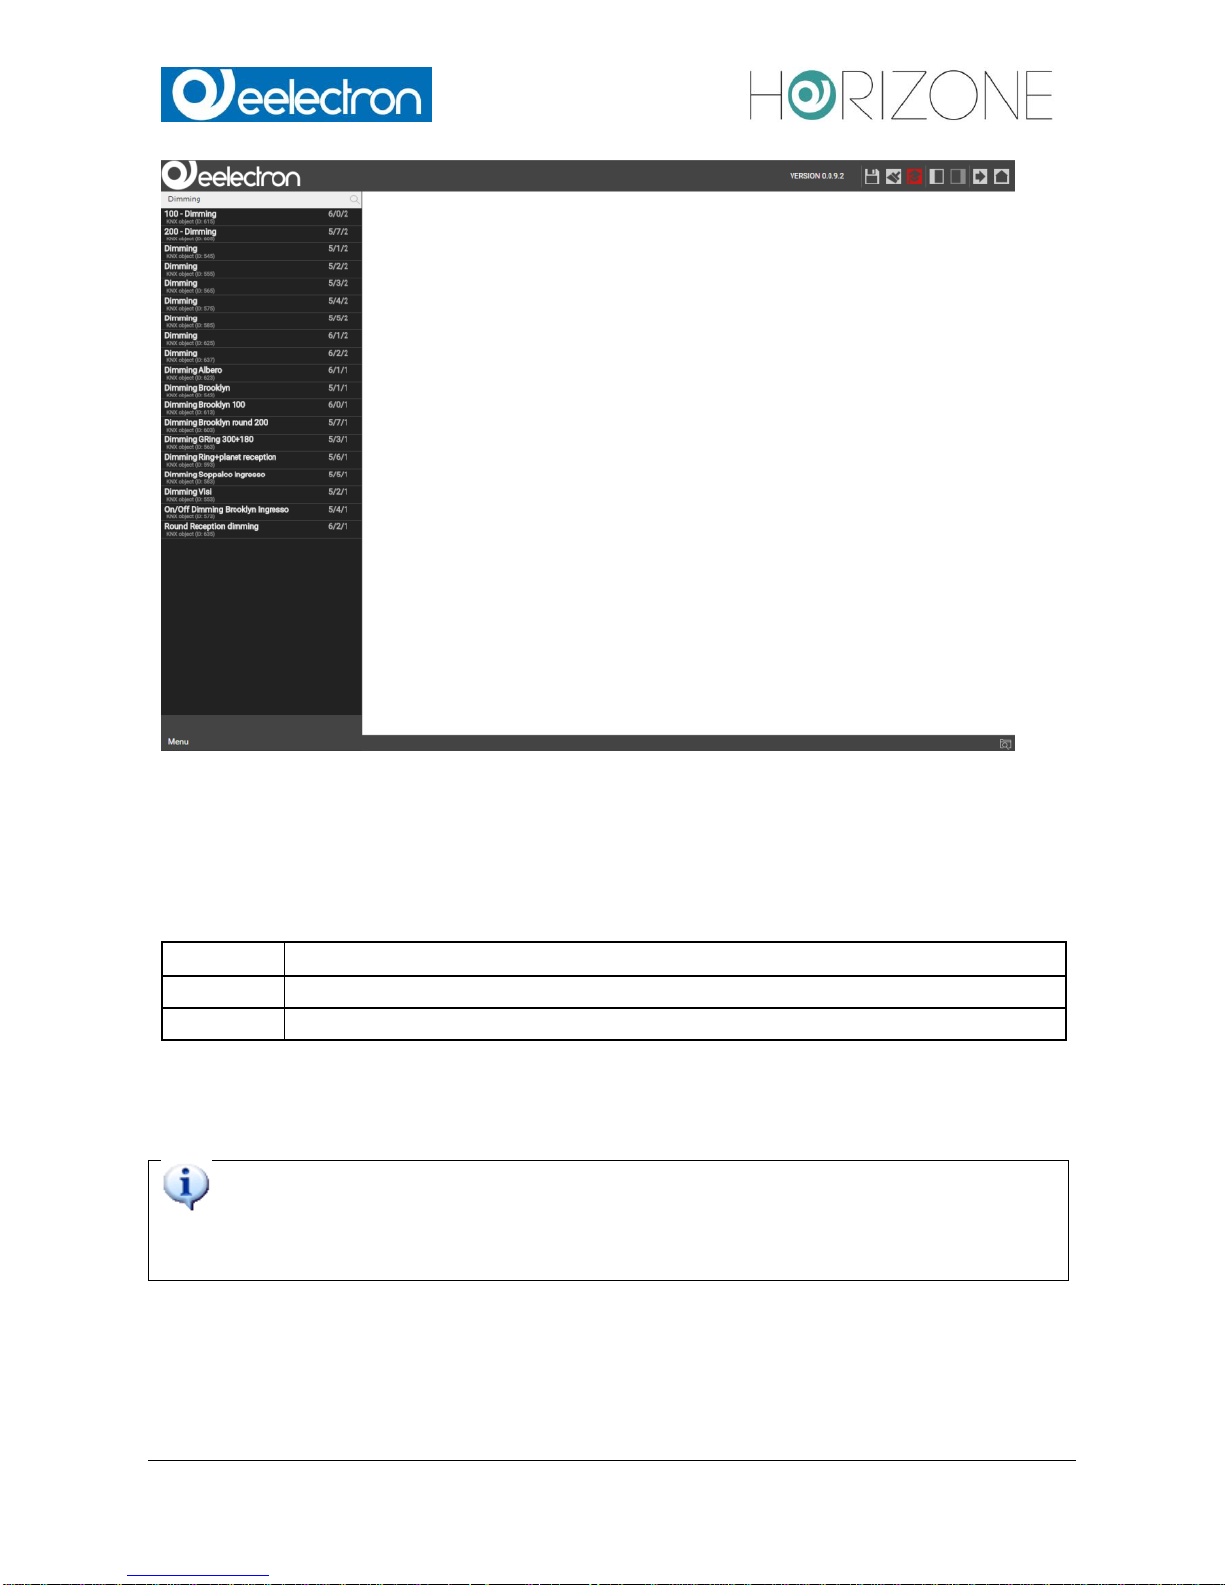
SEARCH BAR
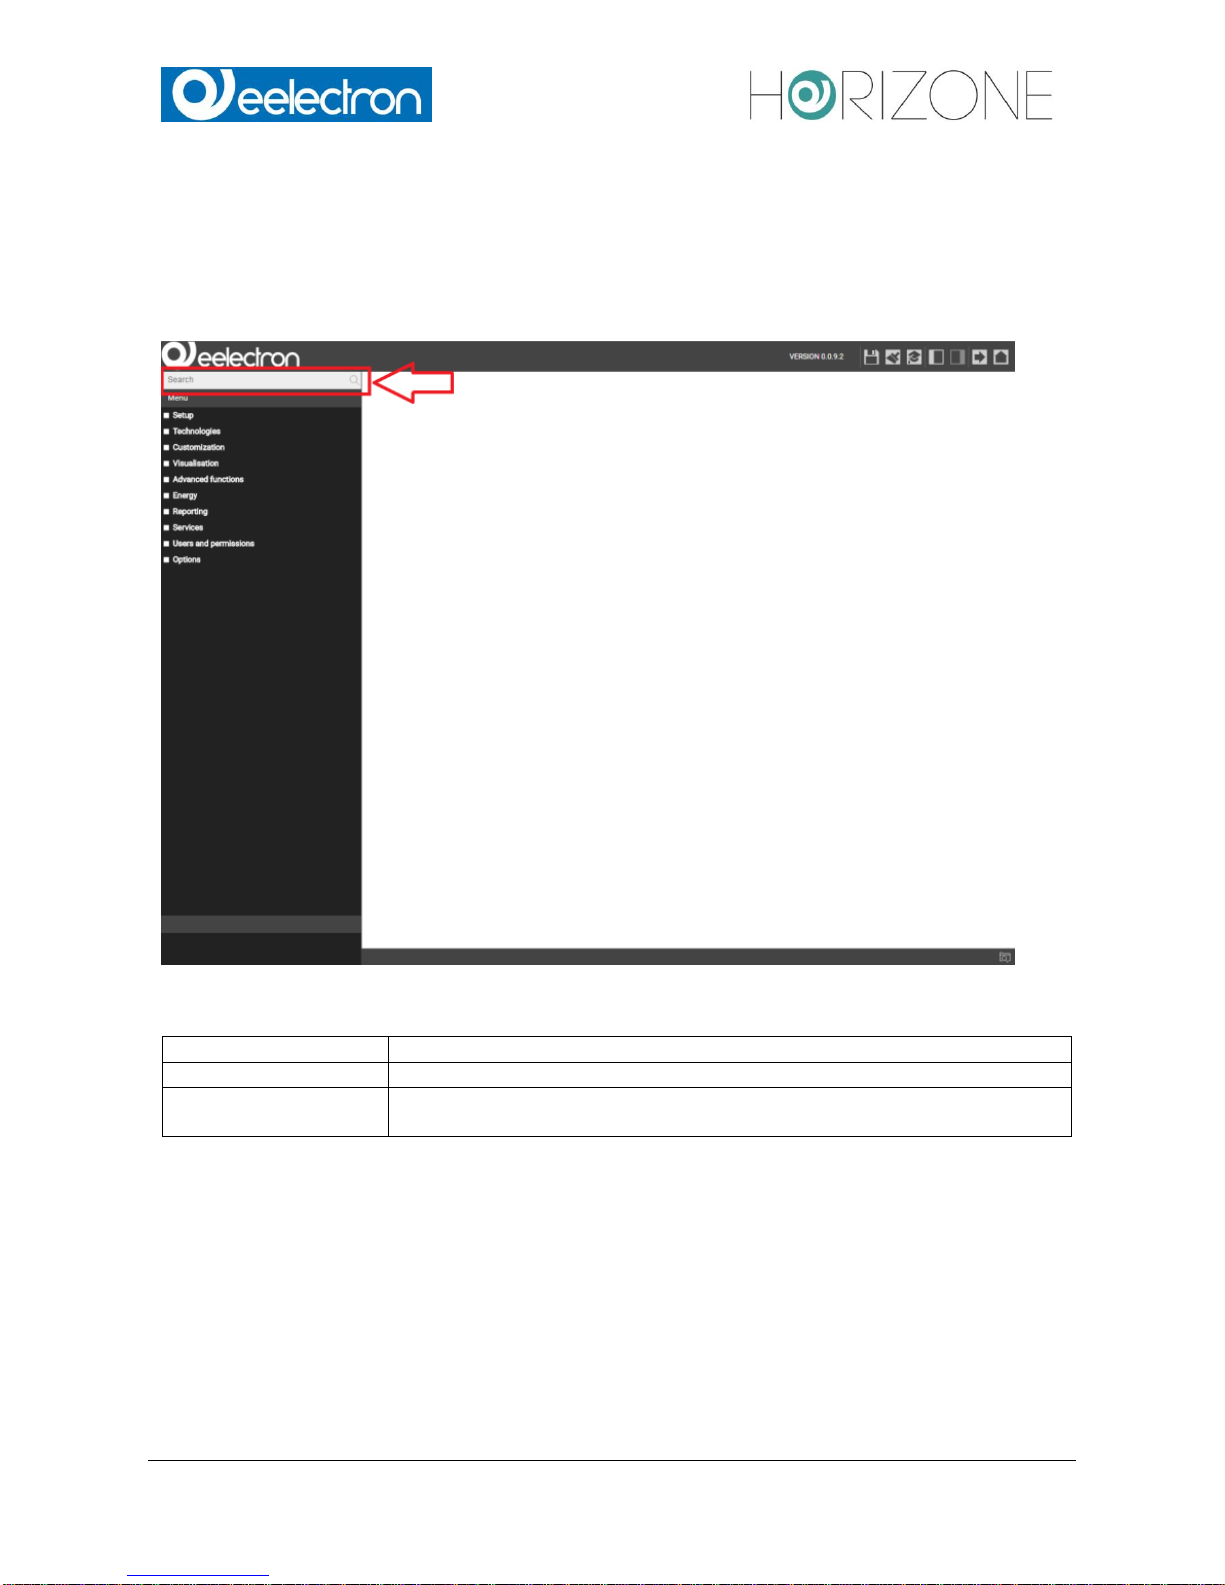
Entering one or more keywords into the search box in the upper left corner, the software searches
for all objects, which include the specified keyword in their names or other primary properties. The
results are displayed in the left area instead of the navigation menu, which is minimized for this
purpose:
The results are shown together with the following information:
NAME
Name of the object inside the software’s database
TYPE
Object-type; shown directly under the name of the object
PRIMARY PROPERTY
If available, on the right side the primary property of an object is shown (for
exam
ple: the group address of a KNX object)
A result entry will be highlighted if it’s clicked; as within the navigation menu, there will appear
some action buttons in the bottom toolbar, if the selected object allows editing. In this case, the 3
points on the right side of the selected entry will be visible, enabling a quicker access to the
property window.
Eelectron Spa
IN00B02WEBFI00070102_ADMIN_MANUAL_EN.DOCX
28/113
The search function also supports the multiple selection of objects by holding the CTRL key of your
keyboard while selecting the desired objects with the mouse. The selected objects will all be highlighted.
The TOOLBAR can show the following action buttons:
EDIT
Opens the configuration window of the selected objects
DELETE
Removes the selected objects from the project
CLONE
Clones the selected objects
The CLONE-action creates a one-on-one copy of the selected objects. After the execution of this
command, the search results are refreshed and also the cloned objects will be shown (can be
recognized from the prefix “Copy of ...”).
When cloning an object, not only the objects itself is duplicated, but also all of its
connections / relations with other objects This means that the cloned object will be
contained in the same rooms, logics, scenarios etc. as also the original object.
Therefore, after the creation of a cloned object, all relations and connections should be
checked and, if necessary, corrected.
NOTE: if the original object was present in a room with BACKGROUND view, the cloned object will
be positioned AT THE SAME PLACE in the room and will cover the original object. In this case,
please edit the BACKGROUND view and place the cloned object in a different position.
Eelectron Spa
IN00B02WEBFI00070102_ADMIN_MANUAL_EN.DOCX
29/113
WORKSPACE
OVERVIEW
The WORKSPACE is the working surface of the BACK END area. It offers the possibility to open
several configuration windows at the same time in different tabs.
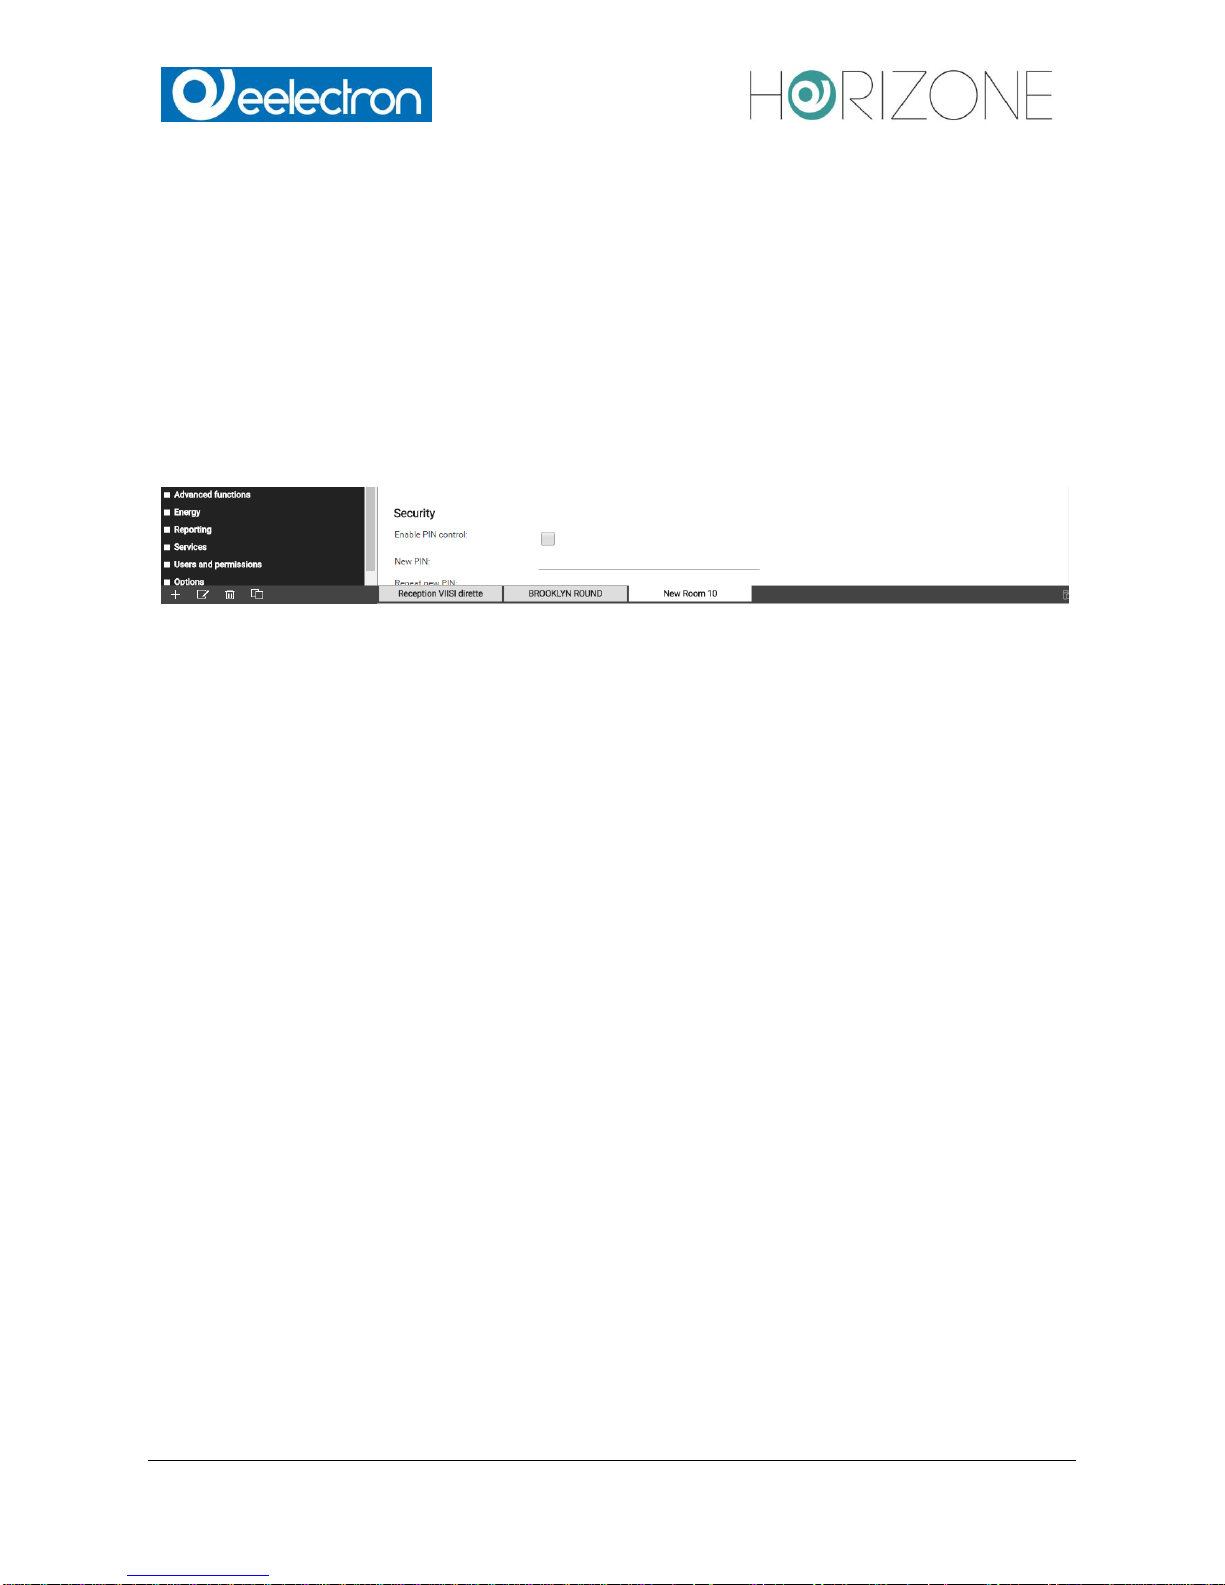
USE OF TABS
All opened tabs are displayed in the TAB-BAR of in the lower area of the WORKSPACE:
If a large number of tabs is opened, they cannot be displayed all in the TAB-BAR. The hidden tabs
can be accessed through the button at the right end of the TAB-BAR, which, on click, shows a
complete list of all opened tabs. To close an opened tab, move the mouse pointer on the tab title
and click on the appearing X-icon. If there are present any unsaved changes in the tab, you will be
informed about it before the tab is closed, in order to avoid data loss.
Eelectron Spa
IN00B02WEBFI00070102_ADMIN_MANUAL_EN.DOCX
30/113
SETUP
INTRODUCTION
This chapter explains the configuration pages for installation, commissioning and maintenance of
HORIZONE SERVER. All sections and menus described in this chapter can be found in the
SETUP section of the navigation menu. To have access to all of these settings, you must be
logged in as administrator.
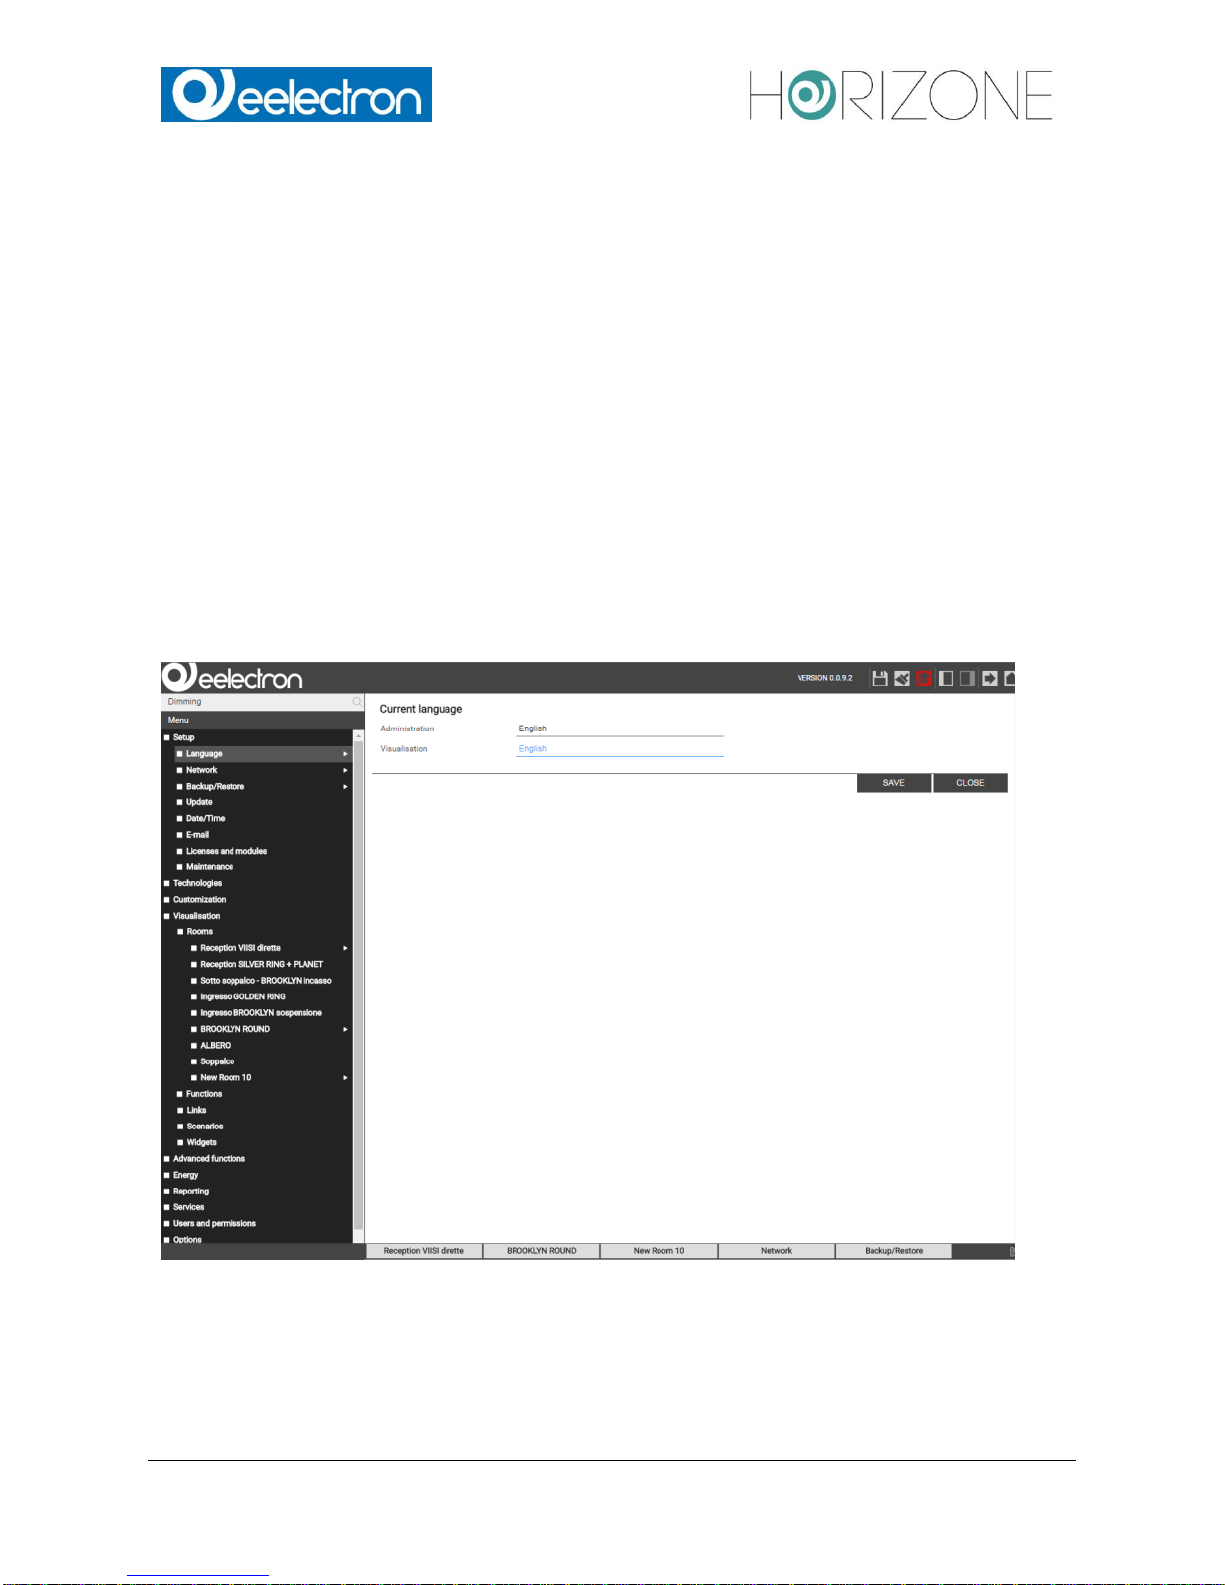
LANGUAGE
This page allows the configuration of the language that should be used for the different
environments of HORIZONE SERVER. Currently the language can be set separately for the
FRONT END and BACK END. Select the desired language and click on "SAVE". Once the storage
procedure is completed, the page will be refreshed and displayed in the selected language.
 Loading...