

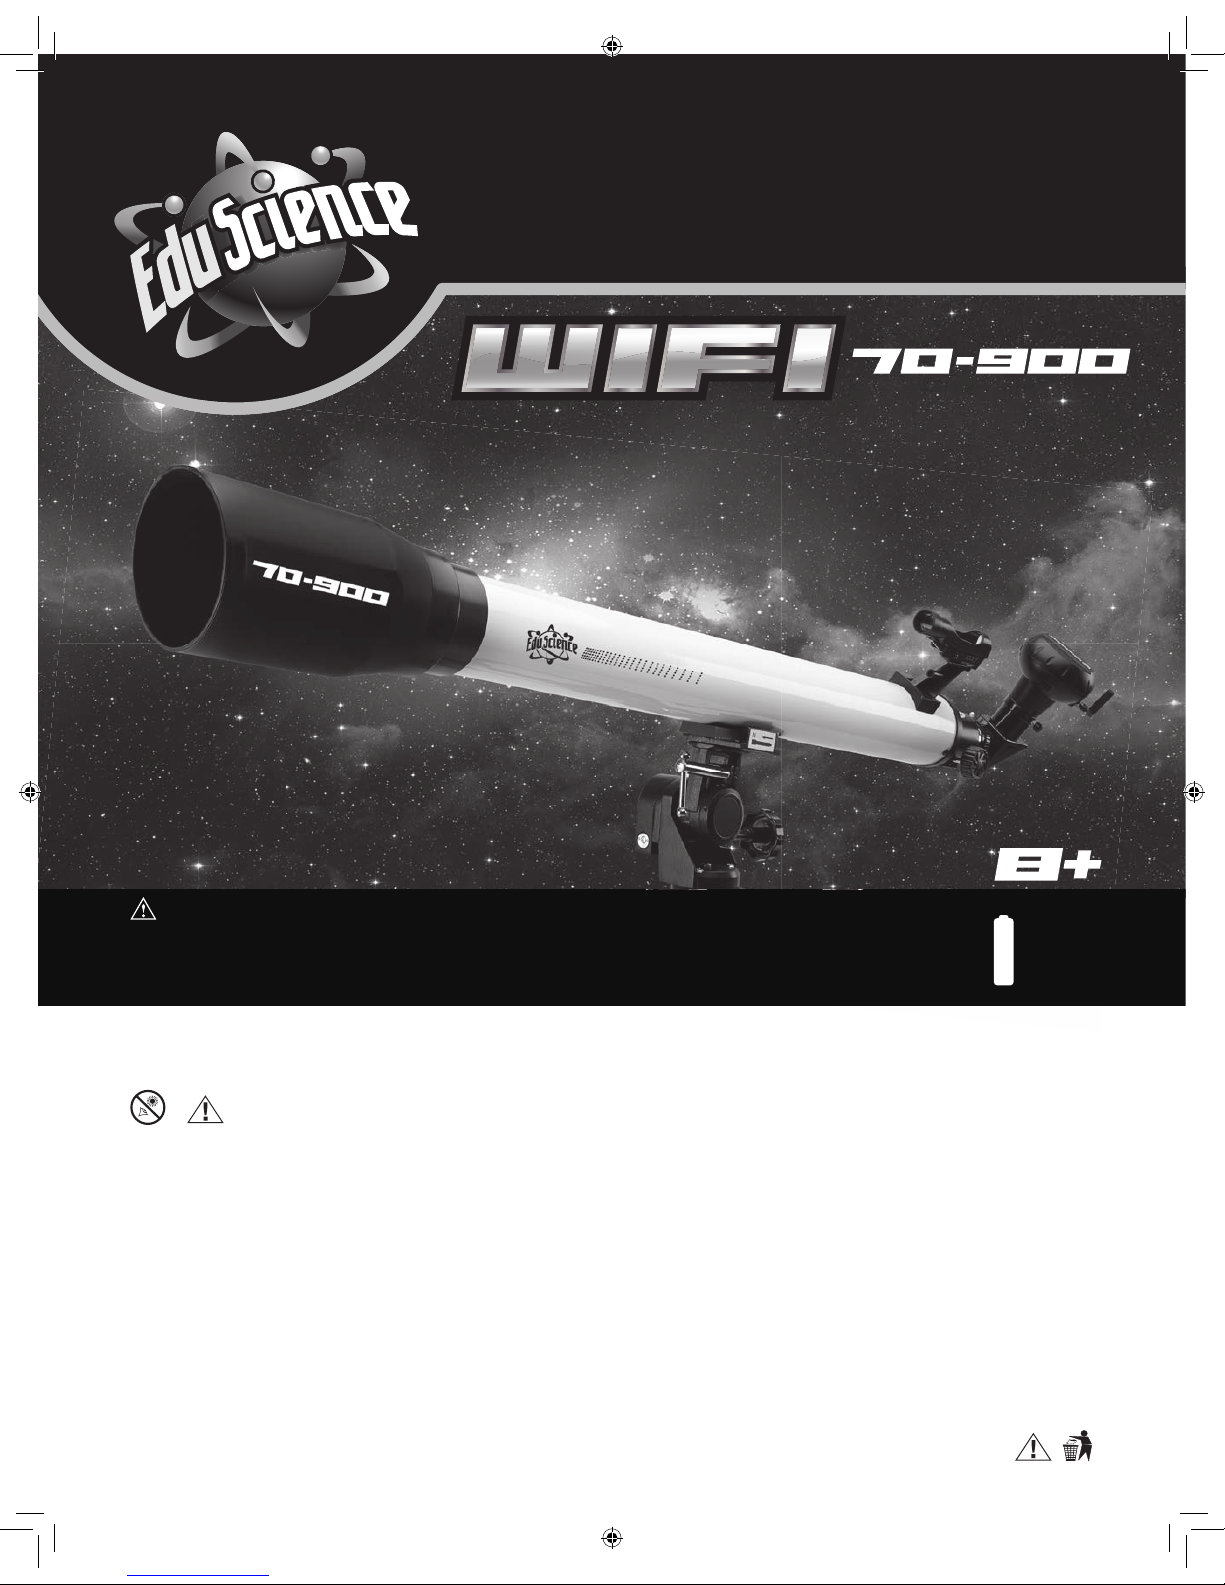
Page 1
#5F62DC6
RISK to your child!
Never look through this device directly at or near the sun. There is a risk
of
BLINDING YOURSELF!
Children should only use this device under supervision. Keep packaging
materials (plastic bags, etc.) away from children. There is a risk of
SUFFOCATION!
Fire/Burning RISK!
Never subject the device - especially the lenses - to direct sunlight. Light
ray concentration can cause fires and/or burns.
RISK of material damage!
Never take the device apart. Please consult your Customer Service if
there are any defects. The dealer will contact our service center and
send the device in for repair if needed.
TELESCOPE / TÉLESCOPE / TELESCOPIO
TELESCOPE / TÉLESCOPE / TELESCOPIO
WARNING:
Do not look directly at the sun.
CAUTION:
Never attempt observing the sun with this telescope! Especially keep it in mind while the telescope is used by children!
Observing the sun – even for a very short time – will cause blindness!
Packing material (plastic bags, etc.) has to be kept out of reach of children!
A
A
NOT INCLUDED
NON INCLUSES
NO INCLUIDAS
x4
Page 2
Need Help? Toll Free 855-863-4426
13
10
1
4
9
8
5
7
2
3
6
Page 3
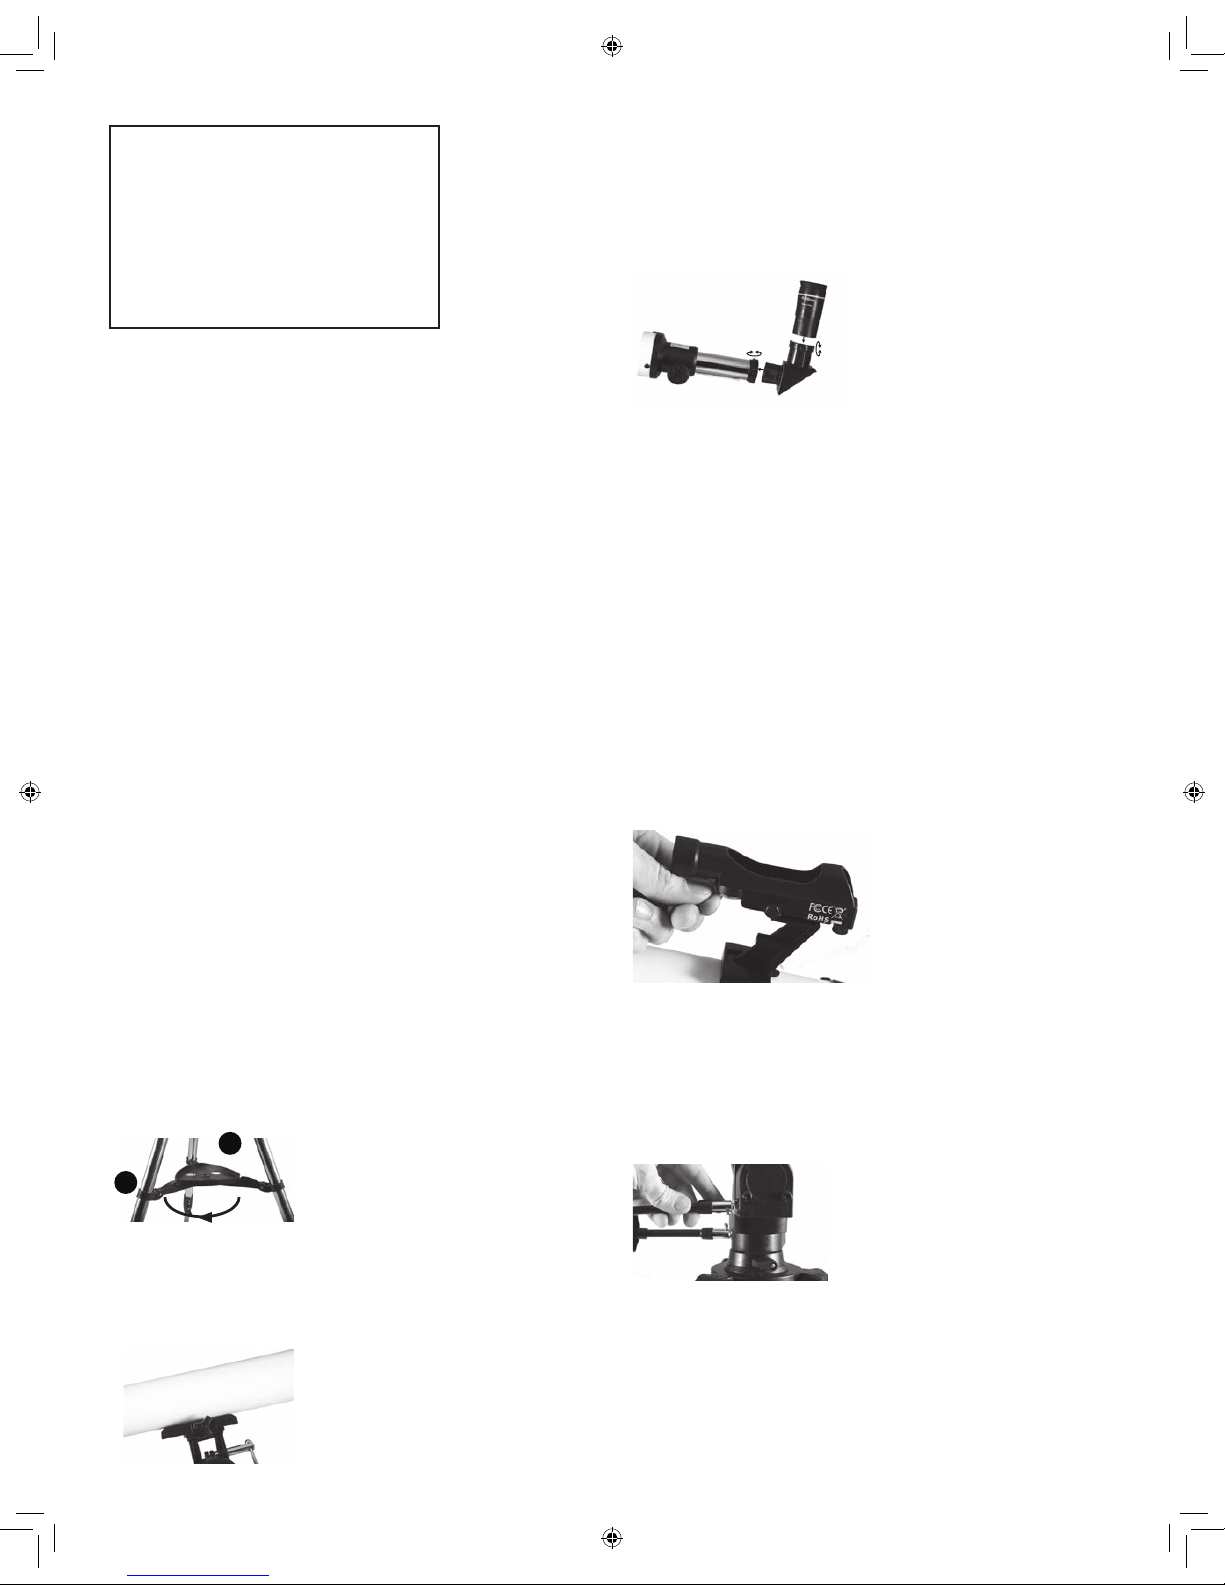
5. Inserting the Eyepiece
2 eyepieces: 26mm and 9.7mm come with your telescope. With the
eyepieces, you can control the magnifi cation of your telescope. Before
installing the eyepieces and the focuser, take the lens cap out of the
eyepiece holder.
NOTE: Make sure the focuser is closest to the object which you are trying
to view. If the focuser is not closest to the object the telescope is facing
backwards and the view will not of the ground and dark or black.
6. Aligning the Red Dot Finder scope
Your telescope is designed for terrestrial and astronomical observations.
Please keep in mind that heat turbulences in the air are also magnifi ed.
In warm conditions, it can be useful to limit observations to medium
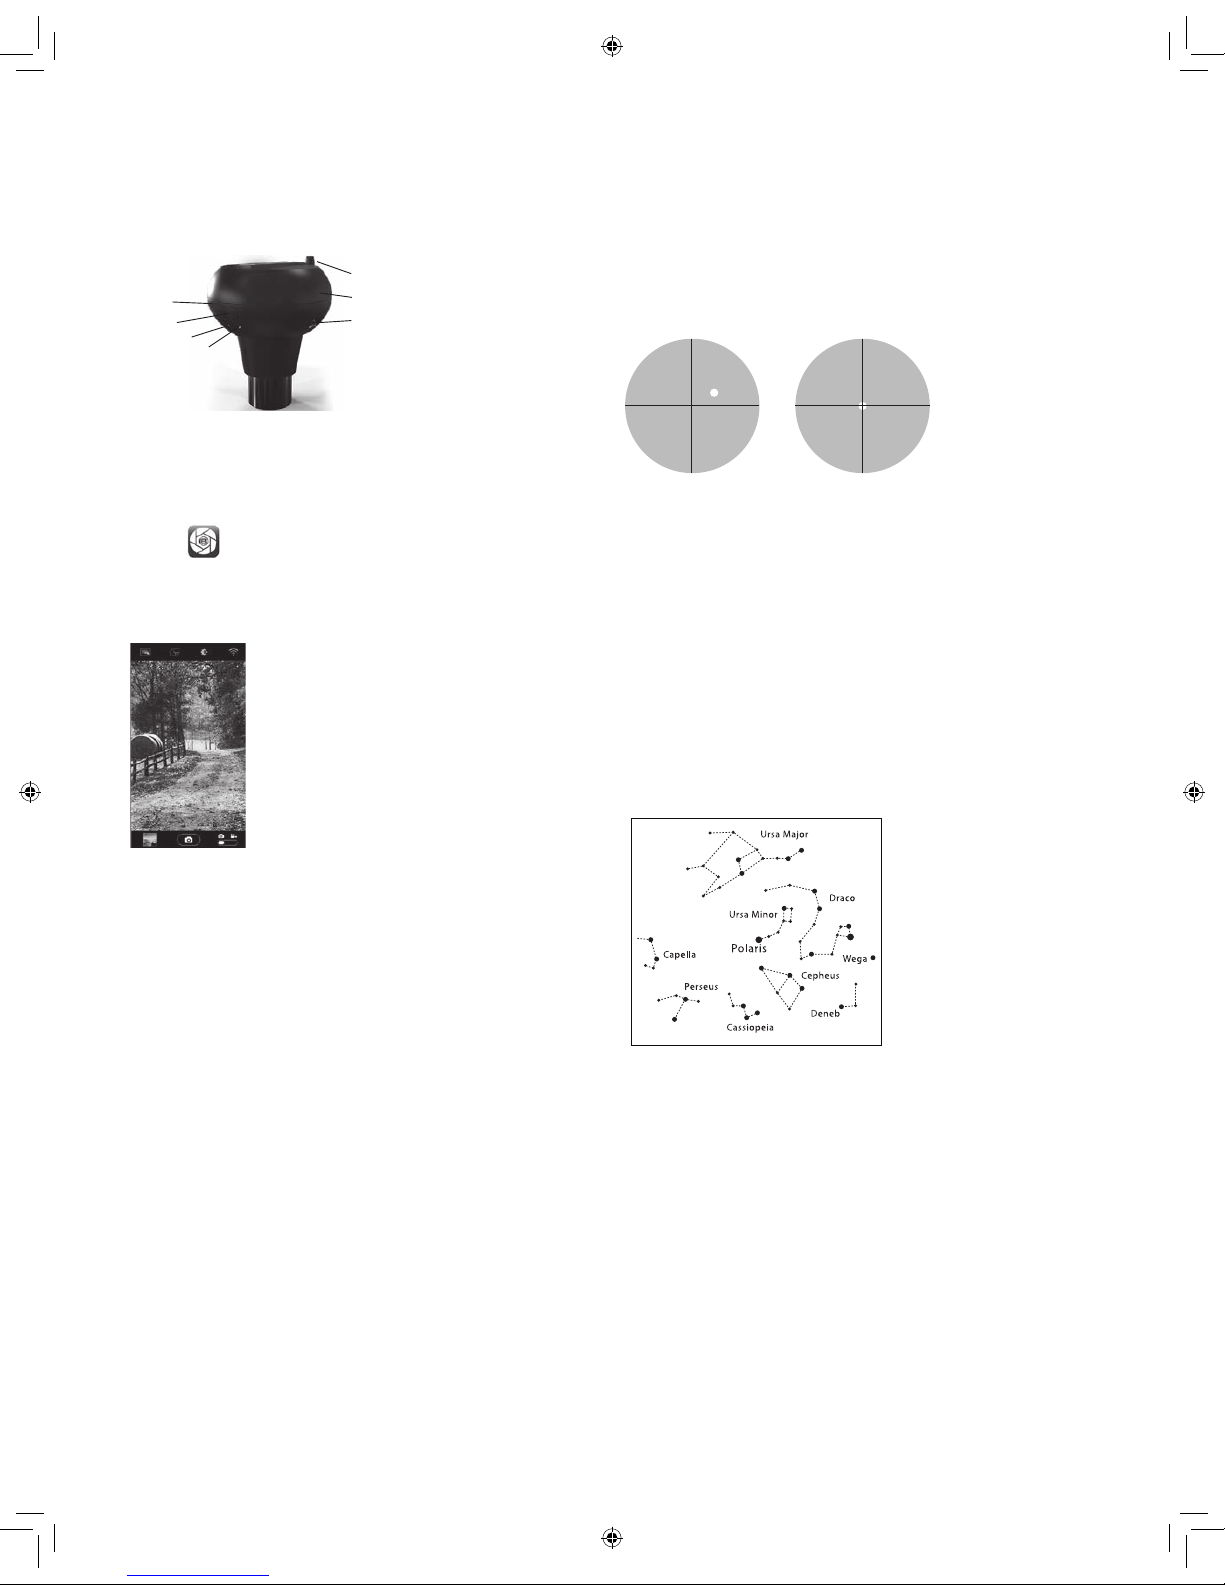
magnifi cations. First, remove the dust cover from the objective lens.
Please make sure to remove plastic insulator from battery (picture
below). Insert the 26mm Eyepiece into the diagonal; you may now
adjust the focus with the draw tube’s wheel. The Red Dot Finder scope is
activated by sliding the switch on its right side; there are two intensities
available. Before the fi rst observation, the Red Dot Finder scope has
to be aligned to the telescope. For this, point at a striking target (e.g.
telephone pole) with the telescope’s eyepiece. Now, without moving the
telescope, switch on the Red Dot Finder scope and adjust the red dot
with the 2 adjustment screws (left and right - up and down) until it fi ts to
the eyepiece’s view. Now the Red Dot Finder scope is aligned and ready
to point for the telescope.
Never use a telescope to look at the sun! Looking at or near the sun
will cause instant and irreversible damage to your eye. Eye damage is
often painless, so there is no warning to the observer that damage has
occurred until it is too late. Do not point the telescope or its viewfi nder at
or near the sun. Do not look through the telescope or its viewfi nder as it is
moving. Children should always have adult supervision while observing.
7. Flexible shafts
In order to facilitate the exact fi ne adjustment of the declination and right
ascension shafts, the fl exible shafts have been placed on the holders
of both these shafts, in the places designed for that purpose. The long
fl exible shaft is mounted parallel to the telescope tube. It is secured with
a clamp screw on the designat-ed indentation on the shaft. The short
fl exible shaft is mounted sideways. It is secured with a clamp screw on
the designated indentation on the shaft. Your telescope is now ready for
use.
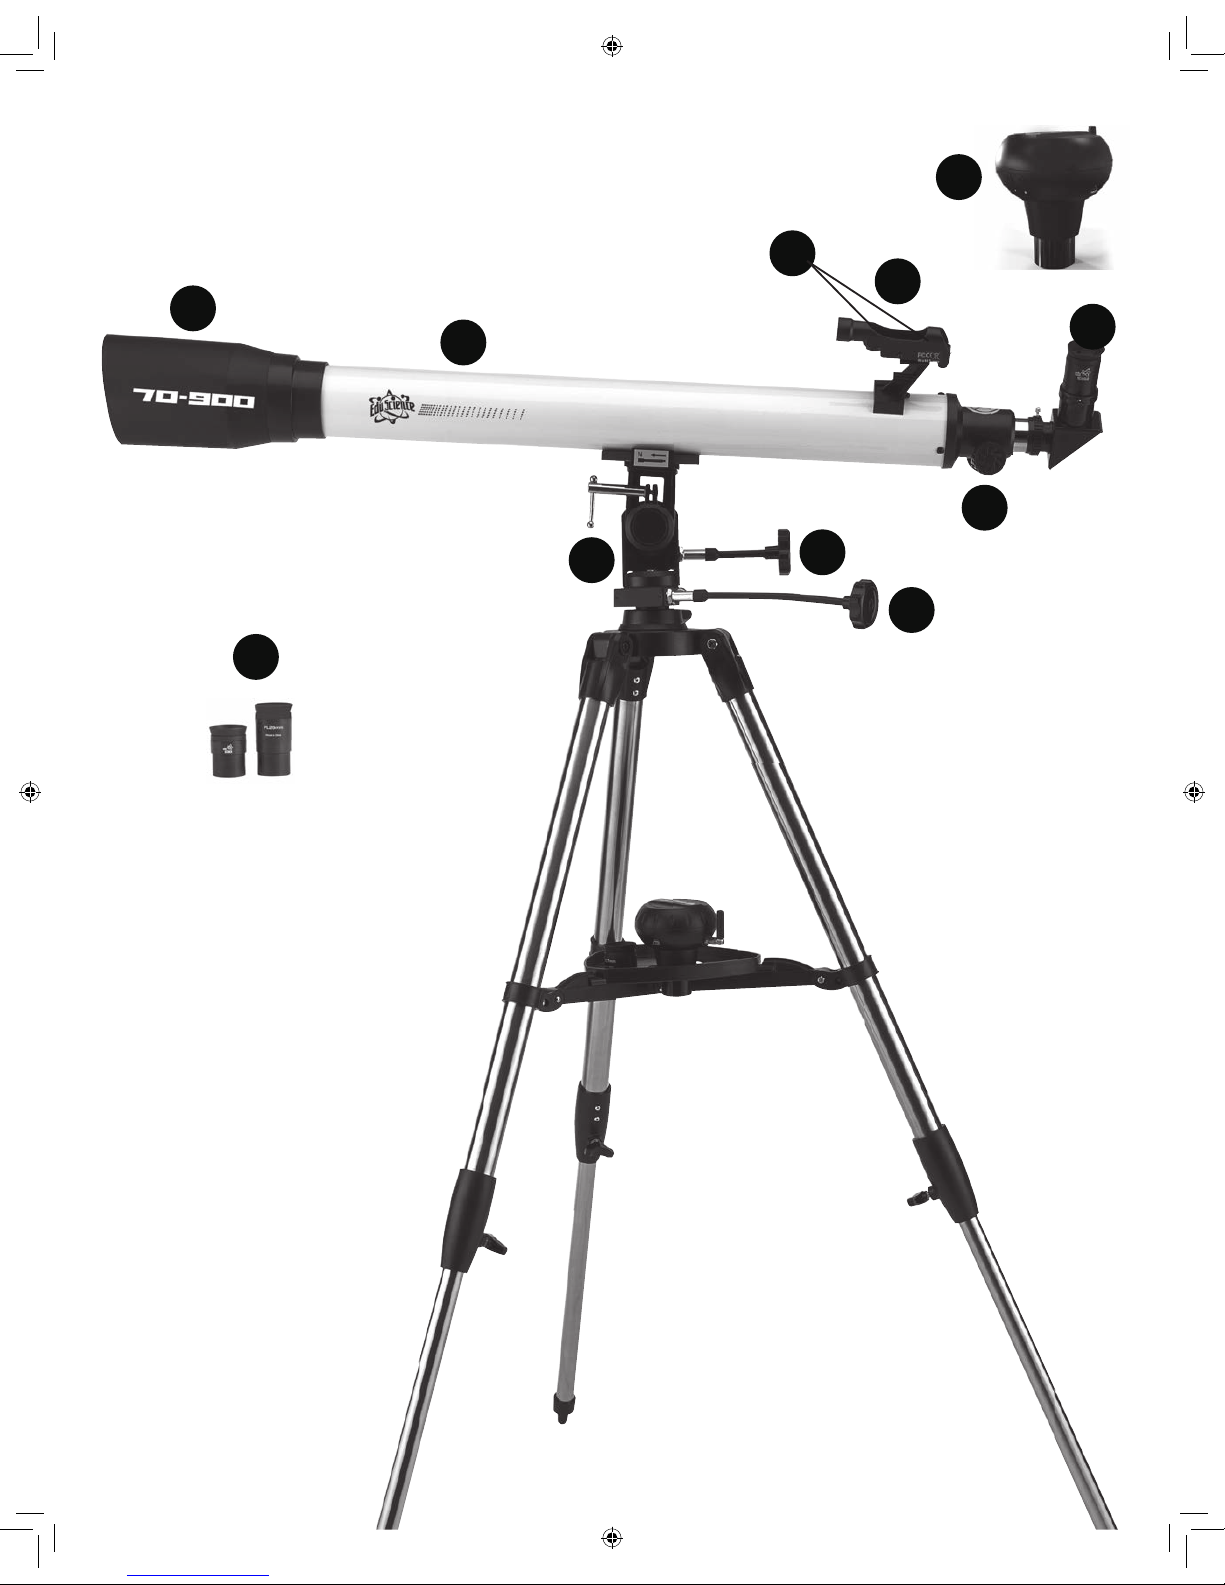
Parts listing
Your telescope has the following parts:
1 Telescope tube
2 Red Dot Finder
3 Adjusting screws for fi nder
4 Dew Shield
5 Focuser
6 Diagonal
7 Flexible Shaft (Azimuth Left and Right)
8 Flexible Shaft (Altitude Up and Down)
9 Mount head
10 26mm and 9.7mm Plossl Eyepieces
11 Locking clips (on tripod)
12 Tripod and Accessory Tray
13 Wi-Fi Eyepiece
Set-up
1. General Information regarding Assembly, Positioning Before beginning
with the assembly, choose a suitable position for your telescope. It will
help if you assemble this apparatus at a spot from where you have a
clear view of the sky, a sturdy surface beneath you, and enough space.
Important: Tighten screws only as much as you can by hand - do not
“over-tighten” the screws.
2. Tripod
Take the three-legged tripod and set it vertically on the fl oor with the feet
pointing downwards. Now take two of the tripod legs and pull these legs
carefully out away from each other, until they have reached their fully
opened position. During this time, the entire weight of the tripod rests on
one leg. Finally, set the tripod down on all legs, so that it stands straight.
Loosen the three locking clips (11) on the tripod legs, pull each individual
tripod leg out until it has reached the desired length close up the locking
clips (11) and set the tripod down on a sturdy, even surface.
TIP:
A small water level on the accessory tray can help you position your
tripod horizontally.
3. Mounting the tray:
The accessory tray must be positioned with its fl at side down in the
middle of the tripod leg brace, and then must be mounted by turning it
60° in a clockwise direction. The three projections on the tray plate must
match up to the mounting brackets on the division bars (and must snap
into place. If necessary, you may push the tripod leg brace downwards
a little.
4. Connecting the tube
Now set the tube (and holder) onto the mount with the objective opening
in the direction marked (N-marking on the tripod head, north point and
telescope fi gure on the mount). Then fasten the tube holder with the
clamping screw of the dovetail adapter on the mount head.
Need Help? Toll Free 855-863-4426
11
12
Page 4
toward the star (with the help of the flexible shafts), or you can adjust
the focus with the focus knob. Additionally, you can now switch to a
higher magnification by changing the eyepiece (to a smaller focal length).
Please be aware that the magnification of the stars is barely perceptible.
TIP: Eyepieces are lens systems designed for your eye. In an eyepiece,
the clear image that is generated in the focal point of a lens is
captured (in other words, made visible) and magnified still more.
Eyepieces with various focal lengths are necessary in order to achieve
various degrees of magnification. Begin each observation with an
eyepiece with a low magnification (large focal length, e.g. 26mm).
Finding stars
In the beginning, you will certainly find it difficult to orient yourself in the
sky, since stars and constellations are always moving, and their position
in the sky varies according to the season, date, and time. The North Star
is an exception to this. If you were to imagine the polar axis of the Earth
extending out into space, it would approximately hit the North Star. The
so-called north ce-lestial pole is the starting point for all star charts. On
the drawing you see a number of the more familiar constellations and
star clusters, which are visible throughout the year. The position of the
stars is, of course, dependent on date and time. If you have fixed your
telescope on one of these stars, you will notice that within a short time it
disappears from the eyepiece field of vision. In order to compensate for
this effect, operate the flexible shaft of the counterweight axis, and your
telescope will follow the ap-parent path of this star.
Storing the Telescope Hopefully your observation session will have been
interesting and successful; afterwards, it is recommended to store the
telescope in a dry and well-ventilated room. Please do not forget to
place the lens caps back onto the front tube opening and the eyepiece
holder. All eyepieces and optical accessories should also be stored in
their respective containers.
NOTE: Make sure the focuser is closest to the object which you are
trying to view. If the focuser is not closest to the object the telescope
is facing backwards and the view will not be of the ground and dark
or black.
Your telescope also include a Wi-Fi eyepiece, once you have your object
in view, you may exchange the 26 eyepiece for the Wi-Fi eyepiece.
After exchanging the eyepiece, please follow the below instructions for
operation of the Wi-Fi eyepiece on applicable Wi-Fi devices.
Wi-Fi___33 Camera Manual Instruction
1 Wi-Fi Camera Mode:
1.1 Place 4pcs AA battery (not included) or insert USB cable to computer
to get power;
1.2 Hold to press power key until power LED becomes red color, and then
press Wi-Fi switch to turn on Wi-Fi function (Wi-Fi LED becomes blue).
1.3 Run “Wi-Fi camera” app on your smartphone or tablet
and open following program (you must choose Wi-Fi device name
“Besser_ WIFI_Cam-bresser Wi-Fi camera” as Wi-Fi host) and you can
snap or record video or operate the file;
2 PC Camera mode:
You can use this device as traditional digital eyepiece by USB cable to
computer, insert USB cable to computer r; hold to press power key till
power led becomes red color, and then you can get picture or video in
computer like traditional digital eyepiece,
Remark:
a. If you want to use Wi-Fi camera function whenever,
only need to turn on Wi-Fi function and run “Wi-Fi camera” app
seen as 1.2 and 1.3,and the device will turn off computer interface
automatically;
b. About power supply, you can choose battery mode or usb cable
mode, if you insert usb cable to connect to computer,
the device will get power from computer firstly.
Using the Telescope
Observation
After you have located the North Star in the finder, you will be able to
recognize the North Star when you look through the eyepiece of the
telescope. If needed, you can angle the tele-scope even more exactly
Need Help? Toll Free 855-863-4426
WIFI
Wi-Fi
Wi-Fi
Battery
USB PortPower
Power
Page 5
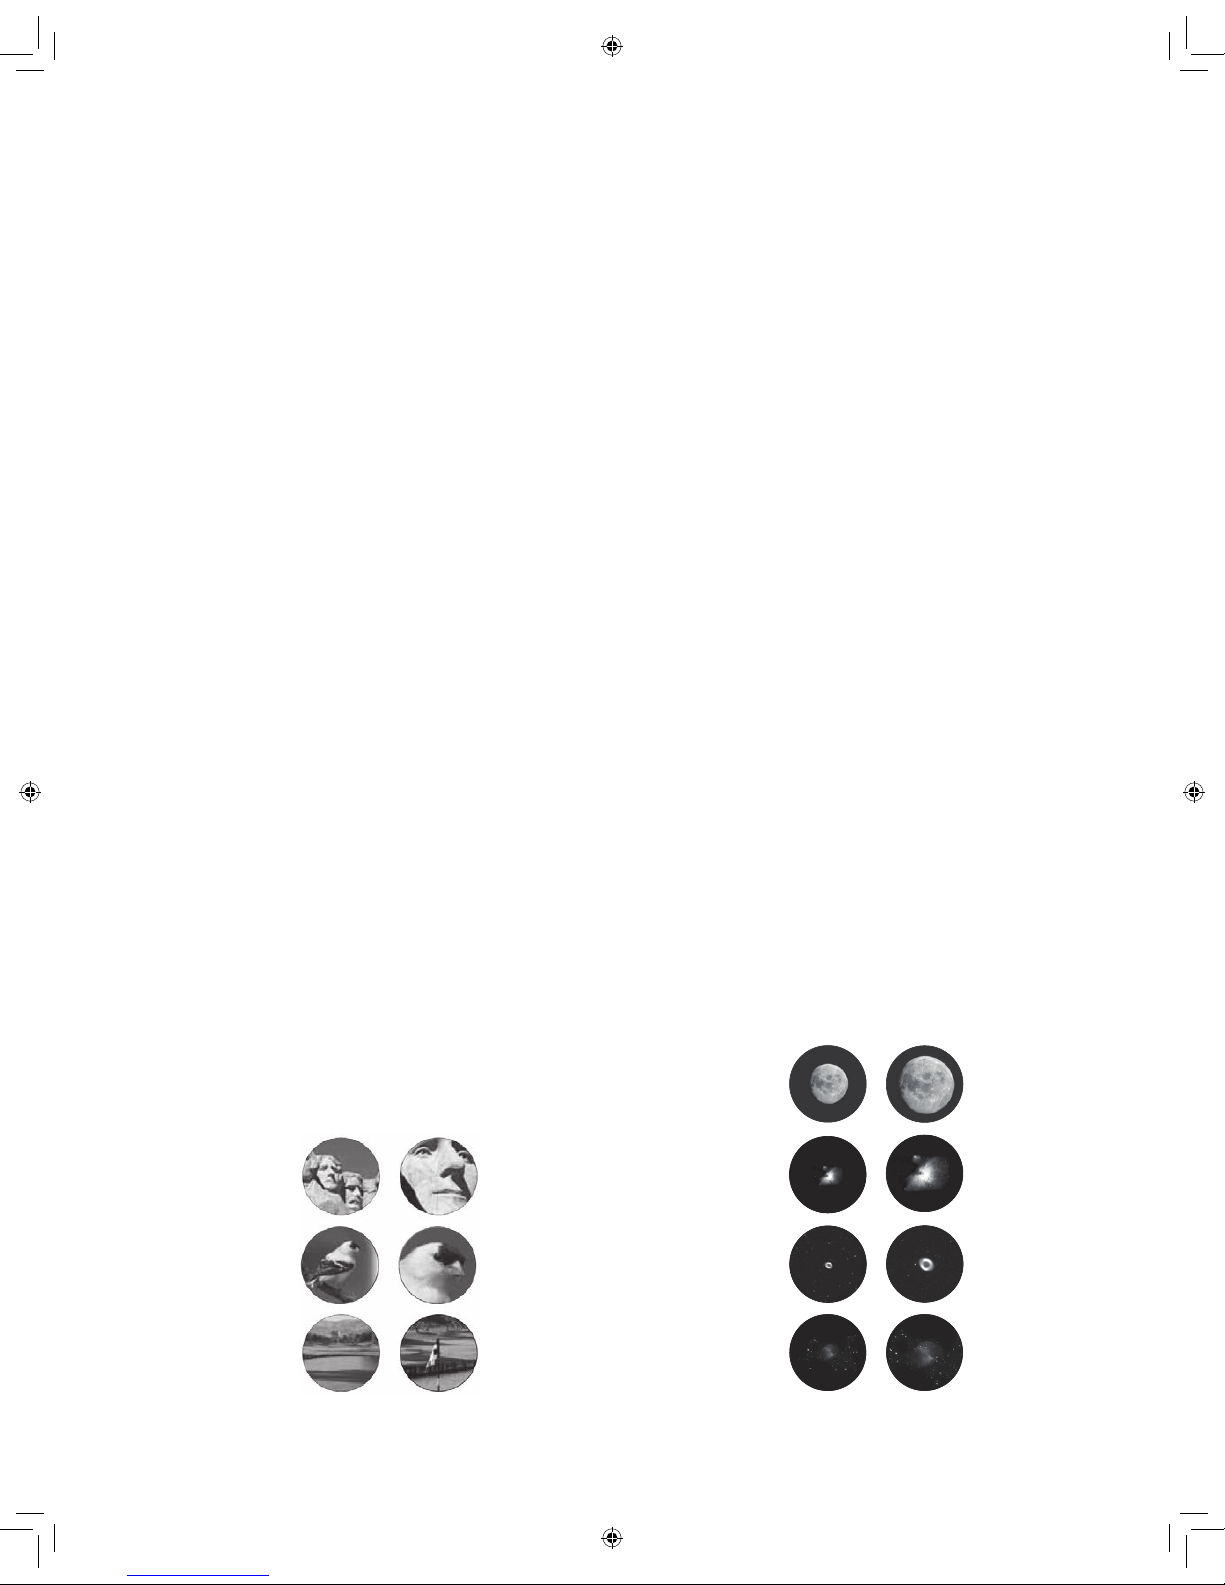
Possible objects for observation:
We have compiled and explained a number of very interesting celestial
bodies and star clusters for you but we suggest that you start practicing
during the day focusing on terrestrial objects such as birds and or
trees at varying distances from you. On the accompanying images at
the end of the instruction manual, you can see how objects will appear
in good viewing conditions through your telescope at varying powers
(see pictoral examples below).
Terrestrial Views
Please note the example picture of Mount Rushmore. Start with the
26mm Plössl eyepiece and focus until clear. After mastering the focus
with the 26mm change the 9.7mm eyepiece and practice focusing and
scanning until images become clear in the eyepiece. We have included
some additional examples that are possible with your telescope such as
a bird and a green on a golf course. DO NOT POINT YOUR TELESCOPE
DIRECTLY AT THE SUN OR BLINDNESS IS POSSIBLE.
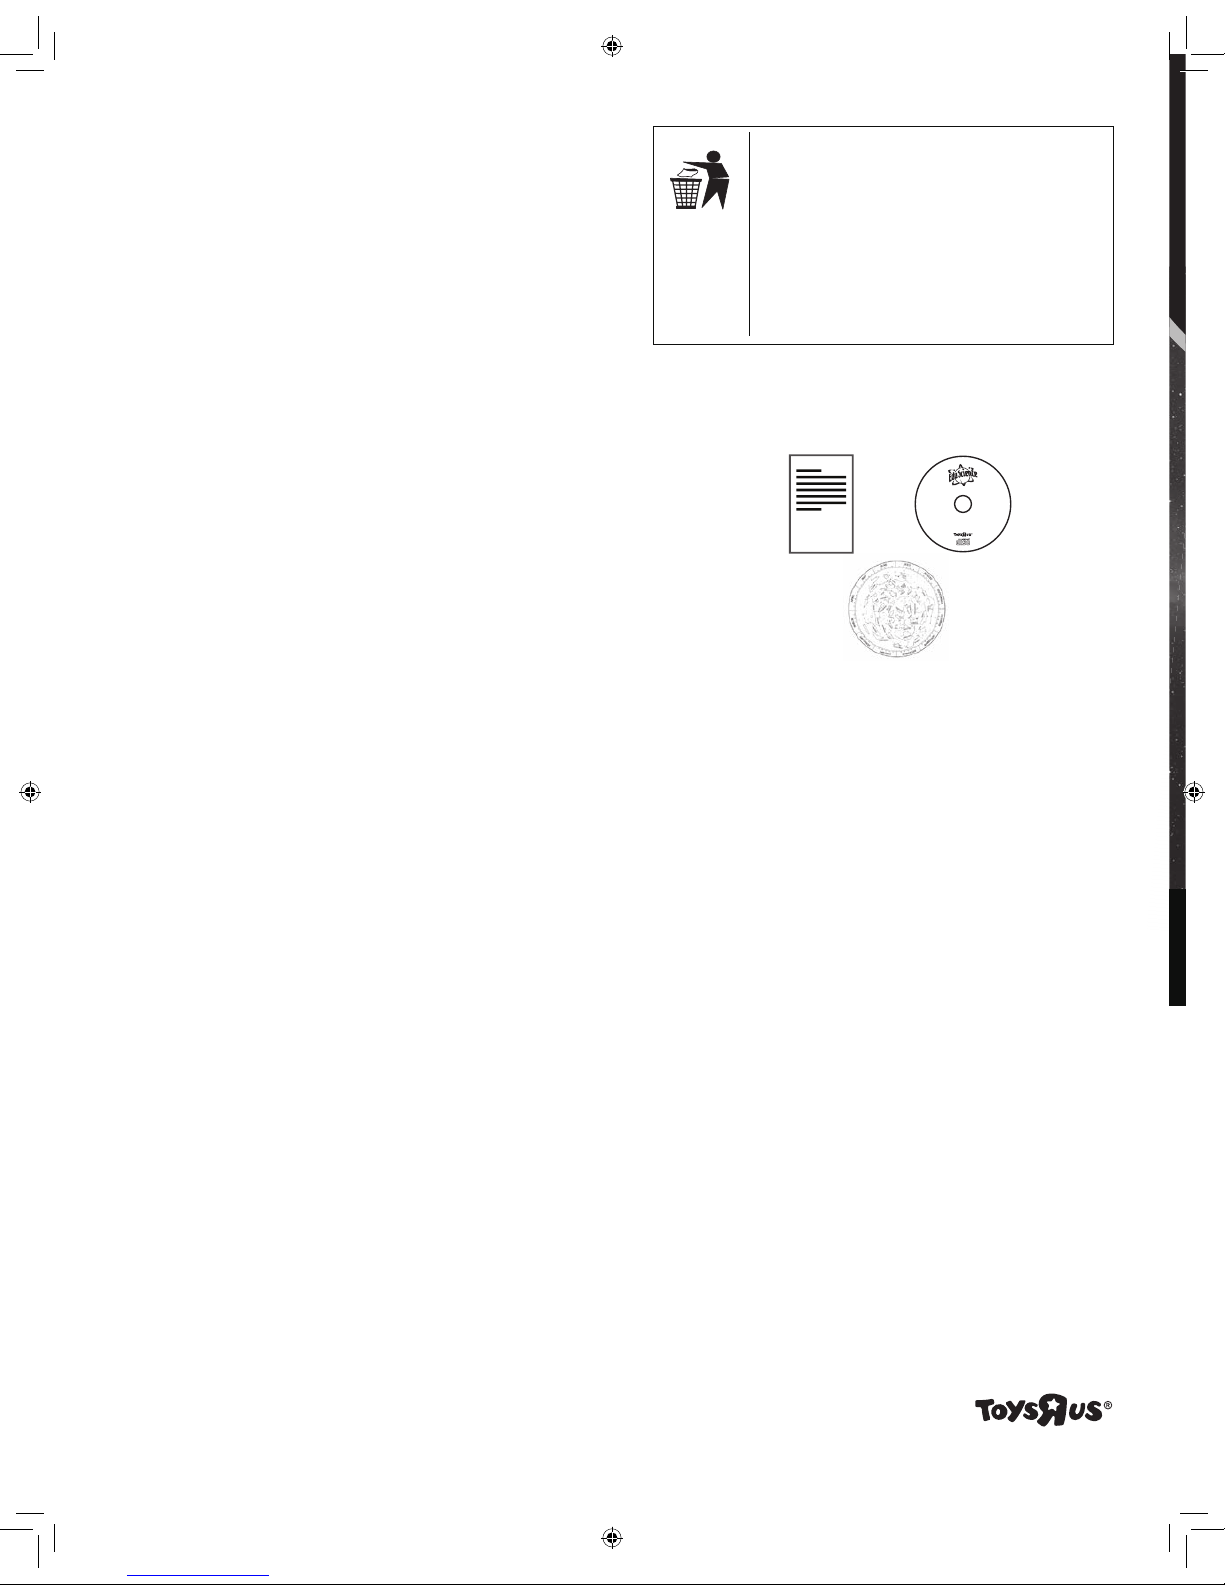
The Moon
The moon is the Earth’s only natural satellite.
Diameter: 3.476 km
Distance: approx. 384 401 km
The moon has been known to humans since prehistoric times. It is the
second brightest object in the sky (after the sun). Because the moon
circles the Earth once per month, the angle between the Earth, the moon
and the sun is constantly changing; one sees this change in the phases of
the moon. The time between two consecutive new moon phases is about
29.5 days (709 hours).
Orion Nebula (M 42)
M 42 in the Orion constellation
Right ascension: 05:32.9 (Hours: Minutes)
Declination: -05:25 (Degrees: Minutes)
Distance: 1.500 light years
With a distance of about 1500 light years, the Orion Nebula (Messier 42,
abbreviation: M 42) is the brightest diffuse nebula in the sky – visible with
the naked eye, and a rewarding object for telescopes in all sizes, from
the smallest fi eld glass to the largest earthbound observatories and the
Hubble Space Telescope.
When talking about Orion, we‘re actually referring to the main part of a
much larger cloud of hydrogen gas and dust, which spreads out with
over 10 degrees over the half of the Orion constellation. The expanse of
this enormous cloud stretches several hundred light years.
Ring Nebula in Lyra constellation (M 57)
M 57 in the Lyra constellation
Right ascension: 18:51.7 (Hours: Minutes)
Declination: -+32:58 (Degrees: Minutes)
Distance: 2.000 light years
The famous Ring Nebula M 57 in the constellation of Lyra is often viewed
as the prototype of a planetary nebula; it is one of the magnifi cent
features of the Northern Hemisphere’s summer sky. Recent studies
have shown that it is probably comprised of a ring (torus) of brightly
shining material that surrounds the central star (only visible with larger
telescopes), and not of a gas structure in the form of a sphere or an
ellipsis. If you were to look at the Ring Nebula from the side, it would
look like the Dumbbell Nebula (M27). With this object, we’re looking
directly at the pole of the nebula.
Dumbbell Nebula in the Vulpecula (Fox) constellation (M 27)
M 27 in the Fox constellation
Right ascension: 19:59.6 (Hours: Minutes)
Declination: -+22:43 (Angle: Minutes)
Distance: 1.250 light years
The Dumbbell Nebula (M 27) in Fox was the fi rst planetary nebula ever
discovered. On July 12, 1764, Charles Messier discovered this new and
fascinating class of objects. We see this object almost directly from its
equatorial plane. If you could see the Dumbbell Nebula from one of the
poles, it would probably reveal the shape of a ring, and we would see
something very similar to what we know from the Ring Nebula (M 57).
In reasonably good weather, we can see this object well even with small
magnifi cations.
Terrestrial Images
The Moon
Orion Nebula (M 42)
Ring Nebula in Lyra
constellation (M 57)
Dumbbell Nebula in the
Vulpecula (Fox)
constellation (M 27)
f=26mmf
f=26mmf
=9.7mm
=9.7mm
Need Help? Toll Free 855-863-4426
Page 6
Telescope ABC’s
What do the following terms mean?
Diagonal:
A mirror that defl ects the ray of light 90 degress. With a horizontal telescope
tube, this device defl ects the light upwards so that you can comfortably
observe by looking downwards into the eyepiece. The image in a diagonal
mirror appears upright, but rotated around its vertical axis (mirror image).
Focal Length:
Everything that magnifi es an object via an optic (lens) has a certain focal
length (FL). The FL is the length of the path the light travels from the surface
of the lens to its focal point. The focal point is also referred to as the focus.
In focus, the image is clear. In the case of a telescope, the FL of the telescope
tube and the eyepieces are combined.
Lens:
The lens turns the light which falls on it around in such a way so that the
light gives a clear image in the focal point after it has traveled a certain
distance (focal length).
Eyepiece:
An eyepiece is a system made for your eye and comprised of one or more
lenses. In an eyepiece, the clear image that is generated in the focal point of
a lens is captured and magnifi ed still more.
There is a simple formula for calculating the magnifi cation:
Focal length of the telescope tube / Focal length of the eyepiece = Magnifi cation.
You see: In a telescope, the magnifi cation depends on both the focal length
of the telescope tube and the focal length of the eyepiece.
Magnifi cation:
The magnifi cation corresponds to the difference between observation with
the naked eye and observation through a magnifi cation apparatus (e.g. a
telescope). In this scheme, observation with the eye is considered “single”,
or 1x magnifi cation. Accordingly, if a telescope has a magnifi cation of 30x,
then an object viewed through the telescope will appear 30 times larger than
it would with the naked eye. See also “Eyepiece”.
Troubleshooting
Mistakes:
No picture
Blurred picture
No focus possible
Bad picture
Viewing object visible
in the fi nder, but not
through the telescope
Despite using star
diagonal prism
the picture is “crooked”
Help:
Remove dust protection cap
and sun-shield from the
objective opening.
Adjust focus with focus wheel.
Wait for temperature to
balance out.
Never observe through a
glass surface.
Adjust fi nder.
The star diagonal prism
should be vertical in
the eyepiece connection.
DISPOSAL
Dispose of the packaging materials properly, according to
their type (paper, cardboard, etc). Contact your local
waste disposal service or environmental authority for
information on the proper disposal.
Please take the current legal regulations into account
when disposing of your device. You can get more information on the proper disposal from your local waste disposal
service or environmental authority.
Need Help? Toll Free 855-863-4426
Product Manual, Planisphere &
Astro Software Visit:
www.exploreone.com/pages/product-manuals
Astro Software CD
Page 7

#5F62DC6
TELESCOPE / TÉLESCOPE / TELESCOPIO
TELESCOPE / TÉLESCOPE / TELESCOPIO
MISE EN GARDE :
Il ne faut jamais tenter d’observer le soleil avec ce télescope! Garder ceci à l’esprit surtout lorsque le télescope est utilisé
par des enfants ! Observer le soleil, même pour une courte durée, causera la cécité !
Le matériau d’emballage (sacs en plastique, etc.) doit être gardé hors de portée des enfants !
MISE EN GARDE: Ne pas regarder directement le soleil.
A
A
NOT INCLUDED
NON INCLUSES
NO INCLUIDAS
x4
Page 8

1
4
9
8
5
7
2
3
6
Vous avez besoin d’aide? Composez sans frais le 855-863-4426
13
10
Page 9

Liste des pièces
Votre télescope est pourvu des pièces suivantes :
1 Tube de télescope
2 Viseur à point rouge
3 Vis de réglage pour le viseur
4 Écran antibuée
5 Roue de mise au point
6 Diagonale
7 Arbre fl exible (azimut gauche et droite)
8 Arbre fl exible (Altitude haute et basse)
9 Tête de montage
10 Oculaires Plossl 26 mm et 9,7 mm
11 Pinces de verrouillage sur trépied
12 Trépied et plateau à accessoires
13 Viseur WiFi
Confi guration
1. Information générale concernant l’assemblage, Positionnement avant
de commencer l’assemblage, choisir un emplacement adéquat pour votre
télescope. Il serait utile d’assembler cet appareil à un endroit d’où tu
auras une vue nette du ciel, une surface solide sous toi et suffi samment
d’espace. Important : Serre les vis à la main autant qu’il est possible,
sans trop les serrer.
2. Trépied
Prends le trépied et installe-le debout sur le sol avec les pattes tournées
vers le bas. Maintenant, prends deux des pattess du trépied et écarte
les pattes délicatement en les éloignant les unes des autres jusqu’à ce
qu’elles soient en position ouverte. Pendant ce temps, le poids du trépied
repose sur une patte. Pour terminer, installe le trépied sur les trois pattes,
afi n qu’il soit bien droit. Desserre les trois pinces de verrouillage (11) sur
les pattes du trépied, tire sur chaque patte jusqu’à la longueur voulue,
ferme les pinces de verrouillage (11) et installe le trépied sur une surface
égale et ferme.
CONSEIL :
Un petit niveau à l’eau sur le plateau d’accessoire peut aider à
positionner le trépied à l’horizontale.
3. Montage du plateau :
le plateau d’accessoires doit être positionné avec le côté plat au milieu
de la ferrure de patte du trépied, puis monté en le tournant à 60° dans le
sens horaire. Les trois projections sur le plateau doivent correspondre
aux ferrures de montage sur les barres de division et s’enclencher en
place. Au besoin, tu peux pousser la ferrure de patte du trépied un peu
vers le bas.
4. Raccordement du tube
Maintenant, installe le tube (et le support) dans le montant avec l’ouverture de
l’objectif dans le sens indiqué (Marque N sur la tête du trépied, point nord et
le dessin de télescope sur le montant). Ensuite, fi xe le support de tube avec la
vis de serrage de l’adaptateur à queue d’aronde sur la tête de montage.
5. Insertion de l’oculaire
2 oculaires : 26mm et 9,7mm livrés avec ton télescope. Avec les oculaires,
tu peux contrôler le grossissement de ton télescope.
Avant d’installer les oculaires et la roue de mise au point, sors le
capuchon de lentilles du support à oculaire.
REMARQUE : assure-toi que la roue de mise au point soit la plus proche
de l’objet que tu essaies de voir. Si la roue de mise au point n’est pas la
plus proche de l’objet, le télescope est tourné vers l’arrière et la vue ne
sera pas du sol, elle sera foncée ou noire.
6. Aligner le télescope de visée à point rouge
Ton télescope est conçu pour des observations terrestres et astronomiques.
Tiens compte du fait que les turbulences thermiques atmosphériques sont aussi
amplifi ées. Lorsqu’il fait chaud, il serait pratique de limiter les observations aux
grossissements moyens. D’abord, retirer la housse à poussière sur les lentilles
de l’objectif. Veillez à retirer l’isolateur plastique de la pile, image ci-dessous.
Insérer l’oculaire 26mm dans la diagonale; tu peux maintenant faire la mise au
point avec la roue du tube télescopique. Le télescope de visée à point rouge
est activé en glissant le commutateur sur son côté droit; deux intensités sont
disponibles. Avant de faire la première observation, la portée du viseur à point
rouge doit être alignée au télescope. Pour faire ceci, pointer une cible très
visible (p. ex. un poteau de téléphone) avec l’oculaire du télescope. Maintenant,
sans bouger le télescope, allume le télescope de visée à point rouge et ajuste le
point rouge avec les 2 vis d’ajustement (gauche et droite - haut et bas) jusqu’à
qu’il vise le même point que l’oculaire. Le télescope de visée à point rouge est
maintenant aligné et prêt à pointer pour le télescope.
Ne jamais regarder le soleil avec un télescope! Regarder le soleil ou à
proximité causera un dommage instantané et irréversible aux yeux. Le
dommage aux yeux est souvent sans douleur, l’observateur n’est donc
pas averti qu’un dommage pourrait survenir avant qu’il ne soit trop tard.
Ne pas pointer le télescope ni son viseur vers, ou près du soleil. Ne pas
regarder à travers le télescope ou son viseur pendant qu’il bouge. Un
adulte doit toujours surveiller les enfants pendant qu’ils observent.
7. Arbres fl exibles
Afi n de faciliter un ajustement précis de la déclinaison et des arbres
d’ascension droite, les arbres fl exibles ont été placés sur des supports
de ces deux arbres, à des endroits prévus à cet effet. L’arbre fl exible long
est monté en parallèle au tube du télescope. Il est fi xé avec une vis de
blocage sur le renfoncement indiqué sur l’arbre. Le bras fl exible court
est monté de côté. Il est fi xé avec une vis de blocage sur le renfoncement
indiqué sur l’arbre. Ton télescope est maintenant prêt à utiliser.
11
12
Vous avez besoin d’aide? Composez sans frais le 855-863-4426
Page 10

Ton télescope peut aussi inclure un oculaire Wi-Fi, une fois que ton objet
est en vue, tu peux remplacer l’oculaire 26mm par un oculaire Wi-Fi.
Après l'échange d’oculaire, suis les directives ci-dessous pour faire
fonctionner l’oculaire Wi-Fi sur un dispositif Wi-Fi compatible.
Mode d’emploi pour Wi-Fi___ 33 Camera
1 Mode caméra Wi-Fi :
1.1 Insérer 4 piles AA (non comprises) ou le câble USB dans l’ordinateur pour
obtenir du courant;
1.2 Tenir la touche enfoncée jusqu’à ce que la DEL de mise sous tension
devienne rouge, puis appuyer sur le commutateur Wi-Fi pour activer la
fonction Wi-Fi (la DEL Wi-Fi devient bleue).
1.3 Exécute l’application « caméra Wi-Fi » sur ton téléphone
intelligent ou sur ta tablette et ouvre le programme suivant (il faut choisir
le nom du dispositif Wi-Fi « Besser_WIFI_Cam-bresser caméra Wifi »
comme l’hôte Wi-Fi) et tu peux prendre une photo ou enregistrer une
vidéo ou exécuter le fichier;
2 Mode caméra ordinateur :
Tu peux utiliser ce dispositif comme oculaire numérique traditionnel
par câble USB à l’ordinateur, branche le câble USB à l’ordinateur;
tiens la touche de mise sous tension enfoncée jusqu’à ce que la DEL
de mise sous tension devienne rouge; ensuite tu peux mettre la photo
ou la vidéo dans l'ordinateur comme un oculaire numérique traditionnel,
Remarque :
a. Si tu veux utiliser la fonction caméra Wi-Fi, en tout temps, il suffit
d’activer la fonction Wi-Fi et d’exécuter l'application de la « caméra
Wi-Fi » comme expliquée aux points 1.2 et 1.3., et le dispositif éteindra
automatiquement l’interface ordinateur;
b. À propos de l’alimentation électrique : tu peux choisir le mode pile
ou le mode câble USB. Si tu branches le câble USB pour connecter à
l’ordinateur, le dispositif tirera d’abord son alimentation électrique de
l’ordinateur.
Utilisation du télescope
Observation
Une fois que tu as localisé l'étoile polaire dans le viseur, tu pourras reconnaître
l'étoile polaire lorsque tu regardes à travers l'oculaire du télescope. Au
besoin, tu peux incliner davantage le télescope vers l’étoile au moyen des
arbres flexibles, ou tu peux ajuster la mise au point avec le bouton de
mise au point. En outre, tu peux maintenant passer à un grossissement
supérieur en changeant l’oculaire pour une distance focale plus petite.
Sois conscient que le grossissement des étoiles est à peine perceptible.
CONSEIL : les oculaires sont des systèmes de lentilles conçus pour
tes yeux. Dans un oculaire, l’image nette produite dans le foyer d’une
lentille est captée, en d’autres mots, rendue visible, puis grossie
davantage. Les oculaires ont diverses distances focales qui sont
nécessaires pour réaliser divers degrés de grossissement. Commence
chaque observation avec un oculaire ayant un petit grossissement
(grande distance focale, p. ex. 26mm).
Trouver des étoiles
Au début, tu trouveras sûrement difficile de t’orienter dans le ciel, car
les étoiles et constellations bougent tout le temps et que leur position
dans le ciel varie selon la saison, la date et l’heure. L’étoile polaire fait
exception. Si tu peux imaginer l’axe polaire de la Terre se prolongeant
dans l’espace, il frapperait approximativement l’étoile polaire. Le pôle
céleste qu’on appelle nord est le point de départ de toutes les cartes
du ciel. Sur le dessin, tu peux voir un nombre de constellations plus
connues et des amas d’étoiles qui sont visibles tout au long de l’année.
La position des étoiles dépend, bien entendu, de la date et de l’heure. Si
tu as réglé ton télescope sur une de ces étoiles, tu remarqueras qu’elle
disparaît du champ de vision de l’oculaire après un court laps de temps.
Afin de compenser cet effet, opère l’arbre flexible de l’axe de contrepoids
et ton télescope suivra le chemin apparent de cette étoile.
Rangement du télescope Nous espérons que votre séance d’observation
a été intéressante et réussie; par la suite, il est recommandé de ranger le
télescope dans une pièce sèche et bien ventilée. N’oublie pas de remettre
les capuchons de lentilles sur l’ouverture avant du tube et du support à
oculaire. Tous les oculaires et les accessoires optiques doivent aussi être
rangés dans leurs contenants respectifs.
REMARQUE : assure-toi que la roue de mise au point soit la plus
proche de l’objet que tu essaies de voir. Si la roue de mise au point
n’est pas la plus proche de l’objet, le télescope est tourné vers
l’arrière et la vue ne sera pas du sol, elle sera foncée ou noire.
WIFI
Wi-Fi
Wi-Fi
Battery
USB PortPower
Power
Vous avez besoin d’aide? Composez sans frais le 855-863-4426
Page 11

Objets possibles pour l’observation :
Nous avons compilé et expliqué certains corps célestes et amas d’étoiles
très intéressants pour toi, cependant nous te suggérons de commencer
par pratiquer la focalisation sur des objets terrestres durant la journée,
comme des oiseaux ou des arbres à diverses distances. Ceci seulement
à des fi ns de pratique, le télescope WIFI HD n’est pas conçu pour le
visionnement terrestre - REMARQUE les images seront de gauche à
droite, ou des images miroirs. Sur les images qui accompagnent à la
fi n du mode d’emploi, tu verras comment les objets apparaîtront dans
de bonnes conditions de visionnement par ton télescope à différentes
puissances (voir les exemples de pictogrammes sur la page suivante).
Visionnement terrestre
Note l’exemple de l’image du Mount Rushmore. Commence avec un
oculaire de 26mm et focalise jusqu’à ce qu’il soit clair. Une fois que tu as
maîtrisé la mise au point avec le 26mm, tu peux le remplacer par l’oculaire
9,7mm et pratiquer la mise au point et le balayage jusqu’à ce que les
images deviennent nettes dans l’oculaire. Nous avons inclus quelques
exemples supplémentaires qui sont possibles avec ton télescope comme
un oiseau et un vert sur un parcours de golf. NE POINTE PAS TON
TÉLESCOPE DIRECTEMENT VERS LE SOLEIL, IL Y A RISQUE DE CÉCITÉ.
La lune
La lune est le seul satellite naturel de la Terre.
Diamètre : 3 476 km
Distance : env. 384 401 km
La lune est connue des humains depuis la préhistoire. C’est le deuxième
objet le plus brillant du ciel, après le soleil. Parce que la lune fait le tour
de la Terre une fois par mois, l’angle entre la Terre, la lune et le soleil
change constamment; on peut constater ce changement dans les phases
de la lune. La durée entre deux phases de nouvelle lune consécutive est
d’environ 29,5 jours (709 heures).
Nébuleuse d’Orion (M 42)
M 42 dans la constellation d’Orion
Ascension droite : 05:32.9 (Heures : minutes)
Déclinaison : -05º 25´ (Degrés : minutes)
Distance : 1 500 années-lumière
Avec une distance d’environ 1 500 années-lumière, la nébuleuse d’Orion
(Messier 42, abréviation : M42) est la nébuleuse diffuse la plus brillante
du ciel - visible à l’œil nu et un objet satisfaisant pour les télescopes
de toutes grandeurs, des plus petites jumelles aux plus grands
observatoires terrestres et le télescope spatial Hubble. Lorsqu’on
parle d’Orion, nous faisons en réalité référence à la partie principale
d’un nuage bien plus grand d’hydrogène gazeux et de poussières qui
s’étale sur plus de 10 degrés par-dessus la moitié de la constellation
d’Orion. L’étendue de cet énorme nuage s’étire sur plusieurs centaines
d’années-lumière.
Nébuleuse de la Lyre dans la Constellation de la Lyre (M57)
M 57 dans la Constellation de la Lyre
Ascension droite : 18 : 53 (Heures : minutes)
Déclinaison : +33º 01´ (Degrés : minutes)
Distance : 2,3 années-lumière
La célèbre Nébuleuse de la Lyre, M57, dans la constellation de la Lyre
est souvent perçue comme le prototype d’une nébuleuse planétaire;
c’est un des traits magnifi ques de l’hémisphère Nord du ciel estival. De
récentes études ont démontré qu’elle est probablement composée d’un
anneau (tore) de matériaux brillants d’un éclat vif qui entourent l’étoile
centrale (seulement visible avec des télescopes plus grands), et non
d’une structure gazeuse en forme de sphère ou d’ellipse. Si tu regardais
la nébuleuse annulaire depuis le côté, elle ressemblerait à la nébuleuse
de l’Haltère (M27). Avec cet objet, nous regardons directement le pôle
de la nébuleuse.
Nébuleuse de l’Haltère dans Vulpecula (Petit Renard) Constellation (M 27)
M 27 dans la constellation du Petit Renard
Ascension droite : 19:59:6 (Heures : minutes)
Déclinaison : +22º 43´ (Degrés : minutes)
Distance : 1 360 années-lumière
La nébuleuse de l’Haltère (M 27) dans le Petit Renard a été la première
nébuleuse planétaire à être découverte. Le 12 juillet 1764, Charles
Messier a découvert cette nouvelle et fascinante classe d’objets. Nous
voyons cet objet presque directement depuis son plan équatorial. Si tu
pouvais voir la nébuleuse de l’Haltère depuis un de ses axes, tu verrais
probablement la forme d’un anneau et quelque chose assez semblable à
ce que nous connaissons de la nébuleuse annulaire de la Lyre (M57). Par
temps relativement clair, on peut bien voir cet objet même avec de petits
grossissements.
Images terrestres
La lune
Nébuleuse d’Orion (M 42)
Constellation de la Lyre dans
la nébuleuse de la Lyre (M57)
Nébuleuse de l’Haltère
dans la constellation
Vulpecula (Petit Renard)
(27)
f=26mm
f=26mmf
f=9,7mm
=9.7mm
Vous avez besoin d’aide? Composez sans frais le 855-863-4426
Page 12

Les rudiments du télescope
Que signifi ent les termes suivants?
Diagonale :
Un miroir qui dévie les rayons lumineux de 90 degrés. Avec un tube télescope
horizontal, cet appareil dévie la lumière vers le haut afi n de pouvoir observer
confortablement en regardant vers le bas dans l’oculaire. L’image dans un
miroir diagonal apparaît debout, mais tourne autour de son axe vertical
(image miroir).
Distance focale :
Tout ce qui grossit un objet au moyen d'optiques (lentilles) a une certaine
distance focale. La distance focale est la distance que parcoure la lumière
de la surface des lentilles à son point focal. Le point focal s’appelle aussi
le foyer. Au foyer, l’image est nette. Dans le cas d’un télescope, la distance
focale du tube de télescope et des oculaires sont combinées.
Lentilles :
La lentille tourne la lumière qui tombe dessus de manière à ce que la lumière
donne une image nette dans le point focal après qu’elle a voyagé sur une
certaine distance (distance focale).
Oculaire :
un oculaire est un système fabriqué pour tes yeux et comportant une ou
plusieurs lentilles. Dans un oculaire, l’image nette produite dans le foyer
d’une lentille est captée, puis grossie davantage.
Il existe une formule simple pour calculer le grossissement :
La distance focale du tube du télescope / la distance focale de l’oculaire = grossissement
Tu vois : dans un télescope, le grossissement dépend de la distance focale
du tube de télescope ainsi que de la distance focale de l’oculaire.
Grossissement :
Le grossissement correspond à la différence entre l’observation à l’œil nu et
l’observation à travers un appareil de grossissement (p. ex. un télescope).
Dans cette combinaison, l’observation à l’œil est considérée comme
« simple » ou un grossissement 1x. Par conséquent, si un télescope a un
grossissement de 30x, alors l’objet visionné à travers un télescope apparaîtra
30 fois plus gros qu'à l'œil nu. Lire aussi « Oculaire ».
Dépannage
Erreurs :
Aucune image
Image trouble
Aucune mise au point possible
Mauvaise image
Il est possible d’observer
un objet par le viseur,
mais pas avec le télescope
Malgré l'utilisation
du prisme incliné,
l'image est tordue
Aide :
Retirer le capuchon antipoussière et l’écran solaire sur
l’ouverture de l’objectif.
Mise au point à l’aide d’une
molette
Attendre que la température
s’équilibre.
Ne jamais observer à travers une
surface vitrée.
Ajuster le viseur.
Le prisme diagonal en étoile doit
être inséré à la verticale dans
l’embout de l’oculaire.
ÉLIMINATION
Éliminer adéquatement les matériaux d’emballage, conformément à leur type (papier, carton, etc.). Prenez contact
avec le service d’élimination des déchets de votre municipalité ou l’autorité compétente en matière d’environnement
afi n d’obtenir des informations sur l’élimination.
Veuillez tenir compte des réglementations légales en
vigueur lors de l’élimination de votre appareil. Vous pouvez obtenir de plus amples informations sur l’élimination
adéquate auprès de votre service d’élimination des
déchets ou de l’autorité compétente.
Vous avez besoin d’aide? Composez sans frais le 855-863-4426
Manuel du Produit, Planisphère &
Astro Software visite:
www.exploreone.com/pages/product-manuals
Astro Software CD
Page 13

#5F62DC6
TELESCOPE / TÉLESCOPE / TELESCOPIO
TELESCOPE / TÉLESCOPE / TELESCOPIO
ATENCIÓN:
¡Nunca observar el Sol con este telescopio! Especialmente cuando el telescopio lo utilizan niños.
Incluso durante un periodo corte de tiempo ¡puede causar ceguera!
El embalaje (bolsas de plástico, etc.) debe mantenerse fuera del alcance de los niños.
ADVERTENCIA:
No mires directamente al sol.
A
A
NOT INCLUDED
NON INCLUSES
NO INCLUIDAS
x4
Page 14

1
4
9
8
5
7
2
3
6
¿Necesita ayuda? Llame al número gratuito 855-863-4426
13
10
Page 15

Lista de piezas
El telescopio cuneta con las siguientes piezas
1 Tubo telescópico
2 Mira de punto rojo
3 Tornillos de ajuste de la mira
4
Protector
5 Foco
6 Diagonal
7 Eje fl exible (azimut derecho e izquierdo)
8 Eje fl exible (altitud arriba y abajo)
9 Montura
10 Oculares Plossl de 26mm y 9,7mm
11 Cierres de bloqueo (en el trípode)
12 Trípode y bandeja de accesorios
13 Ocular WiFi
Montaje
1. Información general sobre el montaje, posicionamiento: antes de
comenzar con el montaje, elegir un lugar adecuado para el telescopio.
Es aconsejable montar el aparato en un lugar donde se tenga una vista
despejada del cielo, una superfi cie robusta en la que apoyarse y sufi ciente
espacio. Importante: Apretar los tornillos todo lo que se pueda con la
mano, pero no apretar demasiado.
2. Trípode
Colocar el trípode verticalmente sobre el suelo con las patas hacia abajo.
Tirar con cuidado de dos de las patas del trípode hacia afuera hasta que
lleguen a su tope. Durante ese tiempo, todo el peso del trípode recae
sobre una pata. Para terminar, apoyar el trípode sobre todas las patas
para que esté recto. Afl ojar los tres cierres de bloqueo (11) de las patas
del trípode, tirar de cada pata hacia afuera hasta que alcance la longitud
deseada, cerrar los cierres de bloqueo (11) y colocar el trípode sobre una
superfi cie estable.
CONSEJO:
Se puede utilizar un nivel colocado dentro de la bandeja de accesorios
para colocar el trípode en posición horizontal.
3. Montaje de la bandeja:
La bandeja de accesorios debe colocarse en medio del soporte del trípode
con la parte plana hacia abajo y se monta girándolo 60º en la dirección de
las agujas del reloj. Los tres salientes de la bandeja deben coincidir con
los soportes de montaje de las barras de división (y ajustarse en su sitio).
Si fuese necesario, se puede empujar un poco hacia abajo la abrazadera
de la pata del trípode.
4. Conectar el tubo
Colocar el tubo (y el soporte) sobre la montura con la apertura del objetivo
abierta en la dirección señalada (marca N en el cabezal del trípode, punto
norte y telescopio en la montura). Apretar el soporte del tubo con el
tornillo del adaptador de cola de pato del soporte de la montura.
5. Introducir el ocular
2 oculares 26mm y 9,7mm incluidos en el telescopio. Los oculares
sirven para controlar el aumento del telescopio.
Antes de instalar los oculares y el foco se debe sacar la tapa de la lente
del soporte del ocular.
NOTA: Comprobar que el foco está lo más cerca posible del objeto que se
intenta ver. Si el foco no es lo más cercano al objeto hacia el que se dirige
el telescopio la vista será del suelo y oscura o negra.
6. Alinear el alcance de la mira de punto rojo
El telescopio ha sido diseñado para realizar observaciones terrestres y
astronómicas. Las turbulencias de calor en el aire también se magnifi can.
En condiciones de temperaturas cálidas, es recomendable limitar las
observaciones a aumentos medios. Primero, quitar el protector de polvo
de la lente del objetivo. Comprobar que se ha quitado el aislante de plástico
de la batería, imagen siguiente. Introducir el ocular de 26mm en la diagonal
y ajustar el foco con la rueda del tubo. El alcance de la mira de punto rojo
se activa al mover el interruptor a la derecha. Hay dos intensidades. Antes
de la primera observación, el alcance de la mira de punto rojo debe estar
alineado con el telescopio. Para hacer esto, apuntar a un objetivo llamativo
(como un poste de teléfonos) con el ocular del telescopio. Sin mover el
telescopio, cambiar el alcance de la mira de punto rojo y ajustar el punto
rojo con los 2 tornillos de ajuste (izquierda y derecha - arriba y abajo) hasta
que se corresponda con la vista del ocular. El alcance de la mira de punto
rojo está alineado y listo.
Nunca utilizar un telescopio para mirar al Sol. Mirar cerca o directamente
al Sol podría provocar un daño instantáneo e irreversible en los ojos.
A menudo, el daño en la visión es indoloro por lo que el daño no se
advierte hasta que es demasiado tarde. No apuntar el telescopio ni el
visor hacia el Sol o cerca de él. No mirar por el telescopio o el visor
mientras se está moviendo. Los niños deben ser supervisados por un
adulto en todo momento mientras utilizan el telescopio.
7. Ejes fl exibles
Para facilitar el ajuste exacto de los ejes de declinación y ascensión recta,
los ejes fl exibles se han colocado en los soportes de ambos ejes, en los
lugares diseñados para este propósito. El eje fl exible largo está colocado
paralelo al tubo del telescopio. Está sujeto con un tornillo abrazadera en
la hendidura del eje. El eje corto fl exible está colocado lateralmente. Está
sujeto con un tornillo abrazadera en la hendidura del eje. El telescopio ya
está listo para usar.
11
12
¿Necesita ayuda? Llame al número gratuito 855-863-4426
Page 16

El telescopio también incluye un ocular WiFi. Cuando el objeto está a la
vista, se puede cambiar el visor de 26 por el ocular WiFi. Cuando se haya
cambiado el ocular, seguir estas instrucciones para utilizar el ocular WiFi
en los dispositivos WiFi aplicables.
Instrucciones de cámara WiFi___33
1 Modo cámara Wi-Fi:
1.1 Colocar 4 pilas AA (no incluidas) o conectar el cable USB al ordenador
para cargar;
1.2. Pulsar el botón de encendido hasta que la luz se vuelva de color rojo,
a continuación pulsar el interruptor WiFi para encender la función WiFi
(la luz WiFi se vuelve azul).
1.3 ejecutar la aplicación “cámara WiFi” en el teléfono inteligente o
tableta y abrir el siguiente programa (se debe seleccionar el dispositivo
WiFi llamado “Besser_WIFI_Cam-bresser Wi-Fi camera” como el
receptor WiFi) y se puede hacer fotos o grabar un vídeo o utilizar el
archivo;
2 Modo cámara PC:
Este dispositivo se puede utilizar como un ocular digitar tradicional con el
cable USB en el ordenador, conectar el cable USB al ordenador; pulsar el
botón de encendido hasta que la luz roja se encienda, después se puede hacer
fotos o grabar vídeos en el ordenador como con un ocular digital tradicional.
Observación:
a. Si se quiere utilizar la función de cámara WiFi en cualquier momento,
solo hay que encender la función WiFi y ejecutar la aplicación “WiFi
camera” de 1.2 y 1.3, y el dispositivo apagará automáticamente el
interfaz del ordenador.
b. Para la alimentación se puede seleccionar el modo pilas o cable USB.
Si se conecta el cable USB al ordenador, el dispositivo tomará primero
la alimentación del ordenador.
Usar el telescopio
Observación
Una vez localizada la Estrella Polar en el buscador, se podrá reconocer
la Estrella Polar cuando se mire por el ocular del telescopio. Si fuera
necesario, se puede dirigir el telescopio todavía más hacia la Estrella
Polar (con la ayuda de los ejes flexibles) o se puede ajustar el enfoque
con el mando de enfoque. Además, se puede cambiar a un aumento
superior cambiando el ocular (a una longitud focal más pequeña). Tenga
en cuenta que el aumento de las estrellas es casi imperceptible.
CONSEJO: Los oculares son sistemas de lentes diseñados para el ojo.
En el ocular, la imagen que se genera en el punto focal de una lente es
captada (es decir, visible) y se magnifica aún más. Los oculares con
varias longitudes focales son necesarios para conseguir diferentes
grados de aumento. Cada observación se comienza con un ocular de
bajo aumento (longitud focal larga, p. ej. 26mm).
Encontrar estrellas
Al principio, es difícil orientarse en el cielo ya que las estrellas y las
constelaciones están en movimiento y su posición en el cielo varía
en función de la estación, la fecha y la hora. La Estrella Polar es una
excepción. Imaginándose que el eje polar de la Tierra se extiende hacia el
espacio, este tocaría aproximadamente la Estrella Polar. El llamado polo
norte celeste es el punto de partida de todos los mapas estelares. En
el dibujo se puede observar algunas de las constelaciones y conjuntos
de estrellas más conocidos y que son visibles durante todo el año. La
posición de las estrellas depende de la fecha y la hora. Si se fija el
telescopio en una de estas estrellas, se podrá ver como al poco tiempo
desaparece del campo de visión del ocular. Para compensar este efecto,
se mueve el eje flexible del eje opuesto y el telescopio seguirá la ruta
aparente de la estrella.
Guardar el telescopio Tras una sesión de observación, se recomienda
guardar el telescopio en un lugar seco y bien ventilado. Se deben
colocar las tapas de las lentes en la parte frontal del tubo y el soporte del
ocular. Todos los oculares y accesorios ópticos deben guardarse en sus
respectivos contenedores.
NOTA: Comprobar que el foco esté lo más cerca posible del objeto que
se intenta ver. Si el foco no es lo más cercano al objeto, el telescopio
estará al revés y la vista será del suelo y oscura o negra.
WIFI
Wi-Fi
Wi-Fi
Battery
USB PortPower
Power
¿Necesita ayuda? Llame al número gratuito 855-863-4426
Page 17

Posibilidades de observación:
Hemos recopilado y explicado varios cuerpos celestes y conjuntos de
estrellas interesantes, pero recomendamos que se empiece a practicar
durante el día centrándose en objetos terrestres como pájaros o árboles
a diferentes distancias. Esto es solo para practicar, el telescopio WIFI
HD no está diseñado para realizar observaciones terrestres. NOTA: Las
imágenes estarán de izquierda a derecha o refl ejadas En las imágenes
que aparecen al fi nal de las instrucciones se puede ver cómo los objetos
aparecen en el telescopio en buenas condiciones a diferentes potencias
(ver ejemplos en la página siguiente).
Vistas terrestres
Mirar la foto de ejemplo del monte Rushmore. Empezar con un ocular de
26mm y enfocar hasta que se vea claramente. Cuando se ha conseguido
el enfoque con el de 26mm, cambiar al ocular de 9,7mm y practicar el
enfoque y la exploración hasta que las imágenes se vean más nítidas en
el visor. Se han incluido ejemplos adicionales como un pájaro o el green
de un campo de golf. NO APUNTAR EL TELESCOPIO DIRECTAMENTE AL
SOL YA QUE PUEDE PROVOCAR CEGUERA.
La Luna
La Luna es el único satélite natural de la Tierra.
Diámetro: 3476 km
Distancia: aprox. 384 401 km
Los humanos conocen la Luna desde tiempos prehistóricos. Es el
segundo objeto más brillante del cielo (después del Sol). Como la Luna
rodea la Tierra una vez al mes, el ángulo entre la Tierra, la Luna y el Sol
cambia constantemente. Estos cambios se aprecian en las fases lunares.
El periodo entre dos lunas nuevas consecutivas es aproximadamente de
29,5 días (709 horas).
Nebulosa de Orión (M 42)
M 42 en la constelación de Orión
Ascensión recta: 05:32.9 (Horas: Minutos)
Declinación: -05º 25´ (Grados: Minutos)
Distancia: 1500 años luz
la nebulosa de Orión (Messier 42, abreviatura: M42) es la nebulosa
difusa más brillante del cielo, visible a simple la vista, y un objeto
gratifi cante para todo tipo de telescopios, desde los más pequeños a
los observatorios terrestres más grandes y el telescopio espacial Hubble.
Al hablar de Orión, en realidad nos referimos a la zona principal de una
nube de hidrógeno y polvo mucho más grande y que se extiende más
de 10 grados sobre la mitad de la constelación de Orión. La extensión
de esta enorme nube se extiende por cientos de años luz.
Nebulosa del anillo en la constelación Lyra (M 57)
M 57 en la constelación de Lyra
Ascensión recta: 18:53 (Horas: Minutos)
Declinación: +33º 01´ (Grados: Minutos)
Distancia: 2,3 años luz
La famosa nebulosa del Anillo M 57 en la constelación Lyra a menudo
se considera como el prototipo de nebulosa planetaria. Es una de las
magnífi cas características del cielo en el hemisferio norte durante el
verano. Estudios recientes han demostrado que posiblemente cuente
con un anillo (torus) de material brillante que rodea la estrella central
(solo visible con telescopios grandes) y no con una estructura de gas
en forma de esfera o elipsis. Si se mira la nébula del Anillo desde el
lateral, se parece a la nebulosa Dumbbell (M 27). Con este objeto, se
mira directamente al polo de la nebulosa.
Nebulosa Dumbbell en la constelación Vulpecula (la Zorra) (M 27)
M 27 en la constelación de la Zorra
Ascensión recta: 19:59,6 (Horas: Minutos)
Declinación: +22º 43´ (Grados: Minutos)
Distancia: 1360 años luz
La nebulosa Dumbbell (M 27) en la Zorra fue la primera nebulosa que se
descubrió. El 12 de julio de 1764, Charles Messier descubrió estos nuevos
y fascinantes objetos. Este objeto se ve casi directamente desde su plano
ecuatorial. Si se pudiera ver la nebulosa Dumbbell desde uno de los polos,
posiblemente mostraría la forma de un anillo y se vería algo similar a lo que
conocemos de la nebulosa del Anillo (M 57). Este objeto se puede ver con
pequeños aumentos cuando hace buen tiempo.
Imágenes terrestres
La Luna
Nebulosa de Orión (M 42)
Nebulosa del Anillo en la
constelación Lyra (M 57)
Nebulosa Dumbbell en la
constelación Vulpecula (la
Zorra) (M 27)
f=26mmf
f=26mmf
=9.7mm
=9.7mm
¿Necesita ayuda? Llame al número gratuito 855-863-4426
Page 18

Fundamentos del telescopio
¿Qué signifi ca los siguientes términos?
Diagonal:
Un espejo que desvía el rayo de luz 90 grados. En un tubo horizontal
de telescopio, este aparato desvía la luz hacia arriba para que se pueda
observar cómodamente mirando hacia abajo por el ocular. La imagen en un
espejo diagonal aparece vertical, pero rotando sobre su eje vertical (imagen
refl ejada).
Longitud focal:
Todo lo que aumenta un objeto a través de una lente tiene una longitud
focal (LF). La LF es la longitud del recorrido por el que viaja la luz desde
la superfi cie de la lente al punto de enfoque. El punto de enfoque también
recibe el nombre de foco. La imagen en el foco es nítida. En un telescopio,
la LF del tubo del telescopio y los oculares están combinadas.
Lente:
La lente convierte la luz para que se pueda ver una imagen nítida en el foco
después de viajar una cierta distancia (longitud focal).
Ocular:
El ocular es un sistema diseñado para el ojo que cuenta con una o más
lentes. En el ocular, la imagen que se genera en el punto focal de una lente
es captada y se aumentada más.
Hay una fórmula sencilla para calcular el aumento:
Longitud focal del tubo del telescopio / Longitud focal del ocular = Aumento
En un telescopio, el aumento depende de la longitud focal del tubo del
telescopio y de la longitud focal del ocular.
Aumento:
El aumento corresponde a la diferencia entre la observación con el ojo y la
observación a través de un aparato de aumento. (P. ej. un telescopio). En
este caso, la observación con el ojo se considera “sencilla” o de 1 aumento.
Por lo tanto, si el telescopio tiene 30 aumentos, el objeto que se observa
a través del telescopio se verá 30 veces más grande que con el ojo. Ver
también “Ocular”.
Resolución de problemas
Errores:
No se ve
Imagen borrosa
No se puede enfocar
Mala imagen
Objeto visible en el visor,
pero no a través
del telescopio
A pesar de usar un prisma
diagonal de estrella,
la imagen se ve “torcida”
Ayuda:
Quitar la tapa de protección contra el
polvo y el protector solar del objetivo.
Ajustar el enfoque utilizando la rueda de
enfoque
Esperar a que la temperatura se
equilibre.
Nunca observar a través de una
superfi cie de cristal.
Ajustar el buscador.
El prisma diagonal de estrella debería
estar en posición vertical en la conexión
del ocular.
DESECHAR
Desechar el material de embalaje adecuadamente, de acuerdo con su tipología (papel, cartón, et.) Ponerse en contacto con el servicio local de vertidos o las autoridades
medioambientales para recibir información sobre la forma
adecuada de deshacerse de ellos.
Hay que tener en cuenta la normativa vigente al deshacerse del dispositivo. Ponerse en contacto con el servicio
local de vertidos o las autoridades medioambientales para
recibir información sobre la forma adecuada de deshacerse de ellos.
¿Necesita ayuda? Llame al número gratuito 855-863-4426
Manual del Producto, Planisferio y
Astro Software Visita:
www.exploreone.com/pages/product-manuals
Astro Software CD
Page 19

MISE EN GARDE:
Ne pas regarder directement le soleil.
Page 20

Do not mix old and new batteries. Do not
mix alkaline, standard (carbon-zinc), or
rechargeable batteries.
Ne mélangez pas les piles neuves et
usées. Ne pas mélanger des piles
alcalines, standard
(au carbone-zinc) piles ou rechargeables.
No mezcle pilas nuevas con pilas usadas.
No mezcle pilas alcalinas, estándar
(carbone-zinc) ni recargables.
Non-rechargeable batteries are not to be
recharged. Remove exhausted batteries from
the toy. Supply terminals are not to be short
circuited.
Les piles non rechargeables ne doivent pas
être rechargées. Retirer les piles épuisées du
jouet. Les bornes d’alimentation ne doivent pas être court-circuitées.
Las baterías no recargables no deben
recargarse. Retire las baterías agotadas de los juguetes. Terminales
de alimentación no se cortocircuito.
Contents and colors may vary.
Le contenu et les couleurs peuvent varier.
El contenido y los colores pueden variar.
CONFORMS TO THE SAFETY REQUIREMENTS OF ASTM F963.
CONFORME AUX NORMES DE SÉCURITÉ ASTM F963.
CUMPLE CON LA NORMATIVA DE SEGURIDAD ASTM F963.
EDU SCIENCE IS A MARK OF (EST UNE MARQUE DE/ES UNA MARCA DE) GEOFFREY, LLC, A SUBSIDIARY OF (UNE FILIALE DE/UNA SUBSIDIARIA DE) TOYS“R”US, INC.
© 2015 GEOFFREY, LLC
MADE IN CHINA (FABRIQUÉ EN CHINE/FABRICADO EN CHINA)
DISTRIBUTED IN THE UNITED STATES BY (DISTRIBUÉ AUX ÉTATS-UNIS PAR/DISTRIBUIDO EN LOS ESTADOS UNIDOS POR) TOYS“R”US, INC.,
WAYNE, NJ 07470 IMPORTED BY (IMPORTÉ PAR/IMPORTADO POR) TOYS“R”US (CANADA) LTD. (LTÉE), 2777 LANGSTAFF ROAD, CONCORD,
ON L4K 4M5 DISTRIBUTED IN AUSTRALIA BY (DISTRIBUÉ EN AUSTRALIE PAR/DISTRIBUIDO EN AUSTRALIA POR) TOYS“R”US
(AUSTRALIA (AUSTRALIE)) PTY LTD.(LTÉE), REGENTS PARK NSW 2143
www.toysrus.com www.toysrus.ca
 Loading...