

Page 1

AIRIDER
Important information to be retained. Instructions for assembling. Product to be assembled by
an adult. Before using your AIRIDER read the following recommendations. Contains small
parts, which could be swallowed. Shapes and colors may vary. WARNING! Remove all the
elements that are not required for the game before giving the toy to a child.
Before any assembly or storage, ensure that your AIRIDER and the radio controller are switched
off; battery pack is disconnected and batteries are removed. The AIRIDER is designated for use
by children over 10 years old. To be used solely under the supervision of adults. Keep face,
eyes, fingers, hair, body parts etc. clear from propellers and moving parts.
For the radio controller do not use rechargeable batteries. Different types of batteries or new and
used batteries are not to be mixed. Do not mix old and new batteries. Do not mix alkaline,
standard (carbon-zinc), or rechargeable (nickel-cadmium) batteries.
Battery Safety
The battery packs are only to be charged under adult supervision.
®
FALCON Instruction manual
Safety Information
Never expose the battery pack to direct sun or hot areas.
The charger and battery pack may become warm during charging.
Do not make direct contact between the battery terminals or touch metal objects to the power cord plug when batteries are connected as this can cause an explosion or fire.
The battery pack must be disconnected from the charger when it is fully charged.
Never leave the battery pack connected to the charger overnight.
Never dispose battery pack into fire, it may cause explosion.
Battery Care
Each battery pack must be charged for at least 2 hours before flying the Vectron for the first time.
Battery Handling
If the power cord, plug and the cover of battery pack are damaged, avoid contact with the
damaged area and stop using the battery pack. Place the damaged battery pack in an appropriate
plastic bag (See Battery Disposal).
If a battery leak develops, avoid contact with the leaking fluid. Place the damaged battery pack
in an appropriate plastic bag (See Battery Disposal).
If the fluid comes in contact with the skin or eyes, flush with cool water for a least 10 minutes and consult a physician immediately.
If the fluid is internally ingested, never give emetics or induce vomiting and consult a physician immediately.
Page 2

Battery Disposal
The batter pack must be collected, recycled or disposed of in an environmentally sound manner.
Do not dispose the battery pack in your regular household waste.
Take the battery pack to an approved battery recycling facility. Contact your local waste
management officials for information regarding environmentally sound collection.
AIRIDER Parts
1
2
6
5
12
11
9
10
8
7
4
3
1. (1) AIRIDER
®
2. (1) Main Wing
3. (1) Radio Controller
4. (1) Cigarette Lighter Adaptor
5. (1) Right Fin
6. (1) Left Fin
7. (8) Fuselage Fastener
8. (8) Wing Fastener
9. (2) Propeller
10. (1) AIRIDER Tool
11. (1) Propeller Insert
12. (5) Rubber Band
13. (1) Battery Compartment Unit
14. (1) Radio Controller
Page 3

1. Your AIRIDER Radio Controller
The Radio Controller uses 6 "AA" (LR6) 1.5V batteries (not included).
Extend the antenna by gently pulling upwards.
2. Fin and Wing Assembly
Insert the wing fasteners into the slots and press firmly. Press and hold firmly to ensure the
fasteners are locked into place.
Page 4
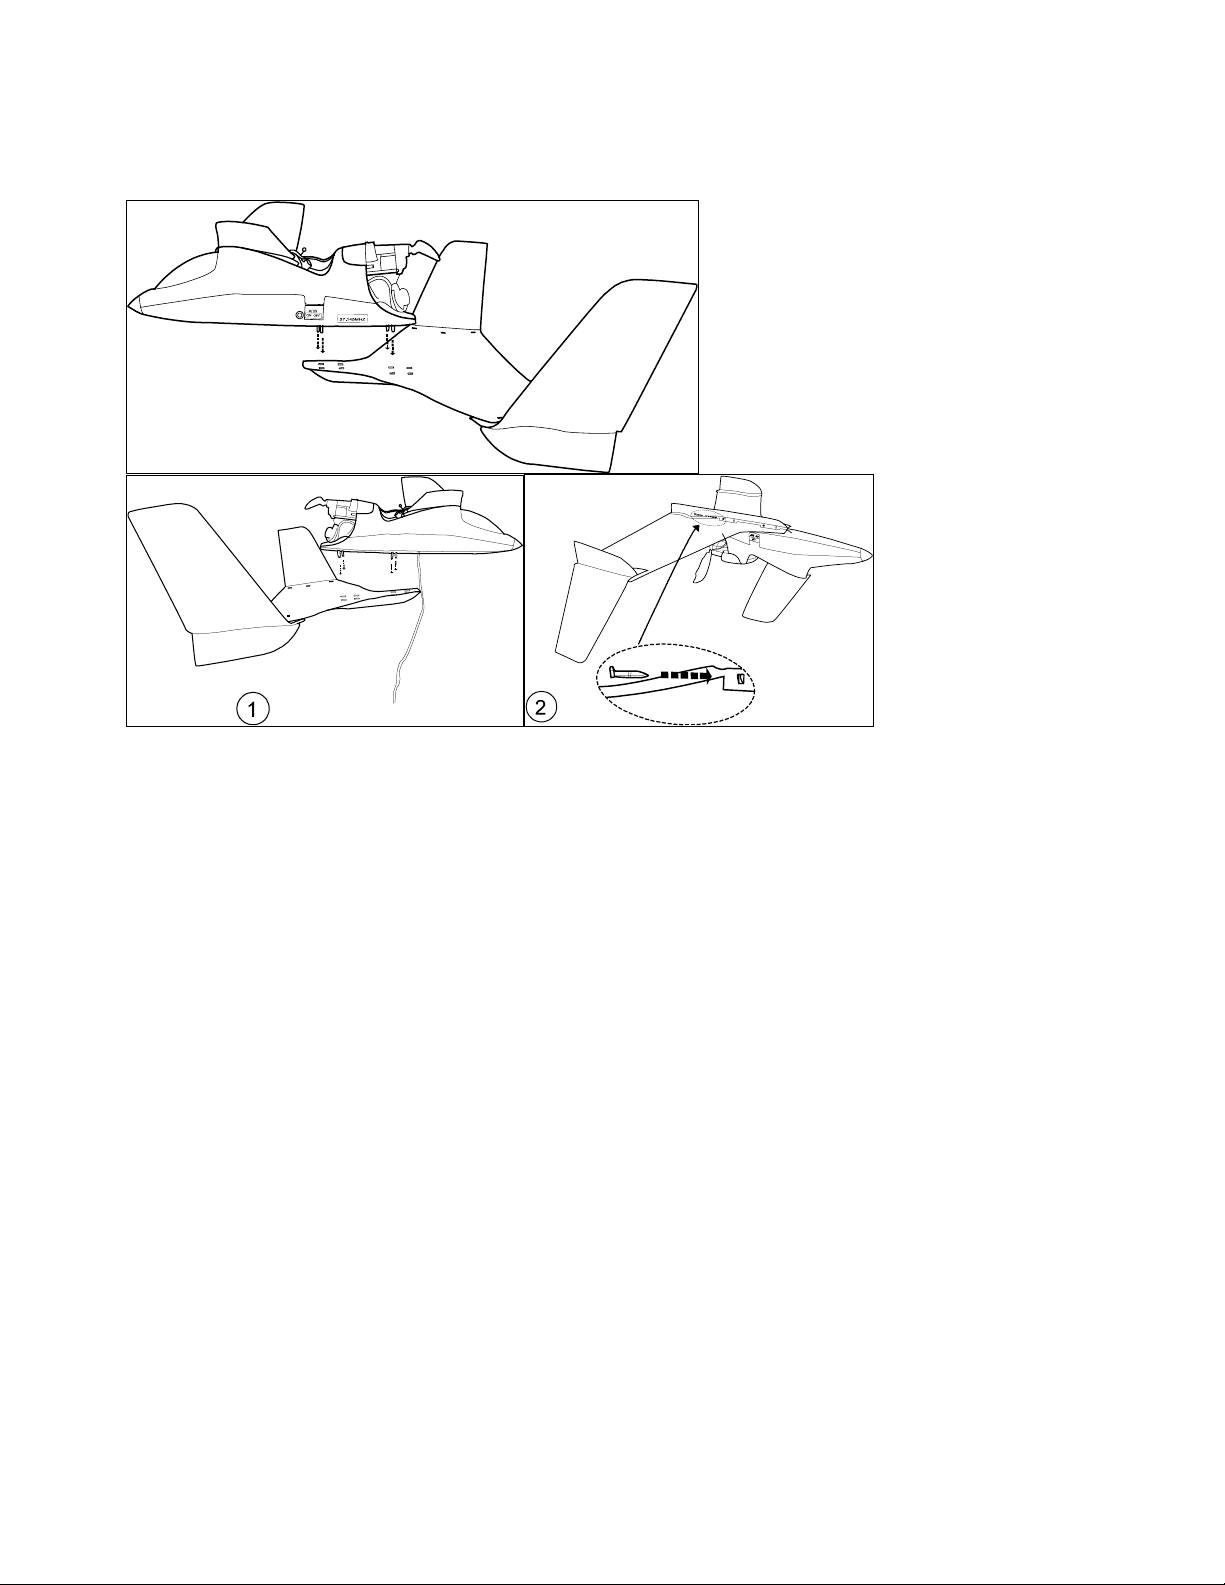
Secure your AIRIDER to the main wings by inserting the fuselage fasteners.
Page 5
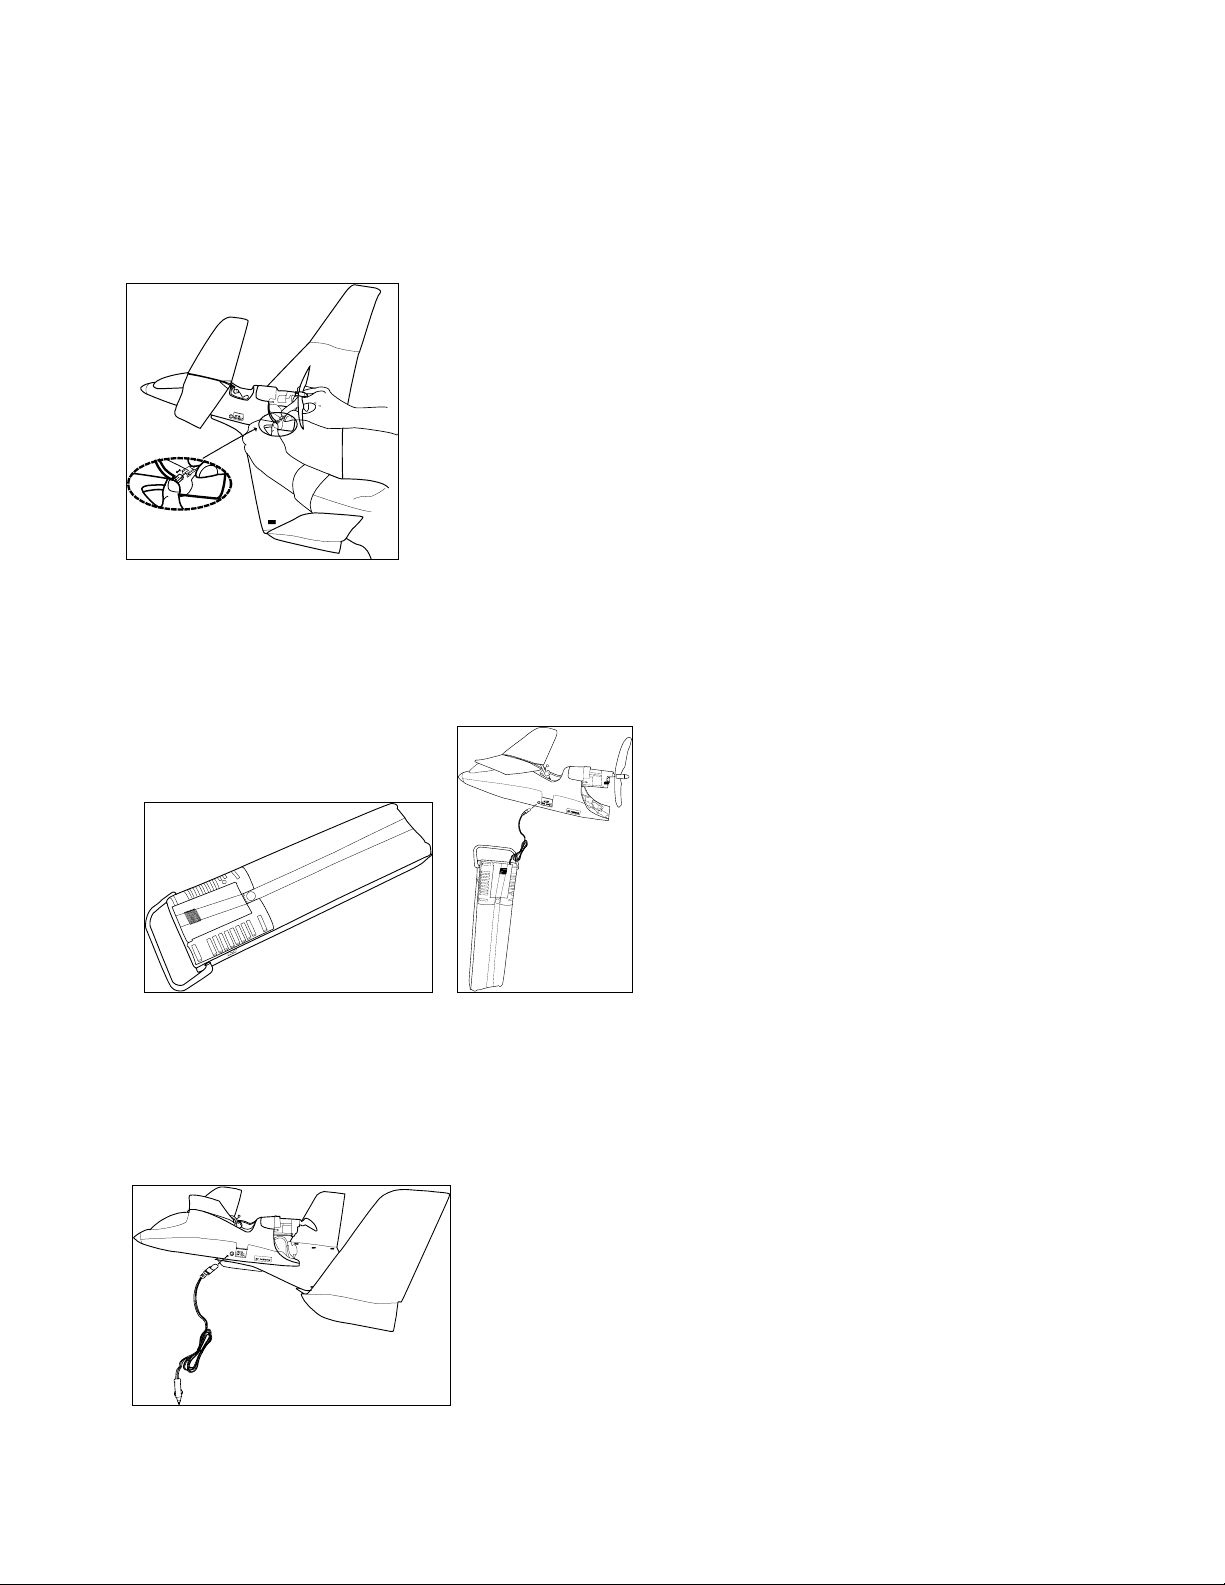
3. Charging Your AIRIDER
You can charge your AIRIDER either through the Battery Compartment Unit or the Cigarette
Lighter Adaptor. Ensure both the AIRIDER and the Radio Controller is switched to the OFF
position before proceeding to charge the batteries. Connect the rechargeable battery pack.
A) Battery Compartment Unit: uses 6 "D" size batteries. Ensure both the AIRIDER and the
Radio Controller is switched to the OFF position. Insert the battery compartment unit power
plug into the DC socket of the AIRIDER.
B) Cigarette Lighter Adaptor: ensure both the AIRIDER and the Radio Controller is switched
to the OFF position. Insert the Cigarette Lighter power plug into the DC socket of
the AIRIDER. Insert the Cigarette Lighter Adaptor into a 12V DC port.
Page 6
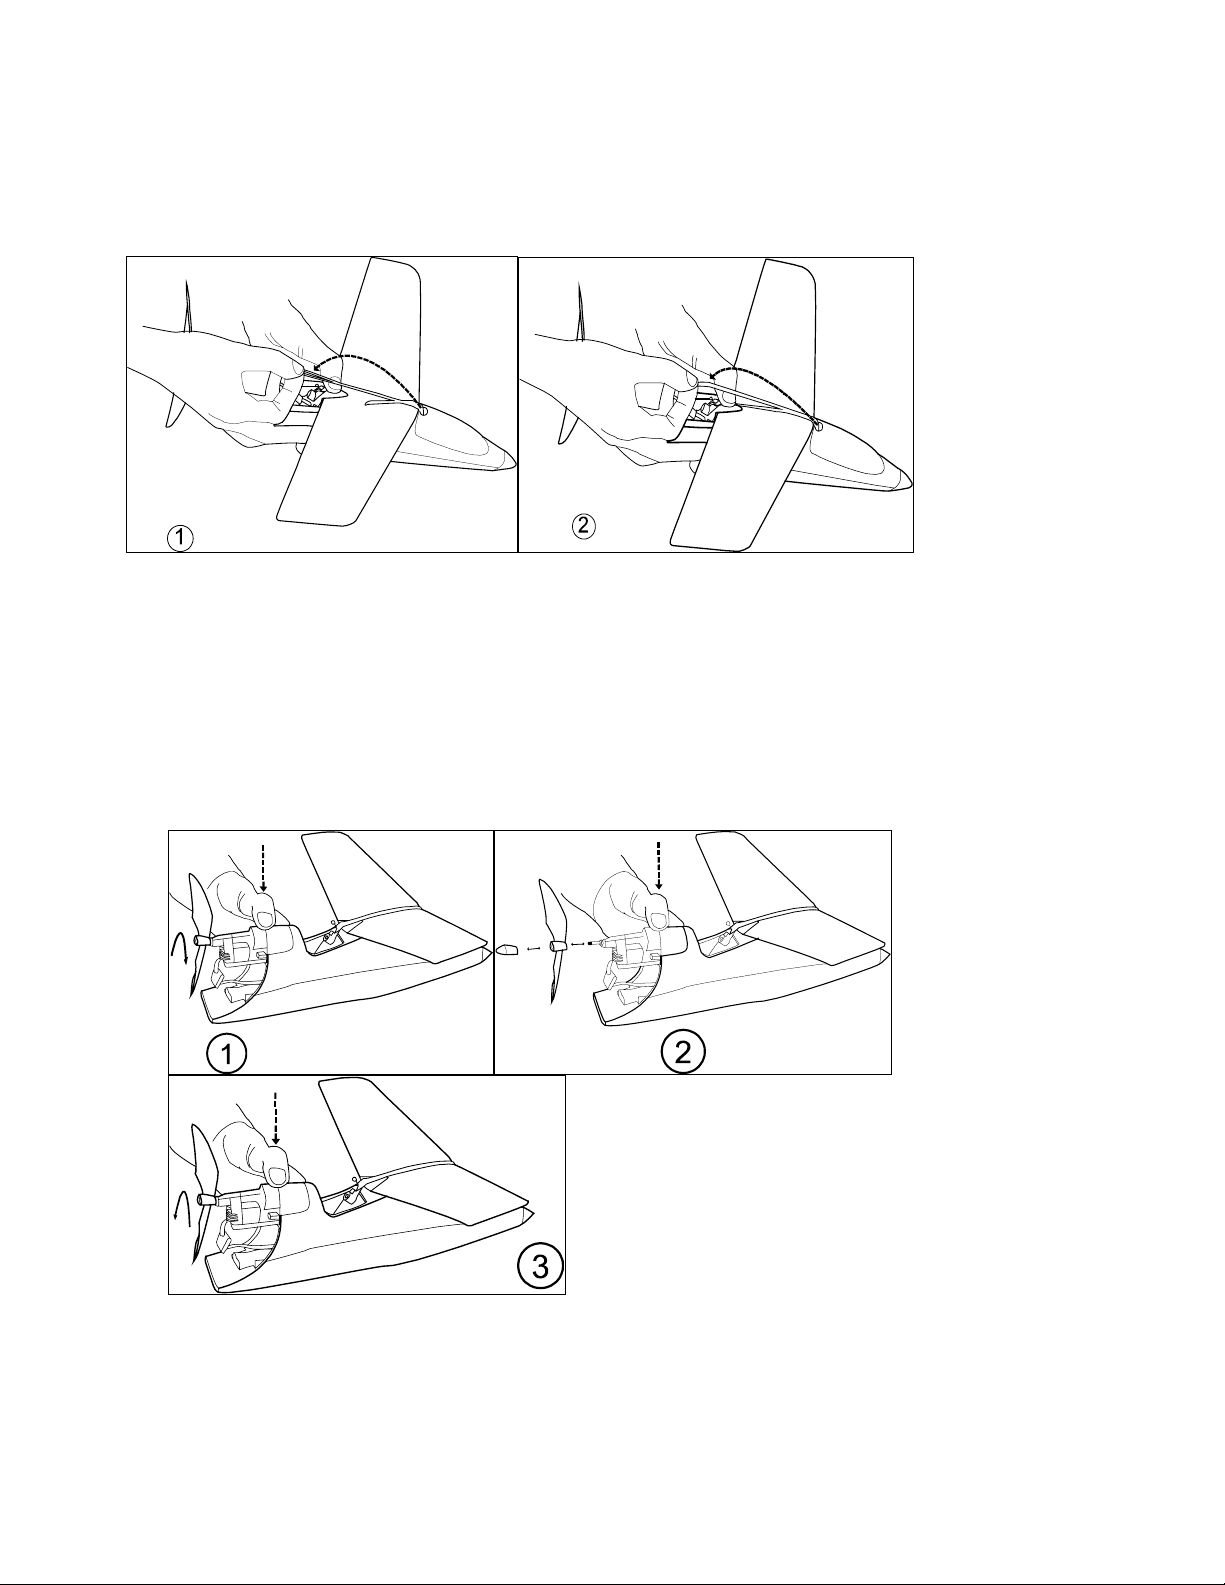
4. Front Wing Assembly
The front wing comes assembled. For installation or alignment, fasten the elastic band from
the cockpit to the turning mechanism. Use the AIRIDER Tool for easy installation.
5. Propeller Assembly
Your AIRIDER propeller comes assembled. To remove the propeller, remove the propeller
cap. Press and hold down the propeller latch. Rotate the propeller clockwise.
To re-install the propeller, press and hold down the propeller latch. Rotate the propeller
counter clockwise until you hear a clicking sound. The propeller does not come to a complete
stop. Re-insert the propeller cap.
Page 7

NOTE: THE MANUFACTURER IS NOT RESPONSIBLE FOR ANY RADIO OR TV
INTERFERENCE CAUSED BY UNAUTHORIZED MODIFICATIONS TO
THIS EQUIPMENT. SUCH MODIFICATONS COULD VOID THE USER’S
AUTHORITY TO OPERATE THE EQUIPMENT.
 Loading...