

EDUGEAR Onebook Flex360B4, ONEBOOK FLEX 360B2 Owner's Manual
Owner’s Manual
Any misuse of the product will void the warranty.
Before using, please read these operating instructions carefully.
They contain important advice concerning the use and safety of your
notebook. Please use it for its intended purpose in accordance with
these operating instructions.
www.edugear.com
FLEX 360B4

Contents
Before You Start
Taking Care of Your Notebook
Your Notebook Tour
Function Keys
Getting Started
Touchpad
Windows Interface
Setup and Connection
Battery
Windows Help and Troubleshooting
Specifications
FCC Declaration of Conformity
2
3
4
7
8
10
11
15
22
24
29
30
2
Before You Start
Make Sure You Have Everything
When you receive your notebook, unpack it carefully, and check to make sure you have all
the items listed below. For a pre-configured model you should have the following:
• One Flex 360B4 notebook
• AC adapter with power cord
• User Manual
Once you have checked and confirmed that your notebook system is complete, read
through the following pages to learn about all of your notebook components.
Depending on the model you purchased, the actual appearance of your
notebook may vary from that shown in this manual.
Call: 888.505.8878 Online: edugear.com Email: support@edugear.com
3
Taking Care of Your Notebook
• DO NOT place near fire or other sources of heat.
• DO NOT expose to magnetic fields.
• DO NOT expose to direct sunlight.
• DO NOT expose to rain or moisture.
• DO NOT place heavy objects on or apply heavy pressure to the computer.
• DO NOT drop the computer.
• Use of the notebook in an environment where the ambient temperature exceeds 35°C is
not recommended.
• There is a risk of explosion if the battery is replaced with an incorrect battery. Please
dispose of used batteries according to the instructions.
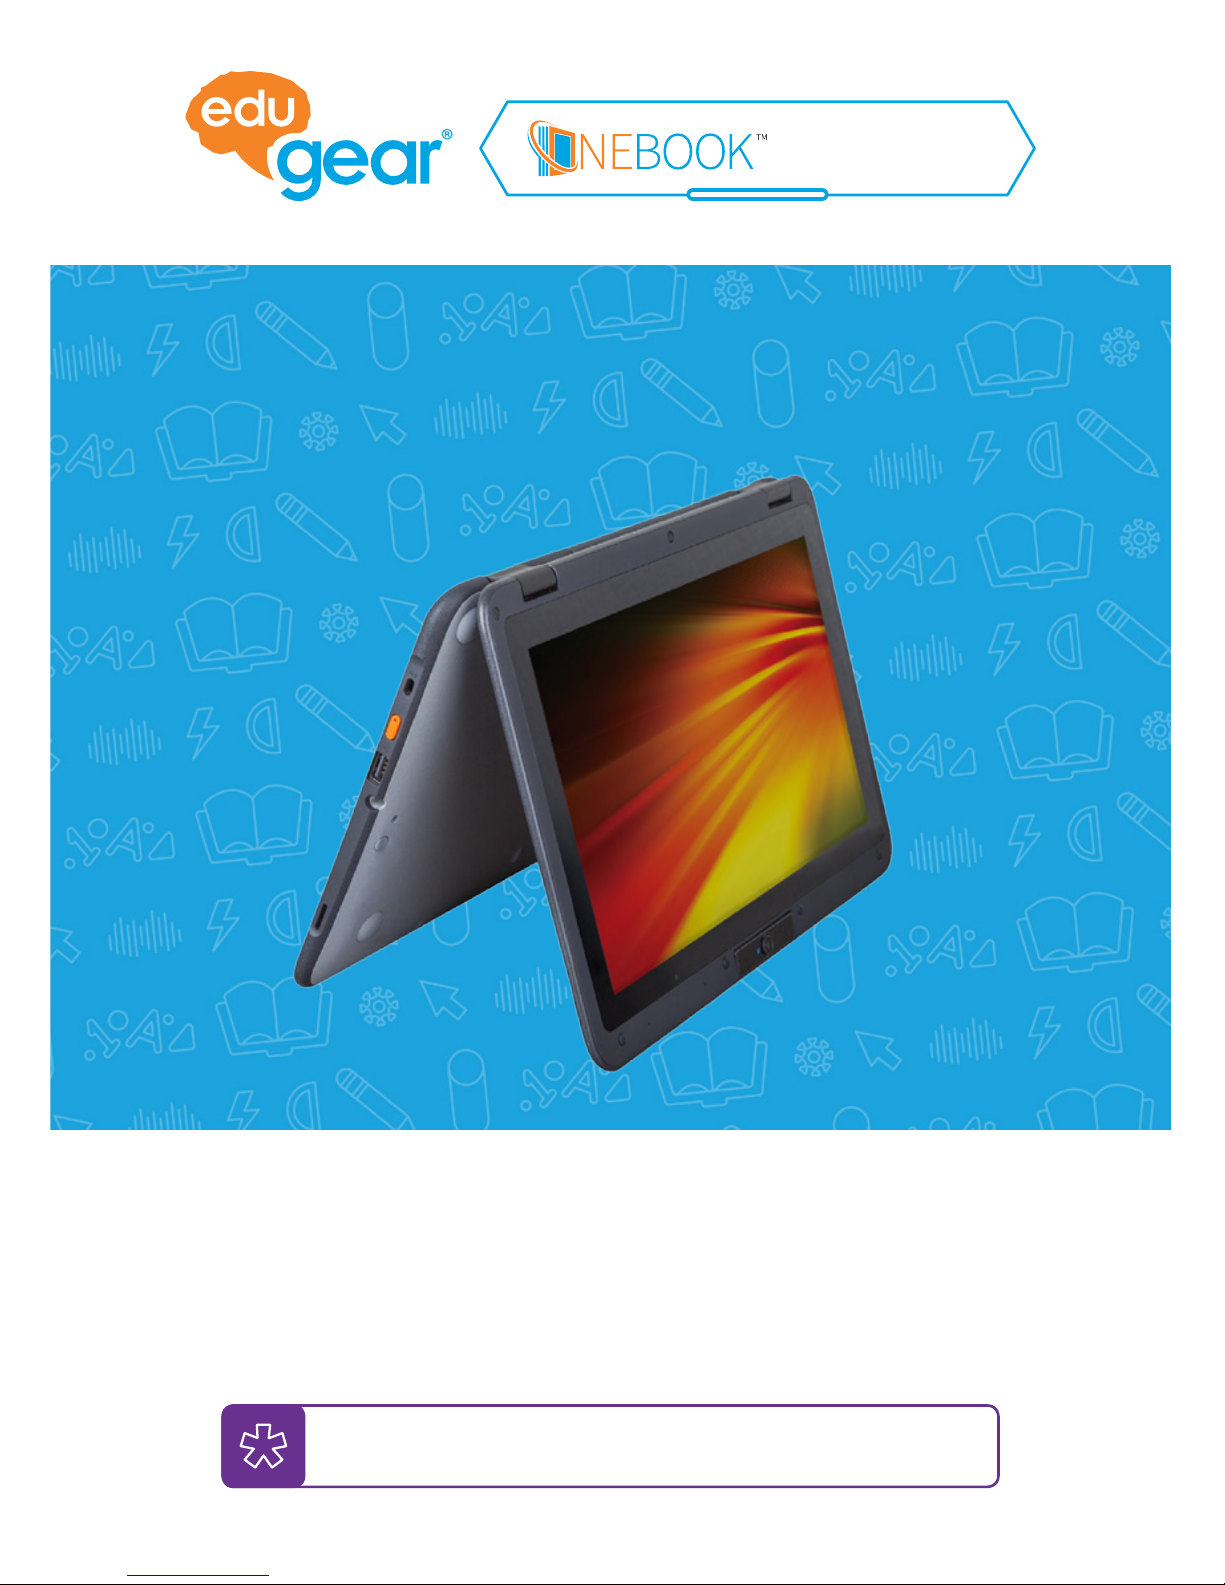
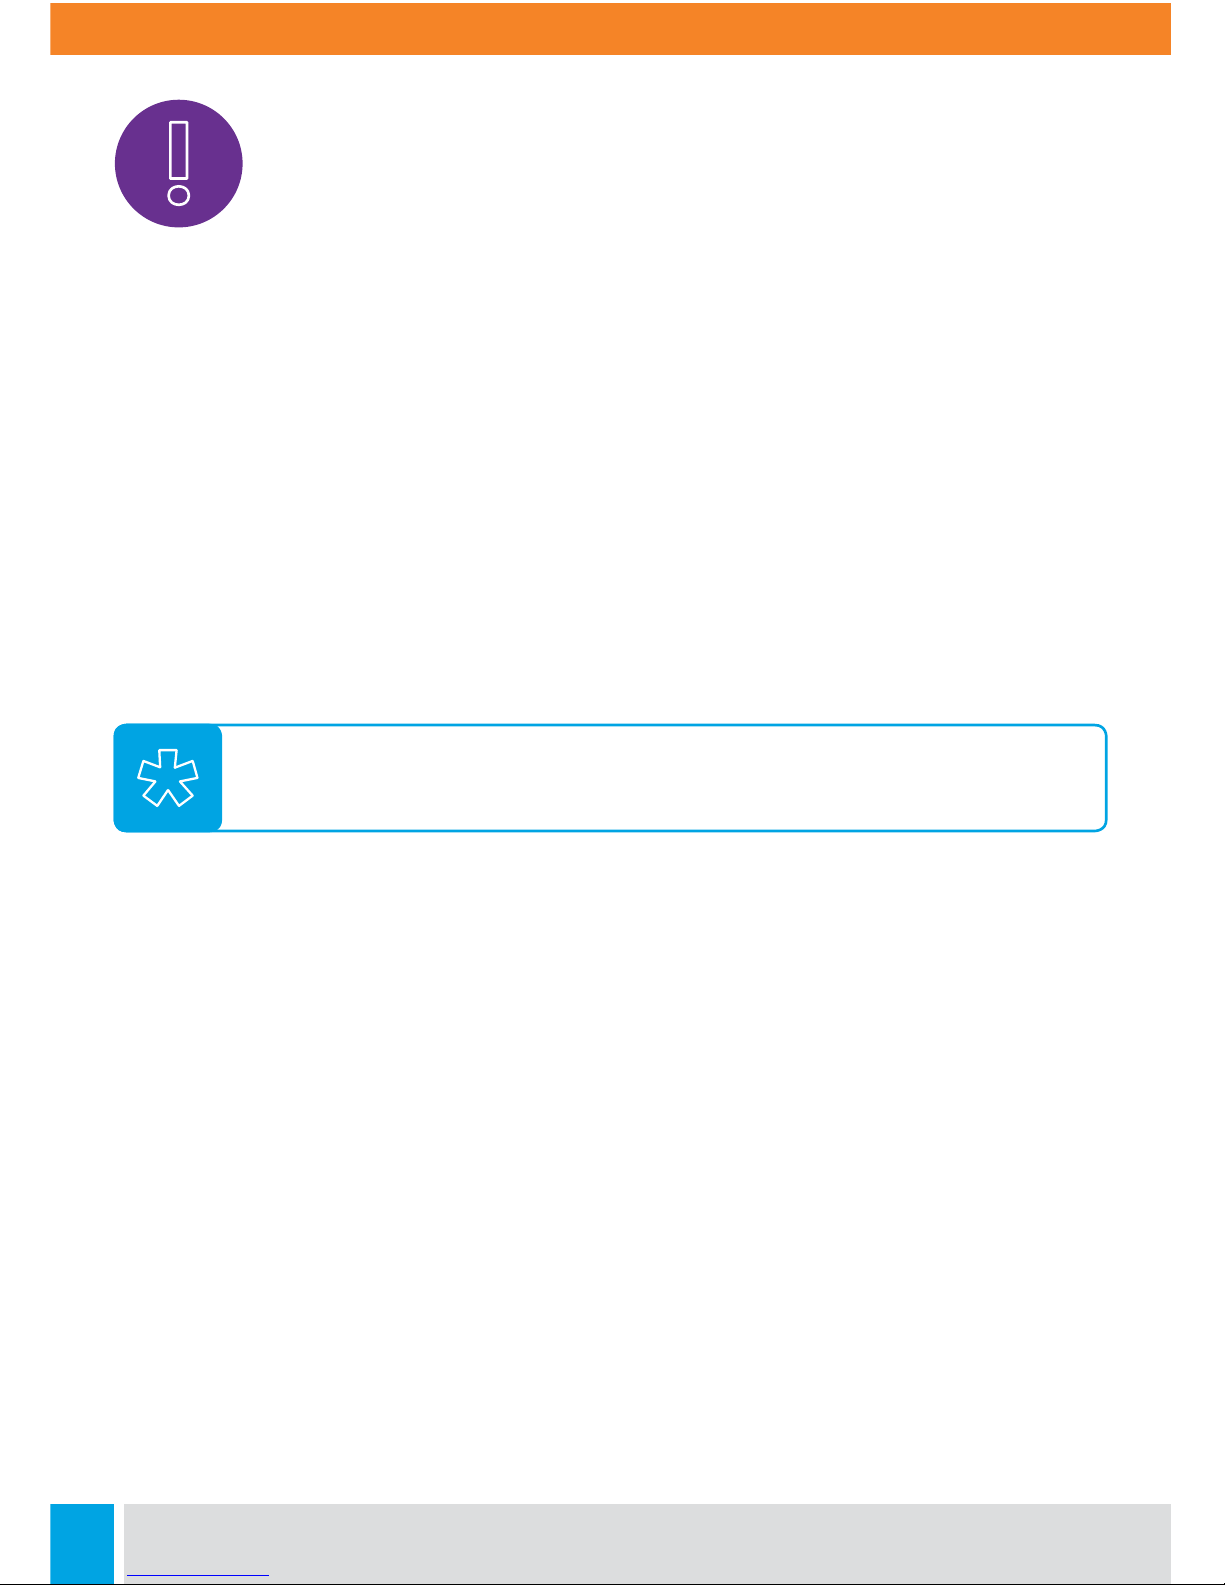
Folding the Keyboard
This laptop supports a swiveling 11.6-inch
touchscreen that can be used in several
dierent ways. Opening the device as a
standard laptop gives you access to the
keyboard and touchpad, while folding the
keyboard behind the screen turns it into a
tablet. You also can prop the notebook’s
screen up in stand mode, which is ideal for
viewing videos and presentations.
4
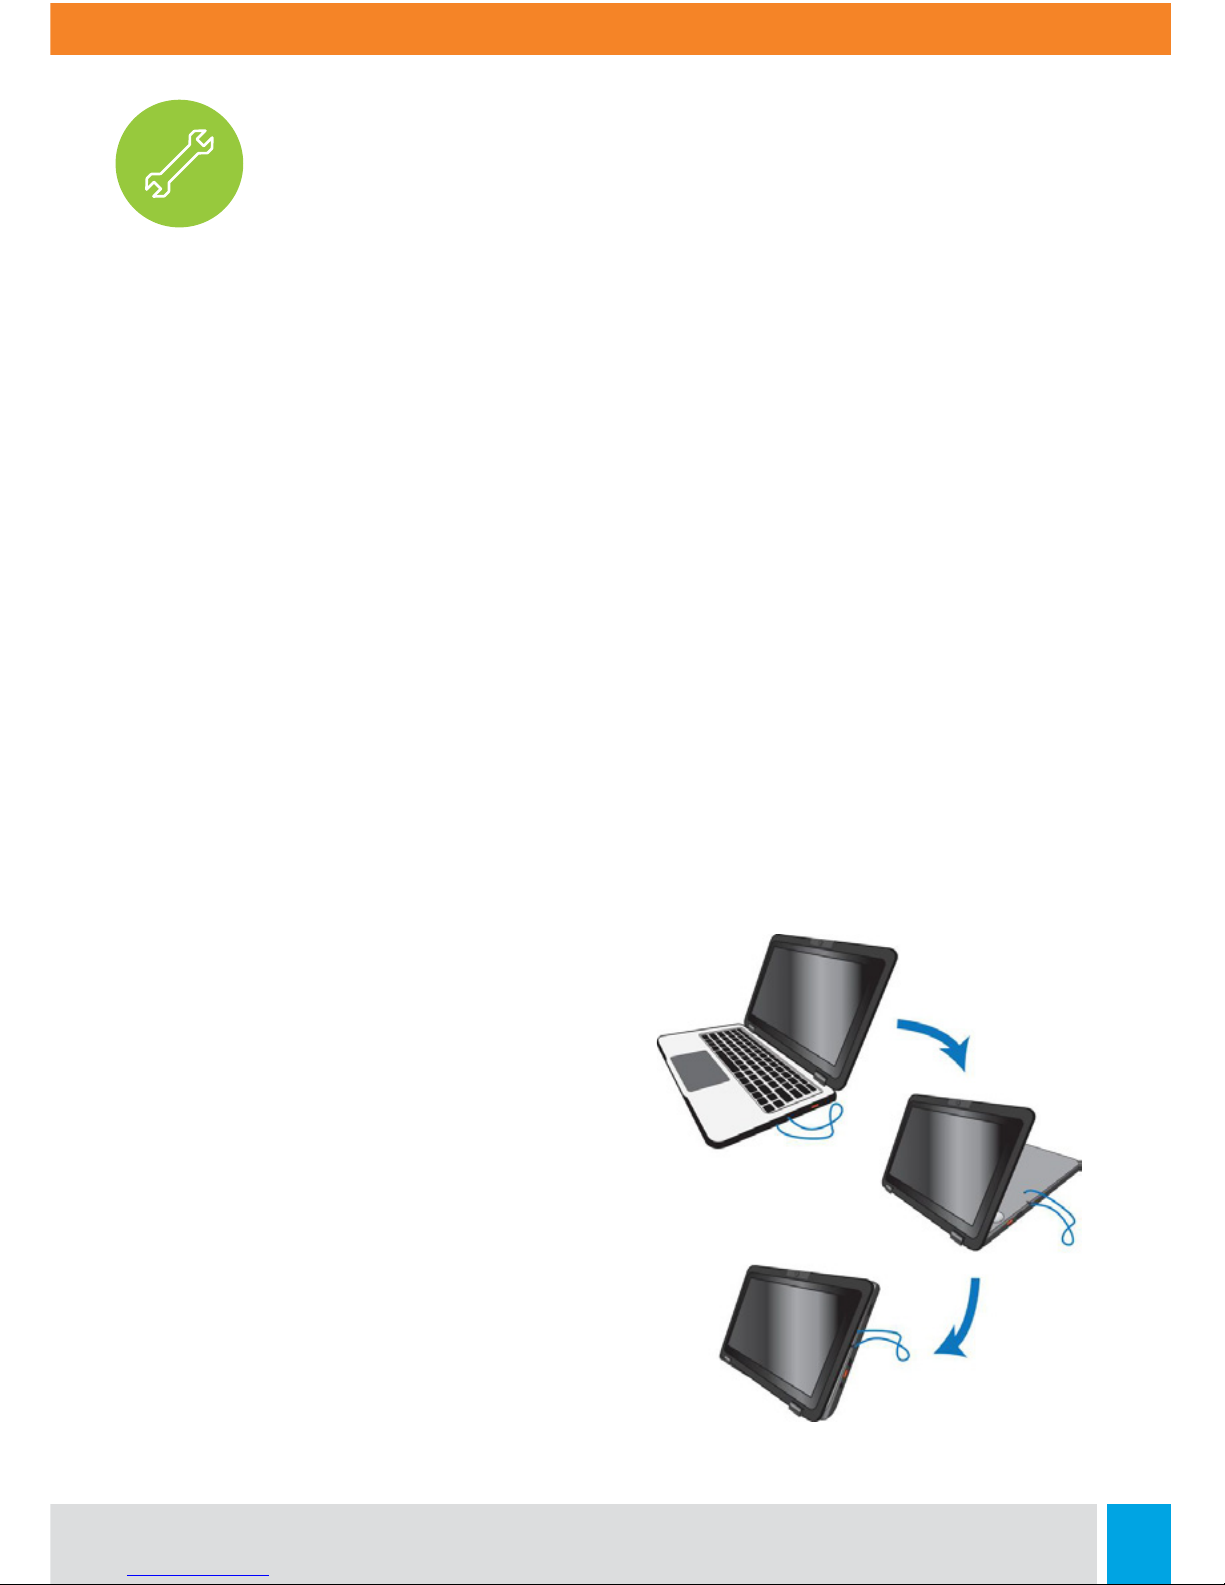
Your Notebook Tour
Front View
Now that you are done setting it up, let us show you around your new notebook.
1. Front-Facing Camera
Oen for taking self-portraits as well as for video conferencing.
2. Microphone
Used for sound and speech recording.
3. Touchscreen
The main display of your laptop. You can touch it with your fingers to control it.
4. Windows Key
Opens the Windows Start Menu at any time.
5. Touchpad
Allows you to control your system using finger gestures.
6. Caps-Lock
Lights up in blue when the caps lock is ON.
Call: 888.505.8878 Online: edugear.com Email: support@edugear.com
5
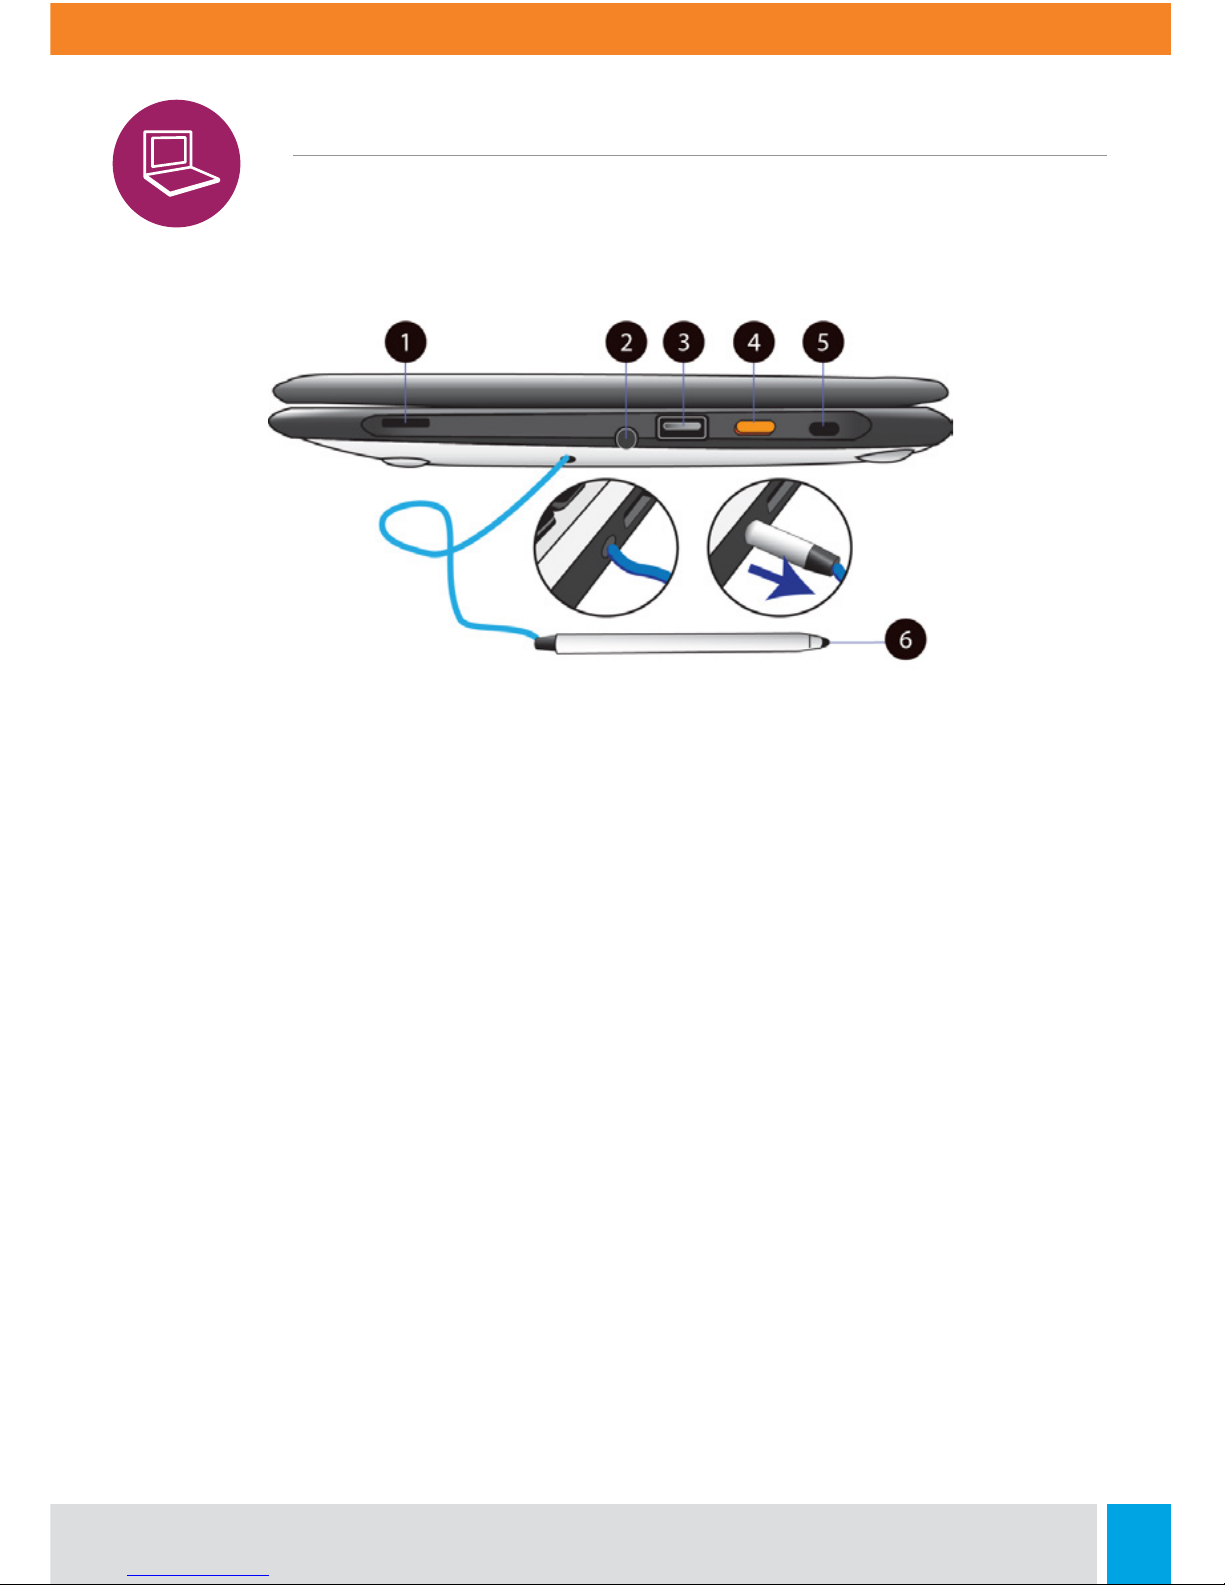
Your Notebook Tour
Right View
1. Speaker
The sound system has two speakers for
playing music, notification sounds, and
other audio data.
2. Stylus Hole
This is where you rest the provided stylus.
3. USB 2.0 Port
Plug your USB devices here.
4. Power button
Press it to power on/o your laptop.
5. Kensington Lock Slot
You can attach a Kensington lock here
to attach a cable from your laptop to a
stationary object such as table.
6. Stylus
Use it as an input device instead of your
fingers on the touchscreen.
6
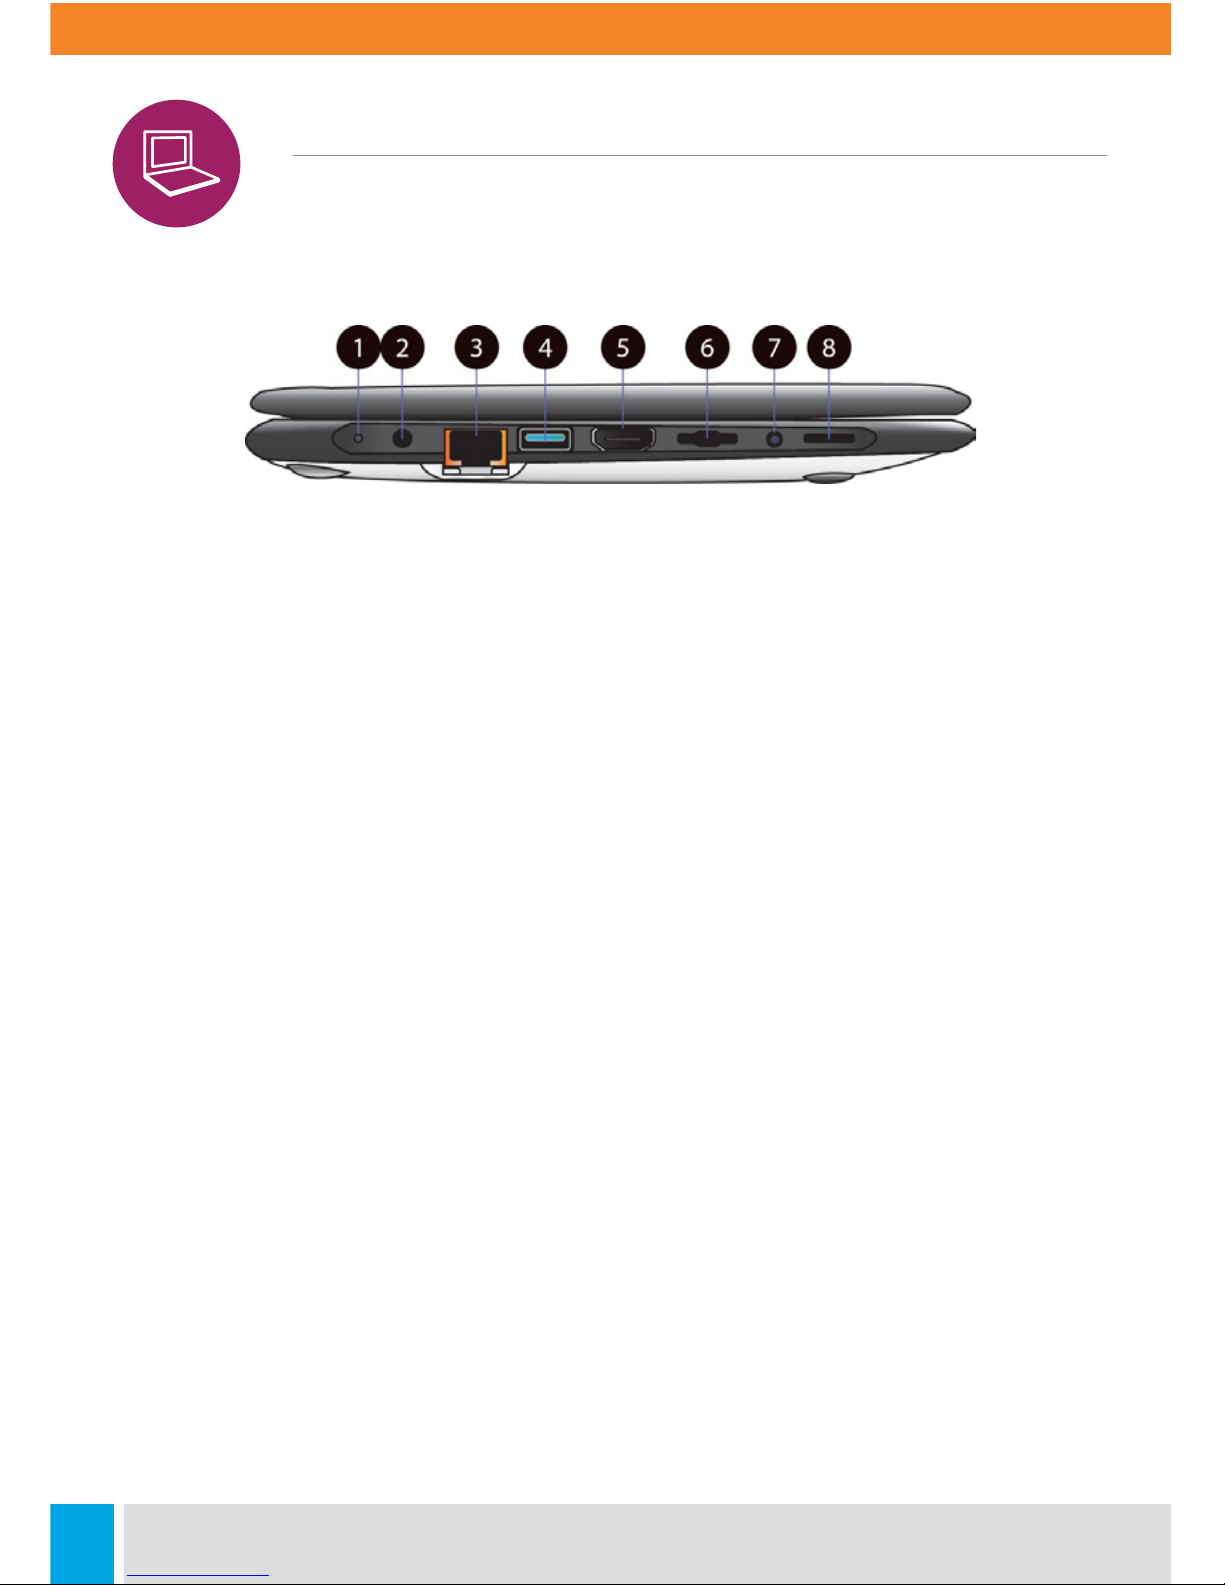
Your Notebook Tour
Left View
1. Charging Indicator
It shows the charging status of your laptop.
It shows blue when the battery is fully
charged.
2. DC-in
Plug the adapter to charge the battery
here.
3. RJ-45 LAN Port
Plug your RJ-45 network cable to connect
your laptop to a wired network here.
4. USB 3.0 Port
Plug your USB devices here.
5. HDMI Port
Plug your HDMI-capable monitor here.
6. Micro SD Card Slot
Plug your micro SD card here.
7. Combo Audio Jack
Plug your 3.5mm headphone here.
8. Speaker
The sound system has two speakers for
playing music, notification sounds, and
other audio data.
Call: 888.505.8878 Online: edugear.com Email: support@edugear.com
7
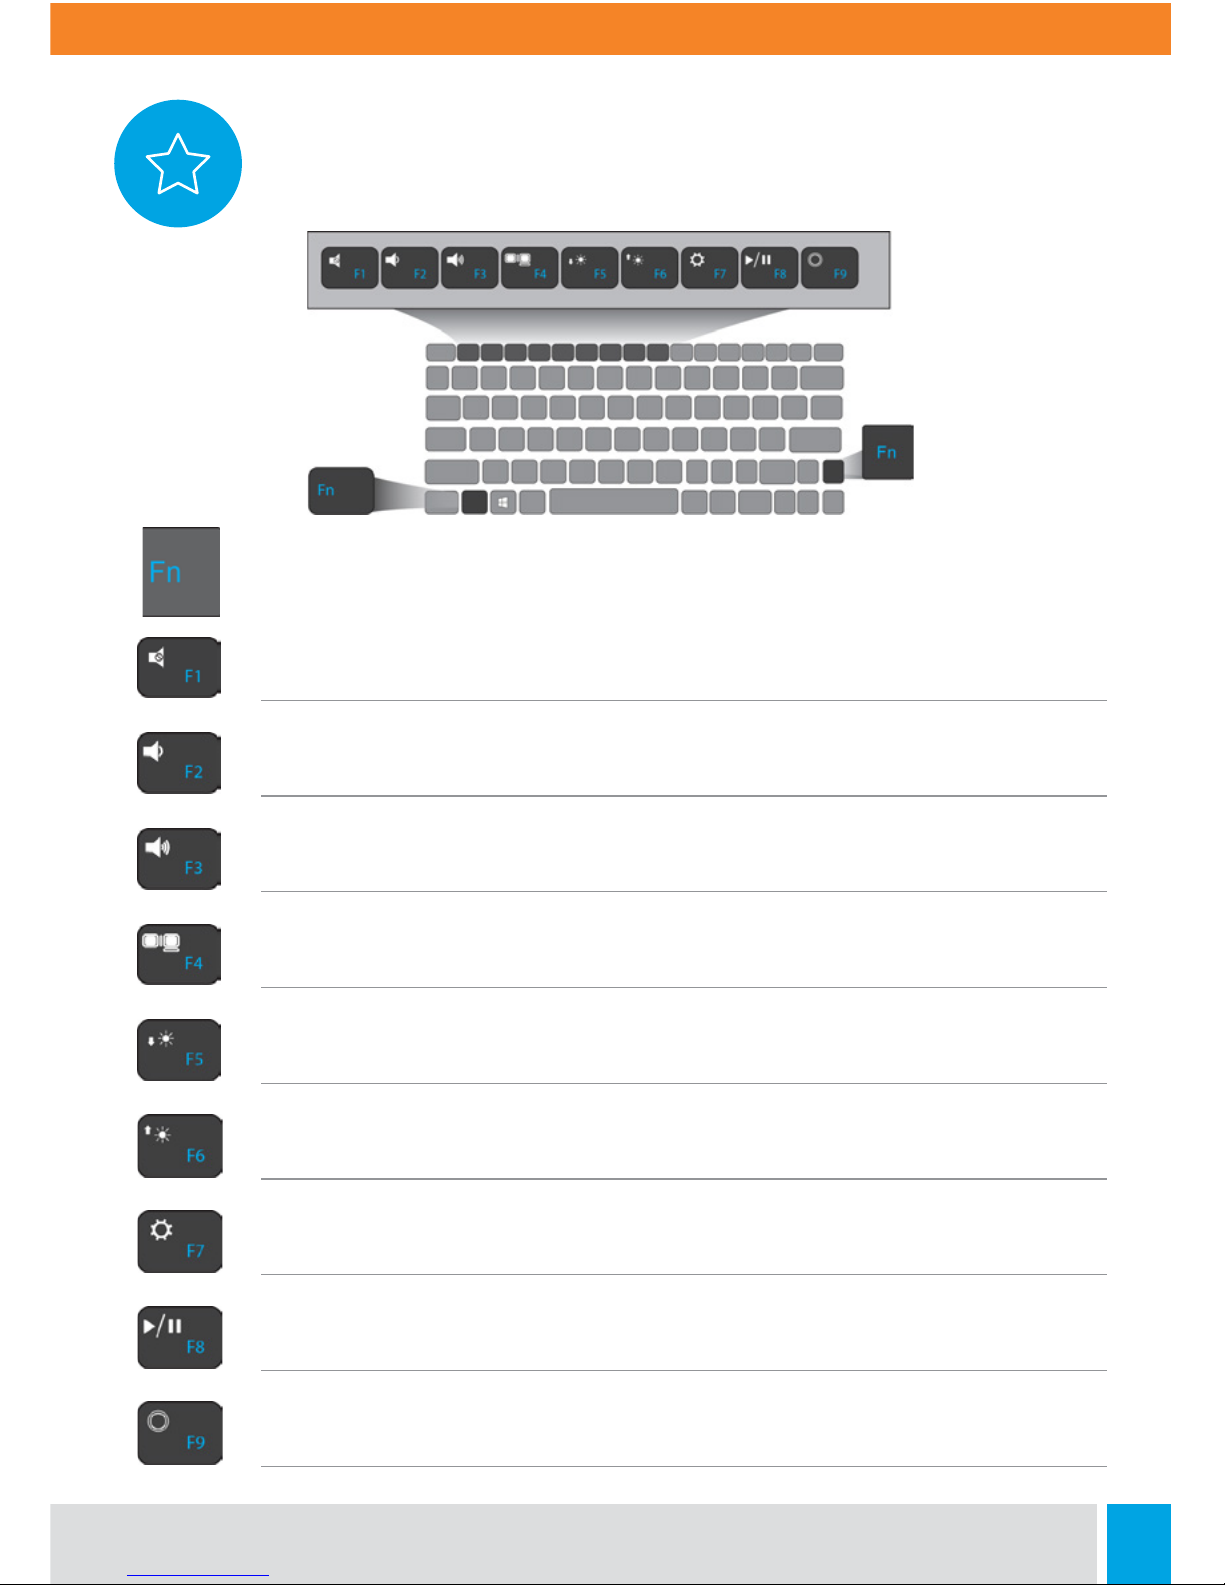
Function Keys
Mute or unmute your system.
Decreases the volume level.
Increases the volume level.
Switches display output.
Decreases the display brightness.
Increases the display brightness.
Opens the Settings screen.
Play or Pause.
Push here to talk to Cortana.
+

8
Getting Started
Powering On/Off Your Notebook
If this is the first time you’re turning this computer on, connect the AC adapter and fully
charge the battery before pressing the power button.
Powering On
Press the power button for 1 to 2 seconds. You should see the blue power indicator light
turn on.
Powering Off
Save all your data before powering your computer o. To power o your system, follow
the steps below:
A. By Start Menu
1. Click the Windows
icon in the lower le
corner of the Desktop,
or press the Windows
key on the keyboard.
2. In the Start menu
click <Power>, then click
<Shut down>.
B. Using the Power Button
Press and hold the power button for at least 4 seconds and you will see an image with
instructions appear in the middle of the screen. Click and drag the image downward to
the bottom of the screen, or press the spacebar to power o the computer. If you don’t
want to power o the computer simply press any key other than the spacebar.

Call: 888.505.8878 Online: edugear.com Email: support@edugear.com
9
Putting Your Computer Into Sleep Mode
When you will be away from your computer for a short time, put the computer to sleep.
Do one of the following:
• Close the display panel
• Press the power button briefly one time.
• Open the Start menu and then select <Power> → <Sleep>.
Waking up Your Computer
Do one of the following:
A: Press the power button briefly one time.
B: Press any key on the keyboard, tap the touchpad, or open the lid of the notebook.
 Loading...