

Educational Insights EI-7924G User Manual
Project1 1/25/05 9:34 AM Page 1
EI-7924G
www
.classr
oomjeopar
.com
dy

LinkGuide_F.qxd 1/25/05 9:29 AM Page 1
TABLE OF CONTENTS
Components ........................................................................................................2
System Requirements ..........................................................................................2
Guide Conventions ..............................................................................................3
Installation and Setup ..........................................................................................3
Installing onto a PC with Windows......................................................................3
Macintosh Installation..........................................................................................5
Game Template Features ....................................................................................7
Menu Bar ......................................................................................................8
Toolbar..........................................................................................................10
Template Cells ..............................................................................................11
General Game Creation Information..........................................................12
Entering Game Content ..............................................................................14
The Spell Checker
Classroom Jeopardy! Link Operations ......................................................23
Revising Games..................................................................................................26
Converting Older Games ..................................................................................27
Sharing Games on the Internet ........................................................................28
Setting Preferences ............................................................................................28
Upgrading Your Classroom Jeopardy! Base Unit ............................................29
Update a Base Unit's Software ........................................................................29
Microsoft Word to Jeopardy Editor Conversion ................................................31
Warranty Infor
mation
........................................................................................21
........................................................................................32

LinkGuide_F.qxd 1/25/05 9:29 AM Page 2
CLASSROOM JEOPARDY! EDITOR
AND LINK
Classroom Jeopardy! Editor and Link are a software/hardware combination that let you
write Classroom Jeopardy! games on a Macintosh or Windows computer and save them onto
Classroom Jeopardy! cartridges. You can then print out the answer keys on your computer’s
printer so that you can refer to them as you play a Classroom Jeopardy! game.
With Classroom Jeopardy! Editor, you simply fill in a game template on your computer. Then
you plug Classroom Jeopardy! Link into the USB port of your computer and transfer the game
content directly from your computer to your cartridge. The whole transfer takes only seconds!
The Classroom Jeopardy! Editor software allows you to view each clue
appear on your TV screen. Special commands have also been added to make the game
writing process more convenient. For example, with the click of your mouse, you can
copy and paste your entries —from single clues to whole categories to complete rounds!
Classroom Jeopardy! Editor even includes a handy Spell Checker function that lets you
check the spelling of your game content quickly and easily.
With Classroom Jeopardy! Editor, you can also easily open games created in earlier versions
of Classroom Jeopardy! so they can be edited, copied, and saved in the same way as new
games that you have created with Classroom Jeopardy! Editor.
Components
A. Classroom Jeopardy! Link unit
B. Base Control Unit Update Cable
C. Classroom Jeopardy! Editor software on CD-ROM
System Requirements — Windows
A. Operating System: Microsoft®Windows®XP / 2000 /
ME / 98SE
B. Processor: Pentium
C. RAM: 128 MB (or higher) recommended;
64 MB minimum
D. Disk Space (min): 50 MB minimum free space on hard drive
E. USB Port: USB 1.1 or 2.0
F. Display Resolution: 1024 x 768 (or higher) recommended; 800 x 600 minimum
G. Pointing Device: Microsoft-compatible mouse or other pointing device
™
®
133MHz (or higher)
exactly as it will
Exciting
New Feature!
With Jeopardy! Link
you can also upload and
download
games on the Internet. It’s an
exciting way for teachers to
share game ideas and receive
ready-made
www
Classroom Jeopardy!
Jeopardy!
Visit
.classroomjeopardy.com
for details.
™
,
games!
System Requirements — Macintosh
A. Operating System: Macintosh OS X (10.2.0 or later) or OS 9 (9.0 or later)
B. Processor: Power PC (G3 or higher recommended)
RAM: 128 MB (or higher) recommended; 64 MB minimum
C.
D. Disk Space (min): 50 MB minimum free space on hard drive
E. USB Port: USB 1.1 or 2.0
F. Display Resolution: 1024 x 768 (or higher) recommended; 800 x 600 minimum
G. Pointing Device: Apple mouse or other pointing device
2
LinkGuide_F.qxd 1/25/05 9:29 AM Page 3
Guide Conventions
The following conventions are used in this guide:
The names of all interface elements (menus, buttons, window titles, dialog boxes, titles, etc.)
are shown in a Helvetica Bold font. For instance, “Click on the OK button.” means the user
should click on the
Menu → Menu Option is used to indicate a menu choice. For instance, File → Open means
the user should click on the
Whenever a combination of keys on the keyboard should be pressed simultaneously, they
will be displayed in the following manner:
OK button in a dialog box.
File menu and select the Open option.
J+o means the user should press the Control key and O key at the same time.
In this case the result would be the display of the Open dialog box.
Note that on most PC keyboards the J key is labeled Ctrl. On most Macintosh computers
it is labeled Control. For readability, we have used the Macintosh Jkey throughout this guide.
Macintosh users should use the
combinations.
Command key instead of the Control key in keystroke
Installation and Setup
NOTE: If you have a gray-colored (Model EI-7920) Classroom Jeopardy! Base Control Unit,
it is recommended that you update its firmware prior to installing and working with the
Classroom Jeopardy! Editor software and Classroom Jeopardy! Link. See page 29
for instructions on how to update the firmware of your Base Control Unit (BCU).
Installing onto a PC with Windows
1. Insert the Classroom Jeopardy! CD-ROM into the CD-ROM player of your computer.
The CD-ROM window will open.
2. Double-click on the Classroom Jeopardy! Setup file.
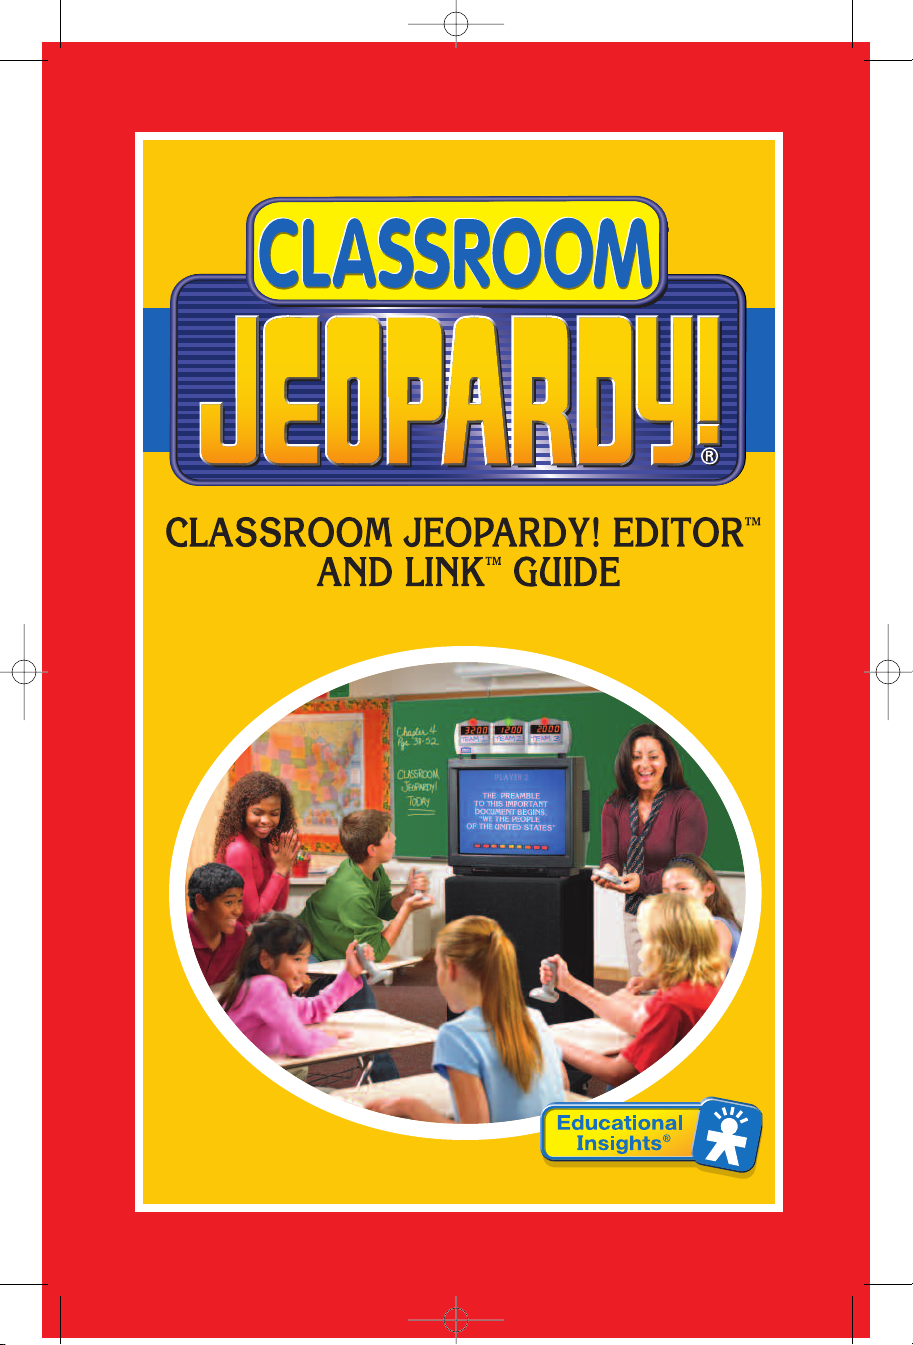
The
Classroom Jeopardy! Editor Setup window
will be displayed. When you are finished reading
the instructions, click on the
Classroom Jeopardy! Editor License Agreement
dialog box will be displayed.
3. In order to install Classroom Jeopardy! Editor, you
must agree to the license agreement. When you are
finished reading the License Agreement, and if you
agree with its terms, select the
terms of the license”
Next > button.
the
box will be displayed.
The
Next > button. The
“I agree to the
radio button. Then click on
Installation Folder dialog
3
LinkGuide_F.qxd 1/25/05 9:29 AM Page 4
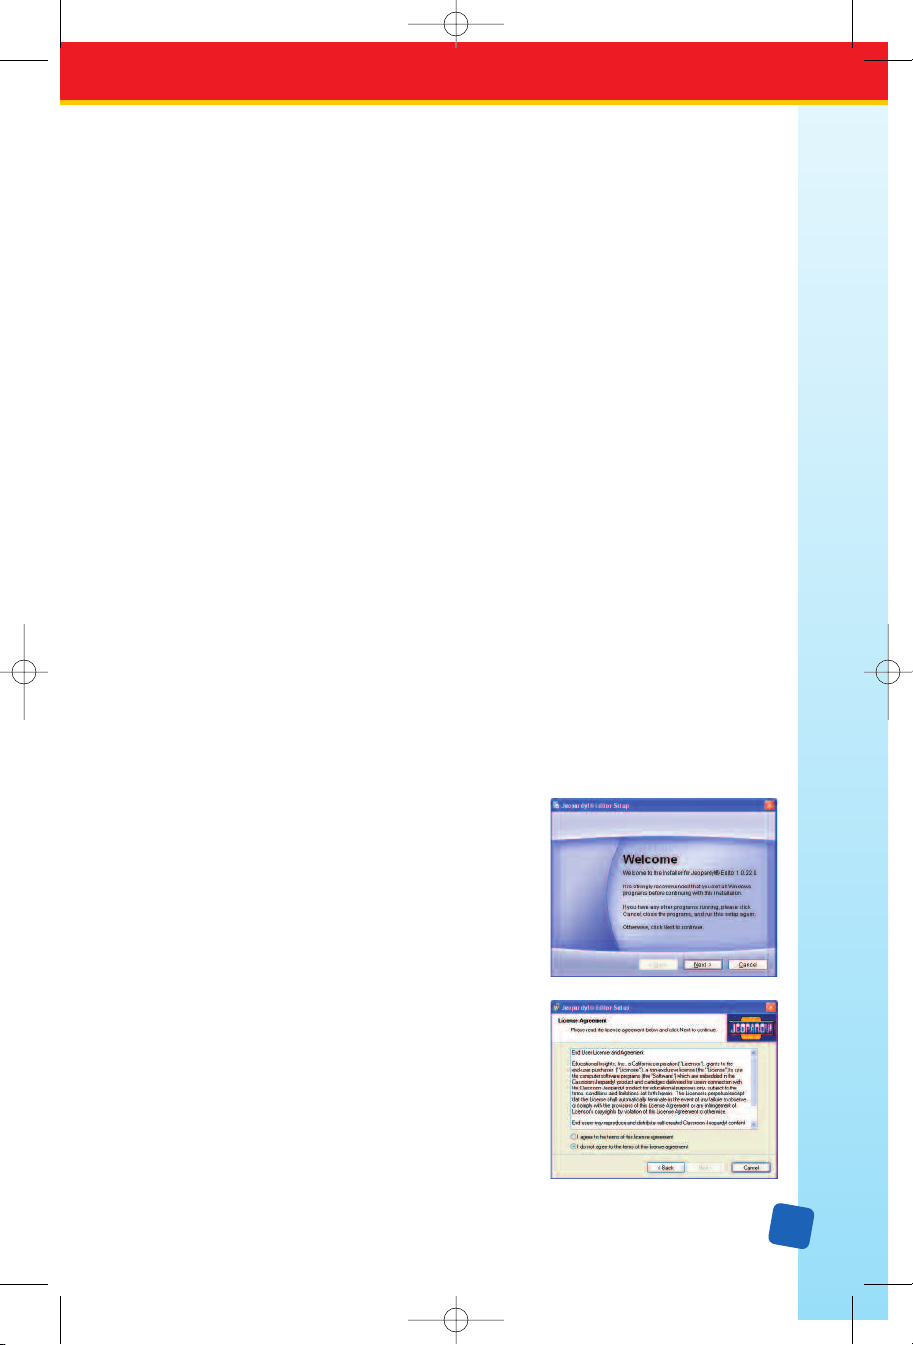
4. The installer is configured to install Classroom
J
eopardy! Editor in the Windows Program folder.
Type in another path name if you wish and press
Next > button. The Shortcut Folder dialog box
the
will be displayed.
5. The installer is configured to install a shortcut
to Classroom Jeopardy! Editor in the Classroom
Jeopardy! Editor folder. Type in another path
name if you wish and press the
Ready to Install dialog box will be displayed.
6. The
Next > button.
If you are satisfied with the settings displayed, click
on the
Next > button. Otherwise you can click on
the < Back button and change the selections you have
previously made.
7. The
Setup Progress dialog box will be displayed.
8. If you wish to cancel the installation, click on the
Cancel button. If you do not cancel the installation,
the
Classroom Jeopardy! Editor Installed
Successfully
dialog box will be displayed.
Click on the Finish button. Congratulations!
ou have successfully installed Classroom
Y
Jeopardy! Editor
.
4

LinkGuide_F.qxd 1/25/05 9:29 AM Page 5
Launching the Program (Windows)
T
here are two ways you can launch Jeopardy! Editor on your computer:
1. An icon labeled Classroom Jeopardy! Editor appears
on your desktop. Double-click the icon to start the program.
2. An item labeled Classroom Jeopardy! Editor appears in your
Start/Programs menu. Single-click the icon to start the program.
The Jeopardy! logo will appear briefly and then disappear, displaying a
blank Classroom Jeopardy! Editor game template on the screen.
Macintosh OS Installation
Installing and Launching onto a Macintosh with OS 9
1. Insert the Classroom Jeopardy! CD-ROM into the CD-ROM player of your computer.
The CD-ROM window will open.
2. Locate and double click on the folder
titled Macintosh OS 9 Files. Drag the
file Classroom Jeopardy!
the folder JGames to your hard drive.
3. Locate the Classroom Jeopardy!
Editor icon on your hard drive and
double click on it to launch the
program. The Classroom Jeopardy!
License Agreement will appear.
4. In order to use Classroom Jeopardy!
Editor you must agree to the terms
of the software license. The software
license agreement only appears the
first time you launch Classroom
Jeopardy! Editor. Click on the
Agree button to accept the terms of
the license agreement. The license
agreement will close.
®
Editor and
5. When the software license agreement
window closes the Classroom
Jeopardy! Editor splash screen will
appear. This screen appears each time
you launch Classroom Jeopardy!
. It will close automatically after
Editor
approximately 3 seconds, or you can
click on it to close it immediately.
5
LinkGuide_F.qxd 1/25/05 9:29 AM Page 6
Installing and Launching onto a Macintosh with OS X
1
. Insert the Classroom Jeopardy! CD-ROM into the CD-ROM player of your computer.
The CD-ROM window will open.
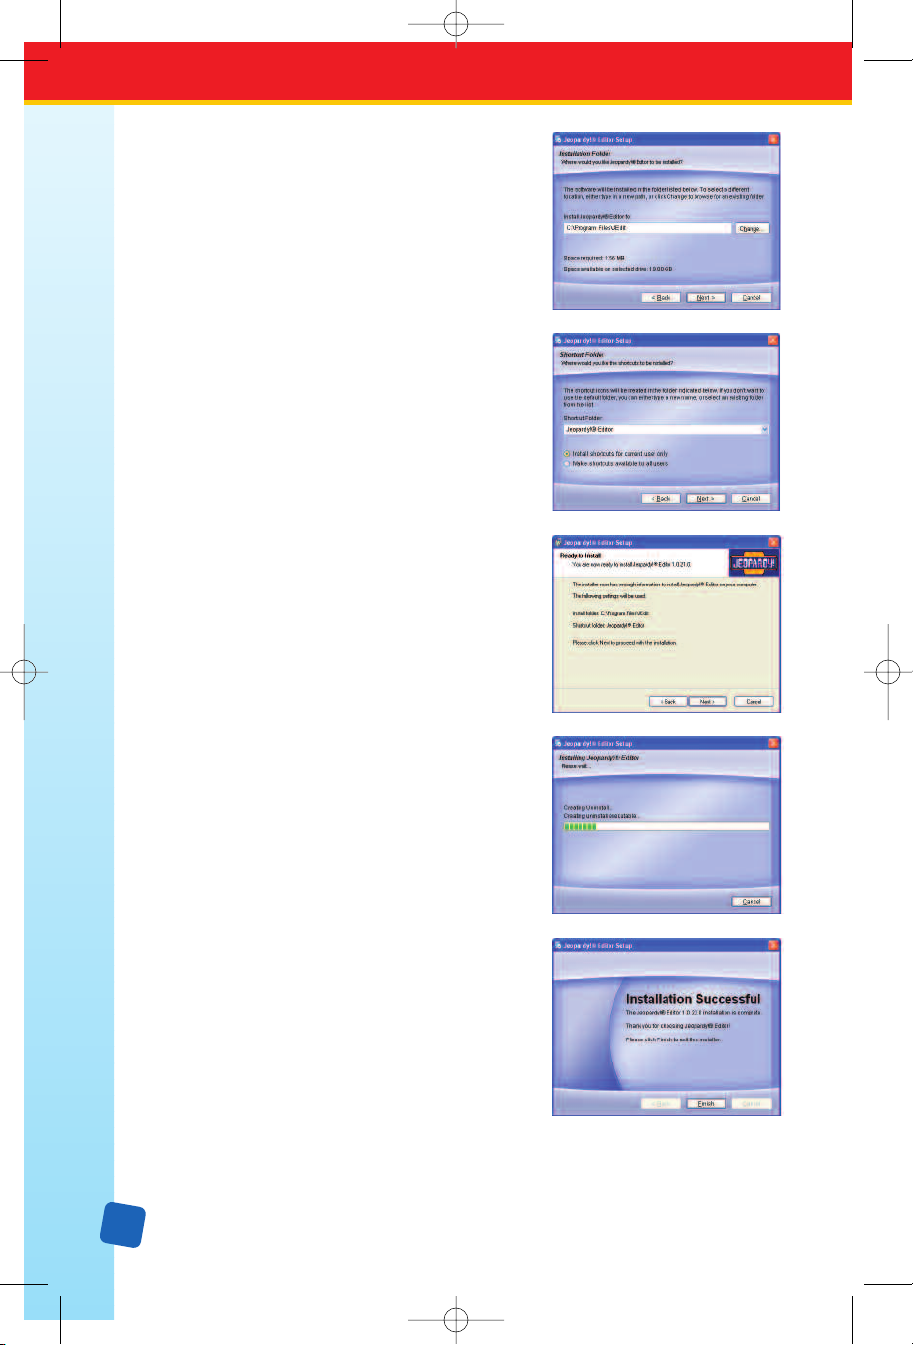
2. Locate and double click on the folder
titled Macintosh OS X Files. Drag the
file Classroom Jeopardy!
®
Editor to the
Applications folder of your hard drive.
Drag the folder JGames to wherever
you want to store Classroom Jeopardy!
Editor games.
3. Locate the Classroom Jeopardy! Editor
icon in the Applications folder on your
hard drive and double click on it to
launch the program. The Classroom
Jeopardy! License Agreement will
appear.
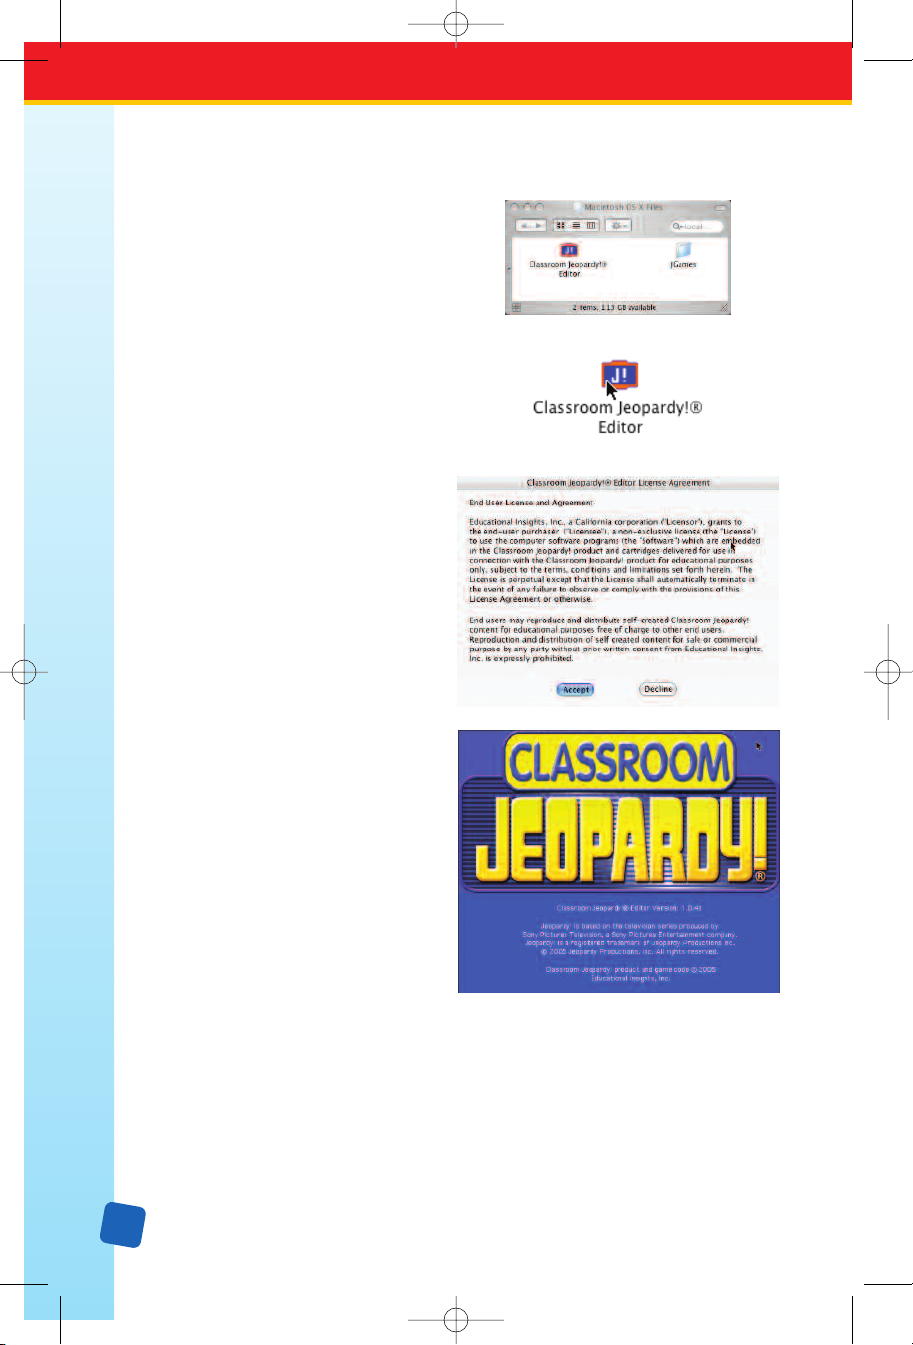
4. In order to use Classroom Jeopardy!
Editor you must agree to the terms
of the software license. The software
license agreement only appears the first
time you launch Classroom Jeopardy!
Editor. Click on the
Agree button to
accept the terms of the license agreement. The license agreement will close.
5. When the software license
agreement window closes the
Classroom Jeopardy! Editor splash
screen will appear. This screen appears
each time you launch Classroom
Jeopardy! Editor. It will close automatically after approximately 3 seconds,
or you can click on it to close it
immediately. If you would like the
Classroom Jeopardy! Editor icon to
remain in the dock, hold down the
option key, click on the icon in the
dock, and select
Keep In Dock.
6
LinkGuide_F.qxd 1/25/05 9:29 AM Page 7
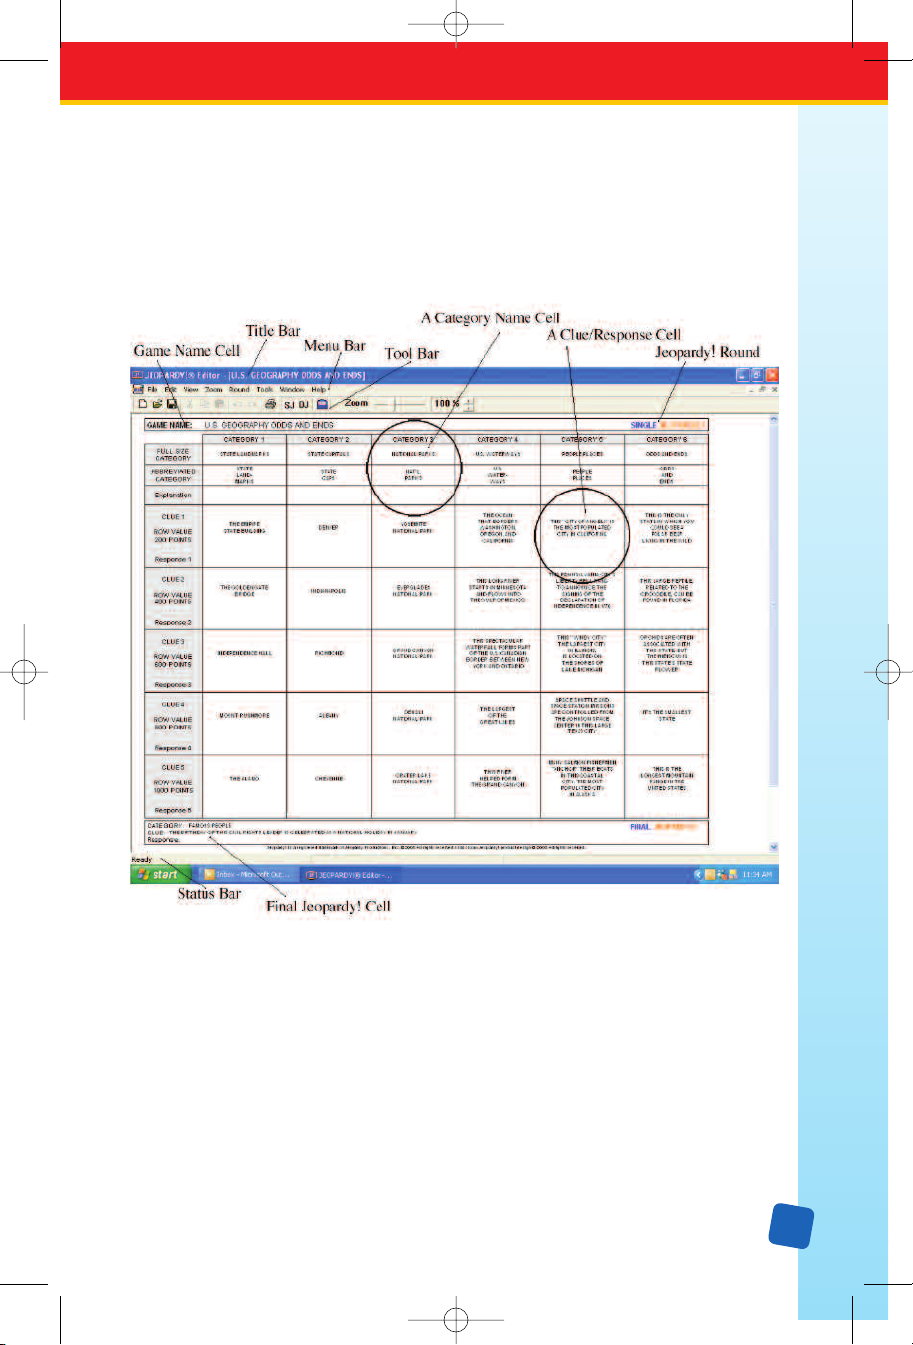
Game Template Features
When you start up Classroom Jeopardy! Editor, the screen displays a blank game template.
You’ll use the template to type in the content for your games. The template is set up so
that you can view the content in either a Single Jeopardy! round or a Double Jeopardy!
r
ound but not both at the same time. The Game Name cell and the Final Jeopardy! cell,
on the other hand, are always displayed at the bottom of both the Single Jeopardy! and
Double Jeopardy! rounds.
If you already use popular applications like Microsoft Word™, AppleWorks™, or Microsoft
, you’ll find that Classroom Jeopardy! Editor uses the same familiar commands and
™
Excel
conventions.
7
LinkGuide_F.qxd 1/25/05 9:29 AM Page 8
MENU BAR
The following pages outline the game template’s key features: the M
S
tatus Bar
The menu bar has eight main headings:
and Help. Each heading gives you access to various pop-up menus, commands, and options.
The first item in the
with a visual clue about what program is currently active.
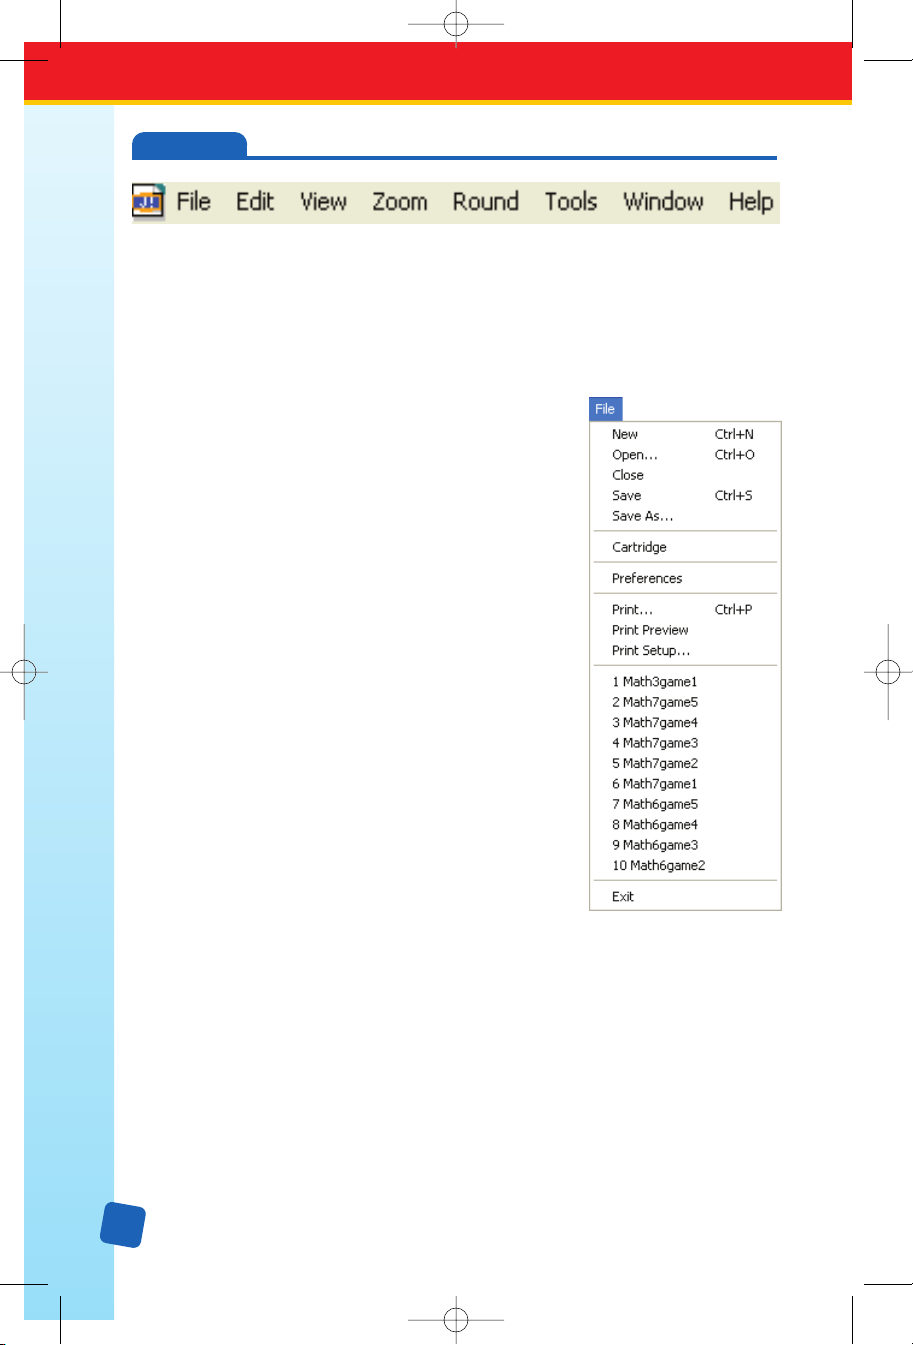
The File Menu
The
games. Select a game name listed in the
, and C
• Select File → New or type J
template for creating a new game.
• Select
• Select
• Select
• Select File → Cartridge to display the Jeopardy! Game
• Select
•
•
• Select
• Select
File → Open or type J
Open dialog box. Select a game file then click on the
Open button to open the selected game.
File → Save or type J
game you have just created.
File → Save As... to open the Save as JGM dialog
Type the name under which you want to save the file
box.
then click on the
Cartridge Interface
tents of a cartridge and allow you to perform a variety of
cartridge operations. (See page 24.)
File → Preferences to display the Preferences dia-
log box. This dialog box allows you to set options for the
messages and warnings that may appear during game
creation. See pages 28–29 for a detailed explanation of
the preferences you can set. The preferences are listed as
questions for which you choose a
preferences you choose take effect immediately and
remain in effect each time you launch the Classroom
Jeopardy! Editor program until you change them.
Select
File → Print or type J
Select
File → Print Preview to see what the printed answer key will look like when
you print it. Press
the magnification level for viewing the print preview.
File → Print Setup to open a dialog box that provides you with options
for your printer.
File → Exit to quit the Classroom Jeopardy! Editor program.
File menu also displays a list of up to the 10 most recently opened Classroom Jeopardy!
.
ells
File, Edit, View, Zoom, Round, Tools, Window,
M
is the program icon. Its purpose is to provide you
enu Bar
+
n to open a blank
+
o to display the
+
s to save the
Save button to save the game.
. This dialog box will display the con
Yes or No answer. The
+
p to print one or both pages of your answer key
Zoom In/Zoom Out or click on the screen with your mouse to select
File menu to open the game’
-
s template for editing.
enu Bar
, T
oolbar
,
.
8

LinkGuide_F.qxd 1/25/05 9:29 AM Page 9
The Edit Menu
• Select Edit → Undo or type J
recently completed action.
• Select
• Select
• Select
• Select
The View Menu
• Select View → Toolbar to toggle the display of the toolbar at
• Select
The Zoom Menu
• Select any of the settings to select the template view’s
Edit → Redo or type J
recently completed action.
Edit → Cut or type J
from any single- or multiple-cell template selection or any
selected text in any editor window and store a copy of it on
the clipboard.
Edit → Copy or type J
multiple-cell template selection or any selected text in any editor window and store
a copy of it on the clipboard.
Edit → Paste or type J
on the clipboard into cells on the template or in an editor window as appropriate.
(See pages 17–20 for an explanation of how selection, cut, copy, and paste work in
Classroom Jeopardy! Editor.)
the top of the screen; deselecting this feature will hide it.
View → Status Bar to toggle the display of the Status Bar
at the bottom of the screen; deselecting this feature will hide it.
The Status Bar shows descriptions of menu items or Toolbar
items as the mouse pointer is passed over them and displays the
Spell Checker progress bar when a spell check is underway.
magnification percentage: 50%, 75%, 100%, 125%, 150%,
175%, or 200%. Classroom Jeopardy! Editor will then default
to the selected Zoom Percentage each time you run the
program. The Zoom Percentage won’t be changed until
you choose a different setting.
+
z to undo the most
+
y to restore the most
+
x to delete the data
+
c to copy the data from any single- or
+
v to paste the cut or copied data currently
The Round Menu
• Select Round → Single to display the Single Jeopardy!
round template. Select Round → Double to display the
Double Jeopardy! round template.
ools Menu
T
The
• Select Tools → Spell Checker to display a dialog box asking
if you want to open the
game. Click on the
game. Click on the No button to dismiss the dialog box.
• Select Tools → Reset Spell Checker to display a dialog box that allows you to reset
Change All and Ignore All choices you have made for the current Spell Checker
the
session. Click on the Yes button to reset these options. Click on the No button to
dismiss the dialog box.
Spell Checker and check the entire
Yes button to begin checking the entire
9
LinkGuide_F.qxd 1/25/05 9:29 AM Page 10
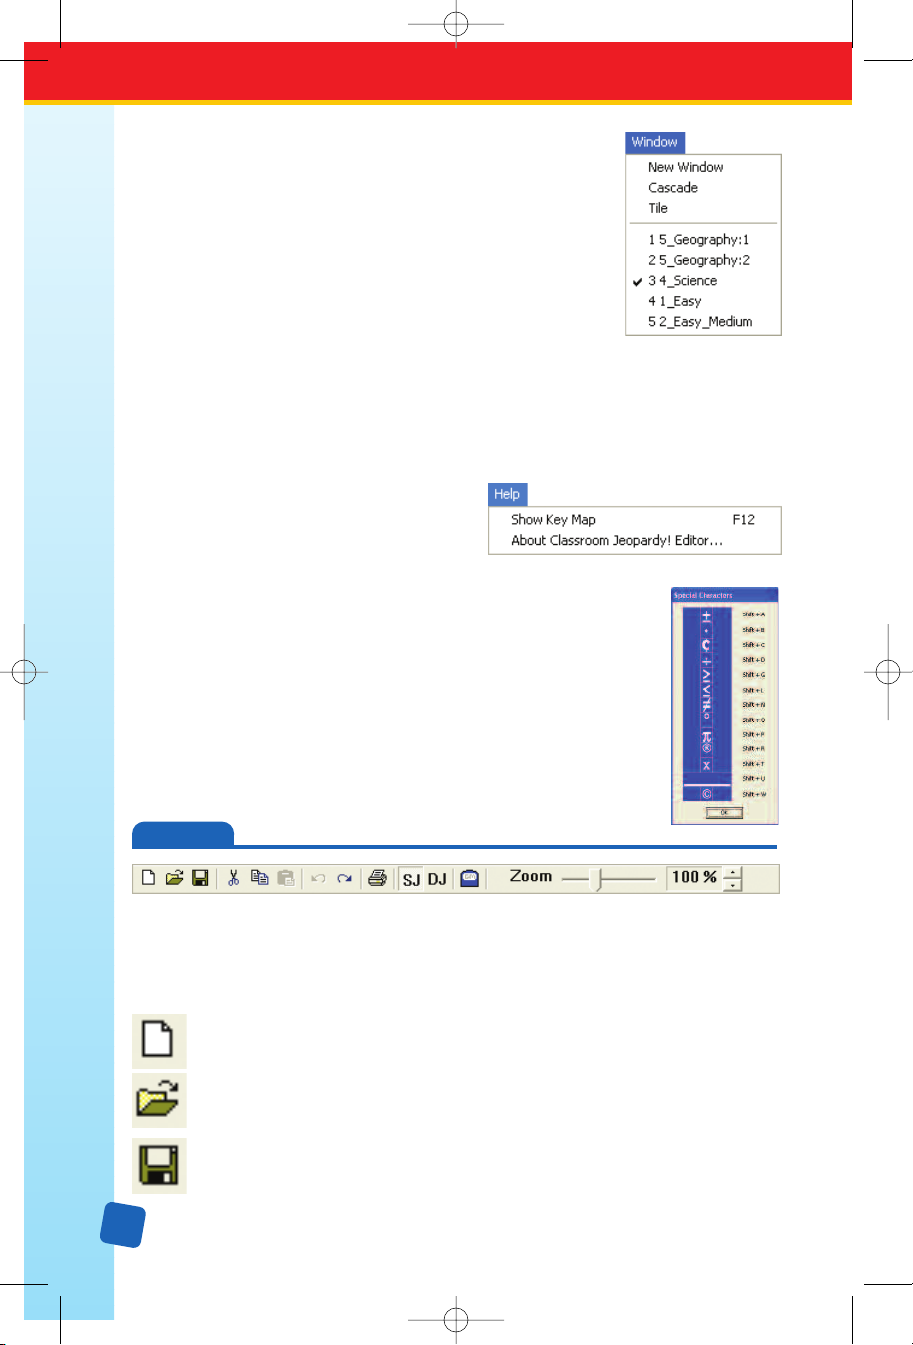
The Window Menu
•
Window → New Window t
Select
o open a duplicate of the
front most window and add a number to the end of the file
name displayed on the title bar designating which copy of the
window you’re viewing. One reason you might want to do this
Select, Cut, Copy, and Paste clue cells from one window
is to
to the other in order to rearrange the clues for the Jeopardy!
round of the game you are writing.
• Select
Window → Cascade to reduce the size of all open win-
dows and display them stacked down and to the right in the
order they are listed in the
Maximize/Zoom button on any window to return all the
Window menu. Click on the
windows to their full size.
• Select Window → Tile to resize all open windows and display them distributed as
evenly as possible on your screen without overlapping. Click on the Maximize/Zoom
button on any window to return all the windows to their full size.
The Help Menu
• Select Help → Show Special Characters,
or press ¤ to display a window with
the special characters you can make by
pressing
S + the appropriate keys. The window will stay on
screen until you click on the OK button. If the window is blocking
your view of a clue, you can move it to a different part of the
screen by clicking and dragging on the
Special Characters title bar
to move the window to the desired location.
Help → About Classroom Jeopardy! Editor . . .
•
will display a
splash screen with the version number and copyright information
for the Classroom Jeopardy! Editor software.
TOOLBAR
The toolbar is located under the menu bar. It allows you to access certain options that are also
available in the menu bar. To choose an option, simply click on the appropriate icon. (To see what
an icon stands for
, use your mouse to move the arrow marker over it; a short description will appear,
indicating the purpose of the icon, and a longer description will appear in the status bar at the bottom of the screen.)
ool
Select the
Select the
the
Select
New T
Open T
Open dialog box to select it, then click on the Open button to open the file.
Save
which you want to save the file, then click on the
The file will be saved with the suffix
to open a blank template for creating a new game.
ool
tool to display the Open dialog box. Click on a game file in
As Tool
to open the Save as JGM dialog box.
Save button to save the game.
“
.jgm”. A “.jgm” file is a Classroom
Type the name under
Jeopardy! Editor game file. It can only be opened and edited with Classroom
10
Jeopardy! Editor and is the file type used by Classroom Jeopardy! Editor cartridges.
 Loading...