

EDTM GLASS-CHEK+ GC2001 User Manual

GLASS-CHEK+
Glass and Air Space Thickness Meters
GENERAL DESCRIPTION:
The GLASS-CHEK+ measures the thickness of both lites of glass, as well as the
airspace of an insulating glass window assembly. All thickness measurements can be
obtained from a single side. Simply press
the GLASS-CHEK+ meter against a single
lite of glass, or a double pane window,
push the power button and hold it until the
measurements are digitally displayed. The
thickness of each lite of glass, the air space,
and the overall thickness of the IG unit will
simultaneously appear on the 2-line LCD
display. On a separate results screen the
meter will also indicate the presence and
location of any Low-E coatings on the rst
pane of glass.
The GLASS-CHEK+ contains a single pane
Low-E coating detector. The single lite LowE
detector will test the nearest lite of glass
in an IG unit. To fully analyze an IG unit
garding Low-E coatings, the window should
be tested on both sides to conrm the presence or absence of the Low-E coating. If
you only have access to one side of the
window, we recommend upgrading to our
Glass-Chek PRO (Model # GC3000).
The user may choose to have the thickness results displayed in one or two of
the following options: fractions of an inch,
thousandths of an inch, or millimeters. The
results screen will ash between the different thickness options selected by the user.
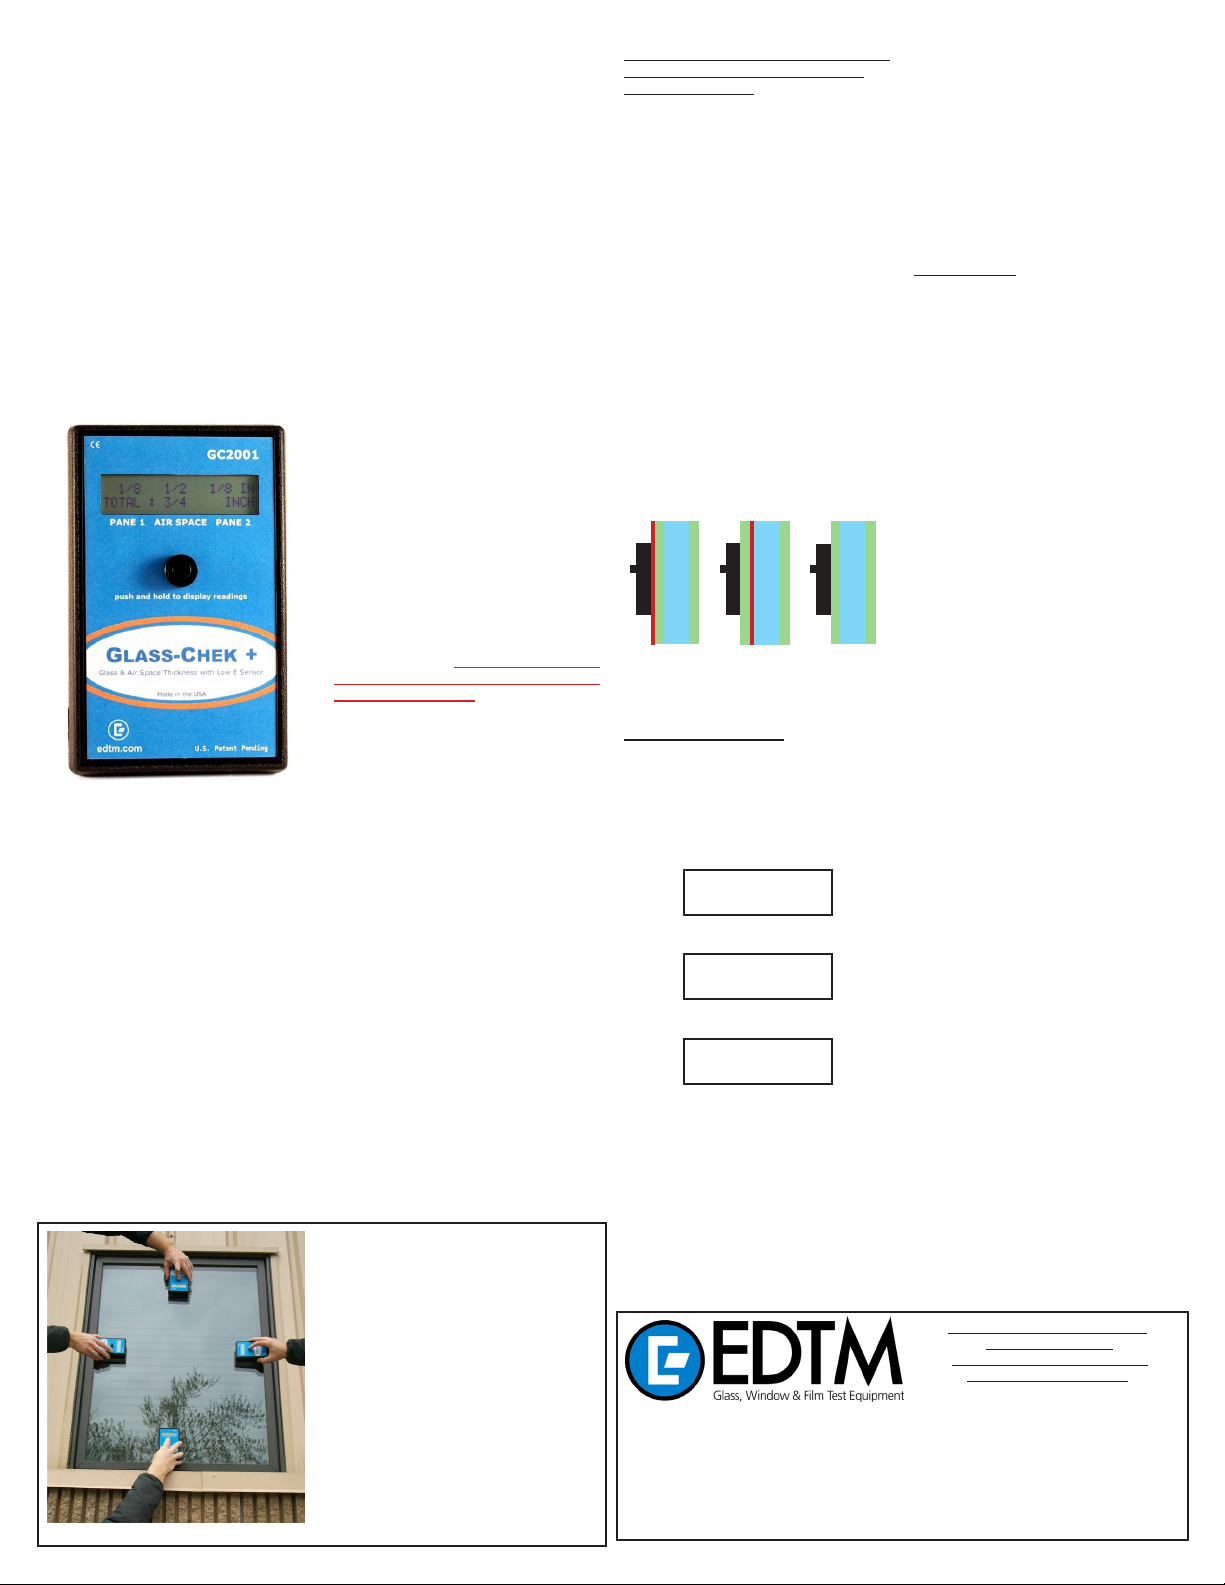
Figure 1: Recommended placement of meter.
MODEL# GC2001
re-
GLASS THICKNESS & AIR SPACE
MEASUREMENT
Simply press the GLASS-CHEK+ meter
against the single or dual lite window assembly and push the button. Continue to
hold the button and the measurement results will appear within two to ve seconds
depending on the application. Tinted glass
applications will typically take longer to measure,
while standard clear windows usually
result in the fastest measurement. Hold the
meter steady during the measurement. The
results will be displayed on the screen and
will continually ash back and forth between
thickness data and the Low-E location for
the rst pane of glass. For best accuracy
please see the “FOUR OPTIMAL TEST
LOCATIONS FOR MOST ACCURATE
RESULTS” section below. Windows often
deect inward or outward due to varying
barometric pressures. The window will hold
closest to its original designed specication
along the edges and at the corners where
the spacer bars hold the glass xed. The
thickness sensing area of the GLASSCHEK+ meter is located along the bottom
edge of the meter. Therefore the four testing locations shown in Figure 1 below will
yield the best results. We recommend tak-
ing multiple readings to verify your results.
Whenever possible, ensure that the
glass sample under test is clean and that
the exit location (aperture) of the laser is
clear of lint, dirt or other contaminants. The
laser aperture is on the back side of the
GLASS-CHEK+ enclosure.
WE STRONGLY RECOMMEND ONLY USING
COMPRESSED AIR TO CLEAN THE
LASER APERTURE. However, if there are
ngerprints or other smudge marks on
the laser aperture window that cannot be
removed in any other way, a lint-free cloth
can be used to wipe off the smudges.
The GC2001 instrument can test the thickness of installed windows from either indoors
or outdoors. In most all applications it does
not matter what is behind the window, as
long as there is nothing touching the far side
surface of the window. For testing windows
in the factory or warehouse, make sure you
are only testing one window at a time. If
testing a stack of IG’s, you must move the
unit you are testing away from the stack
so the additional panes of glass are not
added to the measurement viewing area. If
testing in a lab, be sure to move the glass
off the table surface before testing.
FOUR OPTIMAL TEST LOCATIONS
FOR MOST ACCURATE RESULTS
Hold the meter steady AND FLAT against
the glass during measurement.
The meter should be centered on one of
the four edges of the window with the bot-
tom edge of the meter placed parallel to
the edge of the window (please see the
image to the left). This will minimize the
effect of a concave window. As you move
away from the edge of a window, many
windows will bow inward (concave). Because the sensor runs parallel to the bottom edge of the meter, it is important to
place the bottom edge of the meter along
one of the four edge locations as shown.
GLASS CHEK+ LOW-E DETECTOR
OPERATION
The GLASS-CHEK+ will automatically test
each measured window for the presence
and location of Low-E coatings on the rst
pane of glass. The meter will differentiate
if the coating is on Surface 1 or Surface 2. It
will also indicate if the rst pane of glass is
clear glass, meaning there are no Low-E
coatings present on the glass. Remember
that Low-E coatings are typically placed on
surface 2 or 3 of a window. If you are not
sure which side of the window was intended
to have the Low-E coating, you may want
to test both sides to ensure you have fully
tested for the coating. If testing both sides
of the window is not possible, you should
consider our Glass-Chek PRO (Model# GC
3000) that will test both sides of a double
pane window from a single side for Low-E
coatings.
Low-E Coated
Surface
('
PANE 1
PANE 2
PANE 1
PANE 2
AIR SPACE
LOW-E ON
SURFACE 1
AIR SPACE
LOW-E ON
SURFACE 2
DISPLAY OPTIONS
The display of the GLASS-CHEK+ meter is
pre-programmed at the factory to offer six
different display formats for the results
screen. The user can choose to have the
thickness measurements displayed in:
Fractions of an inch … with 1/32” resolution
1/8 1 /2 1/8 IN
TOTAL IG: 3/4 IN
Decimal inches … with 0.001” resolution
0.125 0.500 0.125 IN
TOTAL IG: 0.750 IN
Millimeters … with 0.1 mm resolution
The user may choose to have any one of
these units of measure displayed, or a combination
3.0 12.5 3.0 MM
TOTAL IG: 18.5 MM
of two of them. If a single unit of
measure is selected, the results screen will
alternate back and forth between the thickness results and the Low-E test results.
If the user selects two units of measure,
the results screen will alternate between
the rst unit of measure for thickness, the
Low-E results screen and then the second
unit of measure selected.
To change the display format, take a measurement and continue to hold the button
while the results are displayed multiple
times. After approximately 40 seconds, the
screen will prompt you to enter set-up mode.
745 Capital Commons Drive
Toledo, Ohio 43615 USA
PHONE: (419) 861-1030
FAX: (419) 861-1031
www.EDTM.com
1
Email: sales@edtm.com
© Copyright 2012 Electronic Design to Market, Inc. All rights reserved.
PANE 1
AIR SPACE
CLEAR
GLASS
Follow the instructions on the screen to select the display option of choice. When the
display option of choice appears, simply release the button. Your meter is now equipped
to read in the display format you selected.
APPLICATIONS
WILL TEST …
The GC2001 instrument is calibrated and
designed for testing at glass applications.
It will test both single pane and double pane
windows. The glass can be clear glass or
coated with Low-E coatings, self clean coatings or other specialty coatings as long as
the glass/coating is transparent. The GC
2001 will also measure tinted glass as long
as it has a visible light transmission value
of approximately 35% or above.
WON’T TEST …
The GC2001 is not capable of measuring
triple pane windows or glass that is coated
with reective (mirror-like) coatings. The
GLASS-CHEK+ is also not capable of testing suspended lm applications such as
Heat Mirror. Laminated glass with Low-E
coatings positioned against the laminate
can also NOT be measured. For most of
PANE 2
these applications we recommend our
Glass-Chek PRO (Model# GC3000).
LAMINATED GLASS:
The GC2001 will test regular laminated
glass assemblies. It will measure the over-
all thickness of the laminated assembly, as
long as there is no Low-E coating placed
against the laminate inner-layer. The laminate assembly can be a single piece or combined
into an insulating unit. The GC2001
will NOT measure the PVB inner-layer or
the individual pieces of glass making up the
laminated glass, it will only measure the
overall thickness of the laminated glass.
TRIPLE PANE & SUSPENDED FILM
The GC2001 will not attempt to measure
triple pane windows. The user must purchase the Glass-Chek PRO (#GC3000) for
this application.
HIGH/LOW RESOLUTION … SPEED OF
MEASUREMENTS
The GC2001 has been equipped with a High
Resolution and Low Resolution Mode.
meter is shipped in Low Resolution
this allows for the quickest measurements
to be taken. The quicker measurements
come at the expense of a little accuracy.
If extreme accuracy is not important, then
the low resolution mode is perfect for getting the quickest test results possible.
If you are testing glass for an application that
requires higher accuracy, you can switch the
meter into High Resolution Mode. This will
improve the meters accuracy as stated in
the specication section of this manual. The
improved accuracy will cause the meter
take measurements more slowly. To change
the resolution/speed of the meter, take a
KEEP THE COMPETITIVE
EDGE WITH PRODUCTS
FROM EDTM, INC.
glass & air space laser meters,
tempered glass detectors, SHGC,
solar, visible, & uv meters LowE type detectors, 4 point sheet
resistance meters, tin side detectors,
self-clean coating detectors,
sales kits, temperature guns &
sales kit accessories.
The
Mode as
to

measurement and continue to hold the button
while the results are displayed multiple
times. After approximately 40 seconds, the
screen will prompt you to enter set-up mode.
Follow the instructions on the screen. After
going through all of the display options
discussed previously, the meter will then
show the High Resolution screen and the
Low Resolution screen. When the resolution option you desire appears on the display, simply release the button. Your meter
is now equipped to operate in the resolution mode you selected. PLEASE NOTE:
changing the resolution mode WILL NOT
affect the display option you were previously
operating in. For instance if you were in millimeter mode before changing the resolution,
the meter will remain in millimeter mode.
IMPROPER GLASS THICKNESS AND AIR
SPACE MEASUREMENT
If the window area under test is excessively
dirty or contaminated,
the GLASS-CHEK+
may give improper results or issue a warning
message that states:
MEASUREMENT ERROR:
CLEAN, MOVE & RETEST
The window area under test must be RELATIVELY CLEAN. Clean the test area or
move the GLASS-CHEK+ to a clean location on the window.
The GLASS-CHEK+ uses
a light/laser beam to measure
the thickness of the
glass and air space. The
unit may be affected by
extremely bright lights or facing the sun
directly. The screen will display the error
message “EXCESSIVE LIGHT” if this condition
occurs. Simply move to a different location or go to the other side of the window
or shade the laser aperture. If the window
is operable you may be able to open the
window and reach through the opening to
block the incident light from the back side
of the meter.
The GLASS-CHEK+
must be used with the
surface opposite the
Power button against the
window. Using the small
end surface of the unit
or tilting the unit away
from the surface will give improper results.
The GLASS-CHEK family of glass thickness
and air space meters
use a Class 2M laser to
take its measurements.
DO NOT push the power button and point
the instrument laser at a persons’ eyes.
Always check the other side of the window
being tested to ensure that no one will be
looking directly into the laser.
GLASS-CHEK+ IMPROPER LOW-E
OPERATING CONDITIONS
Placing your hand or a
metallic object against the
single lite of glass you are
testing may cause the
GLASS-CHEK+ to yield improper
Low-E results. Re-
move your hand or object.
PROBLEM
GLASS-CHEK+ displays
error message: “Clean,
Move & Retest” OR a
partial reading occurs.
TROUBLE-SHOOTING GUIDE
CORRECTIVE ACTION
1. Ensure that the GLASS-CHEK+ is placed at against the
2. Clean the glass surface or move to a cleaner area of
3. Remove dust particles from the laser aperture area on
If the window area under
test is excessively dirty
or contaminated, the
GLASS-CHEK+ may give
improper Low-E results.
The window area under
4. Check that the two window surfaces are relatively par-
5. Verify the operating temperature range.
6. If only a partial reading occurs, move to another loca-
test must be RELATIVELY CLEAN. Clean the test area or move
the GLASS-CHEK+ to a clean location on
the window.
The temperature where I
need to take readings is
outside the GLASS-CHEK+
for cold temperatures:
1. Attempt to keep the unit in a warmer environment until
operating range.
BATTERY & REPLACEMENT
The GC2001 meter is powered by a 9-volt
alkaline battery. When the battery is starting to get low, a warning message will appear during your results screen that recommends you replace the battery soon.
This gives the user plenty of warning that a
2. Carry the GLASS-CHEK+ in your pocket or in some
3. Operate the unit several times repeatedly in an attempt
battery replacement is needed in the near
future. The instrument will still function during this period. This is the initial warning
that a battery replacement is encouraged.
Once the battery voltage gets below a dan-
for hot temperatures:
1. Attempt to keep the unit in a cooler environment until
gerous level that could begin impacting the
performance of the instrument, an error
message will appear on the display that tells
you to replace the battery immediately. The
instrument will NOT be able to take measurements once it reaches this level.
“REPLACE BATTERY”
1. Replace the battery with a 9 volt alkaline battery ONLY
appears on the display.
appears on the display
“EXCESSIVE LIGHT”
1. Attempt to block the source of the bright light. If the light
2. Pointing the GLASS-CHEK+ directly into the sun may
SPECIFICATIONS
POWER SOURCE 9 volt alkaline battery (NEDA 1604A) only
PHYSICAL DIMENSIONS 3.5” x 5.5” x 1.70 inch (89 x 140 x 43mm)
WEIGHT 0.75 pounds
STORAGE TEMPERATURE -10 to +60 degrees Celsius
OPERATING TEMPERATURE 0 to +40 degrees Celsius
DISPLAY 2 lines X 20 characters
ACCURACY:
-High Resolution Mode -Low Resolution Mode (Default)
Pane 1 0.004 inch (0.1 mm) Pane 1 0.008 inch (0.2 mm)
Air Space 0.012 inch (0.3 mm) Air Space 0.012 inch (0.3 mm)
Pane 2 0.006 inch (0.15 mm) Pane 2 0.012 inch (0.3 mm)
MINIMUM GLASS THICKNESS ALLOWED 0.080 inch (2.0 mm)
MINIMUM AIR SPACE ALLOWED 0.187 inch (4.75 mm)
OVERALL THICKNESS RANGE MAXIMUM
Single Pane 2.3 inch (58 mm)
Double Pane with 3/32” (2.5 mm) glass 1.5 inch (38 mm)
Double Pane with 1/4” (6 mm) glass 1.6 inch (40 mm)
Double Pane with 1/2” (12 mm) glass 1.7 inch (44 mm)
GLASS THICKNESS ALLOWED FOR LOW-E READINGS up to 0.5 inch (12.7 mm)
MAXIMUM LASER OUTPUT < 1 mW (CLASS 2M laser product)
LASER WAVELENGTH 650 - 680 nm
This product complies with IEC 60825-1 and FDA regulation 21 CFR 1040.10.
The thickness tolerance is calibrated to NIST traceable standard No. 821/268634-03.
AMERICAN SOCIETY FOR TESTING AND MATERIALS (ASTM) — Tolerance specications for at glass
TRADITIONAL
DESIGNATION
single
1/8 in. (double)
5/32 in.
3/16 in.
1/4 in.
5/16 in.
3/8 in.
1/2 in.
DESIGNATION TOLERANCE
mm
inches
2.5
3
4
5
6
8
10
12
0.09
0.12
0.16
0.19
0.23
0.32
0.39
0.50
mm min.
11.91
2.16
2.92
3.78
4.57
5.56
7.42
9.02
mm max.
2.57
3.40
4.19
5.05
6.20
8.43
10.31
13.49
inches min.
0.085
0.115
0.149
0.180
0.219
0.292
0.355
0.469
inches max.
0.101
0.134
0.165
0.199
0.244
0.332
0.406
0.531
glass surface and that you are testing in the optimal test
location described on page 1.
the glass.
the back of the GLASS-CHEK+. Use compressed air to
remove any dirt or dust particles from the laser aperture
area.
allel to each other and to the GLASS-CHEK+ unit.
tion on the glass or take a reading from the other side.
you are ready to take the readings. The GLASS-CHEK+
will record accurate readings up to the point the electronics reach the outside temperature which is below
the operating range. Depending on the degree of coldness, this will allow for several readings to be taken.
other manner which will keep the unit near a warmer
temperature.
to warm up the die of the laser module itself. This will
work in temperatures which are not greatly beneath the
operating temperature range.
you are ready to take readings. The GLASS-CHEK will
record accurate readings up to the point the electronics reach the outside temperature which is above the
operating range. Depending on the extent of the heat,
several accurate readings should be obtained.
(NEDA 1604A).
source is on the other side of the window you are testing, move to another location or block the light source.
result in an “excessive light” condition. Try rotating the
GLASS-CHEK+ meter to change the angle that the sun
is hitting the laser aperture area on the back side of the
meter.
WARRANTY
The manufacturer warrants all models of the GC2001
to be free from defects in material and workmanship
under normal use and service as specied within the
operator’s manual. The manufacturer shall repair or
replace the unit within twelve (12) months from the
original date of shipment after the unit is returned to
the manufacturers factory, prepaid by the user, and
the unit is disclosed to the manufacturers satisfaction, to be thus defective. This warranty shall not apply to any unit that has been repaired or altered other
than by the manufacturer. The aforementioned provisions do not extend the original warranty period of
the unit which has been repaired or replaced by the
manufacturer. Batteries are not covered by warranty.
The manufacturer assumes no liability for the consequential damages of any kind through the use or misuse of the GC2001 product by the purchaser or others. No other obligations or liabilities are expressed
or implied. All damage or liability claims will be limited
to an amount equal to the sale price of the GC2001,
as established by the manufacturer.
2
GLASS-CHEK+
Mesureurs L’Epaisseur du Verre et de la Lame D’Aire
DESCRIPTION GÉNÉRALE:
Le GLASS-CHEK+ mesure l’épaisseur des
deux vitrages ainsi que la lame d’air d’une
fenêtre à double vitrage. Toutes les mesures
d’épaisseur peuvent être obtenues depuis un
seul côté. Il suft de poser le GLASS-CHEK+
contre une fenêtre à simple ou double vitrage, d’appuyer sur le bouton d’alimentation
et de le maintenir enfoncé jusqu’à ce que les
mesures apparaissent. L’épaisseur de chaque
vitrage, la lame d’air et l’épaisseur totale du
double vitrage apparaîtront simultanément sur
l’écran LCD à deux lignes. Sur un écran de
résultat distinct, le mesureur indiquera également la présence et l’emplacement de tout
revêtement à faible émissivité sur le premier
vitrage.
Le GLASS-CHEK+ contient un détecteur de
revêtement à faible émissivité sur un seul vitrage. Le détecteur de revêtement à faible
émissivité sur un seul vitrage testera le vitrage le plus proche d’une fenêtre à double
vitrage. An d’analyser pleinement les revêtements à faible émissivité d’une fenêtre
à double vitrage, la fenêtre doit être testée
des deux côtés an de conrmer la présence
ou l’absence du revêtement à faible émissivité.
Si vous avez accès à un seul côté de
la fenêtre, nous vous recommandons d’utiliser
notre modèle de gamme supérieure, le GlassChek PRO (n° GC3000).
L’utilisateur peut choisir d’afcher les résultats de l’épaisseur dans une ou deux des options suivantes: fractions de pouce, millième
de pouce ou millimètres. L’écran de résultat clignotera entre ces différentes options
d’épaisseur sélectionnées par l’utilisateur.
Figure 1: Position recommandée du mesureur.
MODÈLE GC2001
MESURE DE L’ÉPAISSEUR DU VERRE ET
DE LA LAME D’AIR
Il suft simplement d’appuyer le mesureur
GLASS-CHEK+ contre une fenêtre simple ou
double vitrage et de pousser sur le bouton.
Maintenez le bouton enfoncé et les résultats
des mesures apparaîtront en deux et cinq
minutes en fonction de l’application. Les
mesures avec du verre teinté sont généralement plus longues alors que les fenêtres
transparentes permettent de réaliser des
mesures très rapidement. Maintenez le mesureur sans le faire bouger pendant la mesure. Les résultats seront afchés à l’écran
et ils clignoteront en continu pour indiquer les
données d’épaisseur et l’emplacement du revêtement à faible émissivité sur le premier vitrage.
Pour une meilleure précision, veuillez
consulter la section QUATRE EMPLACEMENTS
DE TEST OPTIMAUX POUR DES
RÉSULTATS LES LUS PRÉCIS POSSIBLE
en bas de la page. Les fenêtres échissent
souvent vers l’intérieur ou l’extérieur en fonction des variations de pression barométrique.
La fenêtre sera le plus proche de sa spécication nominale le long des bords et des angles
où les entretoises maintiennent le vitrage.
zone de détection d’épaisseur du mesureur
GLASS-CHEK+ est située le long du
inférieur. De ce fait, les quatre zones de
illustrées ci-dessous offriront les meilleurs
résultats (Figure 1). Nous vous recomman-
dons de prendre plusieurs mesures pour
vérier vos résultats. Dans la mesure du
possible, assurez-vous que l’échantillon de
verre testé est propre et que la sortie (ou
ture) du laser est dépourvue de poussière,
saleté ou autres contaminations. L’ouverture
du laser se trouve à l’arrière du boîtier du
GLASS-CHEK+.
NOUS VOUS RECOMMANDONS VIVEMENT
D’UTILISER UNIQUEMENT DE L’AIR COMPRIMÉ
POUR NETTOYER L’OUVERTURE
DU LASER. Cependant, en cas de traces
de doigt ou de saleté qu’il est impossible
de retirer de la lentille, nettoyez à l’aide
d’un chiffon non pelucheux.
Le GC2001 peut tester l’épaisseur des fenêtres installées depuis l’intérieur ou l’extérieur. Dans la plupart des applications, ce
qui se trouve derrière la fenêtre importe peu,
tant que rien ne touche la surface éloignée de
la fenêtre. Pour tester les fenêtres en usine
ou en entrepôt, assurez-vous que vous testez bien une fenêtre à la fois. Si vous testez
une pile de fenêtres double vitrage, vous devez déplacez chaque unité que vous testez
an que les autres vitrages ne soient pas
ajoutés à la mesure. En cas de test en laboratoire, assurez-vous de déplacer le verre
à l’écart de la surface de la table avant de
réaliser le test.
QUATRE EMPLACEMENTS DE TEST OPTIMAUX POUR DES RÉSULTATS LES PLUS
PRÉCIS POSSIBLE
Pendant la mesure, maintenez le mesureur
sans bouger, À PLAT contre le vitrage.
Le mesureur devrait être centré par rapport à
l’un des quatre bords de la fenêtre, avec le
bord inférieur du mesureur parallèle au bord
de la fenêtre (voir l’image de gauche). Ceci
réduira les effets d’une fenêtre concave. Au
fur et à mesure que vous éloignez des bords
d’une fenêtre, de nombreuses fenêtres se
creusent (concave). Comme le capteur est
parallèle au bord inférieur du mesureur, il est
important de placer le bord inférieur du mesureur le long de l’un des quatre bords de la
fenêtre, comme cela est illustré.
EXPLOITATION DU GLASS CHEK+ POUR
LA DÉTECTION DE REVÊTEMENT À
FAIBLE ÉMISSIVITÉ
Le GLASS-CHEK+ testera automatiquement
chaque fenêtre mesurée an de vérier la
présence et la position des revêtements à
faible émissivité sur le premier vitrage. Le
mesureur spéciera si le revêtement est situé
sur la Surface 1 ou la Surface 2. Il indiquera
également si le premier vitrage est transparent, ce qui signie qu’il est dépourvu de revêtement à faible émissivité. N’oubliez pas
que les revêtements à faible émissivité sont
généralement placés sur les surfaces 2 ou 3
d’une fenêtre. Si vous n’êtes pas certain du
côté sur lequel le revêtement à faible émissivité devait être posé sur la fenêtre, testez
les deux côtés an de vous assurer d’avoir
convenablement recherché le revêtement.
S’il n’est pas possible de tester les deux
cô
tés de la fenêtre, vous devriez envisager
d’utiliser notre Glass-Chek PRO (modèle n°
GC3000) qui testera les deux côtés d’une fe-
nêtre à double vitrage depuis un seul côté an
de trouver le revêtement à faible émissivité.
Surface avec revêtement
à faible émissivité
'
(
La
VITRAGE 1
VITRAGE 2
bord
test
ver-
de
LAME D’AIR
REVÊTEMENT
À FAIBLE
ÉMISSIVITÉ SUR
LA SURFACE 1
OPTIONS D’AFFICHAGE
L’écran du mesureur GLASS-CHEK+ est pré
VITRAGE 1
LAME D’AIR
REVÊTEMENT
À FAIBLE
ÉMISSIVITÉ SUR
LA SURFACE 2
programmé en usine pour proposer six formats d’afchage différents à l’écran de résultat. L’utilisateur peut choisir d’afcher les
mesures d’épaisseur en:
Fractions de pouce … avec une résolution
de 1/32»
1/8 1 /2 1/8 PO
TOTAL DV: 3/4 PO
Pouces décimaux … avec une résolution de
0,001»
0,125 0,500 0,125 PO
TOTAL DV: 0,750 PO
Millimètres … avec une résolution de 0,1
mm
3,0 12,5 3,0 MM
TOTAL DV: 18,5 MM
L’utilisateur peut choisir de visualiser l’une de
ces unités de mesure ou une combinaison
de deux. Si une seule unité de mesure est
sélectionnée, l’écran de résultats alternera
entre les résultats d’épaisseur et les résultats du test de revêtement à faible émissivité. Si l’utilisateur choisit deux unités de mesure, l’écran de résultats alternera entre la
première unité de mesure de l’épaisseur, les
résultats du revêtement à faible émissivité
et la seconde unité de mesure sélectionnée.
745 Capital Commons Drive
Toledo, Ohio 43615 USA
TÉLÉPHONE: (419) 861-1030
TÉLÉCOPIE: (419) 861-1031
www.EDTM.com
Courriel: sales@edtm.com
3
An de modier le format d’afchage, prenez
une mesure et maintenez le bouton enfoncé
pendant que les résultats sont afchés plusieurs fois. Après environ 40 secondes, vous
serez invité à entrer dans le mode parametrage. Suivez les instructions à l’écran pour
sélectionner l’option d’afchage de votre choix.
Lorsque l’option d’afchage apparaît, relâchez
simplement le bouton. Votre mesureur est désormais
prêt à lire dans le format d’afchage
que vous avez sélectionné.
APPLICATIONS
PERMET DE TESTER …
Le GC2001 est étalonné et conçu pour tester
du verre plat. Il permet de tester les fenêtres
à simple et double vitrage. Le verre peut être
transparent ou avec des revêtements à faible
émissivité, des revêtements autonettoyants
ou d’autres revêtements spéciaux, tant que
le verre/revêtement est transparent. Le GC
2001 mesure également le verre teinté, tant
qu’il bénécie d’une valeur de transmission
de la lumière visible d’environ 35% ou plus.
NE PERMET PAS DE TESTER …
Le GC2001 ne permet pas de mesurer les
fenêtres à triple vitrage ou le verre revêtu de
revêtements rééchissants (miroir). Le GC
2001 ne permet pas de mesurer les applications de lm suspendu comme le Miroir
Chauffant. Il ne permet pas non plus de mesurer
VITRAGE 2
TRANSPARENT
VITRAGE 1
LAME D’AIR
VERRE
les revêtements à faible émissivité contre
VITRAGE 2
la feuille d’un verre feuilleté. Pour la plupart
de ces pplications, nous recommandons
notre Glass-Chek PRO (modèle n° GC
3000)
.
VERRE FEUILLETÉ:
Le GC2001 permet de tester le verre feuilleté.
Il mesurera l’épaisseur totale du verre feuilleté
tant qu’il n’y a pas de revêtement à faible
émissivité contre la couche intérieure feuilletée. L’ensemble feuilleté peut être d’une seule
pièce ou combiné dans une unité isolante.
Le GC2001 NE MESURE PAS la couche in
rieure de PVB ou chaque feuille composant
verre feuilleté, il indique simplement l’épaisseur générale de l’ensemble feuilleté.
TRIPLE VITRAGE ET FILM SUSPENDU
Le GC2001 ne permet pas de mesurer les
fenêtres à triple vitrage. L’utilisateur doit acheter
le Glass-Chek PRO (n° GC3000) pour
cette application.
HAUTE/BASSE RÉSOLUTION … VITESSE
DES MESURES
Le GC2001 dispose d’un mode haute réso
tion et d’un mode basse résolution. Le mesureur
est expédié en mode basse résolution,
car il permet de réaliser les mesures plus rapidement. Des mesures plus rapides se font
détriment de la précision. Si une précision
extrême n’est pas importante, alors le mode
basse résolution est parfait pour obtenir les
résultats d’essai les plus rapides possible.
Si vous testez le verre pour une application
nécessitant une précision élevée, vous pouvez commuter le mesureur en mode haute
résolution. Ceci améliorera la précision du
mesureur, conformément aux indications de
CONSERVEZ UNE LONGUEUR
D’AVANCE SUR LA
CONCURRENCE GRÂCE AUX
PRODUITS D’EDTM, INC.
Mesureurs laser de verre et lame d’air, détecteurs de verre trempé, détecteurs de revêtement à faible émissivité avec mesure de
fsg, lumière solaire, visible et UV, mesureur
de résistivité par méthode 4 pointes, détecteurs de face étain, détecteurs de revêtement
autonettoyant, kits de vente, pistolet de mesure de température et accessoires de kits
de vente.
Copyright 2012 Electronic Design to Market, Inc. Tous droits réservés.
té-
le
lu-
au
 Loading...