

EDT directION DR359TX User Manual
Table of Contents
Section 1 - Introduction and Set Up
Section 2 - pH Calibration & Measurement
Section 3 - Ion Calibration & Measurement
Section 4 - mV Calibration & Measurement
Section 5 - Use of the Recorder Output
Section 6 - Use with a Printer or Computer
Section 7 - Troubleshooting
Section 8 - Specification
Appendix 1 - pH Electrodes & Buffers
Appendix 1 - Concentration Units
Accessories - Accessories
DR359TX - Ion Meter - Users Manual
SECTION 1 - Introduction
Description
The DR359Tx Ion Concentration/pH meter can be used with pH, Ion selective and
redox electrodes. The meter will automatically calculate the relationship between
up to 5 ion standards allowing sample concentration to be read directly, avoiding
the plotting of calibration graphs.
Unpacking
Verify that you have received all equipment. If you have any questions about the
shipment, please call EDT Direct ION Ltd. or your agent.
When you receive the shipment, inspect the container for any signs of damage.
Note any evidence of rough handling in transit. Immediately report any damage to
the agent.
Note
The carrier will not honour any claims unless all shipping material is saved for
their examination. After examining and removing contents, save packing material
in the event that re-shipment be necessary.
The following items are packed in the box:
DR359Tx Ion Meter E8060 Electrode Stand AC Adapter 9V Battery
Operator’s Manual
Setting Up - AC Operation
Only use the approved power adaptor supplied
Check that the adaptor is the correct voltage for your power supply
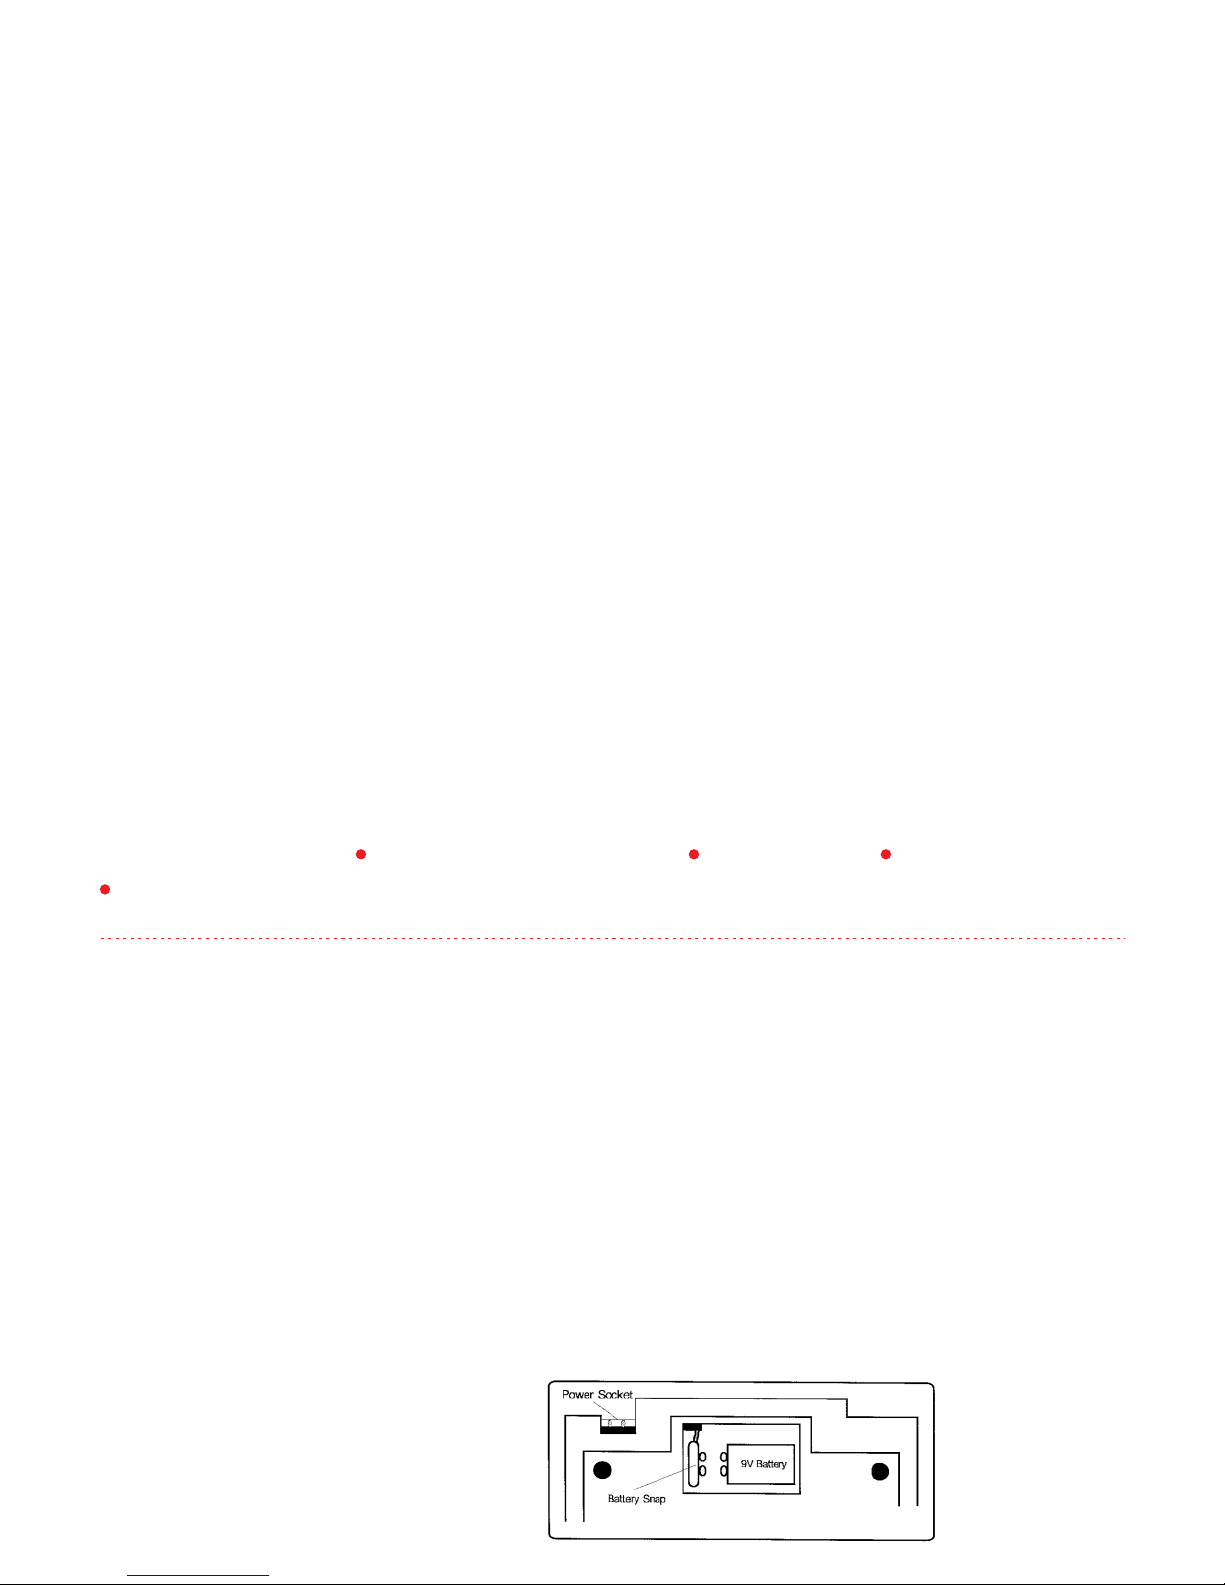
Plug the adaptor into the power socket at the back of the meter, then connect to
the AC supply.
Battery Installation
Approximately 24 hours of continuous use is afforded by the 9V battery.
The BAT flag appears on the display to indicate a low battery.
To install or replace the battery, slide off the back cover
Remove the old battery and insert a new one ensuring that the polarity is correct
Replace back cover.
Figure 1. Bottom view of instrument
showing power connections

Instrument Test Procedure
1. Ensure that the shorting plug is connected to the BNC pH in-put at the back of
the meter. Switch on using the switch on the back panel.
2. Press the Mode key to select pH mode and clear any calibration data by
pressing the Clear key for 5 seconds.
3. The displayed reading should read 7.00 ±0.02pH
4. Switch to mV mode by pressing the mode key. Display should read 0.0 ±0.2mV
5. Switch to °C key by pressing the mode key. Ensure that the display has a value
in the range 0.0 to 19.0°C and is adjustable.
i.e. responds to the use of the keys. Adjust to 20.0°C
6. Switch to concentration mode (CONC) and ensure that the
display reads 10.0 ± 0.2
7. The meter is ready for calibration
A Note on Electrodes
pH, Ion Selective and Redox electrodes may all be used with the DR359Tx. These
may be combination or half-cell types. Combination or sensing half-cells should
have a BNC terminal and be connected to the socket marked pH/ION input at the
back of the meter. Reference half-cells should have a 4mm bunched terminal
and be connected to the socket marked REF. Always refer to electrode
instructions before use. See also, Appendix 1.
Figure 2. Rear view of DR359Tx

Calibration Keys - Alter displayed reading
Enters displayed value as calibration data
Displays electrode slope.
Transmits data to printer. Acts as Hold facility.
Selects measurement type—pH; mV; °C, Conc
Clears Calibration data when pressed for 5 s
Alters displayed decade.
Calibration key for Ion Concentration.
Figure 3. Front Panel
Section 2 - pH Calibration and Measurement
For accurate results, stir all buffers and samples. Always rinse electrodes and blot dry
before transferring from one solution to another to prevent contamination. Ensure that any
electrode filling holes are left uncovered during use.
Automatic Calibration & Temperature Compensation
1. Connect the pH electrode(s) and temperature probe and switch on using the power
ON/OFF switch on the back panel.
2. In order to calibrate in pH mode, any existing ion calibration data MUST be cleared.
Presence of calibration data is indicated by the CAL flag in the left hand corner of the
display. Select Conc mode and then press Clear for 5 seconds. Select pH mode.
3. Place the pH electrode(s) and the temperature probe in the first buffer and wait for a
stable reading. Press the Enter key. The fist calibration point will now be entered
automatically at the correct value for the temperature of measurement. The Cal flag will be
displayed.
4. Rinse, blot and place the pH electrode(s) and temperature probe in the second buffer.
Wait for a stable reading. Press the Enter key. The second calibration point will now be
entered automatically at the correct value for the temperature of measurement.
5. Rinse, blot and place pH electrode(s) and temperature probe in the sample. Wait for a
stable reading and record pH value.
Note: The performance/condition of the electrode(s) may be monitored by pressing the
Slope key. This displays the slope of the electrode as a % of the Nernstian or Theoretical
Slope. The value should lie between 80 and 110%.
Clear
Enter
X10
Slope
Mode
Send
 Loading...