

Edsal UR185-DW User Manual
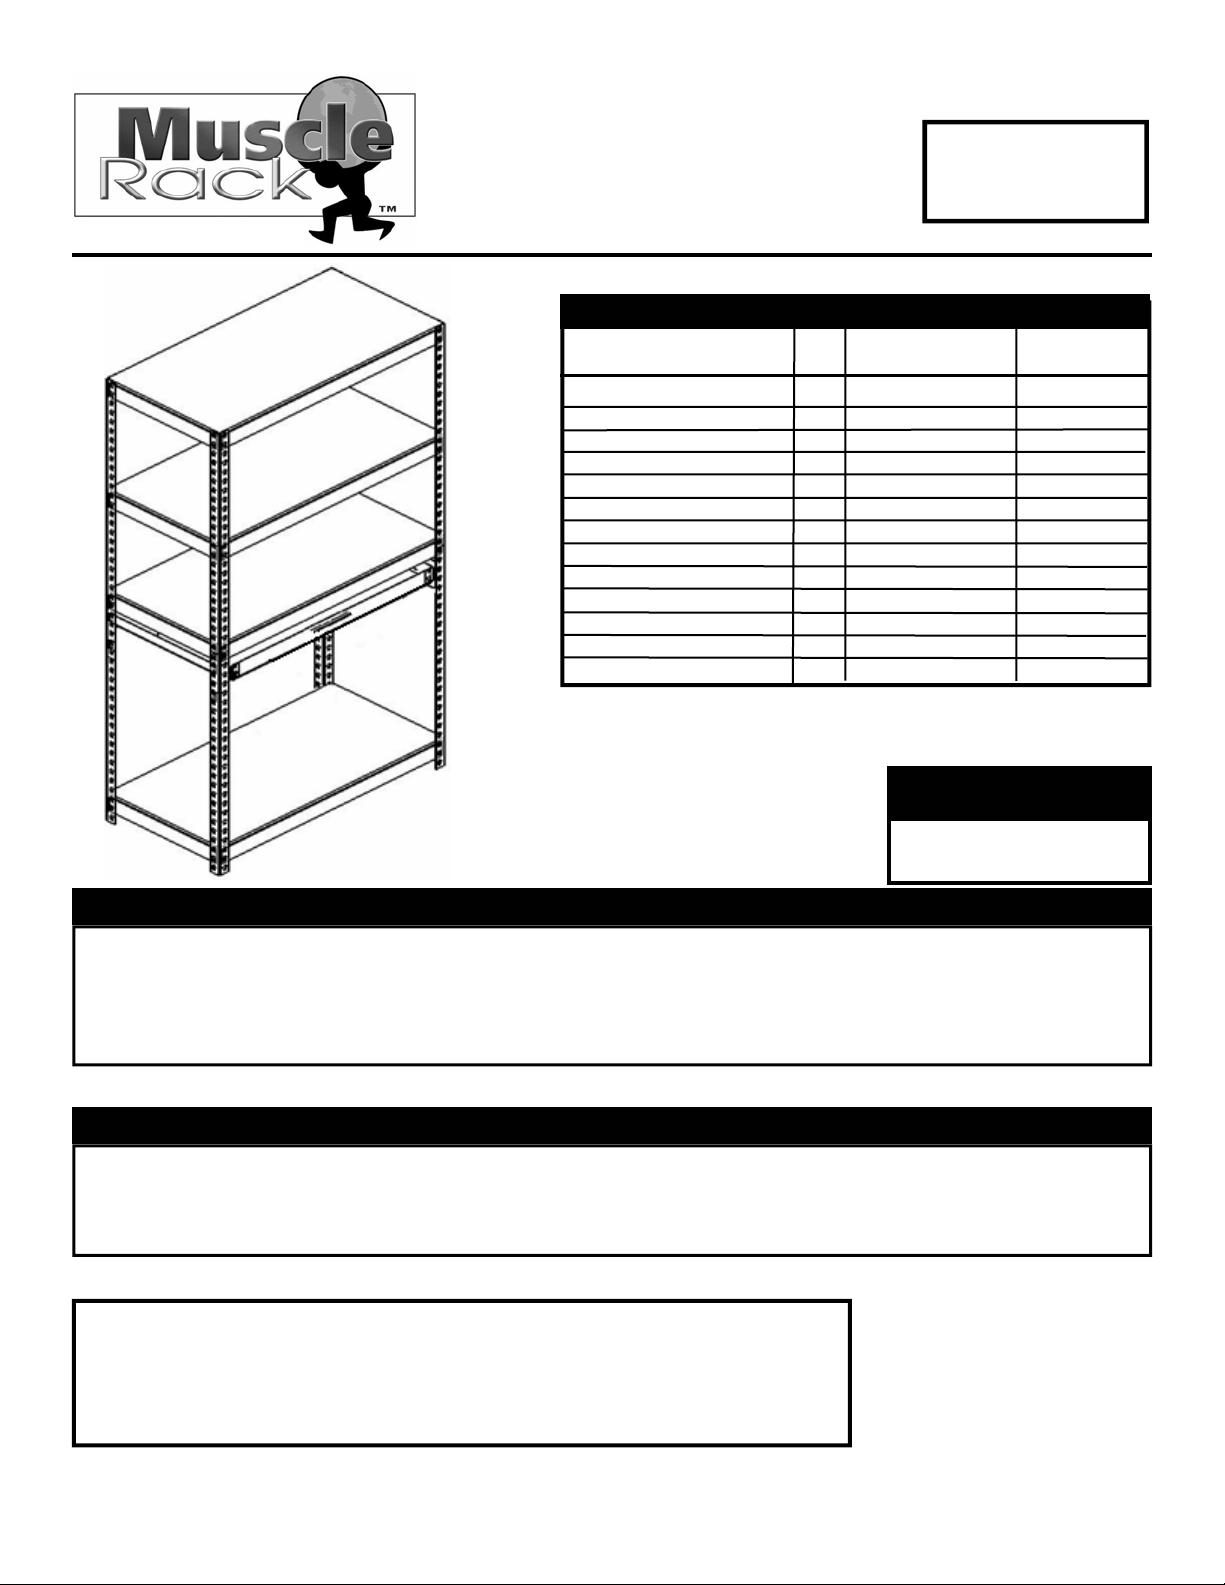
Boltless Storage Unit
MODEL NUMBER
4 Shelf 1 Drawer
UR185-DW
DW 4 Shelf 1 Drawer
UR185
UR185
UR185
Beams
Braces
Post
Left Drawer Mount
Right Drawer Mount
Left Drawer Slide
Right Drawer Slide
Front Drawer Brace
Back Drawer Brace
Laminate Shelves
Laminate Drawer Shelf
Handle
Wall Anchor
-
DW 4 Shelf 1 Drawer
-
DW 4 Shelf 1 Drawer
-
Description
Qty.
8
8
8
1
1
1
1
1
1
4
1
1
2
Part Number
RUBE3502
RUBE1702
RUPT3602S
SVRWDM1705L
SVRWDM1705R
SVRWDS1403L
SVRWDS1403L
SVRWDB3102F
SVRWDB3102B
RPB21836LM
RPB31011LM
72”h x 18”d x 36”w
-
72”h x 18”d x 36”w
-
72”h x 18”d x 36”w
-
Part Size
18” x 36”
11” x 31”
HDL1000
N/A
Required Tools
Required Tools
Required Tools
- Rubber Mallet
36”
18”
36”
N/A
N/A
N/A
N/A
31”
31”
N/A
N/A
Safety Instructions
Safety Instructions
Safety Instructions
These units should be placed on a level surface. Failure to do so can result in poor product performance or create a
possible safety hazard. This unit should be securely anchored to a wall or floor with suitable fasteners, which are not
included. Do not use this unit for anything other than the manufactures intended purpose. DO NOT STAND ON ANY
PART OF THE UNIT, OR USE IT AS A LADDER. Evenly distribute the weight on each level and always keep the
heavier loads on the bottom. Use care when working with metal parts.
General Instructions
General Instructions
General Instructions
Assembly is done with the rivets of the beams and braces fitting into the slots of the post. A rubber mallet may be used
on the beams and braces to seat the rivets properly. A hammer can also be used, providing one uses a cloth or a block
of wood between the hammer head and the parts to prevent damage. Tap gently and be sure the rivets are straight and
fully engaged.
Should you have any comments, damage, missing parts, or problems with assembly of this unit please feel
free to contact our Edsal manufacturing facility at, (773) 475-3000 and request customer service. We can
also be reached on the internet at the following email address : customerservice@edsal.com.
To obtain replacement parts, please provide the following information :
- Model # - Part # & Description - Location Purchased - Date Purchased
Consumer Products Division
Edsal Manufacturing Company
4400 South Packers Avenue
Chicago, IL 60609 www.edsal.com
MADE IN CHINA

Assembly Instructions for UR185DW
Assembly Instructions for UR185DW
Assembly Instructions for UR185DW
Step
1
Figure B
Post
Brace
Assemble two (2) post with one (1) brace. Skipping one
slot from the bottom of the post (see figures A & B),
place the rivets into post with the slot pointing down,
and with the shelf ledge of the brace facing up, and tap
lightly to seat rivets (see figure A). Repeat with two (2)
post and one (1) brace. Assemble the two (2) post
units with two (2) beams (see figure C). Skip one hole
from the bottom of post, tap lightly to seat rivets. After
level is complete, add a laminate shelf.
Figure A
Note:
Post are
directional.
The slot
must point
down.
Figure C
Tap Lightly
Shelf Ledge
Post Slot Points Down
Skip One (1) Slot
Beam
Step
Right Side
Drawer Mount
2
Note:
Drawer
mount
installs one
slot down
from the
top of the
post.
Black Flat Drawer Brace (rear)
(Bend Down)
Silver Flat Drawer Brace (front)
(Bend Down)
Take two (2) drawer mounts and insert the rivets skipping
one (1) slot hole down from the top of the post on both
sides of the unit. Take two (2) drawer slides, one (1) silver,
and one (1) black 31” Flat drawer braces. With the bend facing down, insert the rivets of the black brace into the slot and
half slot holes located on the back end of the drawer slides.
Insert the laminated shelf, and install the silver front drawer
brace to the front of the drawer slides. Install the drawer assembly to the drawer mounts slides of the unit (see figure D).
Laminate
Shelf
Figure D
Right Side
Drawer Slide
Laminate
Shelf
IMPORTANT NOTE : Make sure all rivets are fully seated into the post slots.
IMPORTANT NOTE : Make sure all rivets are fully seated into the post slots.
IMPORTANT NOTE : Make sure all rivets are fully seated into the post slots.
Step
3
Figure F
Tap Lightly
Bottom
Post
Assemble the top post to the bottom post by using two
(2) beams and two (2) braces (see figure E). One (1)
rivet from each beam and brace must be placed in the
top slot hole of the bottom post, and the bottom slot
hole of the top post (see figure F). After all beams and
braces are in place, tap lightly to properly seat the rivets.
Note:
Post are
directional.
The slot
must point
down.
Top
Post
Slot
Down
Figure E
Step
4
Add a laminate shelf to the previously built level, and the
drawer. Continue by adding the third and fourth level to
the unit using two (2) beams and two (2) braces per
level. Tap lightly to properly seat rivets. Add the final
laminate shelves, and the handles to the drawers to finalize the assembly of the unit. Optional anchor hardware
is supplied with this unit so the unit can be fastened to a
wall if necessary.
 Loading...