

Edsal PSB6500 User Manual
Installation Addendum For Bin Unit
Installation Addendum For Bin Unit
Installation Addendum For Bin Unit
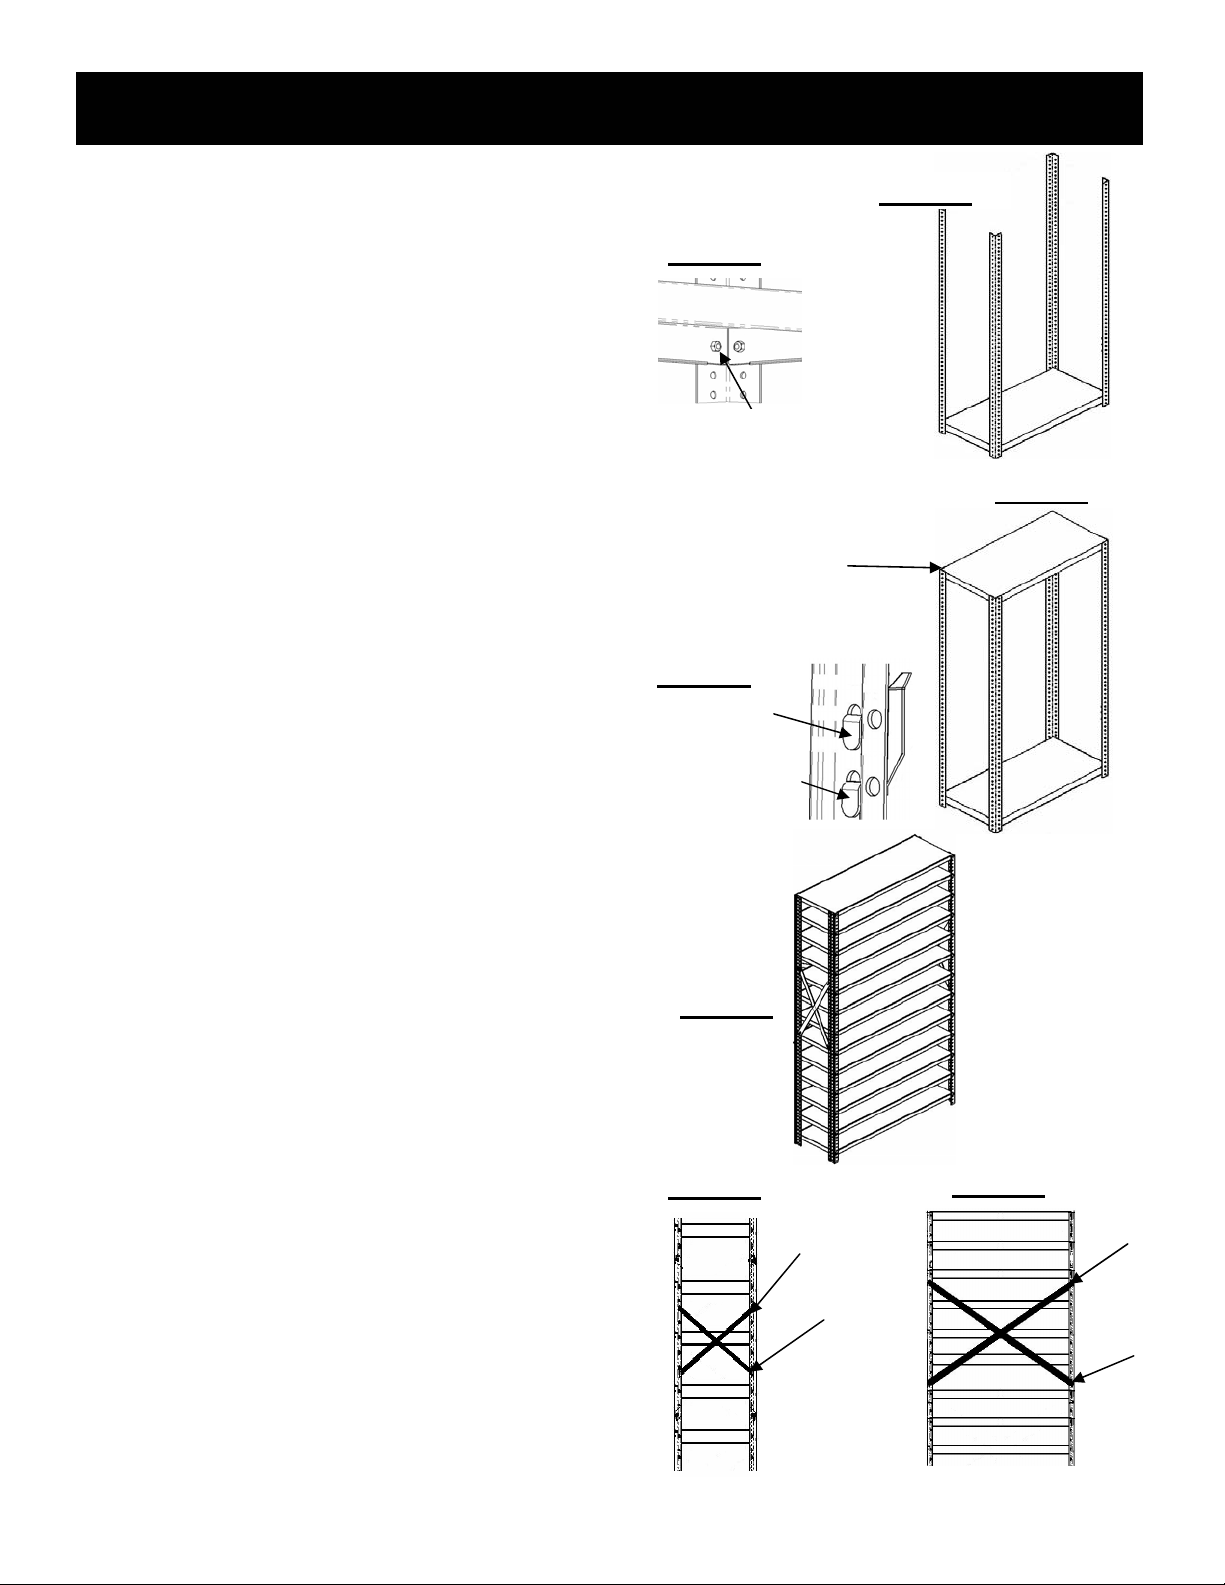
STEP 1: install one shelf with the four (4) post to create the
bottom of the unit (See Figure 1). Start by aligning the holes
from the shelf to the third hole from the bottom of the post.
Insert the screws through the post and shelf and fasten with
the nuts provided (See Figure 2).
STEP 2: Install one shelf to the 4 post to create the top of the
unit. Start by aligning the holes from the shelf to the top holes
of the four (4) post. Insert the screws through the post and
shelf and fasten with the nuts provided (See Figure 3).
STEP 3: Install 2nd shelf from top shelf. Start by counting
down eight (8) holes from the top hole of the post. Insert the
Kwik-Klip’s top tab into the eigth(8) hole from the top of the
post, and the Kwik-Klip’s bottom tab into the ninth (9) hole
from the top of the post (See Figure 4). Repeat this step on
the three (3) remaining post, then continue by installing the
second (2) shelf onto the clips.
STEP 4: Finish installing the remaining ten (10) shelves by
placing the top tab of a Kwik-Klip every five (5) holes counting
down five holes from the bottom tab of the Kwik-Klip that was
previously installed. Complete this process on all four (4)
post. Then continue by installing the shelves onto the clips
(See Figure 5).
STEP 5: Install the side braces in a criss-cross manner on
both sides of the assembled unit. Start by counting down
twenty two holes (22) from the top hole of the back post.
Align one (1) hole of the side brace with the hole of the post.
Insert a screw through the side brace and post, and fasten
with the nuts provided. Take the opposite end of the side
brace and count down forty nine (49) holes from the top hole
of the front post (See Figure 6). Align the hole of the brace
with the hole of the post. Insert a screw through the side
brace and the post, and fasten with the nuts provided. Continue by doing the same procedure for the opposite side of the
unit for the installation of the remaining side braces.
STEP 6: Install back braces in a criss-cross manner to the
back of the unit. Start by counting down fifteen holes (15)
from the top hole of the left back post. Align one (1) hole of
the back brace with the hole of the post. Insert a screw
through the back brace and the post, and fasten with the nut
provided. Take the opposite side of the back brace and count
down thirty nine (39) holes from the top hole of the right back
post (See Figure 7). Align the hole of the back brace with the
hole of the post. Insert a screw through the back brace and
the post, and fasten with the nut provided. Continue by fastening the opposite end of the back braces to the opposite
end of the unit using the same procedure.
Figure 2
Third Hole
Form Bottom
Top Hole
Figure 4
Klip Top Tab
Klip Bottom Tab
Figure 5
Figure 6
22nd Hole
Figure 1
Figure 3
Figure 7
15th Hole
49th Hole
39th Hole
 Loading...