

Edsal HDL301260 User Manual
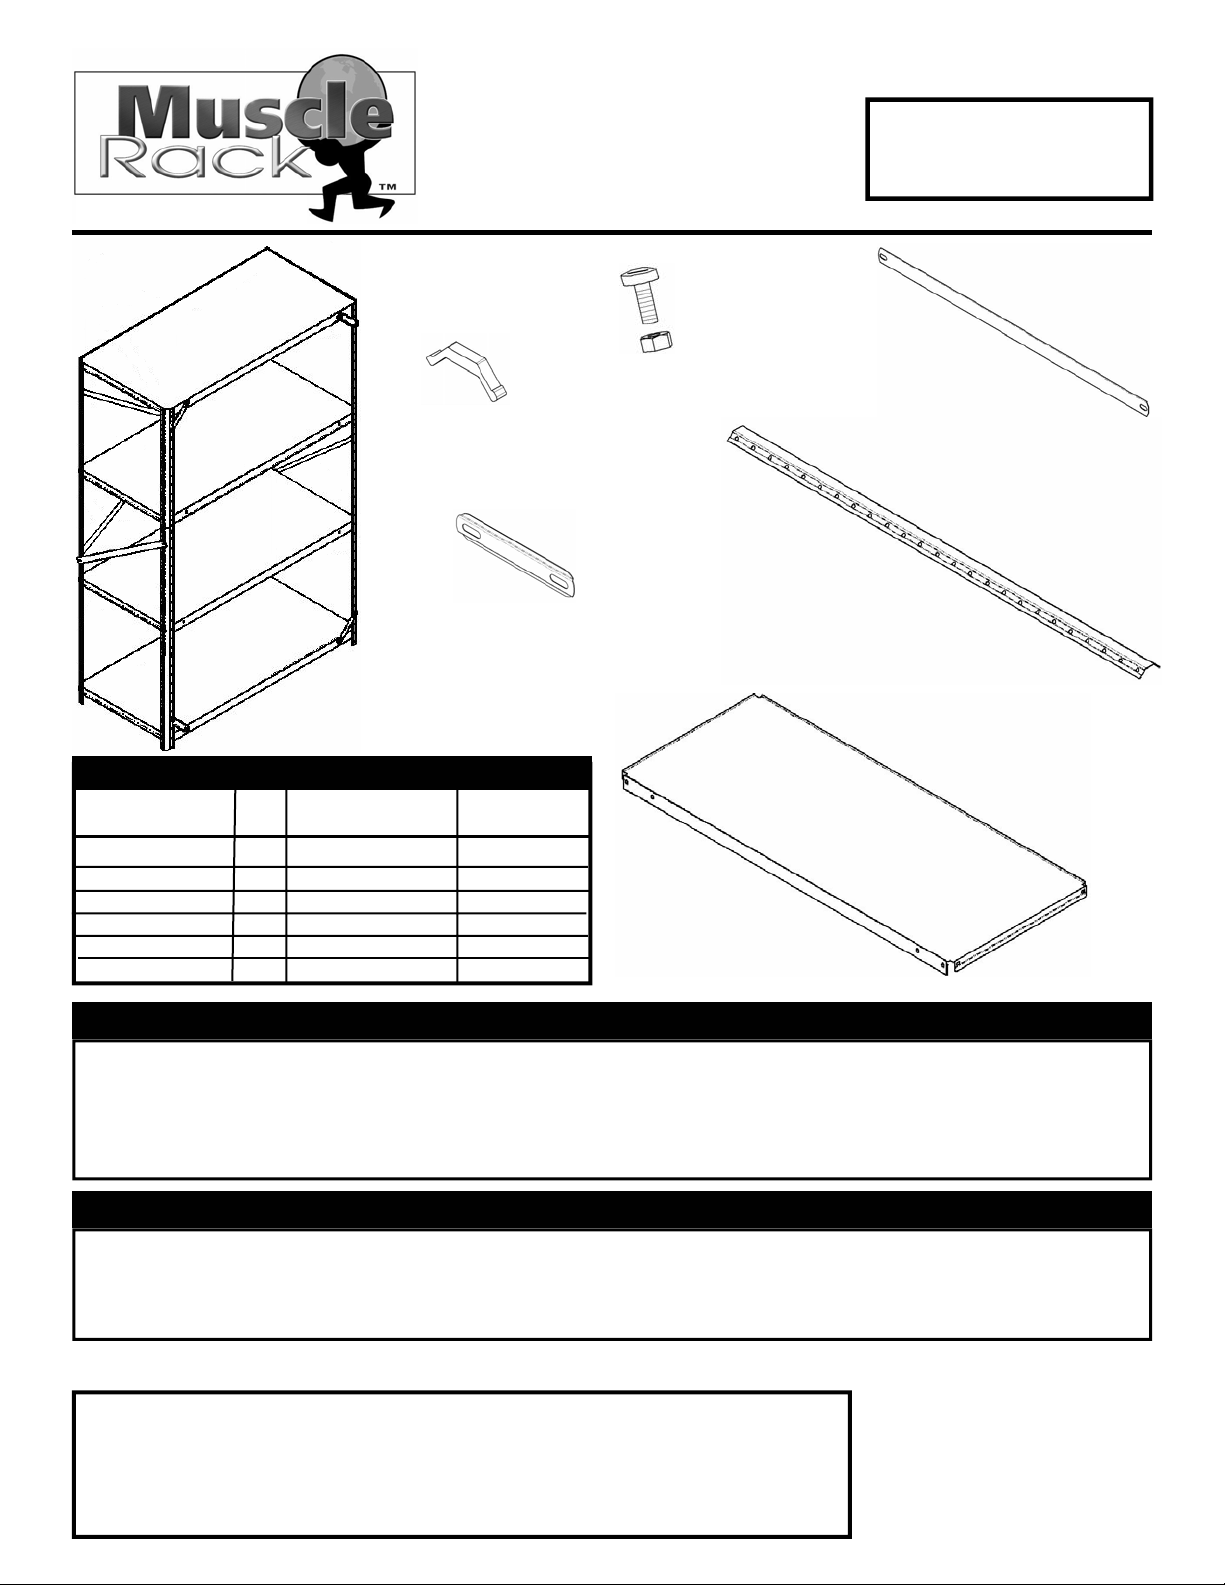
Light Duty Steel Shelving
Light Duty
Steel Shelving
F - Foot Protector
D - Gusset
MODEL NUMBER
HDL301260
C - Brace
E - 10-24x1/2”
B - Post
HDL301260 4 Shelf
HDL301260 4 Shelf
HDL301260 4 Shelf
Description
A - Shelf
B - Post
C - Brace
D - Gussets
E - Hardware
F - Ft. Protector
Safety Instructions
Safety Instructions
Safety Instructions
These units should be placed on a level surface. Failure to do so can result in poor product performance or create a
possible safety hazard. This unit should be securely anchored to a wall or floor with suitable fasteners, which are not
included. Do not use this unit for anything other than the manufactures intended purpose. DO NOT STAND ON ANY
PART OF THE UNIT, OR USE IT AS A LADDER. Evenly distribute the weight on each level and always keep the
heavier loads on the bottom. Use care when working with metal parts.
General Instructions
General Instructions
General Instructions
Assembly is done with the nuts and bolts fitting into the holes of the post and shelf. A regular blade screw driver, 3/8”
socket wrench, or a 3/8” nut driver will be the tools necessary to complete the assembly. During shipping and handling,
some of the parts may bend. Use care when forming them back to the original shape by hand. To assure squareness
of the unit, do not fully tighten the nuts and bolts until final assembly is complete.
Qty.
4
8
6
4
81
4
-
60”h x 12”d x 30”w
-
60”h x 12”d x 30”w
-
60”h x 12”d x 30”w
Part Number
HHSH3314
HHPT3102
HHBR2001
HHGU0501
NB58
FP100
Part Size
30” x 12”
31”
20 7/32”
5”
N/A
N/A
A - Shelf
Should you have any comments, damage, missing parts, or problems with assembly of this unit please feel
free to contact our Muscle Rack manufacturing facility at, (773) 475-3000 and request customer service.
We can also be reached on the internet at the following email address : customerservice@edsal.com.
To obtain replacement parts, please provide the following information :
- Model # - Part # & Description - Location Purchased - Date Purchased
Consumer Products Division
Edsal Manufacturing Company
4400 South Packers Avenue
Chicago, IL 60609 www.edsal.com
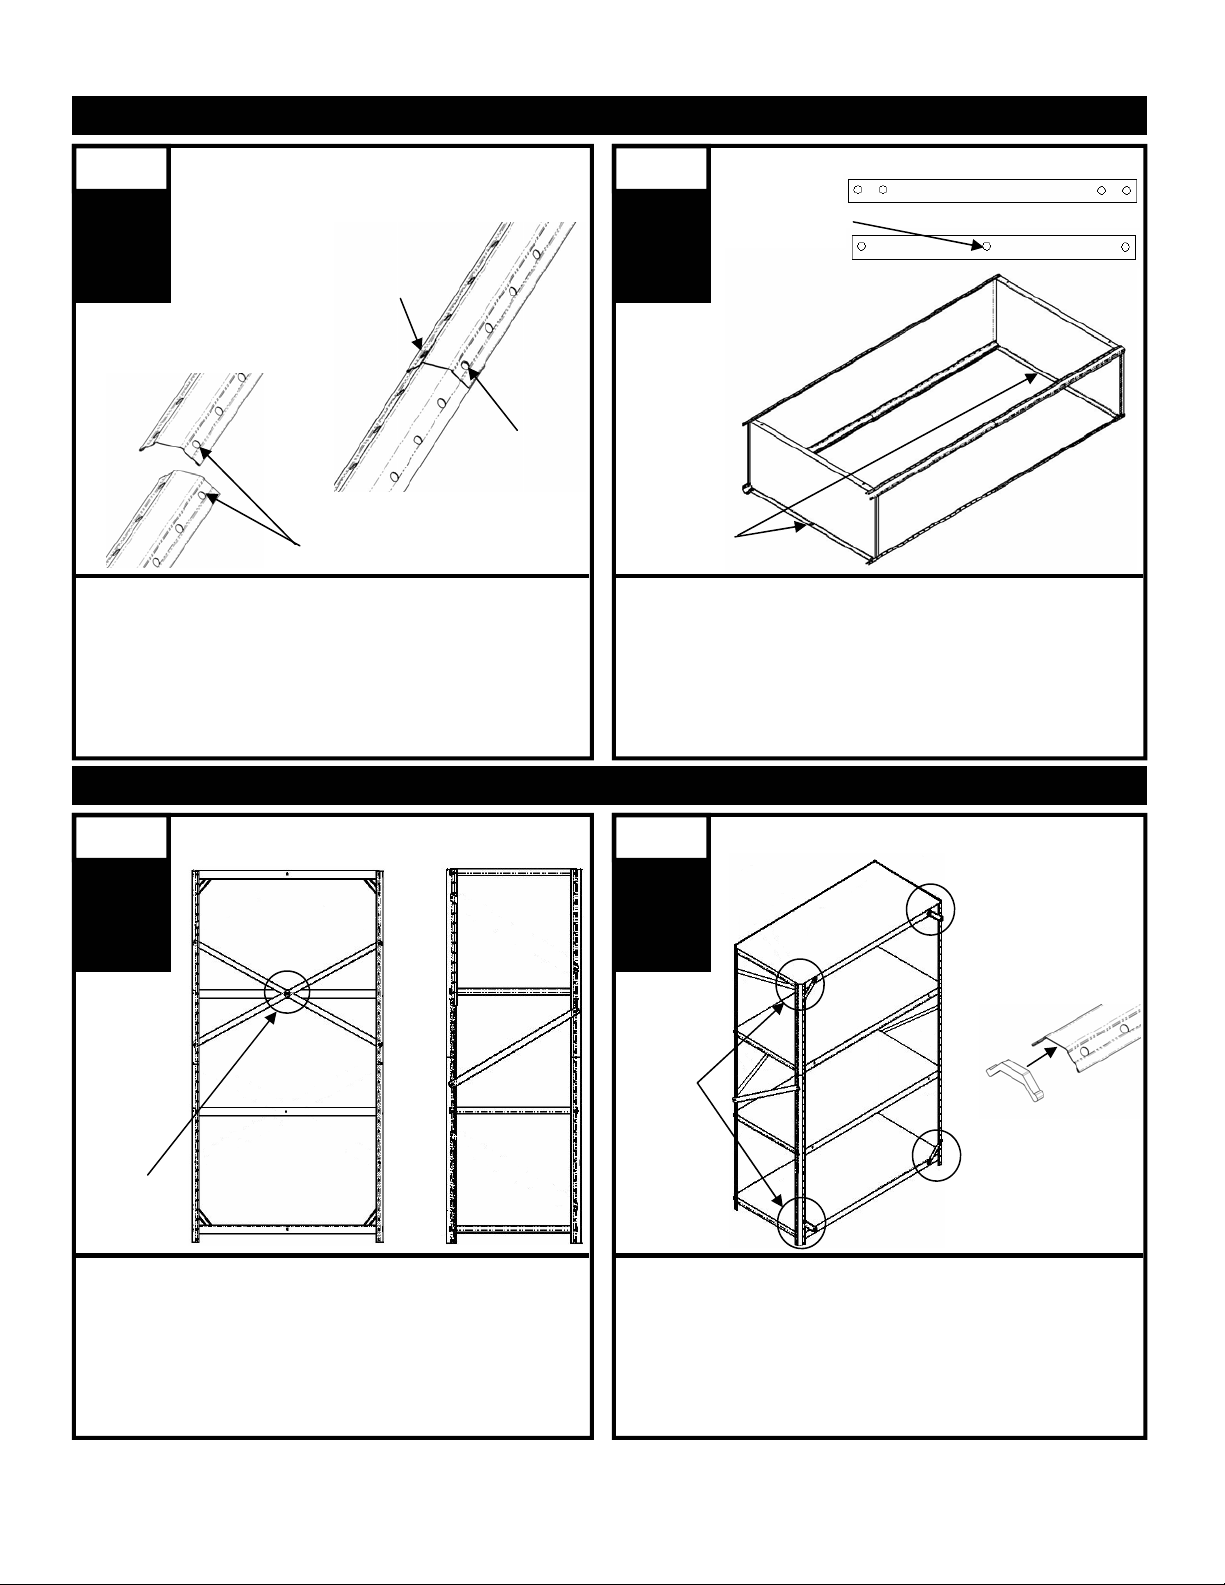
Assembly Instructions for HDL301260
Assembly Instructions for HDL301260
Assembly Instructions for HDL301260
Step
1
Figure A
Assemble four (4) post sets by using 2 sections of the
split post (see figure A). Overlap the post so that one
hole from the bottom post and one hole from the top
post are aligned. Use two (2) nuts and bolts to fasten
the post together (see figure B). Tighten appropriately.
Bolt here
Overlap post by one hole
Figure B
Bolt here
Step
Figure C
Center hole
Front of shelf
Back of shelf
2
Figure D
Center hole
facing down
Bolt the top and bottom shelf to the post assemblies. Make certain the back of the shelves which have the center hole, are
facing down (see figure C). Align the bottom shelf with the third
hole of the post, insert nuts and bolts and FINGER TIGHTEN
ONLY. Align the top shelf with the first hole of the post insert
the nuts and bolts and FINGER TIGHTEN ONLY (see Figure D).
Install the last two (2) shelves and FINGER TIGHTEN ONLY.
Step
Figure E
Figure F
3
Bolt to
center
hole
Take four (4) braces for the back and bolt one end of
each brace to the center hole of the 3rd shelf, FINGER
TIGHTEN ONLY. Bolt the opposite end of each braces
to the sides of the posts, FINGER TIGHTEN ONLY
(see figure E). Install the side braces one (1) on each
side of the unit between the 2nd and the third shelves,
FINGER TIGHTEN ONLY (see figure F).
Step
Figure G
4
Figure H
Gussets
Place the unit on a level surface so that the unit is square.
Hold the unit securely and tighten all nuts and bolts appropriately. After all nuts and bolts are secure, install the four
(4) gussets to the four corners of the front of the unit (see
figure G). Tighten nuts and bolts appropriately. Finally
install the four (4) plastic floor guards to the bottom of the
post to help prevent scratching of the floor (see figure H).
 Loading...