

Edsal BW2472 User Manual
Instructions : BW2472
Instructions : BW2472
Instructions : BW2472
-
Bulk Storage Rack
-
Bulk Storage Rack
-
Bulk Storage Rack
2 - Welded End Frames
Parts
Safety Instructions
Safety Instructions
Safety Instructions
This rack unit must be placed on a level surface. Failure to do so can result in unit failure, poor product performance, or
a possible “tipping” safety hazard. Make sure all the beams are securely anchored to the post by using the plastic
push clips. Failure to do so can cause the beams to shift under load and “unhook” from the post slots. DO NOT
STAND ON THE UNIT OR USE THE UNIT AS A LADDER ! DO NOT OVERLOAD ! Evenly distribute the weight on
each shelf, and keep the heaviest loads on the bottom shelf. Use care when working with metal parts.
General Instructions
General Instructions
General Instructions
Muscle Rack Bulk Storage Rack is engineered to offer maximum flexibility as well as ease and quickness of assembly.
The rack units can stand individually, or for greater stability, be joined together using a common post. Individual beams
can be adjusted without disturbing the beams in adjoining units. These instructions should be followed exactly. All parts
supplied must be used as shown. Any alteration or deviation from this instruction sheet can result in unit failure. After
the unit is assembled, it must be placed on a level surface.
Assembly Instructions
Assembly Instructions
Assembly Instructions
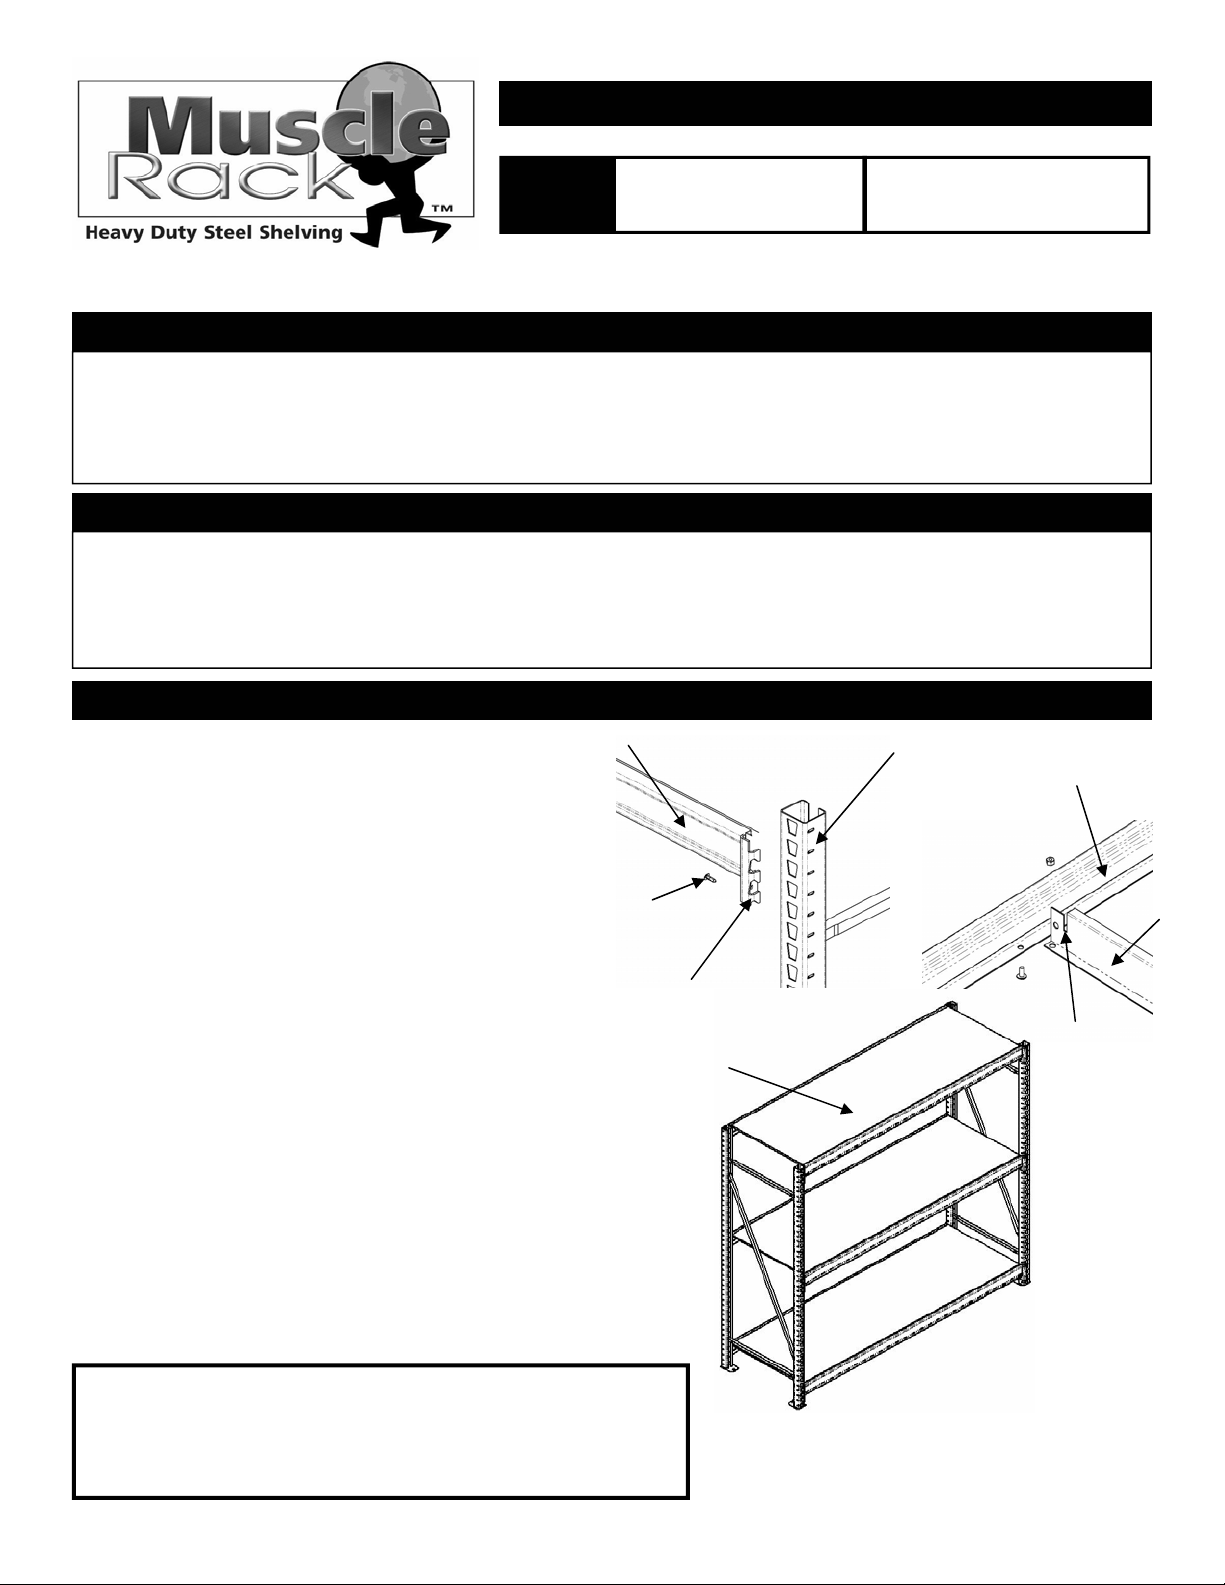
Attach the beams to the welded end frames as seen in
figure 1. Use both welded end frames to establish the
left and the right sides of the units. After a beam has
been placed to the end units, place a plastic push clip
into the hole of the beam clip, then tap with a hammer
to drive the clip into the end frame post to secure the
beam to the end frame (see figure 1). Note: If the
beam end clip tabs become bent due to mishandling. It may be necessary to adjust the tabs back
to their proper form.
The completed unit should have three (3) levels evenly
spaced for maximum stability. Note: Although the
beams are adjustable in height, it’s recommended to
evenly space them so that the stability of the unit is not
compromised.
After the beams are in place, the tie bars are now to be
fastened. Each level requires one (1) tie bar. Slide the
slot of the tie bar into the shelf ledge of the beam, and
align the hole located in the center of the beam to the
hole of the tie bar. Place the nut and bolt through the
holes and tighten appropriately (see figure 2).
Place the particle board shelving to each level to complete the unit.
Plastic
Push Clip
3 - Particle Board Shelves
Beam
Beam End
Clip Tabs
6 - Beams
End Frame Post
Figure 1
Particle Board Shelf
3 - Tie Bars
6 - Nuts and Bolts
12 - Plastic Push Clips
Beam Shelf Ledge
Figure 2
Tie Bar Slot
Tie Bar
Should you have any comments, damage, missing parts, or problems with assembly
of this unit please feel free to contact our Muscle Rack manufacturing facility at,
(773) 475-3000 and request customer service. To obtain replacement parts, please
provide the following information :
- Model # - Part # & Description - Location Purchased - Date Purchased
Made in the U.S.A.
Chicago, IL
 Loading...