

EDS CapAnalyzer 88A Series II, EDS-88A Operating Instructions And Owner's Manual
EDS-88A
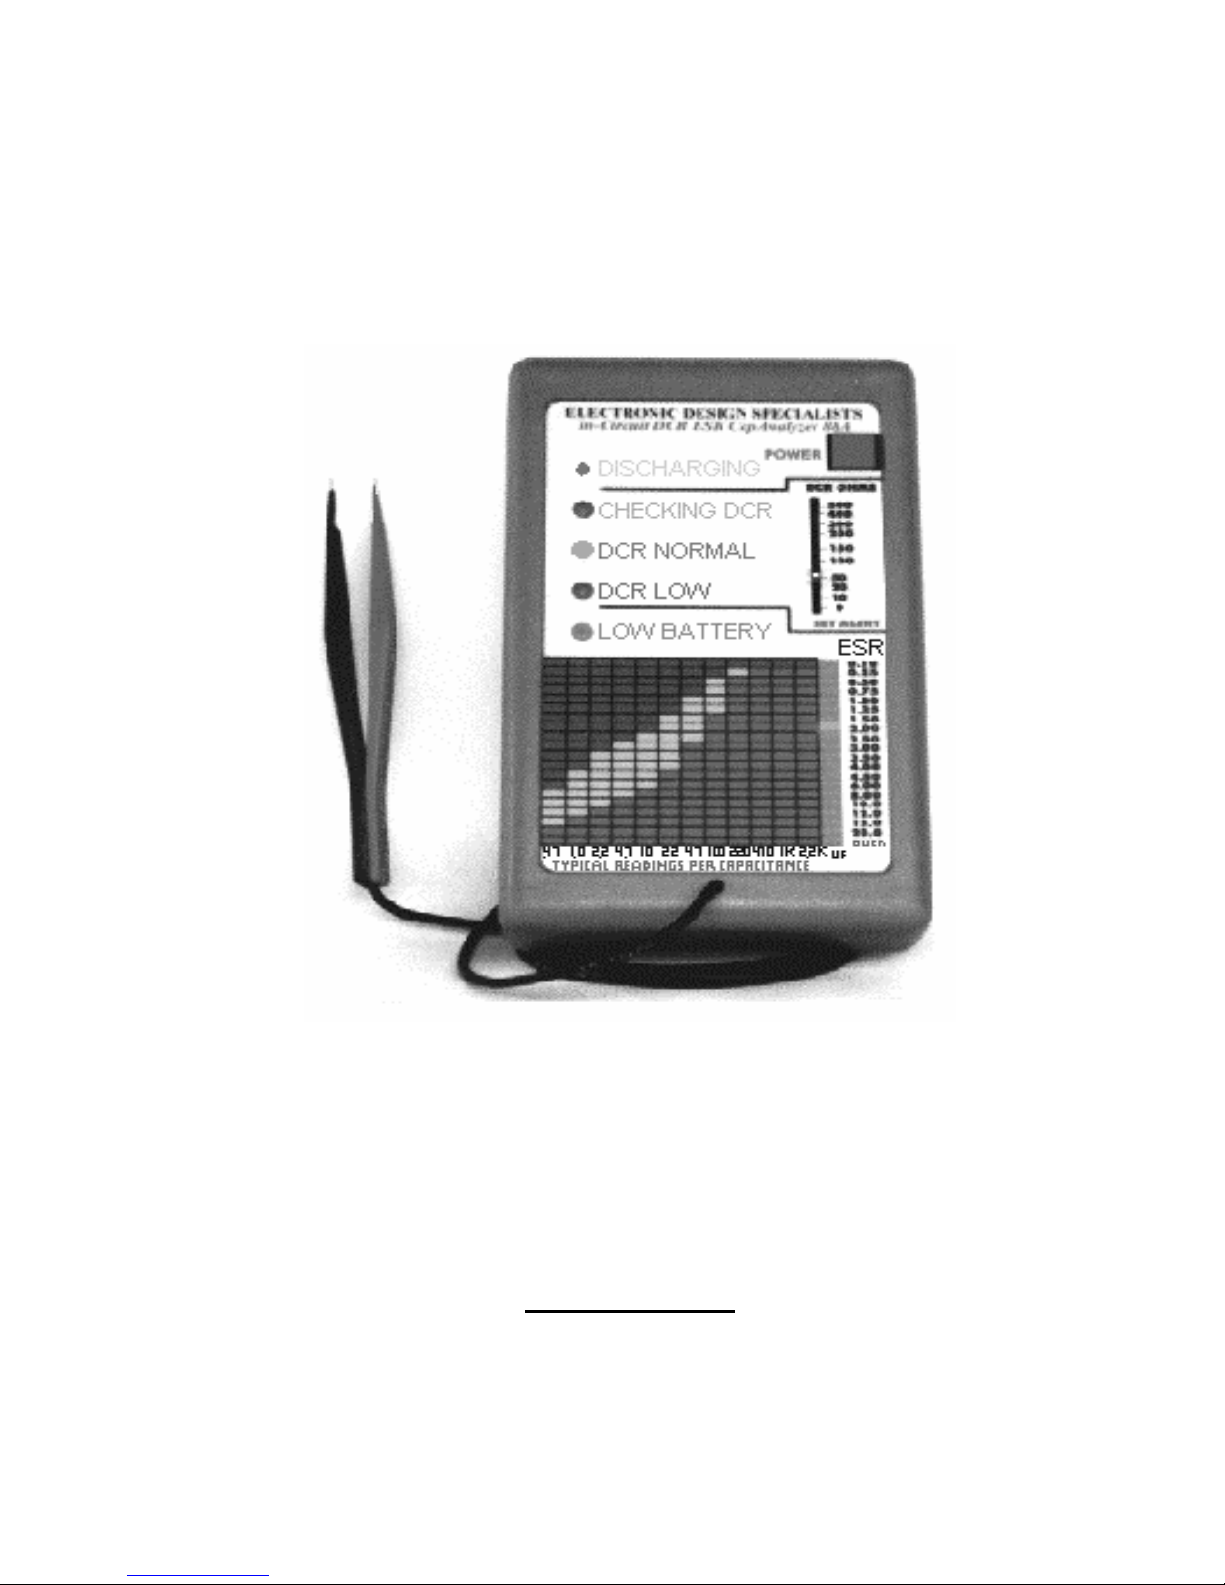
CapAnalyzer Series II
In-Circuit Electrolytic Capacitor DCR/ESR Tester
OPERATING INSTRUCTIONS
and
OWNER’S MANUAL
©EDS-Inc 1997-2018
For Technical Assistance
parts or FAQs go to
www.eds-inc.com

TROUBLESHOOTING CAPACITOR-
RELATED PROBLEMS
using the CapAnalyzer 88A
ATTENTION: THIS UNIT IS DESIGNED TO CHECK ELECTROLYTIC
CAPACITORS IN OR OUT OF CIRCUIT WITH POWER DISCONNECTED FROM
THE CIRCUIT UNDER TEST. IF THE UNIT UNDER TEST IS POWERED UP,
THE POWER WILL BACKFEED INTO YOUR CAPANALYZER AND DAMAGE
BOTH UNITS!
DO NOT ATTEMPT TO BEND THE TWEEZER PROBE ENDS, THEY ARE
HARDENED BERYLLIUM COPPER AND WILL SNAP OFF.
Troubleshooting and locating defective electrolytic capacitors has been a thorn in the
side of all technicians for many years. The CapAnalyzer 88A will help solve problems
caused by electrolytics in audio, video, power supply, and system control circuits. This
manual will also show how to locate these bad capacitors easily without having to unsolder
and test, or cut up the pc board, and without needing the service manual, by using
specialized test equipment specifically designed to make you more productive. Although
you will have to unlearn your old-fashioned, slower methods, those who will be progressive
enough to learn these tricks will have much more time on their hands to spend with their
family and friends.
There are several ways a capacitor can fail. High temperatures usually cause electrolytics to
dry up. In high-frequency circuits such as digital pulse-width power supplies, the capacitors
tend to leak. In low-voltage circuits such as system control and low-voltage supplies,
capacitors tend to short, partially or completely. Therefore, the technician must first check
all electrolytics for DCR (DC Resistance) shorts or leakage, then check for physically leaky
or dried-up capacitors by measuring high-frequency ESR (Equivalent Series Resistance).
These methods will not require a soldering iron, a service manual, or any cutting tools. It
will require some logical reasoning, good eyesight, and some specialized equipment; your
$29 DVM won't help you find the tough dogs. With the CapAnalyzer 88A (and the
LeakSeeker 82B or LeakSeeker 89), hours can turn into minutes, and repairs that were once
considered "no-fixers" can now be profitable.
DRIED UP and PHYSICALLY LEAKY CAPACITORS
As a capacitor dries up internally, it can become electrically leaky. As the cap dries up, it
can cause strange problems in the particular circuit it is in. For example, in the TV's vertical
section, it can cause vertical overlap, insufficient vertical, too much overscan, or non-linear
scanning. If the cap is in the power supply, jail bars or "hairy" interference may ride on the
2

video and power semiconductors can keep failing. In the audio section it can cause
distortion, feedback or low audio. In the system control supply it can cause intermittent
functions and microcontroller confusion, shutdown, even a blank display. In the video
circuits it can cause incorrect colors, distortion, even a fully scrambled picture.
Usually, the problem will be less noticeable if the unit is left on for some time. That's
because a dried-up capacitor will usually decrease its ESR with higher temperature.
Other consumer electronic components can also have these problems, but with a different
culprit: surface mounted capacitors. Most camcorders, VCRs, and big screen TVs now use
surface mounted electrolytic capacitors in modules. In VCRs, they are usually in the sound
MPX decoder module. In big screen TVs, they can be in the sound module and in the video
PIP and video convergence circuits as well. In camcorders they are everywhere, usually
showing up as varying speeds if they are in the servo circuits, color or sync problems if in
the video, and low, distorted, or missing audio if in the audio circuits.
Most technicians already know these symptoms, and have an idea where on the board to
start. The first step is visual observation; vacuum all debris off of the board and look for
dark areas under each cap, for bulging tops, and for splitting vinyl covers. On surface mount
caps, look for the solder connections under the cap to have a cloudy look. After replacing
the obviously defective caps, it is important to clean the board with a stripper solvent and to
check all local feedthroughs, as these type of capacitors leak an acidic electrolyte that loves
copper!
After visual observation and replacement of the obvious offenders, it will be necessary to
measure the rest of the caps. The problem of measuring each capacitor is more difficult than
measuring resistors, which can be measured in circuit quite easily with any cheap DVM.
That is because any circuit that encompasses an electrolytic already has some DC resistance
and some capacitance from other parts of the circuit. Some "capacitor checkers" claim to
work in circuit, but since they actually measure circuit capacitance and resistance, they give
such erroneous readings that caps usually have to be unsoldered and re-measured out of
circuit anyway. In fact, even some of the most expensive capacitor meters (over $2000) will
not always measure capacitors accurately in circuit. Some meters measure the capacitance at
two different frequencies, and show it as two different readings. Most ESR meters will show
a partially or fully shorted cap as "perfect".
Speaking of "ESR" meters, their designers already know that the trick to locating bad
capacitors in circuit is not to measure capacity at all! Years of testing by many technicians
and engineers has shown that as a capacitor ages, its Equivalent Series Resistance increases.
What is ESR? Without going through the math, a perfect capacitance will measure as an
3
 Loading...