

Page 1

User guide 5
Bedienungsanleitung 8
Gebruiksaanwijzing 11
Användermanual 14
Guide utilisateur 17
Guía del usario 20
Manual do utilizador 23
Manuale per l’utente 26
EM
Transmitter
Wall-Mounted Remote Control
Page 2

Transmitter - Wall-Mounted Remote Control Ref : EM
July 2009 page 2 EM
General Security Note
For carefree and safe use of this product, please read this manual and safety information
carefully and follow the instructions. Technical manipulation of the product or any changes
to the product are forbidden, due to security and approval issues.
Please take care to set up the device correctly - consult your user guide. WARNING: Do Not
Open! Risk of Electrical Shock. Voltages in this equipment are hazardous to life. No user-
serviceable parts inside. Refer all servicing to qualied service personnel.
Important: the product must be used according the instructions in this manual and is not
suitable for other purposes.
Please avoid the following: strong mechanical wear and tear, high temperature, strong
vibrations, and high humidity.
Please also respect the additional security notes in the various user guide chapters. To
ensure correct set up please read the manual and security notes carefully.
Allgemeine Sicherheitshinweise
Bitte lesen Sie diese Bedienungsanleitung und Sicherheitshinweise für eine problemlose
und sichere Benutzung dieses Produktes und befolgen Sie die Anleitung. Technische
Manipulationen und Veränderungen dieses Produktes sind aus Sicherheitsgründen und
Zulassungen verboten.
Bitte verwenden Sie das Gerät korrekt – beachten Sie die Bedienungsanleitung.
WARNUNG: Nicht öffnen! Verletzungsgefahr durch elektrischen Schlag. In diesem Gerät
gibt es lebensgefährliche Stromspannung. Enthält keine durch den Benutzer zu wartenden
Teile. Lassen Sie alle Wartungen von geschulten Kundendiensttechnikern durchführen.
Wichtig: Das Produkt muss gemäß dieser Bedienungsanleitung benutzt werden, für andere
Einsatzzwecke ist das Produkt nicht geeignet.
Bitte vermeiden Sie folgendes: große Belastung und Zug, hohe Temperatur, starke Erschütterung, und hohe Luftfeuchtigkeit.
Bitte beachten Sie auch die zusätzlichen Sicherheitsanmerkungen in den verschiedenen
Kapiteln dieser Bedienungsanleitung. Für eine korrekte Funktion lesen Sie bitte diese Bedienungsanleitung und Sicherheitshinweise genau durch.
Veiligheidsvoorschrift
Lees voor een zorgeloos en veilig gebruik van dit product deze handleiding en de veiligheidsinformatie zorgvuldig door en volg deze op. Technische veranderingen of andere aanpassing-en van het product zijn niet toegestaan om redenen van veiligheid en keuringen.
Lees de gebruiksaanwijzing zorgvuldig voor het correct installeren van dit product.
WAARSCHUWING: Niet openmaken! Risico van een elektrische schok. De spanning in deze
apparatuur is levensgevaarlijk. Er bevinden zich geen door de gebruiker te onderhouden
onderdelen in het product. Laat alle onderhoud door bevoegde onderhoudsmonteurs
uitvoeren.
Page 3

Transmitter - Wall-Mounted Remote Control Ref : EM
July 2009 page 3 EM
Belangrijk: Het product moet worden gebruikt volgens de aanwijzingen in deze handleiding
en is niet geschikt voor andere doeleinden.
Voorkom de volgende situaties: Overmatige mechanische slijtage en schade, hoge temperaturen, sterke vibraties en hoge luchtvochtigheid.
Lees voor een zorgeloos en veilig gebruik van dit product de waarschuwingen verderop in
deze handleiding en de veiligheidsinformatie zorgvuldig door en volg deze op.
Allmänna säkerhetsråd
För säker användning av denna produkt, vad snäll och läs manualen och säkerhetsinformationen och var noga med att följa instruktionerna. Tekninsk manipulation av produkten eller
ändring av något slag är strängt förbjuden., med tanke på säkerhet och godkännande frågor.
Var noga med att ansluta produkterna på ett korektt sätt- kolla imanualen. VARNING: Öppna
inte! Risk för elektrisk stöt. Spänningar i denna utrustning är skadliga för livet. INGA EGNA
DELAR på insidan. Hänvisa all service till kvalicerad servicetekniker.
VIKTIGT: Produkt skall användas till till det den är till för och inget annat.
Undvik följande för stora mekaniska påfrestningar, för höga tempraturer, starka och stora
vibrationer, hög fuktighet. Var vänligen respektera också de extra säkerhets anteckningarna
i de olika kapitlen i användarhandboken. För att säkerställa korrekt inställning läs manualen
och säkerhets noteringarna noggrant.
Conseils de sécurité
Lisez attentivement ce guide utilisateur an de garantir une utilisation sûre et sans problèmes de ce produit et suivez minutieusement les conseils de sécurité. Pour des raisons de
sécurité, toute manipulation technique ou modication du produit est interdite.
Consultez le guide utilisateur an d’installer la produit correctement.
AVERTISSEMENT : Ne pas ouvrir ! Risque d’électrocution. Les tensions présentes dans
cet appareil peuvent être mortelles. Cet appareil ne contient pas de pièces pouvant être
remplacées par l’utilisateur. Tout travail de dépannage doit être coné à un réparateur
professionnel compétent.
Important : la produit doit être utilisée conformément aux indications de ce guide utilisateur
et ne doit pas à être utilisée à d’autres ns.
Veuillez éviter: Les chocs et les tensions mécaniques, les températures extrêmes, les vibra-
tions, et l ’humidité
Veuillez également respecter les autres consignes de sécurité présentées dans les chapitres
ultérieurs de ce manuel.
Nota general de seguridad
Para un uso cómodo y seguro de este producto, lea este manual e información de seguridad
cuidadosamente y siga las instrucciones. La manipulación técnica el producto o cualquier
modicación quedan prohibidos, debido a motivos de seguridad y aprobación.
Asegúrese de congurar correctamente el dispositivo – consulte su guía del usuario.
Page 4

Transmitter - Wall-Mounted Remote Control Ref : EM
July 2009 page 4 EM
¡No abrir! Riesgo de descarga eléctrica. Los voltajes que hay dentro de este equipo son
peligrosos para la vida. Dentro del dispositivo no hay piezas que el usuario pueda reparar.
Encargue todo servicio al personal de servicio calicado.
Importante: El producto debe usarse según las instrucciones de este manual, y no es
adecuado para otros nes.
Evite las situaciones siguientes: desgaste mecánico pronunciado, altas temperaturas, fuertes
vibraciones, humedad elevada.
Respete igualmente las notas adicionales de seguridad de los diversos capítulos de la guía
del usuario. Para garantizar una conguración correcta, lea cuidadosamente el manual y las
notas de seguridad.
Nota geral de Segurança
Para uso cuidado e seguro deste producto, por favor lê cuidadosamente este manual e informação de segurança e segue as instruções. Manipulação técnica do producto ou qualquer
mudanças ao producto são proibidas, devido a segurança e questões de aprovação.
Por favor, toma cuidado ao montar o equipamento correctamente - consulta teu guia de
utente.
Não abra! Risco de choque elétrico. As tensões presentes neste equipamento podem causar
risco de vida. Não há peças internas que possam ser reparadas pelo usuário. Toda a ma-
nutenção deve ser realizada por pessoal de manutenção qualicado.
Importante: o producto deve ser usado de acordo com as instruções neste manual e não é
conveniente para outros propósitos.
Evite o seguinte: forte desgaste mecânico, alta temperatura, vibrações fortes, humidade alta.
Por favor, também respeita as notas adicionais de segurança nos vários capítulos do guia de
utente. Para assegurar ajuste correcto por favor, lê o manual e notas de segurança cuidadosamente.
Note Generali di Sicurezza
Per un uso sicuro e responsabile di questo prodotto si prega leggere attentamente questo
manuale e le informazioni di sicurezza, seguendo scrupolosamente le istruzioni. Qualsiasi
manipolazione o modica tecnica del prodotto sono proibite, per salvaguardare la sicurezza e
le norme di certicazione del prodotto.
Si prega avere cura di congurare correttamente il prodotto - consultare questo manuale per
l’utente. Non aprire: rischio di folgorazione. Le tensioni all’interno di questo apparecchio sono
mortali. All’interno nonvi sono parti riparabili dall’utente. Per qualsiasi intervento rivolgersi a
personale qualicato.
Importante: Del prodotto dev’essere utilizzato rispettando le istruzioni di questo manuale,
non essendo adatto per scopi diversi da quanto riportato nel manuale.
Si prega evitare: forti sollecitazioni meccaniche, alte temperature, forti vibrazioni, alta umidità
Si prega altresì di rispettare le note di sicurezza aggiuntive riportate nei vari capitoli di questo
manuale per l’utente. Per assicurare una corretta congura-zione si prega leggere attentamente il manuale e le note di sicurezza.
Page 5

Transmitter - Wall-Mounted Remote Control Ref : EM
July 2009 page 5 EM
Notes
Page 6
Transmitter - Wall-Mounted Remote Control Ref : EM
July 2009 page 6 EM
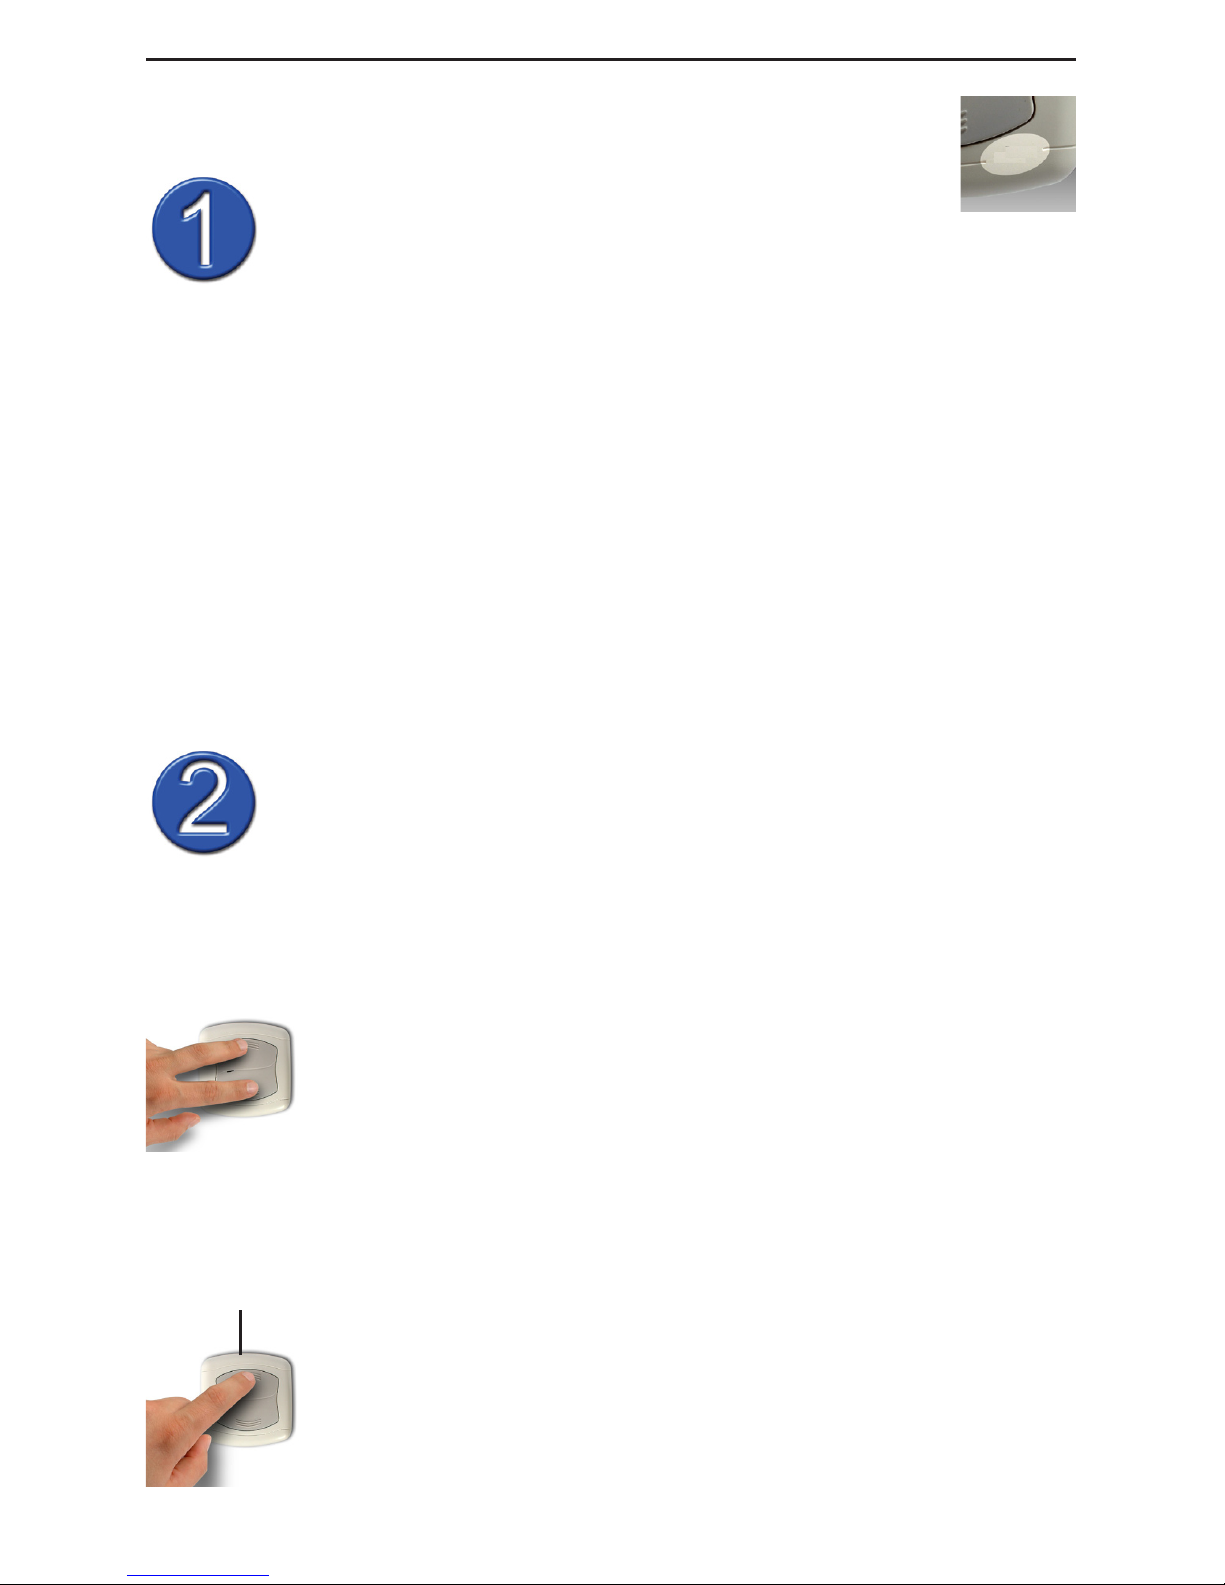
Set the address, if necessary
A. Simultaneously press the On and Off button during 1 second
(the LED turns Yellow) then release.
The LED will blink Red for House Code then Green for Unit Code
(the factory setting is A1: One Red blink and one Green blink),
then go to Yellow (program mode).
Go to the next step to congure the House Code and Unit Code.
After 6 seconds the modules will return to normal operation and
leave the program mode.
The X10 address consists of a House Code and Unit Code.
This unique address makes it possible to control one or more receivers
(with the same address) with commands from EM switch.
Important: When tting the switch, always make sure the ebode
logo is situated at the right bottom.
General Information:
1. The factory default address is set to A1.
This means you can remotely control the X10 compatible receivers which is set
to address A1:
(a) Like e.g. the ebode receivers RMA, RMV, RPT, RPA, RPL (RPA and
RPL require a RF transceiver in order to convert the RF signals to
X10 powerline commands, e.g the RPT).
(b) Or Classic X10 Receivers with rotary address selectors, e.g TM13 or
SC28 security console, when set to the same House code, A.
2. The front LED of the EM module indicates the following state:
- Green: ON
- Red: OFF
Programming the EM switch
Information:
The front LED indicates the 3 following states:
Red LED: House code (A to P)
Green LED: Unit code (1 to 16)
Yellow LED: status of the program mode.
Start
B. Conguring the House Code
Press and release the ON key the appropriate number of times for
the House Code you want to set. Once for A, twice for B, etc.
The factory setting will be “A = 1 Red Blink”
Page 7
Transmitter - Wall-Mounted Remote Control Ref : EM
July 2009 page 7 EM
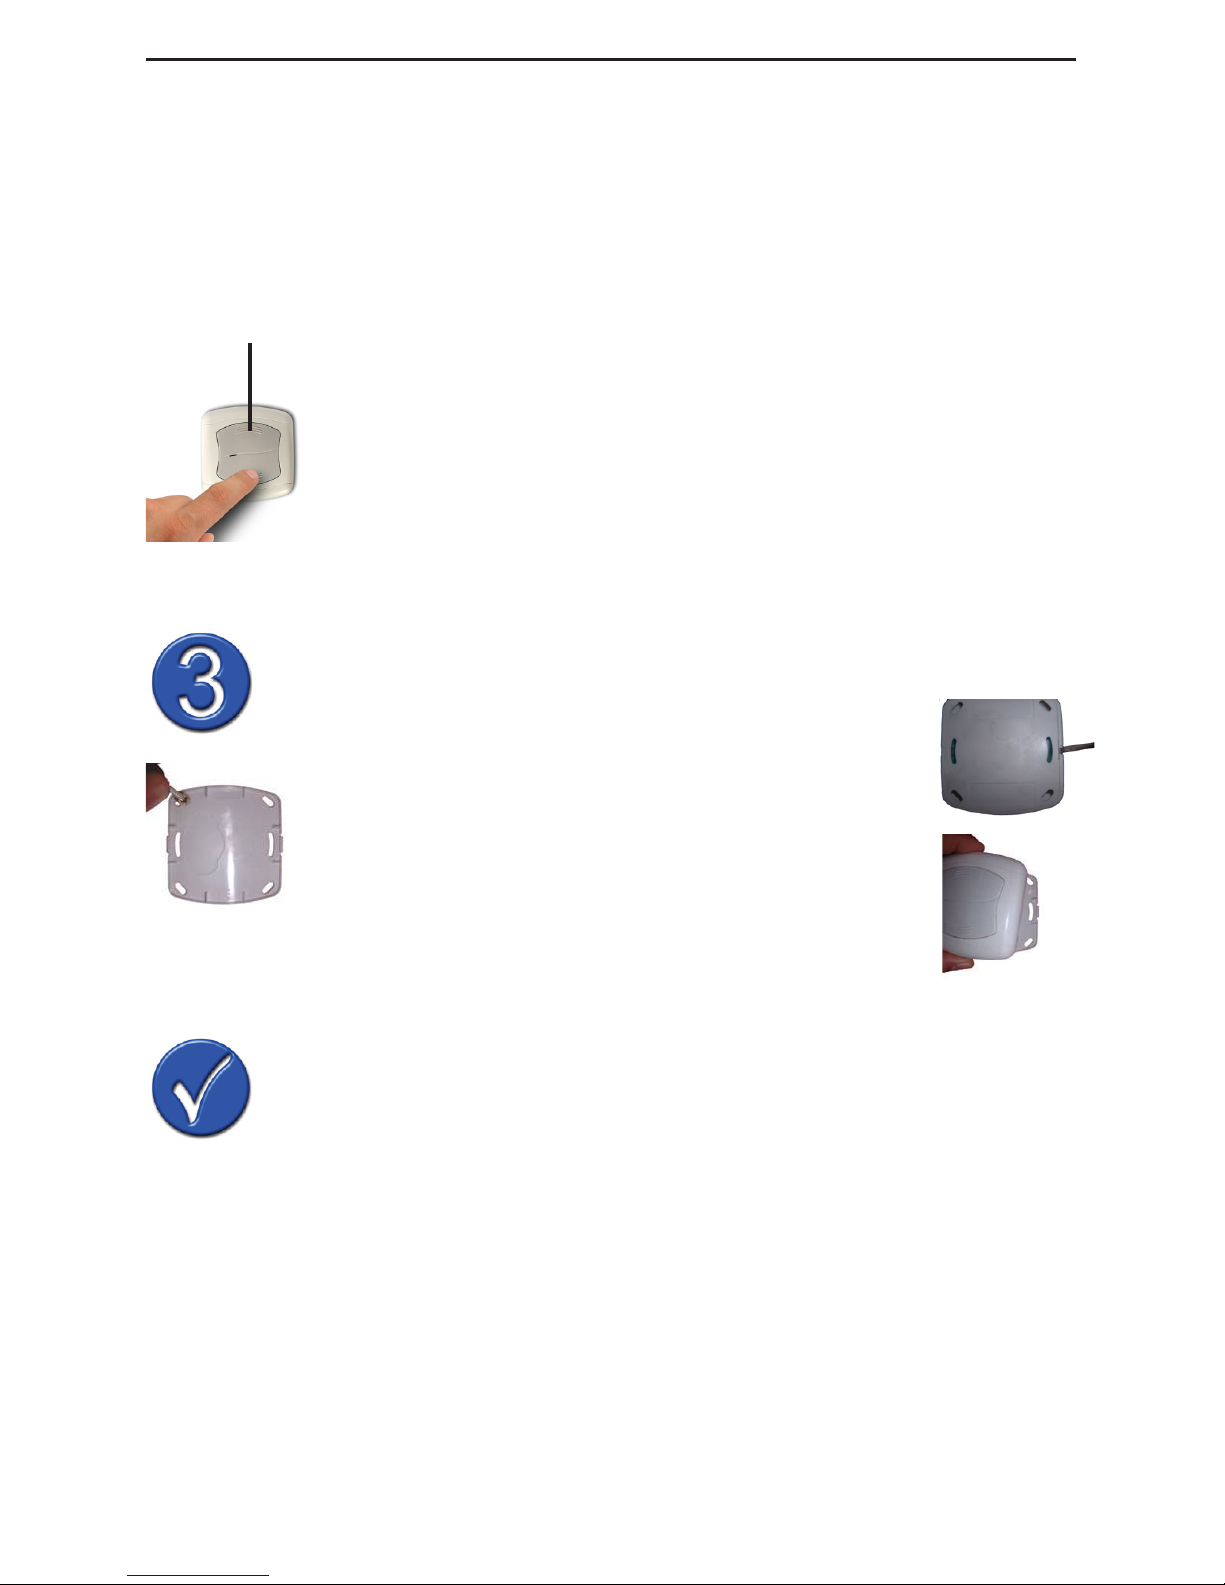
Mounting the EM switch to the wall
Operating the EM module
Check the address.
Simultaneously press the On and Off button shortly to check the
address.
Short press on the ON button, receivers with the same address will power on or
open (when used with shutter).
Short press on the OFF button, receivers with the same address will power off or
close (when used with shutter).
When changing the battery, the address will be retained.
e.g.: for B3 the red led will blink 2 times for the house code and the green led will
blink 3 times for the unit code. Wait until the yellow led blinks 3 times to indicate
the module has left the program mode.
1. Use a screwdriver to remove the mounting plate
from the switch cover. Be careful not to damage the
electronic circuit.
2. Attach the mounting plate to the wall using e.g.
double sided tape or 2 screws (2 mm) etc.
3. Reattach the cover to the mounting plate. Make
sure the ebode logo is on the right bottom.
C. Conguring the Unit Code
Press and release the ON key the appropriate number of times for
the Unit Code you want to set. Once for 1, twice for 2 etc.
The factory setting will be “1 = 1 Green Blink”
After setting the UNIT Code, the yellow LED blink 3 times, which
means the Unit Code is set and the module has leave the program
mode.
Stop
After setting the House Code, the Yellow LED will blink 3 times,
which means the House Code is set and the module has left the
program mode.
To now set the Unit Code, start from step A but skip step B and
go directly to step C.
Page 8

Transmitter - Wall-Mounted Remote Control Ref : EM
July 2009 page 8 EM
Dimmer/Position function:
1. Hold the ON or OFF button pressed to dim or bright.
2. Press the UP or DOWN button shortly to place in position the shutter.
Zone function: Installation diagram for centralized shutter control. (RMV
receiver)
EM transmitter for
centralised master control
Place at the door entrance
RMV Receivers located
on the rst oor
RMV Receivers located
on the ground oor
EM Transmitter to
control the rst
oor as a group
EM Transmitter to
control the ground
oor as a group
Receivers do not respond to wall switch command?
- Check and/or change the battery if necessary.
- Check the radio signals transceiver RPT, RMA, RMV, TM13 or SC28 security
console is powered on.
Tips - Knowledge base available on www.ebodeelectronics.eu.
Page 9

Transmitter - Wall-Mounted Remote Control Ref : EM
July 2009 page 9 EM
Einprogrammieren der Adresse
A. Drücken Sie für eine Sekunde gleichzeitig den Ein- und den
Aus-Knopf (die LED leuchtet gelb)und lassen Sie dann die Knöpfe
los.
Die LED blinkt rot für den Haus Code und grün für den Geräte Code
(Fabrik-Einstellung ist A1: Ein rotes Blinken und ein grünes Blinken)
und wechselt dann auf gelb (Programmier-Modus).
Gehen Sie weiter zu Schritt B um den Haus Code und zu Schritt
C um den Geräte Code zu programmieren. Nach 6 Sekunden
wechselt das Modul wieder in den normalen Zustand und verlässt
den Programmier-Modus.
Die X10 Adresse besteht aus einem Haus Code und einem Geräte
Code.
Diese einzigartige Adresse macht es möglich, einen oder mehrere
Empfänger (mit den gleichen Adressen) mit Befehlen vom EM-Schalter
zu steuern.
Wichtig: Wenn Sie den Schalter einbauen, achten Sie darauf, dass
sich das ebode Logo unten rechts bendet.
Allgemeine Hinweise:
1. Die Fabrik-Einstellung der Adresse lautet A1.
Dies bedeutet, dass Sie jeden X10-kompatiblen Empfänger, der auf die Adresse
A1 gestellt ist, fernsteuern können, wie z.B.
(a) die ebode Empfänger RMA RMV, RPT, RPA, RPL (RPA und RPL
benötigen einen Funk-Transceiver, um Funk-Signale auf Powerline-
Signale umzuwandeln, wie z.B. das RPT).
(b) Oder klassische X10 Empfänger mit Adress-Wahlscheiben, wie z.B.
TM13 oder die SC28 Alarmanlage, wenn diese auf den Hauscode
A gestellt sind.
2. Die vordere LED zeigt den Zustand des EM Moduls an:
- Grün: AN
- Rot: AUS
Programmierung des EM Schalters:
Information:
Die vordere LED zeigt folgende drei Zustände an:
- LED rot: Haus Code (A bis P)
- LED grün: Geräte Code (1 bis 16)
- LED gelb: Status des Programmier-Modus
START
B. Programmierung des Haus Codes
Drücken Sie den Ein-Schalter so oft wie notwendig, um den Haus
Code einzustellen. Einmal für A, zweimal für B usw.
Page 10
Transmitter - Wall-Mounted Remote Control Ref : EM
July 2009 page 10 EM
C. Programmierung des Geräte Codes
Drücken Sie den Ein-Knopf so oft wie notwendig um den GeräteCode einzustellen, einmal für eins, zweimal für zwei usw.
Fabrikeinstellung ist 1, also blinkt die LED einmal grün.
Nach der Programmierung des Geräte Codes blinkt die LED dreimal
gelb. Dies bedeutet, dass der Geräte Code eingestellt ist und das
Modul den Programmier-Modus verlassen hat.
STOP
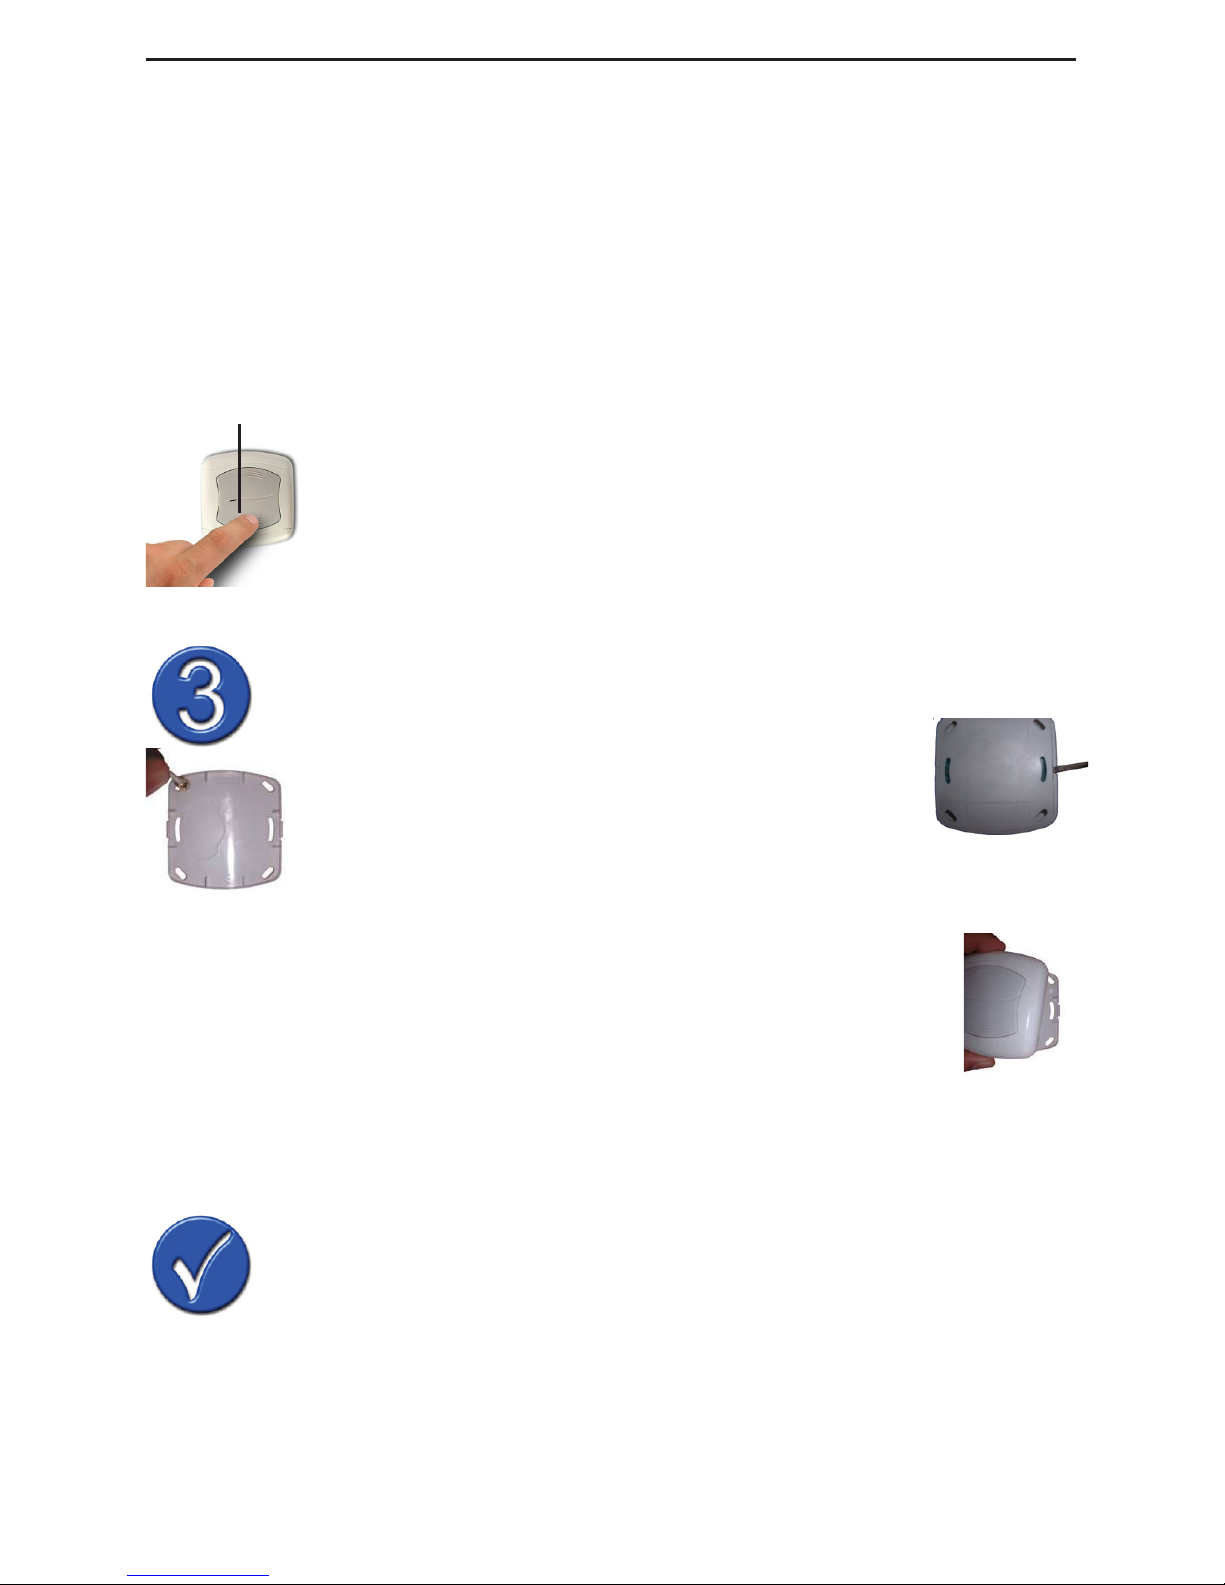
Montage des EM Schalters an der Wand
Bedienung des EM Moduls
Prüfen der Adresse.
Drücken Sie gleichzeitig kurz den An- und Aus-Knopf um die
Adresse zu prüfen.
Beim Wechseln der Batterie wird die Adresse gespeichert.
Beispiel: Für B3 blinkt die LED zweimal rot für den Haus-Code B und die LED
dreimal grün für den Geräte-Code 3. Warten Sie, bis die LED dreimal gelb blinkt,
um zu zeigen, dass das Modul den Programmier-Modus verlassen hat.
1. Verwenden Sie einen Schraubenzieher um die
Befestigungsplatte vom Schalterdeckel zu entfernen. Achten Sie darauf, die Elektronik nicht zu
beschädigen.
2. Befestigen Sie die Befestigungsplatte an der Wand, indem Sie
entweder 2 Schrauben (2 mm) oder z.B. doppelseitiges Klebeband
verwenden.
3. Befestigen Sie den Deckel wieder auf der Befestigungsplatte. Stellen
Sie sicher, dass das ebode Logo sich unten rechts bendet.
Fabrikeinstellung ist A, also blinkt die LED einmal rot.
Nach dem Einstellen des Haus Codes, blinkt die LED dreimal gelb,
dies bedeutet, dass der Haus Code eingestellt ist und das Modul
den Programmier-Modus verlassen hat.
Um jetzt die Geräte-Adresse einzustellen, gehen Sie zu Schritt A
und weiter zu Schritt C
Page 11

Transmitter - Wall-Mounted Remote Control Ref : EM
July 2009 page 11 EM
Ein kurzer Druck auf den An-Knopf schaltet Empfänger mit der gleichen Adresse
an, bzw. öffnet Rollläden.
Ein kurzer Druck auf den Aus-Knopf schaltet Empfänger mit der gleichen Adresse
aus, bzw. schließt Rollläden.
Dimmer/Position:
1. Drücken Sie länger den An- oder Aus-Knopf um das Licht heller oder dunkler
zu machen.
2. Drücken Sie kurz den An- oder Aus-Knopf um die Rollladen in einer bestimmten Position anzuhalten.
Empfänger antworten nicht auf die Befehle des Wandschalters?
- Prüfen Sie und/oder wechseln Sie die Batterie, falls notwendig.
- Prüfen Sie die Funk-Transceiver RPT, RMA, RMV, TM13 oder ob die Alarmanlage
SC28 eingeschaltet ist.
Hinweis – Sie nden eine Wissensdatenbank unter www.ebodeelectronics.eu.
Zone funktion: Installationzeichnung für zentralisierten Verschluss
kontrolliert. (RMV Empfänger)
EM Sender für die zentrale
Master Kontrolleinheit.
Am Eingang installieren
RMV Empfänger im
ersten Stock
RMV Empfänger im
Erdgeschoß
EM Sender um den
ersten Stock als eine
Gruppe zu steuern
EM Sender um das
Erdgeschoß als eine
Gruppe zu steuern
Page 12

Transmitter - Wall-Mounted Remote Control Ref : EM
July 2009 page 12 EM
Instellen van het X10 adres, indien
noodzakelijk
Een X10 adres bestaat uit een HUIS CODE en een UNIT CODE.
Dit unieke adres maakt het mogelijk om een of meerdere ontvangers
(wanneer deze hetzelfde adres hebben) te schakelen met de EM
schakelaar.
Belangrijk: Zorg dat bij het monteren van de EM schakelaar het
ebode logo rechtsonder zit.
Algemene informatie:
1. Het standaard geprogrammeerde adres is A1.
Dit betekend dat u de volgende ontvangers met adres A1 kunt bedienen:
(a) De ebode modules RMA, RMV, RPT, RPA, RPL (Om de modules RPA,
RPL te kunnen bedienen heeft u een ontvanger nodig om de RF
signalen om te zetten naar X10 signalen op het lichtnet, b.v.RPT).
(b) Standaard X10 RF ontvangers zoals TM13 en SC28 alarm console
wanneer deze huiscode A hebben.
2. De LED op de voorkant van de EM module wordt gebruikt om de status van de
module weer te geven:
- Groene LED: AAN
- Rode LED: UIT
Programmeren van de EM schakelaar:
De LED op de voorzijde geeft de volgende 3 statussen weer:
Rode LED: Huis code (A tot P)
Groene LED: Unit code (1 tot 16)
Gele LED: Status van de programmeer mode.
A. Druk gelijktijdig op de bovenste (AAN) en onderste (UIT) knop;
de gele LED gaat aan; laat beide toetsen weer los. Na 0,5 sec
gaat de gele led uit.
Vervolgens geven het aantal keren knipperen van de rode led en
de groene led respectievelijk de huiscode en unitcode aan. (het
standaard adres A1 betekent dus 1x knipperen van de rode led
(huiscode A) en 1x knipperen van de groene led (unitcode 1)
De oranje LED gaat opnieuw aan en gaat 0,5 sec later weer uit.
B. Stel nu de huiscode in door de AAN knop herhaaldelijk in te
drukken (1x drukken is huiscode A, 2x drukken is huiscode B, 3
x drukken huiscode C….. 16x drukken huiscode P)
START
Page 13

Transmitter - Wall-Mounted Remote Control Ref : EM
July 2009 page 13 EM
STOP
Bevestigen van de EM schakelaar aan
de muur
Bedienen van de EM schakelaar
Check het adres.
Druk gelijktijdig op de AAN en UIT knop tot de gele led gaat knipperen. Tel het aantal keren dat de rode led knippert (huiscode) en
het aantal keren dat de groene led knippert (unitcode).
Wanneer de batterijen vervangen worden zal het ingestelde adres bewaard
blijven.
Bijvoorbeeld adres B3: 2x knipperen rode led en 3x knipperen groene led.
Wacht nu tot de gele led drie keer knippert.
Houdt de schakelaar ondersteboven en plaats een
schroevendraaier links van de ebode stikker tussen
het deksel en de bodemplaat. Kantel de schroevendraaier naar buiten en verwijder het deksel van
de bodemplaat.
U kunt nu de bodemplaat op de muur bevestigen met 2 schroeven
(2 mm) .
Het is natuurlijk ook mogelijk om de EM schakelaar met een dubbelzijdige tape op een gladde ondergrond te bevestigen.
Na het instellen van de huiscode wacht u 5 seconde; de gele LED
knippert drie keer om aan te geven dat de huiscode is opgeslagen;
de EM schakelaar verlaat de programmeerstand
C. Om de unitcode in te stellen volgt u opnieuw bovenstaande
stappen 1 t/m 3 (4 en 5 slaat u nu over).
Stel nu de unitcode in door de UIT knop herhaaldelijk in te drukken
(1x drukken is unitcode 1, 2x drukken is unitcode 2, 3 x drukken
unitcode 3….. 16x drukken unitcode 16)
Na het instellen van de unitcode wacht u 5 seconden; de gele LED
knippert drie keer om aan te geven dat de unitcode is opgeslagen;
de EM schakelaar verlaat de programmeerstand
U bent nu klaar met programmeren.
Page 14

Transmitter - Wall-Mounted Remote Control Ref : EM
July 2009 page 14 EM
Een korte druk op de AAN knop zal ontvangende X10 modules inschakelen (of bij
gebruik van een rolluikmodule open sturen).
Een korte druk op de UIT knop zal ontvangende X10 modules uitschakelen (of bij
gebruik van een rolluikmodule dicht sturen).
Dimmer/Positie functie:
Houdt de AAN of UIT knop ingedrukt (langer dan 0,5 s) om de lamp FELLER te
laten branden, respectievelijk te dimmen
In combinatie met een rolluikmodule zal bij het ingedrukt houden van de AAN
of UIT knop (langer dan 0,5 s) het rolluik naar de gewenste positie kunnen
worden gestuurd.
De ontvangers reageren niet op de EM schakelaar
- Controleer het ingestelde X10 adres van de EM schakelaar.
- Controleer en/of vervang de batterijen
- Is het te bedienen apparaat op hetzelfde adres ingesteld als de EM
schakelaar?
- Is er een RF ontvanger in de installatie aanwezig en ontvangt deze de X10 signalen
(RF ontvangers zijn bijvoorbeeld RPT, RMA, RMV, TM13, CM15 en SC28.
Tips – Kenniscentrum beschikbaar op www.ebodeelectronics.eu
Zone functies: Installatie diagram voor gecentraliseerde rolluik controle.
(RMV ontvanger)
EM zender voor complete
gecentraliseerde controle
Plaats deze bij de
deur bij de ingang
RMV Ontvangers voor
de 1e verdieping
RMV Ontvangers voor
de begane grond
EM Zender voor
controle van de
begane grond als
groep
EM Zender voor
controle van de
1e verdieping als
groep
Page 15

Transmitter - Wall-Mounted Remote Control Ref : EM
July 2009 page 15 EM
X10 adress
X10 adresser består av en Huskod och en Enhetskod.
Denna unika adress gör det möjligt att kontrollera en eller era
mottagare (med samma adress) med kommandon från EM reglaget.
Viktigt: När du fäster reglaget, se alltid till att ebode loggan sitter
nere till höger.
Generell information:
1. Den förinställda adressen är inställd på A1.
Detta innebär att du kan fjärrstyra alla X10 kompatibla enheter som är inställda
på adress A1:
a) Till exempel ebode mottagarna RMA, RMV, RPT, RPA, RPL (RPA
och RPL kräver en RF mottagare för att konvertera RF signalerna
till X10 strömlinjekommandon, , e.g RPT).
b) Eller klassiska X10 mottagare med adressväljare så som CM15,
TM13 eller SC28 säkerhetskonsoler då de är inställda på samma
huskod, A.
2. Front LED lampan på EM modulen indikerar följande status:
- Grön: PÅ
- Röd: AV
Programmmera EM reglaget:
ront LED lampan indikerar följande 3 lägen:
- Röd LED: Huskod (A till P)
- Grön LED: Enhetskod (1 till 16)
- Gul LED: status för programmerat läge.
A. Tryck samtidigt på På och Av knappen i 1 sekund (tills LED
lampan lyser i gult) och släpp upp igen.
LED kommer att blinka i rött för Huskoden och sedan i grönt
för Enhetskoden (fabriksinställningen är A1: En röd blinkning
och en grön blinkning), gå sedan till gult (programmeringsläget).
Gå till nästa steg för att ställa in Huskoden och Enhetskoden.
Efter 6 sekunder kommer modulerna att återgå till normal
användning och lämna programmeringsläget.
B. Ställa in in Huskoden
Tryck och släpp upp PÅ knappen för att ställa in den Huskod du
vill ha. En gång för A, två gånger för B, etc.
START
Page 16

Transmitter - Wall-Mounted Remote Control Ref : EM
July 2009 page 16 EM
STOP
Montera EM reglaget på väggen
Använda EM modulen
Kolla adressen
Tryck samtidigt på På och Av knappen kort för att kolla adressen.
Till exempel, för B3 kommer röda LED att blinka 2 gånger för
Huskoden och 3 gånger för Enhetskoden.
Då du byter batteri så kommer adressinställningarna att bevaras.
Vänta tills det att gula LED blinkar 3 gånger för att indikera att modulen har lämnat
programmeringsläget.
1. Använd en skruvmejsel för att ta bort moteringsplattan för reglagehöljet. Var försiktig så att du inte
skadar elektroniken.
2. Fäst monteringsplattan på väggen med dubbelsidad fästtejp eller 2 skruvar (2mm), etc.
3. Fäst höljet på monteringsplattan. Se till så att ebode loggan är
nere till höger.
Fabriksinställningen kommer att vara “A = 1 röd blinkning”
Efter att du ställt in huskoden kommer LED blinka 3 gånger i gult
vilket innebär att Huskoden är klar och att modulen har lämnat
programmeringsläget.
För att nu ställa in Enhetskoden, börja från steg A men hoppa över
steg B och gå direkt till steg C.
C. Ställa in enhetskoden
Tryck och släpp upp PÅ knappen för att ställa in Enhetskoden som
du har valt. En gång för 1, två gånger för 2, etc.
Fabriksinställningen är “1 = 1 grön blinkning”
Efter att du ställt in Enhetskoden kommer LED att blinka tre gånger
i gult vilket betyder att Enhetskoden är klar och att modulen har
lämnat programmeringsläget.
Page 17

Transmitter - Wall-Mounted Remote Control Ref : EM
July 2009 page 17 EM
Tryck kort på PÅ knappen så kommer mottagare med samma adress att slås på
eller öppnas (då ansluten till sådana apparater).
Tryck kort på AV knappen så kommer mottagare med samma adress att slås av
eller stängas (så ansluten till sådana apparater).
Dimmer/positioneringsfunktion
1. Håll PÅ eller AV knappen nedtryckt för att sänka eller höja lyskraften.
2. Tryck på UPP eller NED knappen kort för att positionera apparaten.
Mottagarna svarare inte på kommandon från väggreglage?
- Kolla och/eller byt ut batteriet om nödvändigt.
- Kolla radiosignalenheterna så att RPT, RMA, RMV, CM15, TM13 or SC28
säkerhetskonsolen är påslagen.
Vansligt förekommande frågor
Zonfunktion: Installationsdiagram för centraliserad positionskontroll. (RMV
mottagare)
EM sändare för centraliserad
masterkontroll
Placera vid dörringången
RMV mottagare placerade
på första våningen
RMV mottagare placerade
på marknivån
EM sändare för
att kontrollera
marknivån som
en grupp
EM ändare för att
kontrollera första
våningen som en
grupp
Tips – Information och kunskap hittar du på www.ebodeelectronics.eu
Page 18

Transmitter - Wall-Mounted Remote Control Ref : EM
July 2009 page 18 EM
Regler la voie, si nécessaire.
La voie est constituée d’un code MAISON et d’un code UNITE.
La voie unique permet à un ou plusieurs récepteurs (réglés sur la même
voie) de reconnaître les ordres en provenance de la commande EM.
IMPORTANT : Repérer les positions MARCHE/HAUT et ARRET /
BAS en plaçant l’inter mural de façon à ce que le logo ebode
apparaisse en BAS et à DROITE de la façade cache/décor.
INFOS
1. Le paramétrage de l’inter mural est par défaut A1.
Dès maintenant commander à distance (récepteur réglé sur la voie A1):
a) Les récepteurs RMA, RMV, RPT, RPA, RPL (rappel : les récepteurs RPA et
RPL nécessite la présence d’un convertisseur d’ordre radio vers courant
porteur).
b) Les récepteurs à sélecteurs rotatifs, associer un convertisseur radio
(TM13, la console CM15 ou SC28) et vérier que le sélecteur rouge
est positionné sur A.
2. Le voyant lunineux LED en façade de l’inter mural indique l’état suivant:
- LED VERTE : MARCHE/ALLUME
- LED ROUGE : ARRET/ETEINT
Entrer en mode programmation, si vous désirez
recongurer une voie.
INFOS
La LED en façade de l’inter mural indique les 3 états suivants:
LED ROUGE pour le CODE MAISON (A à P)
LED VERTE pour le CODE UNITE (1 à 16)
LED JAUNE pour l’entrée et sortie du mode programmation
A. Appuyer simultanément sur les touches MARCHE et ARRETde
l’inter mural pendant 1 seconde (la LED est JAUNE) puis relâcher.
La LED clignote ROUGE indiquant le code MAISON puis clignote
VERT indiquant le code UNITE actuel (réglage d’usine code A1 soit
un clignotement ROUGE suivi d’un clignotement VERT) puis passe
au JAUNE (entrée en mode programmation)
Dans l’intervalle de 6 secondes, passer à l’étape suivante correspondant au réglage des codes MAISON et UNITE désirés.
B. Régler le CODE MAISON.
Appuyer sur le bouton MARCHE pour changer le code MAISON
autant de fois que nécessaire pour obtenir la LETTRE désirée.
START
Page 19

Transmitter - Wall-Mounted Remote Control Ref : EM
July 2009 page 19 EM
Fixer l’inter mural sans l au mur.
Verier le bon fonctionnement de l’Inter Mural.
Vérication de la voie mémorisée.
Appuyer simultanément sur les touches MARCHE et ARRET an de
vérier la voie mémorisé.
Lors d’un changement de pile, la voie enregistrée est concervée.
Exemple : B3 correspond à 2 clignotements ROUGE pour le code MAISON et 3
clignotements VERT pour le code UNITE. Attendre que l’inter mural clignote 3 fois
en JAUNE pour sortir du mode programmation.
1. A l’aide d’un tournevis, retirer le socle de sa façade cache/décor, attention à ne pas endommager
l’électronique.
2. Fixer le socle au mur par du ruban adhésif double
face ou directement sur le mur avec deux vis de
diamètre 2 mm.(NON fournies)
3. Fixer la façade cache/décor sur le socle de façon
à ce que le logo ebode se trouve en bas et à droite
de l’inter mural.
C. Régler le CODE UNITE.
Appuyer sur le bouton ARRET pour changer le code UNITE autant
de fois que nécessaire pour obtenir l’UNITE désirée.
Exemple : 1 = 1 fois, 2 = 2 fois, 3 = 3 fois, etc…
Réglage d’usine « 1 = 1 clignotement VERT »
Après le réglage du code UNITE, la LED clignote 3 fois en JAUNE
conrmant la mémorisation et la sortie du mode programmation.
STOP
Exemple : A = 1 fois, B = 2 fois, C = 3 fois, etc…
Réglage d’usine « A = 1 clignotement ROUGE»
Après le réglage du code MAISON, la LED clignote 3 fois en JAUNE
conrmant la mémorisation et la sortie du mode programmation.
Avant de régler le code UNITE, reprendre à l’étape A puis passer
directement à l’étape C.
Page 20

Transmitter - Wall-Mounted Remote Control Ref : EM
July 2009 page 20 EM
NOTA : Si l’inter mural a été initialisé avec plusieurs récepteurs ebode, chaque
impulsion sur la touche MARCHE ou ARRET , activera ou désactivera le ou les
récepteurs ebode.
Appuyer brièvement sur la touche MARCHE, le ou les récepteurs ayant la même
voie s’allument.
Appuyer brièvement sur la touche ARRET, le ou les récepteurs ayant la même
voie s’éteignent.
FONCTION ZONING Schéma pour une centralisation globale pour volet.
(récepteur RMV)
Les récepteurs ne répondent plus aux commandes de l’Inter
Mural?
- Vérier et/ou changer la pile de l’inter mural si nécessaire.
- Vérier que le convertisseur radio RPT, RMA, RMV, TM13 la console SC15 ou
SC28 est branché au secteur.
Emetteur EM pour la
centralisation globale
A placer à la porte d’entrée
Emetteur EM
pour la centralisation de
l’étage
Emetteur EM
pour la centralisation du Rez
de Chaussée
Récepteurs RMV
de l’étage
Récepteurs RMV
du Rez de Chaussée
CONSEILS (base de connaissance disponible sur www.ebodeelectronics.eu.)
Fonction variation.
Un appui long sur l’une des touches MARCHE “+” ou ARRET “-”, vous donne
accès à la fonction varition pour les luminaires.
Pour effectuer de la variation avec un Inter Mural Encastrable Motorisé RMV il
vous suft de réappuyer sur la touche MARCHE/MONTEE ou ARRET/DESCENTE
pour arrêter le volet roulant, store ou encore écran motorisé à la position
souhaitée.
Page 21

Transmitter - Wall-Mounted Remote Control Ref : EM
July 2009 page 21 EM
Dirección X10
La dirección X10 consiste en un Código de Casa y un Código de
Unidad.
Esta dirección exclusiva permite controlar uno o más receptores (con
la misma dirección) con las órdenes del interruptor EM.
Importante: Cuando instale el interruptor, asegúrese de que el
logo de ebode esté situado en la parte inferior derecha.
Información general:
1. La dirección por defecto de fábrica se establece en A1.
Esto implica que puede controlar a distancia cualquier receptor compatible con
X10 establecido en la dirección A1:
(a) Como, por ejemplo, los receptores de ebode RMA, RMV, RPT, RPA,
RPL (RPA y RPL necesitan un transceptor RF para convertir las
señales a órdenes de línea de corriente X10, como el RPT).
(b) O receptores X10 Classic con selectores de dirección giratorios,
como la consola de seguridad TM13 o el SC28 (SC9000), cuando se
establezca en el mismo código de casa, A.
2. El LED delantero del módulo EM indica el estado siguiente:
- Verde: ACTIVADO
- Rojo: DESACTIVADO
Programmación del interruptor EM
Información: El LED delantero indica los 3 estados siguientes:
LED rojo: Código de casa (A a P)
LED verde: Código de unidad (1 a 16)
LED amarillo: estado del modo de programa.
A. Pulse simultáneamente los botones de encendido y apagado
durante 1 segundo (el LED se encenderá en amarillo) y suéltelos.
El LED parpadeará en rojo para el código de casa y luego en verde
para el código de unidad (la conguración de fábrica es A1: Un
parpadeo rojo y un parpadeo verde), y luego pasará a amarillo
(modo programación).
Vaya al paso siguiente para congurar el código de la casa y el
código de la unidad. Pasados 6 segundos el módulo volverá al
funcionamiento normal y saldrá del modo programación.
B. Conguración del código de casa
Presione y suelte la tecla encendido el número adecuado de veces
para el código de casa que desee establecer. Una vez por A, dos
por B, etc.
START
Page 22

Transmitter - Wall-Mounted Remote Control Ref : EM
July 2009 page 22 EM
C. Conguración del código de unidad
Presione y suelte la tecla encendido el número adecuado de veces
para el código de unidad que desee establecer. Una vez para 1,
dos para 2, etc.
La conguración de fábrica es “1 = 1 parpadeo verde”
Después de establecer el código de unidad, el LED Amarillo parpadeará 3 veces, lo que implica que el código de unidad se ha
establecido y el módulo ha salido del modo programación.
STOP
Montaje del interruptor EM en la pared
Uso del módulo EM
Comprobación de la dirección.
Pulse simultáneamente los botones de encendido y apagado
brevemente para comprobar la dirección.
Cuando cambie la batería, se conservará la dirección.
Por ejemplo: Para B3, el LED rojo parpadeará 2 veces para el código de casa
y el LED verde parpadeará 3 veces para el código de unidad. Espere a que el
LED amarillo parpadee 3 veces para indicar que el módulo ha salido del modo
programación.
1. Use un destornillador para sacar la placa de
montaje de la tapa del interruptor. Tenga cuidado
de no dañar el circuito electrónico.
La conguración de fábrica es “A = 1 parpadeo rojo”
Después de establecer el código de casa, el LED Amarillo parpadeará 3 veces, lo que implica que el código de casa se ha establecido y el módulo ha salido del modo programación.
Para establecer ahora el código de unidad, comience por el paso
A, pero sáltese el paso B y pase directamente al C.
2. Fije la placa de montaje a la pared usando, por ejemplo, cinta adhesiva de doble cara o 2 tornillos (2mm), etc.
3. Vuelva a colocar la tapa sobre la placa de montaje. Asegúrese de
que el logo ebode esté en la parte inferior derecha.
Page 23

Transmitter - Wall-Mounted Remote Control Ref : EM
July 2009 page 23 EM
Pulse el botón encendido, los receptores con la misma dirección se encenderán o
abrirán (cuando se usen con persianas).
Pulse el botón apagado, los receptores con la misma dirección se apagarán o
cerrarán (cuando se usen con persianas).
Función Regulador/Posición:
1. Mantenga pulsado el botón encendido o apagado para reducir o
intensicar.
2. Pulse brevemente el botón arriba o abajo para colocar la persiana.
Los receptores no responden a las órdenes del interruptor de
pared.
- Compruebe y/o cambie la batería si es necesario.
- Compruebe las señales de radio y que el transceptor RPT, RMA, RMV, TM13 o
consola de seguridad SC28 estén activados.
Recomendaciones – Documentación disponible en
www.ebodeelectronics.eu.
FUNCIÓN ZONING El esquema de la instalación para el control centralizado
de obturador. (Receptor de RMV)
transmisor EM para control
principal centralizado
situar en la puerta de entrada
Receptores RMV situados
en la primera planta
Receptores RMV situados
en la planta de abajo
Transmisor EM
para controlar la
primera planta
como un grupo
Transmisor EM
para controlar la
planta de abajo
como un grupo
Page 24

Transmitter - Wall-Mounted Remote Control Ref : EM
July 2009 page 24 EM
Endereço X10
A. Premir simultaneamente os botões On e Off durante um Se-
gundo (o led acende a amarelo) e soltar botões.
O led irá piscar a vermelho para o código de casa e a verde para
o código de unidade (de fábrica o módulo vem congurado com
A1: um picar vermelho e um piscar verde), em seguida volta a
car aceso a amarelo (modo de programação).
Um endereço X10 consiste num código de casa (letra) e um código
de unidade (número). Este endereço único faz com que seja possível
controlar um ou mais receptores com os sinais emitidos pelo interruptor
EM.
Importante: Ao xar o interruptor, certique-se que o logo ebode
se situa no canto inferior direito.
INFOS
1. O endereço congurado por defeito é o A1. Isto signica que remotamente é
possível controlar qualquer equipamento compatível com X10 congurado com
o endereço A1:
(a) Por exemplo os receptores ebode RMA, RMV, RPT, RPA, RPL (os
receptores RPA e RPL requerem um transceptor RF que converta os
sinais RF em sinais X10 na rede eléctrica, como por ex. o RPT).
(b) Ou receptores X10 clássicos por exemplo o TM13 ou a consola de
segurança SC28, quando congurada para receber o código de
casa A.
2. O Led frontal do módulo EM indica o seu estado:
- Verde: ON
- Vermelho: OFF
Programar o interruptor EM
Informação: A cor do led indica os seguintes estados:
- Vermelho: Código de casa (A a P)
- Verde: Código de casa (1 a 16)
- Amarelo: estado do modo de programação.
Par congurar o endereço execute o próximo passo. Ao m de 6
segundos o módulo retorna ao modo de funcionamento normal.
Congurar o código de casa.
Page 25

Transmitter - Wall-Mounted Remote Control Ref : EM
July 2009 page 25 EM
B. Prima e o botão On o número de vezes desejado. Um impulso
signica código de casa A, dois impulsos signicam o código de
casa B, etc.
De fábrica o código de casa é o A “A = 1 piscar a vermelho”
Após congurar o código de casa o led pisca 3 vezes a amarelo,
que signica que o código de casa está congurado e o módulo
saiu do modo de programação.
Para congurar o código de unidade temos que voltar ao passo A
e passamos directamente para o passo C.
C. Congurar o código de unidade
Prima e o botão Off o número de vezes desejado. Um impulso
signica código de unidade 1, dois impulsos signicam o código
de unidade 2, etc.
De fábrica o código de unidade é o 1“1 = 1 piscar a verde”
Após congurar o código de casa o led pisca 3 vezes a amarelo,
que signica que o código de casa está congurado e o módulo
saiu do modo de programação.
START
STOP
Montagem do interruptor sem os EM na
parede
Funcionamento do interruptor sem os EM
Verique o endereço.
Pressione simultaneamente os botões On e Off durante 1 segundo
para vericar o endereço.
Quando efectuar a mudança da bateria, o endereço mantêm-se.
1. Utilize uma chave de fendas para remover a
tampa traseira. Tenha cuidado para não danicar
a placa com o circuito electrónico.
2. Fixe a tampa traseira à parede utilizando ta-cola de dupla face ou
através de 2 parafusos.
3. Encaixe o corpo do interruptor na tampa traseira. Certique-se que
o logo ebode se situa no canto inferior direito.
Page 26

Transmitter - Wall-Mounted Remote Control Ref : EM
July 2009 page 26 EM
Um toque rápido no botão ON faz com todos os receptores congurados com o
mesmo endereço se liguem ou abram os estores lá ligados.
Um toque rápido no botão Off faz com todos os receptores congurados com o
mesmo endereço se desliguem ou fechem os estores lá ligados.
Por ex.: para o endereço B3 o led vermelho vai piscar 2 vezes indicando o código de
casa e o verde irá piscar 3 vezes indicando o código de casa. Espera que o led pisque
3 vezes a amarelo indicando que o módulo saiu de modo de programação.
Envio de comandos DIM e BRIGTH e ajuste de posição de estores
1. Mantenha o botão ON ou OFF premidos para enviar sinais BRIGTH e DIM
2. Pressione as teclas UP ou DOWN brevemente para ajustar a posição do
estore.
Zone função: O diagrama de instalação para controle centralizado de veneziana. (Receptor de RMV)
Transmissor EM para controlo
geral centralizado
Deixar/colocar à porta de
entrada
Receptores RVM localizados
no primeiro andar
Receptores RVM localizados
no rés-do-chão
Transmissor EM
para controlar o
primeiro andar
como um todo
Transmissor EM
para controlar o
rés-do-chão como
um todo
Os receptores não respondem ao sinal enviado pelo interruptor sem
os?
- Verique e substitua as baterias se necessário.
- Verique se os receptores de sinais RF se encontram RPT, RMA, RMV, TM13,
SC28 se encontram ligados.
Dica – Base de conhecimento disponível em www.ebodeelectronics.eu.
Page 27

Transmitter - Wall-Mounted Remote Control Ref : EM
July 2009 page 27 EM
Indirezzo X10
L’indirizzo X10 è costituito da un House Code e uno Unit Code.
Questo indirizzo unico consente di comandare uno o più ricevitori
(impostati sullo stesso indirizzo) mediante comandi provenienti
dall’interruttore EM.
Importante: Quando s’installa l’interruttore, vericare che il logo
ebode sia situato nell’angolo inferiore destro.
Informazioni Generali:
1. L’indirizzo di fabbrica è impostato su A1 (default).
Ciò signica che è possibile comandare da remoto qualsiasi ricevitore compatibile
X10, impostato sull’indirizzo A1:
(a) Come per es. i ricevitori ebode RMA, RMV, RPT, RPA, RPL
(RPA ed RPL richiedono un ricetrasmettitore per convertire i segnali
RF in comandi X10 a onde convogliate sulla linea elettrica, es.
RPT).
(b) Oppure i Ricevitori X10 Classici con rotella selezione indirizzi, es.
TM13 o console di sicurezza SC28 (SC9000), se impostati sullo
stesso House code, A.
2. Il LED frontale del modulo EM indica le seguenti condizioni:
- Verde: ON
- Rosso: OFF
Programmazione dell’interruttore EM
Informazioni: Il LED frontale indica le 3 seguenti condizioni:
- LED Rosso: House code (da A a P)
- LED Verde: Unit code (da 1 a 16)
- LED Giallo: stato della modalità programmazione.
A. Premere simultaneamente i tasti On e Off per 1 secondo (il
LED diventa Giallo) e quindi rilasciarli.
Il LED lampeggerà di colore Rosso per l’House Code e di colore
Verde per lo Unit Code (l’impostazione di fabbrica è A1: Un lampeggio Rosso e Un lampeggio Verde), quindi si porterà sul Giallo
(modalità programmazione).
Andare al passo successivo per congurare l’House Code e lo Unit
Code. Dopo 6 secondi i moduli ritorneranno al normale funziona-
mento, uscendo dalla modalità programmazione.
B. Congurazione dell’House Code
Premere e rilasciare il tasto ON un numero appropriato di volte,
dipendentemente dall’House Code da impostare. Una volta per
A, due volte per B, etc.
Page 28

Transmitter - Wall-Mounted Remote Control Ref : EM
July 2009 page 28 EM
Montaggio a parete dell’interruttore EM
Funzionamento del modulo EM
Controllo indirizzo.
Premere velocemente, simultaneamente, i tasti On e Off per control-
lare l’indirizzo.
Durante la sostituzione batterie, l’indirizzo sarà mantenuto.
1. Utilizzare un cacciavite per rimuovere il supporto
di ssaggio dalla copertura dell’interruttore.
Prestare attenzione a non danneggiare la circuiteria
elettronica.
L’impostazione di fabbrica è “A = 1 Lampeggio Rosso”
Dopo aver impostato l’House Code, il LED lampeggerà 3 volte
Giallo, a signicare che l’House Code è stato impostato e il modulo
è uscito dalla modalità programmazione.
Per impostare adesso lo Unit Code, ripetere il passo A saltando il
passo B e procedendo direttamente al passo C.
C. Congurazione dello Unit Code
Premere e rilasciare il tasto ON un numero appropriato di volte,
dipendentemente dallo Unit Code da impostare. Una volta per 1,
due volte per 2, etc.
L’impostazione di fabbrica è “1 = 1 Lampeggio Verde”
Dopo aver impostato lo UNIT Code, il LED lampeggerà 3 volte
Giallo, a signicare che lo Unit Code è stato impostato e il modulo
è uscito dalla modalità programmazione.
START
STOP
2. Fissare il supporto a parete utilizzando per es. nastro biadesivo o
2 viti (2 mm) etc.
3. Ripristinare la copertura sul supporto di ssaggio. Vericare che il
logo ebode sia situato nell’angolo inferiore destro.
Page 29

Transmitter - Wall-Mounted Remote Control Ref : EM
July 2009 page 29 EM
Premere velocemente sul tasto ON, i ricevitori impostati sullo stesso indirizzo si
accenderanno o apriranno (se utilizzati con avvolgibili).]
Premere velocemente sul tasto OFF, i ricevitori impostati sullo stesso indirizzo si
spegneranno o chiuderanno (se utilizzati con avvolgibili).
Funzione Dimmer/Posizione:
1. Tenere premuto il tasto ON o OFF per aumentare o ridurre la luminosità.
2. Premere velocemente il tasto UP o DOWN per portare in posizione
l’avvolgibile.
es.: per B3 il LED lampeggerà 2 volte Rosso per l’House Code e quindi lampeggerà
3 volte Verde per lo Unit Code.
Attendere che il LED lampeggi 3 volte Giallo a indicare che il modulo è uscito dalla
modalità programmazione.
I Ricevitori non rispondono ai comandi degli interruttori a parete.
- Controllare e/o sostituire le batterie, se necessario.
- Controllare che i ricetrasmettitori di segnali radio RPT, RMA, RMV, TM13 o la
console di sicurezza SC28 siano accesi.
Suggerimenti – Base di conoscenza disponibile su www.ebodeelectronics.eu.
La funzione zone: Il diagramma di installazione per il controllo di persiana
accentrato. (Il ricevitore di RMV)
Trasmettitore EM per il controllo
principale centralizzato
Porre all’entrata della porta
Ricevitori RVM posti
al primo piano
Ricevitori RVM posti
al pian terreno
Trasmettitore EM
per controllare
il promo piano
come gruppo
Trasmettitore EM
per controllare
il pian terreno
come gruppo
Page 30

Transmitter - Wall-Mounted Remote Control Ref : EM
July 2009 page 30 EM
CE DECLARATION OF CONFORMITY
UK - We, BMB Electronics BV, Kortakker 10 – 4264 AE Veen – The Netherlands, herewith
declare that the following designated product EM, is in compliance with the essential
requirements and other relevant provisions of Directive 1999/5/EC.
DE - Wir, BMB Electronics BV, Kortakker 10 – 4264 AE Veen – The Netherlands, erklären
hiermit die Übereinstimmung des Gerätes EM mit den grundlegenden Anforderungen und
anderen relevanten Festlegungen der Richtlinie 1999/5/EC.
NL - Hierbij verklaart BMB Electronics BV, Kortakker 10 – 4264 AE Veen – Nederland, dat
de EM in overeenstemming is met de essentiële eisen en de andere relevante bepalingen
van richtlijn 1999/5/EG
SE - Härmed intygar BMB Electronics BV, Kortakker 10 – 4264 AE Veen – The Netherlands, att denna EM står I överensstämmelse med de väsentliga egenskapskrav och övriga
relevanta bestämmelser som framgår av direktiv 1999/5/EG.
FR - Nous, BMB Electronics BV, Kortakker 10 – 4264 AE Veen – The Netherlands, déclarons
que le produits suivantes: EM est dans la conformité avec les exigences essentielles et aux
autres dispositions pertinentes de la directive 1999/5/CE.
ES - Por medio de la presente BMB Electronics BV, Kortakker 10 – 4264 AE Veen – The
Netherlands, declara que el EM cumple con los requisitos esenciales y cualesquiera otras
disposiciones aplicables o exigibles de la Directiva 1999/5/CE.
PT - Nós, BMB Electronics BV, Kortakker 10 – 4264 AE Veen – The Netherlands, certicamos que o EM cumpre os requisitos essenciais e outros aspectos relevantes previstos pela
Directiva 1999/5/EC. A declaração de conformidade completa está disponível através de
pedido.
IT - Con la presente BMB Electronics BV, Kortakker 10 – 4264 AE Veen – The Netherlands,
dichiara che questo EM è conforme ai requisiti essenziali ed alle altre disposizioni pertinenti
stabilite dalla direttiva 1999/5/CE.
Product category : general consumer (category 3).
Date: March 2009 Peter Schoon - Product Manager BMB
Device: The use of the symbol indicates that this product may not be treated as household
waste. By ensuring this product is disposed of correctly, you will help prevent potential negative consequences for the environment and human health, which could otherwise be caused
by inappropriate waste handling of this product. For more detailed information about recycling
of this product, please contact your local city ofce, your household waste disposal service or
the shop where you purchased the product.
Batteries: Do not dispose of used batteries in the household rubbish!
They should be deposited at a collection point for used batteries.
Device:
The use of the symbol indicates that this product may not be treated as household waste. By ensuring this
product is disposed of correctly, you will help prevent potential negative consequences for the
environment and human health, which could otherwise be caused by inappropriate waste handling of
this product. For more detailed information about recycling of this product, please contact your local city
office, your household waste disposal service
Batteries
Do not dispose of used batteries in the household rubbish! They should be deposited at a collection point for used batteries.
Page 31

Transmitter - Wall-Mounted Remote Control Ref : EM
July 2009 page 31 EM
Also available from ebode electronics:
On-Wall Modules
In-Wall Modules
Under development
Product Description
EM 2-position RF wall switch, ideal for retro t installations to e.g.
control blinds, shutter, home cinema screens but also lighting
or appliances.
IMRF Single position RF wall switch, ideal for retro t installations to
e.g. control applications or an inside or outside light.
RMV Control your shutter, blind or e.g. cinema screen via the front
panel keys, or remotely via any ebode / X10 compatible
controller.
RMA Control your appliance, light or e.g. pump via the front panel
keys, or remotely via any ebode/X10 compatible controller.
RPA, RPL,
RPT
Ideal for retro t installations, the classic X10 plugin module in
a new and stylish jacket. Control your appliance or lamps etc,
via any ebode or X10 compatible controller via PLC AND RF!
TPC/ TMML New stylish RF remote to control any ebode or X10 compatible
RF receiver.
Product Description
EMML 2-position RF in-wall module to install behind any mechanical
wall switch. The EMML is battery operated.
RMML In-wall RF receiver, ideal for any switches lights and appliances
up to 300W.
PMML A package containing both the EMML and the RMML.
Product Description
RMP Update on existing RMV with dry contact output. Ideal to
control e.g a motorized gate.
RMSN In-wall RF receiver without Neutral for light applications
including incandescent, halogen, uorescent, LED (even 0.5W
charge).
Page 32

www.ebodeelectronics.eu
 Loading...