

Edmonds AiroMatic Product Manual

Product Manual
2
Item Checklist & Additional Tools Required For Installation
1
2
3
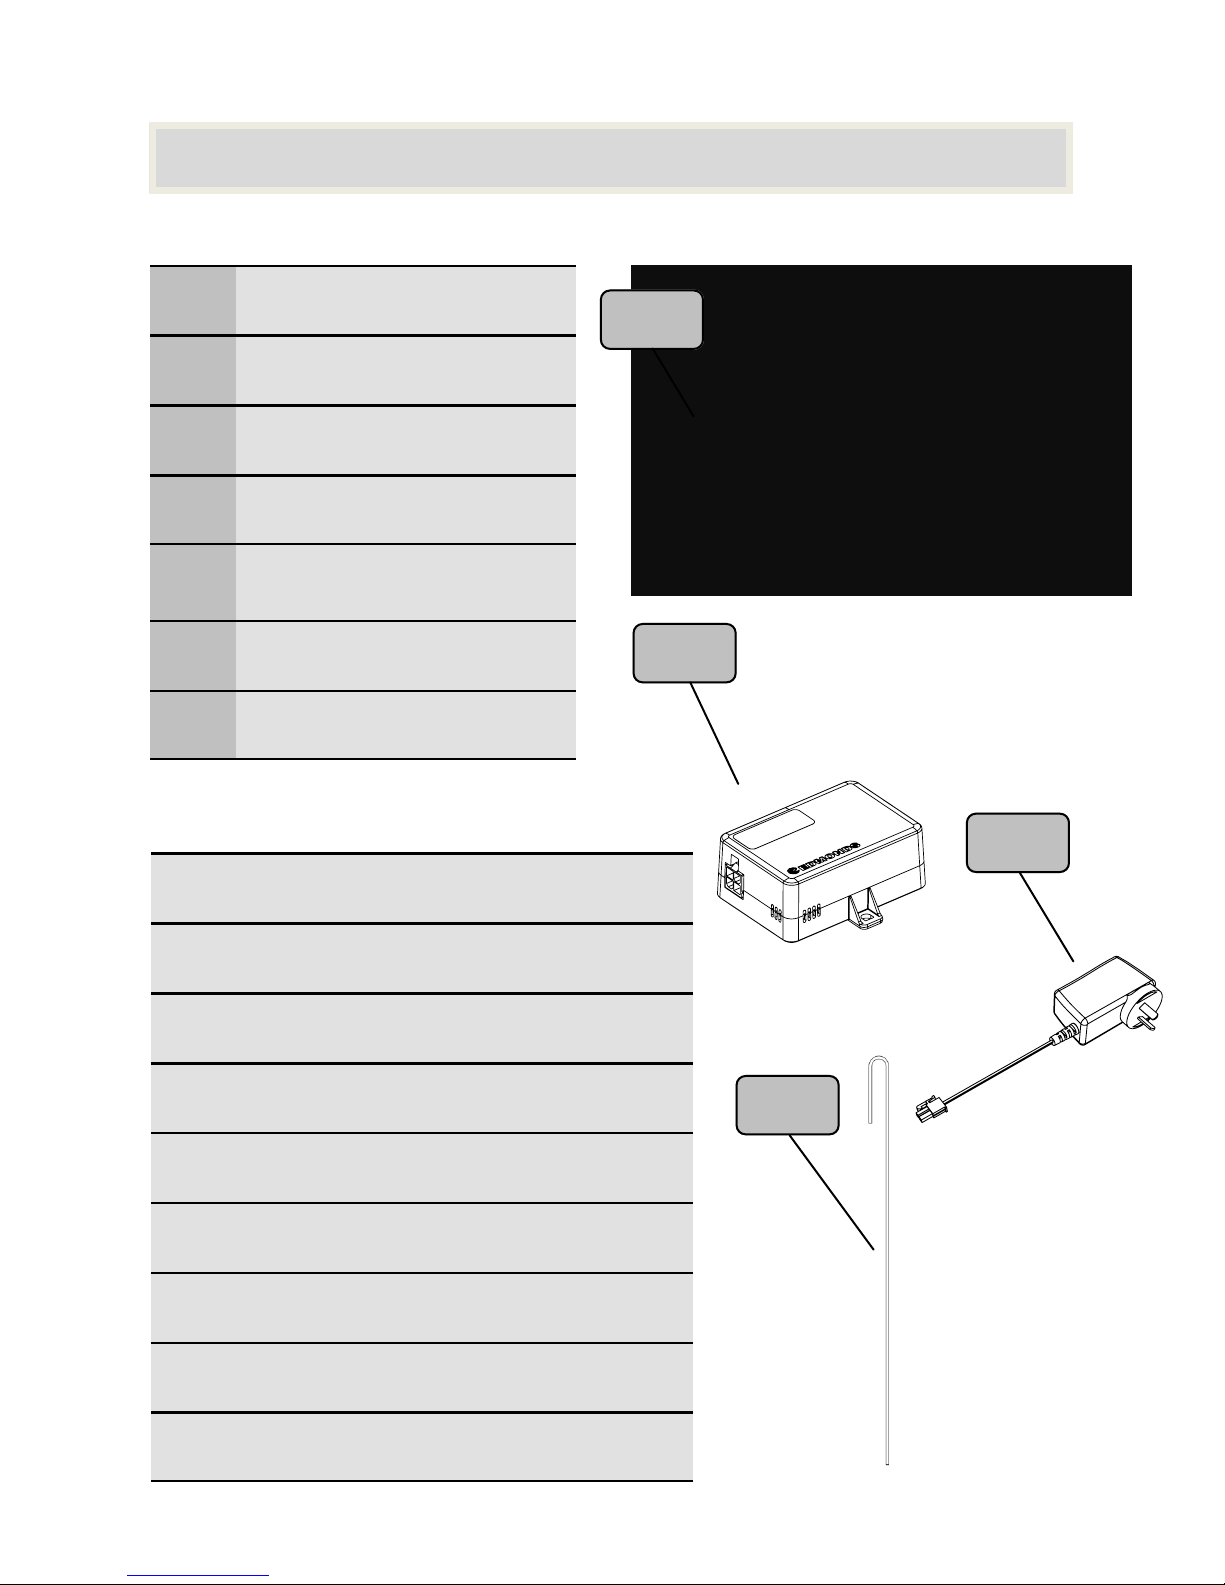
Additional Parts & Tools Required (Not Supplied)
Soft Rubber Hammer
Roof Sealant & Caulking Gun
Cable Ties
Cordless Drill & Screwdriver
Marker Pen
Foil Tape (Sarked Roofs Only)
Knife ( Sarked Roofs Only)
Tek Screws or Sealed Rivets x 10 (Metal Roof Only)
Nibbler or Similar Cutting tool (Metal Roof Only)
Included Parts: QTY:
1 AiroMatic (1)
2 Speed Controller (1)
3 Power Supply (1)
4 Fixing Strap (1)
5
Speed Controller Fixing
Screws 6Gx13mm
(2)
6 Product Manual (1)
7 Warranty Document (1)
4

3
Important Notes
The Airomatic is designed for general household ventilation only. DO
NOT use to exhaust hazardous or explosive materials and vapours
The Airomatic has an unguarded fan assembly. DO NOT use in locations
readily accessible to people or animals. The fan is intended for use
facing an unoccupied space only.
Always use the provided power supply and speed controller to power
the fan. Failure to do so can damage the product.
Power supply and speed controller are for dry indoor use only. Ensure
that the power supply and speed controller are not left on damp
surfaces, fasten to the structure with screws or cable ties as required.
Only use one Airomatic per speed controller and power supply
Important Notices and Warnings
WARNING: Do not proceed with the installation until you have read the
entire instructions, including these warnings.
Install at your own risk
The installation of this product may be dangerous and includes the potential
of death, personal injury or property damage. Please be aware of the following
before installing this product.
Installation requires climbing and working at heights. Use caution to
minimise risks by:
Clearing the area below the workspace
Avoid walking on surfaces that are slippery, wet or dusty
Using appropriate equipment (tie off ladders etc.)
There are sharp edges on the flashing, Take care and wear appropriate
personal protective equipment when handling and installing products
DO NOT attempt to install if you are uncomfortable with working at
heights or on sloping roof surfaces

4
STEP 1
Remove one tile
from the third row
down from ridge
cap.
If the gap
produced is less
than a 250mm
square opening
then either push
the tiles above
upwards or cut the
tiles to provide
clearance
Installation—Tiled Roof
The removal of a tile higher than this may damage the integrity of
the ridge tile pointing and is NOT recommended
STEP 2
If the roof is
‘sarked’ , Cut
sarking in a cross
folding back the
corners outwards
to give a 250mm
square opening.
Tape the corners
down with foil tape
to prevent them
from fouling the
fan
5
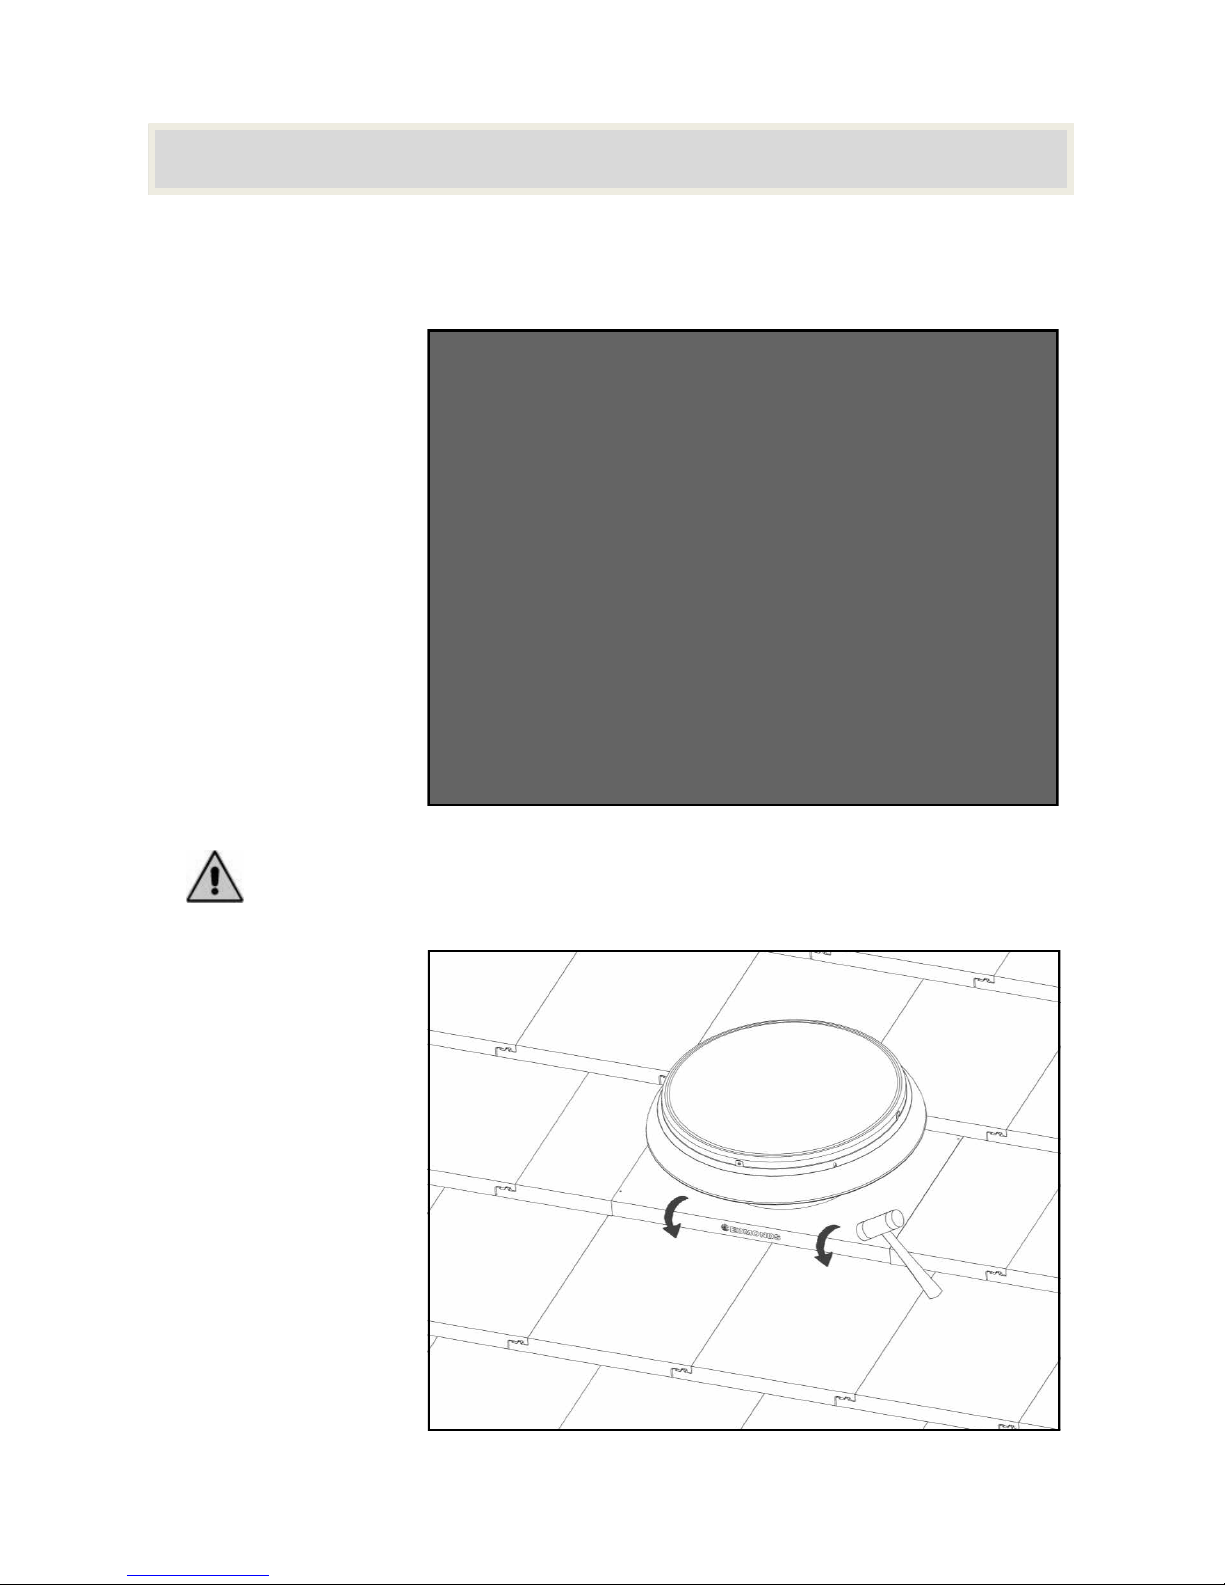
STEP 4
Fold down the
bottom edge of the
flashing to seal
against the lower
tiles.
Using a soft
hammer if required,
carefully dress the
front and sides of
the flashing into the
shape of the tiles.
Make sure that the cable is through the opening and not caught
under the flashing.
STEP 3
Taking the Airomatic
unit slide the
flashing under the
tiles above the
opening.
Ensure the motor
cable is on the low
side for correct
orientation.
Centre the unit over
the opening.
Installation—Tiled Roof
6
Installation—Tiled Roof
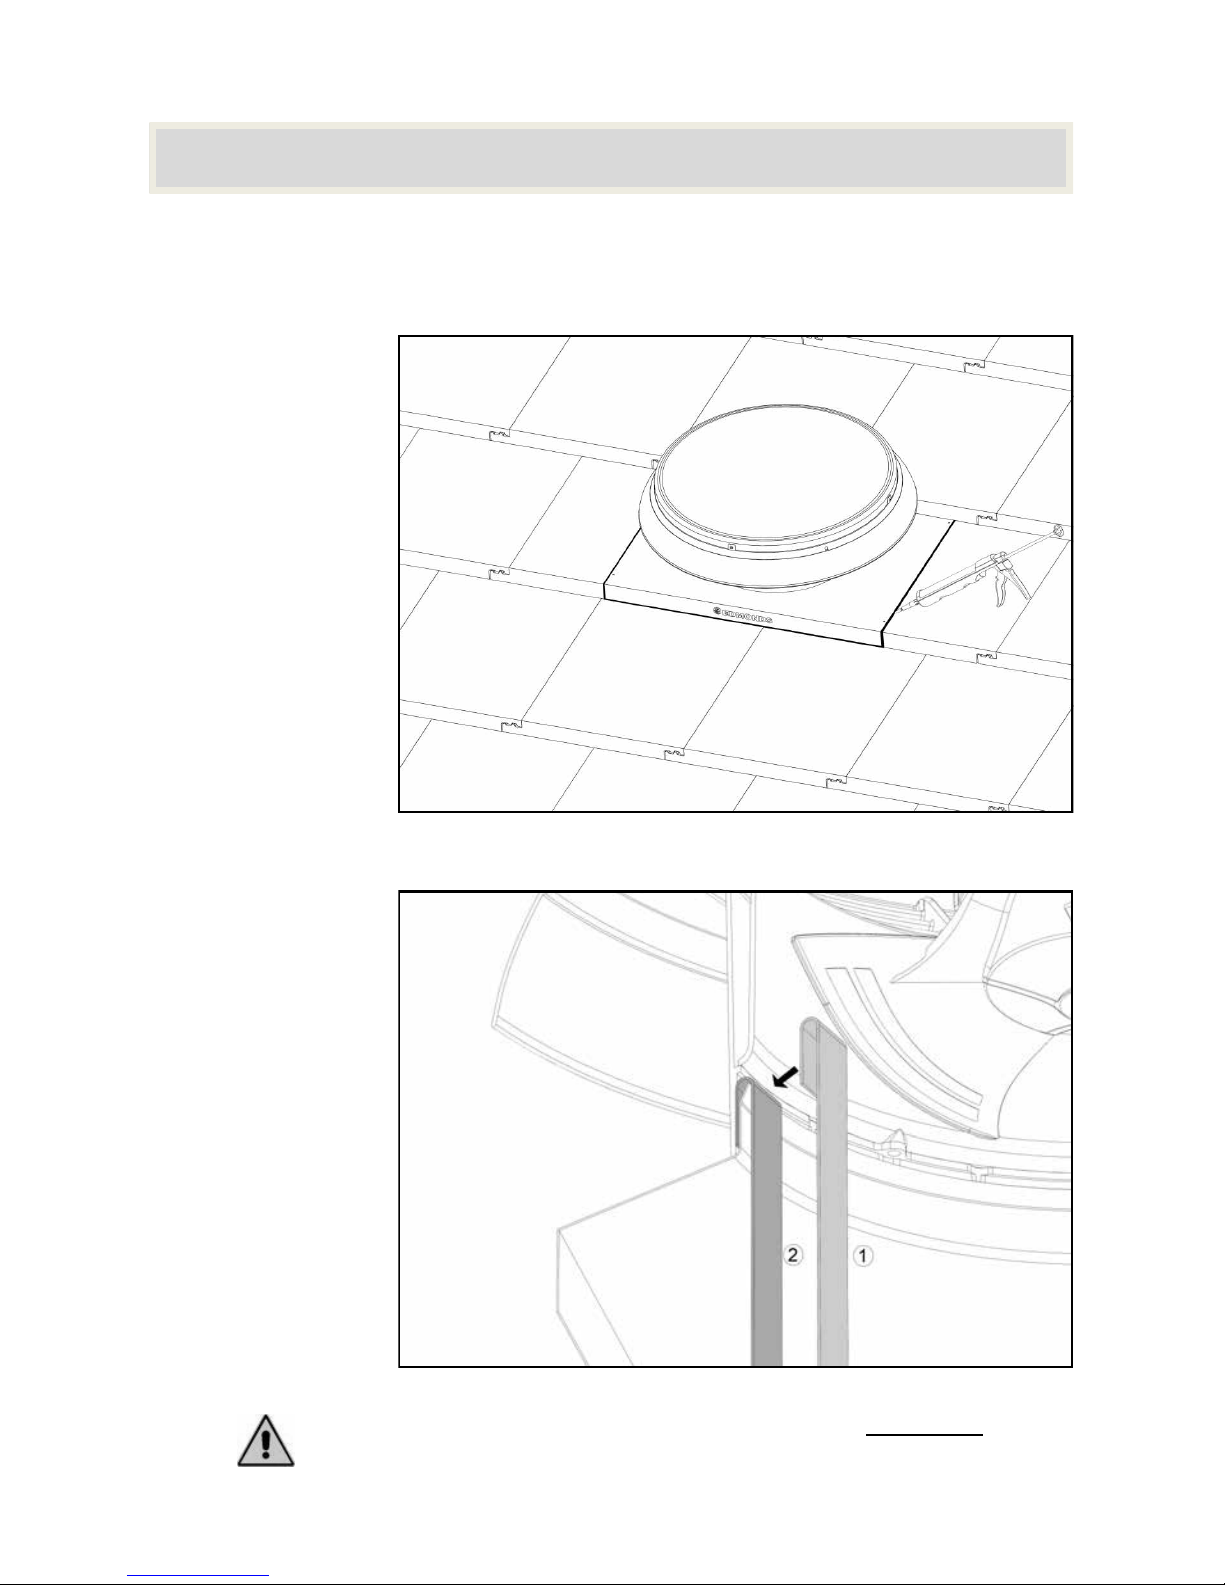
STEP 5
To ensure a
weatherproof
installation, apply
a bead of silicone
under the side
and front edges of
the flashing.
STEP 6
From within the
roof space, fit the
fixing strap by
hooking it
between the
flashing up stand
and the outer
housing.
The fixing strap
should be hooked
near to the cable
exit.
Ensure the fixing strap is seated firmly and that it DOES NOT
interfere with the fan
 Loading...